

JL Audio Stealthbox SB-B-3SER/CPE/SDN(E9092), 94281 Installation Manual
INSTALLATION GUIDE
for the
SB-B-3SER/CPE/SDN(E90\92)
SKU#94281
2006-Up Sedan
2007-Up Coupe
Thank you for choosing a JL Audio Stealthbox® for your automotive sound system. With proper installation, your new
vehicle-specific enclosed subwoofer system will deliver years of listening pleasure.
We strongly recommend that you have your new Stealthbox® installed by your authorized JL Audio dealer. The
installation professionals employed by your dealer have the necessary tools and experience to disassemble and
reassemble your vehicle properly. Also, keep in mind that your warranty coverage extends to 2 years if your system is
installed or approved by your authorized JL Audio dealer. If you prefer to perform your own installation, please read
this installation guide completely
before beginning the process.
If you choose to per form the installation yoursel f, it is abso lutely vital that
the Stealthbox
®
be properly mo unted to the vehicle according to these
instructions . Failure to mount the enclosure prop erly presents two problems:
1) The sub-bass per formance will suffer due to the movement of the enclosure
caused by the force exe rted by the woofer(s).
2) A loose enclosure pres ents a serious safety haza rd in the event of a collision
or sudden deceleration.
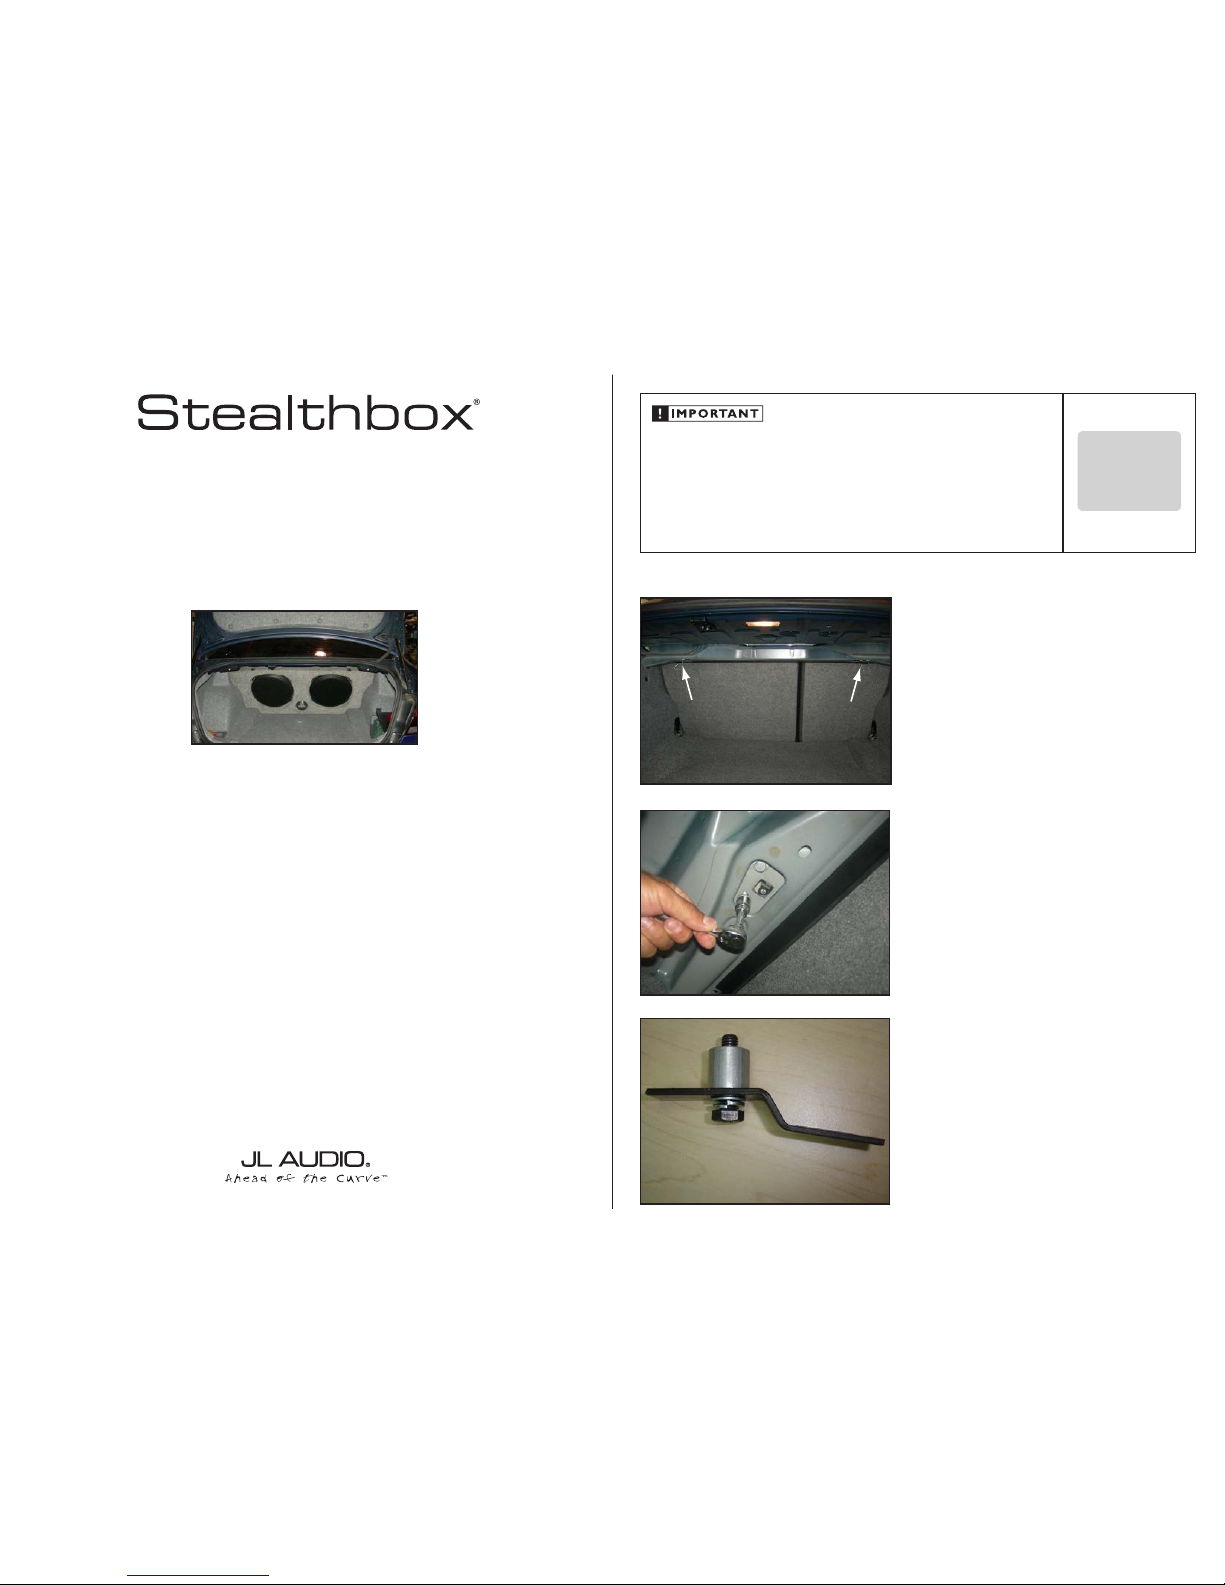
STEP 1
Remove anything stored in the trunk so that you are working
in a clean environment.
Unpack the Ste althbox® and test for pr oper operation
before continuing!
The wiring for the Stealthbox® should go from the seam
between the seatback and the floor to the amplifier location.
Along the bottom of the rear deck from the trunk , there are
two recessed areas (as indicated by arrows at left) with two
bolts going up into the deck in each recess.
Continued on Next Page
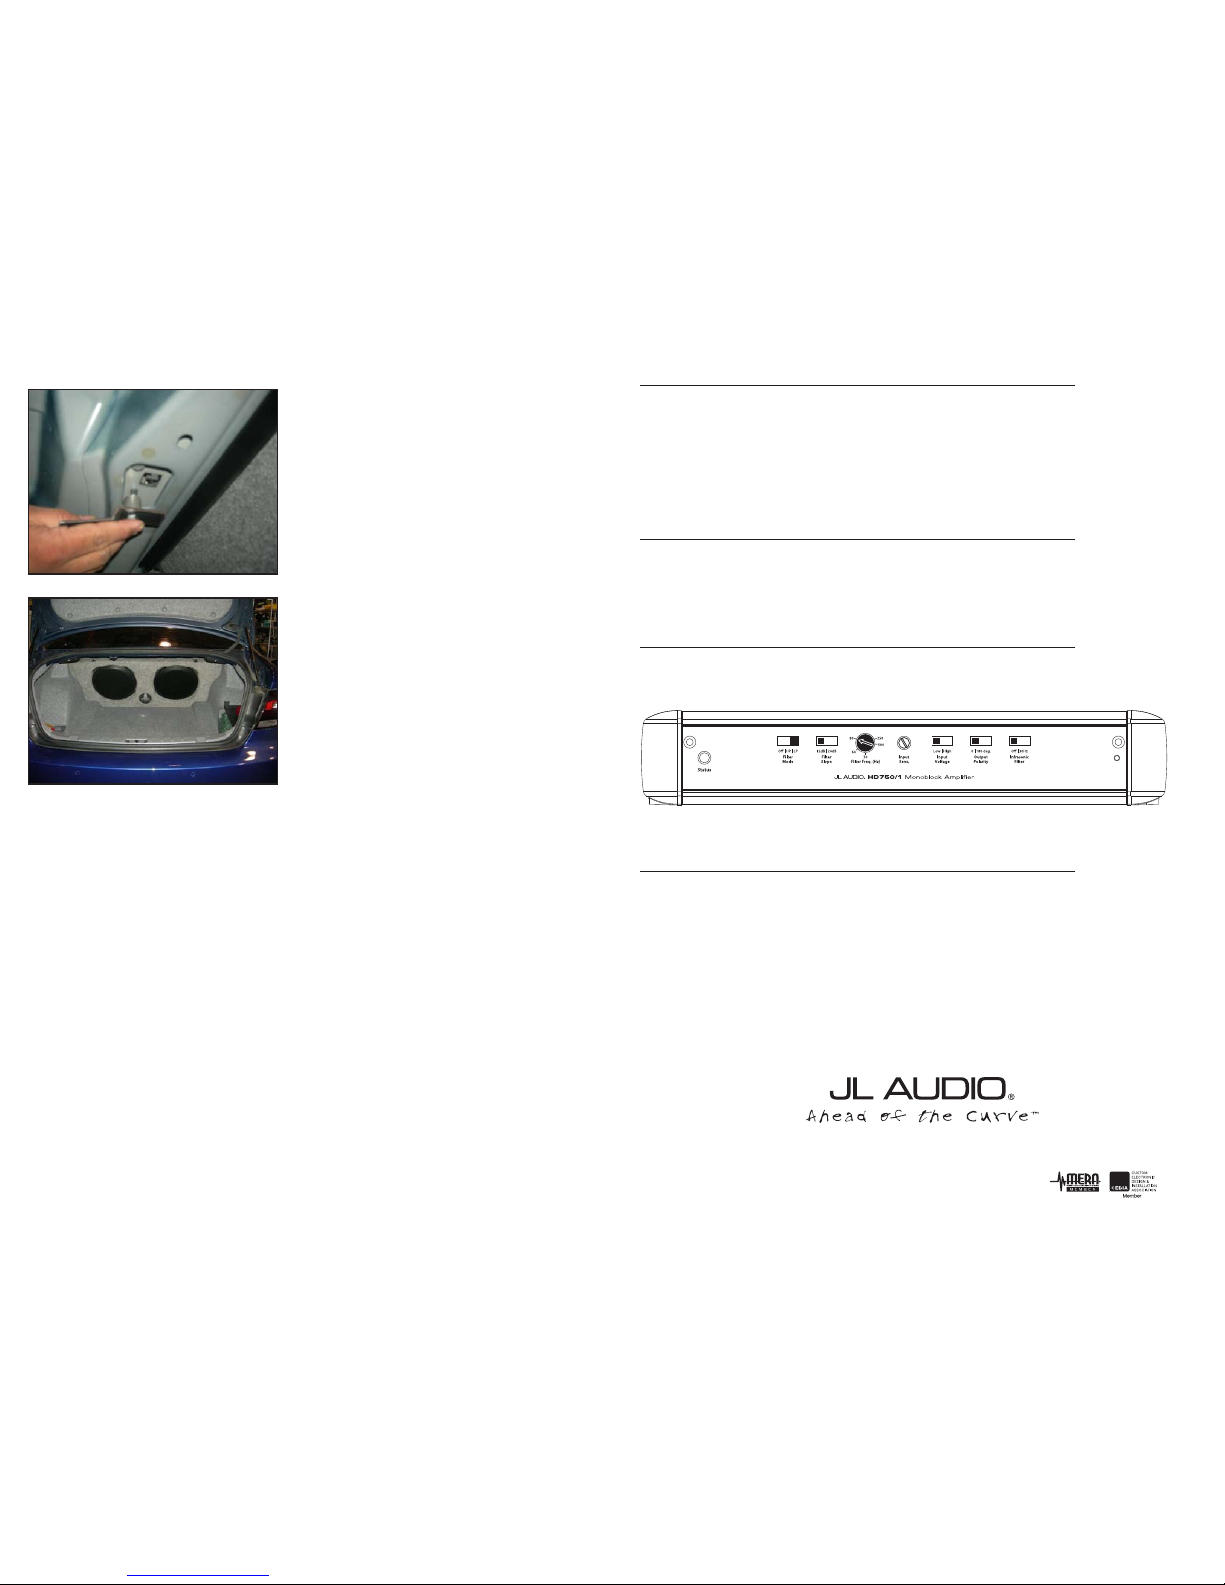
STEP 2
The outer-most bolt in each recess must be removed.
SB-B-3SER /CPE /SDN INSTR_SKU# 011256
IN STALL ATIO N
DIFFICULTY:
1
5
OUT
OF
ESTIMATED TIME:
30 MIN
STEP 3
Using each of the black oxide 3/8"-16 x 1 1/2" bolts assemble
a split lock washer, flat washer, bracket, 1" spacer, through the
hole in the bracket (the slot will mount the Stealthbox® to
the bracket).
SB-B-3SER /CPE /SDN INSTR_SKU# 011256
STEP 5
Set the enclosure into the trunk with the woofers facing
down, attach the wires going to the amplifier. Push the
enclosure towards the seat, and tilt it up so that it res ts fully
against the seat. Install the silver bolts, split lock w ashers
and flat washer through the slots in the previously installed
brackets into the Stealthbox®, apply pressure to the enclo sure so that the bolts go through the slots as close to the
seat as possible and tighten all bolts.
CONGRATULATIONS!
You have completed the installation for this model!
Enjoy your new Stealthbox®!
Please refer to the Power Recommendation se ction for an
amplifier recommendation and basic set-up help.
STEP 4
Using the hardware assembled in STE P 3, install two mount
brackets where bolts were removed in STEP 2. D o not
tighten the bolts down yet, just get them snug. The slot ted
end of the bracket should p oint down and towards the rear
of the car.
Page 2 • JL Audio, Inc 2008
All specifications are subject to change without notice. “JL Audio®” and the JL Audio logo, “Stealthbox” and the Stealthbox logo are registered
trademarks of JL Audio, Inc. “Ahead of the Curve” and its respective logo is a trademark of JL Audio, Inc.
JLA-SKU# 01125 6
04.01.2013 • Printed in USA • ©2008 JL Audio, Inc. • U.S. PATENTS: #5,734,734 #5,949,898 #6,118,884 #6,229,902 #6,243,479
#6,294,959 #6,501,844 #6,496,590 #6,441,685 #5,687,247 #6,219,431 #6,625,292 #D472,891 #D480,709 Other U.S. & Foreign patents pending.
(954) 443-1100
www.jlaudio.com
10369 NORTH COMMERCE PARKWAY • MIRAMAR, FLORIDA • 33025 • USA
INCLUDED HARDWARE
(2) 8mm- 1.25 x 35mm B lack Oxide Hex Head Bolt
(2) 8mm- 1.25 x 22mm Chrome Hex Head Bol t
(4) 8mm Flat Washer
(4) 8mm Split Lock Washer
(2) Custom Mount Br ackets
(2) 3/4" Aluminium Spacers
SPECIFICATIONS
Enclosure Type: Acoustic Suspension (sealed)
Driver Type: 13TW5v2- 4
Nominal Impedance: 2 ohms
Continuous Power Handling: 600 Watts (per woofer)
POWER RECOMMENDATION
JL Audio recommends using a high quality amplifiers such as the J L Audio HD750/1. The diagram below shows the
recommended settings for the HD750/1.
The JL Audio HD750/1is a very versatile audio component. Please consult the owner ’s manual for even more
detailed information about installing and tuning this amplifiers.
MID/HIGH FREQUENCY DRIVER FITMENT
A variety of JL Audio coa xial and component systems will fit in the f actory speaker locations of your vehicle.
Front Speaker Size / Locatio n: 4" In the doors
Fits JL Audio Models: N/A
Rear Speaker Size / Location: Coupe-6.5"/Rear Deck Sedan-5.25"/Rear Doors 4"/Rear Deck
Fits JL Audio Models: Coupe: TR650-CXi, C2- 650x, C3-650, & C5- 650x
Sedan: TR525-CXi, C2-525x, C3-525, C5-525x, TR400- CXi, C2-400x
Towards back of
car >
 Loading...