

Page 1
OWNER'S MANUAL
GPW Series
JET EQUIPMENT & TOOLS, INC. P.O. BOX 1349 Phone: 253-351 -6000
A WMH Company Auburn, WA 98071-1349 Fax: 1-800-274-6840
www.jettools.com e-mail jet@jettools.com M-181000 06/01
Page 2

This manual has been prepared for the owner and operators of a JET General Purpose Winch. Its
purpose, aside from machine operation, is to promote safety through the use of accepted correct
operating and maintenance procedures. Completely read the safety and maintenance instructions before
operating or servicing the winch. To obtain maximum life and efficiency from your General Purpose
Winch, and to aid in using the tool safely, read this manual thoroughly and follow instructions carefully.
Warranty & Service
The JET Group warrants every product it sells. If one of our tools needs service or repair, one of our
Authorized Repair Stations located throughout the United States can give you quick service.
In most cases, any one of these JET Group Repair Stations can authorize warranty repair, assist you in
obtaining parts, or perform routine maintenance and major repair on your JET, Performax or Powermatic
tools.
For the name of an Authorized Repair Station in your area, please call 1-800-274-6848.
More Information
Remember, the JET Group is consistently adding new products to the line. For complete, up-to-date
product information, check with your local JET Group distributor.
JET Group Warranty
The JET Group (including Performax and Powermatic brands) makes every effort to assure that its
products meet high quality and durability standards and warrants to the original retail consumer/purchaser
of our products that each product be free from defects in materials and workmanship as follow: 1 YEAR
LIMITED WARRANTY ON ALL PRODUCTS UNLESS SPECIFIED OTHERWISE. This Warranty does
not apply to defects due directly or indirectly to misuse, abuse, negligence or accidents, normal wear-andtear, repair or alterations outside our facilities, or to a lack of maintenance.
THE JET GROUP LIMITS ALL IMPLIED WARRANTIES TO THE PERIOD SPECIFIED ABOVE, FROM
THE DATE THE PRODUCT WAS PURCHASED AT RETAIL. EXCEPT AS STATED HEREIN, ANY
IMPLIED WARRANTIES OR MERCHANTIBILITY AND FITNESS ARE EXCLUDED. SOME STATES DO
NOT ALLOW LIMITATIONS ON HOW LONG THE IMPLIED WARRANTY LASTS, SO THE ABOVE
LIMITATION MAY NOT APPLY TO YOU. THE JET GROUP SHALL IN NO EVENT BE LIABLE FOR
DEATH, INJURIES TO PERSONS OR PROPERTY, OR FOR INCIDENTAL, CONTINGENT, SPECIAL,
OR CONSEQUENTIAL DAMAGES ARISING FROM THE USE OF OUR PRODUCTS. SOME STATES
DO NOT ALLOW THE EXLUSION OR LIMITATION OF INCIDENTAL OR CONSEQUENTIAL
DAMAGES, SO THE ABOVE LIMITATION OR EXCLUSION MAY NOT APPLY TO YOU.
To take advantage of this warranty, the product or part must be returned for examination, postage
prepaid, to an Authorized Repair Station designated by our office. Proof of purchase date and an
explanation of the complaint must accompany the merchandise. If our inspection discloses a defect, we
will either repair or replace the product, or refund the purchase price if we cannot readily and quickly
provide a repair or replacement, if you are willing to accept a refund. We will return repaired product or
replacement at JET’s expense, but if it is determined there is no defect, or that the defect resulted from
causes not within the scope of JET’s warranty, then the user must bear the cost of storing and returning
the product. This warranty gives you specific legal rights; you may also have other rights which vary from
statetostate.
The JET Group sells through distributors only. Members of the JET Group reserve the right to effect at
any time, without prior notice, those alterations to parts, fittings, and accessory equipment which they
may deem necessary for any reason whatsoever.
Page 3
WARNING
1. Do not load winch beyond its rated capacity. Capacity rating is based on one layer of line around the
drum. As line builds on drum, capacity decreases. Obtain cable and rope manufacturers
recommendation for size and type.
2. Do not use winch for lifting people or loads over people.
3. Learn to use your winch. After installing your winch, take the time to practice using it so that you are
comfortable with it when the need arises. Periodically, check the winch installation to assure that all
bolts are tight.
4. If used as a vehicle winch, do not "move" your vehicle to assist the winch. The combination of the
winch and the vehicle pulling together could overload the cable.
5. Keep winch area clear. Do not allow people to remain in the winch area. Do not stand between the
winch and the load.
6. Inspect cable frequently. A frayed cable, or rope with broken strands should be replaced
immediately. Do not operate winch if line is kinked, or shows any signs of corrosion, or weakness.
7. Keep hands and fingers clear of the winch and cable when using the winch.
8. Always check for correct direction of rotation before using the winch.
9. Do not hold a load on a trailer with winch cable. Tie down ropes or straps must be used to secure a
load to the trailer.
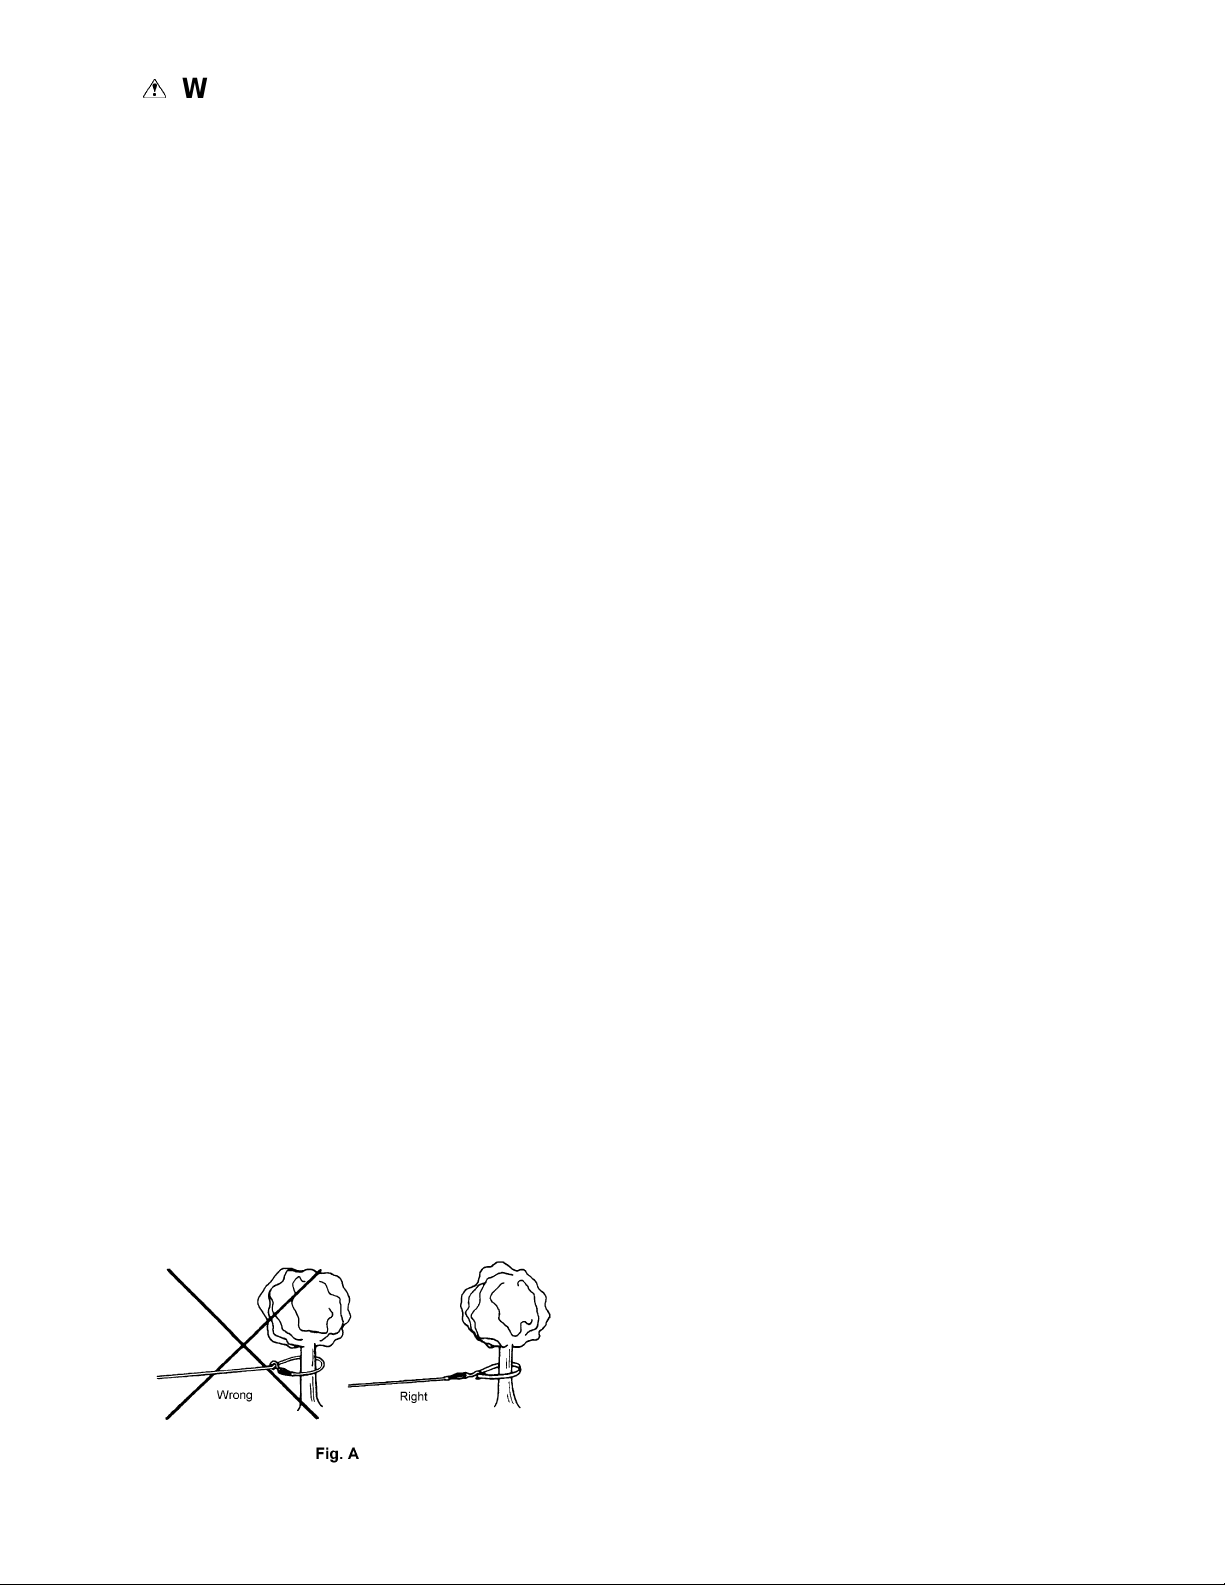
10. Never hook the cable back onto itself, use a sling. Hooking the cable onto itself creates an
unacceptable strain on the cable.
(See Fig. A)
11. It is a good idea to lay a heavy blanket or jacket over the cable about 15 feet from the hook end when
pulling in severe conditions. If a cable failure should occur, the weight of the cloth will act as a
damper and prevent broken cable from whipping.
12. Avoid pulls from extreme angles. This may damage the cable and winch drum.
13. Never install winch in such a way that the warning and direction labels are obscured. Someone who
has not read this manual may need to see them to understand the proper operation of the winch.
14. Do not attach winch to objects of unknown carrying capacity which may cause it to break loose during
operation.
15. Operate winch by hand power only.
16. Always keep a minimum of four coils of cable on the drum for safe operation. This will supply friction
for a proper anchor; otherwise the cable, or rope may pull loose from the drum.
17. Failure to comply with all of these warnings may cause serious injury and /or damage to property.
Page 4

JET GPW Winch Specifications
Model Number GPW-1000 GPW-1200 GPW-1400 GPW-2000 GPW-2500
Stock Number
Winch Load Capacity (lbs)
Number of Speeds
Gear Ratio
Ratchet Ways
Free-Wheel Ratchet Position
Hand Brake
Handle Length (in)
Hub Diameter (in)
181000 181200 181400 18200 182500
1,000 1,200 1,400 2,000 2,500
1112 2
4:2:1 4:2:1 4:2:1 4:6/11.1 5.1:1/12.1:1
2222 2
Off Center Center Center Center
No No No No Yes
8881111
1111 1
Reel Capacity (ft)
Net Weight (lbs)
5/16”
rope
3/8”
rope
7/16”
rope
1/2"
rope
3/16”
cable
1/8”
cable
55 55 55 55 -
35 35 35 35 60
25 25 25 25 35
----25
100 100 100 100 160
215 215 215 215 -
6661414
Page 5

WARNING
Read and understand the entire contents of
this manual before attempting set-up or
operation of this winch!
Failure to comply may cause serious injury
and/or property damage!
Contents of the Shipping Carton
Cable Installation
Caution
Pay particular attention to the accompanying
diagrams and the orientation of the cable.
1. Obtain cable and rope manufacturers
recommendations for size and type.
1Winch
1 Handle
1 Owner's Manual
1 Warranty Card
Installation Instructions
The mounting location for the winch must be
capable of handling the loads of the job you
intend the winch to do. The winch may be
mounted in any position as long as the operator
will be standing in a comfortable position with
unobstructed access to and a clear view of the
winch and cable.
Do not mount the winch where it has the
possibility of getting wet or submerged in water.
Use 3/8” diameter mounting hardware (i.e. bolts,
flat washers, lock washers and nuts) of sufficient
strength that is equal to or exceeds the capacity
of the winch.
Before Installing Cable
2. Use proper cable stop, or keeper fastened
through square holes.
The winch must be tested for proper operation
before installing cable:
1. Attach the handle to the pinion gear shaft on
the GPW-1000, GP W-1200 and GPW-1400
with one nyloc nut. Attach the handle for
GPW-2000 and GPW-2500 by pressing the
spring loaded clip and sliding the handle on
to the pinion gear shaft.
2. As you turn the handle, a noticeable clicking
sound should be heard.
3. Flip the pawl back and forth to make sure
the spring is functioning and the pawl makes
contact with the gear teeth.
The GPW-2000 and GPW-2500 have two pinion
gear shafts for different s peeds. Move the
handle to the location that makes the job
easiest.
Page 6

Operation
WARNING
Never fully extend the rope, or cable while
under load.
Failure to comply may cause serious injury
and/or property damage!
1. Keep hands away from load bearing cables,
ropes, sheaves, drums and pulleys while
operating.
2. Keep rope, or cable properly aligned on the
drum.
3. Keep moving parts including gears, ratchets
and shafts clean and lubricated to insure
proper and safe operation.
GPW Parts Breakdown
Index Part
No. No. Description Winch Model
1..........GPW1000-01................... Handle............................................... GPW-1000/1200/1400.............
............ GPW2500-01 ................... Handle...............................................GPW-2000/2500 .....................
2..........GPW1000-02................... Pawl..................................................GPW-1000..............................
............ GPW1200-02 ................... Pawl.................................................. GPW-1200/1400 .....................
............ GPW2000-02 ................... Pawl.................................................. GPW-2000/2500 .....................
3..........GPW1200-03................... Spring................................................GPW-1200/1400 .....................
............ GPW2000-03 ................... Spring................................................GPW-1000/2000 .....................
............ GPW2500-03 ................... Spring................................................GPW-2500..............................
Page 7

JET EQUIPMENT & TOOLS, INC. P.O. BOX 1349 Phone: 253-351-6000
A WMH Company Auburn, WA 98071-1349 Fax: 1-800-274-6840
www.jettools.com e-mail jet@jettools.com
 Loading...