

Page 1

mmmLIENN-AIR
Use and Care Manual
30" Expressions ®
Convection Wall Oven
Models W30_OO, WM30460_WW30430
_OlO_ww_
.......... ................... 2..2,.:...............-..,.,.,._._
................................. .. ....................................
===================================
j
MODELWW30430
For Microwave Oven, refer to Use and Ca_e Manual packed in Microwave Oven.
Page 2
Congratulationson yourchoiceofa Jenn-Airwalloven. YourJenn-Airconvectionoven
combinesthe bestof fourcookingmethods:conventionalbaking orroasting,convection
baking,convection roasting, and broiling,in aself-cleaningoven,
TheJenn-Air convectionoven isactuallya conventionaloventhat circulatesheatedair
within the oven. As both bake and broil heatingelements cycle on and off with the
thermostat, a fan keeps the heated air circulating around the food. The constantly
recirculatingheated air in the convectionoven strips away the layer of cooler air that
surroundsfood. Consequently,manyfoodscookmore quickly. Distributedheatmakes
multiplerackcookingpossible. Convectionroastedmeatsretaintheirnaturalflavorand
juicinesswith less shrinkagethan conventionalroasting.
Beforeyou begin cookingwith yournew oven,pleasetake a few minutesto read and
become familiarwith the instructionsin this book. On the followingpages youwilt find
a wealth of information regardingall aspectsof using yournew oven. Byfollowing the
instructionscarefully,you will beableto fully enjoy andproperly maintainyourovenand
achieve excel/entresults with the food you prepare.
Should you haveany questionsabout usingyour Jenn-Airoven, writeto us. Besure
to providethe modelnumber.
Jean-Air Customer Assistance
c/o Maytag Customer Service
P.O. Box2370
Cleveland,TN 37320-2370
Model Number
Serial Number_
(numbersappear ontheserial plate ontheeven front frame)
Date Purchased
JENN-AIRDEALERFROMWHOM PURCHASED
Address
City_
Phone
Page 3
Baking
Baking Chart ................................................................................................ 15
Causes of Cake Failure ............................................................................... 16
Convect Baking ...................................................................................... 15-17
Convect Cooking on Multiple Racks ............................................................ 17
General Recommendations ......................................................................... 14
Before You Call For Service ....................................................................... 35-36
Broiling
Broiling ......................................................................................................... 26
Broiling Tips ................................................................................................. 27
Broiling Chart ............................................................................................... 27
Caring for Your Oven
Adjust Oven Temperature ........................................................................... 34
Child Protection Lock ................................................................................... 34
Cleaning Other Surfaces............................................................................. 32
Oven Light Bulb Replacement .................................................................... 33
Cleaning
Self-Cleaning Process28-32
Clock Controls
Clock Controlled Baking or Roasting ...................................................... 12-13
Time of Day Clock ........................................................................................ 10
Timer ........................................................................................................... 11
Oven Operation
Oven Control Panel ........................................................................................ 6
Rack Positions ............................................................................................. 9
Setting Controls ............................................................................................. 8
Probe ........................................................................................................... 22-25
Roasting
Conventional Roasting Recommendations18
Convect Roasting ................................................................................... 19-21
Frozen Convenience Foods ......................................................................... 21
General Roasting Recommendations .......................................................... 18
Roasting Chart ............................................................................................ 19
Safety Precautions .......................................................................................... 4-5
Page 4

Baking
Baking Chart ................................................................................................ 15
Causes of Cake Failure ............................................................................... 16
Convect Baking ...................................................................................... 15-17
Convect Cooking on Multiple Racks ............................................................ 17
General Recommendations ......................................................................... 14
Before You Call For Service ....................................................................... 35-36
Broiling
Broiling ......................................................................................................... 26
Broiling Tips ................................................................................................. 27
Broiling Chart ............................................................................................... 27
Caring for Your Oven
Adjust Oven Temperature ........................................................................... 34
Child Protection Lock ................................................................................... 34
Cleaning Other Surfaces............................................................................. 32
Oven Light Bulb Replacement .................................................................... 33
Cleaning
Self-Cleaning Process28-32
Clock Controls
Clock Controlled Baking or Roasting ...................................................... 12-13
Time of Day Clock ........................................................................................ 10
Timer ........................................................................................................... 11
Oven Operation
Oven Control Panel ........................................................................................ 6
Rack Positions ............................................................................................. 9
Setting Controls ............................................................................................. 8
Probe ........................................................................................................... 22-25
Roasting
Conventional Roasting Recommendations18
Convect Roasting ................................................................................... 19-21
Frozen Convenience Foods ......................................................................... 21
General Roasting Recommendations .......................................................... 18
Roasting Chart ............................................................................................ 19
Safety Precautions .......................................................................................... 4-5
Page 5
Readbeforeoperatingyour oven
All appliances - regardlessof the manufacturer- have the potentialthrough
improperor careless use to create safety problems. Thereforethe following
safetyprecautionsshouldbeobserved:
1. Besureyour applianceisproperly installedandgrounded bya qualified
technician.
2. Never useyour appliancefor warmingor heatingtheroom.
3. Childrenshouldnot be leftaloneor unattendedin areawhere appliance
isin use. Theyshould neverbe allowedtosit or standon any part of the
appliance.
4. Wearproperapparel. Loose-fittingorhanginggarmentsshouldneverbe
wornwhile usingthe appliance.
5, Do not repair or replace any part of the appliance unlessspecifically
recommendedinthis manual. Allotherservicingshouldbereferredtoan
authorizedJenn-AirServiceContractor.
6. Flammablematerialsshouldnot be storedin anoven.
7. Do not use water on grease fires. Smother fire or flame or use dry
chemical orfoam-typeextinguisher.
8. Useonlydry potholders. Moistordamppotholdersonhot surfacesmay
result in burns from steam. Do not let potholder touch hot heating
elements. Do notusea towelor otherbulkycloth,
9. Use carewhen openingoven door. Lethot air orsteam escapebefore
removingor replacingfood.
10. Donot heat unopenedfoodcontainers.Build-upofpressuremaycause
containerto burstand result in injury.
11. Keepoven ventducts unobstructed.
12. Alwaysplaceovenracksindesiredlocationwhileoveniscool. Ifrackmust
be moved while oven is hot, do not let potholder contact hot heating
element inoven.
13. Do notcleandoor gasket. The doorgasketis essentialfor a good seal.
Care should be takennot to rub,damage,or movethe gasket.
14. Do not use oven cleaners. No commercial ovencleaner or oven liner
protectivecoatingofanykindshouldbe usedin oraroundanypart ofthe
oven.
15. Cleanonly partslistedin this manual.
16. CAUTION: BEFORESELF-CLEANINGTHE OVEN, REMOVE FOOD,
BROILERPAN ANDOTHER UTENSILS.
Page 6
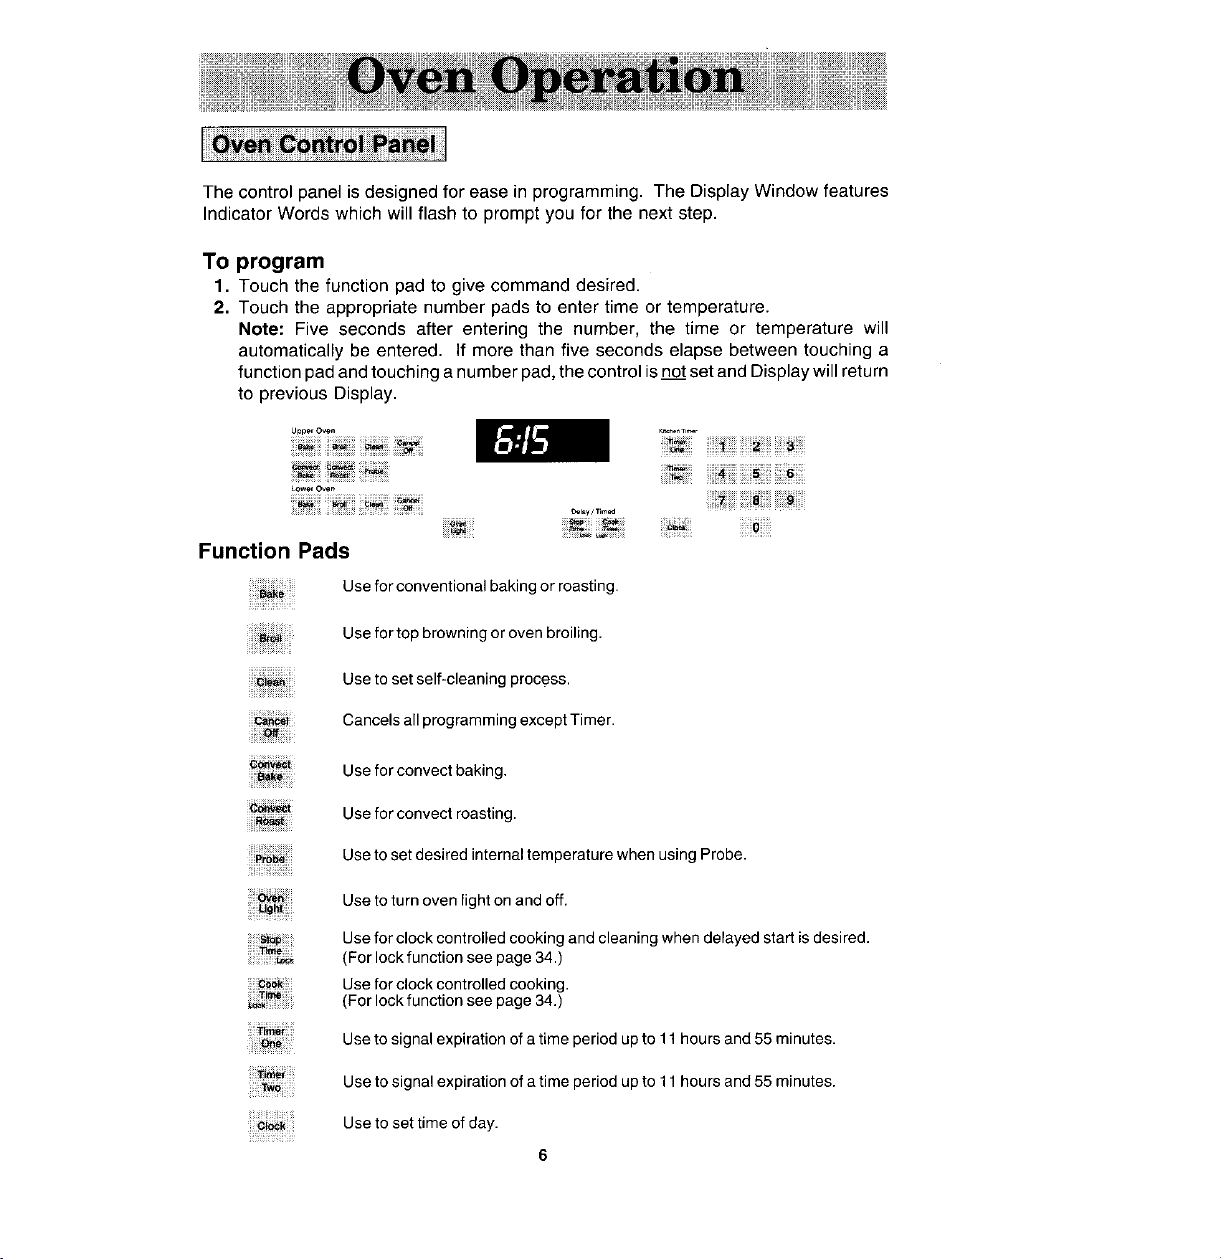
The control panel is designed for ease in programming. The Display Window features
Indicator Words which will flash to prompt you for the next step.
To program
1. Touch the function pad to give command desired.
2. Touch the appropriate number pads to enter time or temperature.
Note: Five seconds after entering the number, the time or temperature will
automatically be entered. If more than five seconds elapse between touching a
function pad and touching a number pad, the control is not set and Display will return
to previous Display.
UpperO_n _henTier
LOWerOve_ ............ • •
ii_ !__!_!ii i_ ¸_!i _i_il _i_ii_i_!i!!!_!i_i!_
Function Pads
Use for conventional baking or roasting•
Use for to rowning or oven broiling.
Use to set self-cleaning process.
c_: Cancels all programming except Timer.
Use for convect baking,
_ Use for convect roasting.
Use to set desired internal temperature when using Probe.
Use to turn oven light on and off.
Use for clock controlled cooking and cleaning when delayed start is desired.
(For lock function see page 34.)
Use for clock controlled cooking.
i
(For lock function see page 34.)
ii!_ii!i
Use to signal expiration of a time period up to 11hours and 55 minutes.
Use to signal expiration of a time period up to 11 hours and 55 minutes.
Use to set time of day.
pb
6
Page 7

Number Pads
Useto settime ortemperature.
Oven Light Pad (Control Panel)
TheovenlightautomaticallycomesonwhenevertheovendoorJeopened.Whendoorisclosed,touch
theOven Light Padtoturnovenlighton oroff.Note: A beepwillsound everytimethe Oven Light
Pad istouched.
Display Window
Showstimeofday, timer,andovenfunctions. 88_8 8 i888c ° 888:
Display Numbers: STOPTII_ _]_ _I_OVEiVLOCKPKi_AE_ LOCI(P61D_dr_]
• Showtime of day.
• Countdownoftime remainingwhen usingtime functions.
• Showtemperatureofoven as itrises toreachprogrammedtemperatureandthe set tempera-
tureonce it is reached.
• Recallprogrammedtemperatureortimewhen commanded.
• Rounding of Display Numbers: Temperature rangeis 100° to 550°Fand can be set in 5°
increments.Whensettingtemperature,thecontrolwillroundittothe nearest 10°.Forexample,
if237oisentered,thecontrol willround thetemperatureto240°.
Prompts:
• Serveasaremindertoshutovendoor, ifitisopen,forself-cfeaningoperationwhentheword,
door,isdisplayed.
• "Err"willappearinthe Displaywhenanimpropertemperatureortimehasbeenentered. "Err"
will flash and a beepwill be heardthree times. Then, the Displaywill returnto the previous
Displaybeforethe error was entered.
Indicator Words:
• Flashto promptnext step.
• Indicatestatusofprogrammedfunction.
• Showprogrammedfunctionwhenrecalled.
• Showoven selected. U -isthe upperoven; L- isthe lower oven. (ModelWW30430)
DELAYSTARTCODKTIMED CLEANBRDIL CLEANBROIL
CCLilVBAKEROASTCONVBAKEROAST
Chimes vs. Beeps
• A chime soundis usedto designatetheend of atimingor cookingoperation.
• A beepsound will be heard when any pad istouched. A series of shortbeeps are usedto
designateanincorrectentry,door isopenwhensetfor aself-clean,probeneedsto beremoved
andafauttcode.
End of Cycle Chimes:
• Theend of cycle chimes isfour short chimesfollowed by "reminder"chimes for a specified
lengthof time,untilyoucancelthatfunction. FortheTimerfunction,there are two "reminder"
chimes every 30 seconds for five minutes. For the Timed Cook, functions there is one
"reminder"chimeeveryminuteforten minutes.To cancelthese "reminder"chimes,touchthe
appropriatepadagain (either the Timer Pad or Cook Time Pad). You may also touchthe
CancelOffPad tocancelthe"reminder"chimes,but itwilla/socancelallotherovenfunctions.
• Ifyou would liketo eliminateallthe "reminder"chimesentirely,touch andholdthe Caneel Off
Padfortwelveseconds. (Thiswillnot eliminate the initialfour shortchimes).
• To return the "reminder"chimes,touchand hold the CancelOff Padfortwelve seconds.
[NOTE: _enn-AirT_chang_the_v_nt_a24h_urc__ck_r_e_s`us(C)degr__s_c_ntacty_urauth___zedServiceContractoror installer, l
7
Page 8
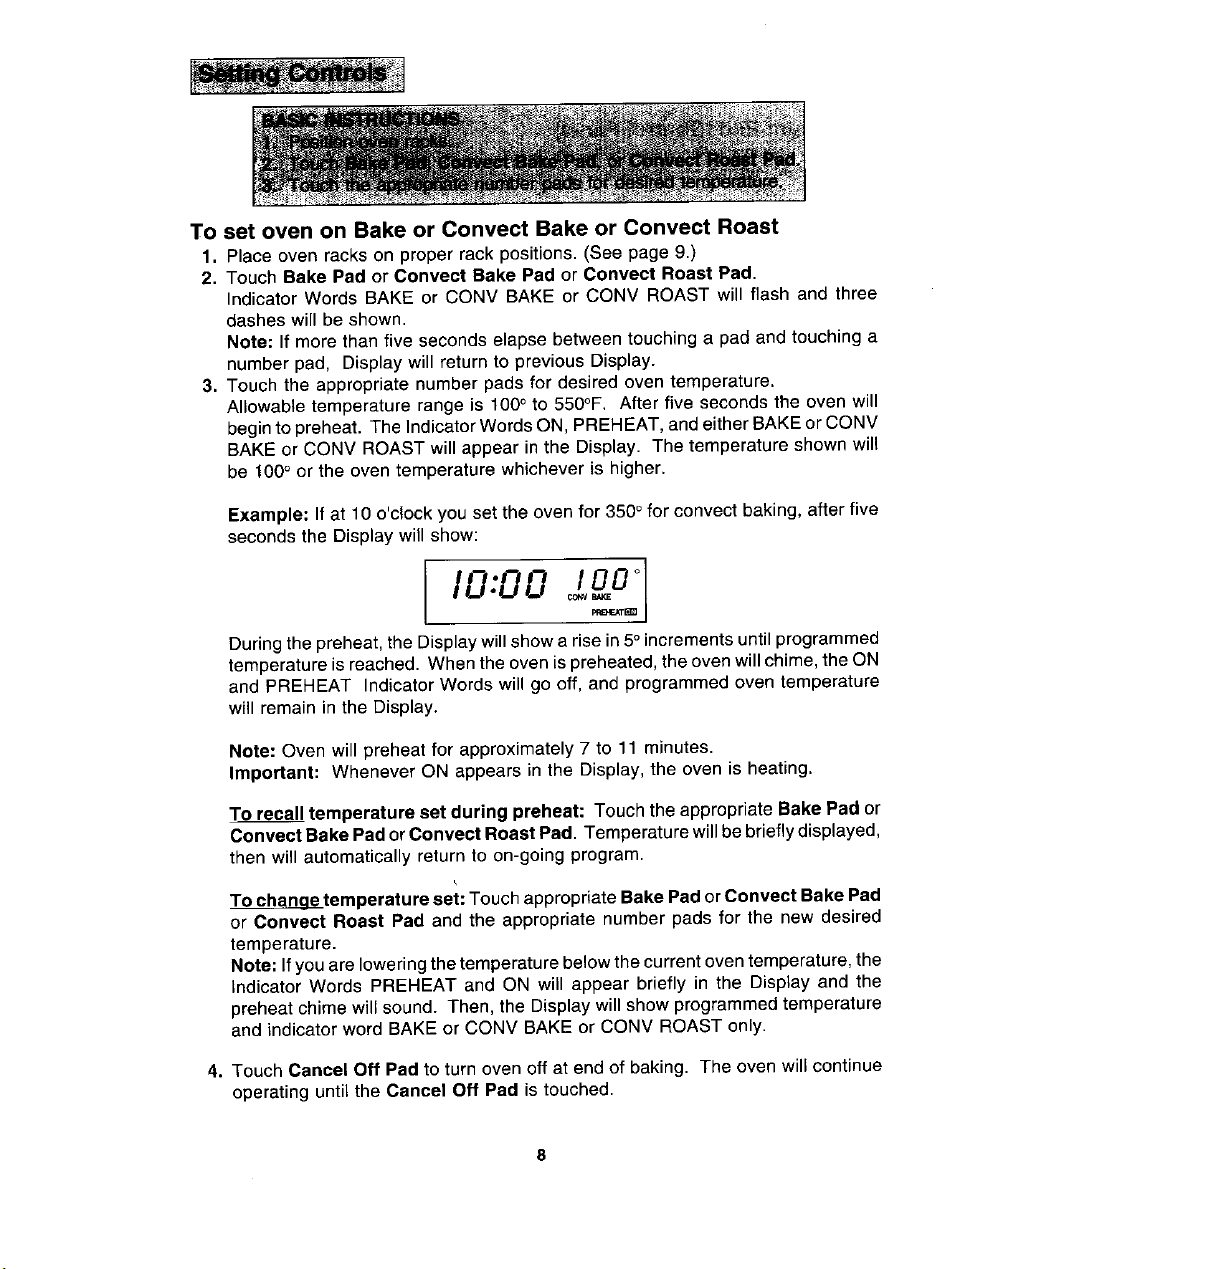
To set oven on Bakeor ConvectBakeor ConvectRoast
1. Place ovenracksonproperrackpositions.(See page 9.)
2. TouchBake Pad or Convect Bake Pad or Convect Roast Pad,
IndicatorWordsBAKEor CONV BAKEor CONV ROAST will flash and three
dasheswill be shown.
Note: If morethanfivesecondselapsebetweentouchinga padand touchinga
numberpad, DisplaywillreturntopreviousDisplay.
3. Touch the appropriate number pads for desired oven temperature.
Allowable temperature range is 100° to 550°F. After five seconds the oven will
beginto preheat. The IndicatorWordsON, PREHEAT,andeither BAKEorCONV
BAKE or CONV ROASTwill appear in the Display. Thetemperature shown will
be 100° or the oventemperature whichever is higher.
Example: If at 10 o'clock you set the oven for 350°for convectbaking, after five
seconds the Display will show:
I0:00
Duringthe preheat,the Displaywill showa rise in5°incrementsuntil programmed
temperatureis reached. Whentheovenis preheated,the oven willchime,theON
and PREHEAT Indicator Words will go off, and programmedoven temperature
will remain in the Display.
Note: Oven will preheatfor approximately7 to 11 minutes.
Important: Whenever ON appears in the Display, the oven is heating.
To recall temperature sat during preheat: Touch the appropriate Bake Pad or
Conveot Bake Pad orConvect Roast Pad. Temperature willbebrieflydisplayed,
then will automatically return to on-going program.
Tochange temperatureset: TouchappropriateBake Pador Convect BakePad
or Convect Roast Pad and the appropriatenumber pads for the new desired
temperature.
Note:If youare loweringthetemperaturebelowthecurrentoventemperature,the
indicatorWords PREHEAT and ON will appear briefly in the Display and the
preheatchimewillsound. Then,the Displaywillshowprogrammedtemperature
and indicatorwordBAKEorCONV BAKEor CONV ROAST only.
4. TouchCancel Off Padtoturnovenoffat endof baking. The ovenwillcontinue
operatinguntilthe Cancel Off Pad is touched.
Page 9
Therackpositionsnoted aregenerally recommendedfor the best browningresultsand
mostefficientcookingtimes. Formanyfood items, excellentresults canbe achieved
whenusingoneofseveraldifferentrackpositions. Refertobakingand roastingsections
for recommendationsfor specificfoods.
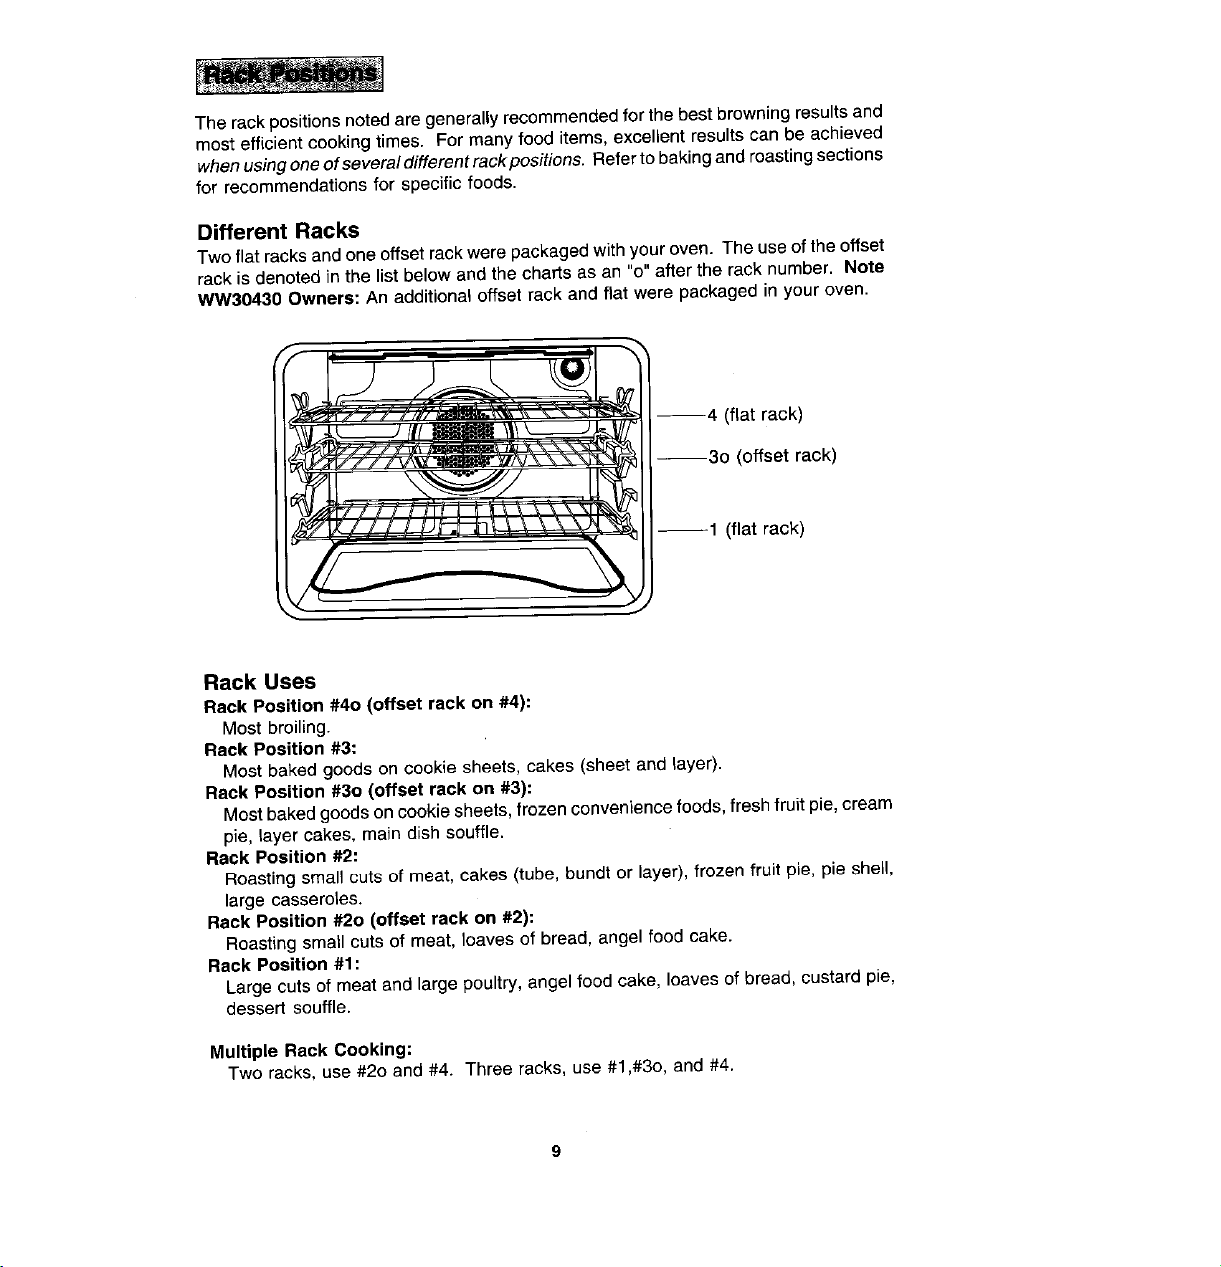
DifferentRacks
Two flat racksand one offsetrackwere packagedwith youroven. The useof theoffset
rackis denoted inthe list belowand the chartsas an "o"after the rack number. Note
WW30430 Owners: An additionaloffset rack andflat were packaged in youroven.
_'_F 4 (flat rack)
3o (offsetrack)
1 (flat rack)
Rack Uses
Rack Position #4o (offset rackon #4):
Most broiling.
RackPosition #3:
Most bakedgoods on cookie sheets, cakes (sheet and layer).
RackPosition #30 (offsetrack on #3):
Mostbakedgoodson cookiesheets,frozenconveniencefoods, freshfruit pie, cream
pie, layercakes, maindish souffle.
Rack Position #2:
Roastingsmall cuts of meat,cakes (tube,bundt orlayer), frozen fruit pie,pie shell,
large casseroles.
RackPosition #20 (offsetrack on #2):
Roastingsmall cuts of meat, loavesof bread, angelfoodcake.
RackPosition #1:
Large cutsof meat and large poultry,angel food cake, loaves of bread, custardpie,
dessert souffle.
Multiple Rack Cooking:
Two racks, use #20 and #4. Threeracks, use #1,#30,and #4.
Page 10
When electrical power is supplied or after power interruption, the last clock time
displayed before powerwas interrupted will flash. Time will advanceand continueto
flash until clock is reset.
BASI_ INS_UCTiONS
12;To_haP_PNate:: numberPadS:I
To setTime ofDay
I,TouchClockPad.
Indicatorword TIME willflash and time digits willappear in theDisplay. (If more
than five seconds elapse betweentouching Clock Pad and touching a number
pad, the Clock Pad must be touched again in order to set clock.)
2. Touch the appropriatenumber padsuntil correct timeof day appearsin Display.
Note: Five seconds after touching the number pads, the time of day will
automatically be entered.
IMPORTANT
• To recalltime of day whenanothertimefunction isshowing: Touch Clock Pad.
• Clock time cannot be changed when oven has been programmed for Timed
Bake,TimedConvectBake,Timed ConvectRoastor Self-clean.Cancelprogram
before reprogrammingclock.
10
Page 11

Important: This intervalTimer can be used to remindyou when a period, up to 11
hoursand55minutes, expires. It can be used independentlyofanyotheroven activity
andcan be set while another oven function isoperating. The Timer does netcontrol
the oven.
TO set Timer
1. Touch Timer Pad.
The IndicatorWord Timer and either 1 or 2 flashes and "0Hr:00" appears in the
Display.
2. Touchtheappropriate numberpads untilthedesired numberof minutesor hours
and minutes appear in the Display.
Note: If more than five seconds elapsebetween touching a Timer Pad and a
number pad,the Timer Pad must be touched again.
Example: To set Timer One for 5 minutes, touchthe Timer One Pad and the
number5 pad. After five seconds, the display will show:
:g5
TIME_ []
Example: To setTimerTwo for 1hourand 30minutes,touchtheTimer Two Pad
and the numbers "1,3, 0" pads, After five seconds, the Displaywill show:
Countdownwillstartafter fiveseconds. Countdownwillhavedisplay precedence
over othertime functions. If bothtimers are set, thetimer with the least amount
of timeremaining will have display precedence.
Atthe end oftime set,the Timerwill chime four times and "End"will appearin the
Display. Iftimer is notcancelled(see below), "End" will remaininthe Displayand
there will be two chimes every thirty seconds for five minutes.
To cancel Timer
1. Touchand hold the Timer Pad for four seconds.
OR
2. A. Touch the Timer Pad.
B. Touch "0" number pad. Five seconds laterthe Timer will be cancelled.
NOTE: TouchingCancel Off Pad tocancelchimeswillcancelALLselectedoven1
programming.
11
/
Page 12

mit steps 5 you want baki gto sta_ immediatl ,lyl......................
To set oven to start immediately and shut off automatically
1. Touch Bake Pad or Convect Bake Pad or Convect Roast Pad.
IndicatorWords BAKE orCONV BAKE orCONV ROAST will flash andthree dashes
will be shown.
2. Touch the appropriate number pads for desired oven temperature.
After four seconds the oven will begin to preheat. The Indicator Words ON,
PREHEAT, and SAKE orCONV BAKE orCONV ROAST will appear in the Display.
The temperature shown will be 100° or the temperature of the oven, whichever is
higher. Example: If at 10 o'clock you set the oven for 3500for convection baking,
the Display will show:
B,o:oo
During the preheat, the Display will show a rise in 5° increments until programmed
temperature is reached, When the oven is preheated, the oven will baep, the ON
and PREHEAT Indicator Words will go off, and programmed oven temperature will
be displayed. Important: Whenever ON appears in the Display, the oven isheating.
3. Touch Cook Time Pad.
indicator Words COOK TIME will flash and Display will show "0 HR:00".
4. Touch the appropriate number pads to enter cooking hours in five minute
increments. Hoursare toleft of colon andminutes to rightofcolon. (Allowable range
is 5 minutes to 11 hours and 55 minutes.) Examp|e: If cooking time selected for
the oven is 2 hours and 30 minutes, the Display will show:
I _,££°
After fifteen seconds, the time of day returns to the Display.
Important: Oven will preheat for approximately 7 to 11 minutes. At end of
programmed Cook Time, oven will shut offautomatically; retained heat willcontinue
tocook food. Clock controlled cooking is not recommended for baked items that
require a preheated oven, such as cakes, cookies, pies, breads. For these foods,
place food in preheated oven, then use Timer to signal end of baking time.
At the end of programmed Cook Time, the oven will shut off automatically and a
"chime" will be heard four times and "End" will appear inthe Display. If oven is not
cancelled, "End" will remain inthe Display andthere will be a chime every minute
for one hour. 12
Page 13

To set oven to start at future time and shut off automatically
1-4. FollowprecedingSteps1-4,on page12.
5. TouchStop Time Pad.
IndicatorWords STOPand TIME will flash, Display will show the calculated
stop time basedon currenttimeofdayand cooktime. Note WW30430Owners:
The appropriateletter (U - upperoven; L - loweroven) and OVENwill alsoflash.
6. Touch the appropriatenumber padsto enterdesired stop time.
A stop timecan onlybe acceptedfor laterinthe day.Note; Sincefood continues
to cookifleft inthe even, it is suggestedthat theclock controls be used primarily
tostarttheovenwhennooneisinthekitchen. Provisionsshouldbemadetohave
the food removedas soon as the chime has sounded.
Example: Ifat 10o'clockyousetthe ovenfor350°convectionbakingand2hours
and 30 minutescooking time, the calculatedstop time would be "12:30". The
Displaywould show:
8TOp F_k_AT_
I,<:3o
Ifyouwantthestoptimetobe I o'clock,touchthenumberpads"I,0,0".Five
secondslater, the Displaywill briefly show the starttime:
lg:a.q o°
After five seconds, the displaywill returnto current time of day, thus showing:
I0:00 °
oe_¥ lIMEO
Attheendofthedelayedperiod,theDELAYIndicatorWordwillgooffandtheoven
will begintoheat. 100°will beshown. Asthe ovenheats, the Displaywillshow
a risein incrementsof 5° until programmedtemperatureis reached.
Atthe end ofprogrammedCookTime,the ovenwillshut off automaticallyand a
"chime"will beheardfour times and"End"will appear in the Display. If ovenis
notcancelled, "End"will remaininthe Displayand therewill be onechimeevery
minute for ten minutes.
IMPORTANT
• NoteWW30430Owners: Clockcontrolledbakingcanbe usedwithonlyoneoven
ata time. Toprogram,first setthe bakeor eonvectbakeor convectroastfunction
forthe desiredoven,thenset the cooktime. If oneovenisset forclock controlled
baking,theotheroven cannot beset to self-clean.
• To recall time function programmed: Touchthe appropriatetimepad.
• To cancel timedfunctiononly: Hold CookTime Padforfourseconds. Thiswill
onlycancelcook time and stoptime, notprogrammedbake mode.
• If morethan five secondselapsebetweentouchinga functionpad and touching
appropriatenumber pads,the oven is not setand Display will returnto previous
Display.
13
Page 14

• Whencooking foodsforthe first time inyour new oven,userecipe cookingtimes
and temperaturesas a guide.
• Usetested recipesfrom reliable sources.
• Preheatthe oven only whennecessary. For baked foods that rise and for richer
browning, a preheated oven is better. Casserolescan be started in a cold oven.
Preheatingtakesfrom7 to 11 minutes;placefoodin ovenafterPREHEATIndicator
Wordcycles off.
• Arrangeoven racksbefore turning on oven. Follow suggestedrack positionson
page 9 and invarious bakingcharts.
• Allowabout1to 11/2inchesof spacebetweentheovensidewallsand panstoallow
proper air circulation.
• Whenbakingfoods in morethan one pan, placethem on oppositecorners ofthe
rack. Staggerpans when bakingon two racks so that one pan does not shield
anotherunless shieldingis intended. (Seeabove left)
• To conserve energy, avoidfrequent or prolonged door openings. At the endof
cooking,turn oven off before removing food.
• Alwaystestfordoneness(fingertip,toothpick,sides pullingawayfrompan). Donot
rely ontime or brownnessasonly indicators.
• Usegood quality baking pans and the size recommendedin the recipe.
• Dull,dark,enameledorglasspanswillgenerallyproduceabrown,crispcrust. Shiny
metal pansproduce a light, goldencrust.
• Frozenpies inshiny aluminumpans should be bakedon a cookiesheeten rack2
or be removedto a dull or glasspan.
• Ifedgeofpiecrustbrownstooquickly,fold a stripoffoilaroundrim ofcrust,covering
edge. (See aboveright.)
NOTE: A coolingfanwilloperateduringallcookingmodes. Thefanmayalsocontinue
to operateafter the oven is turned elf unti the oven hascooled down.
14
Page 15

tBakingChart I
Note: ForConventionalBake usethe Bake Pad.
,<I:I_i!AA
: :1 .
ii_ii_:_ii?i_i_i_i?i_i_;i_!_!i_iii_Z';!ili;2_:
i'H
_-_
_ _._¢._ .........._........
* An "o" after a rack numberimpliesthat the offset rack should be used.
** The times given arebased on specific brands of mixes or recipestested. Actual
times will dependon the onesyou bake.
***The Convect Baketemperatureis 25°F lowerthan recommendedon packagemix
or recipe.
15
Page 16

• Use convection baking for breads, cakes, cookies, and pies.
• As a general rule, when using recipes or prepared mixes developed for a
conventional bake oven, set the oven temperature 25°F }ower than the recipe
recommended temperature. Times will be similar to or a few minutes }ess than
recipe recommended times. The chart on page 15compares times and temperatures
of many baked foods. Use this as a reference.
• For better browning, place cookie sheets and baking pans lengthwise, side to side
on the rack.
• Cookie sheets should be without sides and made of shiny aluminum. The best size
to use for cookie sheets is 16" x 12" or smaller.
16
Page 17

Forbest results,bakefoodsononerackat atime asdescribedinthismanual.However,
very good results can be obtained whenbaking quantitiesof foods on multiple racks.
Quantity cookingprovides both time and energysavings.
Convect Bake is suggested for most multiple rack cooking, especially three rack
cooking,becausethe circulatingheatedair resultsin moreevenbrowning. Fortwo rack
cooking,the conventiona_bakeovenprovidesverygoodbakingresultsespeciallywhen
pans can be staggered,such as withlayer cakes andfresh pies.
Many foods can be preparedon three racksat the same time. These are just a few
examples: cookies, cupcakes, rolls, biscuits, muffins, pies, pizzas, appetizers, and
snack foods.
To obtainthe best results in multiplerackcooking,follow these suggestions:
• Usetemperatureand timesin this manual as a guide for best results.
• Fortwo rack baking,rackpositions#2o and4 arebestformostbakedproductsbut
positions#2 and4 also provideacceptableresults.
• Forthreerackbakingusepositions#1,30 and4. Oneexceptionispizza.(Seepage
21.)
• Sincefoodsonpositions#1 and4willusuallybe donebeforefoodson position#3o,
additionalcookingtime will be needed for browning foods on the middle rack. An
additional minute is needed for thin foods such as cookies. For foods such as
biscuits,rolls,or muffins,allow1to2 moreminutes. Frozenpiesandpizzas,which
should bebakedon a cookie sheet, needabout2 to 4 more minutes.
• Staggersmall pans,such as layercake pans, in the oven.
• Frozenpiesinshinyaluminumpans shouldbe placedon cookiesheetsandbaked
on rack positions #1, 30 and 4.
• Cookiesheetsshouldbe placed lengthwise,sidetoside,in frontof thefanformore
even browning.
• Ovenmealsare recommendedforenergyconservation. Userackpositions#t and
3o or #2o and 4 and Convect Roast.
17
Page 18

• Preheatingis not necessary.
• Foropenpanroasting,place meator poultryonthe slottedportionofthetwo-piece
pan includedwith the oven. Do notadd waterto the pan. Use open panroasting
fortendercuts ofmeat. Lesstendercuts of meat needtobe cookedby moistheat
in a covered pan.
• Forbestresults,ameatthermometeror probeisthe mostaccurateguidetodegree
of doneness. The tipofthe thermometerorprobeshouldbe locatedinthe thickest
part of a roast, not touchingfat, bone, or gristle. For turkeys and largepoultry
products,insertthetipof the thermometerorprobeintothe thickestpartof theinner
thigh.
• Placeroastfat side up to allow self basting of meat duringroasting.
• Since meats continueto cook after being removedfrom the oven, removeroast
from oven when it reachesan internal temperatureabout 5 degrees below the
temperaturedesired.
• For less loss ofjuices and easier carving, allowabout 15 minutes"standingtime"
after removingmeat from oven.
• Forbestresultsin roastingpoultry,thawcompletely. Duetothe structureof poultry,
partiallythawed poultry willcook unevenly.
• If preferred,tender cutsof meatcan be roastedinthe conventionalbakeoven by
following the general recommendationsgiven above. However, meatswill roast
more quicklyin the convect oven usingConvect Roast.
• Conventionalbakeis best for lesstendercuts of meatthat requirea longer,moist
heatmethodofcooking. Followyour recipefortimesand temperaturesfor covered
meats.
• Meatscookedinovencookingbags,dutchovens,or coveredroastingpansarebest
cooked in the conventionalbakeoven usingthe Bake Pad.
• Use meat roasting charts in standard cookbooks for recommended times and
temperaturesfor roastingin a conventionalbakeoven.
NOTE: A cooling fan will operate during all cooking modes. The fan may also
continue to operateafter the oven is turned off untilthe oven has cooled
down.
18
Page 19

Chart time is based on thawed meats only. For Conventional Roasting use the Bake Pad.
v_y and W_¢. •
cutofM_l " . (_)
BEEF o
RibRoast 4 to8 : 325° 145_(rare) 25-30 1 30-35
4,p,,,.
I o {_6Oo(med_um)3o-35 I
RibEyeRoast 4 to6 325 1450(rare) 25-30 / 30-35
TendedoinRoast 2 to3 _ 4000 _ 145o(rare) I :18-23 28-28
EyeofRoundRoast .4 to5 I 325 I 145_(rare) 25-30 30-35
TopLoinRoast 3 to6 { 325 / 145[(rare) 25-30 • 30-,35
FloundTipRoast I 4 to6 1 325 I 145 (rare) _5-30_ :. 30.35 ;
, ,,. ,I ,:/ l
': PORK : ' " "
ShoulderBladeRoast 4 to6 325° 170° 3040 i 35-45
Boneless I o
St_ould_rBladeRoast _ to6 325 170° 25-35
TopLoin,bOneless 3 to4 325° 170° =..3_..
Ham,Haft(Fullycooked) 5to7 325° 140° NA •
Ham,Half(Cook 5 to7 : 275° . 160° 8040
beforeeating) I l o
Amlpicrdc_oulder 5 to8 325° 140 20-25 [
TU_ey,Unstuffed "_2t016 _ t; 1E_°_'_85° :;1_3_15:'
Tgd_ey,u_ed "16t020 32_ | i_3_-185_ t43:
I _ / 160oimedium)l 30-35 35-40
I o I 160o(medium) 30-35 13540
; _:_ Hen :_t_:i_ ; ;3:'Z5]::| 180°;1o85° =',_';:::! ":
* WhenusingtheConvectRoasfmode, thereisnoneedtopreheattheovenortolowerthe
temperaturefromconventionalroasttemperatures.
** Notrecommendedfor convectioncooking.Mostprecookedhamshavetobecoveredwhile
roasting,thustherewouldbe notimesavingsfromusingtheconvectmode.
19
Page 20

• Tender cuts of meat and poultry can be roasted to a rich golden brown in the
convectionoven. Followgeneralrecommendationsfor roastingand useConvect
Roast.
• Referto convectionmeat roastingchart for recommendedcooking temperature
and time. Thechart can serve as a guideto helpplan meal servingtime.
• Minutes per pound will vary accordingto the size, shape, quality, and initial
temperatureof meatas wellastheelectricalvoltagein your area. Timesare based
on refrigeratorcold meat.
• A large cut of meat will usually requirefewer minutes per pound to roastthan a
smaller cut of meat.
• Donot use a roasting panwith high sides; use pan providedwith oven.
• Donot cover meat. Allowthe circulatinghotair to surroundthe meat and seal in
the juices.
• Since the breast meat on a large turkeycooks more quicklythan the thigh area,
placea"foilcap"overthe breastareaafterdesiredbrownnessisreachedtoprevent
overbrowning.(See above.)
• Astuffedturkeywill requirean extra 30to 60minutesdependingon size. Stuffing
should reachan internaltemperatureof 165°F.
ConvectRoasting:Frozento Finish
Meats(except poultry)maybe roastedfrozen to finish, Followthese guidelinesforthe
most satisfactoryresults.
• Usetemperaturesfor roastingfresh meatsas recommendedby mostcookbooks,
Generally, most meats are roasted at 325°F. For best results do not use
temperaturesbelow 300°F.
• Usetimesfor roastingfreshmeats giveninyourfavoritecookbooksas approximate
guidesfor roasting frozenmeats. Roastingtimes willvary due to factors such as
coldnessof meat,size,quality, orcut. Ingeneral,roastingtimesforfrozentofinish
in the convection oven will be approximately the same as fresh to finish in a
conventionalbake oven.
• Theguidelinesgivenfor roastingfreshmeatsinthe convectionovenalsoapply to
roastingfrozen meats.
• Insertmeat thermometeror probe midway during the cooking process.
2O
Page 21

• Use the Convect Roast Pad for bestresults.
• Preheatingthe oven is not necessary.
• Followpackage recommendationsfor oven temperature,foil covering and use of
cookiesheets. Cooking timeswill besimilar. Seechartbelowfor someexceptions
and examples.
• Centerfoodsin the oven. If morethanonefood itemisbeingcookedor iffoods are
being cooked on multiple racks,stagger foodsfor properair circulation.
• Mostfoods are cooked on rackposition#3o.
• For multiple rackcooking, use racks#1, 3o and 4. However, pizzas should be
placedon cookiesheetsand cooked on rackposition#20, 3 and 4.
Here are a few examples of times and temperatures
,CONVENTIONAL
BAKE**PREHEATED
Temp.° F _linutes***
ii ii_iii i'i _ i_ ! _ ii_ :_ _ii _
* An "o" after a racknumberimplies that the offset rackshould be used.
** Conventionalbake uses the Bake Pad.
*** The times given are based on specific brandsof mixes or recipestested.
Actual timeswill depend on the onesyou cook.
Note: Convectroastingtimeswillbesimilartotheconventionaltimesbecausetheoven
is not preheated. The time savings comesfrom not havingto preheatthe oven.
21
Page 22

t steps 6-9 i sh to start cooking
1. Insertthe probe into the food item.
For meats,theprobetip shouldbelocated
in the center of the thickest part of the
meat and not in fat or touching a bone.
Placethe food in the oven using the rack
TO set probe feature
position suggestedon page 9.
Insertthe probe plug into the receptacle located on the top left of the oven. Be
certain to insert plug into the receptacleall the way.
Note=Afterthe probeisinserted,the IndicatorWord PROBEwill flash anda beep
will sound reminding you to enter the desired probe temperature.
2. Touch Probe Pad.
IndicatorWord PROBE will flash and three dashes will be shown in the Display.
3. Touch the appropriate number padsto setthe temperature fordesireddegreeof
doneness.
The temperaturemay beset in 5° increments. (Allowablerangeis 100°to 200°.)
Example: At 10o'clockto setthe probe for 150°, touchthe Probe Pad and the
numberpads "1,5,0". After five secondsthe Displaywill showprobetemperature
or 95°, whichever is higher.IndicatorWords CONV,BAKE and ROASTwill flash.
195 °
I O:OO....
22
Page 23

Fifteensecondslater,the Displaywillreturn to currenttimeof dayand the Indicator
WordTIMED will appear in the Display.
8. Touch Stop Time Pad.
IndicatorWords STOPTIMEwill flash. Displaywillshow the calculatedstop time
based oncurrent time of day and cook time.
Note"Probe settemperature willcontrolthe actualbaketime. Probetemperature,
not stoptime, will turn oven off when food is done. Stoptime is programmed for
the purpose of computing start time.
9. Touch the appropriate number pads to enter stop time.
A stoptime canonly beaccepted forlaterintheday. If an unacceptablestoptime
is entered, "Err" wi(I flash briefly in the Display and then Display will return to
previous acceptable Stop Time.
Example: If at 10 o'clock you set the oven for a probe temperature, for 325°
convection roastingand 2hoursand30 minutescooking time,thecalculatedstop
time would be "12:30". The Displaywould show:
8Top
Iz-3oL,s ]
If you want the stop time to be 1 o'clock, touch the numberpads "1,0,0". After
five seconds,the Displaywill brieflydisplaythestarttime. Thus,theDisplaywould
show:
!g:39Log }
After five seconds,the Display will return to current time of day, thus showing:
I0:00 1_9s l
Whenselected temperature hasbeen reached,the oven willshut off and achime
will soundfour times. Plus, the actual probe temperature will flash and the word
"End"will bein the Display. These words will remain in the Displayand a chime
will soundevery minuteforten minutesor until the Cancel Off Pad istouched. If
the probe is not removed, a beep will sound continuously until the probe is
removed.
• To recall eselected temperature ot time: Touch the appropriatefunction pad./
• To change oven temperature set: Touch appropriate pad and touch thej
appropriate number pads to enter new desired temperature. /
• if more than five seconds elapse betweentouching afunction pad and touching)
a number pad, the on-going program returns to the Display. /
I , PO.TA.T 1
24
Page 24

]
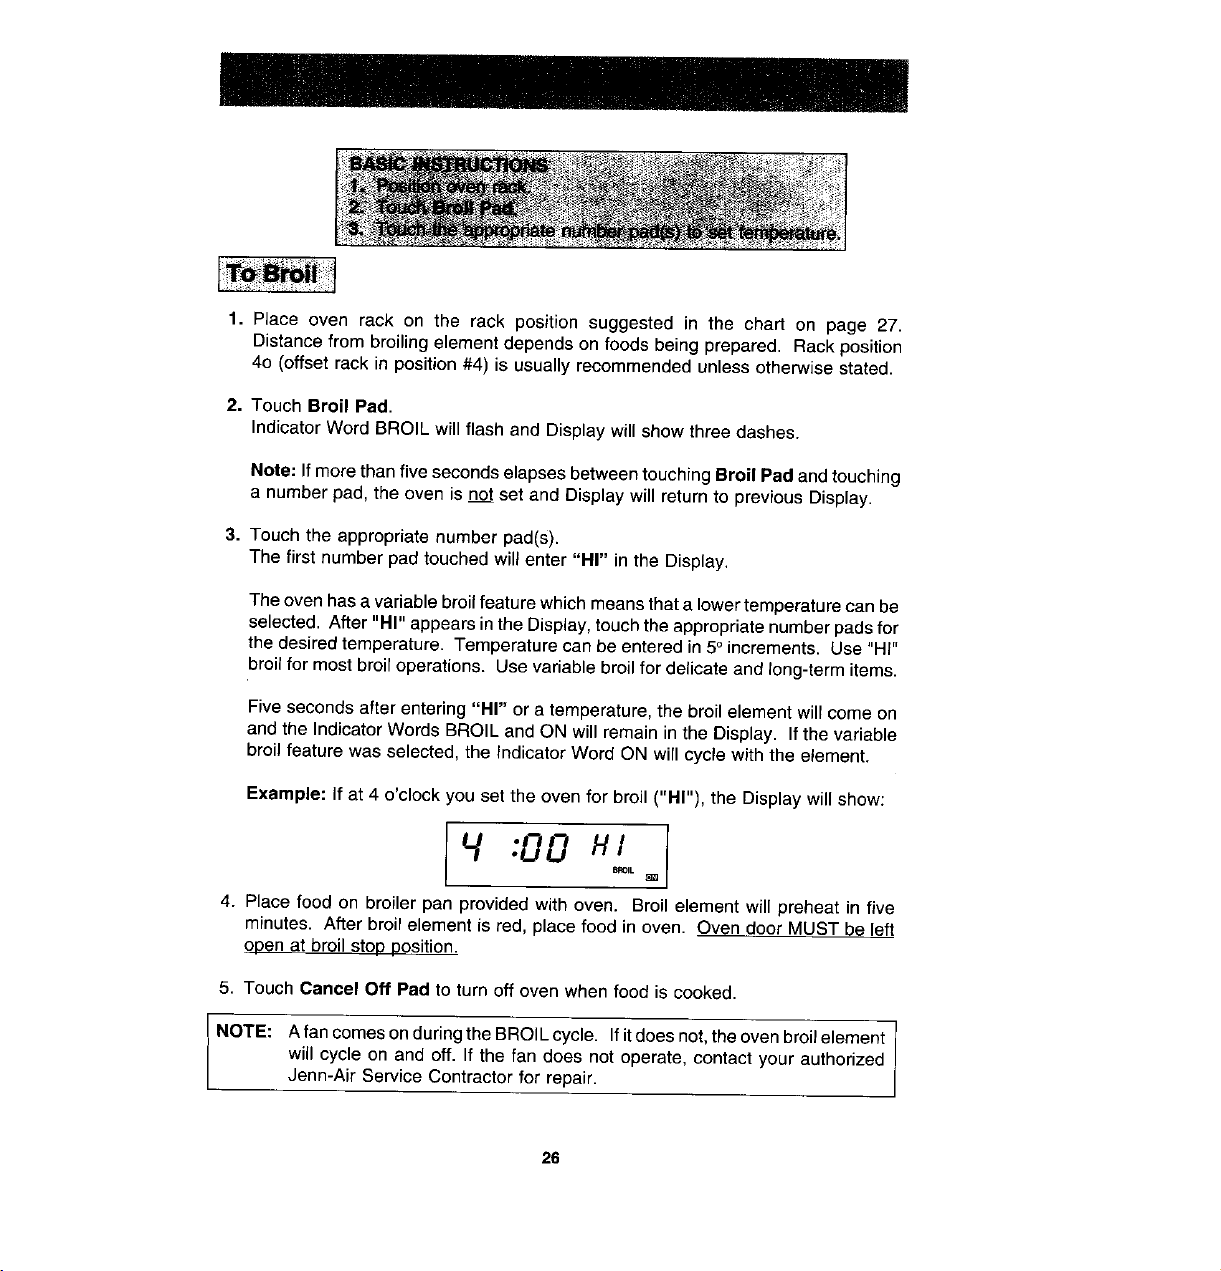
1. Place oven rack on the rack position suggested in the chart on page 27.
Distancefrom broiling elementdependsonfoods being prepared. Rack position
4o (offset rack inposition #4) is usually recommendedunless otherwisestated.
2. Touch Broil Pad.
IndicatorWord BROIL will flash and Displaywill showthree dashes.
Note: Ifmorethan five secondselapsesbetweentouchingBroil Pad andtouching
a numberpad, the oven is not set and Displaywill return to previous Display.
3. Touch the appropriatenumber pad(s).
The first number pad touchedwill enter "HI" in the Display.
Theoven has a variablobroilfeature whichmeansthata lower temperaturecanbe
selected. After "HI" appears inthe Display,touchthe appropriatenumberpads for
the desiredtemperature. Temperature can be entered in 5° increments. Use"HI"
broil for mostbroil operations. Usevariablebroil fordelicate and long-termitems.
Fivesecondsafter entering"HI" or a temperature,the broilelementwill come on
and the IndicatorWords BROILand ON will remainin the Display. If thevariable
broil feature was selected,the IndicatorWord ON will cyclewith the element.
Example: If at 4 o'clock you set the oven for broil ("HI"), the Displaywill show:
:00 Hl
4. Place food on broiler pan provided with oven. Broil element will preheat in five
minutes. After broilelementis red, placefood in oven. Oven door MUSTbe left
open at broil stop position.
5. Touch Cancel Off Pad to turn off ovenwhen food is cooked.
NOTE: Afan comesonduringthe BROILcycle. Ifitdoes not,the ovenbroilelement
will cycle on and off. If the fan does not operate, contact your authorized
Jenn-Air ServiceContractorfor repair.
26
_ROIL
Page 25

Fifteensecondslater,the Displaywillreturn to currenttimeof dayand the Indicator
WordTIMED will appear in the Display.
8. Touch Stop Time Pad.
IndicatorWords STOPTIMEwill flash. Displaywillshow the calculatedstop time
based oncurrent time of day and cook time.
Note"Probe settemperature willcontrolthe actualbaketime. Probetemperature,
not stoptime, will turn oven off when food is done. Stoptime is programmed for
the purpose of computing start time.
9. Touch the appropriate number pads to enter stop time.
A stoptime canonly beaccepted forlaterintheday. If an unacceptablestoptime
is entered, "Err" wi(I flash briefly in the Display and then Display will return to
previous acceptable Stop Time.
Example: If at 10 o'clock you set the oven for a probe temperature, for 325°
convection roastingand 2hoursand30 minutescooking time,thecalculatedstop
time would be "12:30". The Displaywould show:
8Top
Iz-3oL,s ]
If you want the stop time to be 1 o'clock, touch the numberpads "1,0,0". After
five seconds,the Displaywill brieflydisplaythestarttime. Thus,theDisplaywould
show:
!g:39Log }
After five seconds,the Display will return to current time of day, thus showing:
I0:00 1_9s l
Whenselected temperature hasbeen reached,the oven willshut off and achime
will soundfour times. Plus, the actual probe temperature will flash and the word
"End"will bein the Display. These words will remain in the Displayand a chime
will soundevery minuteforten minutesor until the Cancel Off Pad istouched. If
the probe is not removed, a beep will sound continuously until the probe is
removed.
• To recall eselected temperature ot time: Touch the appropriatefunction pad./
• To change oven temperature set: Touch appropriate pad and touch thej
appropriate number pads to enter new desired temperature. /
• if more than five seconds elapse betweentouching afunction pad and touching)
a number pad, the on-going program returns to the Display. /
I , PO.TA.T 1
24
Page 26
]
1. Place oven rack on the rack position suggested in the chart on page 27.
Distancefrom broiling elementdependsonfoods being prepared. Rack position
4o (offset rack inposition #4) is usually recommendedunless otherwisestated.
2. Touch Broil Pad.
IndicatorWord BROIL will flash and Displaywill showthree dashes.
Note: Ifmorethan five secondselapsesbetweentouchingBroil Pad andtouching
a numberpad, the oven is not set and Displaywill return to previous Display.
3. Touch the appropriatenumber pad(s).
The first number pad touchedwill enter "HI" in the Display.
Theoven has a variablobroilfeature whichmeansthata lower temperaturecanbe
selected. After "HI" appears inthe Display,touchthe appropriatenumberpads for
the desiredtemperature. Temperature can be entered in 5° increments. Use"HI"
broil for mostbroil operations. Usevariablebroil fordelicate and long-termitems.
Fivesecondsafter entering"HI" or a temperature,the broilelementwill come on
and the IndicatorWords BROILand ON will remainin the Display. If thevariable
broil feature was selected,the IndicatorWord ON will cyclewith the element.
Example: If at 4 o'clock you set the oven for broil ("HI"), the Displaywill show:
:00 Hl
4. Place food on broiler pan provided with oven. Broil element will preheat in five
minutes. After broilelementis red, placefood in oven. Oven door MUSTbe left
open at broil stop position.
5. Touch Cancel Off Pad to turn off ovenwhen food is cooked.
NOTE: Afan comesonduringthe BROILcycle. Ifitdoes not,the ovenbroilelement
will cycle on and off. If the fan does not operate, contact your authorized
Jenn-Air ServiceContractorfor repair.
26
_ROIL
Page 27

• Tender cuts of meat or marinated meats are best for broiling. This includes rib and
loin cuts of steak, ground beef, ham steaks, poultry pieces or fish. For best results,
steaks should be at least 1" thick. Thinner steaks should be pan-broiled.
• Do not cover broiler grid with foil since this prevents fat drippings from draining into
bottom of pan.
• Before broiling, remove excess fat from meat and score edges of fat (do not cut into
meat) to prevent meat from cuding. Salt after cooking.
• To prevent dry surface on fish or lean meats, brush melted butter on top.
• Foods that require turning should be turned only once during broiling. Turn meat
with tongs to avoid piercing and loss of juices.
[Brojfip.gCha_ j
Chart time is based on a preheated broil element using the "HI" setting.
i_?¸i¸i__!i_!i_j_i_!iii_i i!!_:!
_ii!i!!iii_!_i!ii_¸_ili!!i_ii!
ii_!_!ii!!iii!ii,i_!_i_ii_ii_!iii_ilj_ii_!ii_,_i¸¸_'I__ _/_i_!;_
ili i!!i¸iiiiii!, iiji '!ii!!i
*An "0" after the rack number implies that the offset reck should be used.
Note: This chart is a suggested guide. The times may vary with food being cooked.
27
Page 28

Whenthe ovencontrolsaresetto CLEAN,the ovenheatstotemperaturesthatarehigher
than those usedfor cooking. The high temperaturescause food soil to burn off and
substantiallydisappear. Whilethis occurs,adevice in theoven vent helpsto consume
normalamountsefsmoke,The ovenisventedthroughanopeningunderthecontrolpanel.
Note WW30430Owners:Bothovens cannotbe self-cleanedat the same time.
• Removethebroilerpanandany otherutensilsfromthe oven. Theseutensilscannot
withstandthe hightemperaturesof thecleaningprocess.
• Cleanspattersand spillsfromthoseareaswhichwill notbecleanedduringtheself-
cleaningprocess:
- centerfrontof ovenand door nearopeningindoor , _--_... / //_ ]
gasket.
- porcelainovendoor liner (areaoutsidethedoor
gasket).
- oven front frame.
Note: DO NOT CLEAN serial plate locatedon the
ovenfront. To cleanthese areas,use hot waterand
detergent, nonabrasivecleansersor soap filled steel
woolpads.Rinsethoroughly,beingcarefulnottousean
excessiveamountof waterthatwoulddampenthedoorgasket.Soilleft intheseareas
willbemoredifficultto removeaftertheself-cleaningprocesssincethe highheat will
bakeon anysoil thatis present.DO NOTUSECOMMERCIALOVENCLEANERS
TO CLEANTHESEAREAS.
• DONOTAI-rEMPTTO CLEAN,RUB,OR APPLYWATERTOGASKETONOVEN
DOOR.ThegasketisessentialforagooddoorseaL Rubbingorcleaningwilldamage
the gasketand mayaffectthe seal.
• Wipe up excessgreaseand foodspilloverswhich have netbakedonthe bottomof
theoven. Largeaccumulationsofsoilcancauseheavysmokeorfire intheovendudng
thecleaningprocess. For easeofcleaning,theheatingelementcanbe liftedslightly.
• Althoughsmokeor fire in the oven is a normaloccurrenceand there is no safety
problem,there willbe ventingof excessivesmokeandodor.
• The oven rackscanbecleanedin the oven. However,the ovenrackswilldiscolor,
lose shininess,andbecomedifficultto slidein and out if left inthe ovenduringthe
cleaningprocess.REMOVERACKSFROMOVENIFTHISDISCOLORATIONWILL
BE OBJECTIONABLE.Asasuggestion,donotleavetheracksintheovenduringthe
self-cleaningprocessiftheydonotneedtobecleanedsincetheywill discolortoa dull
silverafteronecleaning. Moderatelysoiledrackscanbe cleanedwithasoapyS.O.S.
pad or Scotch-Britescourpad. Stubbornstainsneed to be removedin the self-
cleaningprocess. Besureto readspecialtips on page32 ifovenracksarecleaned
duringthe self-cleaningprocess.
28
Page 29

I Theoven rackscanbecleanedinthe oven. However,theovenrackswilldiscolor,
loseshininess,andbecomedifficultto slideinand outif leftintheovenduringthe
cleaningprocess.REMOVE RACKS FROM OVEN IF THIS DISCOLORATION
WILLBEOBJECTIONABLE.As a suggestion,do notleavetheracksintheoven
duringtheself-cleaningprocessifthey donotneedtobe cleanedsincethey will
discolortoa dullsilverafteronecleaning.Moderatelysoiledrackscanbe cleaned
witha soapyS,O,S. pador Scotch-Britescour-pad. Stubbornstainsneedto be
removedintheself-cleaningprocess.Besuretoreadspecialtipsonpage32 ifoven
racksarecleanedduringthe self-cleaningprocess.
Steps to Follow for Self-Cleaning Process
*Omitsteps4 youwishcleaningtobeginimmediately.
To set ovento startcleaning immediately
1. Closetheovendoor.
2. TouchClean Pad ofovento be cleaned.
IndicatorWordsClean Time willflashandDisplaywillshow" HR : __ __".
NoteWW30430Owners;Theappropriateletter(U-upperoven;L-loweroven) and
OVENwill alsoflash.
3. Touch the appropriatenumberpad(s)•
Thefirst numberpad touchedwill enter"3:00"in the Displayfor an averagesoiled
oven. Thecleaningtimecan bevaried dependingonthe amountof soil. Set "2:00"
for lightsoil or "4:00" for heavysoil.
Note; If more than fifteen secondselapsesbetween touching a Clean Pad and
touching a numberpad,the ovenisnotset andtime ofdaywillautomaticallyreturn
to the Display.
Example:Ifat9o'clock youselectedtoself-cleanyourovenfor3 hours,theDisplay
willshow:
13
Fifteensecondsafterentering"3:00"orfoursecondsafterenteringa differenttime,
theovendoorwillstarttoautomaticallylatchandthecoolingfanwillcomeon. The
LOCKIndicatorWordwillcomeon whenthe door is latched.
Note: If ovendoorwas left open, "door"willflash in Displayanda signalwill
continuouslybeep untilthe doorisclosedandthe Clean Pad istouched.
TheIndicatorWordON comesonwhenthedoorislatchedandwillremainuntilthe
cleantemperatureis reached.The IndicatorWordON willcyclewiththeelements
to maintaintheclean temperature. 29
Page 30

To set ovento startcleaning at a latertime
1-3.Follow Steps 1-3 in previoussection on page 29.
4. Touch Stop Time Pad.
IndicatorWords STOPTIME willflash in the Disp;ay. The IndicatorWordCLEAN
and the calculatedstoptime will also appear in Display.
Note WW30430 Owners: The appropriate letter (U-upper oven; L-lower oven)
and OVEN will also flash.
5. Touch the appropriatenumber pads to enter stop time.
Astoptimecan onlybeacceptedfor later intheday. If anunacceptablestoptime
is entered, "Err" will flash briefly in the Display and then Display will return to
previous acceptable Stop Time.
Example: If at9 o'clock yousetthe ovento clean forthree hours,the calculated
stop time would be "12:00", The Displaywould show:
12:00
_TOpT_E
If you want the stop time to be 1 o'clock, touch the number pads "1,0,0". Five
seconds _ater,the Display would show StartTime:
I0:00
_ky _TI_T _IE CLFJ_
After five seconds, the Displaywill returnto currenttime of day, thus showing:
The LOCKIndicator Wordwillcome on andthe coo(ingfan will go off as soon as
the oven door has latched.
Whenthe oven begins to clean, the Indicator Word ON and the cooling fan will
come on and the IndicatorWord DELAY will go off.
Whenthe cleantime has been completed, the IndicatorWords CLEAN and ON
will gooff. The IndicatorWord LOCKand the coolingfan will remain on until the
oven has cooled down and the door has unlocked,
CCFJCJ
30
Page 31

To cancel self-clean
• Touch Cancel Off Pad.
• The oven doorwill be locked while the LOCK Indicator Word remains in the Display.
Depending on the length of time the oven had been self-cleaning, it may take up
to 45 minutes for the oven to cool down, the door to unlock and cooling fan to turn
off.
IMPORTANT
• Note WW30430 Owners: Both ovens CANNOT be cleaned at the same time. The
LOCK Indicator Word for the first oven must go off before setting the second oven
for a clean
• Note WW30430 Owners: If one oven is set to clean, the other oven cannot be
set for clock controlled baking.
• To recall cleaning time or stop time: Touch the appropriate pad (Clean Pad or
Stop Time Pad).
• To change cleaning time or stop time before cleaning begins: Repeat the
preceding steps.
• When the Clean Pad is touched, a fan comes on. If this fan is not operating, the
oven will go through the cleaning process at a reduced oven temperature and the
oven will not clean effectively. If the fan does not operate, contact your authorized
Jenn-Air Service Contractor for service.
• A slight odor may be detected, and if an oven is heavily soiled, some smoke may
be visible. Some smoke and odor during the cleaning process is a normal
occurrence. Since the oven is vented under the control panel, vapors, moisture,
etc. may be seen coming from this area.
• During the cleaning process, do not be alarmed it an occasional flame is visible
through the oven window. This is caused by excessive food soil that was not
removed before the oven was set to clean.
• SINCE THE DOOR AND WINDOW OF THE OVEN WILL GET WARM DURING
THE SELF-CLEANING PROCESS, AVOID CONTACT.
• Some types of soil may disintegrate but leave a light film or heavier deposit of ash.
The amount of ash depends onthe amount of soil which was in the oven. After oven
has cooled, this ash may be removed with a damp sponge. If other dark deposits
remain after wiping with a sponge, the time set for the length of cleaning was not
enough. Increase the cleaning time for future cleanings or clean more frequently,
The normal cleaning time is 3 hours. A maximum of 4 hours may be selected if
necessary.
31
Page 32

• If racks have been left in oven during the cleaning process, they should be treated
asfollows. After the cleaning process is completed and the oven has cooled, buff
the underside of rack edges with Scotch-Brite scour pad or rub lightly the
underside of rack edges with a coating of vegetable oil. Use a light application
of oil so it does not soil the oven. This will make the cleaned racks slide more
easily.
• To remove occasional spillovers between cleanings, use a soap-filled scouring
pad or mild cleanser; rinse well.
• Itis better to clean the even regularly rather than wait until there is a heavy build-
up of soil in the oven.
• During the cleaning process, the kitchen should be wen ventilated to help
eliminate normal odors associated with cleaning.
• DO NOT USE COMMERCIAL OVEN CLEANERS.
• DO NOT USE ALUMINUM FOIL OR OTHER LINERS IN THE OVEN.
Oven DoorTrim
Slightly dampen a cloth or paper towel with soapy water or nonabrasive cleanser such
as Fantastik or 409. Do not use excessive amounts of water or allow water to run down
through the air vents under the door handle since this will cause streaks which will be
visible through the glass door. White parts may be cleaned with chlorine bleach or a
nonabrasive cleanser that contains chlorine bleach. Do not use any abrasive cleansers,
oven cleaners, or scrub with any abrasive materials, such as S.O.S. pads, Scoth-Brite
pads, etc.
Glass Window or Glass Oven Door Front
Use any suitable glass cleaner or soapy water.
32
Page 33

Control Panel Area and Display Window
Wipe with softcloth dampenedwithsoapywater or glasscleaner. Do not spray any
cleaning solutionsdirectly ontothe displaywindow or use large amountsof soapand
water. Donot scrub with S.O.S.pads orabrasivecleaners.
Stainless Steel (select models)
Do not use any cleaning product containing chlorine bleach.
Always wipe with thegrain when cleaning.
DailyCleaning/LightSoil- Wipewithone ofthefollowing- soapywater,whitevinegar/
watersolution,Formula409GlassandSurfaceCleanerorasimilarmulti-surfacecleaner
- usinga sponge or soft cloth. Rinse and dry.To polish andhelp prevent fingerprints,
followwith Stainless SteelMagic Spray(Jenn-AirModelA912, PartNo. 20000008).
Moderate/Heavy Soil - Wipewith oneofthe following- Ben Ami or Soft Scrub- using
adampspongeorsoftcloth.Rinseanddry. Stubbornsoilsmayberemovedwitha damp
Scotch-Britepad;rubevenly withthe grain. Rinseanddry.To restorelusterand remove
streaks, follow with Stainless Steel Magic Spray (Jenn-Air Model A912, Part No.
2OOOO0O8).
Discoloration - Using a damp sponge or soft cloth, wipewith Cameo StainlessSteel
Cleaner.Rinseimmediately and dry. Toremovestreaksand restoreluster,follow with
StainlessSteel MagicSpray (Jenn-AirModelA912,Part No. 20000008).
To removepull forwardto the "stop"position;lift up _
on thefront of the rackand pull out.
Beforereplacingbulb,disconnectpowertoovenatthemainfuseorc/rcuitbreakerpaneL
Be sure that the entireoven cavityincludingthe light bulb is cool before attemptingto
remove.
To replace light bulb
1. Carefullyunscrewtheglass light lens.
2. To obtain firm grasp on the bulb, wear protective rubber
gloves. Removebyturning bulbtotheleft. Do not toucha hot j
ovenlight bulb withadampclothasbulbwillbreak. Note: If
the bulb does break andyou wish to remove it, becertain
power supply is disconnected and wear protective gloves.
YoumaycontactyourauthorizedJenn-AirServiceContractor
for service.
3. Replacebulbwith a 40wattoven-ratedappliance bulb. Bulb
withbrassbaseisrecommendedtopreventfusingofbulbinto
socket.
4. Replace bulb coverand reconnect power to oven. Reset
clock.
33
Page 34

The oven temperature can be adjusted if all oven temperatures are too low or too high
and the length of time to cook ALL foods is too long or too short. De NOT adjust the
temperature if only one or two items are not baking properly.
To adjust
1. Touch the Bake Pad.
2. Enter 500° by touching the number pads: "5,0,0".
3. Touch and hold the Bake Pad for 8 seconds until "00°" appears in the Display.
4. Touch the appropriate number pads to enter the offset temperature. (Allowable
range is -35° to +35°.) Note: Touching the Broil Pad will change the - sign to a
positive number or back to a negative number.
Note: Do not change the temperature setting more than 10° before checking the
oven.
5. Touch the Cancel Off Pad to return to the previous Display.
Important: The even should be adjusted only 10° and the oven should be tested. (We
recommend baking two 9" yellow layer cakes using a purchased box mix.) If the oven
temperature is still too low or too high, repeat the procedure described above.
The oven operation controls can be locked in the "OFF" position during cleaning or to
prevent a child from accidentally turning them on. The oven functions which can be
locked in the "OFF" position are: Bake, Convect Bake, Convect Roast, Probe, Broil and
Clean. The control functions which can always be used regardless of lockout are: Timer,
Clock and Oven Light.
To set
Touch and hold the Cook Time Pad and the Stop Time Pad simultaneously for four
seconds. The Indicator Word "OFF" will appear and remain in the temperature digits
for fifteen seconds.
Note: If an oven function is currently being used, the controls cannot be locked off.
Note: If someone touches an oven function pad, the Indicator Word "OFF" will again
appear in the temperature digits for fifteen seconds.
To cancel
Touch and hold the Cook Time Pad and the Stop Time Pad simultaneously for four
seconds. The Indicator Word "OFF" will appear briefly in the temperature digits and
then go ott.
34
Page 35

Checkthe following listto besureaservicecall is really necessary. A quick reference
ofthis manualmay preventan unneededservice call.
If nothing on the oven operates:
Q checkfor a blowncircuit fuseor a tripped main circuit breaker.
• check if oven is properlyconnectedto electricoutlet.
If clock, indicator words, and/or lights operate but oven does not
heat:
• the controls may havebeen setincorrectly.
• clockcontrols may be setfor delayedstart of oven.
• the Child ProtectionLock may have been set.
If the oven light does not work:
• the light bulb is loose or defective.
• oven light does not work during self-cleaningprocess.
If oven will notgo throughself-cleaning process:
• controlsmay beimproperly set.
• checkthe "Clean"and "Stop"timesettingsandthe currenttime of dayon the clock.
If oven did not clean properly:
• oven may need longer cleaning time.
• excessivespills were not removedprior to self-cleaning process.
If oven door will not unlock:
• oven may not have cooled to safe temperature after self-cleaning process.
• electriccurrent cominginto the oven may be off.
If foods do not broil properly:
• the control may not be set properly.
• check rack position.
• voltage intohouse may be low.
If bakedfood is burnedor too brownontop:
• food may bepositioned incorrectlyin oven.
• oven not preheated properly.
If foods bakeunevenly:
• the oven maybe installedimproperly.
• checkthe oven rackwith a level.
• staggerpans, do not allow pansto touch each otheror ovenwall.
• check instructions for suggestedplacementof pans on oven rack.
If oven baking resultsare less than expected:
• the pans being used may not be of the size or material recommendedfor best
results.
• there maynot besufficientroom aroundsides ofthe pansfor properair circulation
in the oven.
• check instructionsfor preheating,rack positionand oventemperature.
35
Page 36

If baking results differ from previous oven:
• oven thermostat calibration may differ between old and new ovens. Follow recipe
and use and care directions before calling for service since the calibration on the
previous oven may have drifted toa too high or too low setting. (See p.34 - Adjusting
Oven Temperature.)
If the cooling fan continues to operate after the oven has been
turned off:
• this is normal and the fan will automatically shut off when the oven is cooled.
If a fan is heard while using the bake mode:
• this is the cooling fan and is normal. The fan will continue to run after use until the
oven cools.
If probe does not work:
• check to be sure probe plug is properly inserted into oven receptacle.
• probe may not be positioned in food properly.
• probe temperature may have been improperly set.
Fault Codes
• Fault codes are shown in the Display as "F" and a number. If a fault code appears
in the Display and a continuous beep sounds, touch the Cancel Off Pad. If the fault
code reappears, disconnect power to the oven and call an authorized Jenn-Air
Service Contractor.
mBJENN-AIR
Printed in U.S.A. Cat. No. OU304OOUF
@1997 Jenn Air Part No. 8111 P343-60 9/97
403WESTFOURTHSTREETNORTHoPOBOX39' NEWTON,IA50208
 Loading...