

Jenn-Air w30400 User Manual
Use and Care Manual
30” Expressions@
Convection Wd Oven
Models W30400, WM30460, WW30430
w304oos, ww3043os
MODEL WW30430
For Microwave Oven, refer to Use and Care Manual packed in Microwave Oven.
7
(00 3/b

Congratulatiorfs on your choice of a Jenn-Air wall oven.
Your Jenn-Air convection oven
combines the best of four cooking methods: conventional baking or roasting, convection
baking, convection roasting, and broiling, in a self-cleaning oven.
The Jenn-Air convection oven is actually a conventional oven that circulates heated air
within the oven. As both bake and broil heating elements cycle on and off with the
thermostat, a fan keeps the heated air circulating around the food. The constantly
recirculating heated air in the convection oven strips away the layer of cooler air that
surrounds food. Consequently, many foods cook more quickly. Distributed heat makes
multiple rack cooking possible. Convection roasted meats retain their natural flavor and
juiciness with less shrinkage than conventional roasting.
Before you begin cooking with your new oven, please take a few minutes to read and
become familiar with the instructions in this book. On the following pages you will find
a wealth of information regarding all aspects of using your new oven. By following the
instructions carefully, you will be able to fully enjoy and properly maintain your oven and
achieve excellent results with the food you prepare.
Should you have any questions about using your Jenn-Air oven, write to us. Be sure
to provide the model number.
Jenn-Air Customer Assistance
c/o Maytag Customer Senrice
P.O. Box 2370
Cleveland, TN 37320-2370
Model Number
Serial Number
(numbers appear on the serial plate on the oven front frame)
Date Purchased
JENN-AIR DEALER FROM WHOM PURCHASED
Address
City
Phone
2
Baking
Baking Chart
Causes of Cake Failure
Convect Baking
................................................................................................
...............................................................................
......................................................................................
Convect Cooking on Multiple Racks
General Recommendations
.........................................................................
15
16
15-17
............................................................
17
I4
Before
You Call
For Service
. . . . . . . . . . . . . . . . . . . . . . . . . . . . . . . . . . . . . . . . . . . . . . . . . . . . . . . . . . . . . . . . . . . . . . . 35-36
Broiling
Broiling
Broiling Tips
Broiling Chart
.........................................................................................................
.................................................................................................
...............................................................................................
Caring for Your Oven
Adjust Oven
Child Protection
Cleaning Other
Oven Light Bulb
Temperature ...........................................................................
Lock
...................................................................................
Surfaces .............................................................................
Replacement ....................................................................
Cleaning
Self-Cleaning Process28-32
Clock Controls
Clock Controlled Baking or Roasting
Time of Day Clock
Timer
........................................................................................................... 11
........................................................................................ 10
Oven Operation
Oven Control
Panel..
Rack Positions
Setting Controls
...................................................................................... 6
.............................................................................................
............................................................................................. 8
......................................................
12-13
26
27
27
34
34
32
33
9
Probe
. . . . . . . . . . . . . . . . . . . . . . . . . . . . . . . . . . . . . . . . . . . . . . . . . . . . . . . . . . . . . . . . . . . . . . .
Roasting
Conventional Roasting Recommendations1 8
Convect
Roasting
. . . . . . . . . . . . . . . . . . . . .
Frozen Convenience Foods
General Roasting
Roasting
Chart
Safety Precautions
Recommendations . . . . . . . . . . . . . . . . . . . . . . . . . . . . . . . . . . . . . . . . . . . . . . . . . . . . . . . . . .
. . . . . . . . . . . . . . . . . . . . . . . . . . . . . . . . . . . . . .
. . . . . . . . . . . . . . . . . . . . . . . . . . . . . . . . . . . . . . . . . . . . . . . . . . . . . . . . . . . . . . . . ..~.......................
. . . . . . . . . . . . . . . . . . ..~..........................~..............
. . . . . . . . . . . . . . . . . . . . . . . . . . . . . . . . . . . . . . . . . . . . . . . . . . . ..~...................
3
,......................,............
22-25
19-21
. . . . . . . . . . . . . . . . . . . . . . . . . . . . . . ..*.....................
4-5
21
18
19
Read before operating your oven
All appliances improper or careless use to create safety problems. Therefore the following
safety precautions should be observed:
1.
2.
3.
4.
5.
6.
7.
8.
9.
10.
11.
12.
13.
14.
15.
16.
Be sure your appliance is properly installed and grounded by a qualified
technician.
Never use your appliance for warming or heating the room.
Children should not be left alone or unattended in area where appliance
is in use. They should never be allowed to sit or stand on any part of the
appliance.
Wear proper apparel. Loose-fitting or hanging garments should never be
worn while using the appliance.
Do not repair or replace any part of the appliance unless specifically
recommended in this manual. All other servicing should be referred to an
authorized Jenn-Air Service Contractor.
Flammable materials should not be stored in an oven.
Do not use water on grease fires. Smother fire or flame or use dry
chemical or foam-type extinguisher.
Use only dry potholders. Moist or damp potholders on hot surfaces may
result in burns from steam. Do not let potholder touch hot heating
elements. Do not use a towel or other bulky cloth.
Use care when opening oven door. Let hot air or steam escape before
removing or replacing food.
Do not heat unopened food containers. Build-up of pressure may cause
container to burst and result in injury.
Keep oven vent ducts unobstructed.
Always place oven racks in desired location while oven is cool. If rack must
be moved while oven is hot, do not let potholder contact hot heating
element in oven.
Do not clean door gasket. The door gasket is essential for a good seal.
Care should be taken not to rub, damage, or move the gasket.
Do not use oven cleaners. No commercial oven cleaner or oven liner
protective coating of any kind should be used in or around any part of the
oven.
Clean only parts listed in this manual.
CAUTION: BEFORE SELF-CLEANING THE OVEN, REMOVE FOOD,
BROILER PAN AND OTHER UTENSILS.
regardless of the manufacturer - have the potential through
4

17. Listen for fan. A fan noise should be heard during the bake, convect bake,
convect roast, broil and cleaning cycles. If not, call a serviceman.
18.
19.
20. This appliance has been tested for safe performance using conventional
21.
DO NOTTOUCH HEATING ELEMENTS OR INTERIOR SURFACES OF
OVEN. Heating elements may be hot even though they are dark in color.
Interior surfaces of any oven become hot enough to cause burns. During
and after use, do not touch, or let clothing or other flammable materials
contact heating elements or interior surfaces of oven until they have had
sufficient time to cool. Other surfaces of the appliance may become hot
enough to cause burns-among these surfaces are: oven vent openings
and surfaces near these openings, oven doors, windows of oven doors.
PREPARED FOOD WARNING: Follow food manufacturer’s instructions.
If a plastic frozen food container and/or its film cover distorts, warps or is
otherwise damaged during cooking, immediately discard the food and its
container. The food could be contaminated.
cookware. Do not use any devices or accessories that are not specifically
recommended in this manual. Do not use add-on convection systems.
The use of devices or accessories that are not expressly recommended
in this manual could create serious safety hazards, result in performance
problems, and reduce the life of the components of the appliance.
Do not allow aluminum foil or meat probes to contact heating element.
IMPORTANT SAFETY NOTICE AND WARNING
The California Safe Drinking Water and Toxic Enforcement Act of 1986
(Proposition 65) requires the Governor of California to publish a list of
substances known to the State of California to cause cancer or reproductive
harm, and requires businesses to warn customers of potential exposures to
such substances. Users of this appliance are hereby warned that when the
oven is engaged in the self-clean cycle, there may be some low level exposure
to some of the listed substances, including Carbon Monoxide. Exposure to
these substances can be minimized by properly venting the oven to the
outdoors during the self-clean cycle.
- SAVE THESE INSTRUCTIONS -
5

Oven Control Panel
The control panel is designed for ease in programming. The Display Window features
Indicator Words which will flash to prompt you for the next step.
To program
1. Touch the function pad to give command desired.
2. Touch the appropriate number pads to enter time or temperature.
Note: Five seconds after entering the number, the time or temperature will
automatically be entered. If more than five seconds elapse between touching a
function pad and touching a number pad, the control is not set and Display will return
to previous Display.
2 3
Lo*nrown
mwwQc1w;;;*
Function Pads
Use for conventional baking or roasting.
Use for top browning or oven broiling.
c-w’-
iz
% J!=
OMI
CWk
5 6
7
8 9
0
Use to set self-cleaning process.
Cancels all programming except Timer.
Use for convect baking.
Use for convect roasting.
Use to set desired internal temperature when using Probe.
Use to turn oven light on and off.
Use for clock controlled cooking and cleaning when delayed start is desired.
(For lock function see page 34.)
Use for clock controlled cooking.
(For lock function see page 34.)
Use to signal expiration of a time penod up to 11 hours and 55 minutes.
Use to signal expiration of a time period up to 11 hours and 55 minutes.
Use to set time of day.
6

Number Pads
Use to set time or temperature.
Oven Light Pad (Control Panel)
The oven light automatically comes on whenever the oven door is opened. When door is closed, touch
the Oven Light Pad to turn oven light on or off. Note: A beep will sound every time the Oven Light
Pad is touched.
Display Window
Shows time of day, timer, and
oven functions.
Display Numbers:
0 Show time of day.
0 Countdown of time remaining when using time functions.
0 Show temperature of oven as it rises to reach programmed temperature and the set tempera-
ture once it is reached.
0 Recall programmed temperature or time when commanded.
0 Rounding of Display Numbers: Temperature range is 100” to 550°F and can be set in 5”
increments. When setting temperature, the control will round it to the nearest 10”. For example,
if 237” is entered, the control will round the temperature to 240°.
, 1
cwlv BANE IlMn CONI WE ROAST
DELAY START COOK TIMED
STOP TIMER KHZ q lllD~EN LOCK PBUUT fiJII LBCK PBEIIEAT m
I I
CLEM Brlllll CLEAK BROIL
Prompts:
0 Serve as a reminder to shut oven door, if it is open, for self-cleaning operation when the word,
door,
is displayed.
0 “Err” will appear in the Display when an impropertemperature or time has been entered. “Err”
will flash and a beep will be heard three times. Then, the Display will return to the previous
Display before the error was entered.
Indicator Words:
0 Flash to prompt next step.
0 Indicate status of programmed function.
0 Show programmed function when recalled.
0 Show oven selected. U - is the upper oven; L - is the lower oven. (Model WW30430)
Chimes vs. Beeps
0 A chime sound is used to designate the end of a timing or cooking operation.
0 A beep sound will be heard when any pad is touched. A series of short beeps are used to
designate an incorrect entry, door is open when set for a self-clean, probe needs to be removed
and a fault code.
End of Cycle Chimes:
0 The end of cycle chimes is four short chimes followed by “reminder” chimes for a specified
length of time, until you cancel that function. For the Timer function, there are two “reminder”
chimes every 30 seconds for five minutes.
“reminder” chime every minuteforten minutes. To cancel these “reminder” chimes, touch the
appropriate pad again (either the
Cancel Off Pad to cancel the “reminder” chimes, but it will also cancel all other oven functions.
0 If you would like to eliminate all the “reminder” chimes entirely, touch and hold the Cancel Off
Pad for twelve seconds. (This will oat the initial four short chimes).
0 To return the “reminder” chimes, touch and hold the Cancel Off Pad for twelve seconds.
NOTE: To change the oven to a 24 hour clock or Celsius (C) degrees, contact your authorized
Jenn-Air Service Contractor or installer.
Timer
For the Timed Cook, functions there is one
Pad or Cook Time Pad). You may also touch the
7
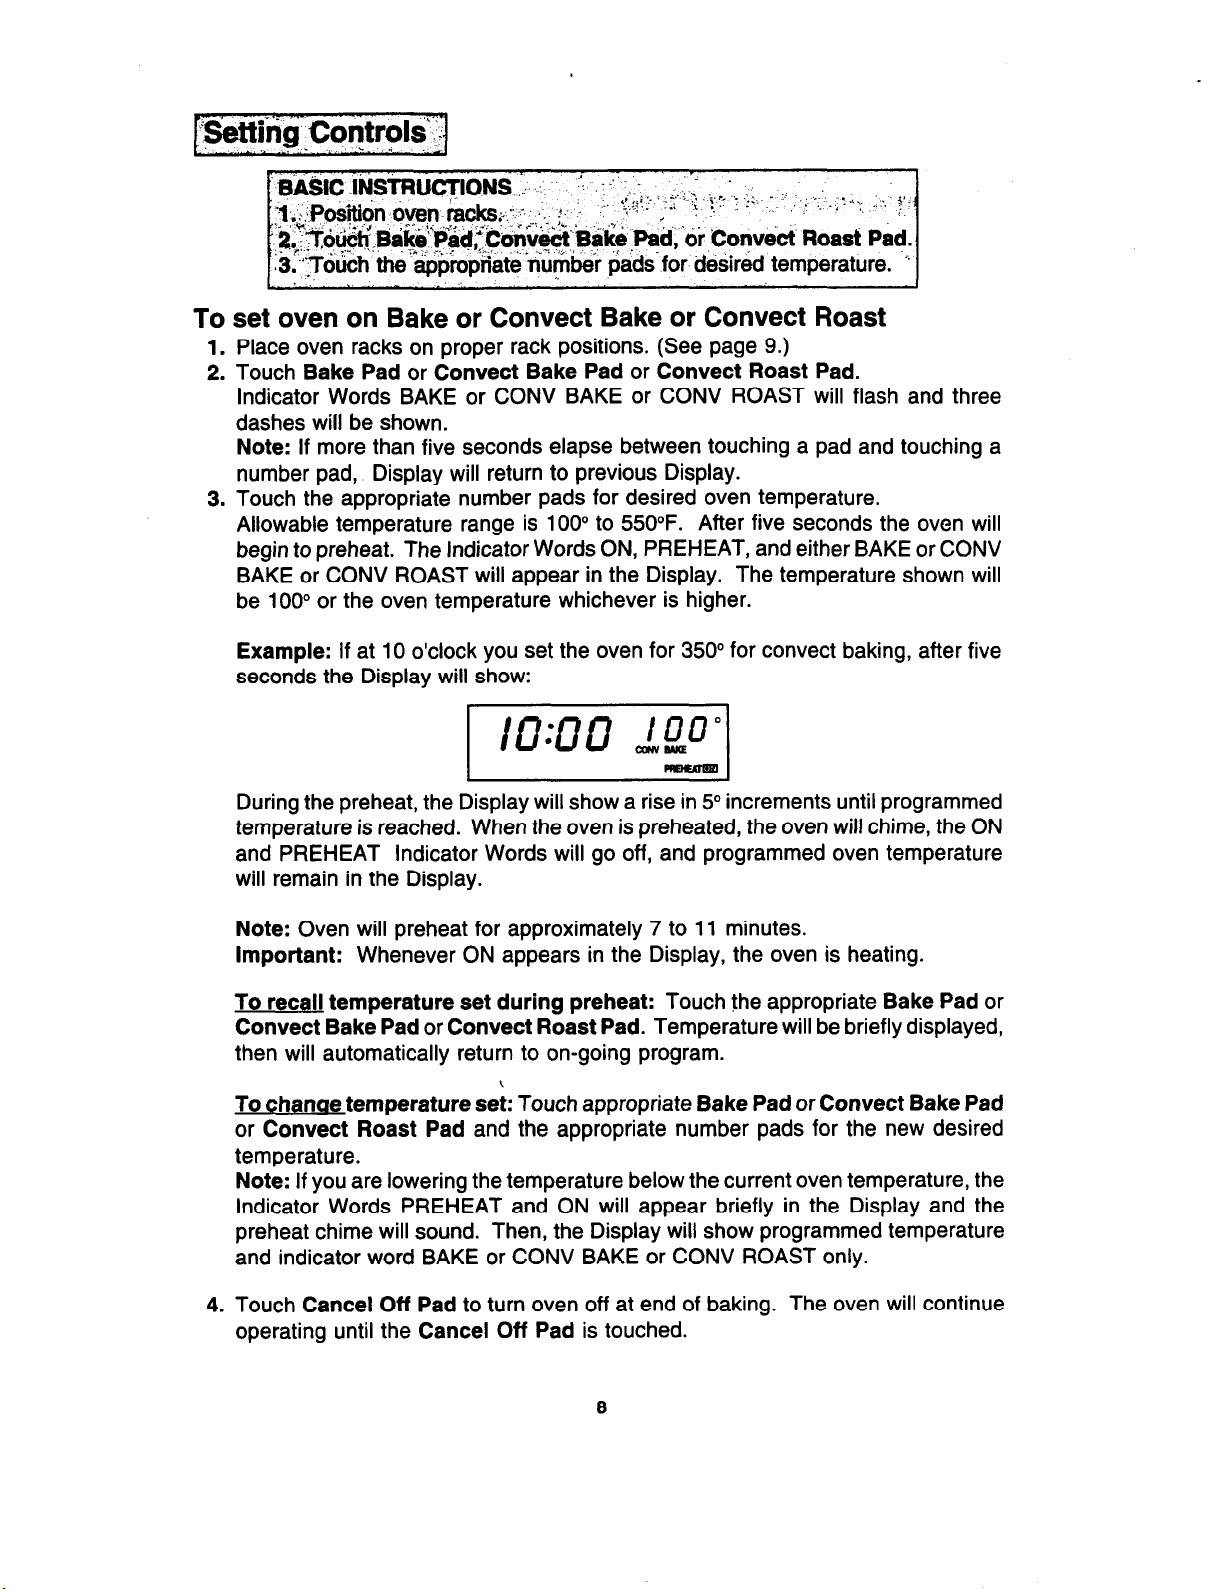
To set oven on Bake or Convect Bake or Convect Roast
1.
Place oven racks on proper rack positions. (See page 9.)
2. Touch
Indicator Words BAKE or CONV BAKE or CONV ROAST will flash and three
dashes will be shown.
Note:
number pad, Display will return to previous Display.
3. Touch the appropriate number pads for desired oven temperature.
Allowable temperature range is 100” to 550°F. After five seconds the oven will
begin to preheat. The Indicator Words ON, PREHEAT, and either BAKE or CONV
BAKE or CONV ROAST will appear in the Display. The temperature shown will
be 100” or the oven temperature whichever is higher.
Bake Pad
or
Convect Bake Pad
or
Convect Roast Pad.
If more than five seconds elapse between touching a pad and touching a
Example:
If at 10 o’clock you set the oven for 350” for convect baking, after five
seconds the Display will show:
During the preheat, the Display will show a rise in 5” increments until programmed
temperature is reached. When the oven is preheated, the oven will chime, the ON
and PREHEAT Indicator Words will go off, and programmed oven temperature
will remain in the Display.
Note:
Important:
To recall temperature set during preheat:
Convect Bake Pad
Oven will preheat for approximately 7 to 11 minutes.
Whenever ON appears in the Display, the oven is heating.
Touch the appropriate
or
Convect Roast Pad.
Temperature will be briefly displayed,
Bake Pad
or
then will automatically return to on-going program.
To chanae temperature set:
or
Convect Roast Pad
Touch appropriate
Bake Pad
or
Convect Bake Pad
and the appropriate number pads for the new desired
temperature.
Note:
If you are lowering the temperature below the current oven temperature, the
Indicator Words PREHEAT and ON will appear briefly in the Display and the
preheat chime will sound. Then, the Display will show programmed temperature
and indicator word BAKE or CONV BAKE or CONV ROAST only.
4. Touch
Cancel Off Pad
operating until the
to turn oven off at end of baking. The oven will continue
Cancel Off Pad
is touched.
8
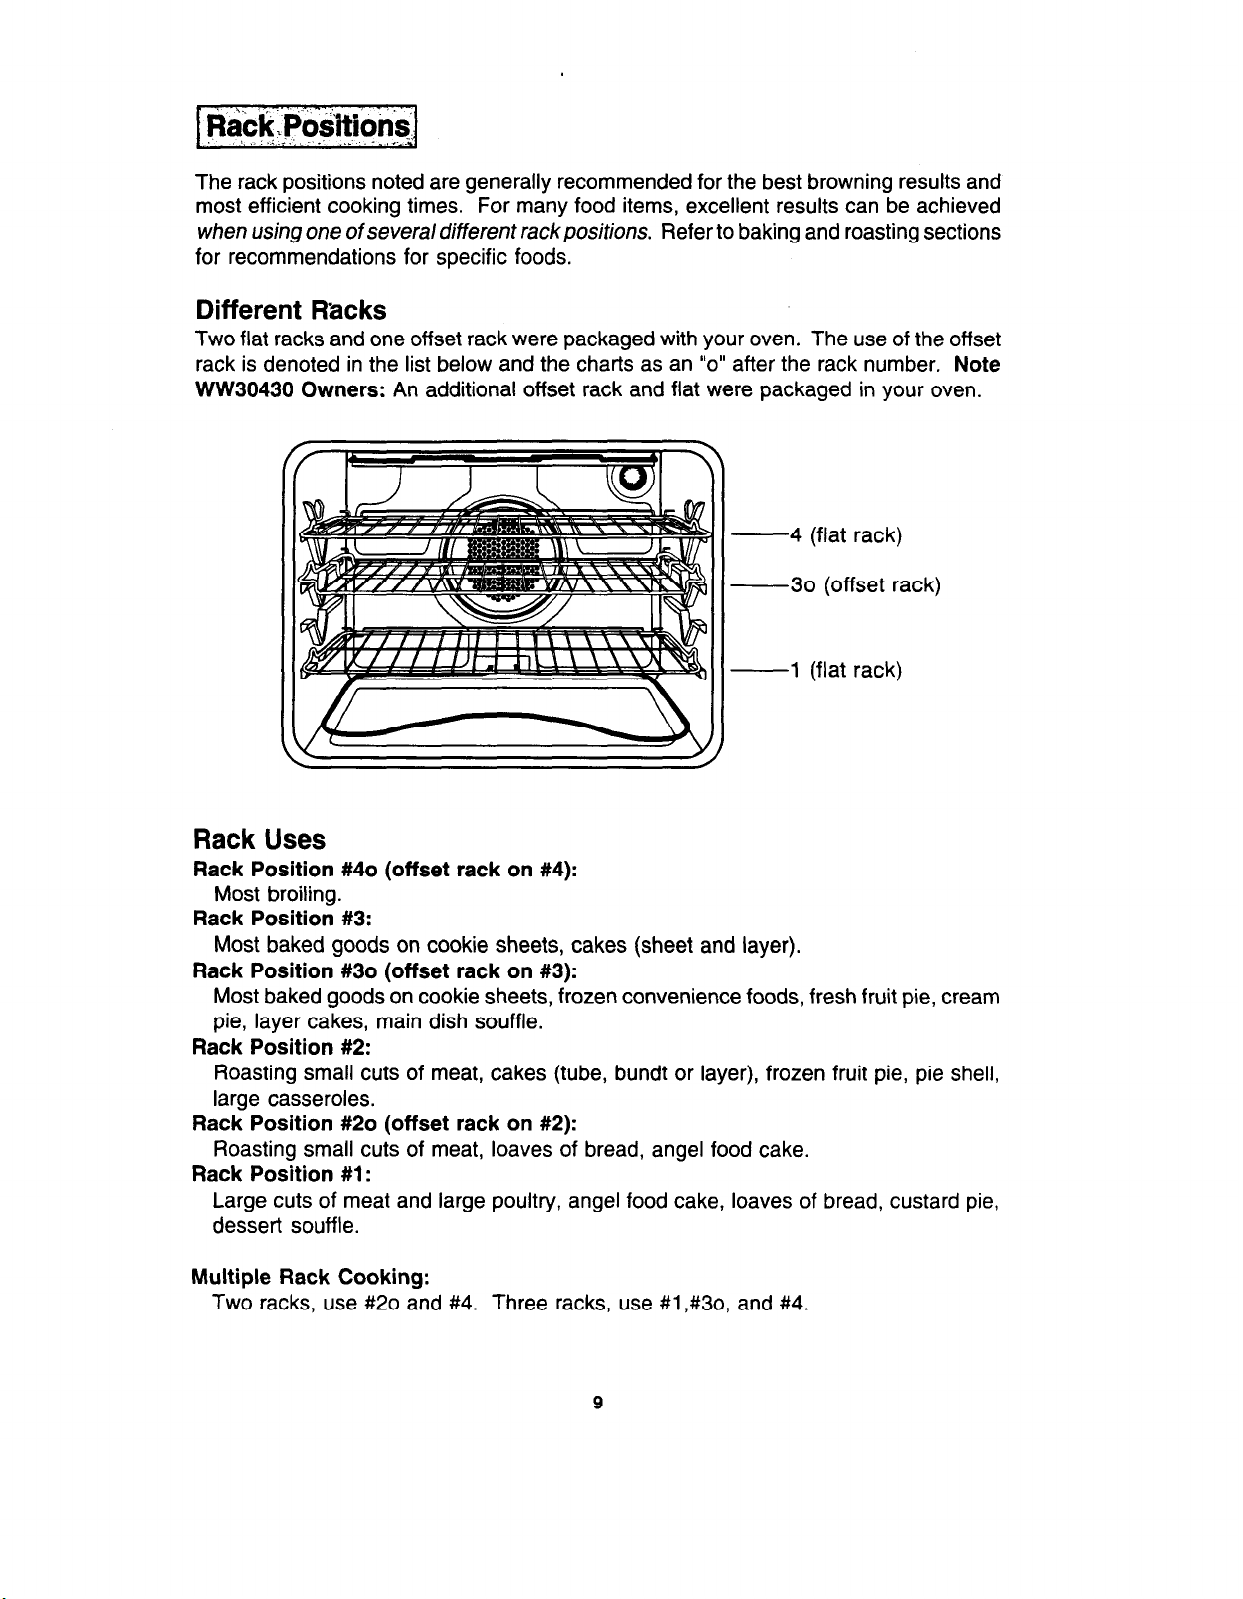
The rack positions noted are generally recommended for the best browning results and
most efficient cooking times. For many food items, excellent results can be achieved
when using one of several dif?erent rackpositions.
Refer to baking and roasting sections
for recommendations for specific foods.
Different Racks
Two flat racks and one offset rack were packaged with your oven. The use of the offset
rack is denoted in the list below and the charts as an “0” after the rack number.
WW30430 Owners:
An additional offset rack and flat were packaged in your oven.
-4 (flat rack)
-30 (offset rack)
-1 (flat rack)
Note
Rack Uses
Rack Position #40 (offset rack on #4):
Most broiling.
Rack Position #3:
Most baked goods on cookie sheets, cakes (sheet and layer).
Rack Position #30 (offset rack on #3):
Most baked goods on cookie sheets, frozen convenience foods, fresh fruit pie, cream
pie, layer cakes, main dish souffle.
Rack Position #2:
Roasting small cuts of meat, cakes (tube, bundt or layer), frozen fruit pie, pie shell,
large casseroles.
Rack Position #20 (offset rack on #2):
Roasting small cuts of meat, loaves of bread, angel food cake.
Rack Position #l:
Large cuts of meat and large poultry, angel food cake, loaves of bread, custard pie,
dessert souffle.
Multiple Rack Cooking:
Two racks, use #20 and #4. Three racks, use #1,#30, and #4.
9
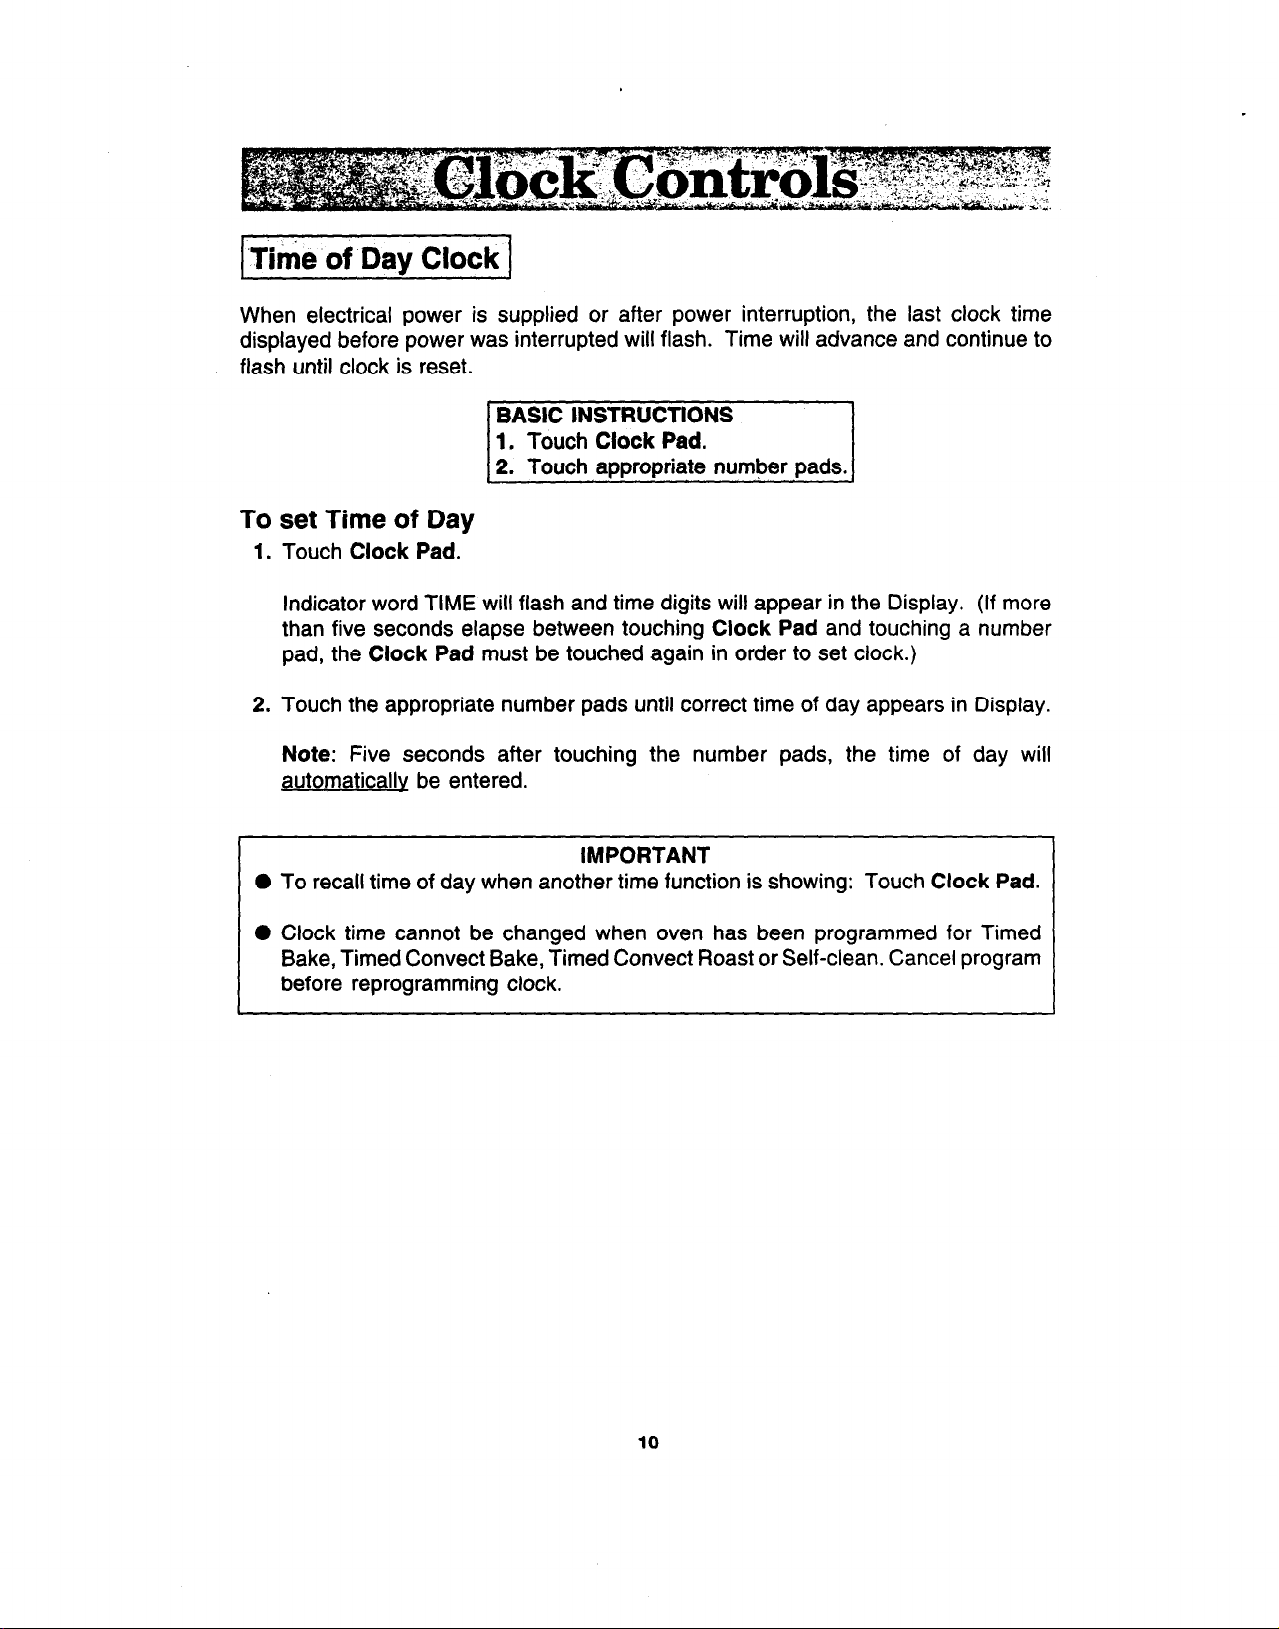
‘The of Day Clock
When electrical power is supplied or after power interruption, the last clock time
displayed before power was interrupted will flash. Time will advance and continue to
flash until clock is reset.
</
2. Touch appropriate number pads.
To set Time of Day
1. Touch
Indicator word TIME will flash and time digits will appear in the Display. (If more
than five seconds elapse between touching
pad, the Clock Pad must be touched again in order to set clock.)
2. Touch the appropriate number pads until correct time of day appears in Display.
Clock Pad.
Clock Pad
and touching a number
Note:
Five seconds after touching the number pads, the time of day will
automatically be entered.
IMPORTANT
l
To recall time of day when another time function is showing: Touch
Clock Pad.
0 Clock time cannot be changed when oven has been programmed for Timed
Bake, Timed Convect Bake, Timed Convect Roast or Self-clean. Cancel program
before reprogramming clock.
10

Important:
This interval Timer can be used to remind you when a period, up to 11
hours and 55 minutes, expires. It can be used independently of any other oven activity
and can be set while another oven function is operating. The Timer does not control
the oven.
BASIC INSTRUCTIONS
1. Touch
Timer Pad.
2. Touch the appropriate number pads.
To set Timer
1.
Touch
The Indicator Word Timer and either 1 or 2 flashes and “0Hr:OO” appears in the
Display.
2. Touch the appropriate number pads until the desired number of minutes or hours
and minutes appear in the Display.
Note:
number pad, the
Timer Pad.
If more than five seconds elapse between touching a
Timer Pad
must be touched again.
Timer Pad
and a
Example:
To set Timer One for 5 minutes, touch the
Timer One Pad
number 5 pad. After five seconds, the display will show:
Example:
To set Timer Two for 1 hour and 30 minutes, touch the
Timer Two Pad
and the numbers “1, 3, 0” pads. After five seconds, the Display will show:
Countdown will start after five seconds. Countdown will have display precedence
over other time functions. If both timers are set, the timer with the least amount
of time remaining will have display precedence.
At the end of time set, the Timer will chime four times and “End” will appear in the
Display. If timer is not cancelled (see below), “End” will remain in the Display and
there will be two chimes every thirty seconds for five minutes.
To cancel Timer
1.
Touch and hold the
OR
2.
A.
Touch the
B.
Touch “0” number pad. Five seconds later the Timer will be cancelled.
Timer Pad
Timer Pad.
for four seconds.
and the
NOTE:
Touching
Cancel Off Pad
programming.
to cancel chimes will cancel ALL selected oven
11
 Loading...