

Jenn-Air W188W, W188 Owner’s Manual

JENN-AIR
m_W °
Use and Care Manual
Electronic Control Self-Cleaning
Radiant and Convection Oven
Model W188
About Your Jenn-Air Oven
Your Jenn-Air self-cleaning oven combines the best of two cook-
ing methods, convection and radiant (conventional) baking or
roasting.
The benefits of convection cooking, used by major restaurants and
chefs all over the world are at your fingertips.
The Jenn-Air convection oven is actually a conventional oven that
circulates heated air within the oven. As both bake and broil heating
elements cycle on and off with the thermostat, a fan keeps the heated
air circulating around the food.
The constantly recirculating heated air in the convection oven
strips away the layer of cooler air that surrounds food. Consequently,
many foods cook more quickly. Distributed heat makes multiple rack
cooking possible. Convection roasted meats retain their natural
flavor and juiciness with less shrinkage than radiant bake roasting.
In addition to the many exclusive benefits of aconvection oven, it is
also a fine full-featured "bake and broil" oven.
You can cook your "old favorite" recipes as you have in the past.
The radiant bake oven also gives you the flexibility of preparing
various foods when convection cooking may not be as beneficial, as
when cooking foods in covered casseroles or clay pots.
The broil element is convenient for top browning and oven broiling
of foods.
The BAKE TIME and STOP TIME features can be used with either
the convection or radiant bake oven.
The electronic controls provide additional features not possible
with other control panels, plus easy to set operation. The smooth
control panel provides ease of maintenance. Temperatures for
BROIL and CLEAN modes are pre-set. Extra features such as the
ALARM and recall of program are possible because of the electronic
memory bank.
Since this manual explains how you can obtain the best use of your
oven, it is essential that you follow the instructions carefully. This will
enable you to fully enjoy and properly maintain your Jenn-Air oven
and achieve fine cooking results with the foods you prepare.., year
after year.
Should you have any questions about using your Jenn-Air
appliance, write to us. Be sure to provide the model number of your
appliance.
Consumer Relations Department
Jenn-Air Company
3035 Shadeland Avenue
Indianapolis, IN 46226-0901


SAFETY PRECAUTIONS
Read before operating your oven
All appliances -- regardless of the manufacturer -- have
the potential through improper or careless use to create
safety problems. Therefore the following safety
precautions should be observed:
1. Be sure your appliance is properly installed and
grounded by a qualified technician.
2. Never use your appliance for warming or heating the
room.
3. Children should not be left alone or unattended in area
where appliance is in use. They should never be
allowed to sit or stand on any part of the appliance.
4. Wear proper apparel. Loose-fitting or hanging
garments should never be worn while using the
appliance.
5. Do not repair or replace any part of the appliance
unless specifically recommended in this manual. All
other servicing should be referred to an authorized
Jenn-Air Service Contractor.
=
Flammable materials should not be stored in an oven.
7.
Do not use water on grease fires. Smother fire or
flame or use dry chemical or foam-type extinguisher.
8. Use only dry potholders. Moist or damp potholders on
hot surfaces may result in burns from steam. Do not
let potholder touch hot heatingelements. Do notuse a
towel or other bulky cloth.
9. Usecare whenopeningoven door.Lethot air or steam
escapebeforeremovingor replacingfood.
10. Do not heat unopened food containers. Build-up of
pressure may cause container to burst and result in
injury.
11. Keep oven vent ducts unobstructed.
12. Always place oven racks in desired location while
oven is cool. If rack must be moved while oven is hot,
do not let potholder contact hot heating element in
oven.
13. Do notclean door gasket.Thedoor gasket is essential
for a good seal. Care should be taken not to rub,
damage, or move the gasket.
14. Do not use oven cleaners. No commercial oven
cleaner or oven liner protective coating of any kind
should be used in or around any part of the oven.
15. Clean only parts listed in this manual.
16. Before self-cleaning the oven, remove broiler pan and
other utensils.
17. Listen for fan. A fan noise should be heard during the
cleaning cycle. If not, call a serviceman before self-
cleaning again.
18. DONOTTOUCH HEATINGELEMENTSOR INTERIOR
SURFACESOF OVEN. Heating elements may be hot
eventhough theyare dark in color. Interior surfaces of
any oven become hot enough to cause burns. During
and after use, do not touch, or let clothing or other
flammable materials contact heating elements or
interior surfaces of oven until they havehad sufficient
time to cool. Other surfaces of the appliance may
become hot enough to cause burns -- among these
surfaces are: oven vent openings and surfaces near
these openings, oven doors, windows of oven doors.
Control Panel Operation
Oven Control Panel
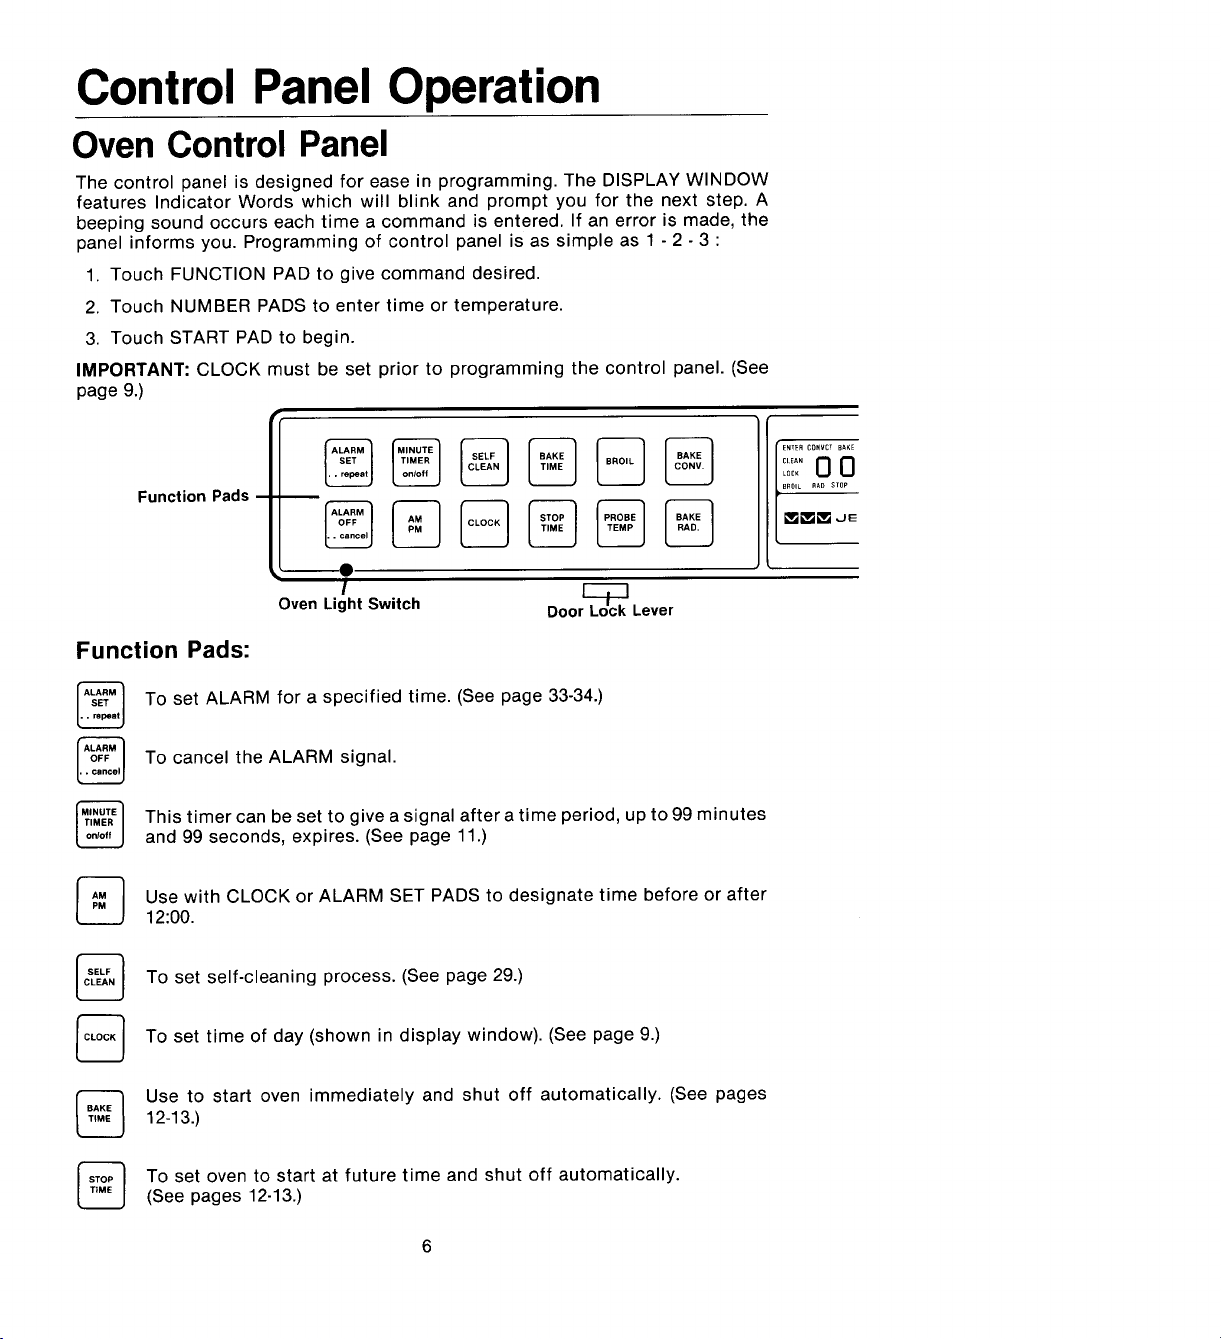
The control panel is designed for ease in programming. The DISPLAY WINDOW
features Indicator Words which will blink and prompt you for the next step. A
beeping sound occurs each time a command is entered. If an error is made, the
panel informs you. Programming of control panel is as simple as 1 - 2 - 3 :
1. Touch FUNCTION PAD to give command desired.
2. Touch NUMBER PADS to enter time or temperature.
3. Touch START PAD to begin.
IMPORTANT: CLOCK must be set prior to programming the control panel. (See
page 9.)
Function Pads --
Oven Light Switch Doo Lever
Function Pads:
I ENTER CONVCT BaKE:;: 0 0
B_OIL RAO STOP
%
To set ALARM for a specified time. (See page 33-34.)
To cancel the ALARM signal.
This timer can be set to give a signal after a time period, up to 99 minutes
and 99 seconds, expires. (See page 11.)
Use with CLOCK or ALARM SET PADS to designate time before or after
12:00.
To set self-cleaning process. (See page 29.)
To set time of day (shown in display window). (See page 9.)
12-13.)
Use to start oven immediately and shut off automatically. (See pages
To set oven to start at future time and shut off automatically.
(See pages 12-13.)
6

DisplayWindow
/
Use for top browning or oven broiling of foods. (See pages 26-27.)
Use with probe to cook foods to desired internal temperature.
(See pages 22-25.)
Use for convection baking or roasting.
m Number Pads
%
Use for radiant (conventional) baking or roasting.
Use to start the programmed function after all commands are entered.
Cancels any programmed cooking function or stops beeping signal of
ALARM or MINUTE TIMER.
Number Pads: Use to program times or temperatures.
Display Window: Shows time of day as set with CLOCK PAD or displays
what has been set with oven controls or MINUTE TIMER. (See page 8.)
Oven Light Switch: The oven light automatically comes on whenever the
oven door is opened. When door is closed, push in switch to turn oven light on or
off. Light cannot be turned on during the self-cleaning process.
Door Lock Lever: Use to lock oven for self-cleaning process.
Display Window
_/ENTER CONVCTBAKE
IndicatorWords _--_I_CLEAN O O
'_ LOCK
_'BROIL RAD STOP
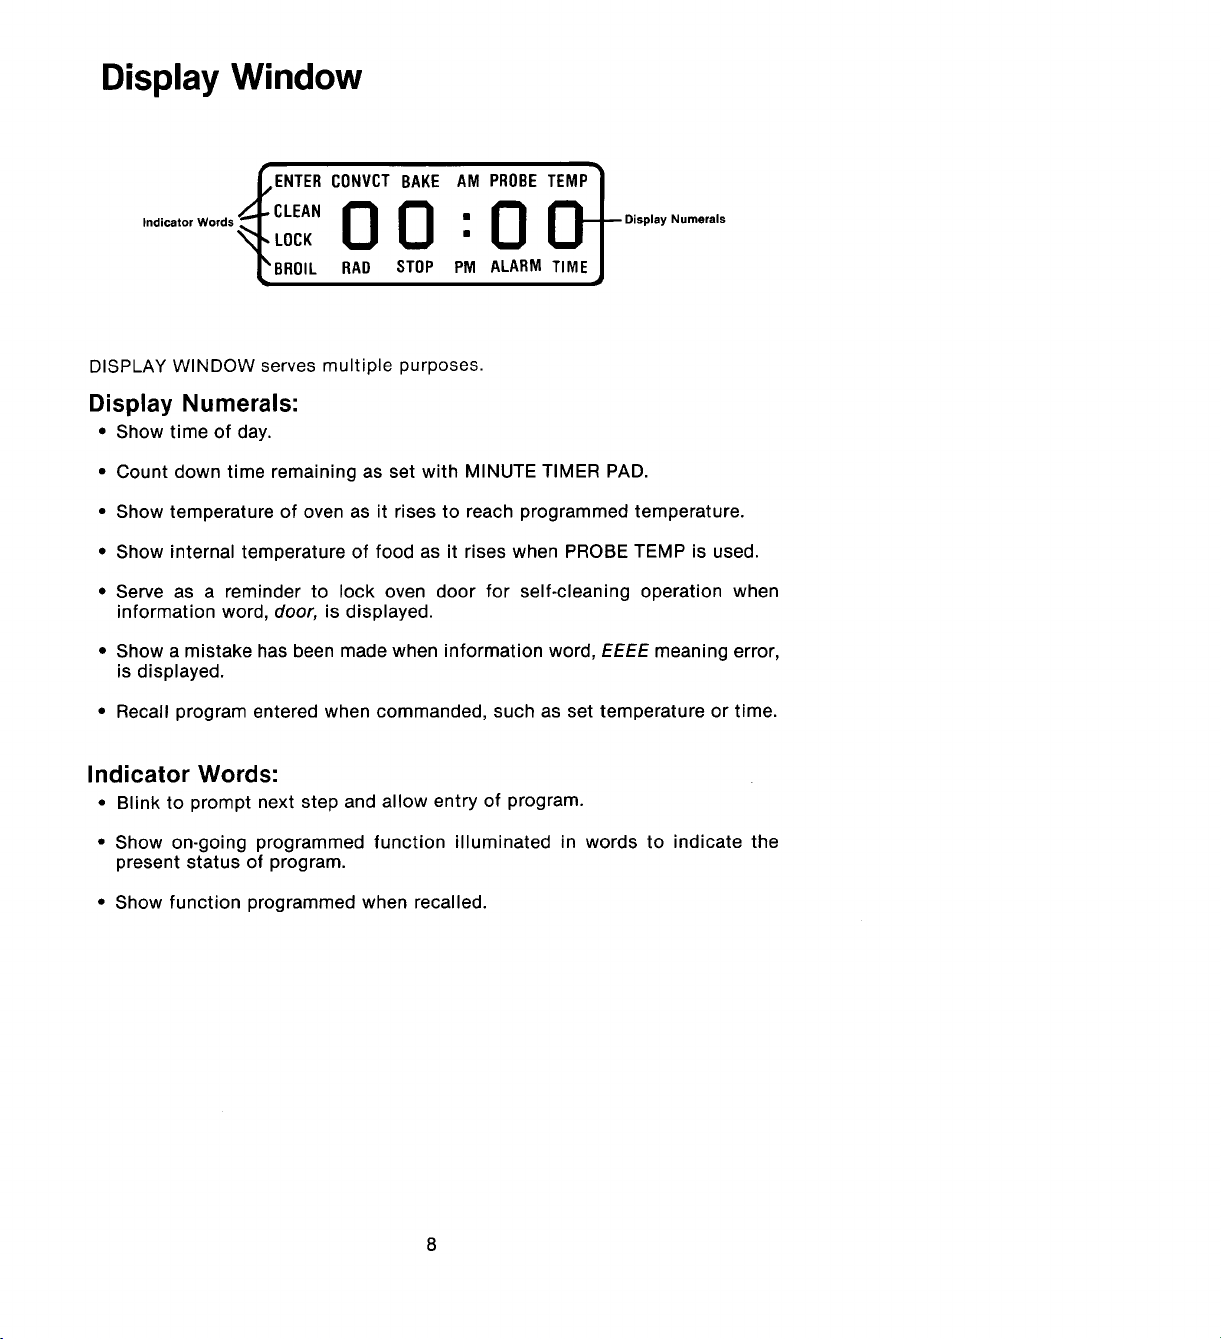
DISPLAY WINDOW serves multiple purposes.
AM PROBE_lkP 1
0 U_ Display Numerals
PM M TIMEJ
Display Numerals:
• Show time of day.
• Count down time remaining as set with MINUTE TIMER PAD.
• Show temperature of oven as it rises to reach programmed temperature.
• Show internal temperature of food as it rises when PROBE TEMP is used.
• Serve as a reminder to lock oven door for self-cleaning operation when
information word, door, is displayed.
• Show a mistake has been made when information word, EEEE meaning error,
is displayed.
• Recall program entered when commanded, such as set temperature or time.
Indicator Words:
• Blink to prompt next step and allow entry of program.
• Show on-going programmed function illuminated in words to indicate the
present status of program.
• Show function programmed when recalled.
Clock Setting
°L,,.88 .
LOCK •
BROIL RAO STOP PM ALARM TIMEJ
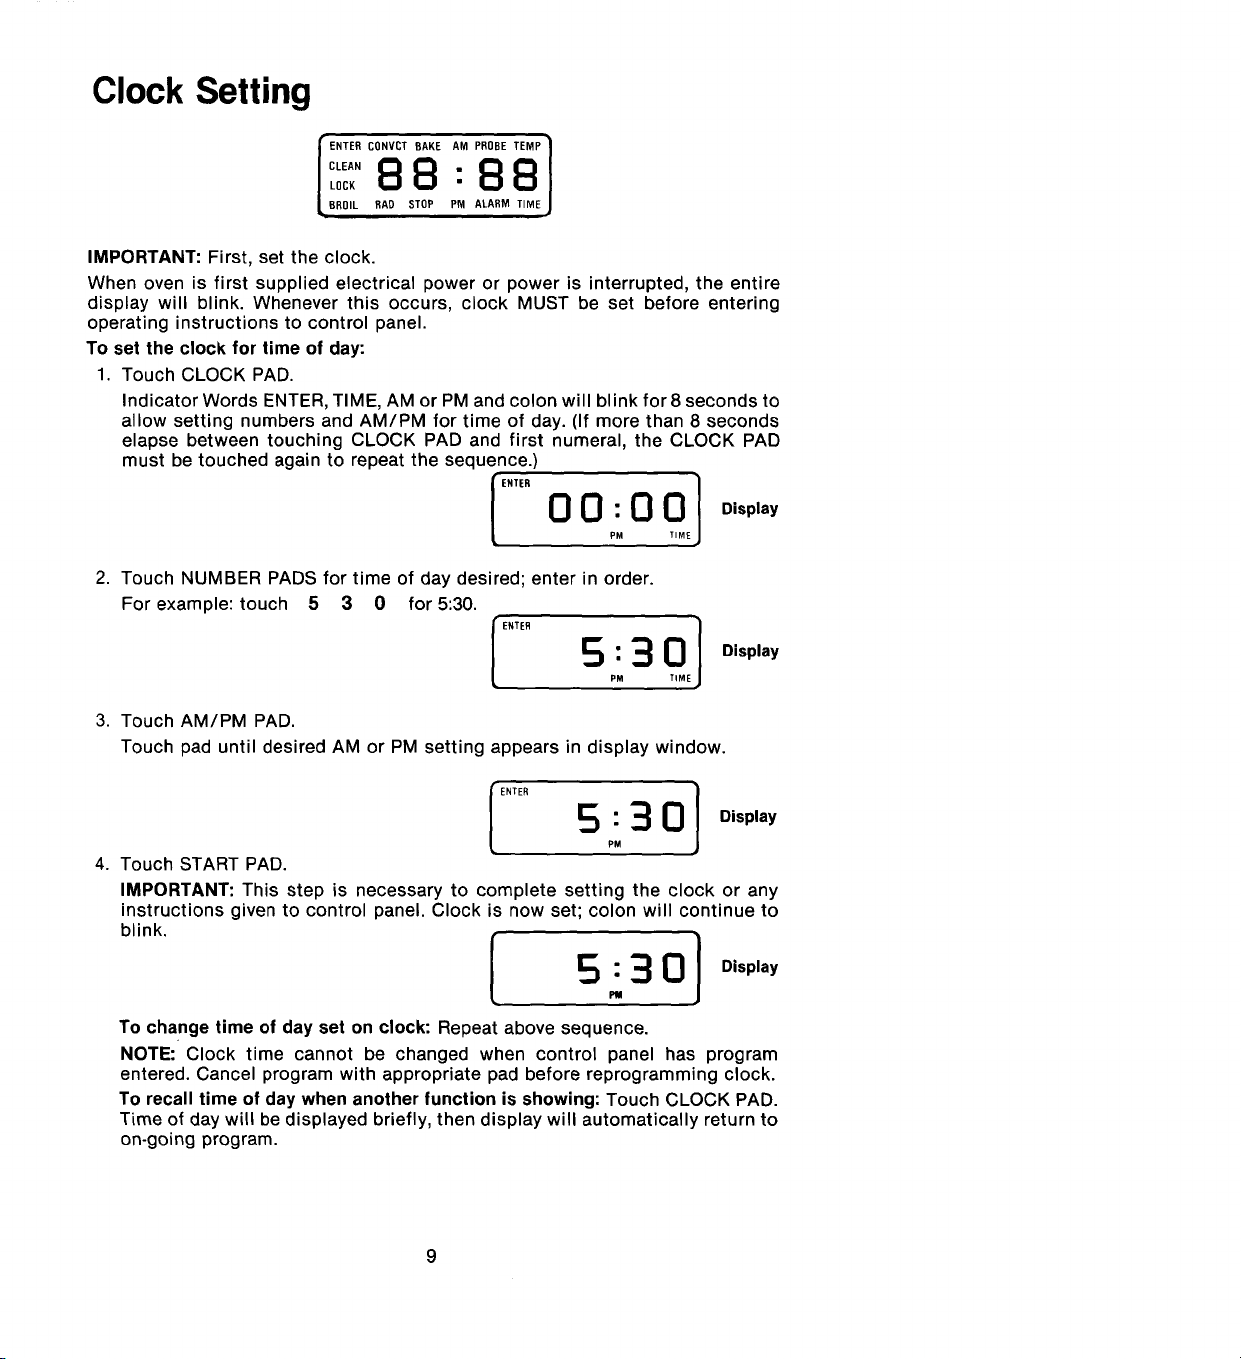
IMPORTANT: First, set the clock.
When oven is first supplied electrical power or power is interrupted, the entire
display will blink. Whenever this occurs, clock MUST be set before entering
operating instructions to control panel.
To set the clock for time of day:
1. Touch CLOCK PAD.
Indicator Words ENTER, TIME, AM or PM and colon will blink for8 seconds to
allow setting numbers and AM/PM for time of day. (If more than 8 seconds
elapse between touching CLOCK PAD and first numeral, the CLOCK PAD
must be touched again to repeat the sequence.)
2. Touch NUMBER PADS for time of day desired; enter in order.
For example: touch 5 3 0 for 5:30.
Display
3. Touch AM/PM PAD.
Touch pad until desired AM or PM setting appears in display window.
I ENTER 5",M3 01 Display
4. Touch START PAD.
IMPORTANT: This step is necessary to complete setting the clock or any
instructions given to control panel. Clock is now set; colon will continue to
blink.
To change time of day set on clock: Repeat above sequence.
NOTE: Clock time cannot be changed when control panel has program
entered. Cancel program with appropriate pad before reprogramming clock.
To recall time of day when another function is showing: Touch CLOCK PAD.
Time of day will be displayed briefly, then display will automatically return to
on-going program.
Oven Operation, Baking or Roasting
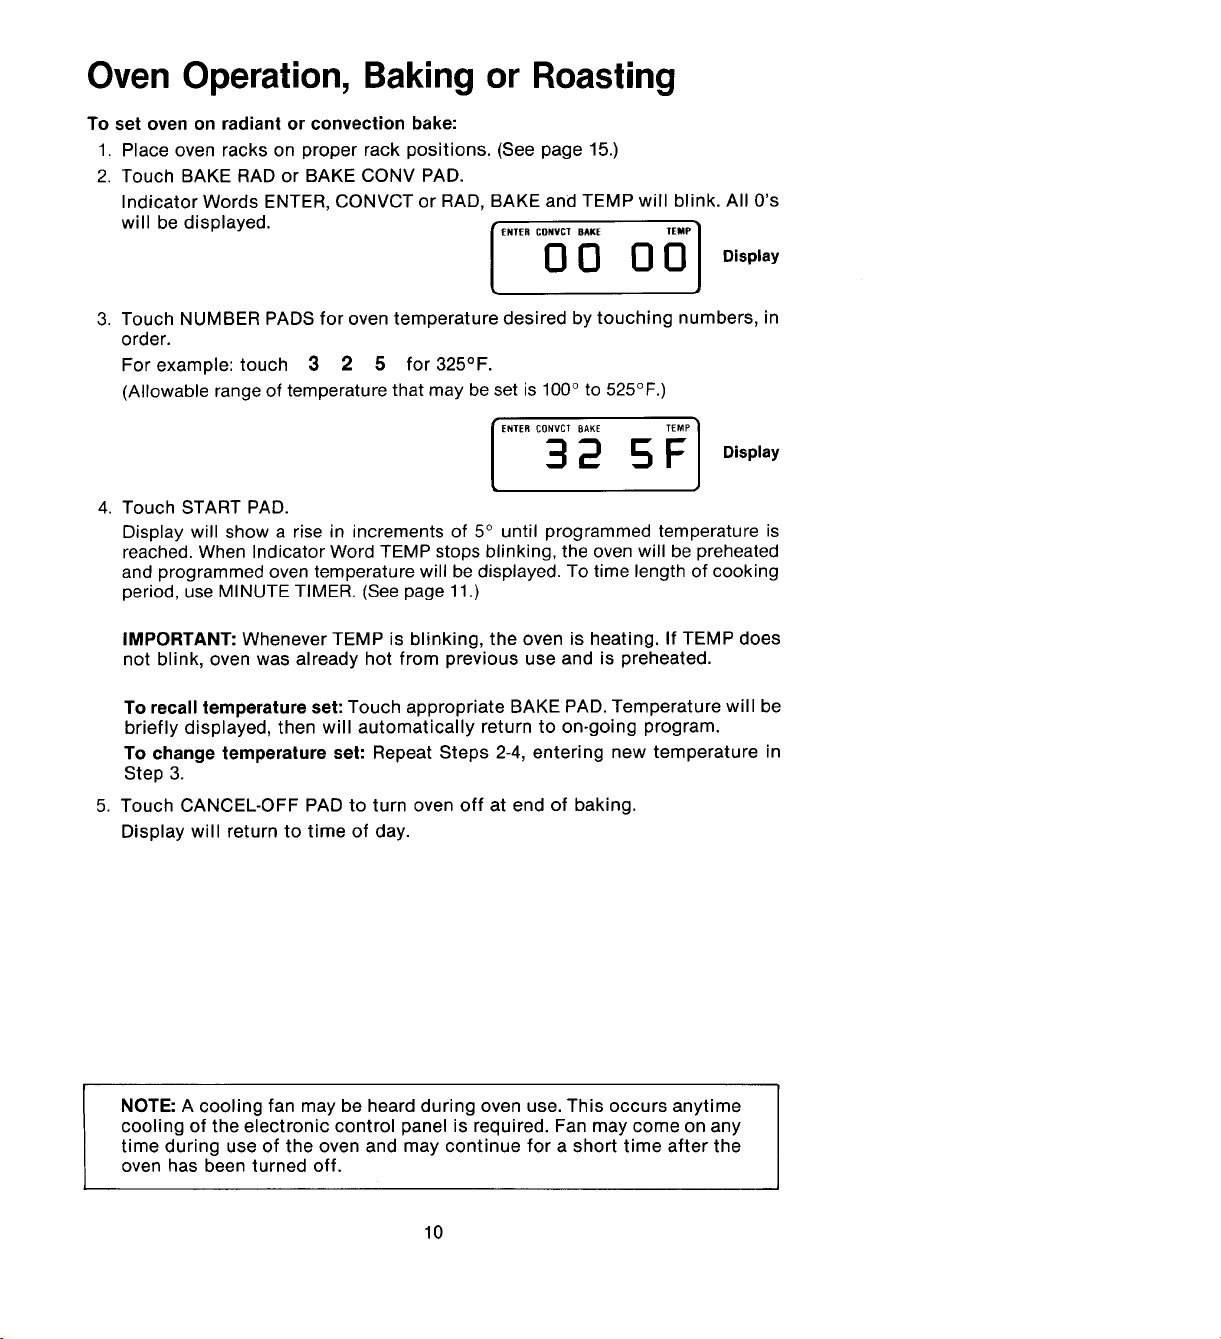
To set oven on radiant or convection bake:
1. Place oven racks on proper rack positions. (See page 15.)
2. Touch BAKE RAD or BAKE CONV PAD.
Indicator Words ENTER, CONVCT or RAD, BAKE and TEMP will blink. All O's
will be displayed. [_.TEeCO_ 0 _P] Display
3. Touch NUMBER PADS for oven temperature desired by touching numbers, in
order.
For example: touch 3 2 5 for 325°F.
(Allowable range of temperature that may be set is 100° to 525°F.)
3 2 5 Display
ENTER CONVCT BAKE _P ]
4. Touch START PAD.
Display will show a rise in increments of 5° until programmed temperature is
reached. When Indicator Word TEMP stops blinking, the oven will be preheated
and programmed oven temperature will be displayed. To time length of cooking
period, use MINUTE TIMER. (See page 11.)
IMPORTANT: Whenever TEMP is blinking, the oven is heating. If TEMP does
not blink, oven was already hot from previous use and is preheated.
To recall temperature set: Touch appropriate BAKEPAD.Temperature will be
briefly displayed, then will automatically return to on-going program.
To change temperature set: Repeat Steps 2-4, entering new temperature in
Step 3.
5. Touch CANCEL-OFF PAD to turn oven off at end of baking.
Display will return to time of day.
NOTE: A cooling fan may be heard during oven use. This occurs anytime
cooling of the electronic control panel is required. Fan may come on any
time during use of the oven and may continue for a short time after the
oven has been turned off.
10

Minute Timer
IMPORTANT: This timer does not control the oven; it only operates a beeper. It
can be used to remind you when a period, up to 99 minutes and 99 seconds,
expires. It can be used independently of any other oven activity and can be set
anytime.
To set minute timer:
1. Touch MINUTE TIMER PAD.
Indicator Words ENTER and TIME will blink and all O's will be displayed for 8
seconds to allow setting numbers. (If more than 8 seconds elapse between
touching MINUTE TIMER PAD and first numeral, the MINUTE TIMER PAD
must be touched again to set the numbers.)
oo. oq) o,.,,o,
2. Touch NUMBER PADS for time desired.
For example: touch 3 0 0 0 for 30 minutes or touch 3 0 for 30
seconds.
IMPORTANT: This is the only function where time entered is in minutes and
seconds. Minutes are to left of colon and seconds to right of colon.
I or[ os
3. Touch START PAD.
This starts the countdown that will be displayed. Countdown will have display
precedence over anything else programmed, such as oven temperature or
probe temperature. At end of time set, signal will beep five times.
After timer runs out, display will return to time of day or whatever is
programmed on control panel.
4. To cancel MINUTE TIMER, touch MINUTE TIMER PAD to stop beeping or to
cancel timer at any time. CANCEL-OFF PAD can also be used to stop the
beeping; however, this will also cancel any other cooking function.
11
Time-Controlled Baking or Roasting
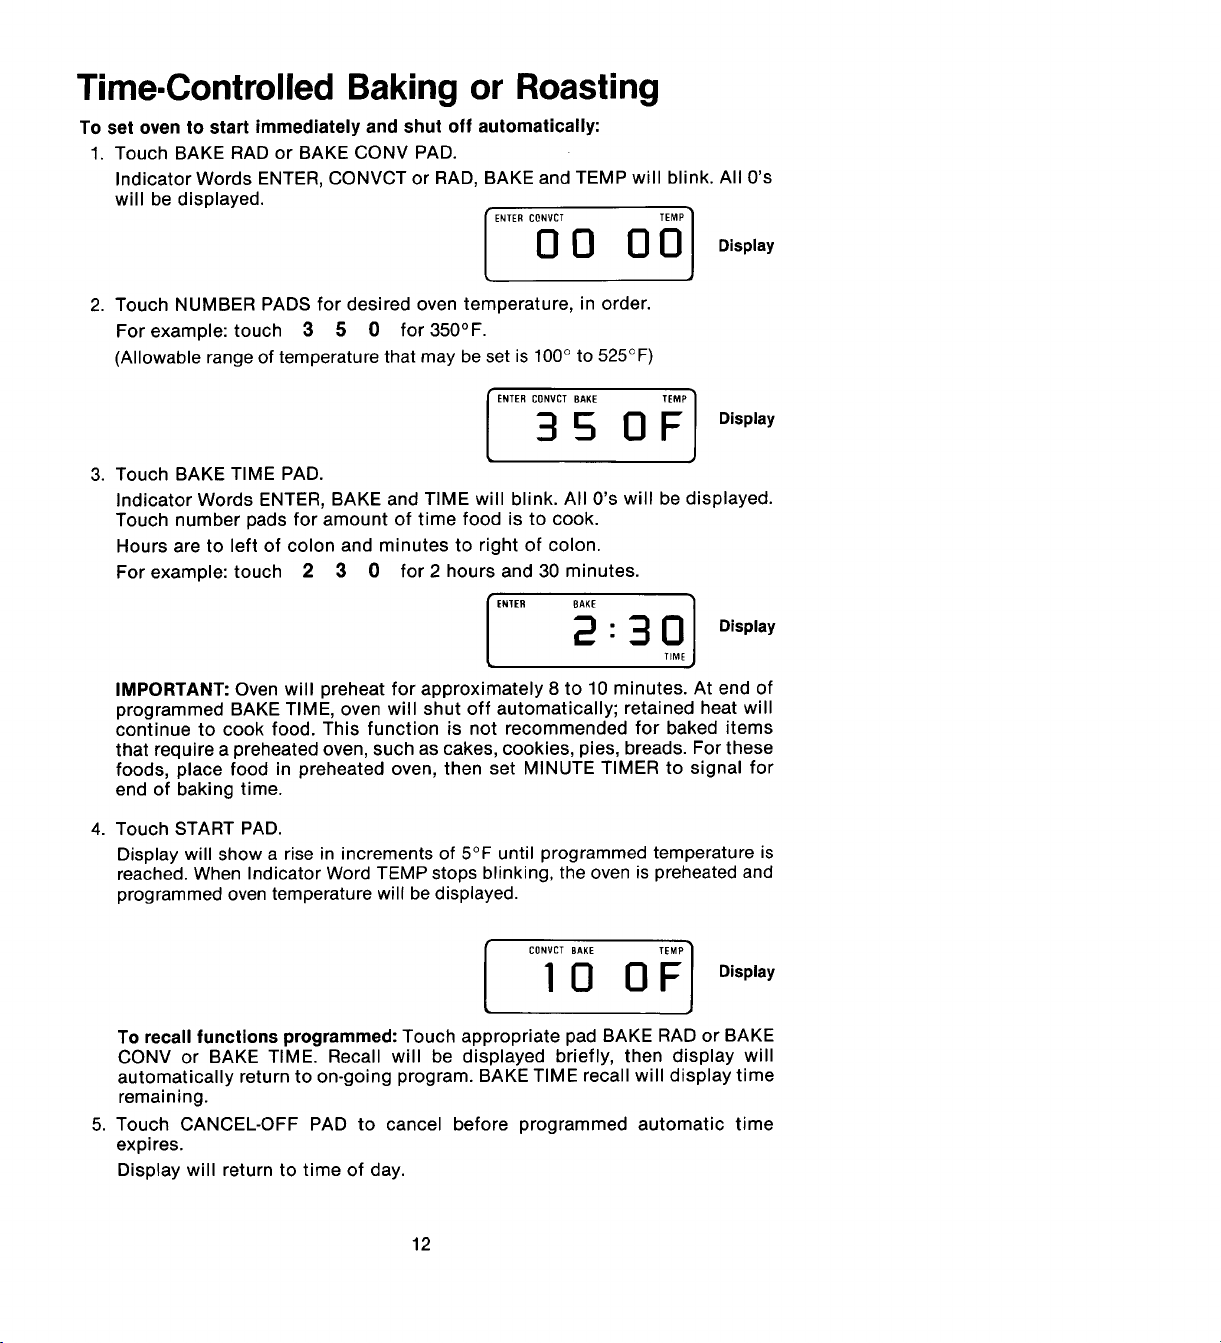
To set oven to start immediately and shut off automatically:
1. Touch BAKE RAD or BAKE CONV PAD.
Indicator Words ENTER, CONVCT or RAD, BAKE and TEMP will blink. All O's
will be displayed.
0 0 0 0
ENTER CONVCT TEMP 1
2. Touch NUMBER PADS for desired oven temperature, in order.
For example: touch 3 5 0 for 350°F.
(Allowable range of temperature that may be set is 100° to 525°F)
3 5 0 Display
ENTER CONVCT BAKE FP 1
3.
Touch BAKE TIME PAD.
Indicator Words ENTER, BAKE and TIME will blink. All O's will be displayed.
Touch number pads for amount of time food is to cook.
Hours are to left of colon and minutes to right of colon.
For example: touch 2 3 0 for 2 hours and 30 minutes.
EN]ER BAKE TIOME ]
IMPORTANT: Oven will preheat for approximately 8 to 10 minutes. At end of
programmed BAKE TIME, oven will shut off automatically; retained heat will
continue to cook food. This function is not recommended for baked items
that require a preheated oven, such as cakes, cookies, pies, breads. For these
foods, place food in preheated oven, then set MINUTE TIMER to signal for
end of baking time.
4. Touch START PAD.
Display will show a rise in increments of 5°F until programmed temperature is
reached. When Indicator Word TEMP stops blinking, the oven is preheated and
programmed oven temperature will be displayed.
[CONVCT BAKE TEMP l
To recall functions programmed: Touch appropriate pad BAKE RAD or BAKE
CONV or BAKE TIME. Recall will be displayed briefly, then display will
automatically return to on-going program. BAKE TIME recall will display time
remaining.
5. Touch CANCEL-OFF PAD to cancel before programmed automatic time
expires.
Display will return to time of day.
2-3
I 0 0 F Display
12
 Loading...