

Jenn-Air W216, W116 Use And Care Manual
JENN-AIR
UseandCareManual
Self-Cleaning
Radiant Bake Ovens
MODELS W116, W216
About Your
Jenn-Air Oven
Congratulations on your choice of a Jenn-Air wall oven. As
you use your new full-featured "bake and broil" wall oven, we
know you will appreciate the many features that provide
excellent performance, ease of cleaning, convenience and
dependability.
Before you begin cooking with your new oven, please take a
few minutes to read and become familiar with the instructions
in this book. On the following pages you will find a wealth of
information regarding all aspects of using your new oven. By
following the instructions carefully, you will be able to fully enjoy
and properly maintain your oven and achieve excellent results
with the food your prepare.
Should you have any questions about using your Jenn-Air oven,
write to us. Be sure to provide the model number.
Consumer Relations Department
Jenn-Air Company
3035 Shadeland
Indianapolis, IN 46226-0901
SAFETY
PRECAUTIONS
I
Read before operating your oven
All appliances -- regardless of the manufacturer -- have the
potential through improper or careless use to create safety prob-
lems. Therefore the following safety precautions should be
observed:
1. Be sure your appliance is properly installed and grounded
by a qualified technician.
2. Never use your appliance for warming or heating the room.
3. Children should not be left alone or unattended in area
where appliance is in use. They should never be allowed to
sit or stand on any part of the appliance.
4. Wear proper apparel. Loose-fitting or hanging garments
should never be worn while using the appliance.
5. Do not repair or replace any part of the appliance unless
specifically recommended in this manual. All other servicing
should be referred to an authorized Jenn-Air Service
Contractor.
6. Flammable materials should not be stored in an oven.
7. Do not use water on grease fires. Smother fire or flame or
use dry chemical or foam-type extinguisher.
8. Use only dry potholders. Moist or damp potholders on hot
surfaces may result in burns from steam. Do not let
potholder touch hot heating elements. Do not use a towel
or other bulky cloth.
9. Use care when opening oven door. Let hot air or steam
escape before removing or replacing food.
10. Do not heat unopened food containers. Build-up of pres-
sure may cause container to burst and result in injury.
11. Keep oven vent ducts unobstructed.
12. Always place oven racks in desired location while oven is
cool. If rack must be moved while oven is hot, do not let
potholder contact hot heating element in oven.
13. Do not clean door gasket. The door gasket is essential for a
good seal. Care should be taken not to rub, damage or
move the gasket.
14. Do not use oven cleaners. No commercial oven cleaner or
oven liner protective coating of any kind should be used in
or around any part of the oven.
15. Clean only parts listed in this manual.
16. Before self-cleaning theoven, remove broiler pan and other
utensils.
17. Listen for fan. A fan noise should be heard anytime the oven
is turned on. If not, call a serviceman before self-cleaning
again.
18. DO NOT TOUCH HEATING ELEMENTS OR INTERIOR
SURFACES OF OVEN. Heating elements may be hot even
though they are dark in color. Interior surfaces of any oven
become hot enough to cause burns. During and after use,
do not touch, or let clothing or other flammable materials
contact heating elements or interior surfaces of oven until
they have had sufficient time to cool. Other surfaces of the
appliance may become hot enough to cause burns--
among these surfaces are: oven vent openings and sur-
faces near these openings, oven doors, windows of oven
doors.
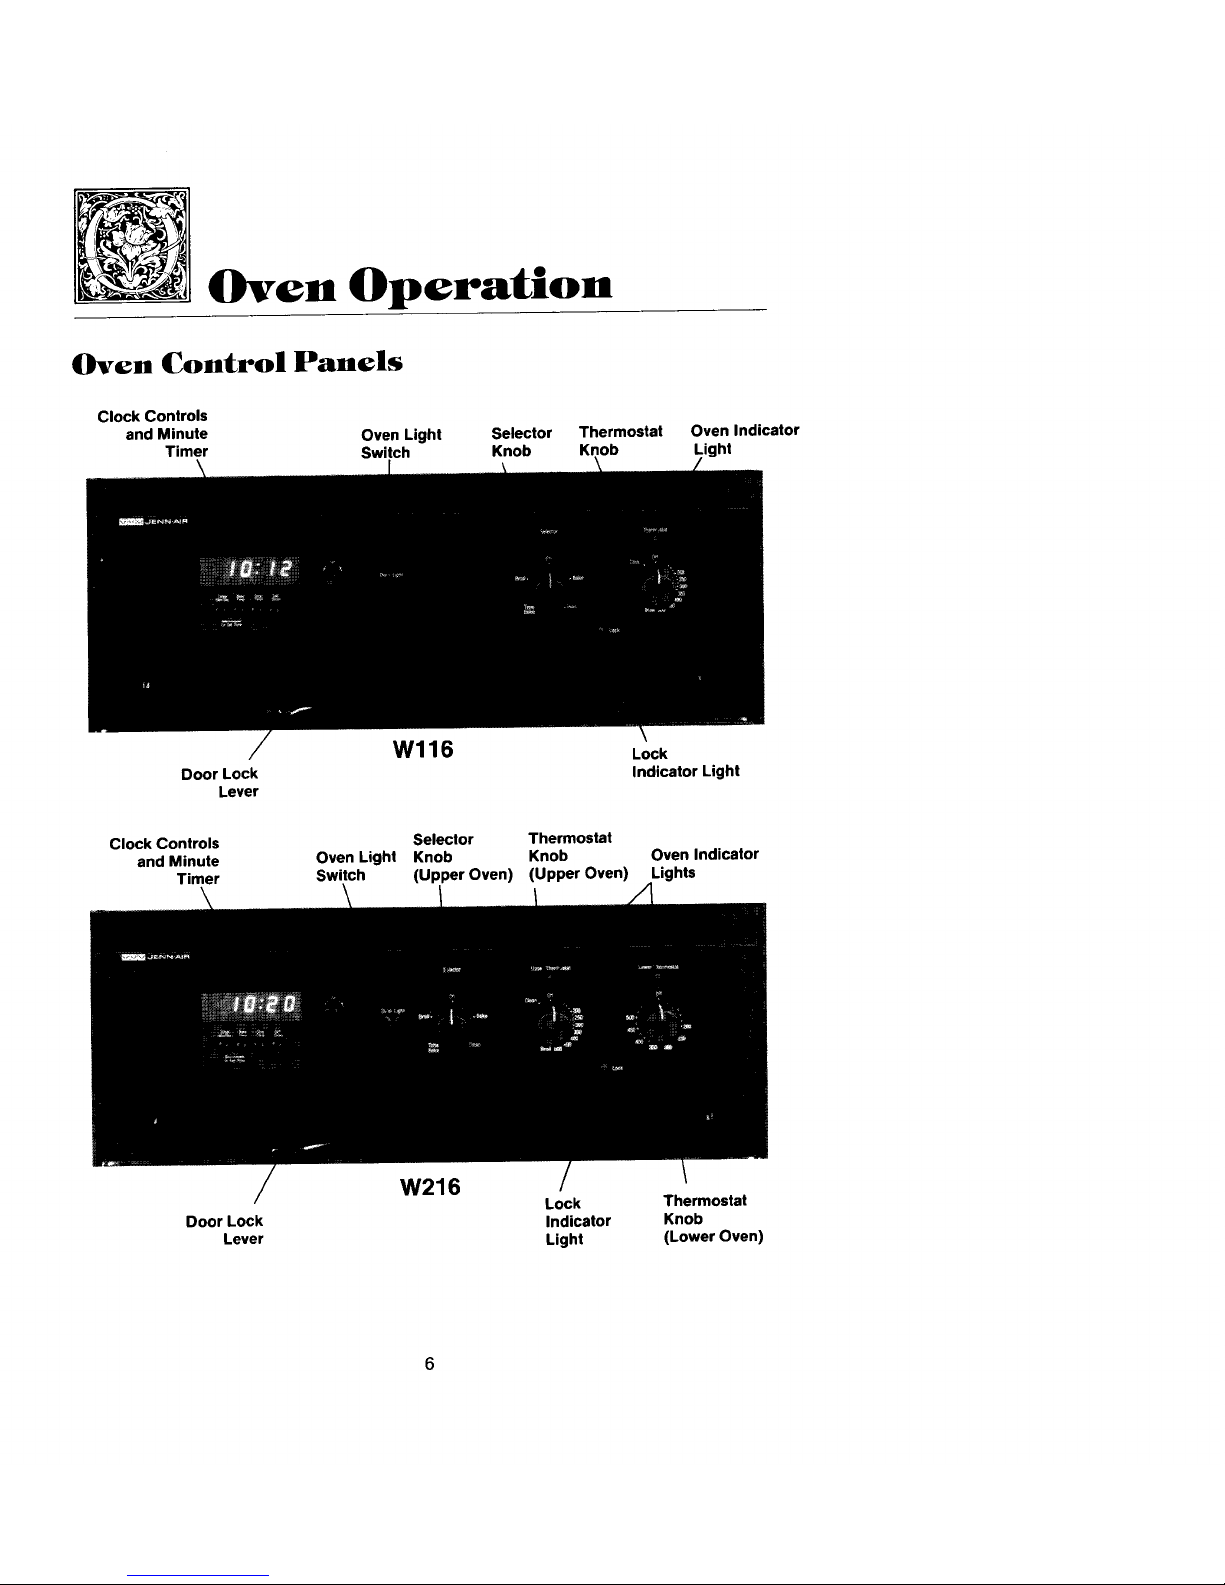
Oven Operation
Oven Control Panels
Clock Controls
and Minute Oven Light Selector Thermostat Oven Indicator
Timer Switch Knob Knob ight
W116 Lock
Door Lock Indicator Light
Lever
Clock Controls Selector Thermostat
and Minute Oven Light Knob Knob Oven Indicator
Timer Switch (Upper Oven) (Upper Oven) Lights
W216
Lock Thermostat
Door Lock Indicator Knob
Lever Light (Lower Oven)
Selector Knob
• This knob controls the oven operation. To operate the oven, turn to desired setting
and turn THERMOSTAT knob to desired setting.
The settings are:
OFF The oven will not operate when knob is on this setting. Keep knob
on this position when oven is not in use.
BAKE Usefor baking or roasting. (See pages12-15.)
TIME BAKE Use with clock controls for automatically starting and stopping oven
when baking or roasting. (Seepage 10.)
BROIL Use for top browning or oven broiling of foods. (See pages 16-17.)
CLEAN Use for self-cleaning process. (Seepages 18-21.)
Thermostat Knob
• Use to set oven temperature. Be sure the indicator line is lined up with the exact
temperature desired. This knob is used with all oven operation settings noted on
the SELECTOR knob.
Oven Indicator Light
• Indicates when oven is turned to an operating position. Light will glow until the
desired temperature is reached. It will cycle on and off as this temperature is
maintained during cooking.
Lock Indicator Light
• Will glow after the door has been locked and after the oven temperature is over
550°F. Door will lock automatically and cannot be opened until oven temperature
drops below 550°F and the LOCK INDICA TOR LIGHT goes off.
Oven Light S_itch
• The oven light may be turned on by pushing the light switch.
Door Lock Lever
• Door lock lever must be in the lock position for the self-cleaning process.
Clock Controls and Minute Timer
• Features time of day, MINUTE TIMER, and clock controls to start and stop oven
automatically. (See pages 8-9.)
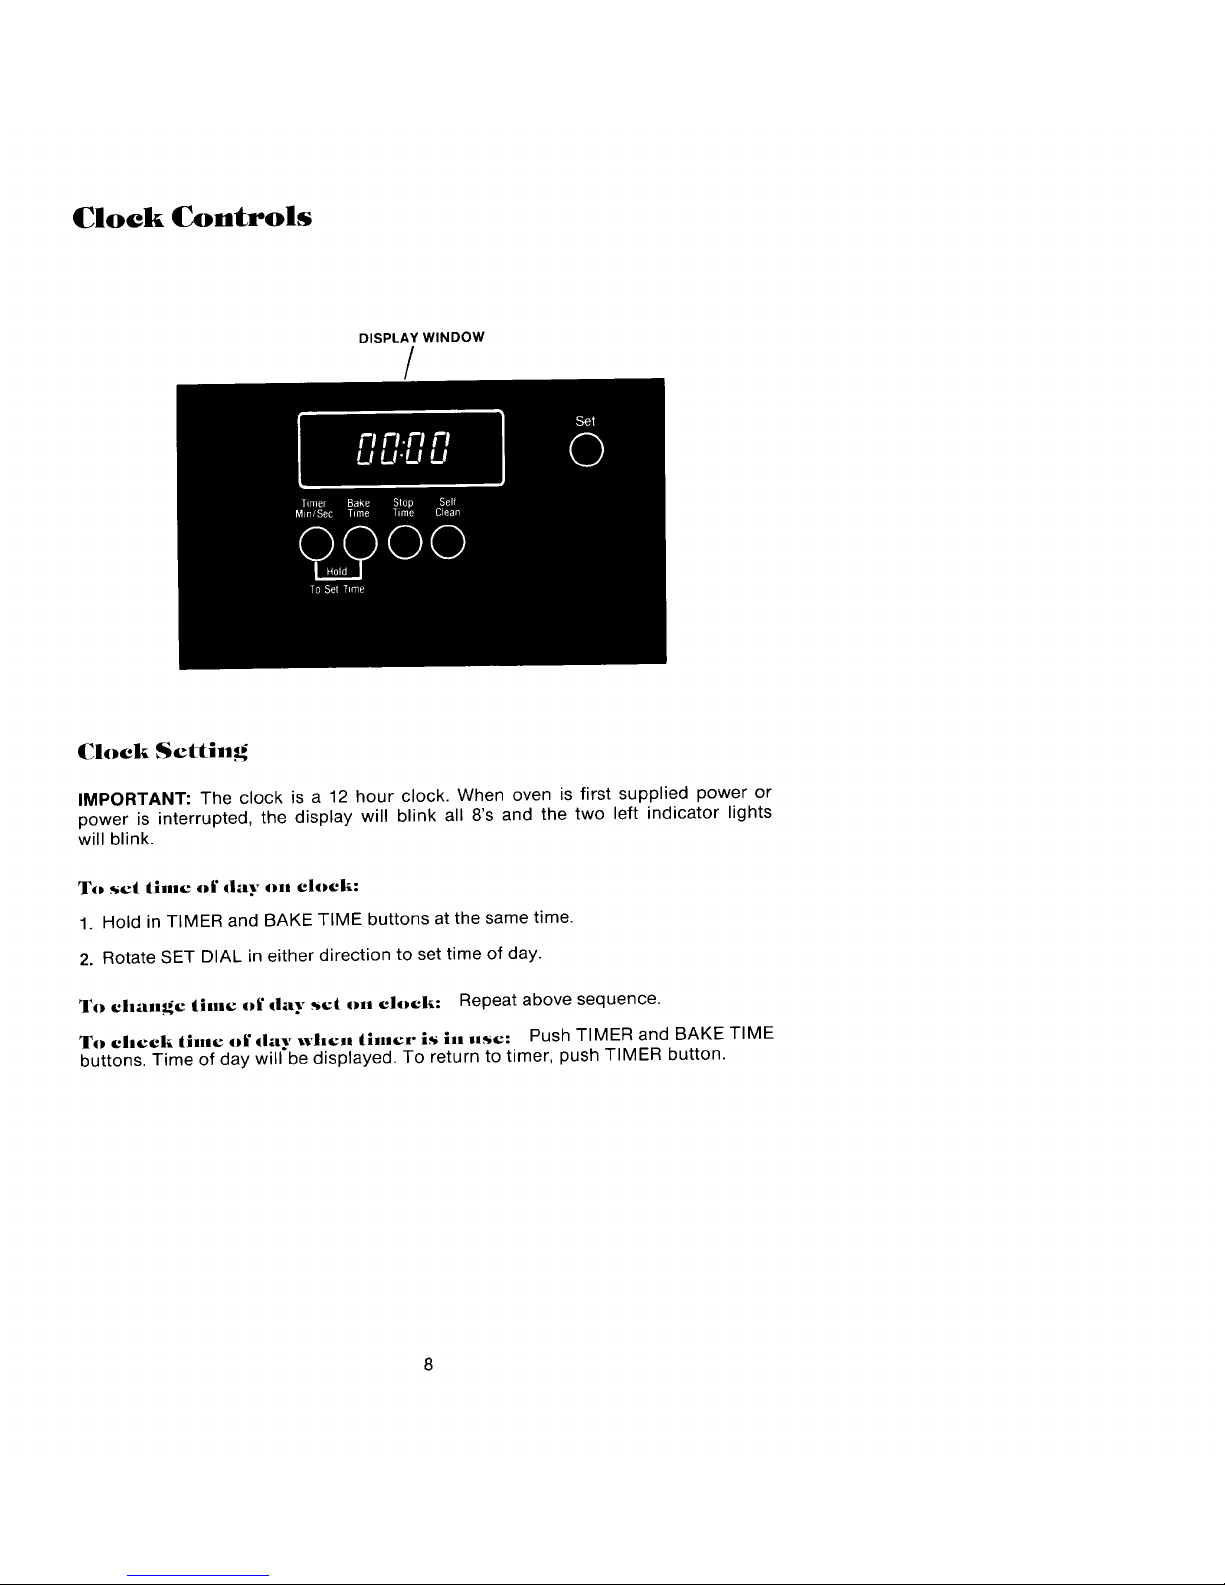
Clock Controls
DISPLAY WINDOW
/
Set
i-I i"l.FI i-I
U La'U U 0
Tinier Sake Slop Self
Min/Sec Time Time Clean
o_ oo
To Set Tnme
Clock Setting
IMPORTANT: The clock is a 12 hour clock. When oven is first supplied power or
power is interrupted, the display will blink all 8's and the two left indicator lights
will blink.
To set tinne of day onn clock:
1. Hold in TIMER and BAKE TIME buttons at the same time.
2. Rotate SET DIAL in either direction to set time of day.
To clnange time of day set ont clock: Repeat above sequence.
To clneck iln.c of day winch timer is inn use: Push TIMER and BAKE TIME
buttons. Time of day will be displayed. To return to timer, push TIMER button.
Minute Timer
IMPORTANT: This interval timer can be used to remind you when a period, up
to 99 minutes and 00 seconds, expires. It can be used independently of any other
oven activity and can be set while another oven function is operating. The timer
does not control the oven.
To set MINUTE TIMER:
1. Push TIMER button.
2. Turn SET dial clockwise until desired number of minutes and seconds appear
in the Display Window.
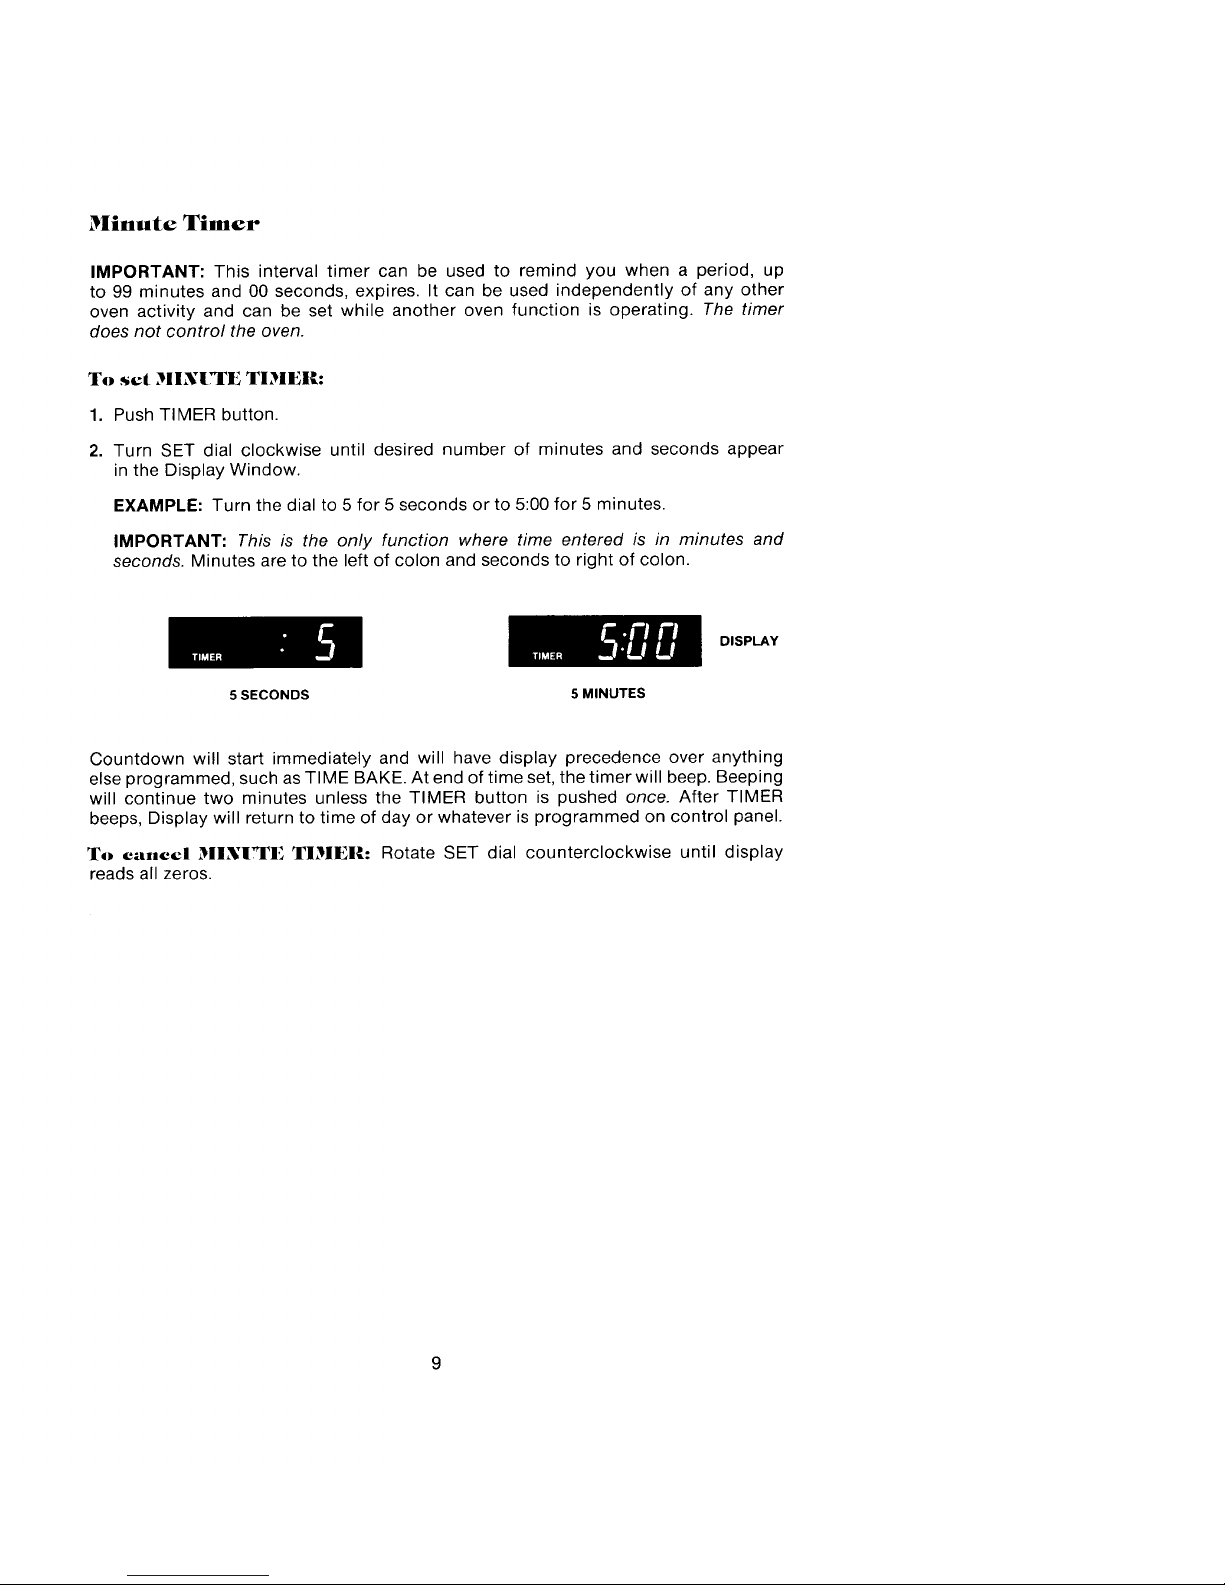
EXAMPLE: Turn the dial to 5 for 5 seconds or to 5:00 for 5 minutes.
IMPORTANT: This is the only function where time entered is in minutes and
seconds. Minutes are to the left of colon and seconds to right of colon.
c.nn
_P'UU
DISPLAY
5 SECONDS 5 MINUTES
Countdown will start immediately and will have display precedence over anything
else programmed, such as TI ME BAKE. At end of time set, the timer will beep. Beeping
will continue two minutes unless the TIMER button is pushed once. After TIMER
beeps, Display will return to time of day or whatever is programmed on control panel.
To c_tncel MINITTE TIMER: Rotate SET dial counterclockwise until display
reads all zeros.
 Loading...