

Page 1
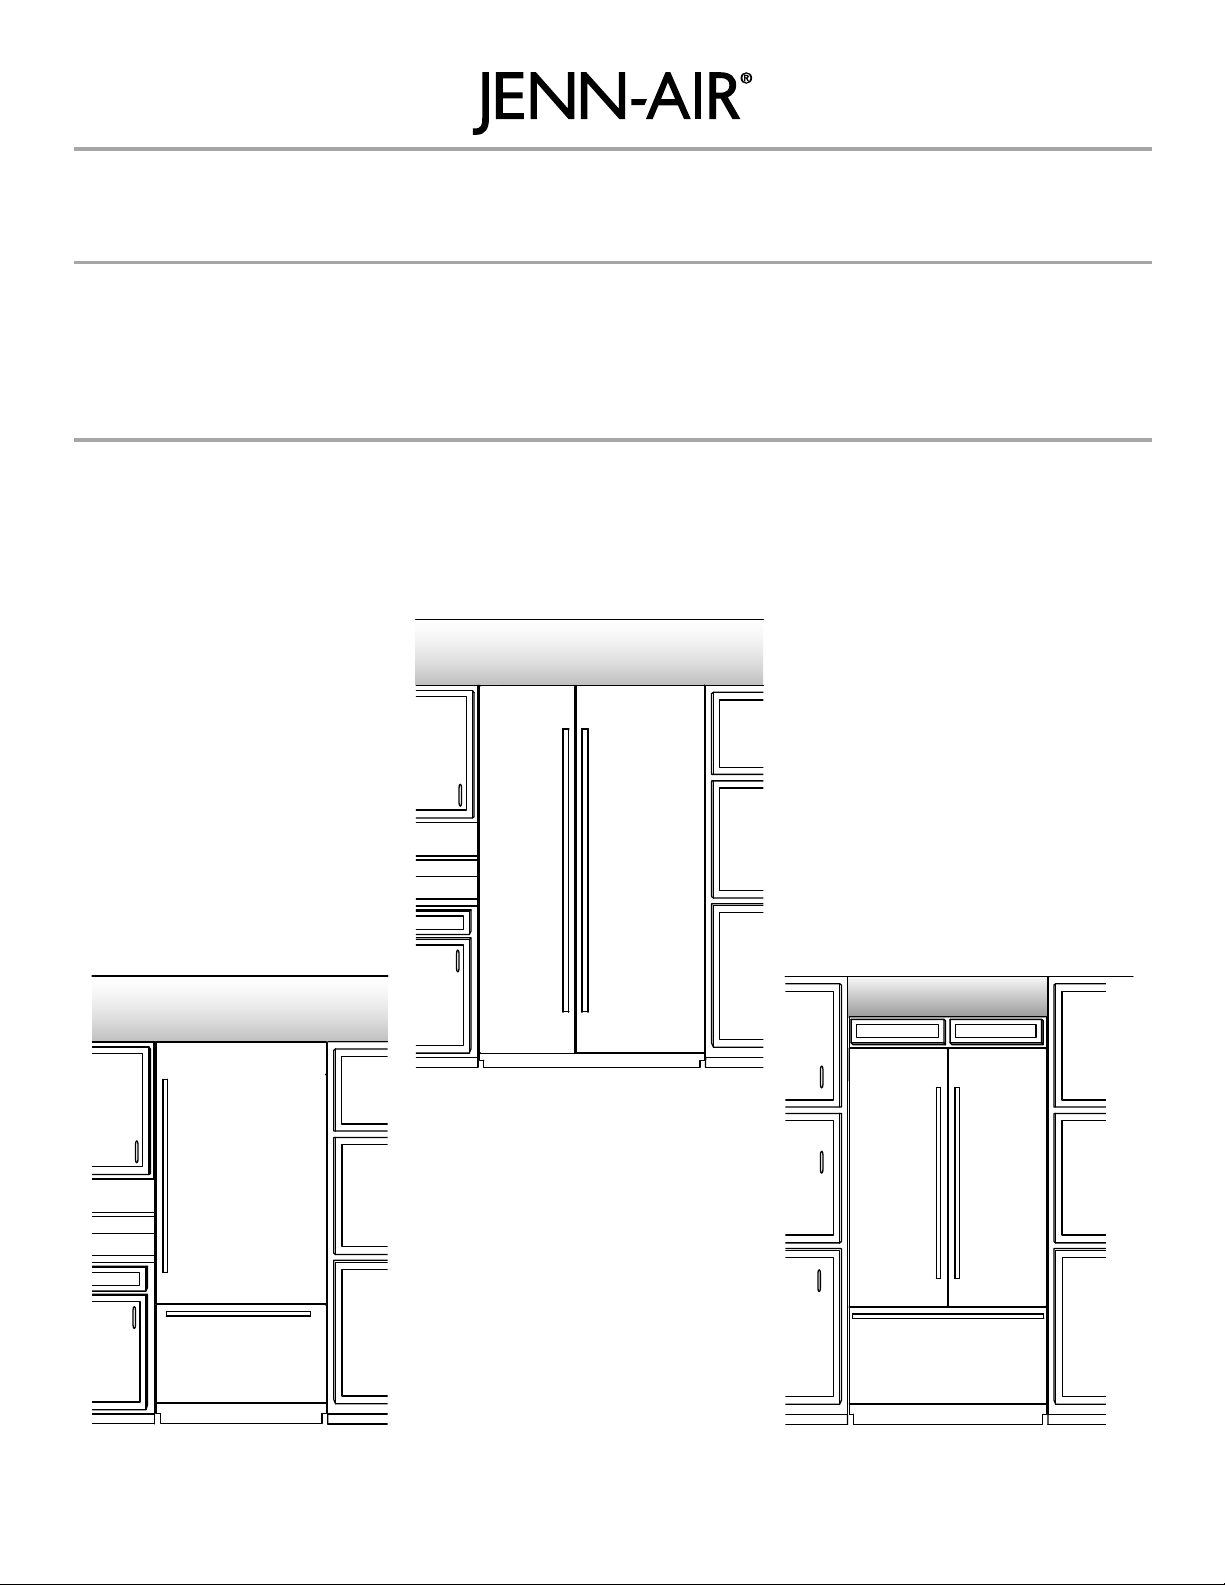
BUILT-IN REFRIGERATOR ARMOIRE-STYLE DOOR
W10295557D
PANEL KIT INSTALLATION INSTRUCTIONS
REFRIGERADOR EMPOTRADO JUEGO DE PANELES
PARA LA PUERTA ESTILO ARMARIO
INSTRUCCIONES DE INSTALACIÓN
RÉFRIGÉRATEUR ENCASTRÉ ENSEMBLE DE
PANNEAUX POUR PORTE DE STYLE ARMOIRE -
INSTRUCTIONS D'INSTALLATION
Page 2

TABLE OF CONTENTS
ARMOIRE KIT SAFETY..................................................................3
INSTALLATION REQUIREMENTS................................................3
Tools and Parts ............................................................................3
Plan the Installation......................................................................4
Opening Requirements ................................................................4
Cabinet and Panel Installation Options .......................................4
Armoire Style Installation Requirements......................................5
Custom Overlay Panels................................................................6
Overlay Panel Dimensions ...........................................................6
ÍNDICE
SEGURIDAD DEL JUEGO ESTILO ARMARIO .........................10
REQUISITOS DE INSTALACIÓN.................................................10
Herramientas y piezas................................................................10
Planifique la instalación..............................................................11
Requisitos para la abertura........................................................11
Opciones para la instalación del armario y los paneles............11
Requisitos para la instalación completamente incorporada.....12
Paneles recubiertos a la medida................................................13
Dimensiones del panel recubierto .............................................13
TABLE DES MATIÈRES
SÉCURITÉ DE L'ENSEMBLE DE L'ARMOIRE...........................17
EXIGENCES D’INSTALLATION...................................................17
Outillage et pièces......................................................................17
Planification de l’installation.......................................................18
Exigences d’ouverture ...............................................................18
Options d’installation du placard et du panneau ......................18
Exigences d’une installation intégrée ........................................19
Panneaux décoratifs personnalisés...........................................20
Dimensions des panneaux décoratifs .......................................20
MODIFICATIONS FOR AN ARMOIRE KIT INSTALLATION........8
Top Grille ......................................................................................8
Install Refrigerator ........................................................................8
Install Grille Panel.........................................................................8
Prepare Custom Wood Door Panels ...........................................9
Complete Installation....................................................................9
MODIFICACIONES EN LA INSTALACIÓN
DEL JUEGO TIPO ARMARIO ......................................................15
Rejilla superior ............................................................................15
Instalación del refrigerador.........................................................15
Instalación del panel de la rejilla ................................................15
Preparación de los paneles de madera a la medida
para la puerta .............................................................................16
Achever l’installation ..................................................................16
MODIFICATIONS POUR UNE INSTALLATION
EN ARMOIRE ................................................................................22
Grille supérieure .........................................................................22
Installation du réfrigérateur ........................................................22
Installation du panneau de grille ................................................22
Préparation des panneaux de porte en bois personnalisés......23
Achever l’installation ..................................................................23
2
Page 3
ARMOIRE KIT SAFETY
You can be killed or seriously injured if you don't immediately
You
can be killed or seriously injured if you don't
follow
All safety messages will tell you what the potential hazard is, tell you how to reduce the chance of injury, and tell you what can
happen if the instructions are not followed.
Your safety and the safety of others are very important.
We have provided many important safety messages in this manual and on your appliance. Always read and obey all safety
messages.
This is the safety alert symbol.
This symbol alerts you to potential hazards that can kill or hurt you and others.
All safety messages will follow the safety alert symbol and either the word “DANGER” or “WARNING.”
These words mean:
follow instructions.
instructions.
DANGER
WARNING
INSTALLATION REQUIREMENTS
The Armoire-Style Door Panel Kit for fully integrated Jenn-Air
refrigerators enables full-height custom door panels with a
hidden top panel for the ultimate in integrated design.
IMPORTANT:
■ These instructions will guide you in preparing your built-in
refrigerator for an armoire installation. They are intended to
supplement the Installation Instructions provided with your
refrigerator not replace them.
■ These instructions are intended as a general guide only and
do not supersede any national or local codes in any way.
Compliance with all local, state or national codes pertaining
to this type of installation should be determined prior to
installation.
Tools and Parts
Assemble the required tools and parts before starting installation.
Read and follow the instructions provided with any of the
required tools listed here. Proper installation is your responsibility.
Tools Needed:
■ Cordless drill
■ Drill bits
■ Two adjustable
wrenches
■ Phillips screwdriver
■ Small level
■ Appliance dolly
■ ³⁄₃₂" Hex key
(panel kits only)
■ ¹¹⁄₃₂" Nut driver
■ ³⁄₈" and ¹⁄₂" Open-end
wrenches
■ ⁵⁄₃₂" and ³⁄₁₆" Hex key
■ ¹⁄₄" and ⁵⁄₁₆" Socket
drivers
■ Tape me a sure
■ Utility knife
■ Tape (painters)
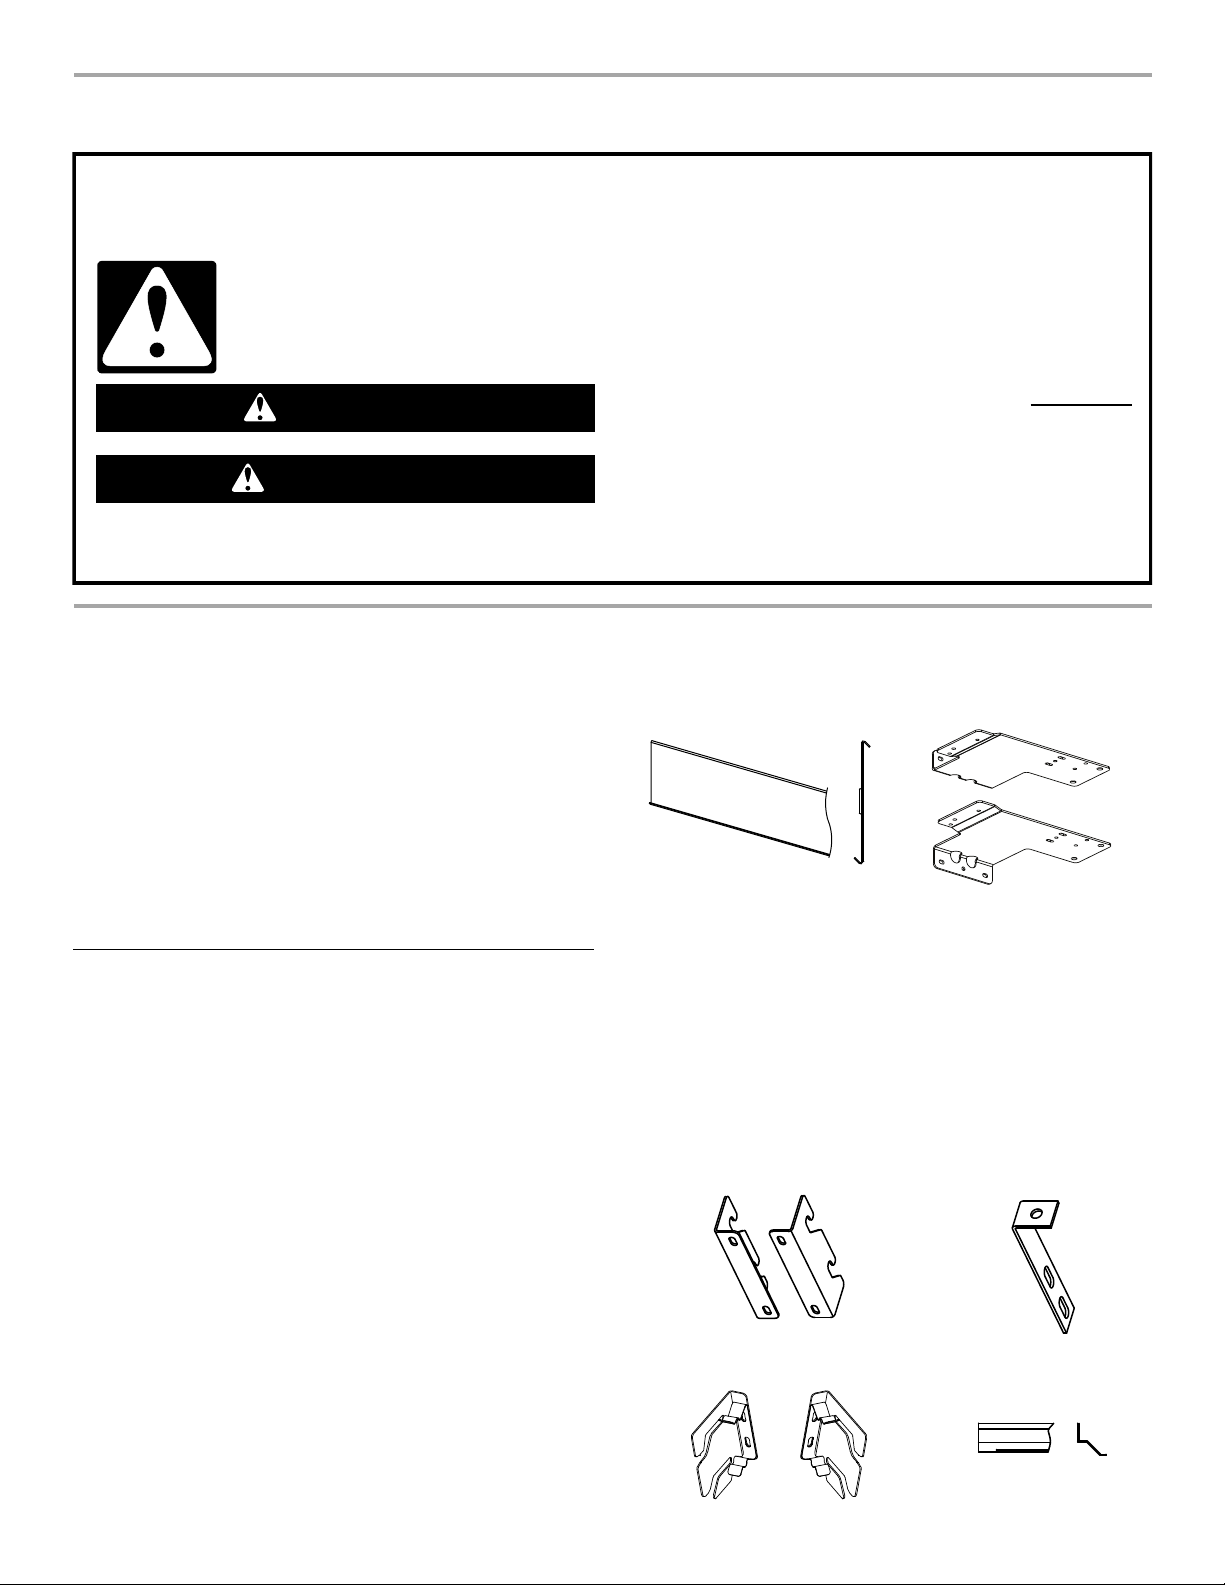
Parts Supplied with Armoire Kit:
■ Grille Assembly ■ Grille Bracket Assembly
■ Instructions
Parts Supplied with Refrigerator - Used in Armoire
Installation:
■ All hardware
■ Drawer panel bracket
■ Panel top bracket
■ Hinge cover trim (RC and FC)
■ Side trim
■ Handle side door trim
■ Installation block
■ Panel templates
Parts Supplied with Refrigerator - Not Used in Armoire
Installation (these parts can be discarded):
■ Standard grille bracket ■ “L” brackets
■ Integrated grille bracket ■ Grille trim
3
Page 4
Plan the Installation
A B
E
D
C
A B
E
D
C
A B
E
D
C
Plan your installation using these instructions in conjunction with
the Installation Instructions provided with the refrigerator.
Modifications must be made to the refrigerator to accommodate
the armoire cabinet.
Required parts
■ One of the following built-in refrigerator models:
Side-by-Side: JS42NXFXDW, JS42NXFXDE, JS48NXFXDE,
JS48NXFXDW
36" Bottom Mount: JB36NXFXLW, JB36NXFXRW.
JB36NXFXLE, JB36NXFXRE
36" French Door Bottom Mount: JF36NXFXDE
42" French Door Bottom Mount: JF42NXFXDW,
JF42NXFXDE
■ Accessory Armoire-Style Door Panel Kit which includes (Grille
Assembly and Grille Bracket Assembly)
■ Custom Panels
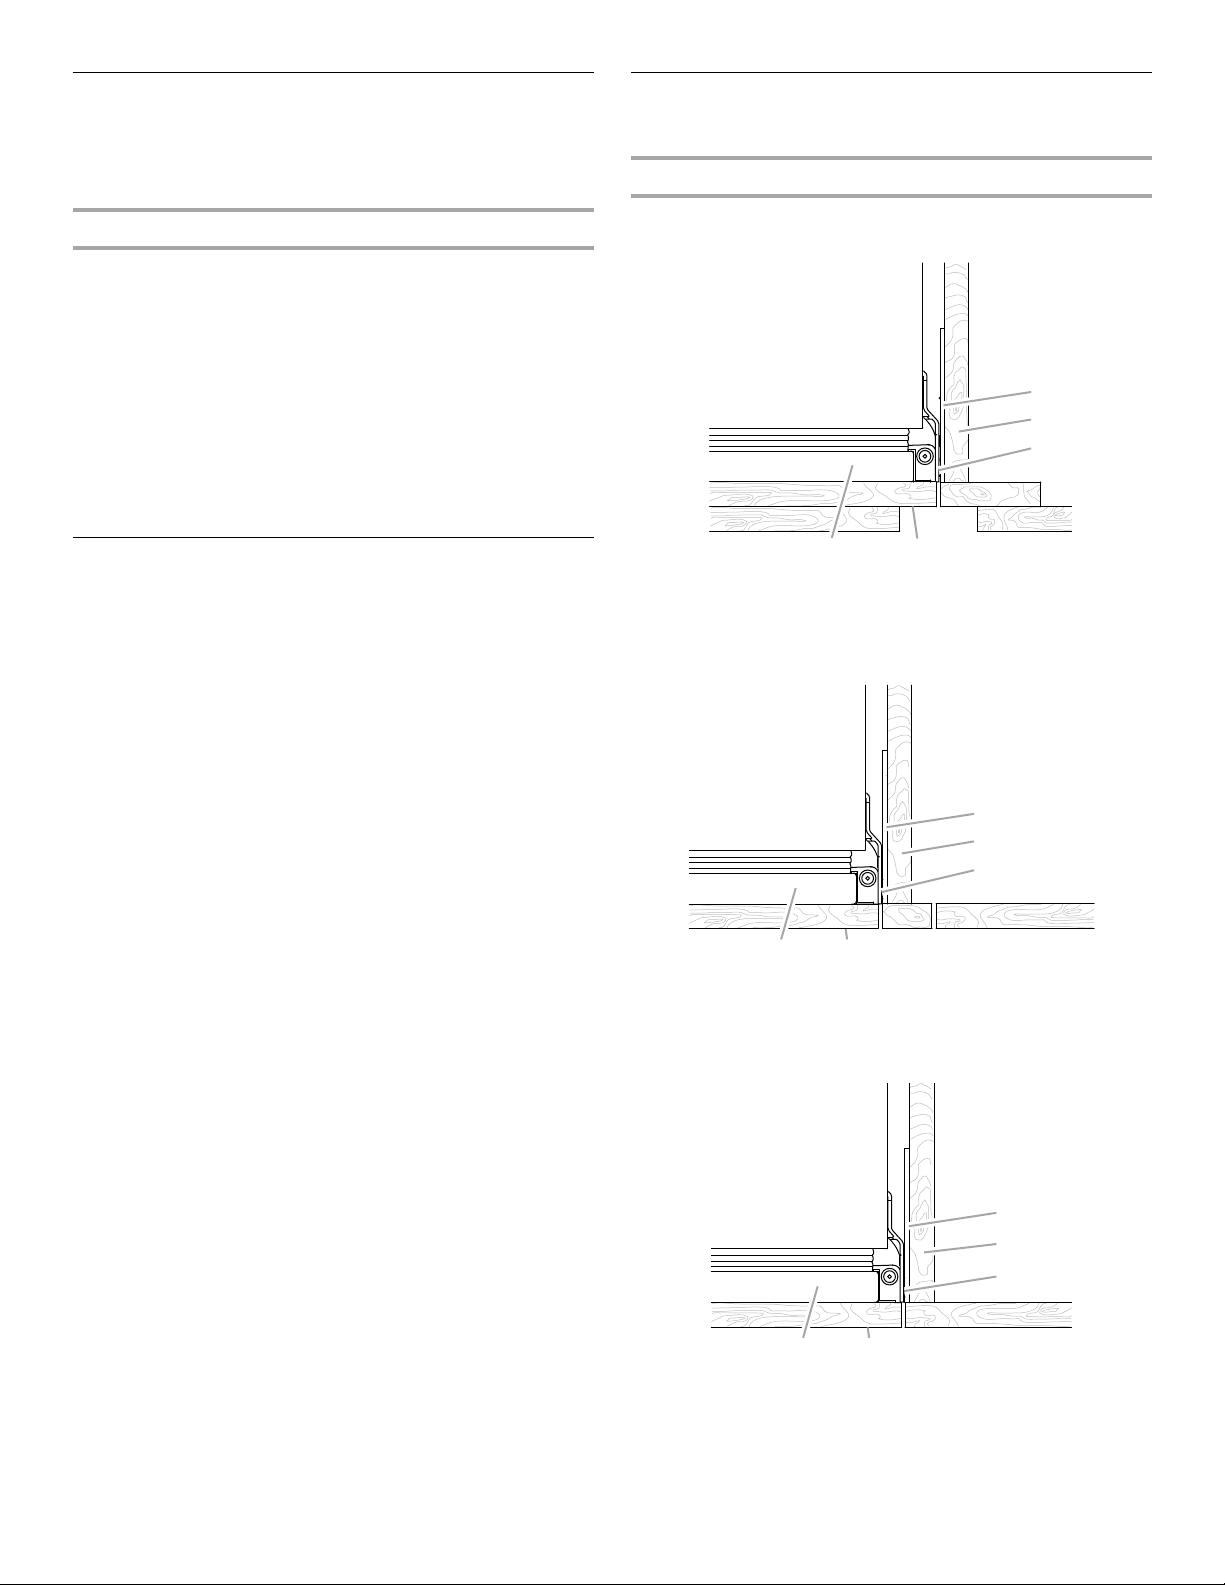
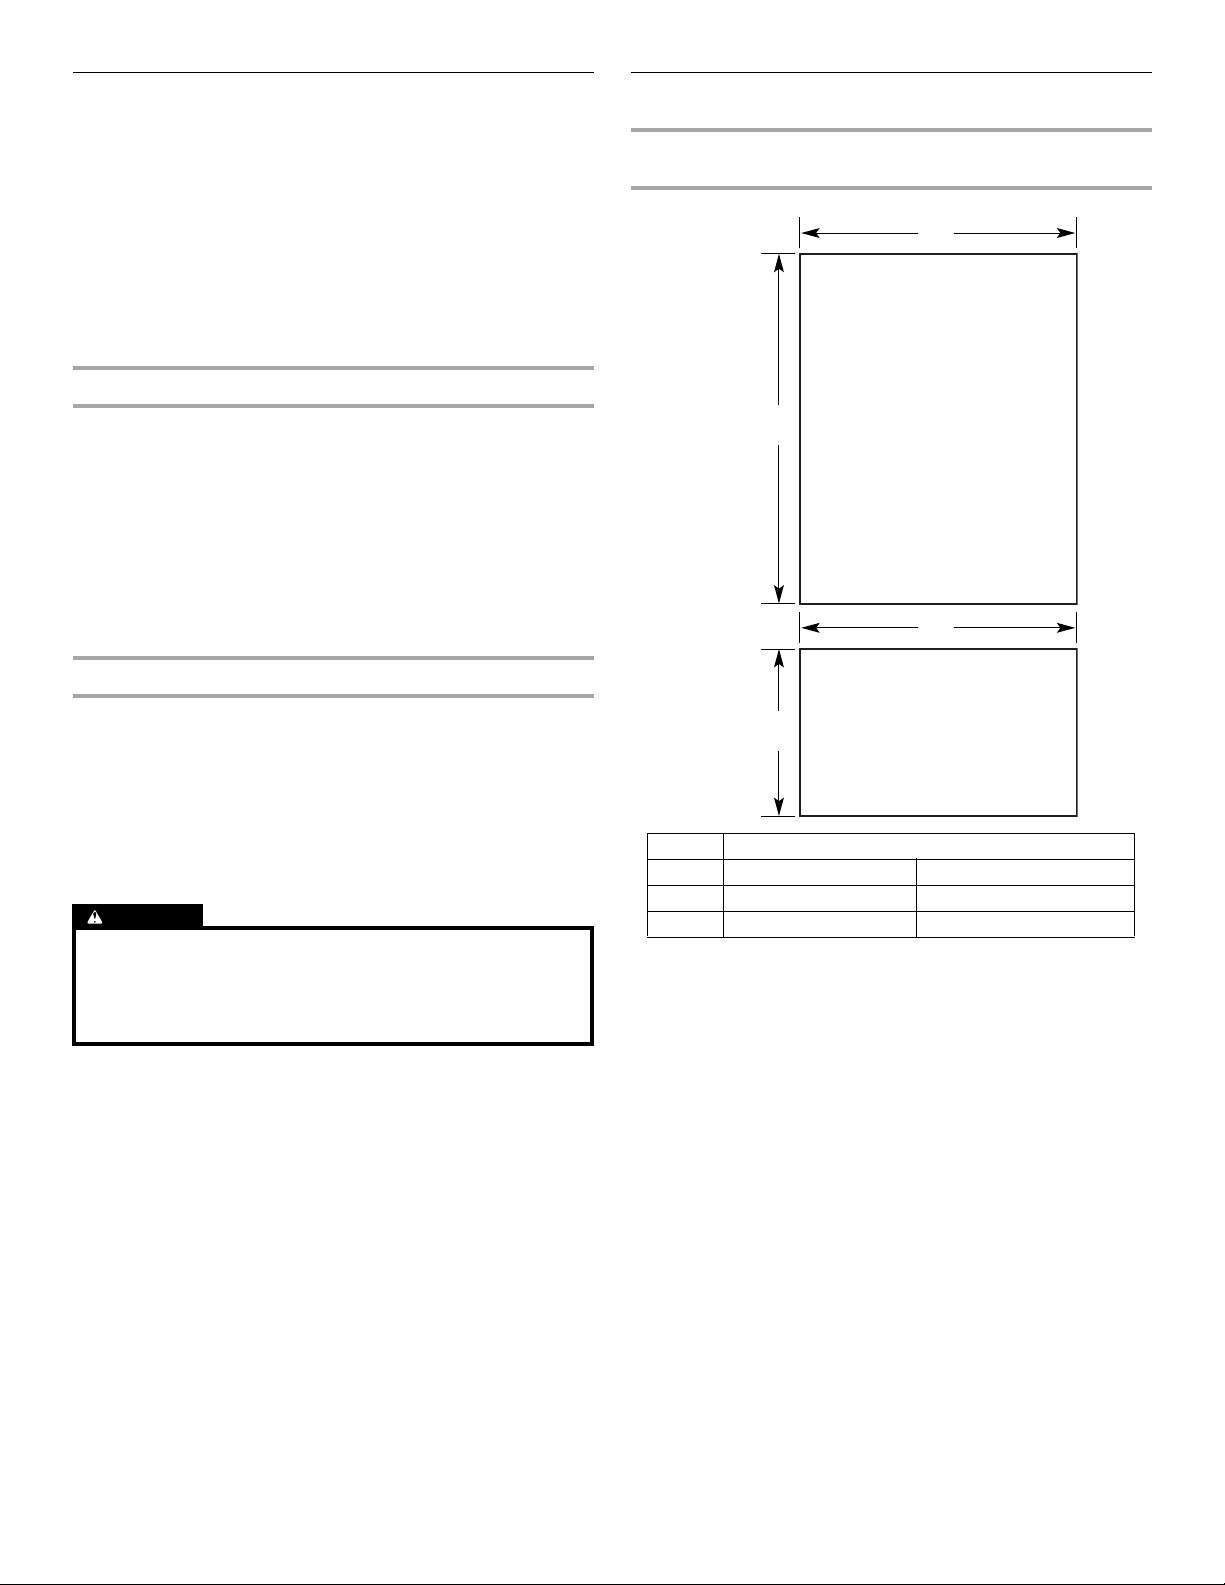
Cabinet and Panel
Installation Options
Cabinet Depth - 25" (63.5 cm)
Framed Cabinetry
Top View - Overlay
Opening Requirements
IMPORTANT:
■ An Armoire installation requires an open soffit. For a fully
integrated installation, a minimum of 6" (15.24 cm) of open
space above the refrigerator is required. The open space
must also extend the width and depth of the unit. See “Fully
Integrated Installation.” Anti-tip boards are required. See
“Install Anti-Tip Boards” in the Installation Instructions
provided with the refrigerator for more information.
■ The width of the opening, from side to side, must be as
specified for your model, for at least 3" (7.62 cm) back from
the face of the cabinet. If your opening does not meet this
requirement, you will need to make modifications.
■ The depth of the opening from the front of the cabinet to the
back wall must be 25" (63.5 cm) minimum to achieve a flush
installation.
■ A grounded 3 prong electrical outlet should be placed within
4" (10.2
“Electrical Requirements” in the Installation Instructions
provided with the refrigerator.
■ The water shutoff should be located in the base cabinets on
either side of the refrigerator or some other easily accessible
area. If the water shutoff valve is not in the cabinets, the
plumbing for the water line can come through the floor. See
“Water Supply Requirements” in the Installation Instructions
provided with the refrigerator.
cm) of the right side cabinets or end panel. See
A. Refrigerator door
B. Overlay panel
C. Side trim
Top View - Inset
A. Refrigerator door
B. Overlay panel
C. Side trim
Frameless Cabinetry
D. Adjacent cabinet
E. Grille bracket
D. Adjacent cabinet
E. Grille bracket
4
A. Refrigerator door
B. Overlay panel
C. Side trim
D. Adjacent cabinet
E. Grille bracket
Page 5
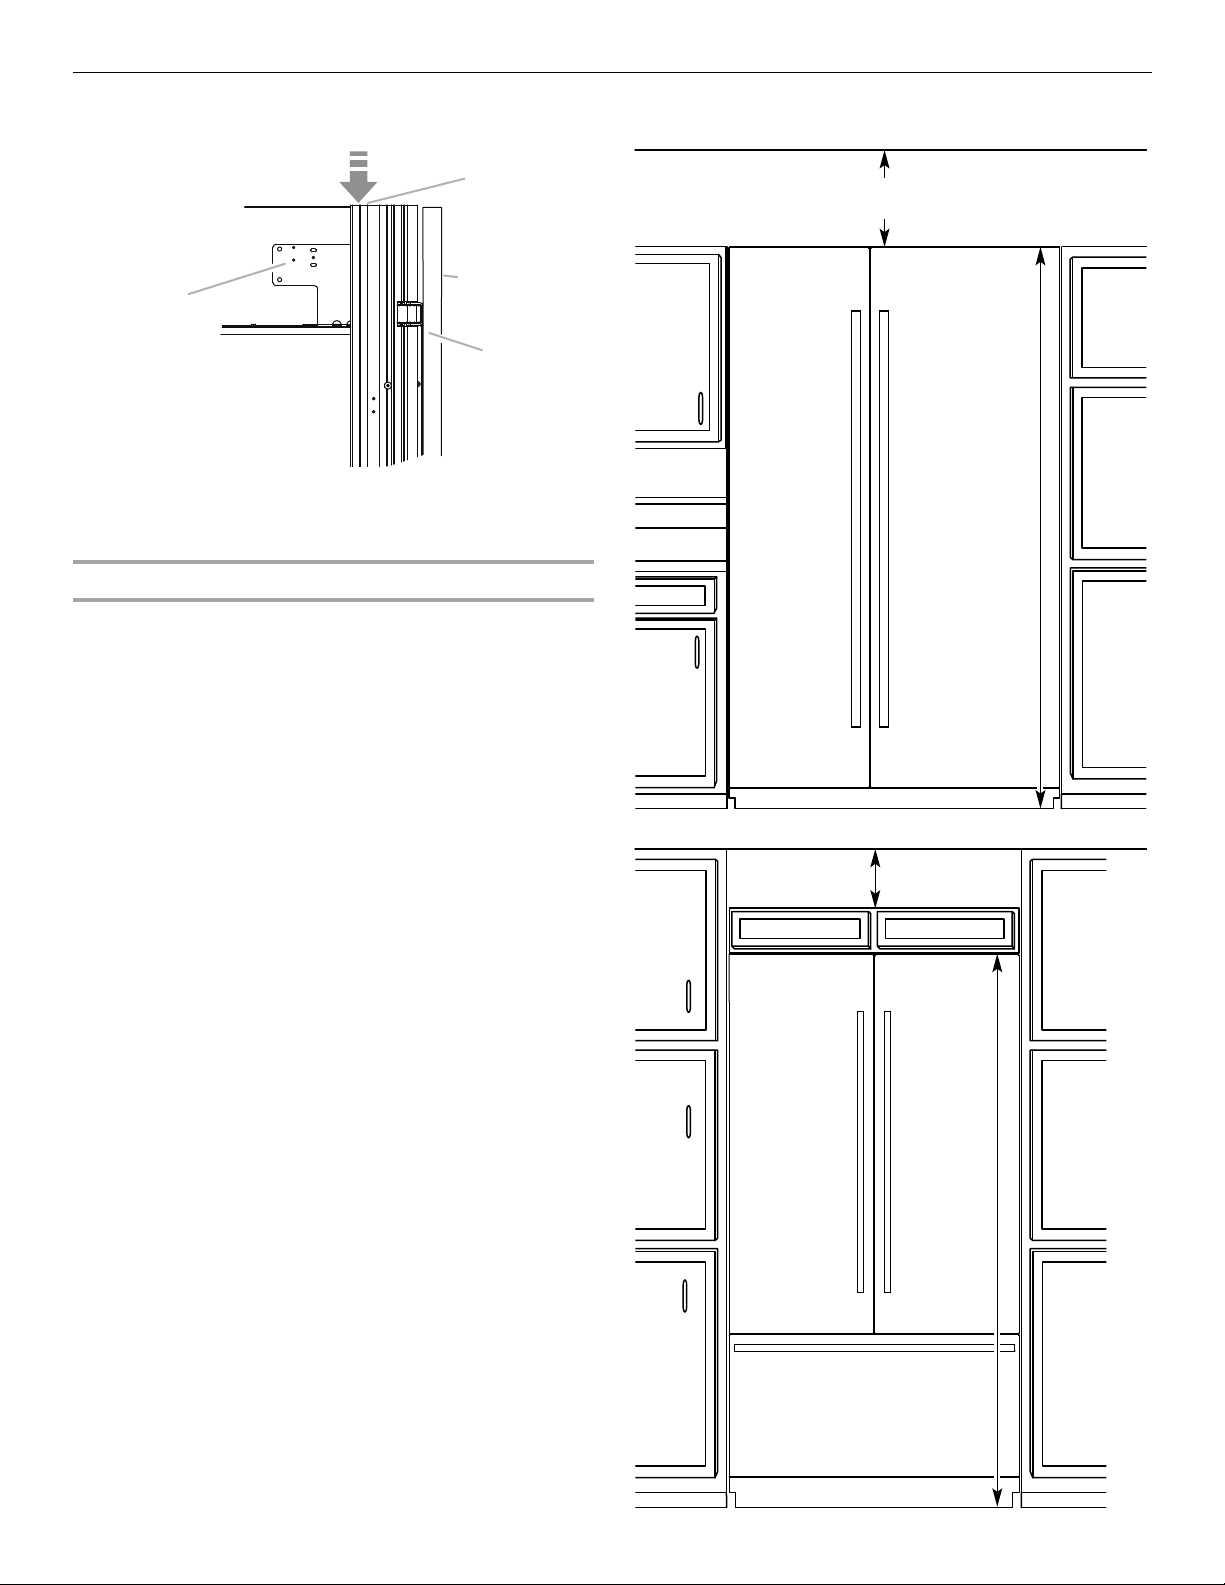
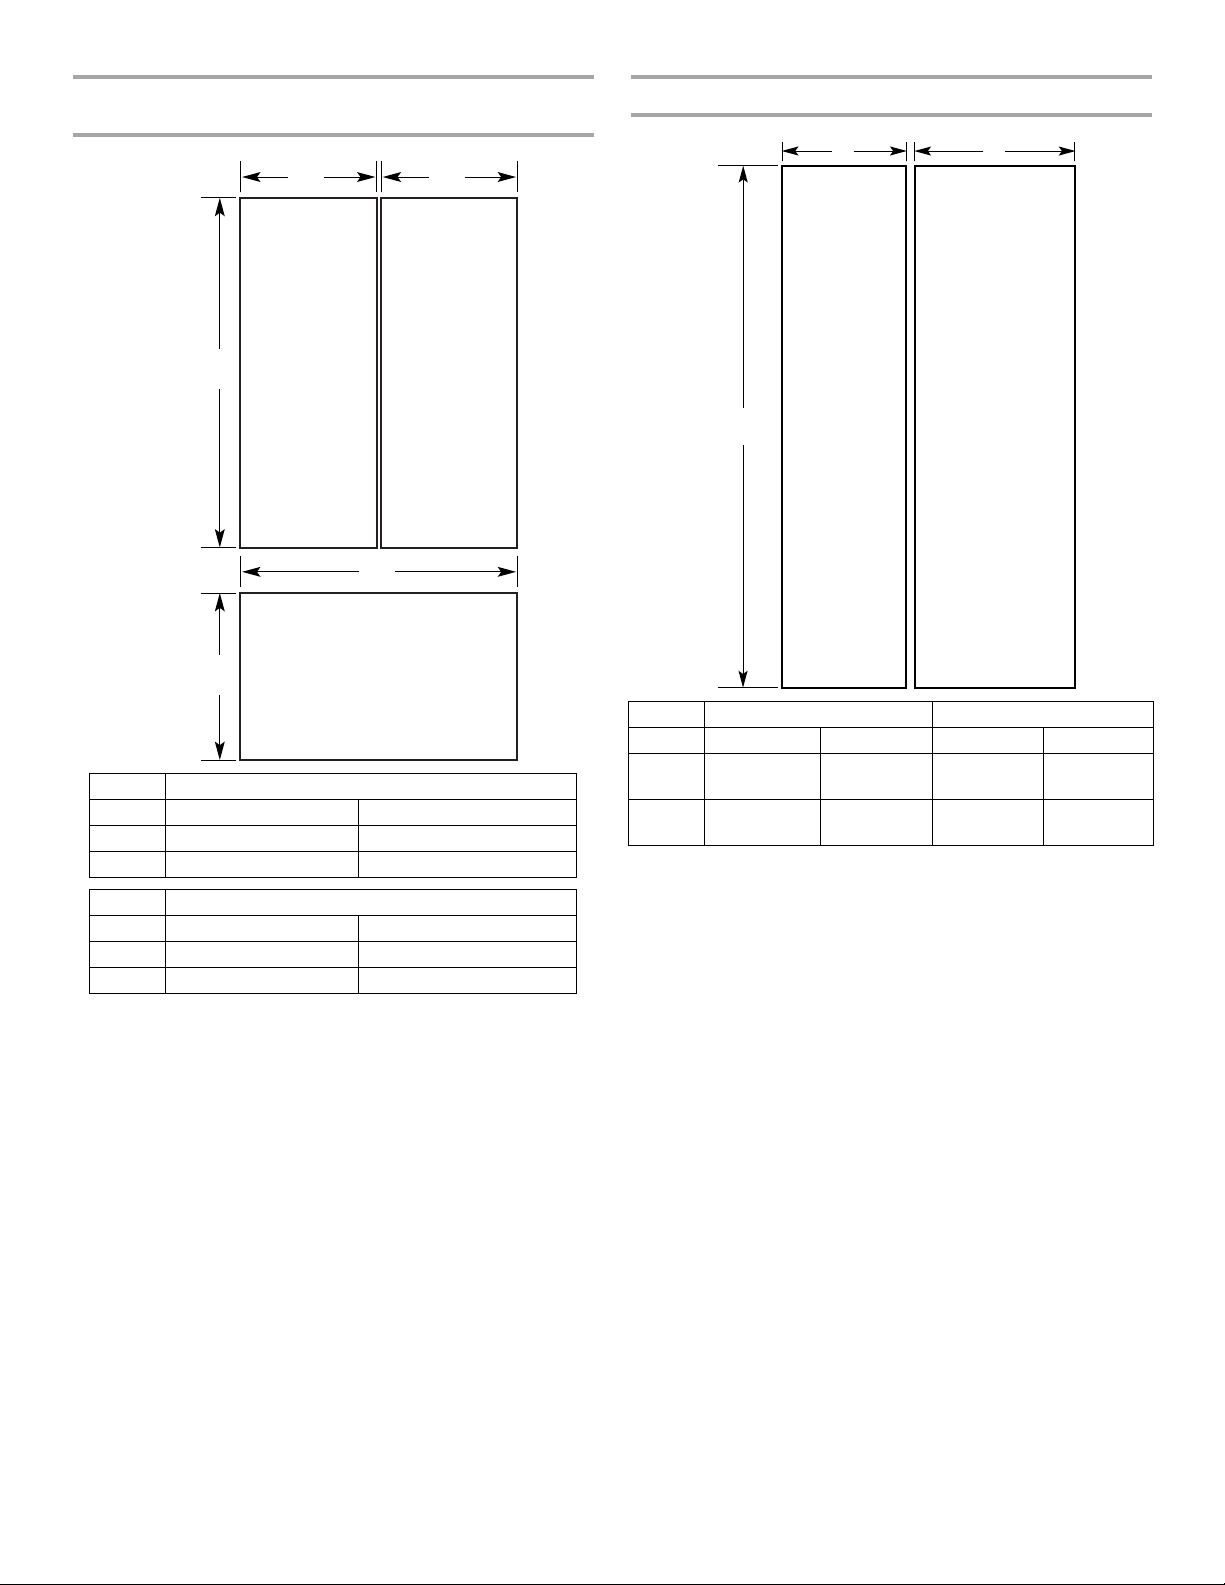
Top Grille - Side View
C
D
A
B
6" (15.24 cm)
min.
84"
(213.4 cm)
6" (15.24 cm)
min.
84"
(213.4 cm)
Armoire Style Installation Requirements
Option 1 - Open to Ceiling (all models)
A. Grille bracket assembly
B. Airflow
C. Full-height
door panel
D. Side trim
Airflow Venting Requirements
IMPORTANT:
■ Armoire style installations require a minimum of 6" (15.24 cm)
of open space above the refrigerator. This space must not be
blocked in any way, including soffits.
■ Models may be installed using either Option 1 or Option 2.
Option 2 - False Front (cabinet face only) (all models)
5
Page 6
Custom Overlay Panels
Pinch Hazard
Installation of door panels with less than a ³⁄₈" (0.95 cm) gap
between the door panel and the adjacent cabinet increases
the risk of potential pinching.
CAUTION
A
B
59¹⁄₈"
(150.2 cm)
20¹⁄₂"
(52.07 cm)
FREEZER DRAWER PANEL
Maximum Weight: 25 lbs (11.34 kg)
REFRIGERATOR DOOR PANEL
Maximum Weight: 60 lbs (27.2 kg)
Custom overlay panels allow you to blend the exterior of your
refrigerator into the overall kitchen décor and to use custom
handles for additional design flexibility.
In some cases, your cabinet manufacturer may choose to work
with one panel routed for the different dimensions. Follow these
panel dimension and placement instructions to be sure that the
custom overlay panels will fit properly.
IMPORTANT:
■ This installation does not require filler or backer panels.
■ The required thickness for all panels is ³⁄₄" (1.91 cm).
Bottom Mount
■ For 36" (91.4 cm) Single-door Bottom Mount models, the
weight of the refrigerator door overlay panel cannot exceed
60 lbs (27.2 kg) and the freezer drawer overlay panel cannot
exceed 25 lbs (11.3 kg).
■ For 36 "(91.4 cm) or 42” (106.7 cm) French Door models, the
weight of each refrigerator door cannot exceed 38 lbs
(17.2 kg) and the freezer drawer overlay panel cannot exceed
30 lbs (13.6 kg).
■ For all models, the weight at the top grille overlay panel
cannot exceed 7
lbs (3.2 kg).
Side-by-Side
Overlay Panel Dimensions
36" (91.4 cm) Single-Door Model - Door and Drawer
Panels
■ The weight of the refrigerator door overlay panel cannot
exceed 66 lbs (29.9 kg) for 48" models or 65 lbs (29.5 kg) for
42" models.
■ The weight of the freezer door overlay panel cannot exceed
50
lbs (23 kg) for 48" models or 49 lbs (22.2 kg) for 42"
models.
■ The weight of the top grille overlay panel cannot exceed 8 lbs
(3.6 kg) for 48" models or 7 lbs (3.2 kg) for 42" models.
Model 36" Bottom Mount
Reveal ³⁄₈" ¹⁄₈"
A 35¹⁄₄" (89.54 cm) 35³⁄₄" (90.81 cm)
B 35¹⁄₄" (89.54 cm) 35³⁄₄" (90.81 cm)
6
Page 7
36" (91.4 cm) French Door and 42" (106.7 cm) French
A
B
59¹⁄₈"
(150.2 cm)
20¹⁄₂"
(52.07 cm)
FREEZER DRAWER PANEL
Maximum Weight: 30 lbs (13.6 kg)
REFRIGERATOR
DOOR PANEL
Maximum Weight:
38 lbs (17.2 kg)
A
REFRIGERATOR
DOOR PANEL
Maximum Weight:
38 lbs (17.2 kg)
B
A
Freezer
Door Panel
42" Model
Max. Weight
49 lbs (22.2 kg)
48" Model
Max. Weight
50 lbs (23 kg)
Refrigerator
Door Panel
42" Model
Max. Weight
65 lbs (29.5 kg)
48" Model
Max. Weight
66 lbs (29.9 kg)
81"
(205.7 cm)
Door Model - Door and Drawer Panels
Side-by-Side - Door Panels
Model 36" French Door Bottom Mount
Reveal ³⁄₈" ¹⁄₈"
A 17⁹⁄₁₆" (44.61 cm) 17¹³⁄₁₆" (45.24 cm)
B 35¹⁄₄" (89.54cm) 35³⁄₄" (90.81cm)
Model 42" French Door Bottom Mount
Reveal ³⁄₈" ¹⁄₈"
A 20⁹⁄₁₆" (52.23 cm) 20¹³⁄₁₆" (52.86 cm)
B 41¹⁄₄" (104.76 cm) 41³⁄₄" (106.05 cm)
Model 42 48
Reveal ³⁄₈" ¹⁄₈" ³⁄₈" ¹⁄₈"
A 17⁹⁄₁₆"
(44.61
B 23⁹⁄₁₆"
(59.85 cm)
cm)
17¹³⁄₁₆"
(45.24 cm)
23¹³⁄₁₆"
(60.48 cm)
20¹⁄₁₆"
(50.96 cm)
27¹⁄₁₆"
(68.74 cm)
20⁵⁄₁₆"
(50.17 cm)
27⁵⁄₁₆"
(69.37 cm)
7
Page 8
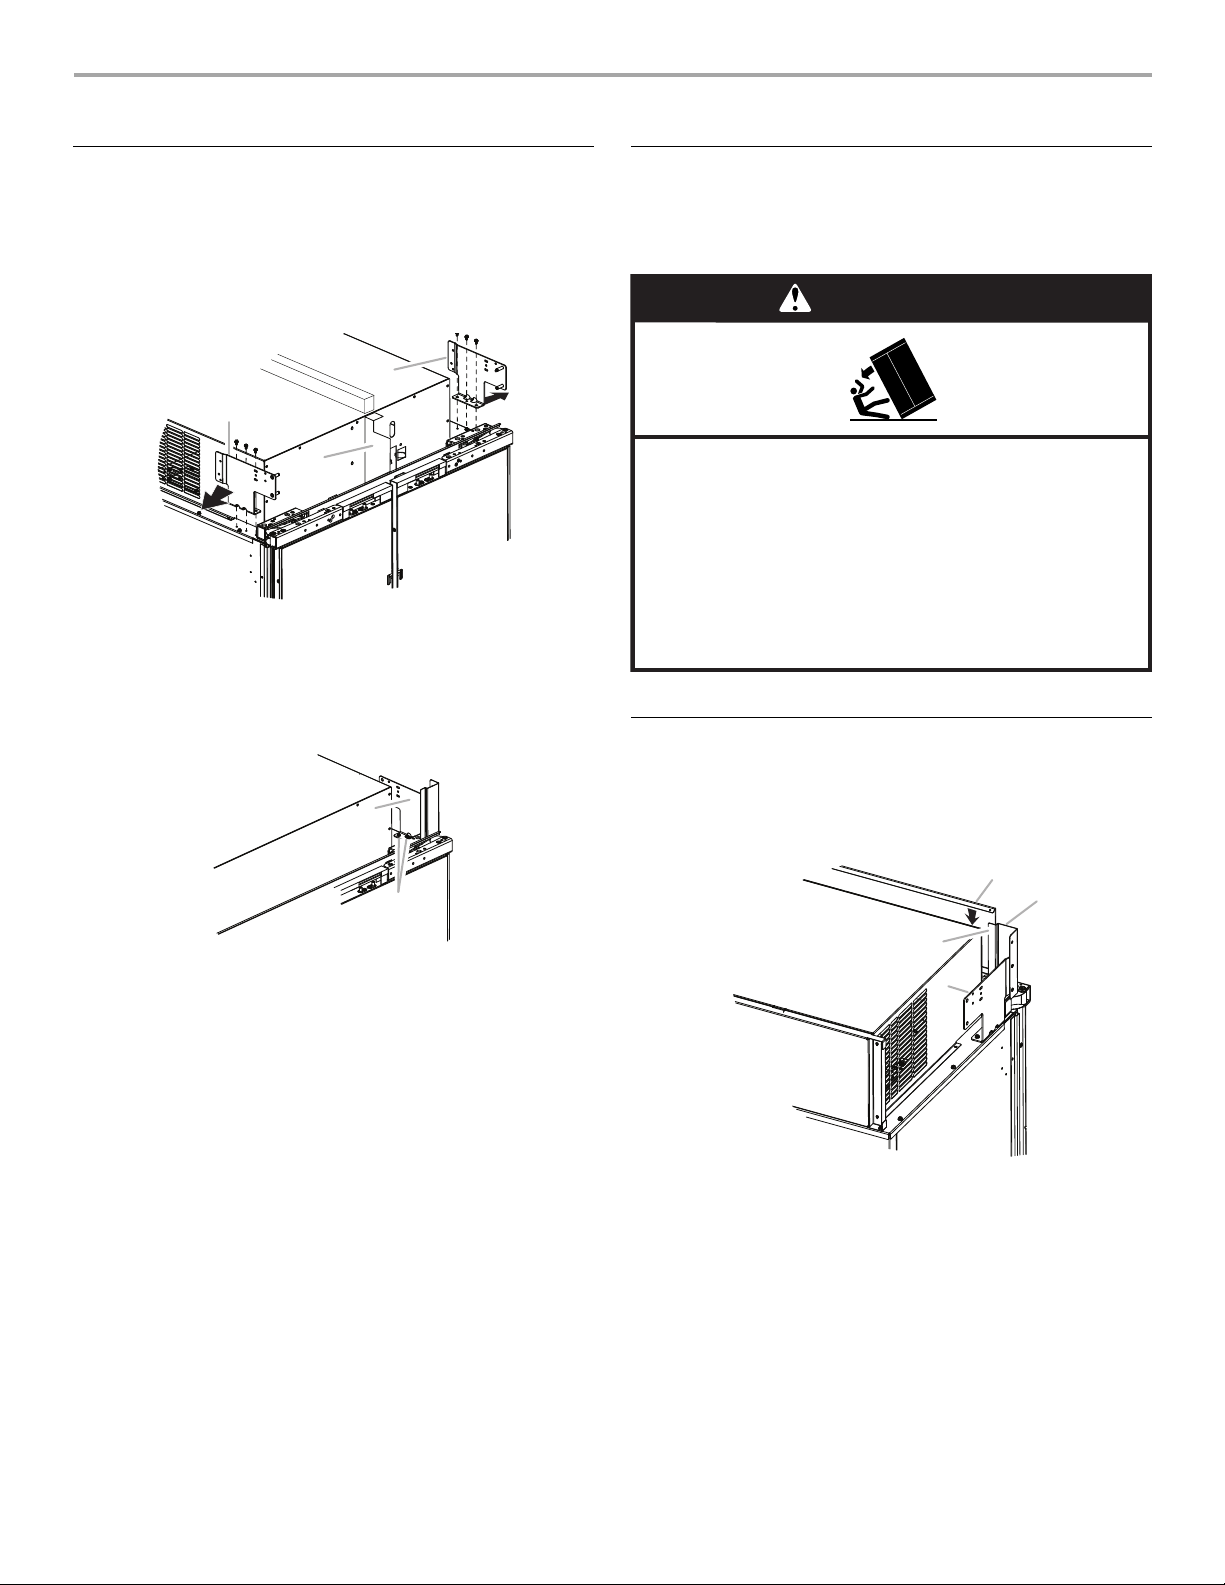
MODIFICATIONS FOR AN ARMOIRE KIT INSTALLATION
A
B
C
WARNING
Tip Over Hazard
Refrigerator is top heavy and tips easily when not
completely installed.
Keep doors taped closed until refrigerator is
completely installed.
Use two or more people to move and install
refrigerator.
Failure to do so can result in death or serious injury.
B
D
A
C
Top Grille
1. Remove the three screws fastening each mounting plate to
the top of the refrigerator on each side. Discard the mounting
plates but keep the screws for attaching the two grille bracket
assemblies provided in this kit.
2. Remove the two screws fastening the air divider to the unit
housing. Discard the air divider, but replace the screws into
the holes from where they were removed.
A. Grille bracket mounting plate
B. Air divider
C. Grille bracket mounting plate
3. Align the three holes in a grille bracket assembly with the
three holes in a cabinet side, as shown. Using the screws
removed in Step
1, attach the grille bracket assembly.
A
Install Refrigerator
IMPORTANT: Follow the “Installation Instructions” in the
“Installation Guide” provided with your refrigerator.
1. Plug refrigerator into grounded 3 prong outlet.
2. Move the refrigerator to its final location.
Install Grille Panel
1. Position the armoire grille panel between the grille brackets
on each side of the cabinet.
2. Slide the grille panel down until the top of the grille panel
hangs on top of the offsets of the grille brackets.
B
A. Grille bracket assembly
B. Screws
4. Repeat steps 2 and 3 to install the other grille bracket
assembly to the opposite side of the refrigerator.
8
A. Offset in bracket
B. Grille
C. Grille bracket
D. Grille bracket assembly
Page 9

Prepare Custom Wood Door Panels
6B\,“
(16.8 cm)
A
C
B
IMPORTANT: For an armoire installation, instead of drilling holes
along the top edge(s) of the custom door panel(s), you must
adjust the placement of the drilling template (provided with the
refrigerator).
NOTES:
■ No template adjustment is needed for the bottom edge of the
door panel(s).
■ No template adjustment is needed for the custom freezer
drawer panel.
1. Align the drilling template on the back of the custom
refrigerator door panel so that the top of the template is offset
6³⁄₄" (17.2
cm) from the top of the refrigerator door panel.
NOTE: The only offset dimension is the 6³⁄₄" (17.2 cm) offset
from the top of the door panel.
A. Top of custom refrigerator door panel
B. Drilling template
C. Bottom of custom refrigerator door
panel
2. Continue to use the template as you normally would along
the bottom, handle side of the door panel.
Complete Installation
IMPORTANT: Return to the instructions provided with your refrigerator to complete the installation. See “Prepare Custom Overlay
Panels” in the Installation Guide.
9
Page 10

SEGURIDAD DEL JUEGO ESTILO ARMARIO
Si no sigue las instrucciones de inmediato, usted puede
morir o sufrir una lesión grave.
Si no sigue las instrucciones, usted puede morir o sufrir
una lesión grave.
Todos los mensajes de seguridad le dirán el peligro potencial, le dirán cómo reducir las posibilidades de sufrir una lesión y lo que
puede suceder si no se siguen las instrucciones.
Su seguridad y la seguridad de los demás es muy importante.
Hemos incluido muchos mensajes importantes de seguridad en este manual y en su electrodoméstico. Lea y obedezca siempre
todos los mensajes de seguridad.
ADVERTENCIA
PELIGRO
Este es el símbolo de advertencia de seguridad.
Este símbolo le llama la atención sobre peligros potenciales que pueden ocasionar la muerte o una lesión a
usted y a los demás.
Todos los mensajes de seguridad irán a continuación del símbolo de advertencia de seguridad y de la palabra
“PELIGRO” o “ADVERTENCIA”. Estas palabras significan:
REQUISITOS DE INSTALACIÓN
El juego de paneles para la puerta estilo armario para
refrigeradores Jenn-Air completamente incorporados permite
usar paneles de puerta a la medida de altura completa con un
panel superior oculto, para lo último en diseños incorporados.
IMPORTANTE:
■ Estas instrucciones lo guiarán al preparar el refrigerador
empotrado para una instalación tipo armario. Las mismas
han sido diseñadas para suplementar las Instrucciones de
instalación provistas con su refrigerador, no para
reemplazarlas.
■ Las siguientes instrucciones sirven solamente como guía
general y no sustituyen de ninguna manera las normas
nacionales o locales. La conformidad con todas las normas
locales, estatales o nacionales relacionadas con este tipo de
instalación debe constatarse antes de realizarse la
instalación.
Herramientas y piezas
Reúna las herramientas y piezas necesarias antes de comenzar
la instalación. Lea y siga las instrucciones provistas con
cualquiera de las herramientas necesarias enumeradas aquí. La
instalación correcta es su responsabilidad.
Herramientas necesarias:
■ Taladro inalámbrico
■ Brocas
■ Dos llaves ajustables
■ Destornillador Phillips
■ Nivel pequeño
■ Plataforma rodante para
electrodomésticos
■ Llave hexagonal de ³⁄₃₂"⁰
(sólo
para los juegos de
paneles)
■ Llave para tuercas de ¹¹⁄₃₂"
■ Llaves de boca de ³⁄₈" y ¹⁄₂"
■ Llave hexagonal de ⁵⁄₃₂" y ³⁄₁₆"
■ Llaves de cubo de ¹⁄₄" y ⁵⁄₁₆"
■ Cinta para medir
■ Cuchillo para uso general
■ Cinta adhesiva (para pintores)
Piezas provistas con el juego estilo armario:
■ Ensemblaje de rejilla ■ Ensamblaje de soporte de
■ Instrucciones
Piezas provistas con el refrigerador – Se usan en la
instalación del armario:
■ Todas las piezas de ferretería
■ Soporte del panel del cajón
■ Soporte superior del panel
■ Moldura de la cubierta de la
bisagra (compartimiento del
refrigerador y del congelador)
Piezas provistas con el refrigerador – No se usan en la
instalación del armario (estas piezas pueden desecharse):
■ Soporte estándar de rejilla ■ Soportes en “L”
■ Soporte incorporado de rejilla ■ Moldura de rejilla
la rejilla
■ Moldura lateral
■ Moldura de la puerta
del lado de la bisagra
■ Bloque de instalación
■ Plantillas de los
paneles
10
Page 11

Planifique la instalación
A B
E
D
C
A B
E
D
C
A B
E
D
C
Planifique la instalación siguiendo estas instrucciones
conjuntamente con las Instrucciones de instalación provistas con
el refrigerador. Deberán hacerse modificaciones en el refrigerador
para acomodar el gabinete tipo armario.
Piezas necesarias
■ Uno de los siguientes modelos de refrigeradores
empotrados:
Dos puertas: JS42NXFXDW, JS42NXFXDE, JS48NXFXDE,
JS48NXFXDW
36" Congelador en la parte inferior de 36”: JB36NXFXLW,
JB36NXFXRW, JB36NXFXLE, JB36NXFXRE
36" Dos puertas con congelador en la parte inferior de 36”:
JF36NXFXDE
42" Dos puertas con congelador en la parte inferior de 42”:
JF42NXFXDW, JF42NXFXDE
■ Juego accesorio de paneles para las puertas estilo armario
que incluye (ensamblaje de la rejilla y ensamblaje de soporte
de la rejilla)
■ Paneles a la medida
Requisitos para la abertura
IMPORTANTE:
■ Para una instalación tipo armario se necesita un sofito
abierto. Para una instalación completamente incorporada, se
necesitará un espacio abierto mínimo de 6" (15,24 cm) arriba
del refrigerador. La superficie abierta también debe ser una
extensión del ancho y de la profundidad de la unidad. Vea
“Instalación completamente incorporada”. Se necesitarán
tableros antivuelco. Vea “Instalación de los tableros
antivuelco” en las Instrucciones de instalación provistas con
el refrigerador para obtener más información.
■ El ancho de la abertura de lado a lado deberá ser el
especificado para su modelo, por lo menos a una distancia
de 3" (7,62 cm) hacia la parte posterior desde la cara del
armario. Si la abertura no cumple con este requisito, deberá
hacer modificaciones.
■ Para lograr una instalación alineada, la profundidad de la
abertura desde el frente del armario hacia la pared posterior
deberá ser de 25" (63,5 cm) como mínimo.
■ Un contacto de 3 terminales con conexión a tierra debe ser
ubicado a no más de 4" (10,2
armarios o del panel del extremo. Vea “Requisitos eléctricos”
en las Instrucciones de instalación provistas con el
refrigerador.
■ La válvula de cierre del agua deberá estar localizada en los
armarios de la base, a cualquier lado del refrigerador o en
algún otro lugar de fácil acceso. Si la válvula de cierre del
agua no está en los armarios, la tubería para la línea del agua
puede llegar a través del piso. Vea “Requisitos del suministro
de agua” en las Instrucciones de instalación provistas con el
refrigerador.
cm) del lado derecho de los
Opciones para la instalación
armario y los paneles
del
Profundidad del armario - 25" (63,5 cm)
Armarios con marcos
Vista superior - Recubierto
A. Puerta del refrigerador
B. Panel recubierto
C. Moldura lateral
Vista superior - Recuadro
A. Puerta del refrigerador
B. Panel recubierto
C. Moldura lateral
Armarios sin marco
D. Armario adyacente
E. Soporte de la rejilla
D. Armario adyacente
E. Soporte de la rejilla
A. Puerta del refrigerador
B. Panel recubierto
C. Moldura lateral
D. Armario adyacente
E. Soporte de la rejilla
11
Page 12

Requisitos para la instalación
C
D
A
B
6" (15,24 cm)
min.
84"
(213,4 cm)
6" (15,24 cm)
min.
84"
(213,4 cm)
completamente
Rejilla superior - Vista lateral
incorporada
Opción 1 - Abierto hacia el techo (todos los modelos)
A. Ensamblaje de soporte de
la rejilla
B. Flujo de aire
C. Panel de la puerta de
altura completa
D. Moldura lateral
Requisitos de flujo de aire y ventilación
IMPORTANTE:
■ Para instalaciones de estilo armario, se necesitará un espacio
abierto mínimo de 6" (15,24
espacio no deberá estar obstruido de ninguna manera,
incluyendo los sofitos.
■ Los modelos pueden instalarse usando la Opción 1 o la
Opción 2.
cm) arriba del refrigerador. El
Opción 2 - Frente falso (solamente la cara del armario)
(todos los modelos)
12
Page 13

Paneles recubiertos a la medida
Peligro de pellizcos
Si se instalan los paneles de la puerta con un espacio menor
de ³⁄₈" (0,95 cm) entre el panel de la puerta y el armario
adyacente, aumentará el riesgo de pellizcos potenciales.
CUIDADO
A
B
59¹⁄₈"
(150,2 cm)
20¹⁄₂"
(52,07 cm)
PANEL DEL CAJÓN DEL
CONGELADOR
Peso máximo: 25 lbs (11,34 kg)
PANEL DE LA PUERTA DEL
REFRIGERADOR
Peso máximo: 60 lbs (27,2 kg)
Los paneles recubiertos a la medida le permiten armonizar el
exterior de su refrigerador con la decoración de la cocina y usar
las manijas a la medida para mayor flexibilidad en el diseño.
En algunos casos, su fabricante de armarios puede elegir
trabajar con un panel trazado para las diferentes medidas. Siga
estas medidas de panel e instrucciones de colocación para
asegurarse de que los paneles recubiertos a la medida encajarán
adecuadamente.
IMPORTANTE:
■ Esta instalación no requiere paneles de relleno ni de soporte.
■ El espesor necesario para todos los paneles es de ³⁄₄"
(1,91 cm).
Congelador en la parte inferior
■ Para los modelos con congelador en la parte inferior de una
sola puerta de 36" (91,4 cm), el peso del panel recubierto de
la puerta del refrigerador no puede ser mayor de 60 lb
(27,2 kg) y el peso del panel recubierto del cajón congelador
no puede ser mayor de 25 lb (11,3 kg).
■ Para los modelos de 36" (91,4 cm) o 42" (106,7 cm), el peso
de cada puerta del refrigerador no puede ser mayor de
38 lb (17,2 kg) y el peso del panel recubierto del cajón
congelador no puede ser mayor de 30 lb (13,6 kg).
■ Para ambos modelos, el peso en el panel recubierto de la
rejilla superior no puede ser mayor de 7
lb (3,2 kg) para
ambos modelos.
Dimensiones del panel recubierto
36" Modelo de 36" (91,4 cm) - Paneles de la puerta y del
cajón
Dos puertas
■ El peso del panel recubierto de la puerta del refrigerador no
puede ser mayor de 66 lb (29,9 kg) para los modelos de 48" o
65 lb (29,5 kg) para los modelos de 42".
■ El peso del panel recubierto de la puerta del congelador no
puede ser mayor de 50
49 lb (22,2 kg) para los modelos de 42".
■ El peso del panel recubierto de la rejilla superior no puede ser
mayor de 8
lb (3,6 kg) para los modelos de 48" o 7 lb (3,2 kg)
para los modelos de 42"
lb (23 kg) para los modelos de 48" o
.
Modelo 36" Congelador en la parte inferior de 36"
Mocheta ³⁄₈" ¹⁄₈"
A 35¹⁄₄" (89,54 cm) 35³⁄₄" (90,81 cm)
B 35¹⁄₄" (89,54 cm) 35³⁄₄" (90,81 cm)
13
Page 14

36" Modelo de dos puertas de 36" (91,4 cm) y modelo de
A
B
59¹⁄₈"
(150,2 cm)
20¹⁄₂"
(52,07 cm)
PANEL DEL CAJÓN DEL
CONGELADOR
Peso máximo: 30 lbs (13,6 kg)
PANEL DE LA
PUERTA DEL
REFRIGERADOR
Peso máximo:
38 lb (17,2 kg)
A
PANEL DE LA
PUERTA DEL
REFRIGERADOR
Peso máximo:
38 lb (17,2 kg)
B
A
Panel de la
puerta del
congelador
42" Modelo
Peso máximo
49 lbs (22,2 kg)
48" Model
Peso máximo
50 lbs (23 kg)
Panel de la puerta
del refrigerador
42" Modelo
Peso máximo
65 lbs (29,5 kg)
48" Model
Peso máximo
66 lbs (29,9 kg)
81"
(205,7 cm)
dos puertas de 42" (106,7 cm) - Paneles de la puerta y
del cajón
Dos puertas - Paneles para las puertas
Modelo 36" Dos puertas con congelador en la parte
inferior de 36"
Mocheta ³⁄₈" ¹⁄₈"
A 17 ⁹⁄₁₆"(44,61 cm) 17¹³⁄₁₆" (45,24 cm)
B 35¹⁄₄" (89,54 cm) 35³⁄₄" (90,81 cm)
Modelo 42" Dos puertas con congelador en la parte
inferior de 42"
Mocheta ³⁄₈" ¹⁄₈"
A 20 ⁹⁄₁₆" (52,23 cm) 20¹³⁄₁₆" (52,86 cm)
B 41¹⁄₄" (104,76 cm) 41³⁄₄" (106,05 cm)
Modelo 42 48
Mocheta ³⁄₈" ¹⁄₈" ³⁄₈" ¹⁄₈"
A 17⁹⁄₁₆"
(44,61
B 23⁹⁄₁₆"
(59,85 cm)
cm)
17¹³⁄₁₆"
(45,24 cm)
23¹³⁄₁₆"
(60,48 cm)
20¹⁄₁₆"
(50,96 cm)
27¹⁄₁₆"
(68,74 cm)
20⁵⁄₁₆"
(50,17 cm)
27⁵⁄₁₆"
(69,37 cm)
14
Page 15

MODIFICACIONES EN LA INSTALACIÓN
A
B
C
ADVERTENCIA
Peligro de Vuelco
El refrigerador puede volcarse cuando está siendo
instalado debido a que la parte superior es pesada.
Mantenga las puertas cerradas con cinta hasta que el
refrigerador esté completamente instalado.
Use dos o más personas para mover e instalar el
refrigerador.
No seguir estas instrucciones puede ocasionar
la muerte o herida seria.
B
D
A
C
DEL JUEGO TIPO ARMARIO
Rejilla superior
1. Quite los tres tornillos que aseguran cada placa de montaje a
la parte superior del refrigerador en cada lado. Deseche las
placas de montaje pero guarde los tornillos para sujetar los
dos ensamblajes de soporte de la rejilla provistos con este
juego.
2. Quite los dos tornillos que sujetan el divisor de aire al
alojamiento de la unidad. Deseche el divisor de aire, pero
reemplace los tornillos dentro de los orificios de donde se
quitaron.
3. Alinee los tres orificios en un ensamblaje de soporte de la
rejilla con los tres orificios en un lado del armario, como se
muestra. Sujete el ensamblaje de soporte de la rejilla con los
tornillos que quitó en el Paso
A. Placa de montaje del soporte de la rejilla
B. Divisor de aire
C. Placa de montaje del soporte de la rejilla
1.
A
Instalación del refrigerador
IMPORTANTE: Siga las “Instrucciones de instalación” en la
“Guía de instalación” provista con su refrigerador.
1. Enchufe el refrigerador a un contacto de 3 terminales con
conexión a tierra.
2. Mueva el refrigerador a su ubicación final.
Instalación del panel de la rejilla
1. Ubique el panel de la rejilla del armario entre los soportes de
la rejilla, a cada lado del armario.
2. Deslice el panel de la rejilla hacia abajo hasta que la parte
superior del panel de la rejilla cuelgue encima del rebajo de
los soportes de la rejilla.
B
A. Ensamblaje del soporte de la rejilla
B. Tornillos
4. Repita el Paso 2 y 3 para instalar el otro ensamblaje de
soporte de la rejilla en el lado opuesto del refrigerador.
A. Rebajo en el soporte
B. Rejilla
C. Soporte de la rejilla
D. Ensamblaje del soporte de la rejilla
15
Page 16

Preparación de los paneles de madera a la medida para la puerta
6⁵⁄₈"
(16,8 cm)
A
C
B
IMPORTANTE: Para una instalación tipo armario, en lugar de
taladrar los orificios a lo largo del (de los) borde(s) superior(es) del
(de los) panel(es) a la medida, deberá regular la ubicación de la
plantilla para taladrar (provista con el refrigerador).
NOTAS:
■ No se necesita ajustar la plantilla para el borde inferior del (de
los) panel(es) de la puerta.
■ No se necesita ajustar la plantilla para el panel a la medida
del cajón congelador.
1. Alinee la plantilla para taladrar en la parte posterior del panel
a la medida para la puerta del refrigerador, de modo que la
parte superior de la plantilla tenga un rebajo de 6
³⁄₄" (17,2 cm)
desde la parte superior del panel para la puerta del
refrigerador.
NOTA: La única dimensión de rebajo es de 6³⁄₄" (17,2 cm)
desde la parte superior del panel de la puerta.
A. Parte superior del panel a la medida para la puerta
del refrigerador
B. Plantilla para taladrar
C. Parte inferior del panel a la medida para la puerta
del refrigerador
2. Continúe usando la plantilla como lo haría normalmente a lo
largo de la parte inferior y el lado con la manija del panel de la
puerta.
Completar la instalación
IMPORTANTE: Vuelva a las instrucciones provistas con el refrigerador para completar la instalación. Vea “Preparación de los paneles
recubiertos a la medida” en la Guía de instalación.
16
Page 17

SÉCURITÉ DE L'ENSEMBLE DE L'ARMOIRE
Risque possible de décès ou de blessure grave si vous ne
suivez pas immédiatement les instructions.
Risque possible de décès ou de blessure grave si vous
ne suivez pas les instructions.
Tous les messages de sécurité vous diront quel est le danger potentiel et vous disent comment réduire le risque de blessure et
ce qui peut se produire en cas de non-respect des instructions.
Votre sécurité et celle des autres est très importante.
Nous donnons de nombreux messages de sécurité importants dans ce manuel et sur votre appareil ménager. Assurez-vous de
toujours lire tous les messages de sécurité et de vous y conformer.
AVERTISSEMENT
DANGER
Voici le symbole d’alerte de sécurité.
Ce symbole d’alerte de sécurité vous signale les dangers potentiels de décès et de blessures graves à vous
et à d’autres.
Tous les messages de sécurité suivront le symbole d’alerte de sécurité et le mot “DANGER” ou
“AVERTISSEMENT”. Ces mots signifient :
EXIGENCES D’INSTALLATION
L’ensemble de panneaux pour porte de style armoire, destiné aux
réfrigérateurs Jenn-Air totalement encastrés, est constitué de
panneaux de portes personnalisés en pleine hauteur, comportant
un panneau supérieur masqué pour une conception encastrée de
grande qualité.
IMPORTANT:
■ Ces instructions facilitent la préparation du réfrigérateur
encastré pour une installation en armoire. Elles complètent
les instructions d’installation fournies avec le réfrigérateur,
mais ne les remplacent pas.
■ Ces instructions ne constituent qu’un guide général et ne
peuvent en aucun cas être substituées aux prescriptions d’un
code national ou local applicable. Avant d’entreprendre
l’installation, on doit déterminer les critères de conformité de
l’installation aux prescriptions de tout code national,
provincial ou local.
Outillage et pièces
Réunir les outils et pièces nécessaires avant de commencer
l’installation. Lire et suivre les instructions fournies avec chacun
des outils mentionnés dans cette liste. C’est à l’utilisateur
qu’incombe la responsabilité de réaliser une installation correcte.
Outillage nécessaire :
■ Perceuse sans fil
■ Forets
■ Deux clés à molette
■ Tournevis Phillips
■ Petit niveau
■ Chariot pour appareil
■ Clé à tête hexagonale de
ménager
3/32"(ensembles de
panneaux uniquement)
■ Tourne-écrou de 11/32"
■ Clés plates de 3/8" et 1/2"
■ Clés à tête hexagonale de
5/32" et 3/16"
■ Clés à douille de 1/4" et
5/16"
■ Mètre-ruban
■ Couteau utilitaire
■ Ruban de masquage (de
peintre)
Pièces fournies avec l’ensemble pour armoire:
■ Grille ■ Support de grille
■ Instructions
Pièces fournies avec le réfrigérateur, utilisées dans
l’installation en armoire
■ Matériel de montage
■ Support pour panneau de
tiroir
■ Support supérieur pour
panneau
■ Garniture de couvre-
charnière (compartiment
:
■ Garniture latérale
■ Garniture de porte du
côté poignée
■ Cale d’installation
■ Gabarits de panneaux
réfrigération et congélation)
Pièces fournies avec le réfrigérateur et inutilisées dans
l’installation en armoire (ces pièces peuvent être jetées)
■ Support de grille standard ■ Supports en “L”
■ Support de grille intégré ■ Garniture de grille
:
17
Page 18

Planification de l’installation
A B
E
D
C
A B
E
D
C
A B
E
D
C
Planifier l’installation à l’aide de ces instructions, accompagnées
des instructions d’installation fournies avec le réfrigérateur. Des
modifications doivent être apportées au réfrigérateur pour
accueillir le meuble armoire.
Pièces nécessaires
■ L’un des modèles de réfrigérateur encastré suivants :
Côte à côte : JS42NXFXDW, JS42NXFXDE, JS48NXFXDE,
JS48NXFXDW
36" avec congélateur en bas : JB36NXFXLW, JB36NXFXRW.
JB36NXFXLE, JB36NXFXRE
36" avec congélateur en bas et porte à double battant :
JF36NXFXDE
42" avec congélateur en bas et porte à double battant :
JF42NXFXDW, JF42NXFXDE
■ Ensemble de panneaux de porte de style armoire incluant
grille et support de grille (accessoire)
■ Panneaux personnalisés
Options d’installation du placard
et du panneau
Profondeur de placard - 25" (63,5 cm)
Meubles à encadrement
Vue du dessus - Apparent
Exigences d’ouverture
IMPORTANT :
■ L’installation en armoire exige un soffite ouvert. Pour une
installation intégrée, un dégagement de 6" (15,24 cm) au
minimum au dessus du réfrigérateur est nécessaire. L’espace
libre doit également agrandir la largeur et la profondeur de
l’appareil. Voir la section “Installation intégrée”. Des planches
antibasculement sont requises. Voir la section “Installation
des planches antibasculement” dans les instructions
d’installation fournies avec le réfrigérateur pour plus
d’informations.
■ La largeur de l’ouverture d’encastrement d’un côté à l’autre
doit être telle que spécifiée par le modèle concerné, pour au
moins 3" (7,62 cm) en retrait de l’avant du meuble. Si
l’ouverture d’encastrement ne respecte pas cette condition,
des modifications devront être apportées.
■ La profondeur de l’ouverture de l’avant du meuble jusqu’au
mur arrière doit être de 25" (63,5 cm) au moins pour une
installation en affleurement.
■ Une prise de courant à 3 alvéoles reliée à la terre doit être
installée à 4" (10,2 cm) du côté droit des placards ou du
panneau d’extrémité. Voir “Spécifications électriques” dans
les instructions d’installation fournies avec le réfrigérateur.
■ Le robinet d’arrêt d’eau doit être situé dans les meubles
inférieurs d’un côté ou l’autre du réfrigérateur, ou à un autre
endroit facilement accessible. Si le robinet d’arrêt ne se
trouve pas dans les meubles, la plomberie d’arrivée d’eau
peut provenir du plancher. Voir “Spécifications de l’arrivée
d’eau” dans les instructions d’installation fournies avec le
réfrigérateur.
A. Porte du réfrigérateur
B. Panneau décoratif
C. Garniture latérale
Vue du dessus - Intégré
A. Porte du réfrigérateur
B. Panneau décoratif
C. Garniture latérale
Meubles sans encadrement
D. Placard adjacent
E. Support de grille
D. Placard adjacent
E. Support de grille
18
A. Porte du réfrigérateur
B. Panneau décoratif
C. Garniture latérale
D. Placard adjacent
E. Support de grille
Page 19

Exigences d’une installation
C
D
A
B
6" (15,24 cm)
min.
84"
(213,4 cm)
6" (15,24 cm)
min.
84"
(213,4 cm)
intégrée
Grille supérieure - Vue latérale
Option 1 - Ouverture vers le plafond (tous les modèles)
A. Assemblage de support de grille
B. Circulation d'air
C. Panneau de porte
D. Garniture latérale
Exigences de circulation d'air pour l'aération
IMPORTANT:
■ Les installations de style armoire exigent un dégagement de
6" (15,24 cm) au moins au-dessus du réfrigérateur. Cet
espace doit être totalement dégagé, notamment d’éventuels
soffites.
■ Les modèles peuvent être installés en suivant l’option 1 ou
l’option 2.
Option 2 - Avant décoratif (façade de placard uniquement)
(tous les modèles)
19
Page 20

Panneaux décoratifs
Risque de pincement
L'installation de panneaux de porte avec un espacement de
moins de ³⁄₈" (0,95 cm) entre le panneau de porte et le
placard adjacent augmente le risque de pincement potentiel.
MISE EN GARDE
A
B
59¹⁄₈"
(150,2 cm)
20¹⁄₂"
(52,07 cm)
PANNEAU TIROIR DU
CONGÉLATEUR
Poids maximal : 25 lb (11,34 kg)
PANNEAU DE PORTE DU
RÉFRIGÉRATEUR
Poids maximal : 60 lbs (27,2 kg)
personnalisés
Les panneaux décoratifs personnalisés permettent d’harmoniser
l’extérieur du réfrigérateur avec l’ensemble du décor de la cuisine
et d’utiliser des poignées personnalisées pour une plus grande
souplesse de design.
Dans certains cas, le fabricant des placards peut préférer
travailler avec un seul panneau usiné pour différentes
dimensions. Suivre les instructions relatives aux dimensions et au
placement du panneau pour s’assurer que les panneaux
décoratifs personnalisés conviendront parfaitement.
IMPORTANT:
■ Cette installation ne nécessite pas de panneaux de
remplissage ni de panneaux d’appui.
■ L’épaisseur nécessaire pour tous les panneaux est de ³⁄₄"
(1,91 cm).
Avec congélateur en bas
■ Pour les modèles de congélateur en bas avec une seule porte
de 36" (91,4
du réfrigérateur ne doit pas excéder 60
du panneau décoratif du tiroir du congélateur ne doit pas
excéder 25
■ Pour les modèles de 36" (91,4 cm) ou de 42" (106,7 cm), le
poids de chaque porte du réfrigérateur ne doit pas excéder
38 lb (17,2 kg) et le panneau décoratif du tiroir du congélateur
ne doit pas excéder 30
■ Pour les deux modèles, le poids du panneau décoratif de la
grille supérieure ne doit pas excéder 7
cm), le poids du panneau décoratif de la porte
lb (27,2 kg) et le poids
lb (11,3 kg).
lb (13,6 kg).
lb (3,2 kg).
Dimensions des panneaux
décoratifs
Modèle de 36" (91,4 cm) - Panneaux de porte et de tiroir
Côte à côte
■ Le poids du panneau décoratif de la porte du réfrigérateur ne
doit pas excéder 66 lb (29,9 kg) pour les modèles de 48" ou
65 lb (29,5 kg) pour les modèles de 42".
■ Le poids du panneau décoratif de la porte du congélateur ne
doit pas excéder 50 lb (23 kg) pour les modèles de 48" ou
49 lb (22,2 kg) pour les modèles de 42".
■ Le poids du panneau décoratif de la grille supérieure ne doit
pas excéder 8 lb (3,6 kg) pour les modèles de 48" ou 7 lb
(3,2 kg) pour les modèles de 42".
Modèle 36" avec congélateur en bas
Retrait ³⁄₈" ¹⁄₈"
A 35¹⁄₄" (89,54 cm) 35³⁄₄" (90,81 cm)
B 35¹⁄₄" (89,54 cm) 35³⁄₄" (90,81 cm)
20
Page 21

Modèle de 42" (106,7 cm)
A
B
59¹⁄₈"
(150,2 cm)
20¹⁄₂"
(52,07 cm)
PANNEAU TIROIR DU
CONGÉLATEUR
Poids maximal : 30 lb (13,6 kg)
PANNEAU DE
PORTE DU
RÉFRIGÉRATEUR
Poids maximal :
38 lb (17,2 kg)
A
PANNEAU DE
PORTE DU
RÉFRIGÉRATEUR
Poids maximal :
38 lb (17,2 kg)
B
A
Panneau de
porte du
congélateur
42" Modèle
Poids maximal
49 lb (22,2 kg)
48" Model
Poids maximal
50 lb (23 kg)
Panneau de porte
du réfrigérateur
42" Modèle
Poids maximal
65 lb (29,5 kg)
48" Model
Poids maximal
66 lb (29,9 kg)
81"
(205,7 cm)
Modèle de porte à double battant de 36" (91,4 cm) et de
42" (106,7 cm) - Panneaux de porte et de tiroir
Côte à côte - Panneaux de porte
Modèle 36" avec congélateur en bas et porte à double
battant
Retrait ³⁄₈" ¹⁄₈"
A 17⁹⁄₁₆" (44,61 cm) 17¹³⁄₁₆" (45,24 cm)
B 35¹⁄₄" (89,54cm) 35³⁄₄" (90,81cm)
Modèle 42" avec congélateur en bas et porte à double
battant
Retrait ³⁄₈" ¹⁄₈"
A 20⁹⁄₁₆" (52,23 cm) 20¹³⁄₁₆" (52,86 cm)
B 41¹⁄₄" (104,76 cm) 41³⁄₄" (106,05 cm)
Mo-
42 48
dèle
Retrait ³⁄₈" ¹⁄₈" ³⁄₈" ¹⁄₈"
A 17⁹⁄₁₆"
(44,61
B 23⁹⁄₁₆"
(59,85 cm)
cm)
17¹³⁄₁₆"
(45,24 cm)
23¹³⁄₁₆"
(60,48 cm)
20¹⁄₁₆"
(50,96 cm)
27¹⁄₁₆"
(68,74 cm)
20⁵⁄₁₆"
(50,17 cm)
27⁵⁄₁₆"
(69,37 cm)
21
Page 22

MODIFICATIONS POUR UNE INSTALLATION EN ARMOIRE
A
B
C
AVERTISSEMENT
Risque de basculement
Le réfrigérateur est lourd au sommet et bascule
facilement lorsqu'il n'est pas complètement installé.
Garder les portes fermées avec un ruban adhésif
jusqu'à l'installation complète du réfrigérateur.
Utiliser deux ou plus de personnes pour déplacer et
installer le réfrigérateur.
Le non-respect de ces instructions peut causer un
décès ou une blessure grave.
B
D
A
C
Grille supérieure
1. Retirer les trois vis fixant chaque plaque de montage sur le
dessus du réfrigérateur de chaque côté. Jeter les plaques de
montage mais conserver les vis pour fixer les deux
assemblages de supports de grille fournis dans cette trousse.
2. Retirer les deux vis fixant le séparateur d’air au logement de
l’appareil. Jeter le séparateur d’air mais réinstaller les vis à
leur emplacement initial.
A. Plaque de montage du support de grille
B. Séparateur d’air
C. Plaque de montage du support de grille
3. Aligner les trois trous d’un support de grille avec les trois
trous d’un côté de la caisse, tel qu’illustré. À l’aide des vis
retirées à l’étape 1, fixer le support de grille.
A
B
Installation du réfrigérateur
IMPORTANT : Suivre les “Instructions d’installation” du “Guide
d’installation” fourni avec le réfrigérateur.
1. Brancher à une prise à trois alvéoles reliée à la terre.
2. Déplacer le réfrigérateur jusqu’à sa position de service finale.
Installation du panneau de grille
1. Positionner le panneau de grille de l’armoire entre les
supports de grille situés de chaque côté du placard.
2. Faire glisser le panneau de grille vers le bas jusqu’à ce que le
haut du panneau de grille se place au-dessus des décalages
des supports de grille.
A. Assemblage de supports de grille
B. Vis
4. Répéter les étapes 2 et 3 pour installer l’autre support de
grille du côté opposé du réfrigérateur.
22
A. Décalage de support
B. Grille
C. Décalage de support
D.Grille
Page 23

Préparation des panneaux de porte en bois personnalisés
6⁵⁄₈"
(16,8 cm)
A
C
B
IMPORTANT : Pour une installation en armoire, au lieu de percer
des trous le long du/des bord(s) supérieur(s) des panneaux de
porte personnalisés, le gabarit de perçage (fourni avec le
réfrigérateur) doit être placé correctement.
REMARQUES :
■ Aucun ajustement du gabarit n’est nécessaire pour le bord
inférieur du/des panneau(x) de porte.
■ Aucun ajustement du gabarit n’est nécessaire pour le
panneau du tiroir de congélateur personnalisé.
1. Aligner le gabarit de perçage sur l’arrière du panneau de
porte de réfrigérateur personnalisé, de sorte que le haut du
gabarit soit décalé de 6³⁄₄" (17,2
la porte.
cm) du haut du panneau de
REMARQUE : La seule dimension de décalage est le
décalage de 6³⁄₄" (17,2
cm) du haut du panneau de porte.
A.Partie supérieure du panneau de porte du
réfrigérateur personnalisé
B. Gabarit de perçage
C. Partie inférieure du panneau de porte du
réfrigérateur personnalisé
2. Continuer d’utiliser le gabarit de façon habituelle le long de la
partie inférieure, du côté de la poignée du panneau de porte.
Achever l’installation
IMPORTANT : Revenir aux instructions fournies avec le réfrigérateur pour terminer l’installation. Voir la section “Préparation des
panneaux décoratifs personnalisés” dans le guide d’installation.
23
Page 24

W10295557D
®
/™ ©2014 Jenn-Air. Used under license by Maytag Limited in Canada. All rights reserved.
Usada bajo licencia por Maytag Limited en Canadá. Todos los derechos reservados.
Emploi sous licence par Maytag Limited au Canada.Tous droits réservés.
11/14
Printed in U.S.A.
Impreso en EE.UU.
Imprimé aux É.-U.
 Loading...