

Page 1

mmmJENN-AIR
Use and Care Manual
Radiant Range with
Convection Oven
Model SCE30600
r-
Page 2
Congratulations on your choice of a Jenn-Air range. Your range has three
radiant elements with one dua_ radiant element.
Your Jenn-Air self-cleaning oven combines the best of four cooking methods,
conventional baking or roasting, convection baking, convection roasting and
broiling.
The Jenn-Air convection oven is actually a conventional oven that circulates
heated air within the oven. As both bake and broil heating elements cycle on
and off with the thermostat, a fan keeps the heated air circulating around the
food. The constantly recirculating heated air in the convection oven strips
away the layer of cooler air that surrounds the food. Consequently, many
foods cook more quickly. Evenly distributed heat makes multiple rack
cooking possible. Convection roasted meats retain their natural flavor and
juiciness with less shrinkage than conventional roasting.
In addition to the many exclusive benefits of convection cooking, your Jenn-
Air oven is also a fine full featured conventional bake and broil oven. You can
cook your "old favorite" recipes as you have in the past. The conventional
bake oven also gives you the flexibility of preparing various foods when
convection cooking may not be as beneficial, as when cooking foods in
covered casseroles or clay pots. The broil element is convenient for top
browning and oven broiling of foods.
Before you begin cooking with your new range, please take a few minutes to
read and become familiar with the instructions in this book. On the following
pages you will find a wealth of information regarding all aspects of using your
new range. By following the instructions carefully, you will be able to fully
enjoy and properly maintain you rrange and achieve excellent results with the
food you prepare.
Should you have any questions about using your Jenn-Air range, write to us.
Be sure to provide the model number.
Jenn-Air Customer Assistance
c/o Maytag Customer Service
P.O. Box 2370
Cleveland, TN 37320-2370
Page 3
Appliance Usage
Before You Cal_ for Service ................................................................................ 43-44
Caring for your Range
Adjust Oven Temperature ....................... 41
Child Protection Lock ........................................................................................ 40
Cteaning Other Parts of Your Range .......................................................... 39-40
Levering Range Legs ........................................................................................ 42
Oven Light Bulb ................................................................................................ 42
Storage Drawer ................................................................................................. 42
Range Components ................................................................................................... 9
Safety Precautions ................................................................................................. 5-8
Using the Cooktop
Cookware ............................................................................................................ 14-! 5
Radiant Element Cooktop ................................................................................... 11-13
Surface Controls ...................................................................................................... 10
Using the Oven
Baking
Baking Chart ..................................................................................................... 25
Causes of Cake Failure .................................................................................... 26
Convect Baking ........................................................................................... 26-27
General Recommendations .............................................................................. 24
Broiling ................................................................................................................ 32-33
Clock Controls
Clock Controlled Baking or Roasting ........................................................... 22-23
Time of Day Clock ............................................................................................ 20
Timer................................................................................................................. 21
Oven Cleaning
Self-Cleaning Process ................................................................................. 34-38
Oven Operation
Oven Control Panel ..................................................................................... 16-17
Rack Positions .................................................................................................. 19
Setting Controls ................................................................................................ 18
Roasting
Convect Roasting ............................................................................................. 30
Frozen Convenience Foods ............................................................................. 31
General Roasting Recommendations .............................................................. 28
Roasting Chart .................................................................................................. 29
Page 4
MODELNUMBER
SERIAL NUMBER_
(numbers appear on the sedal plate on the oven front frame)
DATE PURCHASED
JENN-AIR DEALER FROM WHOM PURCHASED
ADDRESS
CITY
PHONE
AUTHORIZED JENN-AIR SERVICE CONTRACTOR
ADDRESS
CITY
PHONE
Impo_ant:Retainproofofpurchasedocumentsforwarrantysewice-
Page 5
Read before operating your range
All appliances -- regardless of the manufacturer -- have the potential
through improper or careless use to create safety problems. There-
fore the following safety precautions should be observed:
1. Be sure your appliance is properly installed and grounded by a
qualified technician.
2. Never use your appliance for warming or heating the room.
3. Children should not be left alone or unattended in area where
appliance is in use. They should never be allowed to sitor stand
on any part of the appliance.
4. Wear proper apparel. Loose-fitting or hanging garments should
never be worn while using the appliance.
5. Do not repair or replace any part of the appliance unless
specifically recommended in this manual. All other servicing
should be referred to an authorized Jenn-Air Service Contractor.
6. Flammable materials should not be stored in an oven or near
surface units.
7. Do not use water on grease fires. Smother fire or flame or use
dry chemical or foam-type extinguisher.
8. Use only dry potholders. Moist or damp potholders on hot
surfaces may result in burns from steam. Do not let potholder
touch hot heating elements. Do not use a towel or other bulky
cloth.
9. Use proper pan size. Many appliances are equipped with one
or more surface units of different size. Select cookware having
flat bottoms large enough to cover the surface unit heating
element. The use of undersized cookware will expose a portion
of the heating element to direct contact and may result in
ignition of clothing. Proper relationship of cookware to heating
element will also improve efficiency and performance.
10, Never leave surface units unattended at high heat settings. Boil
over causes smoking and greasy spillovers that may ignite.
Page 6
11.Glazedcookware --only certaintypes of glass, glass-ceramic,
ceramic,earthenware or other glazedcookpots aresuitable for
rangetop surface without breaking due to the sudden change
intemperature. Useonlysuchcookwareasyou knowhasbeen
approved for this purpose.
12.Cookware handles should be turned inward and not extend
over adjacentsurfaceheatingelements to avoidburns, ignition
offlammablematerialsandspillageduetounintentionalcontact
with the cookware.
13.CALITION -- Do not store items of interest to children in
cabinets above a range or on the backguard of a range --
childrenclimbingontherangetoreachitemscould beseriously
injured.
14.Donottouchsurface unitsorareasnear units,heatingelements
or interiorsurfaces of oven. Surface units or heating elements
may be hot even though they are dark in color. Areas near
surface unitsand interiorsurfaces ofanoven maybecome hot
enoughto cause burns. During and after use, do nottouch or
let clothing or other flammable materials contact these areas
untilthey have hadsufficient time to cool. Other surfacesmay
become hot enough to cause burns --among these surfaces
are the cooktop, the upper door frame and glass, oven vent
openingandsurfacesneartheopening,andthetopedgeofthe
control panel.
15.Usecarewhen openingoven door. Let hotairorsteam escape
before removing or replacing food.
16.Do not heat unopened food containers. Build-up of pressure
maycause container to burst and result in injury.
17.Keepoven vent ducts unobstructed. The ovenvent is located
at the back of the cooktop.
18.Always place oven racksindesired locationwhile oven is cool.
If rack must be moved while oven is hot, do not let potholder
contact hot heating element in oven.
19.Do not clean door gasket. The door gasket is essential for a
goodseal. Care should be taken not to rub, damage or move
the gasket.
Page 7
20.Do not use oven cleaners. No commercial oven cleaner or
oven liner protective coating of any kind should be used in or
around any part of the oven.
21.Clean only parts listed in this manual and use procedures
recommended.
22.CAUTION: BEFORESELF-CLEANINGTHEOVEN,REMOVE
FOOD,BROILER PAN AND OTHER UTENSILS.
23.Listenforfan. A fan noiseshouldbeheard during the broiland
cleaning cycles. If not, call a serviceman before self-cleaning
again.
24.Do not cookonglass-ceramic cookingsurface ifthecooktop is
broken. Cleaning solutions and spillovers may penetrate the
broken cooktop and create a shock hazard. Contact an
authorized Jenn-Air Service Contractor.
25.Clean glass-ceramic cooktops with caution. Ifwet sponge or
cloth is usedto wipe spillson a hot cooking area, be careful to
avoid steam burns. Some cleansers can produce noxious
fumes if applied to a hot surface.
26.Do not operate with damaged cooking element after any
product malfunction until proper repair has been made.
27.Keep all switches "OFF"when unit is not in use.
28.Do not allow aluminum foil to contact heating elements.
29.Do not use aluminum foil to line oven bottom. Installation of
these liners may result in electric shock or fire hazard.
30.WARNING: To reduce the risk oftipping of the appliance,the
appliancemustbesecuredbyproperlyinstalledanti-tipdevices.
To checkif devices areinstalled properly, removethe storage
drawer and verify that the anti-tip devices are engaged.
31.This appliance has been tested for safe performance using
conventionalcookware. Do notuseanydevices oraccessories
that are not specifically recommended in this manual. Do not
use eyelid covers for the surface units, stovetop grills, or add-
on convectionsystems. The useofdevicesoraccessoriesthat
are not expressly recommended in this manual can create
serious safety hazards, result in performance problems, and
reduce the life of the components of the appliance.
Page 8
32.PREPARED FOOD WARNING: Follow food manufacturer's
instructions. If a plastic frozen food container and/or its film
cover distorts, warps or isotherwisedamaged duringcooking,
immediatelydiscardthefood anditscontainer. The food could
be contaminated.
IMPORTANT SAFETY NOTICE AND WARNING
The California Safe Drinking Water and Toxic Enforcement Act of 1986
(Proposition 65) requires the Governor of California to publish a list of
substances known to the State of California to cause cancer or repro-
ductive harm, and requires businesses to warn customers of potential
exposures to such substances. Users of this appliance are hereby
warned that when the range is engaged in the self-clean cycle, there
may be some low level exposure to some of the listed substances,
including Carbon Monoxide. Exposure to these substances can be
minimized by properly venting the range to the outdoors during the
self-clean cycle.
-SAVETHESEINSTRUCTIONS-
Page 9
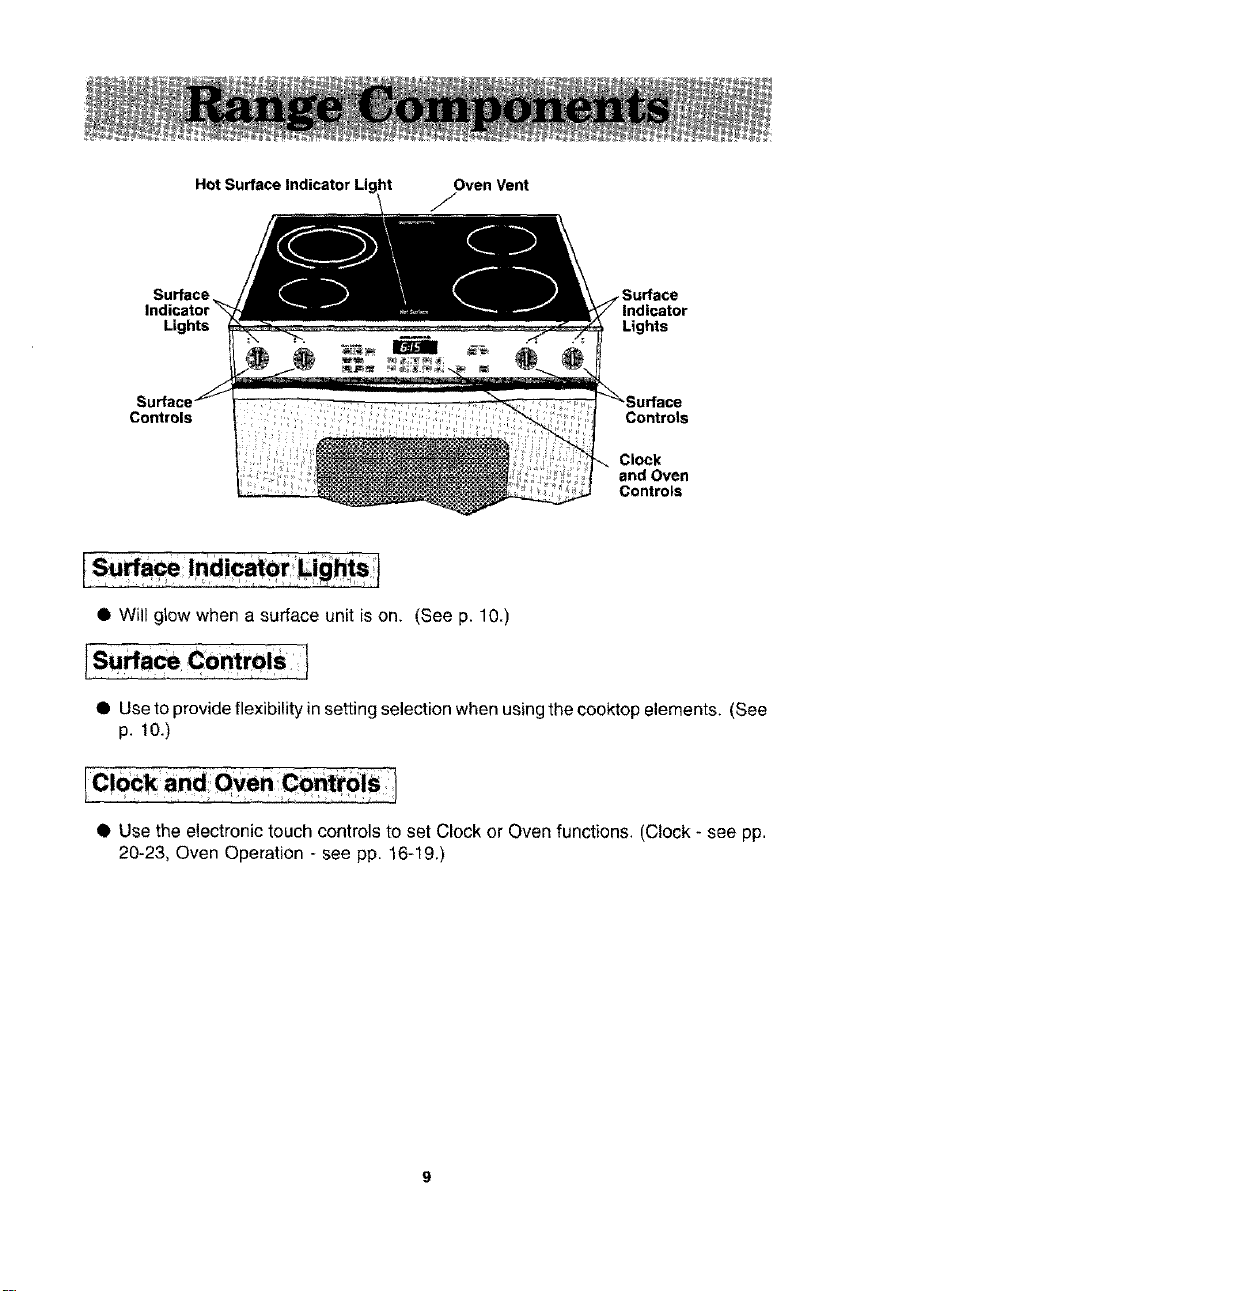
Hot SurfaceIndicator Oven Vent
J
Surface
Lights
Controls Controls
Indicator
Lights
Clock
and Oven
Controls
Q Will glow when a surface unit is on, (See p. 10.)
I Use to provide flexibility in setting selection when using the cooktop elements. (See
p. 10.)
• Use the electronic touch controls to set Clock or Oven functions. (Clock - see pp.
20-23, Oven Operation - see pp. 16-19.)
Page 10

• Sincethecontrotsareapush-tumtype, theymustbepushedinbeforeturning. Toset(from
the OFF position), push in on the control knob and tum it] either direction to desired setting.
• When the control isin any position, other than OFF, it may be turned in any direction without
pushing in.
• For the left rear dual element control, push the control knob in and turn right for the large
element or left for the small element.
• A green indicator light will glow when a surface heating element is ON. There are four
indicator lights, one for each element.
The hot surface light will glow red to indicate that a cooking area is hot. This light wilt remain
on until the area has cooled.
1. Left rear dual element _ _ _ _
2. Left front element _ _a_ _
3. Right front element L_____ __\ / ...... _i_j
4. Right rear element _. _. _. L.
The size and type of cookware and the amount and type of food being cooked will influence the
setting needed for best cooking results. Electrical voltage may also vary, which will affect the
needed control setting. Thesettingindicatedshouldserveasaguidewhileyoubecomefamiliar
with your range.
Hi A fast heat to start cooking quickly, to bring liquids to a boil, to preheat oil for deep fat
frying.
7-10 (Medium High) For fast frying or browning foods, to maintain rapid boil of large
amounts of food, to maintain oil temperature for deep fat frying.
5-6 (Medium) For foods cooked in a double boiler, sauteing, slow boil of large amounts
of food and most frying.
3--4 (Medium Lo) To continue cooking foods started on higher settings.
Lo.-2 Maintaining serving temperatures of foods, simmering foods, melting butter or
The controls offer flexibility insetting selection. On settings other than Hi, you may adjust the
control above or below the numbered setting for best results. Suggested settings are provided
as general guidelines.
chocolate.
10
Page 11
When an element is turned ON, the element will heat up and the red glow of the
heating element can be seen through the glass-ceramic top. It is normal to see the red
glow of the element whenever it cycles on. The elements will cycle on and off for all
control settings except Hi. However, it may also cycle on Hi if improper cookware is
used.
• BEFORE FIRST USE CLEAN COOKTOP. (See p. 39.)
• For best results, always use recommended cookware.
• Different cookpots and different amounts of food being prepared will influence the
control settings needed for best results. For fastest cooking, start with the surface
control on HI for one minute; then turn the control to the lower desired setting.
Covering pans, whenever possible, speeds cooking and is more energy efficient.
• The glass-ceramic cooking area retains heat for a period of time after the elements
have been turned off, Put this retained heat to good use. Turn the elements off a
few minutes before food is completely cooked and use the retained heat to complete
the cooking. Because of this heat retention characteristic, the elements wi!l not
respond to changes in heat settings as quickly as coil elements. In the event of a
potential boilover, remove the cookpot from the cooking area.
• When preparing foods which can be easily scorched or overcooked, start cooking
at a lower temperature setting and gradually increase temperature as needed.
• A higher setting than normal may be necessary when using cookpots made with
material that is slow to conduct heat, such as cast iron.
• A lower setting can be used when cooking small quantities of foods or when using
a cookpot that conducts heat quickly,
IMPORTANT
• Do not use wire trivets, fire rings, pads or any such item between the cookware
and the element.
• Do not cook foods directly on cooktop.
• Do not allow pan to boil dry as this could damage the cooktop and the pan.
• Do not slide heavy metal or glass cookpots across surface since these may
scratch the surface.
• Do not use or place plastic items anywhere on cooktop.
1!
Page 12
• Do not allow plastic objects, sugar, or foods with high sugar content to melt onto the
hot cooktop. Melted materials can cause permanent damage to the cooktop. If you
accidentally melt anything onto the cooktop or a sugary solution boils over, remove
it immediately while the cooktop is still hot. Carefully, use a single edge razor blade
held with a potholder to scrape the melted material or sugary boilover to a cooler
area of the cooktop. Use several layers of paper towels to wipe up the spillover
being careful not to burn yourself. When the element has cooled, use the razor
blade to scrape off the remaining soil and clean as you would for heavy spills. (See
p. 39.)
• Do not use aluminum foil or foil-type containers under any circumstances. Alumi-
num foi! will damage the cooktop if it melts onto the glass. If metal melts on cooktop,
do not use. Catl an authorized Jenn-Air Service Contractor.
• Do not use the glass-ceramic cooktop as a cutting board.
• Do NOT use abrasive cleansing powders or scouring pads (including metal scouring
pads), which will scratch the cooktop.
• Do NOT use chlorine bteach, ammonia, rust removers, oven cleaners, or other
cleanser not specifically recommended for use on glass-ceramic.
• Test cast ironware since atl are not flat. Also be cautioned against possible "impact
damage" should the heavy cookpot be dropped on the glass-ceramic surface.
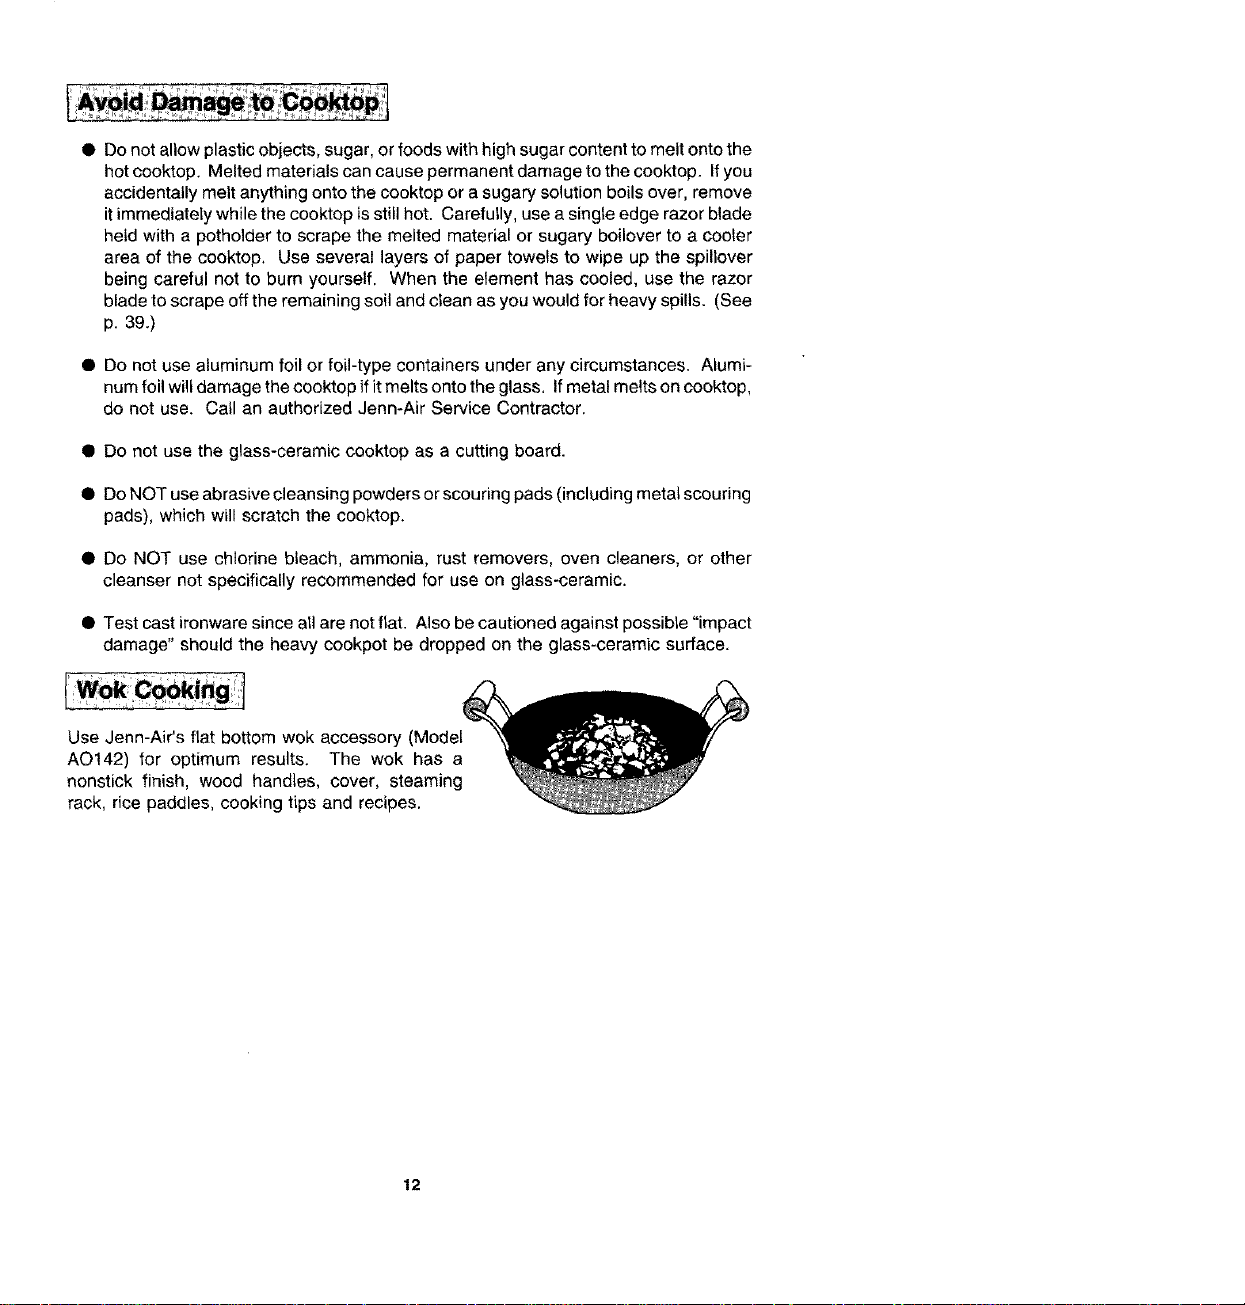
Use Jenn-Air's flat bottom wok accessory (Model
AO142) for optimum results. The wok has a
nonstick finish, wood handles, cover, steaming
rack, rice paddles, cooking tips and recipes.
12
Page 13
• Make sure bottoms of cookpots are always clean and dry. (Soil from the cookpot
bottom can be transferred to the cooktop surface.) Before using cookpots on the
glass-ceramic cooktop for the first time, and periodically as needed, clean the
bottoms with scouring pads or other cleansers. Rinse and dry thoroughly.
• Make it a practice to wipe cooktop surface with a clean damp cloth or paper towel
before each use; dry thoroughly. Invisible spatters, dust specks, cleansers orwater
can cause stains that appear after unit is heated. A sponge or dishcloth which is
not clean will leave film and soil laden detergent water which may cause stains on
surface after area is heated.
• When frying, use a spatter shield to reduce spattering.
• Use correct control settings and cookware large enough to hold food and liquid to
prevent boilovers and splattering.
li If a bad spiltover occurs while cooking, spills may be cleaned from the cooktop while
it is hot to prevent a tough cleaning chore later. Using extreme care, wipe with a
clean towel. Be careful to avoid burns from steam or hands touching the hot
cooktop°
• See cleaning instructions on page 39,
13
Page 14
To achieve optimum cooking performance, use heavy gauge, flat, smooth bottom
cookpots that conform to the diameter of the radiant element (no more than one inch
overhang). Proper cookpots wil! minimize cooking times, use less electricity, cook food
more evenly and require less water or oil.
Cookpots with thin, uneven bottoms do not adequately conduct heat from the radiant
element tothe food in the cookpots which results in hot spots, burned or underdone food.
Using bad cookpots also requires more water, time, and energy to cook food.
• Select heavy gauge cookpots. Usually heavy gauge cookpots will not change
shape when heated.
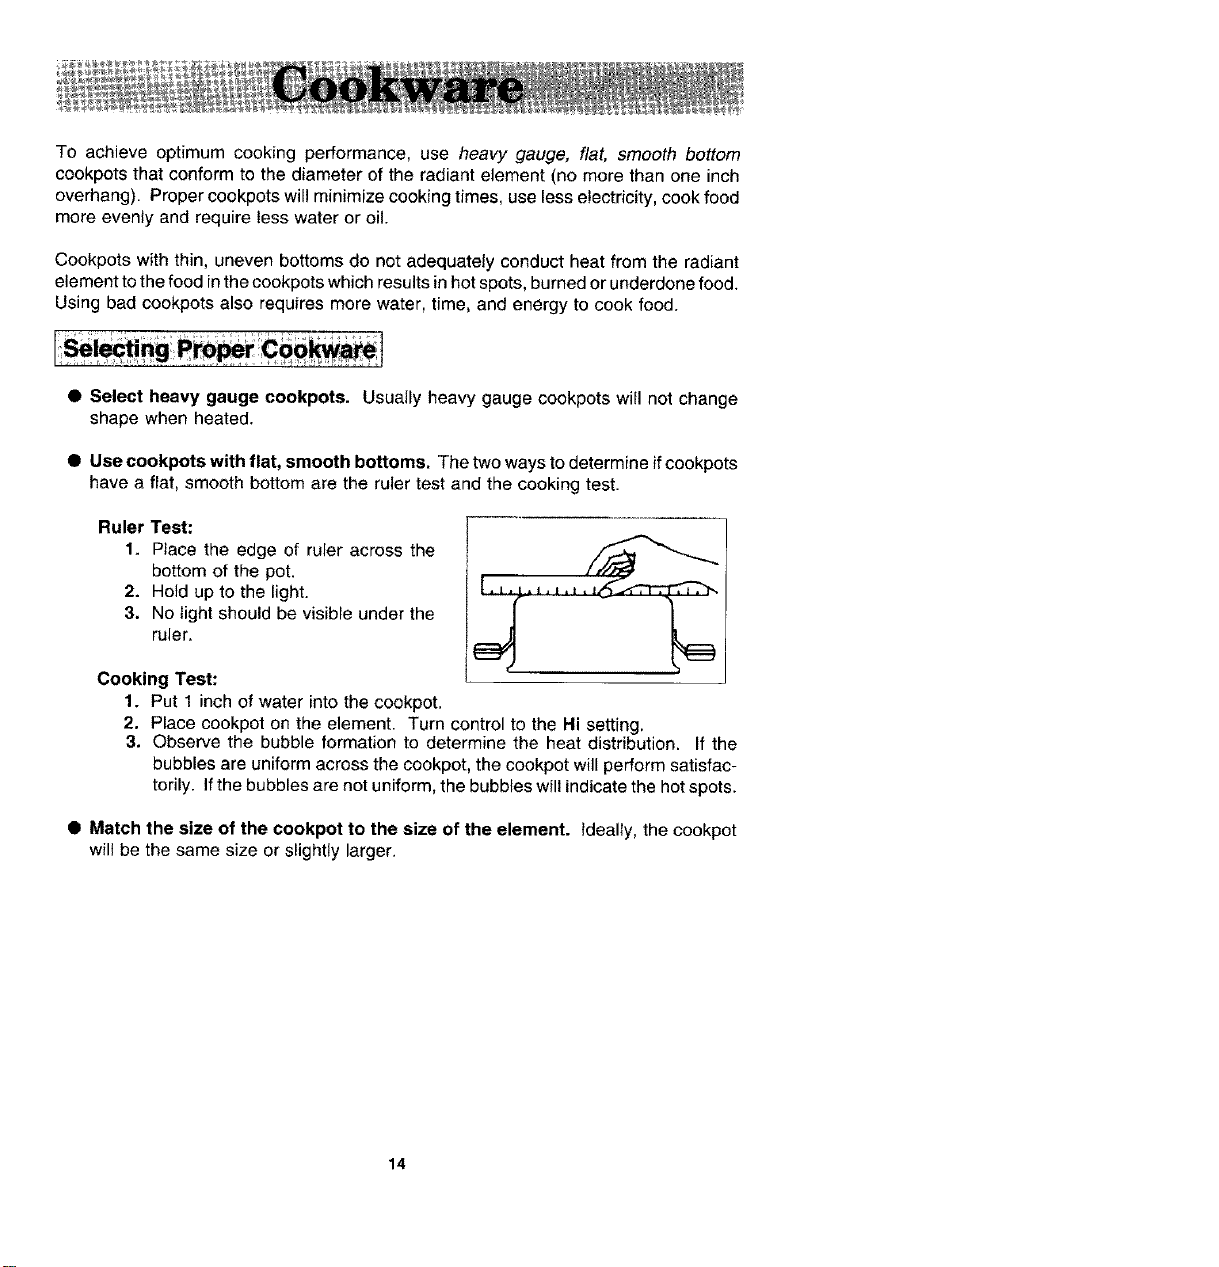
• Use cookpots with flat, smooth bottoms. The two ways to determine ifcookpots
have a flat, smooth bottom are the ruler test and the cooking test.
Ruler Test:
1. Place the edge of ruler across the
bottom of the pot.
2. Hold up to the light.
3. No light should be visible under the
ruler,
Cooking Test:
1. Put 1 inch of water into the cookpot.
2. Place cookpot on the element. Turn control to the Hi setting.
3. Observe the bubble formation to determine the heat distribution. If the
bubbles are uniform across the cookpot, the cookpot will perform satisfac-
torily. If the bubbles are not uniform, the bubbles will indicate the hot spots.
• Match the size of the cookpot to the size of the element. Ideally, the cookpot
will be the same size or slightly larger.
14
Page 15

• Do not use cookware that extends more than 1inch beyond the edge of the element.
@ Do not use a small cookpot on a large element. Not only can this cause the element
to require more energy and time, but it can atso resutt in spiIIovers burning onto the
element which cause extra effort in cleaning.
• Do not use nonflat specia_y {terns that are oversized, uneven or do not meet
proper cookware specifications such as round bottom woks with rings, griddles,
rippled bottom canners, lobster pots, large pressure canners, etc. For wok cooking,
use Jenn-Air flat bottom wok (Model AO142). (See p. 12.)
Acceptable canning pots should not be oversized and must have a flat bottom. When
canners do not meet these standards, the use of the Hi heat setting becomes exces-
sive and may result in damage to the cooktop. In addition, water may not come to a
boil and canners may not reach 10 lb. of pressure.
The acceptable canning procedure uses the Hi setting just long enough to bring the
water to a boiT, then Powerthe setting to maintain the water temperature.
Heavy gauge cookpots with flat, smooth bottoms wil! usually work in a similar way.
However, there are some differences in the cooking performance of various materials.
• Aluminum cookpots heat quickly and evenly. Best suited for simmering, braising,
boiling and frying.
• Stainless steel ceokpots will evenly distribute heat if constructed of tri-ply or
combined with other metals such as aluminum and copper. Use for cooking
functions similar to aluminum.
• Cast iron cookpots are slow to heat but cook more evenly once temperature is
reached. Use for long term low heat cooking or for browning and frying.
• Glass ceramic, earthenware, heat-proof glass or glazed ceokpots can be used if
recommended by the manufacturer for cookpot cooking. Do not use with trivets.
Best used on low to medium control settings.
• Porcelain enamel-on-steel or porcelain enamel-on-cast iron should be used
according to manufacturer's directions. Do not allow to boil dry.
15
Page 16

The control panel is designed for ease in programming. The Display Window features
Indicator Words wh{ch will flash to prompt you for the next step.
To program
1. Touch the function pad to give command desired.
2. Touch the appropriate number pads to enter time or temperature.
Note; Five seconds after entering the number, the time or temperature will
automatically be entered. If more than five seconds elapse between touching a
function pad and touching a number pad, the control is not set and Display will return
to previous DispLay.
O_en Oont,ols
Function Pads
Use for conventional baking or roasting.
Use for top browning oroven broiling.
Use to set self-cleaning process.
Conv_
RoaSt
Use for convect roasting.
B_e
•stop
•¢_k ¸
Use for convect bakin 9.
Use for clock controlled cooking and cleaning when delayed start is desired,
(For lock function see page 40.)
Use for ctock controlled cooking.
(For lock function see page 40.)
Cancels all programming except Timer.
Use to signal expiration of a time period up to 11 hours and 55 minutes.
Use to signal expiration of a time period up to 11 hours and 55 minutes.
Use to set time of day.
Use to turn oven light on and off.
16
Page 17

Number Pads
Use to set time or temperature.
Oven Light Pad (Control Panel)
The ovenlightautomatically comes onwhenevertheovendoor isopened.When door isclosed,
touchtheOven Light Pad to turnovenlight onoroff. Note: A beep will sound every time the
Oven Light Pad istouched.
Display Window
Shows time of day, timer, and oven functions.
BELAYSTy1 _Oal_ 11Ml_
Display Numbers:
• Show time ofday.
• Countdown oftime remaining when usingtimefunctions.
• Show temperature of oven as it rises to reach programmed temperature and the set
temperature once it is reached.
• Recall programmed temperature ortime whencommanded.
• Rounding of Display Numbers: Temperature range is 100°to 550°F and can beset in 5°
increments, When setting temperature, the control willround it to the nearest 10°, For
exampte, if2370isentered, the controlwitl roundthetemperature to 240°.
Prompts:
• Serve as a reminder to shut ovendoor, if it is open,for self-cLeaning operationwhen the
word, door, is displayed.
• "Err"will appear inthe Display when an impropertemperature or time has been entered.
"Err" wiltflash and a beep will be heard three times. Then, the Display will return to the
previous Display before the error was entered.
Indicator Words:
• Flashto prompt next step.
• (ndicatestatus of programmed function.
• Show programmed function when recalled.
=TOe frM_ _._ 01rml
Chimes vs. Beeps
• A chime sound isused to designate the end of a timing or cooking operation.
• A beep sound willbe heard when any padistouched. Aseries ofshort beeps are used to
designate an incorrect entry, door is open when set for a serf-clean and afault code.
End of Cycle Chimes:
• The end ofcyclechimes is four short chimesfollowed by "reminder" chimesfor aspecified
length of time, until you cancel that function. For the Timer function, there are two
"reminder" chimesevery30 seconds for five minutes. Forthe Timed Cook functions, there
is one"reminder" chime everyminutefor ten minutes. Tocancelthese"reminder" chimes,
touchthe appropriate padagain (eithertheTimer Pad orCook Time Pad). You may also
touchthe Cancel Off Pad to cancelthe "reminder" chimes, but itwillalso cancel all other
ovenfunctions.
• Ifyouwould liketo _t_ the "reminder" chimes entirely, touch and holdthe Cancel
Off Pad for twelve seconds (this wilt _ the initialfour short chimes).
• To returnthe "reminder" chimes, touchand hotdthe Cancel Off Padfor twelve seconds.
I NOTE: Tochangetheoventoa24hourclockorCelsius(C)degrees, contactyourauthorized 1
Jenn-Air service contractor or dealer,
17
Page 18

To set oven on Bake or Convect Bake or Convect Roast
1. Place oven racks on proper rack positions. (See p. 19.)
2. Touch Bake Pad or Cenvect Bake Pad or Cenvect Roast Pad.
Indicator Words BAKE or CONV BAKE or CONV ROAST will flash and three
dashes will be shown.
Note: if more than five seconds elapse between touching a pad and touching a
number pad, Display will return to previous Display.
3, Touch the appropriate number pads for desired oven temperature.
Allowable temperature range is 100°to 550°F. After five seconds the oven wi!l begin
to preheat. The Indicator Words ON, PREHEAT, and either BAKE or CONV BAKE
or CONV ROAST will appear in the Display. The temperature shown will be 100°
or the oven temperature whichever is higher,
Example: If at 10 o'clock you set the oven for 350° for convect baking, after five
seconds the Display will show:
During the preheat, the Display will show a dse in 5°increments until programmed
temperature is reached. When the oven is preheated, the oven will chime, the ON
and PREHEAT Indicator Words will go off, and programmed oven temperature will
be displayed.
Note: Oven will preheat for approximately 7 to 11 minutes.
Important: Whenever ON appears in the Display, the oven is heating.
To recall temperature set during preheat: Touch the appropriate Bake or
Convect Bake Pad or Convect Roast Pad. Temperature will be briefly displayed,
then will automatically return to on-going program.
To change temperature set: Touch appropriate Bake Pad or Convect Bake Pad
or Convect Roast Pad and the appropriate number pads for the new desired
temperature.
Note: If you are lowering the temperature below the current oven temperature, the
word PREHEAT and ON witlappear briefly inthe Display and the preheat chime will
sound. Then, the Display wil! show programmed temperature and Indicator Word
BAKE or CONV BAKE or CONV ROAST only.
4. Touch Cancel Off Pad to turn oven off at end of baking. The oven will continue
operating until the Cancel Off Pad is touched.
18
Page 19

The rack positions noted are generally recommended for the best browning results and
most efficient cooking times. For many food items, excellent results can be achieved
when using one of several different rack positions. Refer to baking and roasting sections
for recommendations for specific foods.
Different Racks
Two flat racks and one offset rack are packaged with your oven. The use of the offset
rack is denoted in the list below and the charts as an "o" after the rack number.
--4 (fiat rack)
--30 (offset rack)
--1 (fiat rack)
Rack Uses
Rack Position #40 (offset rack on #4):
Most broiling.
Rack Position #3:
Most baked goods on cookie sheets, cakes (sheet and layer),
Rack Position #30 (offset rack on #3):
Most baked goods on cookie sheets, frozen convenience foods, fresh fruit pie,
cream pie, layer cakes, main dish souffle.
Rack Position #2:
Roasting small cuts of meat, cakes (tube, bundt or layer), frozen fruit pie, pie shell,
large casseroles.
Rack Position #20 (offset rack on #2):
Roasting small cuts of meat, loaves of bread, angel food cake.
Rack Position #1:
Large cuts of meat and large poultry, ange_ food cake, _oaves of bread, custard pie,
dessert souffle.
Multiple Rack Cooking:
Two racks, use #20 and #4. Three racks, use #1,#3o, and #4.
19
Page 20

Whenelectricalpowerissuppliedor afterpowerinterruption,thelastclocktime
displayedbeforepowerwasinterruptedwillflash.Timewilladvanceandcontinueto
flashuntilclockisreset.
To set Time of Day
1. Touch Clock Pad,
Indicator word TIME will flash and time digits will appear in the Display. (If more than
five seconds elapse between touching Clock Pad and touching a number pad, the
Clock Pad must be touched again in order to set clock.)
2. Touch the appropriate number pads until correct time of day appears inthe Display.
Note: Five seconds after touchingthe number pads, thetime of day will autome.tically
be entered.
IMPORTANT
Q TO recall time of day when another time function is showing: Touch Clock
Pad.
• To change time of day set on the clock: Repeat steps 1 and 2 above.
• Clock time cannot be changed when oven has been programmed for Timed Bake,
Timed Convect Bake, Timed Convect Roast or Self-clean. Cancel program before
reprogramming clock.
2O
Page 21

Important: This interval Timer can be used to remind you when a period, upto 11 hours
and 55 minutes, expires. It can be used independently of any other oven activity and
can be set while anottler oven function is operating. The Tim_,_rdoes not control the vo_v_Q
To set Timer
1, Touch a Timer Pad.
The Indicator Word TIMER and either 1 or 2 flashes and "0Hr:00" appears in the
Display.
2. Touch the appropriate number pads until the desired number of minutes or hours
and minutes appear in the Display.
Note: ff more than five seconds elapse between touching a Timer Pad and a
number pad, the Timer Pad must be touched again.
Example: To set Timer One for 5 minutes, touch the Timer One Pad and the
number pad "5". After five seconds, the Display wil! show:
Example: To set Timer Two for 1 hour and 30 minutes, touch the Timer Two Pad
and the number pads "1, 3, 0". After five seconds, the Display will show:
1:30
Countdown will start after five seconds. Countdown will have display precedence
over other time functions. If both Timers are set, the timer with the least amount
of time remaining will have display precedence,
At the end of time set, the Timer will chime four times and "End" will appear in the
Display, If Timer is not cancelled (see below), "End" will remain in the Display and
there will be two chimes every thirty seconds for five minutes.
To cancel Timer
1. Touch and hold the Timer Pad for four seconds.
OR
2, A. Touch the Timer Pad,
B. Touch "0" number pad, Five seconds later the Timer will be cancelled,
NOTE: ouching Cancel Off Pad to cancel chimes will cancel ALL selected oven ]
programming.
21
J
Page 22

you want _gto start
To set oven to start immediately and shut off automatically
1. Touch Bake Pad or Convect Bake Pad or Convect Roast Pad.
indicator Words BAKE or CONV BAKE or CONV ROAST will flash and three dashes
will be shown.
2. Touch the appropriate number pads for desired oven temperature.
After five seconds the oven will begin to preheat. The Indicator Words ON,
PREHEAT, and BAKE or CONV BAKE or CONV ROAST will appear in the Display.
The temperature shown will be 100° or the temperature of the oven, whichever is
higher. Example: Ifat 10 o'clock yeu set the oven for 350° for convection baking,
the Display will show:
I0:00 °
During the preheat, the Display will show a rise in 5Qincrements until programmed
temperature is reached. When the oven is preheated, the oven will chime, the ON
and PREHEAT indicator Words will go off, and programmed oven temperature wili
be displayed. Important: Whenever ON appears in the Display, the oven is heating.
3. Touch Cook Time Pad.
Indicator Words COOK TIME will flash and Display wil_ show "0 HR:00".
4. Touch the appropriate number pads to enter cooking hours in five minute
increments. Hours are to left of colon and minutes to right of colon. (Allowable range
is 5 minutes to 11 hours and 55 minutes.) Example: If cooking time selected for
the oven {s 2 hours and 30 minutes, the Display witl show:
After five seconds, the time of day returns to the Display.
Important: Oven will preheat for approximately 7 to 11 minutes. At end of
programmed Cook Time, oven wilt shut off automatically and retained heat will
continue to cook the food. Clock controlled cooking is not recommended for baked
items that require a preheated oven, such as cakes, cookies, pies, breads. For
these foods, place food in preheated oven, then use Timer to signa_ end of baking
time.
At the end of programmed Cook Time, the oven will shut off automatically and a
chime will be heard four times and "End" will appear in the Display. If oven is not
cancelled, "End" will remain in the Display and there will be one chime every minute
for ten minutes.
22
Page 23

To set oven to start at future time and shut off automatically
%4. Fotlow preceding Steps 1-4 on page 22.
5, Touch Stop Time Pad.
Indicator Words STOP and TIME will flash. Display will show the calculated
stop time based on current time of day and cook time.
6. Touch the appropriate number pads to enter desired stop time.
A stop time can only be accepted for later in the day. Note: Since food continues
to cook if left in the oven, it is suggested that the crock controls be used primarily
to start the oven when no one is in the kitchen. Provisions should be made to have
the food removed as soon as the chime has sounded.
Example: Ifat 10o'clock you set the oven for 350 °convection baking and 2 hours
and 30 minutes cooking time, the calculated stop time would be "12:30". The
Display would show:
12:90 !oo °
If you want the stop time to be 1 o'clock, touch the number pads "1,0,0". Five
seconds later, the Display will briefly show the start time:
10:9 0 o°
DELAySl_RT 11ME
After five seconds, the Display will return to current time of day, thus showing:
I 0:00 I
At the end of the delayed period, the DELAY Indicator Word wit1go off and the oven
will begin to heat. 100° will be shown. As the oven heats, the Display will show
a rise in increments of 5° until programmed temperature is reached.
At the end of programmed Cook Time, the oven will shut off automatically and a
chime will be heard four times and "End" will appear in the Display. If oven is not
cancelled, "End" will remain in the Display and there wilt be one chime every
minute for ten minutes.
IMPORTANT
D To recall time function programmed: Touch the appropriate time pad,
• To cancel timed function only: Hold Cook Time Pad for four seconds. This wilt
only cancel cook time and stop time, not programmed bake mode.
• If more than five seconds elapse between touching a function pad and touching
appropriate number pads, the oven is not set and Display will return to previous
Display.
i .......
23
Page 24

• When cooking foods for the first time in your new oven, use recipe cooking times
and temperatures as a guide,
• Use tested recipes from reliable sources.
• Preheat the oven only when necessary. For baked foods that rise and for dcher
browning, a preheated oven is better. Casseroles can be started in a cold oven.
Preheating takes from 7 to 11 minutes; place food in oven after PREHEAT Indicator
Word cycles off and control chimes once.
• Arrange oven racks before turning on oven, Follow suggested rack positions on
pages 19 and 25.
• Allow about 1to 11/zinches of space between the oven side walls and pans to allow
proper air circulation.
• When baking foods in more than one pan, p(ace them on opposite corners of the
rack. Stagger pans when baking on two racks so that one pan does not shield
another unless shielding is intended. (See above left.)
• To conserve energy, avoid frequent or prolonged door openings. At the end of
cooking, turn oven off before removing food.
• Always test for aloneness (fingertip, toothpick, sides pulling away from pan). Do not
rely on time or brownness as only indicators.
• Use good quality baking pans and the size recommended in the recipe.
• Dull, dark, enameled or glass pans will generally produce a brown, crisp crust. Shiny
metal pans produce a light, golden crust.
• Frozen pies in shiny a{uminum pans should be baked on a cookie sheet on rack 2
or be removed to a dul} or glass pan.
• Ifedge of pie crust browns too quickly, fold a strip of foil around rim of crust, covering
edge. (See above right.)
24
Page 25

ForConventionalBakeusetheBake Pad.
* An "o" after a rack number implies that the offset rack should be used.
"* The times given are based on specific brands of mixes or recipes tested. Actual
times wil depend on the ones you bake.
"** 3"he Convect Bake temperature is 25"F _owerthan recommended on package mix
or recipe.
25
Page 26

!
i
e ..... _"___=. '
............. .... ..........
........, '_,TO0_,_ _ ,
_ _v_ _n_'Ot _x;_ ;_ _
.................. 0r,_,_meb_ _
Use convection baking for breads, cakes, cookies and pies.
As a general rule, when using recipes or prepared mixes developed for a
conventional bake oven, set the oven temperature 25oF lower than the recipe
recommended temperature. Times will be similar to or a few minutes less than
recipe recommended times. The chart on page 25 compares times and temperatures
of many baked foods, Use this as a reference.
For better browning, place cookie sheets and baking pans lengthwise, side to side
on the rack.
Cookie sheets should be without sides and made of shiny aluminum, The best size
to use for cookie sheets is 16" x 12" or smaller.
26
Page 27

For best results, bake foods on one rack at a time as described in this manual. However,
very good results can be obtained when baking quantities of foods on multiple racks.
Quantity cooking provides both time and energy savings.
Convect Bake is suggested for most multiple rack cooking, especially three rack
cooking, because the circulating heated air results in more even browning. For two rack
cooking, the conventional bake oven provides very good baking results especially when
pans can be staggered, such as with tayer cakes and fresh pies.
Many foods can be prepared on three racks at the same time. These are just a few
examples: cookies, cupcakes, rolls, biscuits, muffins, pies, pizzas, appetizers, and
snack foods,
To obtain the best results in multiple rack cooking, follow these suggestions:
• Use temperature and times in this manual as a guide for best results.
• For two rack baking, rack positions #20 and 4 are beet for most baked products but
positions #2 and 4 also provide acceptable results.
• For three rack baking use positions #1, 3o and 4. One exception is pizza. (See p.
31 .)
• Since foods on positions #1 and 4 will usually be done before foods on position #3o,
additional cooking time will be needed for browning foods on the middle rack. An
additional minute is needed for thin foods such as cookies. For foods such as
biscuits, rolls, or muffins, allow 1 to 2 more minutes. Frozen pies and pizzas, which
should be baked on a cookie sheet, need about 2 to 4 more minutes.
• Stagger small pans, such as layer cake pans, in the oven.
• Frozen pies in shiny aluminum pans should be placed on cookie sheets and baked
on rack positions #1, 3o and 4,
• Cookie sheets should be placed lengthwise, side to side, in front of the fan for more
even browning.
• Oven meals are recommended for energy conservation. Use rack positions #1 and
3o or #20 and 4 and Convect Roast.
27
Page 28

• Preheating is not necessary.
• For open pan roasting, place meat or poultry on the slotted portion of the two-piece
pan included with the oven. Do not add water to the pan. Use open pan roasting
for tender cuts of meat. Less tender cuts of meat need to be cooked by moist heat
in a covered pan.
• For best results, a meat thermometer is the most accurate guide to degree of
doneness. The tip of the thermometer should be located in the thickest part of a
roast, not touching fat, bone, or gdst_e. For turkeys and _arge poultry products,
insert the tip of the thermometer into the thickest part of the inner thigh.
• Ptace roast fat side up to allow self basting of meat dudng roasting.
• Since meats continue to cook after being removed from the oven, remove roast
from oven when it reaches an interna_ temperature about 5 degrees below the
temperature desired.
• For less (oss of juices and easier carving, allow about 15 minutes "standing time"
after removing meat from oven.
• For best results in roasting poultry, thaw completely. Due to the structure of poultry,
partially thawed poultry will cook unevenly.
• If preferred, tender cuts of meat can be roasted in the conventional bake oven by
following the general recommendations given above. However, meats will roast
more quickly in the convect oven using Convect Roast.
• Conventional bake is best for less tender cuts of meat that require a longer, moist
heat method of cooking. Follow your recipe for times and temperatures for covered
meats.
• Meats cooked in oven cooking bags, dutch ovens, or covered roasting pans are best
cooked in the conventional bake oven using the Bake Pad.
• Use meat roasting charts in standard cookbooks for recommended times and
temperatures for roasting in a conventional bake oven.
28
Page 29

Chart time is based on thawed meats only. For Conventional Roasting use the Bake
Pad.
*When using the Convect Roast mode, there is no need to preheat the oven or to tower the tem-
perature from conventional roast temperatures.
**Not recommended for convection cooking. Most precooked hams have to be covered while
roasting, thus there woutd be no time savings when using the convect mode.
29
Page 30

• Tender cuts of meat and pouttry can be roasted to a rich golden brown in the
convection oven, Follow general recommendations for roasting and use Convect
Roast.
Q Refer to convection meat roasting chart for recommended cooking temperature
and time. The chart can serve as a guide to help plan meaI serving time.
• Minutes per pound witl vary according to the size, shape, quality and initial
temperature of meat as well as the electrical voltag_ in your area. Times are based
on refrigerator cold meat.
• A large cut of meat will usually require fewer minutes per pound to roast than a
smaller cut of meat.
• Do not use a roasting pan with high sides; use pan provided with oven.
• Do not cover meat. Allow the circulating hot air to surround the meat and seal in
the juices.
• Since the breast meat on a large turkey cooks more quickly than the thigh area,
place a "foil cap" over the breast area after desired brownness is reached to prevent
everbrownLng. (See above.)
• A stuffed turkey will require an extra 30 to 60 minutes, depending on size. Stuffing
should reach an internal temperature of 165°F.
Convect Roasting: Frozen to Finish
Meats (except poultry) may be roasted frozen to finish. Follow these guidelines for the
most satisfactory results.
• Use temperatures for roasting fresh meats as recommended by most cookbooks.
Generally, most meats are roasted at 325°F. For best results do not use
temperatures below 300°F,
• Use times for roasting fresh meats given inyour favorite cookbooks as approximate
guides for roasting frozen meats. Roasting times will vary due to factors such as
coldness of meat, size, quality, or cut, In general, roasting times for frozen to finish
in the convection oven will be approximately the same as fresh to finish in a
conventional bake oven.
• The guidelines given for roasting fresh meats in the convection oven also apply to
roasting frozen meats.
• Insert meat thermometer midway during the cooking process.
30
Page 31

w_
• Use the Convect Roast Pad for best results,
• Preheating the oven is not necessary.
• Follow package recommendations for oven temperature, foil covering and use of
cookie sheets. Cooking times will be similar. See chart below for some exceptions
and examples.
• Center foods in the oven, if more than one food item is being cooked or Jffoods are
being cooked on multiple racks, stagger foods for proper air circulation,
• Most foods are cooked on rack position #3o.
Q For multiple rack cooking, use racks #1, 3o and 4. However, pizzas should be
placed on cookie sheets and baked on rack position #2o, 3 and 4.
Here are a few examples of times and temperatures
* An "o" after a rack number implies that the offset rack should be used.
** Conventional bake uses the Bake Pad.
*** The times given are based on specific brands of mixes or recipes tested. Actual
times will depend on the ones you cook.
Note: Convect roasting times will be similar to the conventional times because the oven
is not preheated. The time savings comes from not having to preheat the oven.
31
Page 32

1. Place oven rack on the rack position suggested in the chart on page 33.
Distance from broiling element depends on foods being prepared. Rack position
40 (offset rack in position #4) is usually recommended unless otherwise stated.
2. Touch Broil Pad.
Indicator Word BROIL will flash and Display will show three dashes.
Note= If more than five seconds elapses between touching Broil Pad and
touching a number pad, the oven is not set and Display will return to previous
Display.
3. Touch the appropriate number pad(s).
The first number pad touched will enter "1-11"in the Display.
The oven has a variable broil feature which means that a lower temperature can be
selected. After "HI" appears in the Display, touch the appropriate number pads for
the desired temperature. Temperature can be entered in 5° increments. Use "HI"
broil for most broil operations. Use variable broil for delicate and long-term items.
Five seconds after entering "HI" or a temperature, the broil element will come on
and the Indicator Words BROIL and ON will remain in the Display. ff the variable
broil feature was selected, the Indicator Word ON will cycle with the element.
Example: If at 4 o'clock you set the oven for broil ("HI"), the Display will show:
4 :OOHI., ,,]
4. Place food on broiler pan provided with oven. Broil element will preheat in 5
minutes. After broil element is red, place food in oven. Oven door MUST be left
open at broil stop Dositior!,
5. Touch Cancel Off Pad to turn off oven when food is cooked.
NOTE: A fan comes on during the BROIL cycle. If it does not, the oven broil element I
will cycle on and off. Ifthe fan does not operate, contact your authorized Jenn-
Air Service Contractor for repair.
32
Page 33

• Tender cuts of meat or marinated meats are best for broiling. This includes rib and
loin cuts of steak, ground beef, ham steaks, poultry pieces or fish. For best results,
steaks should be at least 1" thick. Thinner steaks should be pan-broiled.
• Do not cover broiler grid with foil since this prevents fat drippings from draining into
the bottom of the pan.
• Before broiling, remove excess fat from meat and score edges of fat (do not cut into
meat) to prevent meat from curling. Salt after cooking.
• To prevent dry surface on fish or lean meats, brush melted butter on top.
• Foods that require turning should be turned onty once during broiling. Turn meat
with tongs to avoid piercing and loss of juices.
Chart time is based on a preheated broil element using the "HI" setting.
+;7 '• _;2
+++++;+_++++ ]++ +++; ++ ;+ ?+ +_+++ ,• + .... +++, m+ ++++++ ,_ , +_ •P++ !_+
*An "o" after a rack number implies that the offset rack should be used.
Note: This chart is a suggested guide• The times may vary with food being cooked.
33
Page 34

When the oven controls are set to CLEAN, the oven heats to temperatures that are
higher than those used for cooking. The high temperatures cause food soil to burn off
and substantially disappear. While this occurs, a device in the oven vent helps to
consume normal amounts of smoke. The oven is vented through an opening on the top
of the range at the back of the glass-ceramic top.
@ Remove the broiler pan and any other utensils from the oven. These utensils cannot
withstand the high temperatures of the cleaning process.
Q Clean spatters and spills from those areas which will not be cleaned during the self-
cleaning process:
. center front of oven and door near opening in door gasket.
- porcelain oven door liner (area outside the door gasket).
- oven front frame.
Note: DO NOT CLEAN serial plate located on the
oven front.
To clean these areas, use hot water and detergent,
nonabrasive cleansers or soap filted steel wool pads.
Rinse thoroughly, being careful not to use an excessive
amount of water that would dampen the door gasket.
Soil left in these areas wltl be more difficult to remove
after the self-cleaning process since the high heat will
bake on any soil that is present. DO NOT USE COMMERCIAL OVEN CLEANERS
TO CLEAN THESE AREAS.
"-,_' _ //
@ DO NOT ATTEMPT TO CLEAN, RUB, OR APPLY WATER TO GASKET ON OVEN
DOOR. The gasket is essential for a good door seal, Rubbing or cleaning w{l!
damage the gasket and may affect the seal,
@ Wipe up excess grease and food spillovers which have not baked on the bottom of
the oven. Large accumulations of soil can cause heavy smoke or fire in the oven
during the cleaning process. For ease of cleaning, the heating element can be lifted
slightly.
t Although smoke or fire in the oven is a normal occurrence and there is no safety
problem, there will be venting of excessive smoke and odor.
34
Page 35

II The oven racks can be cleaned in the oven. However, the oven racks wi!l discolor,
lose shininess, and become difficult to slide in and out if left in the oven during the
cleaning process. REMOVE RACKS FROM OVEN IF THIS DISCOLORATION
WiLL BE OBJECTIONABLE. As a suggestion, do not leave the racks in the oven
during each self-cleaning process if they do not need to be cleaned since they will
discolor to a dull silver after one cleaning. Moderately soiled racks can be cleaned
with a soapy S.O.S. pad or Scotch-Brite scour pad. Stubborn stains need to be
removed in the self-cleaning process. Be sure to read special tips on page 37 if oven
racks are cleaned during the self-cleaning process.
*Omit steps 4 & 5 if you wish cleaning to begin immediately.
To set oven to start cleaning immediately
1. Close the oven door.
2. Touch Clean Pad,
indicator Words CLEAN TIME will flash and Display will show "_H_R_ : __ __
3. Touch the appropriate number pad(s).
The first number pad touched will enter "3:00" in the Display for an average soiled
oven. The cleaning time can be varied depending on the amount of soil. Set "2:00"
for light soil or "4:00" for heavy soil.
Note: If more than five seconds elapse between touching a Clean Pad and
touching a number pad, the oven is not set and time of day will automatically return
to the Display.
Example: Ifat 9 o'clock you selected to self-clean your oven for 3hours, the Display
will show:
3 ":00 I
Five seconds after entering "3:00" or a different time, the oven door wit1 start to
automatically latch and the cooling fan will come on. The LOCK Indicator Word will
come on when the door is latched.
Note: If oven door was [eft open, the word "door" will flash in the Display and a signal
will continuously beep until the door is closed and the Clean Pad is touched.
The Indicator Word ON comes on when the door is latched and wil! remain until the
clean temperature is reached. The Indicator Word ON will cycle with the elements
to maintain the clean temperature.
35
Page 36

Whenthecleanfunctionhasbeencompleted,theIndicatorWordsCLEANandON
willgooff.TheIndicatorWordLOCKandthecoolingfanwitlremainonuntiltheoven
hascooled down and the door has unk)cked.
To set oven to start cleaning at a later time
1-3. Follow Steps 1-3 in previous section on page 35,
4. Touch Stop Time Pad.
indicator Words STOP TiME will flash in the Display. The Indicator Word CLEAN
and the calculated stop time will also appear in Display.
5. Touch the appropriate number pads to enter stop time.
A stop time can only be accepted for later in the day. if an unacceptable stop time
isentered, "Err" wilt flash briefly inthe Display and then Display will return to previous
acceptable Stop Time.
Example: If at 9 o'clock you set the oven to clean for three hours, the calculated
stop time would be "12:00". The Display would show:
If you want the stop time to be 1 o'clock, to_ch the number pads "1,0,0". Five
seconds later, the Display would show Start Time:
I0"00
After five seconds, the Display will return to current time of day, thus showing:
The LOCK Indicator Word wilt come on and the cooling fan wilt go off as soon as
the oven door has latched.
When the oven begins to ctean, the Indicator Word ON and the cooling fan will come
on and the Indicator Word DELAY will go off.
When the clean time has been completed, the indicator Words CLEAN and ON will
go off. The Indicator Word LOCK and the cooling fan will remain on until the oven
has cooled down and the door has unlocked.
36
Page 37

To cancel self-clean
• Touch Cancel Off Pad,
• The oven door wiilbe locked while the LOCK Indicator Word remains in the Display.
Depending on the length of time the oven had been self-cleaning, it may take up to
45 minutes for the oven to coot down, the door to unlock and cooling fan to turn off.
IMPORTANT
• To recall cleaning time or stop time: Touch the appropriate pad (Clean Pad or
Stop Time Pad),
• To change cleaning time or stop time before cleaning begins: Repeat the
preceding steps.
• When the Clean Pad is touched, a fan comes on. If this fan is not operating, the
oven will go through the cleaning process at a reduced oven temperature and the'
oven will not clean effectively. If the fan does not operate, contact your authorized
Jenn-Air Service Contractor for service.
[More lnformatmn on the S f-€!eaning,=P
• A slight odor may be detected, and if an oven is heavity soiled, some smoke may
be visible. Some smoke and odor during the cleaning process is a normal
occurrence. Vapors, moisture, etc. may be seen coming from the oven vent area.
• During the cleaning process, do not be alarmed if an occasional flame is visible
through the oven window. This is caused by excessive food soil that was not
removed before the oven was set to clean.
• SINCE THE DOOR AND WINDOW OF THE OVEN WILL GET WARM DURING
THE SELF-CLEANING PROCESS, AVOID CONTACT.
• Some types of soi_may disintegrate but leave a light film or heavier deposit of ash.
The amount of ash depends on the amount of soil which was in the oven. After oven
has cooted, this ash may be removed with a damp sponge. If other dark deposits
remain after wiping with a sponge, the time set for the length of cleaning was not
enough, increase the cleaning time for future cleanings or clean more frequently.
The normal cleaning time is 3 hours. A maximum of 4 hours may be selected if
necessary.
• If racks have been left in oven during the cteaning process, they should be treated
as fotlows. After the cleaning process is completed and the oven has cooled, buff
the underside of rack edges with Scotch-Brite scour pad or rub lightlythe underside
of rack edges with a coating of vegetable oil. Use a light application of oil so it does
not soil the oven. This will make the cleaned racks slide more easily.
37
Page 38

• Toremoveoccasionalspilloversbetweencleanings,useasoap-filledscouringpad
ormildcleanser;rinsewell.
• Itisbettertocleantheovenregularlyratherthanwaituntilthereisaheavybuild-
upofsoilintheoven.
g Duringthecleaningprocess,thekitchenshouldbewellventilatedtohelpeliminate
normalodorsassociatedwithcleaning.
• DONOTUSECOMMERCIALOVENCLEANERS.
• DO NOT USE ALUMINUM FOIL OR OTHER LINERS IN THE OVEN.
38
Page 39

BEFORECLEANING,BECERTAINALLELEMENTSARETURNEDOFFANDTHE
RANGEPARTSARECOOL.
Cleaning and Removing Control Knobs
The knobs on the control panel can be removed with the controls in the OFF position. Pull
each knob straight from the shaft. Wash knobs in warm soapy water or dishwasher; do not
use abrasive cleansers or materials. To replace each knob, match flat part of knob opening
with the spring on the shaft, returning in the OFF position.
Control Panel Area and Display Window
Wipe with paper towels dampened with soapy water or glass cleaner. Do not spray any
cleaning solutions directly onto the Display window or use large amounts of soap and water.
Do not scrub with S.O.S pads or abrasive cleansers.
Glass on Oven Door Front
Use any suitable glass cleaner or soapy water,
Oven Door Trim
Slightly dampen a cloth or paper towel with soapy water or nonabrasive cleanser such as
Fantastik or 409. Do not use excessive amounts of water or allow water to run down through
the vents under the door handle since this will cause streaks which will be visible through the
glass door. White parts may be cleaned with chlorine bleach. _o_Enot use an abrasive
cleans_ers oven cleaners, or scrub with a_s _e___ma_h as S.O.S. pa(;Is, _Scotch:
Brite pads, etc.
Glass-Ceramic Cooktop
CAUTION: Do NOT use a cooktop cleaner on a hot cooktop. The fumes can be hazardous
to your health, and can chemically attack the glass-ceramic surface.
Q For general daily cleaning and light surface soil, use a clean dishcloth or paper towel and
wash surface with solution of water and any of these cleansers: dishwashing liquid such
as Ivory or Joy, baking soda, fine polishing powders such as Bon Ami, or commercial
ceramic cooktop cleansers such as Cooktop Cleaning Creme (Part No. 20000001).
Wipe with clean damp cloth or paper towel. Rinse and dry thoroughly.
Q To remove residue from burned on spills, make a paste of water and baking soda or
cleansers such as Bon Ami, Bar Keepers Friend, Comet, Shiny Sinks or nonabrasive soft
scrubbing cleansers, such as Cooktop Cleaning Creme (Part No. 20000001). Scrub
with paper towels, nylon or plastic scrubber, such as Tufty. Rinse and dry thoroughly.
ff stain is not removed easity, altow paste to remain on surface for 30 to 40 minutes. Keep
moist by covering with wet paper towel or plastic wrap.
• To remove burned on spot, use a single edge razor blade. Place blade edge on cooktop
at 30° angte; scrape off spot. Clean remainder of soil with method described above.
NOTE: Plastic objects, sugar or food with high sugar content allowed to melt onto the I
cooktop can cause damage. See page 12 for clean ng instructions, lj
39
Page 40

Rangetop Trim
The top of the range (the trim around the glass-ceramic cooktop), is made of painted
steel.
D To clean light soil, wipe with a soapy cloth or nonabrasive cleanser, such as
Fantastik or 409.
Q To clean moderate to heavy soil, spray the area with a household cleaner, such as
Fantastik or 409 and allow to soak. If necessary, spray the area with cleanser, cover
with plastic wrap and allow to soak for a few hours, oDonor _ny abrasive
_n_e_aners, or scrub with__anv abrasive materials_uch as S.O.S.
pad_s__.ScScot_c_BdtePadS, etc.
The oven operation controls can be locked in the "OFF" position during cleaning or to
prevent a child from accidentally turning them on. The oven functions which can be
locked in the "OFF" position are: Bake, Convect Bake, Convect Roast, Broitand Clean.
The control functions which can always be used regardless of lockout are: Timer, Clock
and Oven Light.
To set
Touch and hold the Cook Time Pad and the Stop Time Pad simultaneously for four
seconds. The (ndicator Word "OFF" will appear and remain in the temperature digits
for fifteen seconds.
Note: If an oven function is currently being used, the controls cannot be _ocked off.
Note: tf someone touches an oven function pad, the Indicator Word "OFF" wil{ again
appear in the temperature digits for fifteen seconds,
To cancel
Touch and hold the Cook Time Pad and the Stop Time Pad simultaneously for four
seconds. The Indicator Word "OFF" will appear briefly inthe temperature digits and then
go off.
4O
Page 41

To remove, pull forward to the "stop" position; lift
up on the front of the rack and pull out.
The oven temperature can be adjusted if all oven temperatures are too low or too high
and the length of time to cook ALL foods is too long or too short. Do NOT adjust the
temperature if only one or two items are not baking properly.
To adjust
1. Touch the Bake Pad.
2. Enter 500° by touching the number pads: "5,0,0."
3. Touch and hold the Bake Pad for eight seconds until "00°" appears in the Display.
4. Touch the appropriate number pads to enter the offset temperature. (Allowable
range is -35oto +35°.) Note: Touching the Broil Pad will change the - sign to a
positive number or back to a negative number.
Note: Do not change the temperature setting more than 100before checking the
oven.
5. Touch the Cancel Off Pad to return to the previous Display,
Important: The oven should be adjusted only 10°and the oven should be tested. (We
recommend baking two 9" yellow layer cakes using a purchased box mix.) If the oven
temperature is still too low or too high, repeat the procedure described above,
41
Page 42

Before replacing bulb, disconnect power to oven at the main fuse or circuit breaker panel
andat the electric receptacle. Be sure that the entire oven cavity including the light bulb
is cool before attempting to remove.
To replace light bulb
1. Carefully unscrew the glass light lens.
2. To obtain firm grasp on the bulb, wear protective
rubber gloves. Remove by turning bulb to the left.
Do not touch a hot oven light bulb with a damp cloth
as bulb will break. Note: tf the bulb does break and
you wish to remove it, be certain power supply is
disconnected and wear protective gloves. You
may contact your authorized Jenn-Air Service
Contractor for service.
3. Replace bulb with a 40 watt oven-rated appliance
bulb. A bulb with a brass base is recommended to
prevent fusing of bulb into socket.
4. Replace bulb cover and reconnect power to oven.
Reset clock.
The storage drawer at the bottom of the range is safe
and convenient for storing metal and glass cookware.
DO NOT store plastic, papetware, food or flammable
material in this drawer, Remeve drawer to clean under
range.
To remove: Empty drawer and then pull drawer all the way out te the stop position.
Grasp sides and lift up and out to remove drawer.
To replace: Fit ends ef drawer g_ides onto rails, Lift up drawer front and gently slide
drawer to the closed position.
Some floors are net level. Fer proper baking, your
range must be level. Leveling legs are Iocated on
each corner of the base of the range. Level by turning
the legs.
To prevent range from accidently tipping, range must be secured to the floor by sliding
rear leveling leg into the anti-tip bracket supplied with the range.
42
Page 43

Check the following list to be sure a service cat! is really necessary. A quick reference
of this manual may prevent an unneeded service call.
If nothing on the range operates:
• check for a blown circuit fuse or a tripped main circuit breaker.
• check if range is properly connected to electric circuit in house.
If cooktop elements do not get hot enough:
• surface controls may not be set properly.
• voltage to house may be low.
If oven does not heat:
• the oven controls may be set incorrectly.
• clock controls may be set for delayed start of oven.
If the oven light does not work:
• the light bulb is loose or defective.
• oven light does not work during self-cleaning process,
If oven will not go through self-cleaning process:
• controls may be improperIy set.
• check the clock controlled settings and the current time of day on the clock.
If oven did not clean properly:
• oven may need longer cleaning time.
• excessive spills were not removed prior to self-cleaning process.
If oven door will not unlock:
• oven may not have cooled to safe temperature after self-cleaning process.
• electric current coming into the oven may be off,
If foods do not broil properly:
• the oven controls may not be set properly.
• check rack position.
• voltage into house may be low.
If baked food is burned or too brown on top:
• food may be positioned incorrectly in oven.
• oven not preheated properly.
43
Page 44

If foods bake unevenly:
• the range may be installed improperly.
• check the oven rack with a level.
• stagger pans, do not allow pans to touch each other or oven wall,
• check instructions for suggested placement of pans on oven rack.
If oven baking results are less than expected:
• the pans being used may not be of the size or material recommended for best
results.
• there may not be sufficient room around sides of the pans for proper air circulation
in the oven.
• check instructions for preheating, rack position and oven temperature.
• oven vent may have been blecked or covered.
If baking results differ from previous oven:
• oven thermostat calibration may differ between old and new ovens. Follow recipe
and use and care directions before calling for service since the calibration on the
previous oven may have drifted to a too high or too low setting. (See p. 41- Adjusting
Oven Temperature.)
If F plus a number appears in the Display:
• a fautt codes is being shown. When a fault code appears and a continuous beep
sounds, touch the Cancel Off Pad. tfthe fault code reappears, disconnect power
to the range and cal! an authorized Jenn-Air Service Contractor.
BBB;JENN-AIR
403 WE_,T FOLIP,3"H STREET NORTH * NEW_ON_ IA _0208
Printed in U.S.A. Cat. No. RRU30600LIC
©1996 JennoAir Part No. 8111 P213-60 9/96
 Loading...