

Jenn-Air S105 Use And Care Manual

_JEN N-AI FI
mmm °
Useand Care Manual
Grill-Range with Self-Cleaning
Ovell
MODEL $105
About Your
JennoAir
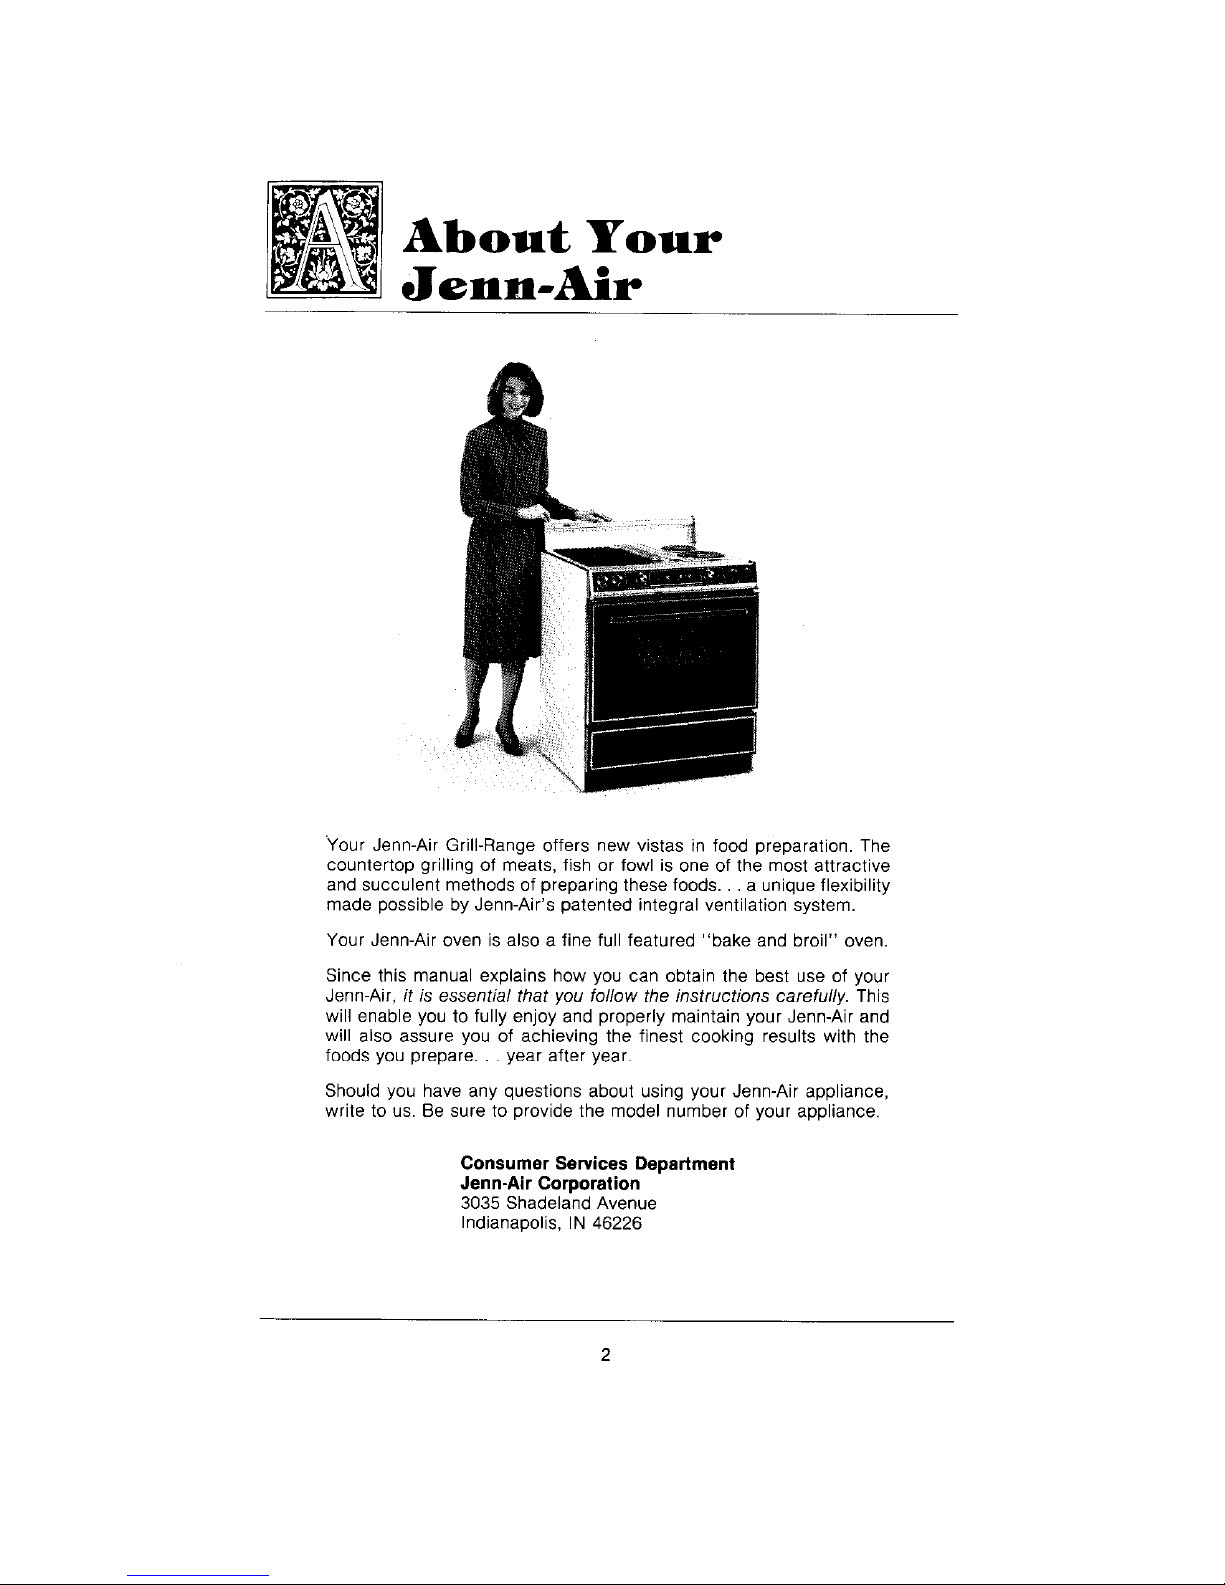
Your Jenn-Air Grill-Range offers new vistas in food preparation. The
countertop grilling of meats, fish or fowl is one of the most attractive
and succulent methods of preparing these foods.., a unique flexibility
made possible by Jenn-Air's patented integral ventilation system.
Your Jenn-Air oven is also a fine full featured "bake and broil" oven.
Since this manual explains how you can obtain the best use of your
Jenn-Air, it is essential that you follow the instructions carefully. This
will enable you to fully enjoy and properly maintain your Jenn-Air and
will also assure you of achieving the finest cooking results with the
foods you prepare.., year after year
Should you have any questions about using your Jenn-Air appliance,
write to us. Be sure to provide the model number of your appliance.
Consumer Services Department
Jenn-Air Corporation
3035 Shadeland Avenue
Indianapolis, IN 46226

Index
Using the Cooktop and Grill
Accessories ................ Installing ................................. 17
Griddle .............................. 23
Optional ............................... 42-43
Cleaning ................... Other Range Parts ......................... 22
Conventional Coil
Cooktop Cartridge ......... Cleaning ................................. 13
Installing, Removing ........................ 11
Usage and Utensil Selection .................. 12
Cooktop and Grill Controls ............................................. 8
Glass-Ceramic
Cooktop Cartridge ......... Cleaning .............................. 15-16
installing, Removing ..................... 11
Usage and Utensil Selection ............... 14, 16
Grill ....................... Cleaning ................................. 21
Installing ................................. 17
Usage and Grilling Tips ................... 18-20
Home Canning ..................................................... 13
Lighted Backsplash ................................................... 38
Surface Controls ................................................... 10
Ventilation System ........... Operation and Cleaning ..................... 9
Using the Oven
Baking .......... General Recomrn_ndations ............. 28-29
Broiling ..................................... 32-33
Cleaning ............ : . Self-Cleaning Process ............. 34-37
Other Cleaning Tips ............. 38-3g
Clock Control ....................................... 26
Light Bulb Replacement ................................ 38
Oven Controls and Operation ........................... 24-25
Rack Positions .................................... 27
Roasting ................ General Recommendations ............... 30-31
Appliance Usage
Safety Tips ....................................................... 5-7
Service Tips ..................................................... 40-41
Warranty ............................................................ 44
3
I_ IMPORTANT INFORMATION
MODEL NUMBER
SERIAL NUMBER
(Numbersappearon the serialplate on theoven front frame.)
Date Purchased
JENN-AIR DEALER FROM WHOM PURCHASED
ADDRESS
CITY
PHONE
AUTHORIZED JENN-AIR SERVICE CONTRACTOR
ADDRESS
CITY
PHONE
IMPORTANT: Retain proof of purchase documents for warranty service

SAFETY
PRECAUTIONS
Read before operating your range
All appliances-- regardless of the manufacturer -- have the
potential through improper or careless use to create safety
problems.Thereforethefollowing safety precautionsshouldbe
observed:
1, Besure your appliance is properly installed andgrounded
by a qualified technician.
2. Neveruseyour appliance for warming or heatingthe room.
3. Children should not be left alone or unattended in area
whereapplianceis in use.Theyshouldneverbe allowedto
sit or stand on any part of the appliance.
4. Wear proper apparel. Loose-fitting or hanging garments
should never be worn while using the appliance.
5. Do not repair or replace any part of the appliance unless
specificallyrecommendedinthe manual.All otherservicing
should be referred to an authorized Jenn-Air Service
Contractor.
6. Flammable materials should not be stored in an oven or
near surface units.
7. Do not use water on grease fires. Smother fire or flame or
use dry chemical or foam-type extinguisher.
8. Use only dry potholders. Moist or clamp potholders on hot
surfaces may result in burns from steam. Do not let
potholder touch hot heating elements. Do not use a towel
or other bulky cloth.
9. Use proper pan size. Many appliances are equipped with
one or more surface units of different size. Select utensils
having flat bottoms large enough to cover the surface unit
heating element. The use of undersized utensils will expose
a portion of the heating element to direct contact and may
result in ignition,of clothing. Proper relationship of utensil
to heating element will also improve efficiency.
10. Never leave surface units unattended at high heat settings.
Boil over causes smoking and greasy spillovers that may
ignite.
11. On conventional element ranges make sure that drip pans
are in place. Absence of these pans during cooking may
subject wiring or components underneath to damage.
12. Do not use aluminum foil to line surface unit drip pans, grill
basin or oven bottom. Installation of these liners may result
in an electric shock or fire hazard.
13. Glazed cooking utensils -- only certain types of glass,
glass-ceramic, ceramic, earthenware, or other glazed
utensils are suitable for range top surface without breaking
due to the sudden change in temperature. Use only such
utensils as you know have been approved for this purpose.
14. Utensil handles should be turned inward and not extend
over adjacent surface heating elements to avoid burns,
ignition of flammable materials and spillage due to
unintentional contact with the utensil.
15. Do not soak or immerse removable heating elements in
water.
16. CAUTION -- Do not store items of interest to children in
cabinets above a range or on the backguard of a range --
children climbing on the range to reach items could be
seriously injured.
17. Do not touch surface units or areas near units, heating
elements or interior surfaces of oven. Surface units or
heating elements may be hot even though they are dark in

color. Areas near surface units and interior surfaces of an
oven may become hot enough to cause burns. During and
after use, do not touch or let clothing dr other flammable
materials contact these areas until they have hadsufficient
time to cool. Other surfaces may become hot enough to
cause burns -- among these surfaces are the cooktop, the
upper door frame and glass, oven vent opening and
surfaces near the opening, and the top edge of the control
panel.
18. Use care when opening door. Let hot air or steam escape
before removing or replacing food.
19. Do not heat unopened food containers. Build-up of
pressure may cause container to burst and result in injury.
20. Keep oven vent ducts unobstructed.
21. Always place oven racks in desired location while oven is
cool. If rack must be moved while oven is hot, do not let
potholder contact hot heating element in oven.
22. Do not clean door gasket. The door gasket isessential for a
good seal. Care should be taken not to rub, damage or
move the gasket.
23. Do not use oven cleaners. No commercial oven cleaner or
oven liner protective coating of any kind should be used in
or around any part of the oven.
24. Clean only parts listed in this manual and use procedures
recommended.
25. Before self-cleaning the oven, remove broiler pan and
other utensils.
26. Listen for fan. A fan noise should be heard during the
cleaning cycle. If not, call a serviceman before self-
cleaning again.
27. Do not cook on glass-ceramic cooking surface if the
cooktop is broken. Cleaning solutions and spillovers may
penetrate the broken cooktop and create a shock hazard.
Contact an authorized Jenn-Air Service Contractor.
28. Clean glass-ceramic cooktops with caution. If wet sponge
or cloth is used to wipe spills on a hot cooking area, be
careful to avoid steam burns. Some cleansers can produce
noxious fumes if applied to a hot surface.
29. Do not operate with damaged cooking element after any
product malfunction until proper repair has been made.
30. Keep all switches "OFF" when unit is not in use.
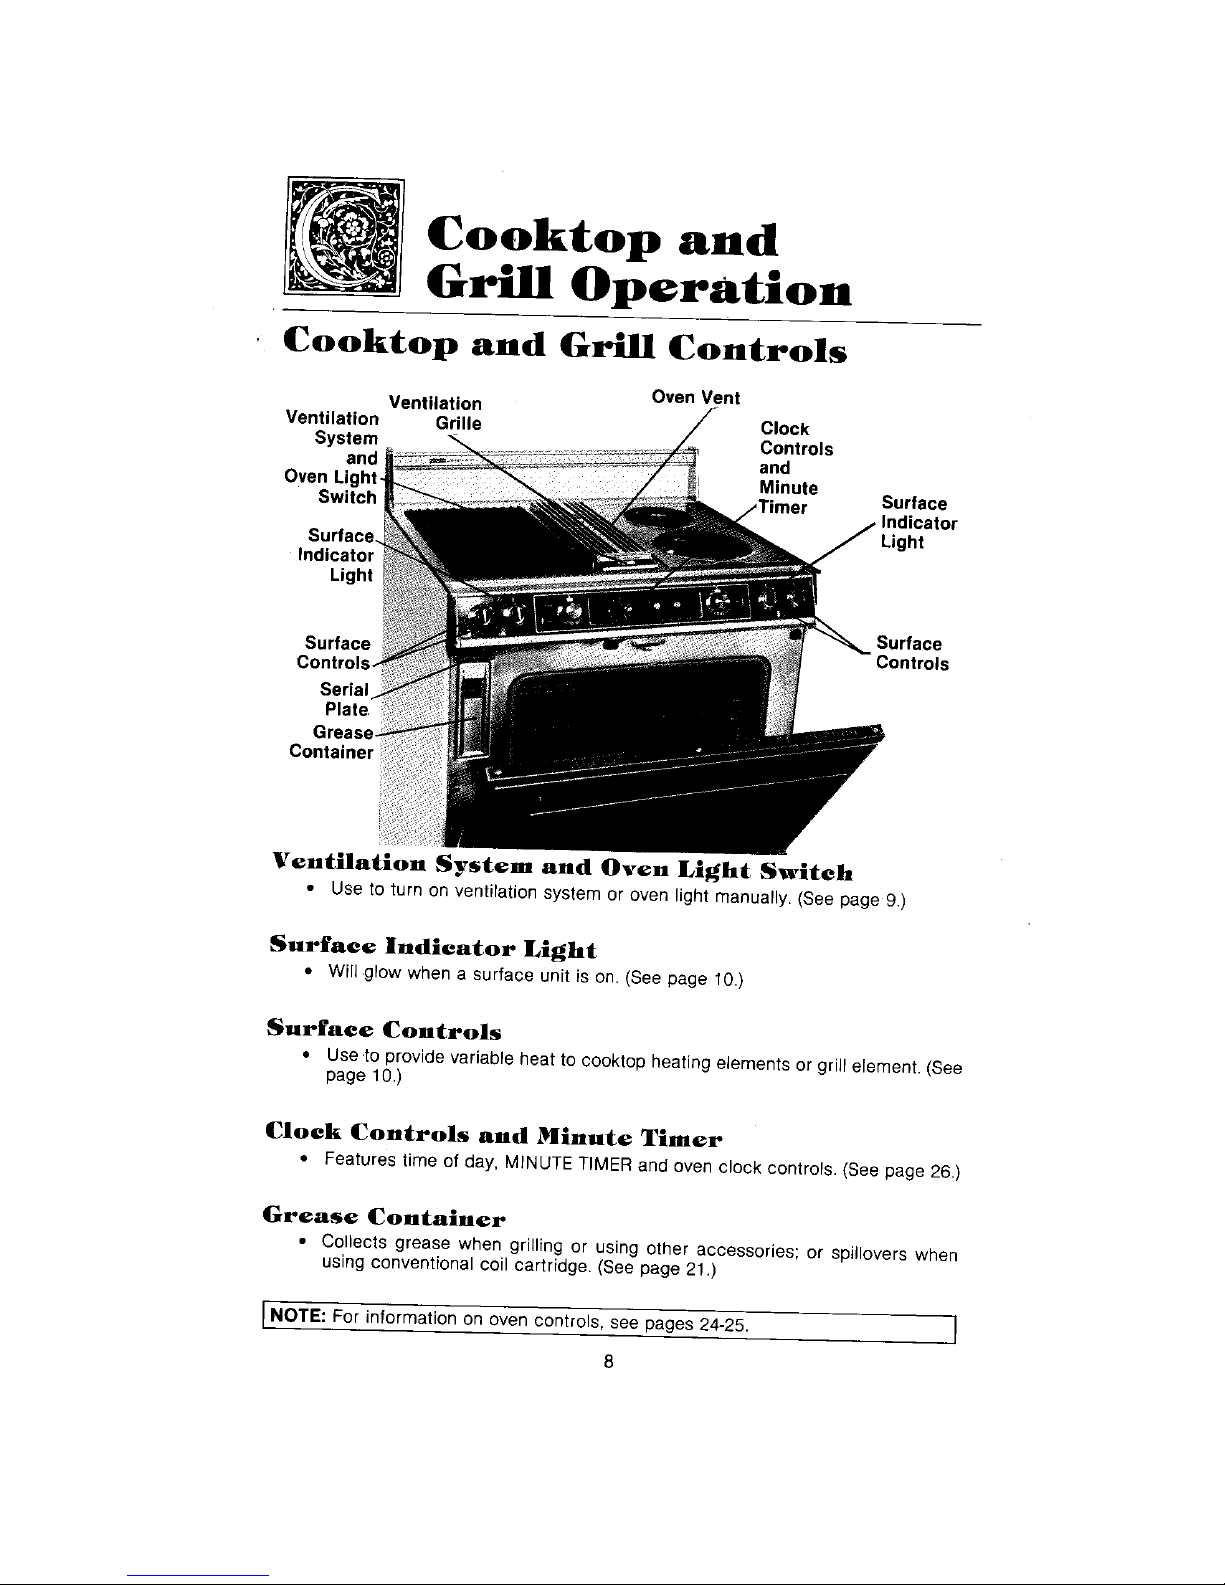
Cooktop and
Grill Operation
Cooktop and Grill Controls
OvenVent
Ventilation
Ventilation Grille Clock
System Controls
and and
OvenLight. Minute
Switch ,Timer Surface
Indicator
Light
Light
Surface Surface
Controls_ s
Serial
Plate.
Grease-
Container
Ventilation System and Oven Light Switch
• Use to turn on ventilation system or oven light manually.(Seepage 9.)
Surface Indicator Light
• Will glow when a surface unit is on.(See page 10.)
Surface Controls
• Use.to providevariable heatto cooktop heating elementsor griilerement.(See
page 10.)
Clock Controls and Minute Timer
• Features time of day, MINUTETIMERand ovenclock controls. (Seepage26.)
Grease Container
• Collects grease when grilling or using other accessories; or spillovers when
usingconventionalcoil cartridge. (Seepage21.)
[NOTE: For informationon oven controls,see pages 24-25. }
8
Ventilation System
The built-in ventilation system removes cooking vapors, odors and smoke from foods
prepared on the cooktop, grill and grill accessories.
Regular use of this system will insure a more comfortable and less humid kitchen which
is free of heavy cooking odors and fumes that normally create a frequent need for
Cleaning and redecorating.
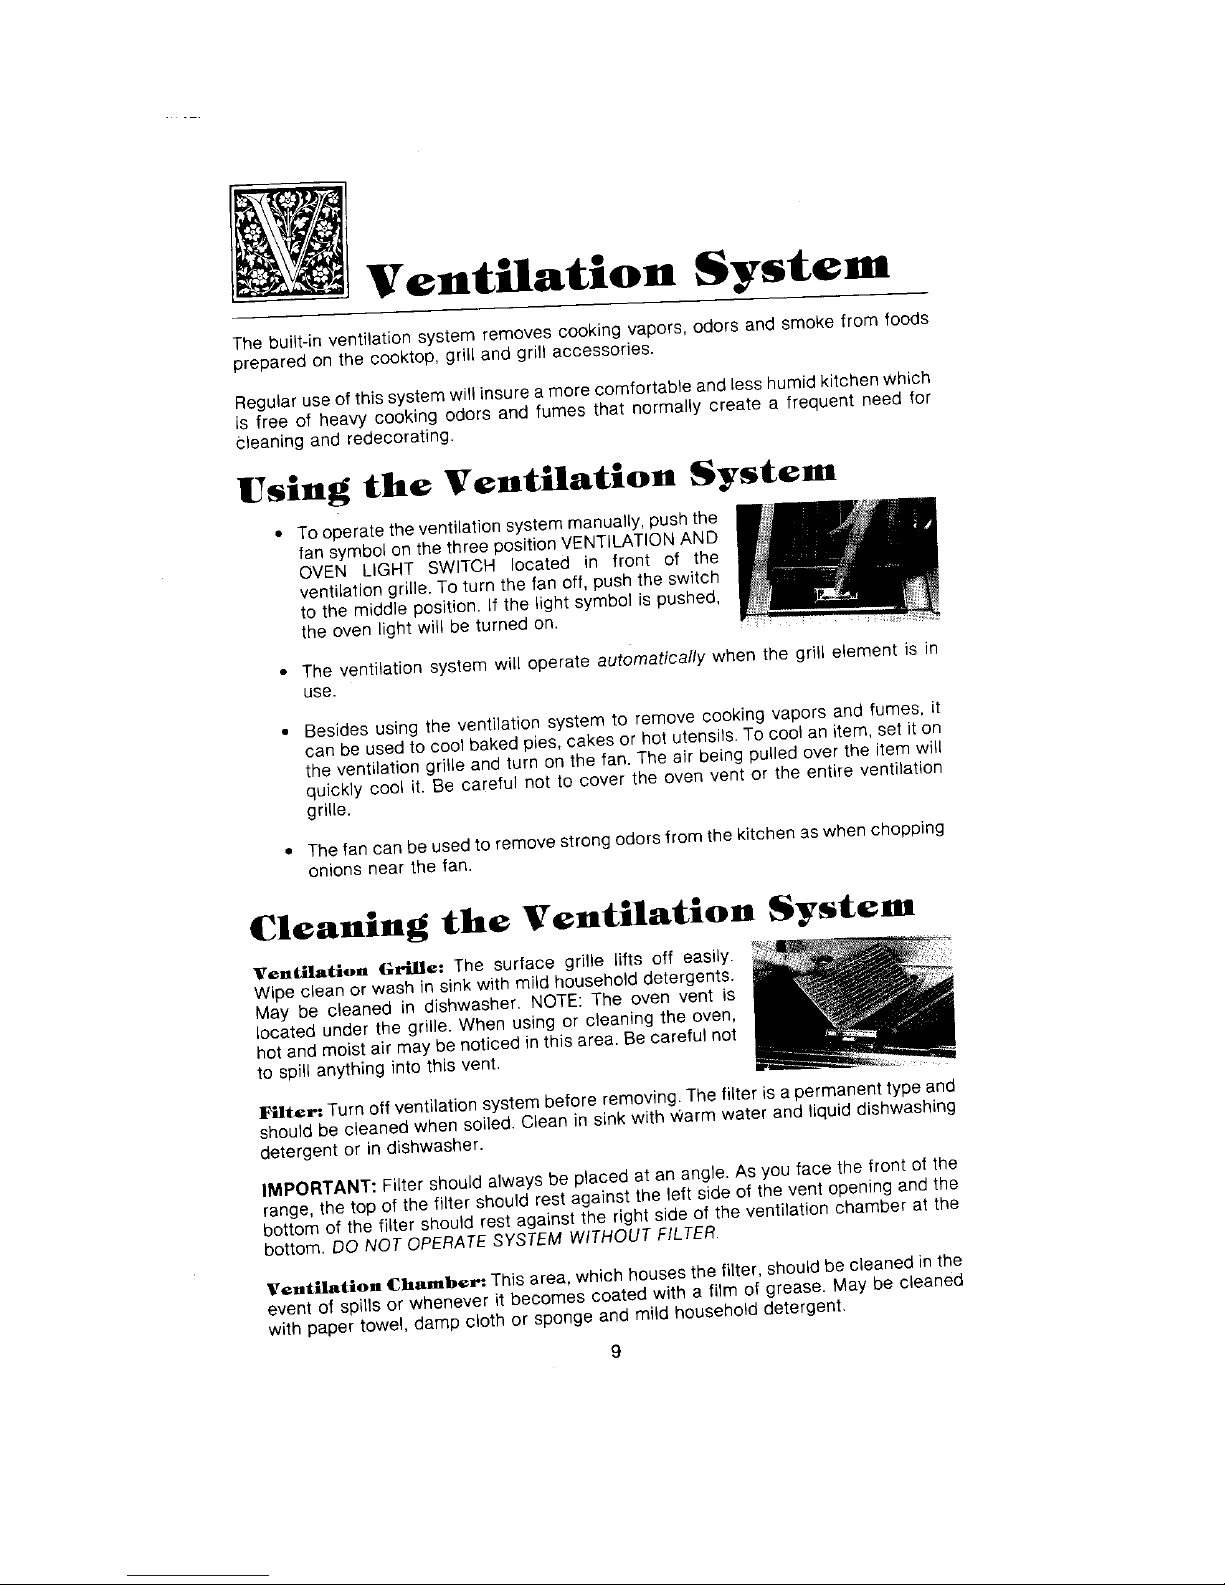
Using the Ventilation Systeiii
• To operate the ventilation system manually, push the
fan symbol on the three position VENTILATION AND
OVEN LIGHT SWITCH located in front of the
ventilation grille. To turn the fan off, push the switch
to the middle position. If the light symbol is pushed,
the oven tight wifl be turned on.
• The ventilation system will operate automatically when the grill element is in
use.
• Besides using the ventilation system to remove cooking vapors and fumes, it
can be used to cool baked pies, cakes or hot utensils. To cool an item, set it on
the ventilation grille and turn on the fan. The air being pulled over the item will
quickly cool it. Be careful not to cover the oven vent or the entire ventilation
grille.
• The fan can be used to remove strong odors from the kitchen as when chopping
onions near the fan.
Cleaning the Ventilation System
Ventilation Grtllet The surface grille lifts off easily.
Wipe clean or wash in sink with mild household detergents.
May be cleaned in dishwasher. NOTE: The oven vent is
located under the grille. When using or cleaning the oven,
hot and moist air may be noticed in this area. Be careful not
to spill anything into this vent.
l_lter: Turn off ventilation system before removing. The filter is a permanent type and
should be cleaned when soiled. Clean in sink with v_arm water and liquid dishwashing
detergent or in dishwasher.
IMPORTANT: Filter should always be placed at an angle. As you face the front of the
range, the top of the filter should rest against the left side of the vent opening and the
bottom of the filter should rest against the right side of the ventilation chamber at the
bottom. DO NOT OPERATE SYSTEM WITHOUT FILTER.
VentHat|on qChamber: This area, which houses the filter, should be cleaned in the
event of spills or whenever it becomes coated with a film of grease. May be cleaned
with paper towel, damp cloth or sponge and mild household detergent.
9
Surface Controls
The variable heat controls for the cooktop cartridges and grill element provide
flexibility in heat setting selection.
To Set Controls
• Since thecontrols area push-turntype,they mustbe pusheddownbefore turning.Toset
(from the OFFposition),pushdownon control knoband turn ineither direction to desired
heat setting.
• When control is in any position, other than OFF, it may be turned in any direction
without pushing down.
• A red indicator light will glow when a surface heating element is ON. There are
two indicator lights, one for the heating elements on the left side of the range,
one for the heating elements on the right side of the range.
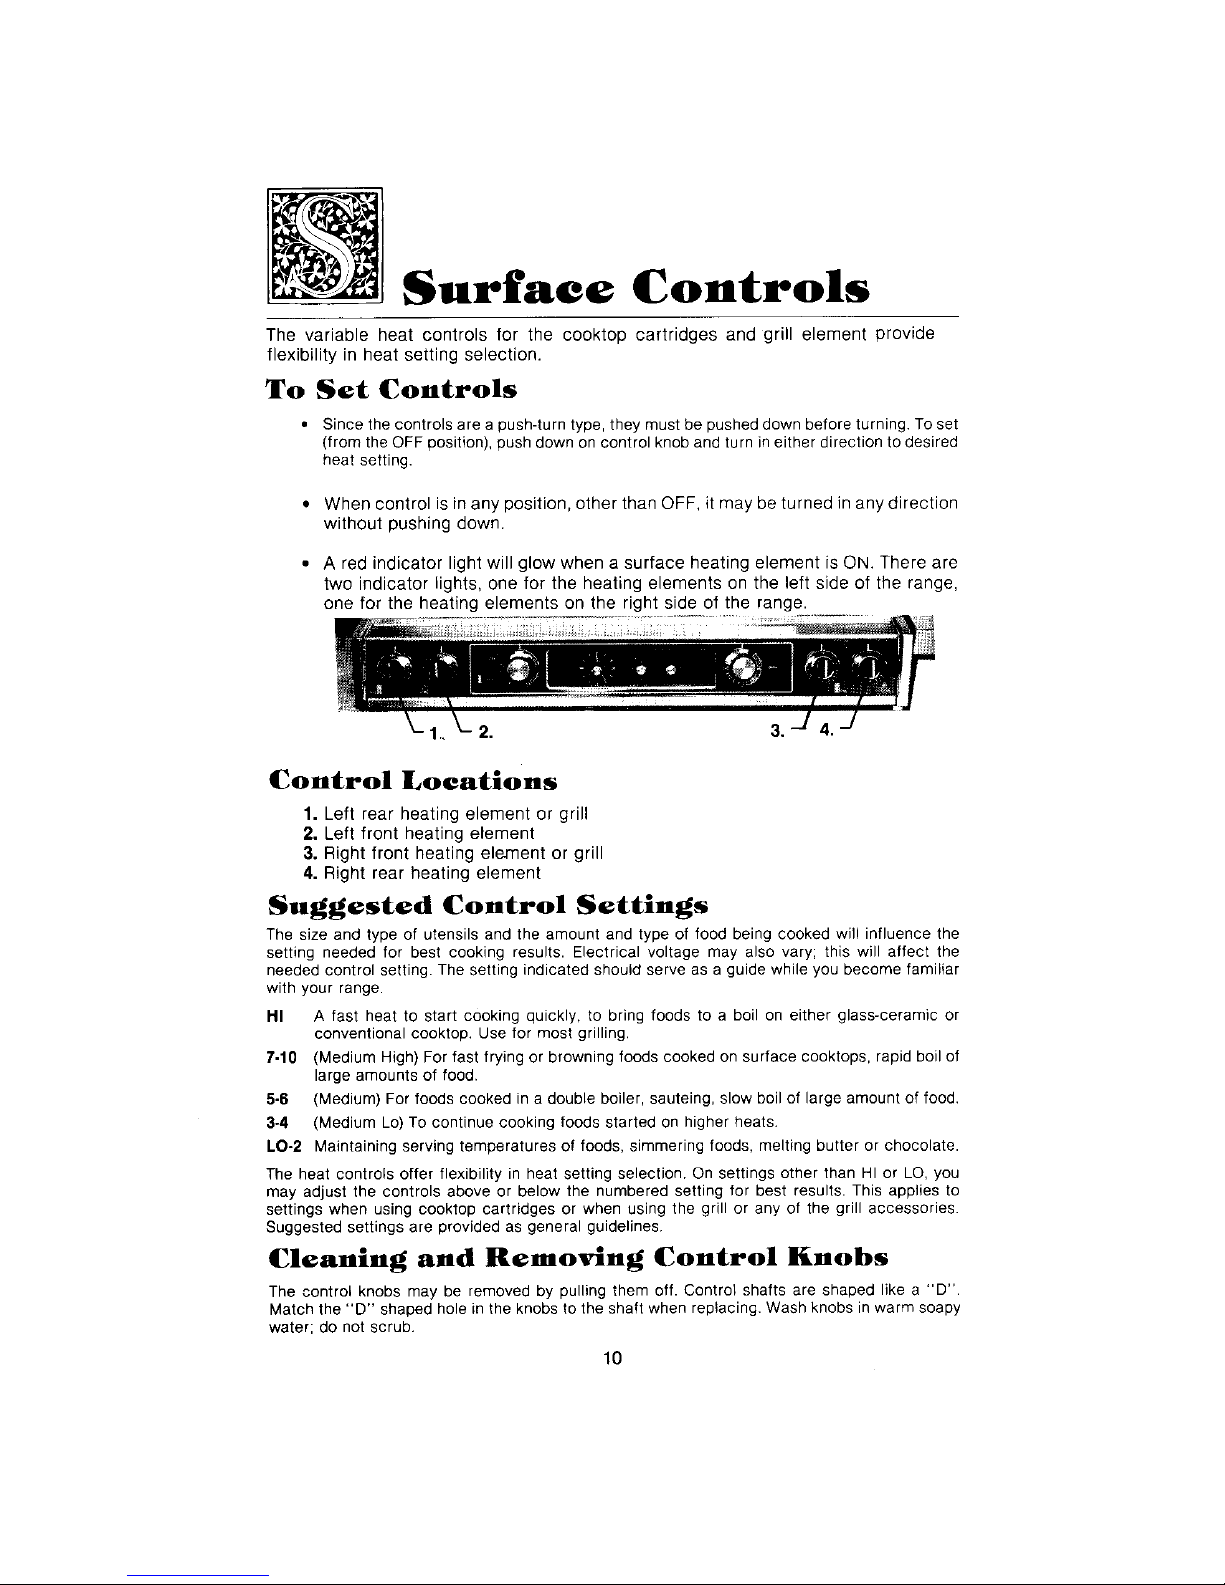
2. 3.
Control Locations
1. Left rear heating element or grill
2. Left front heating element
3. Right front heating element or grill
4. Right rear heating element
Suggested Control Settings
The sizeand type of utensils and the amountand type of food beingcooked will influence the
setting needed for best cooking results. Electrical voltage may also vary; this will affect the
neededcontrol setting.The setting indicated shouldserve asa guidewhileyou become familiar
with your range.
HI A fast heat to start cooking quickly, to bring foods to a boil on either glass-ceramic or
conventional cooktop.Use for most grilling,
Z-10 (MediumHigh) Forfast frying or browning foods cookedon surface cooktops, rapidboilof
large amountsof food.
5-6 (Medium)Forfoods cooked ina doubleboiler, sauteing,slow boilof largeamountof food,
3-4 (MediumLo)Tocontinue cooking foodsstarted on higher heats.
10-2 Maintainingserving temperaturesof foods, simmeringfoods, melting butter or chocolate.
The heat controls offer flexibility in heat setting selection. On settingsother than HI or LO,you
may adjust the controls above or below the numbered setting for best results. This applies to
settings when using cookfop cartridges or when using the grill or any of the grill accessories.
Suggestedsettings are providedas generalguidelines.
Cleaning and Removlng Control Knobs
The control knobs maybe removed by pulling them off. Control shafts are shaped likea "D".
Matchthe "D" shapedholein the knobstothe shaftwhen replacing.Washknobs in warm soapy
water; do notscrub.
10
Using.Cooktop
Cartridges
Cooktopcartridges, eitherconventionalcoil or glass-ceramic,can beinstalledoneither sideofthe
range.
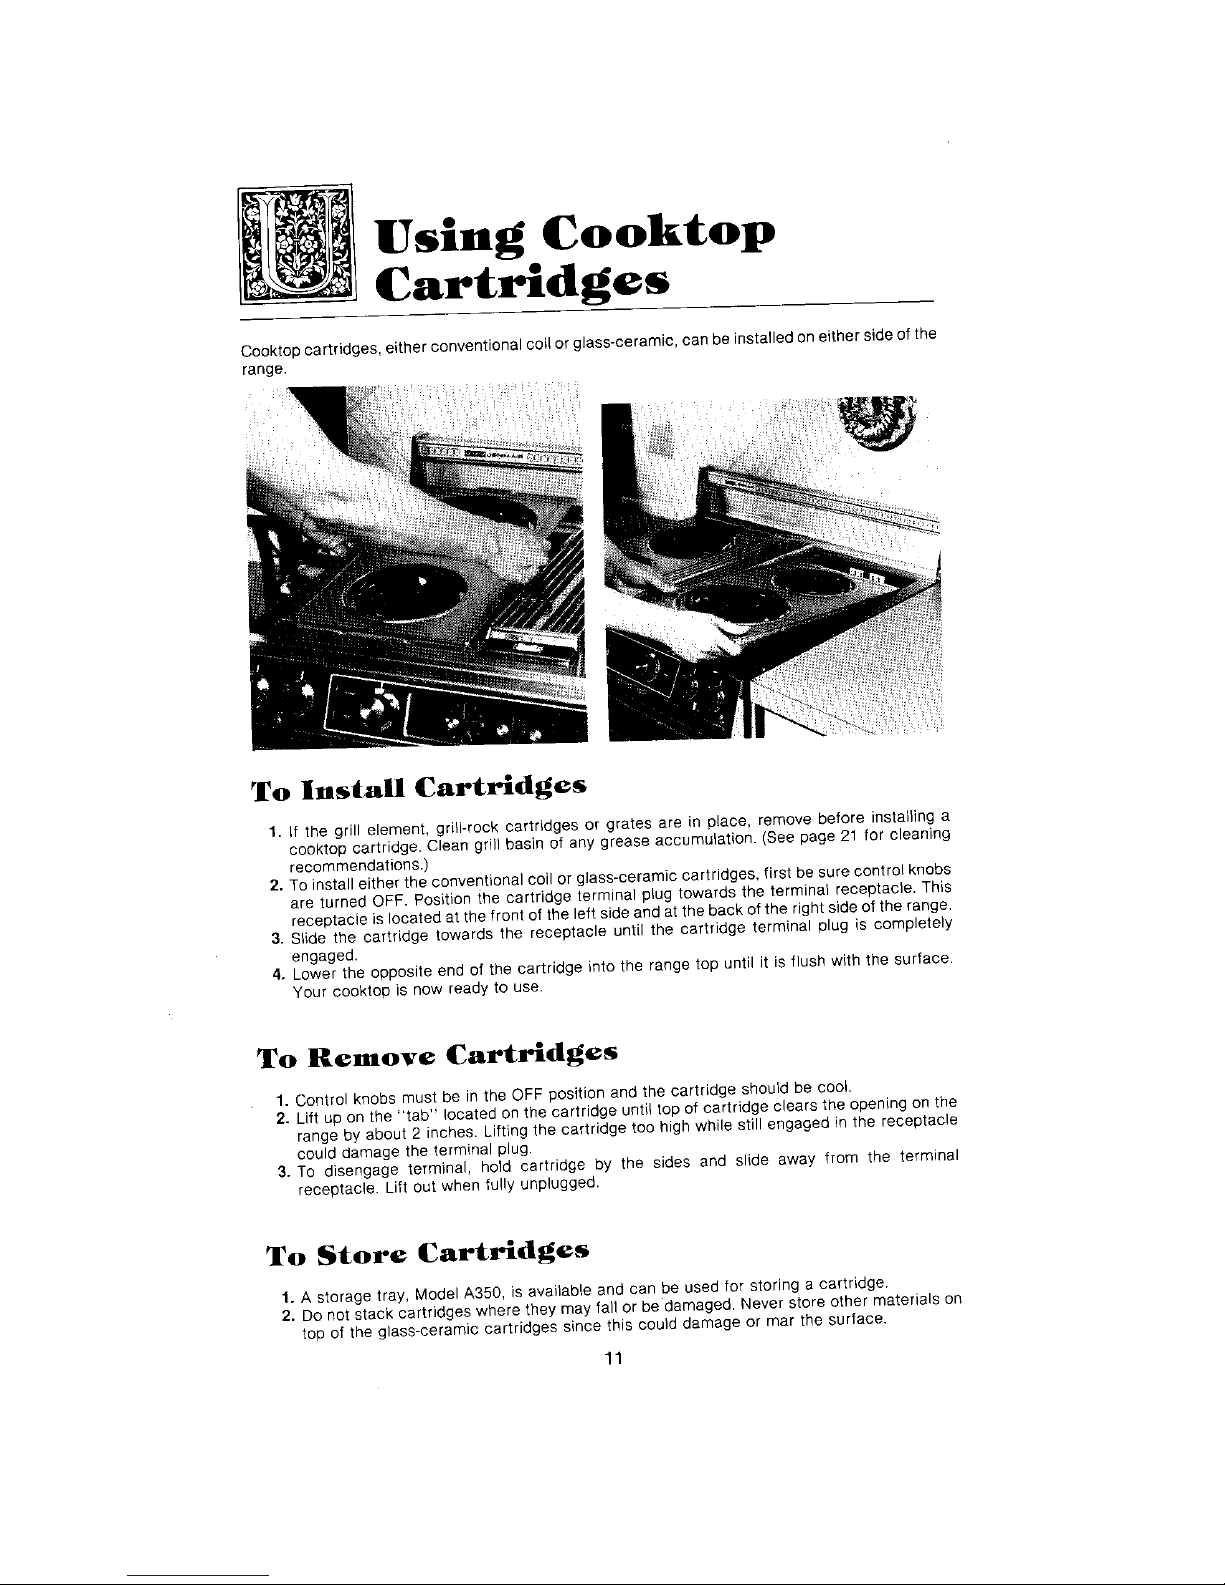
To Install Cartridges
1. If the grill element, grill-reck cartridges or grates are in place, removebefore installing a
cooktop cartridge, Cleangrill basin of anygrease accumulation. (Seepage 21 for cleaning
recommendations.)
2. Toinstall either theconventional coil orglass-ceramic cartridges,first be surecontrol knobs
are turned OFF. Positionthe cartridge terminal plug towards the terminal receptacle. This
receptacle islocated atthe front ofthe leftsideand atthe backof the rightside of the range.
3. Slide the cartridge towards the receptacle until the cartridge terminal plug is completely
engaged.
4. Lowerthe opposite end of the cartridge into the rangefop until it isflush withthe surface.
Your oooktopis now ready tOuse.
To Remove Cartridges
1. Control knobs must be in the OFFposition and thecartridge should be cool.
2. Lift up on the"tab" locatedon the cartridge untiltop of cartridge clears the opening on the
rangeby about2 inches. Liftingthe cartridge too highwhile still engaged inthe receptacle
could damagethe terminal plug.
3. To disengage terminal, hold cartridge by the sides and slide away from the terminal
receptacle. Lift out when fully unplugged.
To Store Cartridges
1. Astorage tray, Model A350,is available and can be used for storing acartridge.
2. Donot stack cartridges where theymay fallor be damaged.Never store other materials on
top of the glass-ceramiccartridges since this could damage or mar the surface.
11
Conventional
Coil Cooktop
For best results, most efficient use of electricity and to prevent damage to the
conventional coil elements, select cookware as described below.
The variable control setting allows flexibility in selecting desired heat. The HI setting
should be used only to start cooking. The control should then be turned to a lower
setting. Energy can be saved by avoiding unnecessary rapid boiling of foods and
covering utensils when bringing water to a boil. Use the lowest setting possible to
maintain correct frying temperature to avoid excessive splattering. Use a tight fitting lid
on utensils to speed cooking.
Retained heat in the elements can be used to finish cooking.
Do not allow pans to boil dry as this could damage both the cooktop and pan.
Selecting Proper Cooking Utensils
• Select cookware with fiat bottoms. Flat bottom pans are the fastest and best
conductors of heat and provide the most consistent and satisfactory results. The
entire bottom of the utensil should touch the heating element evenly. Avoid using
utensils with convex, concave or irregular bottoms. A utensil which is not flat
receives the most heat at the point of contact, which causes "hot spots" and
uneven heat distribution. Hot spots can result in scorching or burning of the food.
Uneven heat distribution slows the cooking process and wastes energy.
• To determine if a utensil is flat, lay a straight edge ruler against the bottom.
• Do not use a wire trivet or any kind of heat retarding pad between the utensil and
element. Reduce the heat control setting instead.
• Do not use utensils that extend more than 1 inch on either side of the element.
(See exceptions for canning on page 13.) Use the correct size pan for the size of
the heating element.
• Do not use large diameter canners or utensils except when boiling water or
canning. Sauce mixtures, syrups and fried foods all cook at much higher
temperatures than boiling water and could eventually reflect damaging heat to
the adjacent component parts of the range, shorten life span of heating element,
damage and discolor drip pans or cause impossible to clean spots on metal
surfaces. These problems are increased when the HI setting is used excessively
with oversized cooking utensils.
• Do not use any vessel with a turned down flange around the bottom.
• Special cooking equipment without flat bottoms, such as the Oriental wok, should
not be used on the cooktop. Only use the Jenn-Air wok accessory, Model A140,
on the range. It has a special heating element designed to eliminate problems
associated with using traditional round bottom woks on the conventional coil
cartridge, such as shortening the life of the heating element.
12
Cleaning the Conventional
Coll Cooktop
Thecooktopcartridgedoes notneedto be removedfrom therangefor normalcleaning,
Neverimmerse cartridge inwater toclean.This can damagewiring.A drain hole within
the cartridge permitsdrainage of normalspills into theporcelain drainpan where itwill
drain into the grease container. Interior andbottom of cartridge may be wiped clean
with detergent solution if necessary.
Cartridge terminals, if dirty, may be polished with S.O.S. pad, but must be cleaned
thoroughly of soapand dried thoroughly before being inserted into range.
Heating E]lement_" Undernormal conditions_most soil will burn off elements.The
heatingelementsunplugfor yourconvenienceincleaningthe drippans.Lift slightlyand
pull awayfrom receptable. DO NOTIMMERSEINWATER.To replace elements,push
comloletelyinto the receptacle. Make surethe elementsfit flat insidethe chrome bowl.
Drip Pans: TOkeep the like-new appearance, clean frequently and never allow
anything to bum on twice. Removesoiled pans (first remove heating element), Clean
lightly soiledpanswith soapandwater or cleanin dishwasher.Difficult to removespots
can becleanedby rubbinglightlywith soapyS.O.S.padsornonabrasivecleansers such
as BonAmi. Tohelpreleaseburnedon soil, soakina solutionof 1/2cupammoniaand1
gallon warm water. Do not use abrasive cleansers, steel wool or cleansers not
recommendedfor use on chrome.A bluing of the drip pansindicates improper utensil
selection and/or using excessively high heat.
Metal Surface.,,: Cleanwith milddetergent ornonabrasivecleansers recommended
for metal surfaces in general: For hard to removesoil, scrub lightly with soapy S.O.S.
pads. Do not use steel wool or abrasivecleansers since these will mar the finish. See
page 22 for cleaning instructions for stainlesssteel areas and cartridges.
NOTE: If excessivespill-overoccurs, check the greasecontainer.
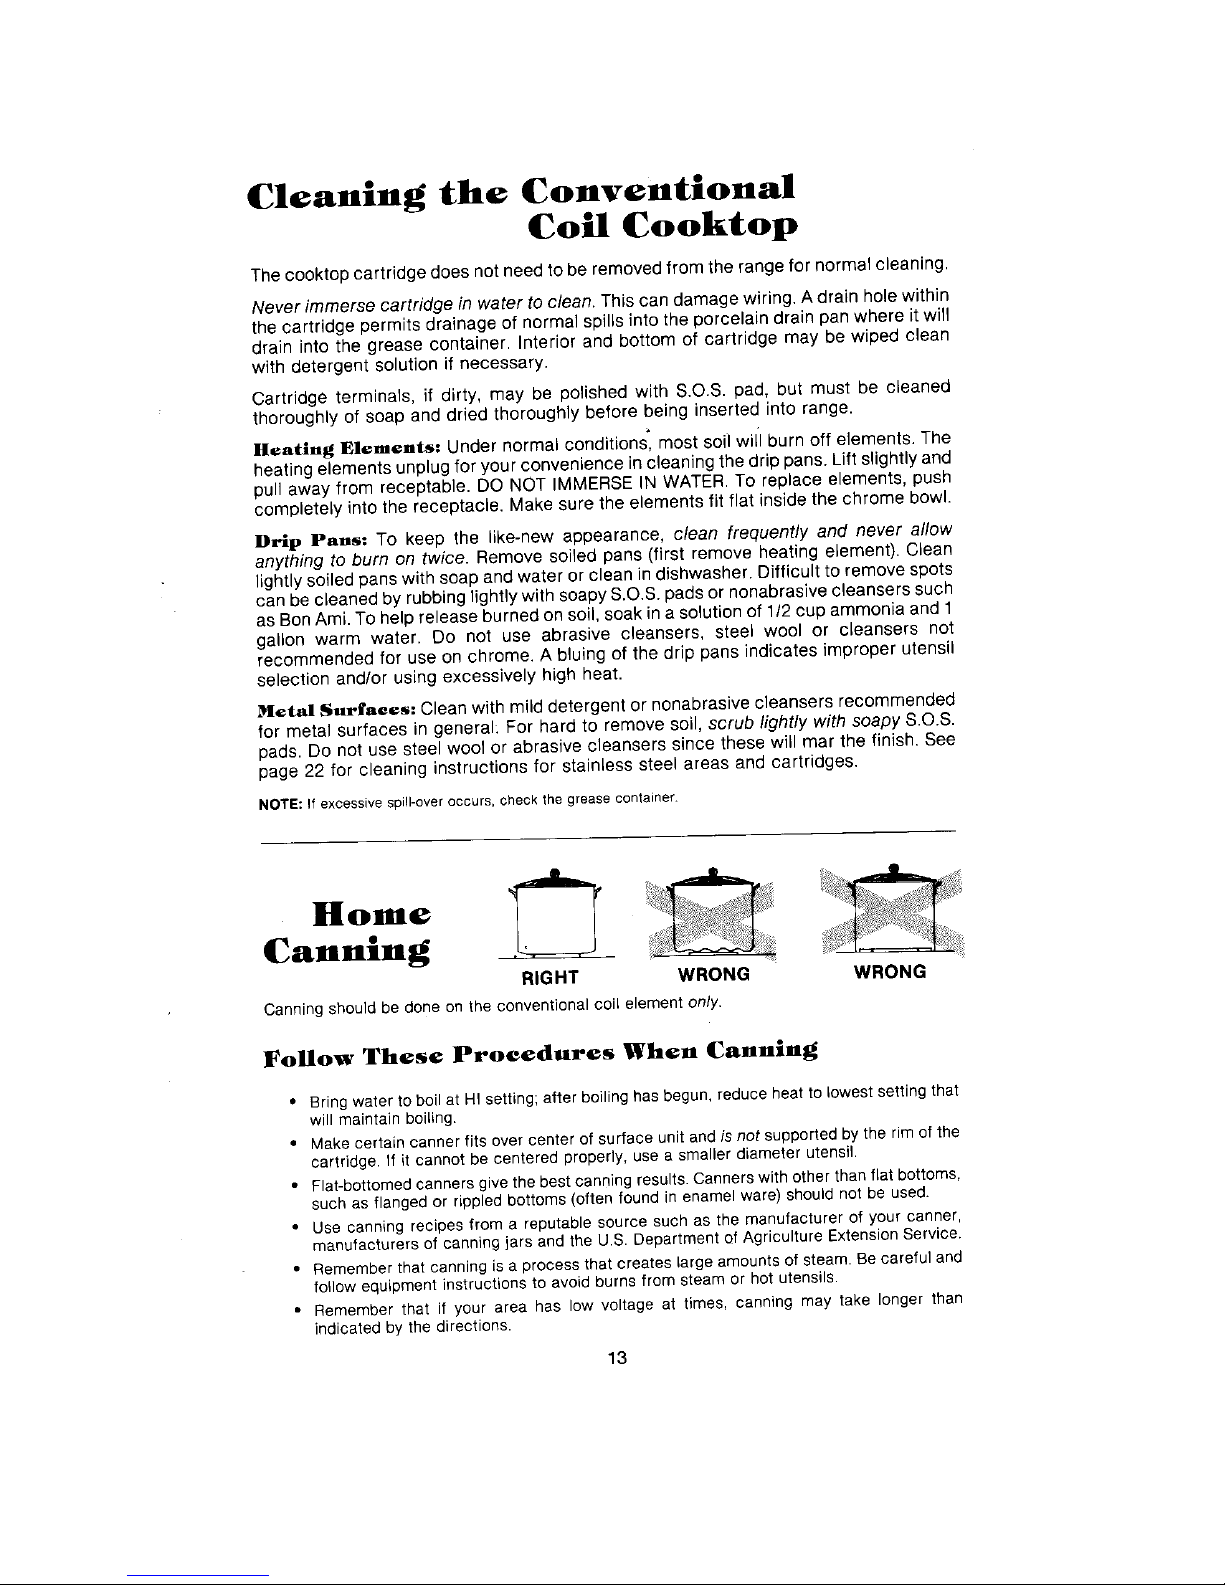
Hollle
Canning .
RIGHT WRONG WRONG
Canningshouldbedoneontheconventionalcoilelementonly.
Follow These Procedures When Canning
• Bringwatertoboilat HIsetting;afterboilinghasbegun,reduceheattolowestsettingthat
will maintainboiling.
• Makecertaincannerfitsovercenterofsurfaceunitandisnotsupportedbythe rimofthe
cartridge.If itcannotbecenteredproperly,usea smallerdiameterutensil.
• Flat-bottomedcannersgivethebeatcanningresults.Cannerswithotherthanflatbottoms,
suchasflangedor rippledbottoms(oftenfoundin enamelware)shouldnot beused.
• Usecanningrecipesfroma reputablesourcesuchasthe manufacturerof yourcanner,
manufacturersofcanningjarsandtheU.S,DepartmentofAgricultureExtensionService.
• Rememberthatcanningis aprocessthatcreateslargeamountsofsteam.Becarefuland
followequipmentinstructionsto avoidburnsfromsteamor hotutensils.
• Rememberthat if yourarea haslowvoltageat times,canningmaytake longerthan
indicatedbythedirections.
13
 Loading...