

Specifications and Main Features
- Model: M170
- Rated Output: 850 W
- Cook By: defrost by weight and time, defrost by time, auto cook, quick 30 sec, child safety lock
- Control type: Operating panels come with touch control functionality
- Turntable: glass tray and roller guide are provided
- Number of power levels: Cook at different speeds (after program cooking also includes 50% power)
- Auto Start feature: Participants are programmed hours up to 11 hrs 59 mins to start cooking at a predetermined time even when the program is not cooking.
- Timer: 12 hr clock display
- Audio signals: Set up beeps, end of cooking beeps, and some noisy errors on dualtons
- Types of dishes: Popcorn, frozen pizza, dinner plate, drink, and other food categories with auto cook options
- Type: Safety interlock system, child safety lock
- Type: Built in but proper grounding is a must
Frequently Asked Questions
- Is it permissible to use the turntable and tray in an erect position?
Yes, if the tray is held parallel to the floor, the door can be opened at all times during the heating process. The oven will stop its operations of heating and will hold the time that is preset on the program until the door has been closed and the Start Pad has been touched.
- What Variable Power Level conditions lead to a drop in the temperature of the oven display and interior light?
It is perfectly normal and shows that the appliance is functioning and circulating in a normal manner.
- Why is there steam and/or vapor leaking out from under the oven door and why do water droplets form on the inside of it?
It is pretty typical because foods release steam while being cooked.
- What do the various beeps imply?
- Short beep: when any pad is touched.
- Three short beeps: any entry is wrong.
- One long beep: when the oven is connected to supply.
- Three long beeps: cooking time is finished.
- A series of three short beeps: food may need to be turned or moved around, check to see.
- Is it possible to operate the mico with the glass tray or the roller guide taken out?
In no instance - The glass tray and roller guide are integral to the operation of the oven.
User Manual
Page 1
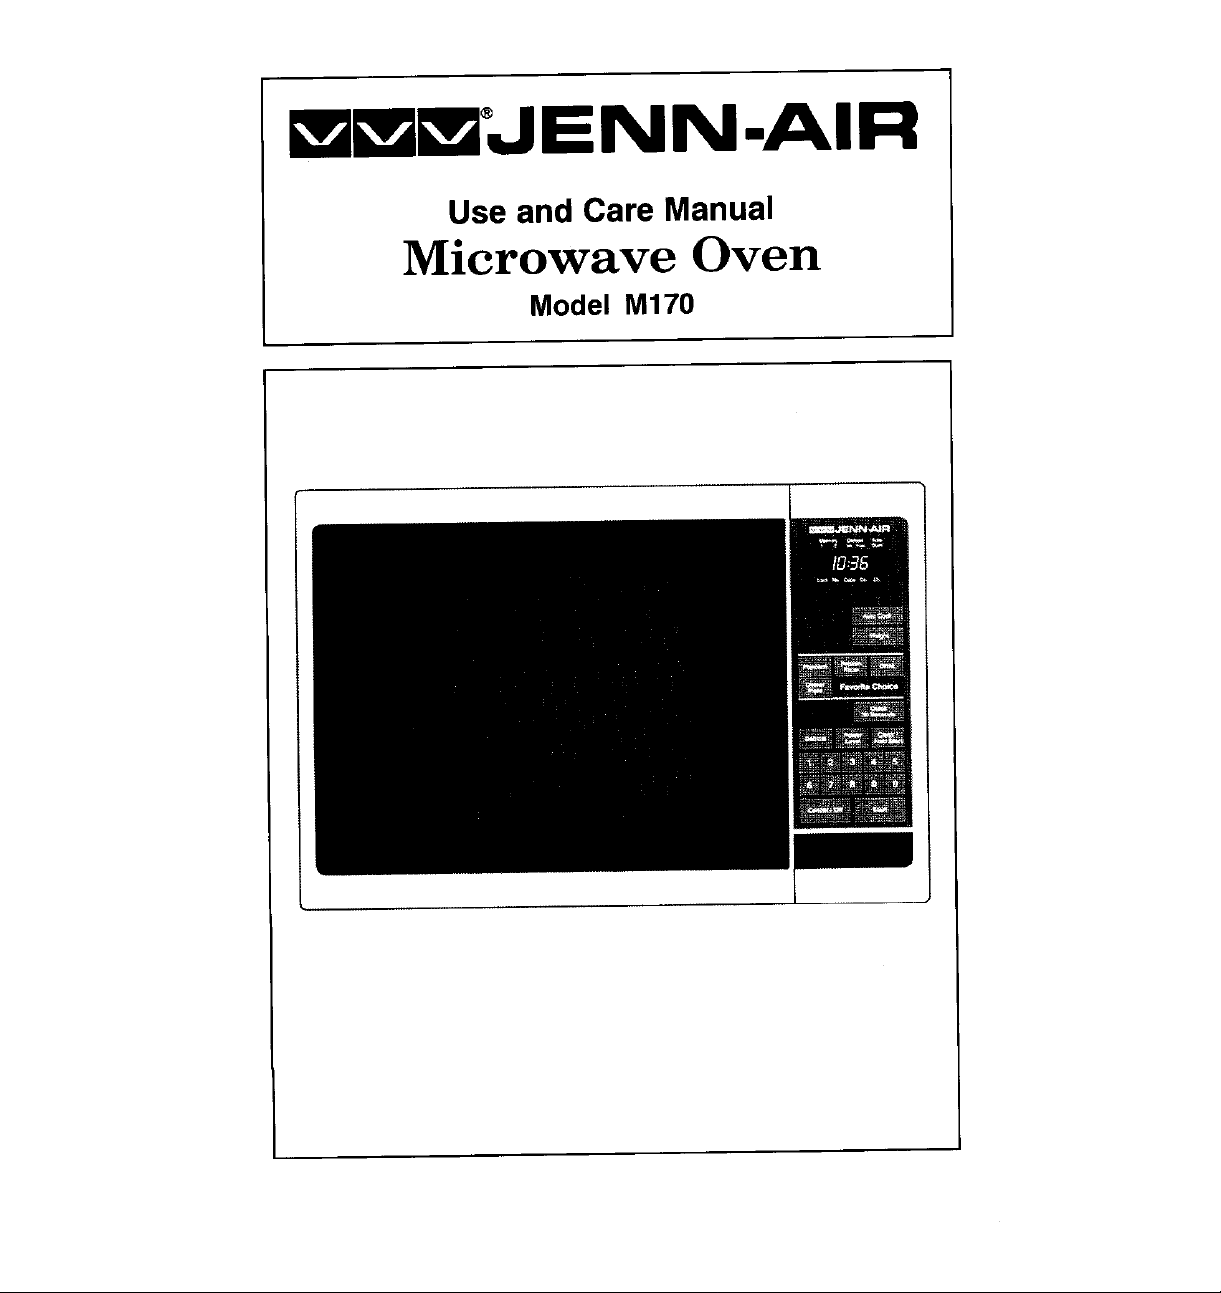
mm/JENN.AIR
Use and Care Manual
Microwave Oven
Model M170
Page 2
Congratulationsonyourchoiceof aJenn-Air MicrowaveOven.Yourmicrowave
ovenhasanoutputwattageof 850watts. Asyouuseyournewmicrowaveoven,
we know you will appreciatethe manyfeaturesthat provideexcellent perfor-
mance,convenienceand dependability.
Beforeyou begincookingwithyour newmicrowaveoven, please take a few
minutesto readand becomefamiliarwiththeinstructionsin this book. Onthe
followingpagesyouwillfindawealthofinformationregardingallaspectsofusing
your new microwaveoven. Byfollowing the instructionscarefully,you will be
abletofullyenjoyandproperlymaintainyourovenandachieveexcellentresults
with the food you prepare.
ShouldyouhaveanyquestionsaboutusingyourJenn-Airappliance,writetous.
Besureto providethe model numberof yourappliance.
Jenn-Air Customer Assistance
c/oMaytagCustomerService
P.O. Box2370
Cleveland,TN 37320-2370
FOR FUTURE REFERENCE
Wesuggestthat yourecordinformationforcontactingyourlocaldealeror
service agentalongwith the identifyingnumbers ofyour appliance.
If serviceis required,this informationmustbe furnished.
Dealer/Servicer:
Address:
ModelNumber:
SerialNumber:
DatePurchased:
2
Page 3

Answersto Questions.................................................................22
Care and Cleaning......................................................................23
installation
Grounding .................................................................................
InterferenceNotes....................................................................8
Oven Operation
AudibleSignals .......................................................................11
Auto Cook ...............................................................................15
Auto Cook Code......................................................................16
Auto Start ................................................................................20
ChildSafety Lock....................................................................21
DefrostbyTime..................................................................18-19
Defrost By Weight...................................................................17
Dinner Plate Pad.....................................................................14
Drink Pad.................................................................................15
FrozenPizzaPad....................................................................15
Oven Controls ......................................................................9-10
PopcornPad ...........................................................................14
Power Level Pad.....................................................................12
Quick30 SecondsPad ...........................................................15
Time Cooking..........................................................................11
Time of DayClock...................................................................11
Two StageCooking.................................................................13
8
Safety
AboutYour Microwave..............................................................2
ImportantSafety Instructionsand Registration.....................4-7
Precautionsto Avoid Possible Exposureto
ExcessiveMicrowaveEnergy ...................................................7
ServiceInformation................................................................24-25
Page 4

Whenusingelectricalappliances,basicsafetyprecautionsshouldbe followed,
includingthe following:
WARNING-Toreducethe riskof burns,electricshock,fire, injuryto personsor
exposureto excessive microwaveenergy:
1. Readall instructionsbefore usingthe appliance.
2. Read and follow the specific "PRECAUTIONS TO AVOID POSSIBLE
EXPOSURETO EXCESSIVEMICROWAVEENERGY"found on page 7.
3. Thisappliancemustbegrounded.Connectonlytoproperlygroundedoutlet.
See "GROUNDINGINSTRUCTIONS"on page8.
4. Installor locatethis appliance in accordancewith the providedinstallation
instructions.
5. Someproductssuchas whole eggs andsealed containers- for example,
closedglassjars - may explodeand shouldnot be heatedin this oven. In
rareinstances,poachedeggshavebeenknowntoexplode.Coverpoached
eggs and allowa standingtime of one minutebeforecutting intothem.
6. Foodswith unbrokenouter "skin" such as potatoes,sausages,tomatoes,
apples, chicken livers and other giblets, and egg yolks (see previous
caution) should be pierced to allow steam to escape during cooking.
"Boilable"cooking pouchesand tightly closedplasticbags should be slit,
pierced,or vented,
7. Donot heat,store or use flammablematerialsin or nearthe oven. Fumes
cancreate a fire hazardor explosion.
8. Usethis applianceonlyfor its intendeduseas describedinthis manual.Do
notusecorrosivechemicalsorvapors in this appliance. This type of oven
isspecificallydesignedto heat, cook,or defrostfood. It is not designedfor
industrial,laboratory,or commercialuse. Itis intended forhome useonly.
Do notusefor drying clothes, linens, newspaper,orsimilar non-foodtype
items.
9. As with any appliance, close supervision is necessary when used by
children.
10. Do notoperate this applianceif it has a damagedcord or plug, if it is not
workingproperly,or ifit has been damagedor dropped.
11. This applianceshould be serviced only by qualified service personnel.
ContactnearestauthorizedJenn-Airservicefacilityfor examination,repair
or adjustment.
12. Donotcover or blockanyopeningson theappliance.
Page 5
13. Donotuseoutdoors.Donot usethisproductnearwater- forexample,near
a kitchensink, in a wet basement,ornear a swimmingpool, andthe like.
14. Donot immersecord orplug in water.
15. Keepcordawayfrom heatedsurfaces.
16. Donot letcord hang over edgeoftable or counter.
17. Whencleaningsurfacesofdoorandoventhatcometogetheronclosingthe
door,useonlymild,non-abrasivesoapsordetergentsappliedwithasponge
orsoft cloth.
18. To reducethe riskof fire in the oven cavity:
a. Do notovercookfood. Carefully attendappliance if paper,plastic, or
other combustible materials are placed inside the oven to facilitate
cooking. Avoid usingrecycledpaperproducts. Do notusenewspaper
or otherprintedpaper in the oven. Such productssometimescontain
impuritieswhich couldignite.
b. Removewiretwist-tiesfrompaperorplasticbagsbeforeplacingbagin
oven.
c. If materialsinsidethe ovenshould ignite,keep ovendoorclosed,turn
oven off,anddisconnectthe powercord, or shut off power atthe fuse
orcircuit breaker panel.
d. Do not usethe ovenfor storage.
e. Do notpop popcornexcept ina microwaveapprovedpopcorn popper
or in a commercialpackage recommendedespecially for microwave
ovens.
19. Donot operatethe ovenwhen empty or with an emptyutensil.
20. Donotleanon theovendoor. The door isdesignedto close tightlyandseal
properlyfor safe operation. Leaningon thedoor maywarp or break the
hinges.
21. To avoid exposure to dangerous high voltage, DO NOT REMOVETHE
SPLAI-I-ERSHIELD insidethe oven cavity.
23. Liquidsheatedincertain shapedcontainers(especiallycylindrical-shaped
containers)maybecomeoverheated,splashoutwithaloudnoise. Forbest
results, stir the liquid several times before heating. Always stir liquids
severaltimes betweenreheatings.
24. Readandfollow specific microwaveoven preparationinstructionsonfood
packagesor containers(especiallybabyfood). Aboveall,this is acooking
appliancedesignedto preparefood.
25. Useonlycookingutensilsand accessoriesmade for useinthe microwave
and specificallydescribedinthis manual.
26. Microwaveovenmanufacturersdo notrecommenddeepfatfryingor frying
inamicrowaveoven. Hotoilcandamageovenpartsandutensilsandeven
resultin skin burns.
27. Plasticwrap: Use onlythose typesdesignedfor microwaveovenuse and
avoidformingan air-tightseal. Foldbacka small corner or cut a smallslit
to allowsteamto escape.
Page 6
28. Stay near the appliancewhile it is in use and check cooking progress
frequently.Leavingtheapplianceunattendedmayresultinovercookedfood
and possiblya fire inyour oven.
29. Built-inInstallations:(Microwavemust be built-inwith a trim kit.) Do not
mountany portionof themicrowaveovenover asink or anyother heating
orcookingapplianceunlessthemicrowaveovenhasbeenapprovedforuse
abovethe heatingappliance. Seelabel onthetrim kitfor a listofapproved
heating appliances. See installationinstructionsfor additional installation
information.
30, TVdinnersmaybemicrowavedinfoil trayslessthan3/4"deep;removetop
foilcoverandreturntrayto box. Whenusingmetalinmicrowaveoven,keep
metalat least 1-inchawayfrom sides of oven.
31. Donot defrostfrozen beveragesin narrowneckedbottles.
32. Cookwaremay becomehot becauseof heat transferredfrom theheated
food. Potholdersmay be neededto handlethe cookware.
33. Do not try to melt paraffinwax in the oven. Paraffinwax will not melt in a
microwaveoven because it allows microwavesto passthrough it.
34. Neverusesharp-edgedutensils in or near the oven.
- SAVE THESE INSTRUCTIONS -
Page 7
a. Do not attempt to operate this oven with the door open since open door
operation canresultin harmful exposure to microwaveenergy. It is important
not to defeat or tamper with the safety interlocks.
b. Do not place any object between the oven front face and the door or allow
soil or cleaner residue to accumulate on sealing surfaces.
e. Oonot operate the oven if it isdamaged. It is particularly important that the
oven door close properly and that there isno damage tothe: (1) door (bent),
(2) hinges and latches (broken or loosened), (3) door seals and sealing
surfaces.
d. The oven should not be adjusted or repaired by anyone except properly
qualified service personnel.
Federal law requires registration of all microwave ovens. To comply with the law,
please fill out the CUSTOMER REGISTRATION CARD packaged in the oven:
1. Check the model and serial numbers on the card to see that they match the
numbers onthe rating label. Rating label islocated on the left inside wall of the
oven cavity. Ifthe numbers on the card are not the sameasthose on the rating
label crossoutthe numbers on thecard andwrite inthe numbers asthey appear
on the rating label.
2. Mail the card. The return address is included on the reverse side of card.
If you move or are not the original owner of this oven, you must by law renew the
registration. Send the renewal registration information to: Maytag Customer
Service, Warranty Administration, P.O. Box 4970, Cleveland, TN 37320-4970.
Renewal Registration information must provide: a) Your name and address and
b) the microwave oven's model and serial numbers.
Page 8
Removeall packingmaterialsbothoutside and insidethe ovenbefore usingthe oven.
Theoven requiresfree movement ofair for properoperation. Do NOT blockair vents
locatedunderneaththe oven. Also,do notremovethefeet fromthe bottomoftheoven.
This appliancemust be grounded. Inthe eventof an electricalshort circuit,grounding
reducesthe risk of electric shockby providing an escapewire for the electric current.
This applianceis equippedwith a cord havinga groundingwire with a groundingplug.
The plug must be plugged into a 120v, 15 amp. outlet that is properly installed and
grounded.
WARNING- Improper use ofthe grounding plug can result in a risk of electricshock.
Consult a qualified electrician or serviceman if the grounding instructions are not
completely understood, or if doubt exists as to whether the appliance is properly
groundedand either:
1) If it isabsolutelynecessaryto usean extensioncord,use only a 3-wire extension
cordthat hasa 3-blade groundingplug,and a 3 slot receptaclethat willacceptthe
plug on the appliance. The marked ratingof the extension cordshall be equal to
or greaterthan the electricalrating of the appliance.OR,
2) Donotuse anextensioncord. Ifthepowersupplycordis too short,haveaqualified
electricianor servicemaninstall an outlet nearthe appliance
Microwaveovensgenerateradiofrequencyenergyduring operation,and ifnotinstalled
properlymay cause interferenceto radio and televisionreception. You can determine
if this unit is causing interference by turning it on and off while the intederence is
occurring. If interference occurs, it may be correctedby one or moreof the following
measures:
• clean doorand sealing surfaces of the oven;
• reorientthe television or radio receivingantenna;
• relocatethe ovenwith respectto the televisionor radio receiver; and/or
• plugthe oveninto a differentoutlet sothat it andthe televisionor radioreceiverare
on different circuits.
If the interference persists, you may wantto consult an experienced radio/television
technicianfor additionalsuggestions.
Page 9

Cooking Guide
Rating Label Display
Label
Light Window
I
I°l
Window, To view the
foodswhilecooking, No Touch Control Panel.
microwaves can pass (See more detailed dia-
throughthe metalshield
in this window.
SafetyInterlockSystem.Safety
DoorLatch, Thesewill latchesareinthemicrowaveoven
slide into the interlock, door. All ovenshaveatleasttwo
Ifdoorisnotcompletely latcheswhich stop the operation
closedthe ovenwillnot of the oven when the door is
operate, opened.
Turntable. Composed of glass tray and
rollerguide. The rollerguide isplacedfirst
inthebottomofthe microwaveandsupports
the glasstray. Both partsmust be in place
when usingthe microwave.
openthe door.
gramof controlpanel on
page 10.)
Page 10

Display Window
_JENN-AIR
AutoCook Pad
p. 16
FrozenPizzaPad
........ . Weight Pad
See p. 15 See p. 16
:::: :: :: Drink Pad
Seep. 14 ,:: ,::_::
::;':bri_;':0:: ' -See p. 15
Favorite Choice
DinnerPlate Quick 30
See p. 14 SecondsPad
See p. 15
DefrostPad ............. iic_,,E! Clock/Auto
See p.17-19
;z
_e_t !A_!_r_ • Start Pad
Seep. 11 &20
Pads__ _ Power LevelPadNumber
ii6!!!;!Tii
iii!!iiii i!i!iiiil !!i_!!_!_i!!iii!!i_!_iii!i
Cancel/Off Pad
Touchto stopcooking
or clear Display of
incorrectentry
See p. 12
Start Pad
Touchto
start cooking
10
Page 11

• Afterplugging in theovenor aftera poweroutage, the Displaywill show":0". Set
clock usingthe instructionsbelow.
• Time of Dayclock is a 12hour clock.
• If set,the time of day will always be displayedwhen no other cooking functionis
being used.
Audible signals are available to guide youwhen setting and usingyour oven:
• A programmingbeepwillsound eachtime you touch apad,
• One long beep willsoundwhentheovenisfirstpluggedin.
• Three long beeps signaltheendof a cookingcycle.
• Three short beeps signalan incorrectentry.
• Series of three short beeps signalyouto check the food.
Consult your recipe for the approximate cooking time. Start with the shortest
recommendedtimeandaddmoretime asneeded.Checkthefoodasit cooks. Theoven
doorcanbeopenedanytimeduringoperation. Theovenwillautomaticallystopcooking
and maintain the time setting untilthe dooris closed and the Start Pad is touched.
*Note: Full power cooking is automatic. If you wish to use a different power level
follow the instructionson p. 12,
Example: To heata cup of coffeefor 11/2minutes,touch the numbers 1,3, 0. Then
touchthe Start Pad. Thetime you selectand an indicatorunder Stage 1
will appearin the DisplayWindow. The oven blower will come on andthe
ovenwill begincooking. Time countdownwill begin. Whenthe time is up,
the microwaveovenwill beep threetimes, and will stop cooking automati-
cally. Time of daywill reappear in the Display.
11
Page 12

As with conventionalcooking methods,your microwaveoven gives you the flexibility
of choosing the cookingspeed (powerlevel)you needfor each type of food.
* For Hi, touch Power Level Pad twice.
** See PowerLevelGuide below.
Example: If the recipe callsfor cooking with 50% powerfor 3 minutes,you would
touch: the Power Level Pad; then 5("50"will appear in the Display
Window);then the numberpads 3,0,0;then Start Pad.
Power LevelGuide*
i_,,_,_!_i,_i_iii_ii_i_!_,,_,_,_ _
* Guide gives percentage of magnetron "on" time at different power levels and
suggesteduses.
12
Page 13

Thetwo stagesofthis microwaveoven letyouprogramtwo sequentialoperationssuch
as defrostingandcooking;and cooking usingtwodifferent powerlevels. The Memory
featureautomaticallychangespowersettingsandcookingtime. Sinceoneshortaudible
beepwill soundbetween stages,it is also possibleto divide cookingtimes. Then,the
signalwould serveas a reminderto addfoods (separatedishes oradd ingredients)and
to obtain preciselythe end results desired.
* Ifyou wish to cook on HI, skip step 2.
** Ifyou wish to cook on HI, skip steps4 & 5.
Note: When the Start Padis touched,bothStage 1 and 2 indicator lights come on in
the Display. Stage1 indicatorlightstarts blinkingto show youthat theoven is cooking
in the first of the two cook stages. Theoven will cookat the powerselected for Stage
1. At the end of Stage 1, theoven wilt beep and startStage2. The Stage 1 indioator
goesoff andtheStage2 indicatorstartsblinking. Three beepssignalthe endof cooking.
To Cancel Stage cooking
1, TouchCancel/Off Pad,
13
Page 14

Popcornisafavoritesnack.ThePopcornPadhas beenautomaticallysetforthe correct
cooktimefor a 3-3.5oz. and1.75 oz. bagsof microwavepopcorn.
Popcorn Tips
• Checkthe popcornasitpopsandstopwhenthepoppingslowsdownto3 seconds
apart.
• Do nottrytorepopunpoppedkernelsor reusea bag,
• Poponlyone packageat a time.
The Dinner Plate Pad letsyoureheata dinnerplatefullof chilledleftovers.
TheDisplaywillshow"11". After 1.5seconds,theDisplaywillshow"2:20"and theoven
starts cooking.
Dinner Plate Tips
• Place meatandbulkyvegetablestothe outsideoftheplate.
• Placedelicatefoodsinthe centeroftheplate. Adddelicatedinnerrollsduringthe
last fewseconds.
• Coverthe platewithwaxpaperto holdsteamaroundmostfoods.However,donot
coverraremeatorvegetableswithcrispexteriors.
14
Page 15

The FrozenPizzaPad allowsyou toreheata frozenpizza (approx.7 oz.)by touching
one pad.
TheDisplaywillshow"7". After1.5seconds,the Displaywillshowcookingtimeandthe
ovenstartscooking.
FrozenPizzaTips
• Useonly onepizzaat a time.
• Followmanufacturer'sdirectionsforcookware.
• Use onlyfrozenpizzaformicrowaveoven.
The DrinkPad letsyoureheata beveragebytouchingone pad.
TheQuick 30 SecondsPadprovidesa convenientwayto reheatfoodsatfullpowerin
multiplesof 30 seconds. By repeatedlytouchingthe pad,you can reheat from 30
secondsto 5 minutes.
15
Page 16

Auto Cook allows you to cook or reheatcommon microwave prepared foods without
needingtoprogramtimes andpowerlevels. TheAutoCook haspresettimesandpower
levelsfor threefoodcategories: bakedpotatoes,fresh vegetablesand cup(s) ofdrink.
* Note: See chart belowor the CookingGuide Label on the front of the ovencavity. -
Example: If you wantto cooktwo bakedpotatoes,touchthe Auto Cook Pad untilAC-
1 is displayed. Touch Weight Pad twice and"2"will show in Display.
The Displaywill show cookingtime and the ovenautomaticallystarts cooking.
16
Page 17

Use the defrost setting to defrost meats, poultry and seafood from .5 pounds to 6.5
pounds. The Defrost Pad can be used forWeight Defrost or Time Defrost.
• Touchthe Defrost Pad once for defrosting by weight.
• Touchthe Defrost Pad twice for defrosting by time.
The oven automaticallysets the defrostingtime and powerlevels.
* Enterthe weight in poundsand tenths of a pound.
IMPORTANT: Duringdefrosting,theovenwillbeepa seriesofshort beepstosignalthat
thefood needsto beturned or rearranged. Oven will continueoperatingif food is not
turnedor rearranged. Three beeps signalthe end or defrosting.
Conversion Chart
17
Page 18

When defrosting by time, the microwave cycles on and off, alternating defrost and standtimes.
When theStart Pad istouched,theTime Defrostindicator startsblinkingto showthattheoven
is intheTime Defrostmode. The Displaycountsdownthetimeto showhowmuchdeffrosting
timeisleft. Duringdefrosting,theovenwill beep a seriesof shortbeepstosignalthatthefood
needs to be turnedor rearranged. Oven will continue operating if food is not turned or
rearranged. Three beepssignal theend of defrosting.
18
Page 19

Tips
1. Do not defrostcovered meat. Covering mightallowcookingto take place. Always
removeouterwrap andtray. Placefoodona microwave-saferackina dish. During
"defrost,juices accumulatein dish and may become hotenough to cookthe food.
Elevating meat off of the dishwill prevent the bottomand side from beginningto
cook.
2. Begindefrostingwhole poultrybreast-side-down. Begindefrostingroastsfat-side-
down.
3. The shapeof the packagealters thedefrostingtime. Shallowrectangularshapes
defrost morequicklythan a deepblock.
4. Defrost By Weight is programmed for specific weights. Defrost results will be
affected if you enter an incorrectweight.
5. DefrostByWeightis programmedfor frozenfood at0°F. Iffoodisstoredatahigher
temperature, expectshorter defrost times.
6. After _/3the defrosttime,check thefood. You maywish to turn over, breakapart,
rearrange or removethawed portions of the food.
7. During defrost (weight ortime), the ovenwill prompt you to turn the food over.
Atthispoint,openovendoorandcheckthe food. Followthetechniqueslistedbelow
for optimumdefrostresults. Then, close ovendoor, touch Start Pad to complete
defrosting.
A) Turn Over Roast, ribs, whole poultry, turkey breasts, hot dogs, sau-
sages, steaks,or chops.
B) Rearrange Breakapart or separatesteaks, chops, hamburger patties,
ground meat, chicken or seafood pieces,chunks of meat
such as stewbeef.
C) Shield Usesmallstripsofaluminumfoilto protectthinareas,edges
or unevenly shaped foods such as chicken wings. To
preventarcing,donotallowfoilto comewithin1-inchofoven
walls ordoor.
D) Remove To prevent cooking, thawed portions should be removed
from the ovenat this point. This may shorten defrost time
for foods weighing lessthan 3-1bs.
8. Afterdefrosting, allowfoodto stand 10to 20 minutesifthere areanyicy _reas. If
largesolidroasts,such assirlointipor rumproasts,are notcompletelythawedafter
standing,return roastto oven and program Defrost ByWeight for 1 lb.
19
Page 20

TheAuto Startfeature allowsyoutoprogramyour ovento begincookingata presettime
of day - up to a delay of 11 hours and 59 minutes. You can programtwo sequential
operations using two different powerlevels.
* If you wishto cook with oneStage, omit steps4, 5 and 6.
** The ovenwill start cookingat theset time. If the door isopenedbeforethe starttime
is reached,touchthe Start Pad to resumethe Auto Startoption.
• YoucannotusetheAutoStartwiththefollowingoptions:Popcorn,FrozenPizza,
Drink,DinnerPlate,DefrostandAutoCook.
• DonotusefoodscontainingbakingpowderoryeastwhenusingAutoStart. They
willnotriseproperly.
• WARNING: To avoidsicknessamd foodwastewhenusingAutoStart:
• Donotusefoodsthatwillspoilwhilewaitingforcookingto start,suchas dishes
withmilkoreggs,creamsoupsandcookedmeatsorfish. Anyfoodthathasto
waitforcookingtostartshouldbe verycoldorfrozenbeforeit isputintheoven.
UNFROZEN FOODSSHOULD NEVER STAND MORE THAN TWO HOURS
BEFORECOOKINGSTARTS.
• Donotallowfoodtoremaininovenformorethantwo hoursafterendofcooking
cycle.
To checkAuto Start Time
1. TouchClock/Auto Start Pad. The programmedAuto Starttime will appearin the
Displayfor 3 seconds.
Tips on Setting Auto Start
• Beforesetting,checkthatthe correcttimeof dayis displayed.
• Ifyouhearthe fan startwhenyoutouchtheStart Pad,youhave notsettheoven
properly.Touchthe Cancel/OffPad and startover.
2O
Page 21

The ovenoperationcan be lockedto preventa childfrom accidentallyturning it on. All
ovenfunctions can be locked.
To set
TouchandholdtheCancel/OffPadforthreeseconds. The lockindicatorlightsandthe
oven beeps.
To cancel
Touch and holdtheCancel/Off Padforthreeseconds.Thelockindicatorlightgoesoff
andtheovenbeeps.
21
Page 22

Q. Can I open the door when the oven is operating?
A. The door can be openedanytimeduring thecookingoperation. The
ovenwill automaticallystop cookingand the time settingwill maintain
untilthe door isclosedandthe Start Pad is touched.
Q. What causes the oven interior light and displayto dim when using
a VariablePower Level?
A. This is normaland indicates the oven is operating andcycling properly.
Q. Why does steam and/or vapor escape aroundthe door and mois-
ture dropletsform on the inside of oven door?
A. Thisisa normaloccurrence- asfoodcooks,steamis givenoff.
Q What do the variousbeeps mean?
A. Shortbeep = any pad istouched.
Three short beeps= incorrectentry.
Onelongbeep = oven pluggedin.
Three long beeps= end of cooking(microwavewill turnoff).
Seriesof three short beeps = checkfoodto see ifturningor rearranging
is needed.
Q. Can the oven be used with the glasstray or roller guide removed?
A. No. Boththeglasstrayandrollerguidemustalwaysbe usedinthe
ovenwhencooking.
22
Page 23

A minimumof maintenance is neededto keepthe microwave ovenclean and trouble
free. Theovenitselfshould becleanedafter each use with adamp clothto keepit free
from greaseand soil buildup. Stubborn soilscan be removedwith a plasticscrub pad.
Whencleaning interiorsurfacesandsurfacesofdoorandoventhatcometogetherwhen
thedoorisclosed,useonlymild,nonabrasivesoaps or detergentsappliedwithasponge
or soft cloth.
Someliquidcleanserscanremovetheshinysurfaceon plasticorvinyl. Therefore,never
sprayorpourliquidcleansersdirectlyonto asurface. Sprayorpourcleanserontoacloth
or spongeand then clean.
Odorscan beeliminatedfrom the insideof theoven by boiling a solution ofone cup of
waterandseveraltablespoonsoflemonjuicein theovenfor5-7 minutes.This alsohelps
loosen anydried soil in the oven. Be very careful not to scratchthe door and interior
surface. Wipe off excess moisture afterevery use.
DONOT USEabrasive cleaners,oven cleaners,abrasive cleaningpadsor steelwool,
as they can scratchor dull oven surfaces.
DO NOT REMOVEOR INSERT KNIFE around the stirrer cover to clean, as it may
damagethe cover or affect the cooking performanceof your oven.
Washoven bottomwithhotsudsywater,rinse anddry. Donotuseexcessiveamounts
of water when cleaningthe oven, especiallyaround the turntable. Do not allow water
or cleaningagents to seep into turntable gears located underneath.
Allow to cool before removing and cleaning. Wash in soapy water or dishwasher.
Clean frequentlyto prevent excessivenoise. Wash in soapywater or dishwasher.
This bulbis to be replacedby properlyqualified servicepersonnel.
23
Page 24

Checkthe following list to be sure a service call is really necessary.
If nothing on the oven operates:
• check for a blown circuitfuse or a tripped main circuit breaker.
• check if oven is properlyconnectedto electriccircuit in house.
• check that controlsare setproperly.
• check that the cooking time is set.
If the oven interior light does not work:
• the light bulb is loose ordefective.
If oven will not cook:
• check that control panel was programmedcorrectly.
• check that door is firmly closed.
• checkthat Start Pad was touched.
• Auto Start was set.
• the Child Safety Lockmay havebeen set.
If oven takes longer than normal to cook or cooks too rapidly:
• besure the Power Level is programmedproperly.
• check instructionson food density, etc.
• verifyvoltage to the microwaveoven is not low.
If the time ofday clock does not always keep correct time:
• check that the powercord is fully insertedinto the outlet receptacle.
• checkthat the oven is properly grounded.
• be sure the oven isthe only applianceon the electrical circuit.
If oven floor or glass tray are hot:
• this is normal. The floor is absorbing heatfrom the food.
If interior of oven collects moisture:
• thisis normal. Foodgives offmoisturewhencookingandthe steamcollectson the
door and the oven surface. Wipeexcess moisturefrom oven after each use.
If food cooks unevenly:
• refer to your recipefor proper cooking procedures.
• be sure food is evenlyshaped.
• be sure food is completelydefrostedbeforecooking.
• check placementof aluminumstrips used to prevent overcooking.
24
Page 25

If food is undercooked:
• checkrecipetobesurealldirections(amount,time,& powerlevels)werecorrectly
followed.
• checkhouseholdvoltage.
• be sure microwaveoven is on a separate circuit.
• be sure food was completely defrostedbefore cooking.
If food is overcooked:
• checkrecipe to besure all directions(amount,powerlevel,time,size of dish)were
followed.
• be sure initial temperatureoffood wasn'thigher than normal.
If arcing(sparks)occur:
• be sure microwave-safedishes were used.
• be surewire twist ties weren't used.
• be sure oven wasn't operatedwhen empty.
If the Display shows a time counting down but the oven is not
cooking:
• check that door is firmly closed.
25
Page 26

mJENN-AIR
403WESTFOURTM STREETNORTH•NEWTON,IA50208
@1996Jenn-Air Company
PaA No. 8111P230-60
Cat. No. MU170UA
6196
 Loading...