

Jenn-air JXA9130AAP Installation
INSTALLATION
INSTRUCTIONS
PROSTYLE LIGHTED
BACKSPLASH
SECTION I
ASSEMBLY OF SHELF TO BACKSPLASH
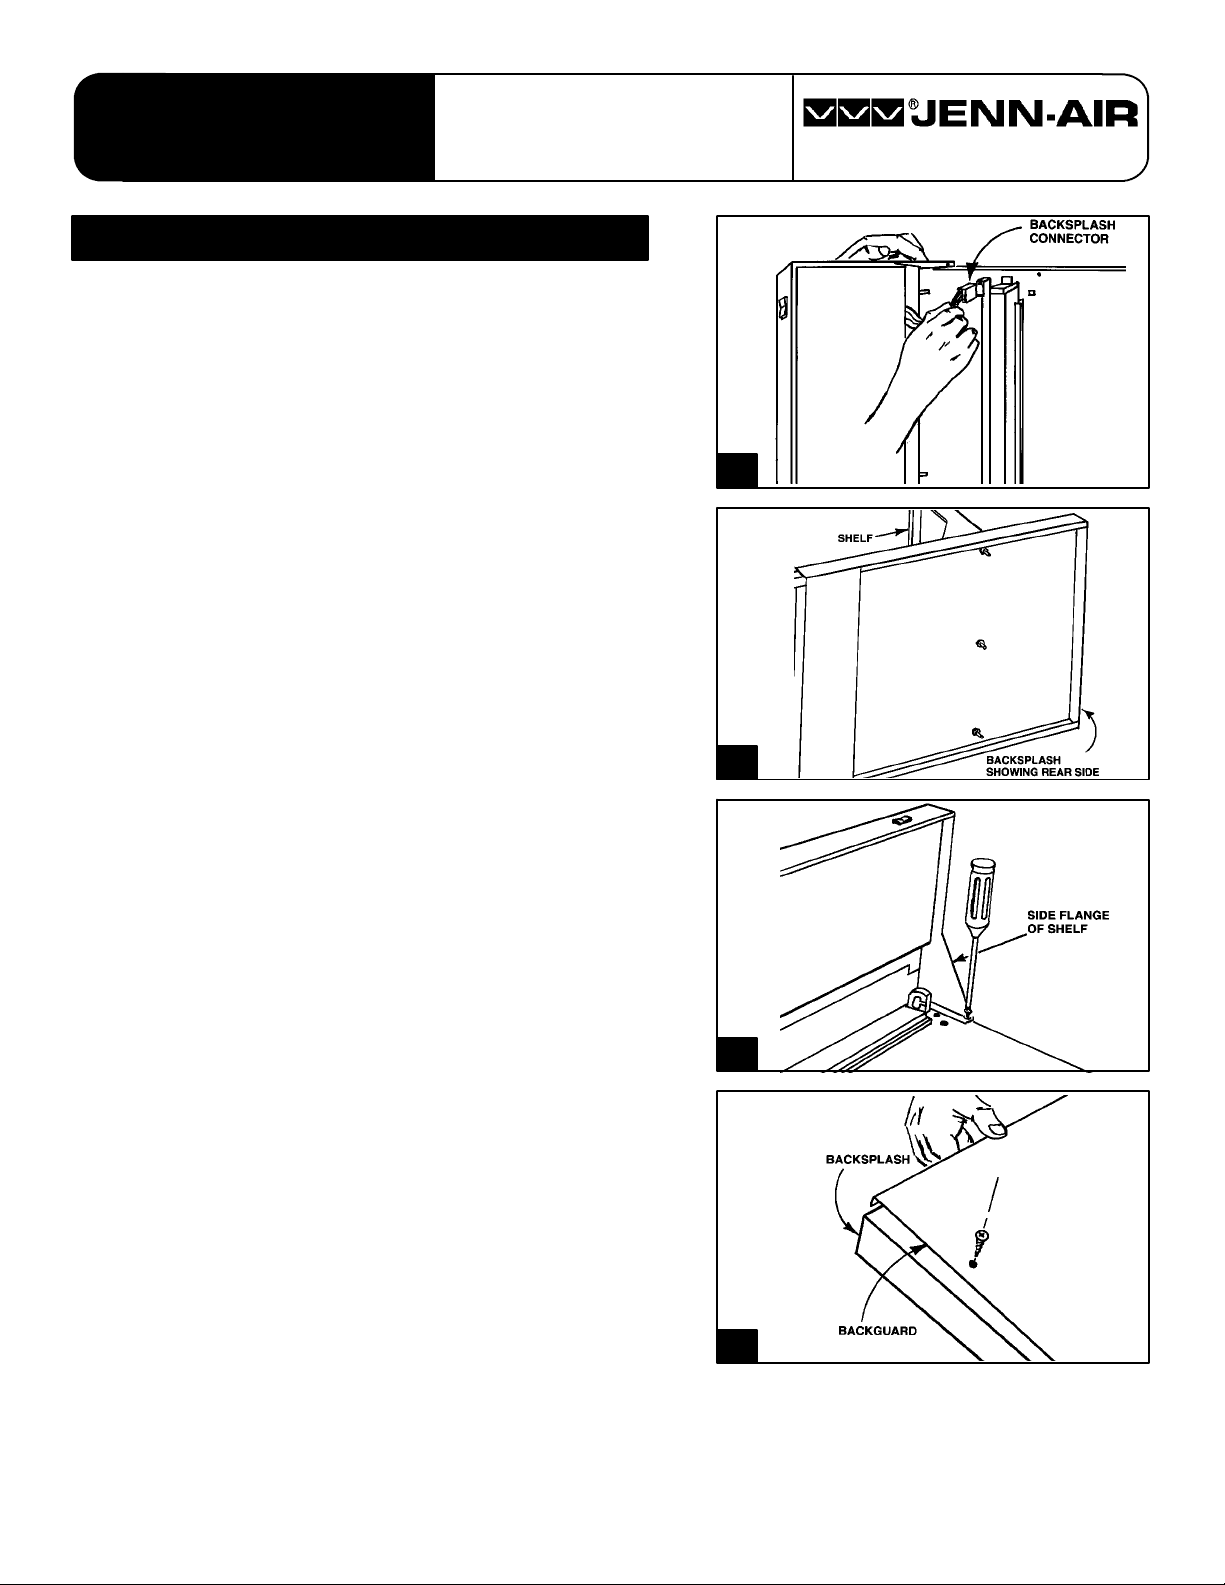
1. Using a flat working surface such as a table, position
the shelf and backsplash on their sides.
403 WEST FOURTH STREET , NORTH D NEWTON, IA 50208
2. Remove upper backguard (black panel) from backsplash.
3. Connect wires from shelf to connector on backsplash as
shown in figure (1).
4. Install shelf by inserting threaded studs on shelf i nto slots
in backsplash as shown in figure (2). Be sure excess wire
from shelf is tucked inside shelf and is not pinched.
5. Install hex nuts, finger-tight only, onto threaded studs
on rear of backsplash.
6. Lay backsplash on it’s back. Install (2) truss head phillips
screws through side flanges of shelf into backsplash as
shown in figure (3).
1
2
3
7. Tighten hex nuts on rear of backsplash to complete this
step.
8. Turn assembly over so the rear of the backsplash faces
up. With flange along top edge, facing inward, attach
backguard to rear flanges of backsplash using (4)
hex-head screws as shown in figure (4).
4
8101P389-60
8101P389-60
(03-01-00)
(03-01-00)
SECTION II
WIRE HARNESS CONNECTION
41. WARNING: RANGE MUST BE
DISCONNECTED FROM POWER SUPPLY
BEFORE ATTEMPTING INSTALLATION. DO NOT
DISTURB ANY INTERNAL WIRING AND SUPPLY
WIRING (WHERE APPLICABLE).
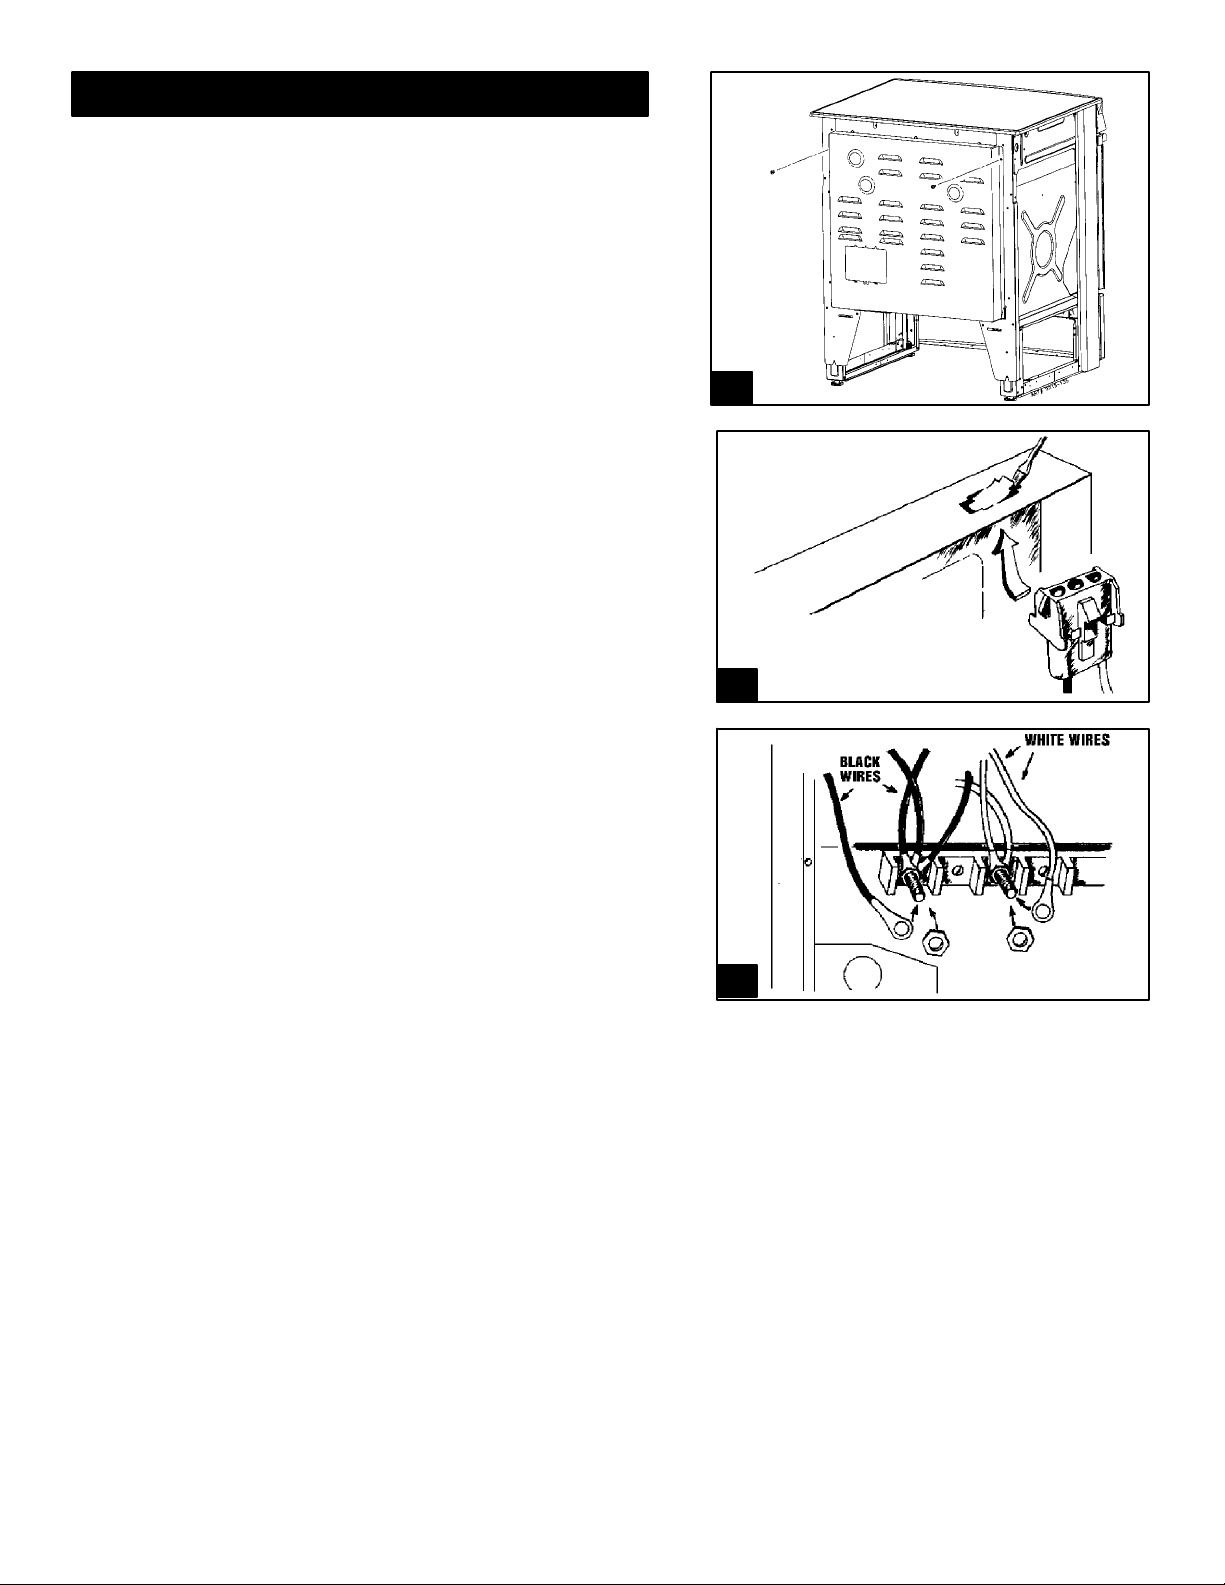
42. REMOVE WIRE COVER: Remove (2)
screwsretainingwirecover to the range structureasshown
in figure (5).
43. REMOVE KNOCKOUT: Remove
knockout with a screwdriver and pliers by bending until
the retaining tabs break. Insert Harness Plug included with
backsplash into knockout hole from underneath side by
pushing up until it snaps into place as shown in figure
(6).
44. Install terminals from harness to range
supply terminal block as shown in figure (7). Use nuts
supplied. Connect black wire to the terminal with black
wires.Connect whitewiretothe terminalwithwhitewires.
5
6
45. Replace wire cover on range structure.
Insert (2) screws and tighten.
2
7
SECTION III
ASSEMBLY OF BACKSPLASH TO RANGE
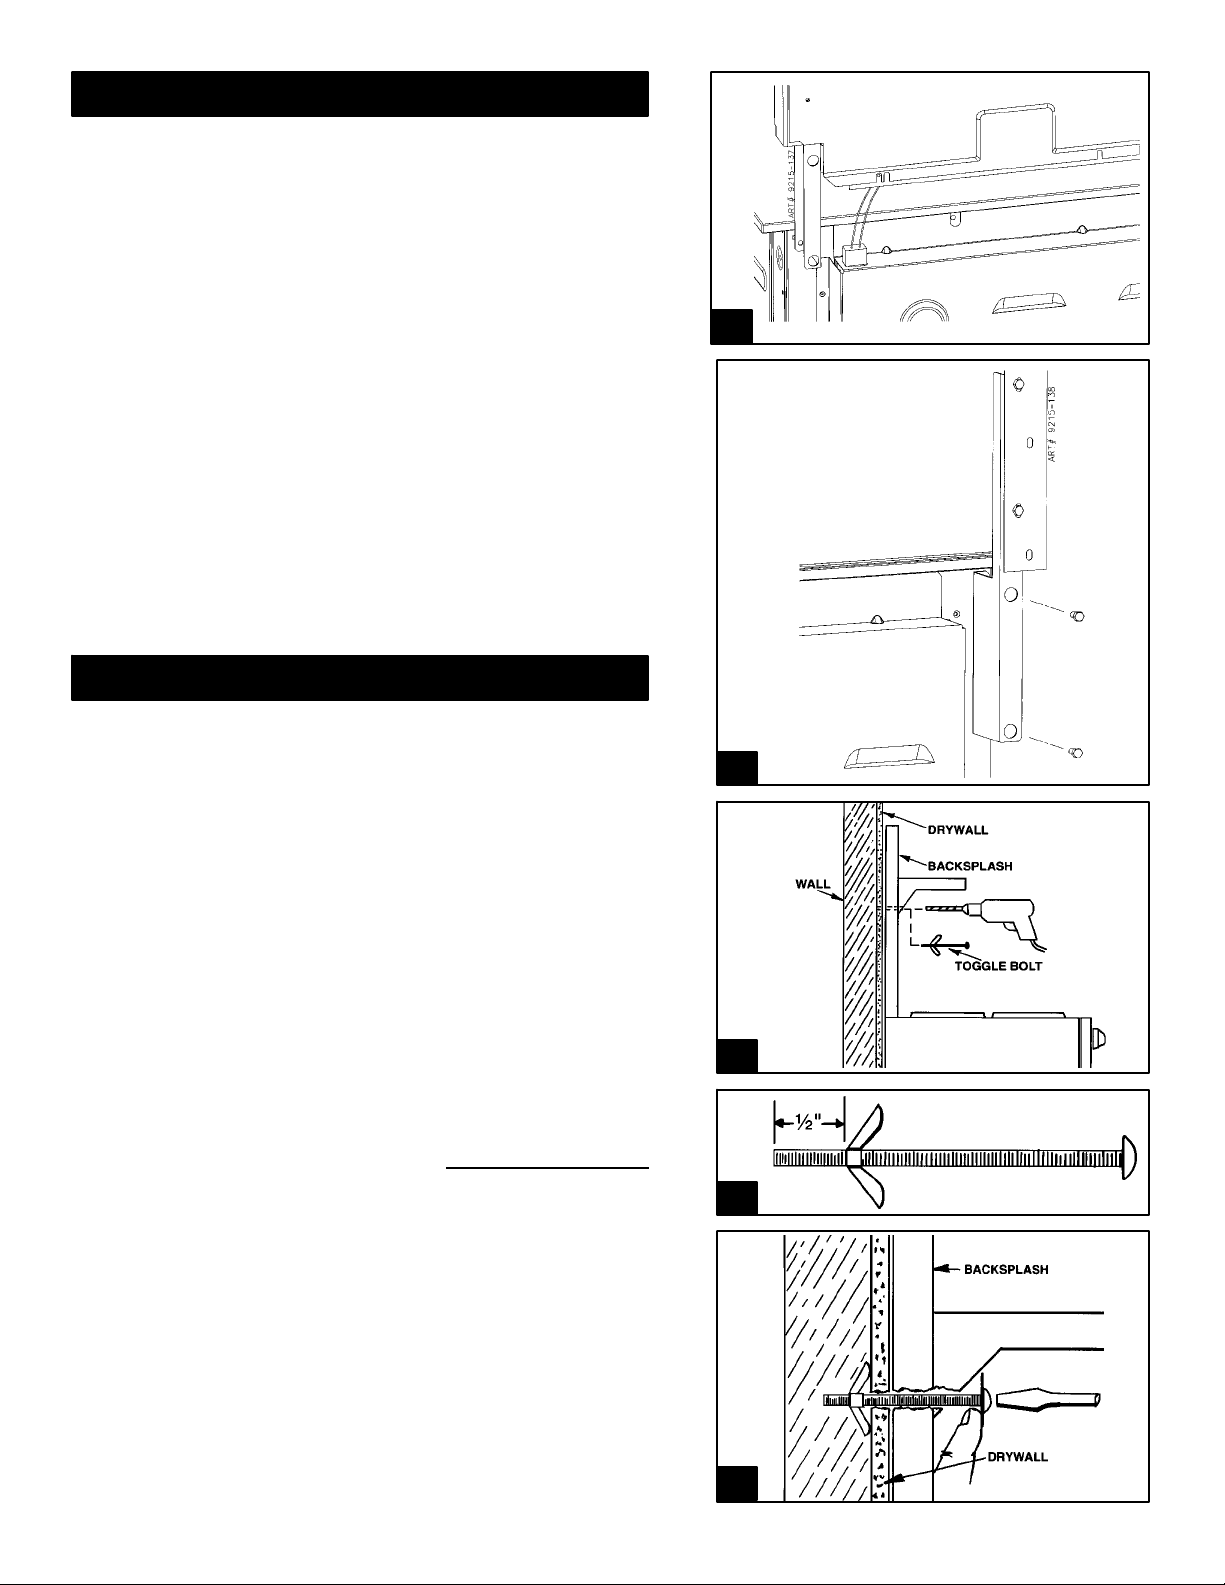
39. Working with an assistant, position
backsplash assembly above and along rear of range. Plug
wire connector from backsplash into mating connector
on range as shown in figure (8). Connector is polarized
to prevent misconnection. Slide backsplash until flange
on backsplash bottoms out against range top.
40. Install (2) hex-head screws through back
supports into the rear of range as shown in figure (9).
(4 screws total).
THIS COMPLETES MOUNTING OF BACKSPLASH TO
RANGE.
8
SECTION IV
MOUNTING BACKSPLASH TO WALL
DUE TO THE SIZE AND LOADED WEIGHT ON THE
SHELF, THE BACKSPLASH MUST BE SECURED TO
THE BACK WALL FOR STABILITY.
1. With backsplash mounted to range as described in Section
III, push assembly back into cabinet opening until it
bottoms out against the wall. Adjust legs under range
until range top reaches desired level next to countertop.
2. Using a 3/8″ diameter bit, insert through hole in
backsplash under each end of shelf and drill through wall.
(Drywall only -- not stud) as shown in figure (10).
3. Pre-thread toggle on toggle bolts to 1/2″ from end of bolt
as shown in figure (11).
4. Push toggle bolt through holes in shelf and drilled holes
in drywall. Tightentogglebolts until backsplashissecured
to back wall.
9
10
11
NOTE: It may be necessary to provide tension under head
of toggle bolt while tightening screw as shown in figure
(12).
If a wall stud is behind the drilled holes, use the 3″ wood
screws and washers to secure backsplash to wall.
3
12
SECTION IV (continued)
12. Disconnect range power supply, then
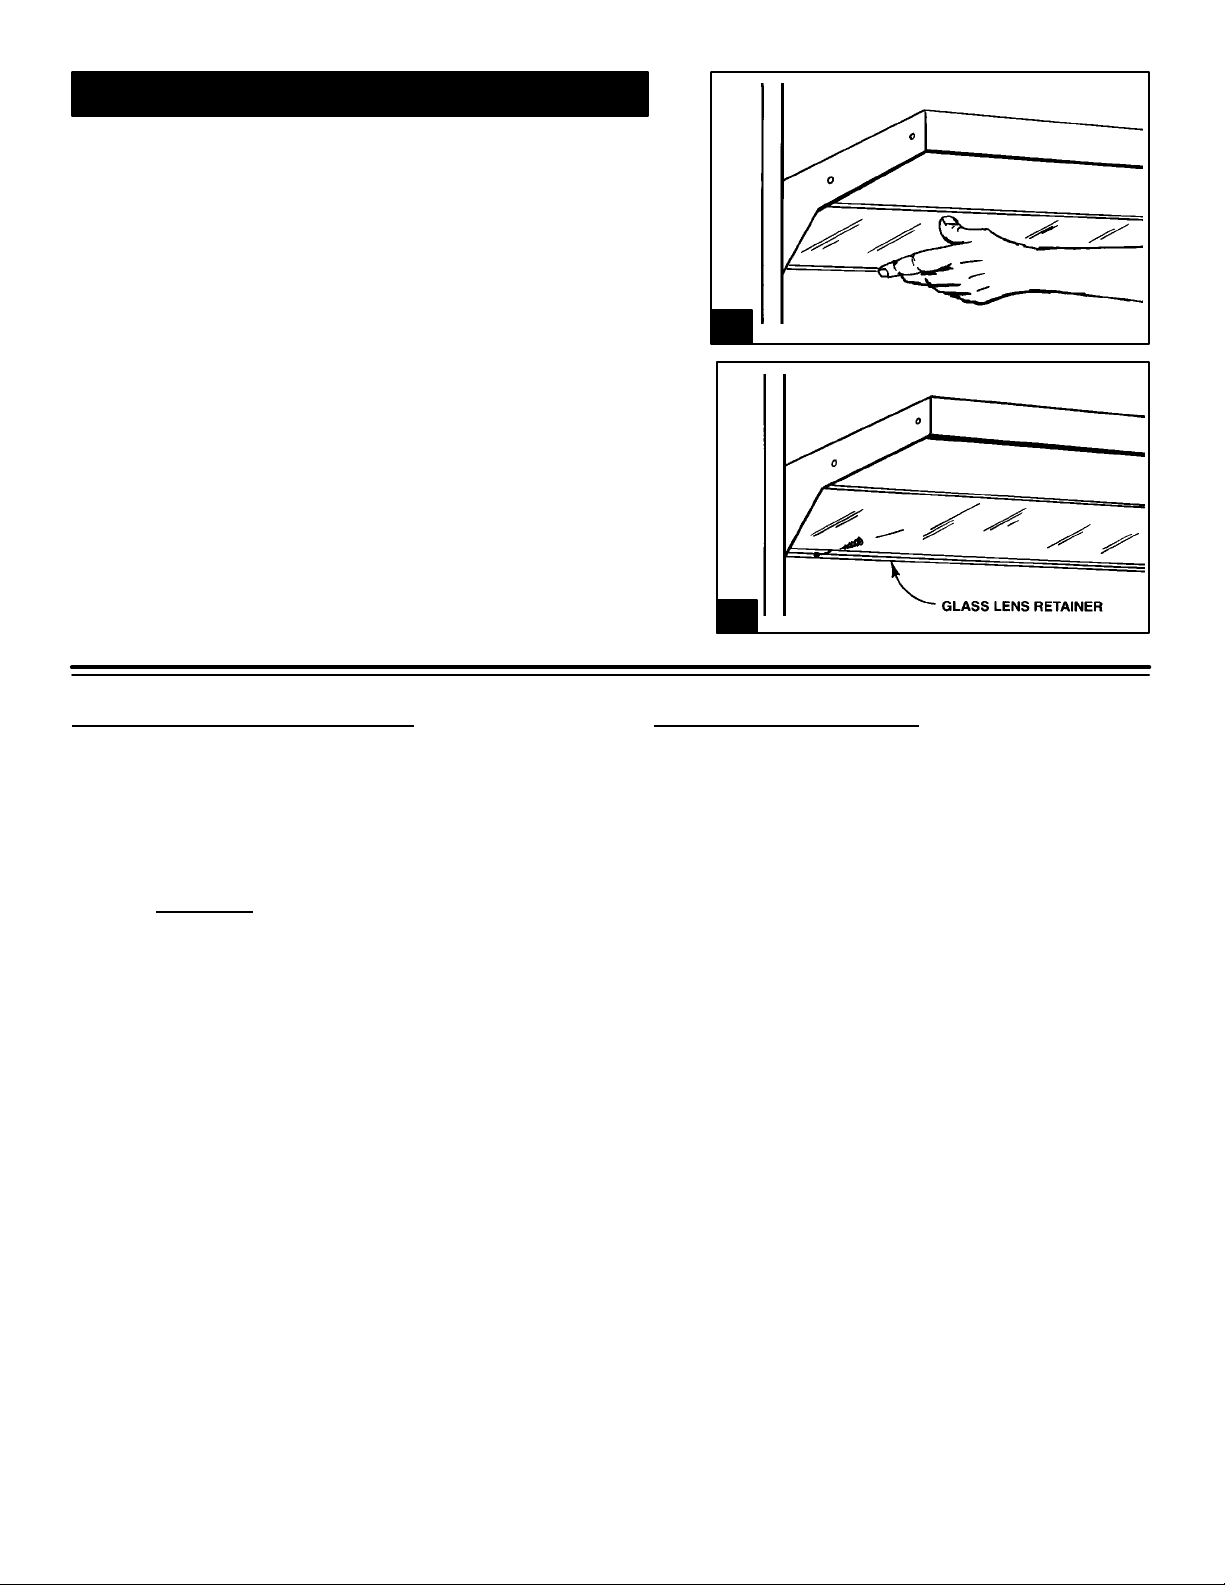
install light bulb under shelf by inserting pins on bulb
into receptacles at sides of shelf.
13. Install glass light lens with painted side
toward the back wall under the shelf. Start the leading
edge of the glass into the “Z” shaped section under the
shelf and rotate bottom edge of glass up against the
backsplash as shown in figure (13). Install glass lens
retainer (stainless steel) up against bottom of glass using
a 3 truss-head phillips screws as shown in figure (14).
14. Check operation of light by pressing
switch on front of shelf.
13
14
TO CLEAN BACKSPLASH
Wipe with soapy cloth or nonabrasive cleanser, such
as Luneta (Jenn-Air Model A912, Part No. 712191).
Rinse, buff with soft cloth, polish with glass cleaner
if necessary.
NOTE: DO NOT use abrasive cleansers or Scotch
Brite pads.
TO REPLACE BULB
Disconnect range power supply before installing
bulb or servicing backsplash.
Remove glass light lens: Carefully remove the
glass lens retainer and glass light lens by removing
the 3 screws using a phillips screwdriver.
NOTE: The glass light lens is separate from the
light lens retainer. The two pieces will drop down
into your hands at the same time as the last screw
is removed.
Fluorescent bulb: Using both hands, rotate bottom
of fluorescent tube a quarter turn towards
backsplash. Replace with a similar size 18 watt -28″ Cool White fluorescent bulb by first inserting
bulb prongs into sockets and then rotate bottom of
fluorescent tube towards you.
Replace glasslightlens:Placetheglass with painted
side toward the back wall under the shelf. Start the
leading edge of the glass into the “Z” shaped section
under the shelf and rotate bottom edge of glass up
against the backsplash. Install the glass lens retainer
(stainlesssteel) up against the glass. Using a phillips
screwdriver add the 3 screws.
4
 Loading...