

Jenn-Air JWD7130DDW, JWD7130DDS, JWD7130DDP, JWD7130DDB, JWD6130DDW Owner’s Manual
...
JENN-AIR ELEC_C WARMING D ER
_JENN-AIR
Form No, B/03/03 Part No, 8112P242-60 74007515 cO2003 Maytag Appliances Sales Co. Litho U.S.A,
,/ wPORTANT SAFE"I Y IRUC IONS
_' B _ ....... P" ""t ........ "s P" ""t .... P" ""7 ........... "4
Installer: Pleasereavethis manual
with this apphance.
Consumer: Pleaseread and keep
this manualfor future reference.Keep
salesreceipt and/or cancelled check
asproof of purchase.
Hodei Number
Serial Number
Date of Purchase
If you have questions, ca[[:
Jenn-Air Customer Assistance
1-800-JENNAIR
1-800-688-2080 ( U.S.TTY for hear-
ing or speechimpaired)
(Non.-Fri. 8 am- 8 pm EasternTime)
[nternet: http://www.jennair.com
For service information, seepage 7°
SAFETY INSTRUCTIONS
Warning andImportant SafetyInstructions
appearing in this guide are not meant to
cover ai[possibleconditions andsituations
that mayoccur. Common sense, caution,
andcaremust beexercisedwhen installing,
maintaining,or operating the appliance.
Always contact your dealer, distributor,
serviceagent,or manufacturer about prob-
lemsor conditions you do not understand.
WARNING - Hazards or unsafe prac-
tices which COULD result in severe per-
sonalinjury or death.
- A
CAUTION - Hazardsor unsafepractices
which COULD result in minor personal
iniury.
READ AND FOLLOW ALL IN-
STRUCTIONS BEFORE USING
THiS APPUANCEo
, For your safety, the information inthis
manual must be followed to mini mize
the risk of fire or explosion, electric
shock, or to prevent property damage.
personal injury, or ross of life.
. ANTI-TIP BRACE REQUIRED
A[[ warming drawers can tipand
injury coumdresumtifnot property
instaImed°
To preventacciden_luppingofthe
warming drawer, instal[it with ananti°
tip brace as described [n the [nstalia°
uon Instructions.
When usingelectricalappliances,basicsafety
precautions should be followed, including
the following:
SAFETY PRECAUTIONS
Use this appliance only for its inmnded
purpose as described inthisOwner's Hanual.
Be sure your appliance is properly installed
and grounded by a qualified technician in
accordance with the provided installation
instructions.
Do not operate the warming drawer if the
decorative front [<it has not been installed.
Do not attempt to repair or replace any
part of your warming drawer unless it is
specificallyrecommended in thismanual Ai[
other servicing should be referred to a
Have the installer show you the location of
the circuit breaker or fuse.Hark it for easy
reference,
Before performing any service, unplug or
disconnect the power supplyat the house-
hold distribution panelbyremoving the fuse
or switching off the circuit breaker.
Do not leavechildrenalone.Childrenshould
not be [eft alone or unattended in an area
where an appliance is in use.They should
never beallowed to sit or standonanypart
of the appliance.
Do not allowanyoneto climb,standor hang
on the drawer. They could damage the
warming drawer, or causesevere personal
injury.
Be sure the warming drawer is securely
installed in acabinet that is firmly attached
to the house structure.
Never leavethe drawer openwhenyou are
not watching the warming drawer.
Always keep combustible wail covering,
curtainsor drapesasafedistancefrom your
warming drawer.
this gu!de.
Alwayskeepwoodenandp[astkutensils
andcannedfoodasafedistanceawayfrom
yourwarmingdrawer.
Teachchildrennotto playwiththecon-
troisor any other part of thewarming
drawer.
Do not placemore than 75 poundsinto the
drawer.
For your safety,never use your apphance
for warming or heating the room.
foods for more than 2-3hours.
The purpose of the warming drawer is to
hold hot cooked foods at servingtempera-
ture.
Always start with hot food; cold food can-
not be heated or cooked in the warming
drawer.
to reach items€ould be seriously in.
jure&
Use only dry pot holders. Moist or damp
pot holders on hot surfacesmay resuk in
burns from steam.Do not let pot holders
touch hot heating dements. Do not usea
towel or other bulky cloth.
Do not let cooking grease or other flare-
mane materials accumulate in or nearthe
Do not use water on grease fires. Never
pick up a flaming pan. Turn the controls off.
Flame in the warming drawer can be smoth-
ered by dosing the drawer or using a multi-
purpose dry chemical or foam-type fire
extinguisher.
Do not touch the heating dement or the
interior surface of the warming drawer.
These surfaces may be hot enough to burn.
REMEMBER: The inside surface of the
warming drawer may be hot when the
drawer is opened.
Do not store or use combustible materials,
gasoline or other flammable vapors and
liquids in the vicinity of this or any other
appliance.
Never leave jars or cans of fat: drippings in
or near your warming drawer.
Use care when opening the drawer. Open
the drawer a crack and let hot air or steam
escape before removing or replacing food.
Hot air or steam which escapes can cause
burns to hands, face and/or eyes.
Do not heat unopened food containers.
Pressurecould build up andthe container
could burst, causingan injury.
Do not Nod< vents.
Do not: use the warming drawer to dry
newspapers. If overheated, they can catch
on fire.
Do not use the warming drawer to warm
towels.
Do not use the warming drawer for a
storage area. Items stored in the warming
drawer can ignite.
Do not leave paperproducts, cooking uten-
sils or food in the warming drawer when
not inuse,
Clean only parts listed in the Care and
Cleaning section of the warming drawer
guide.
Do not use aluminum foil to line the drawer.
Foil is an excellent heat insulator and wi[[
trap heat beneath it. This wi[[ upset the
performance of the drawer and it could
damage the interior finish.
The warming drawer w@ keep hot, cooked
foods at serving temperature, Always start
with hot food.
REAb AND OLLOW
THIS SAIPE Y IN>ORMATION
¢ r" ""_
SAVE THESE INSIRUCIH)NS FOR FUTURE REEE ENCE
PERA I/[NG NSTRUCTH)NS
TSIIN G HE
%%YARMX[NG AWER
Do not use to heat cold food other than
proofing yeast dough, crisping crackers,
chips or dry cereal.
£ONTROL KNOBS
The warming drawer controls are hidden
with the drawer shut. Open the drawer.
The controls are on the right side of the
front frame.
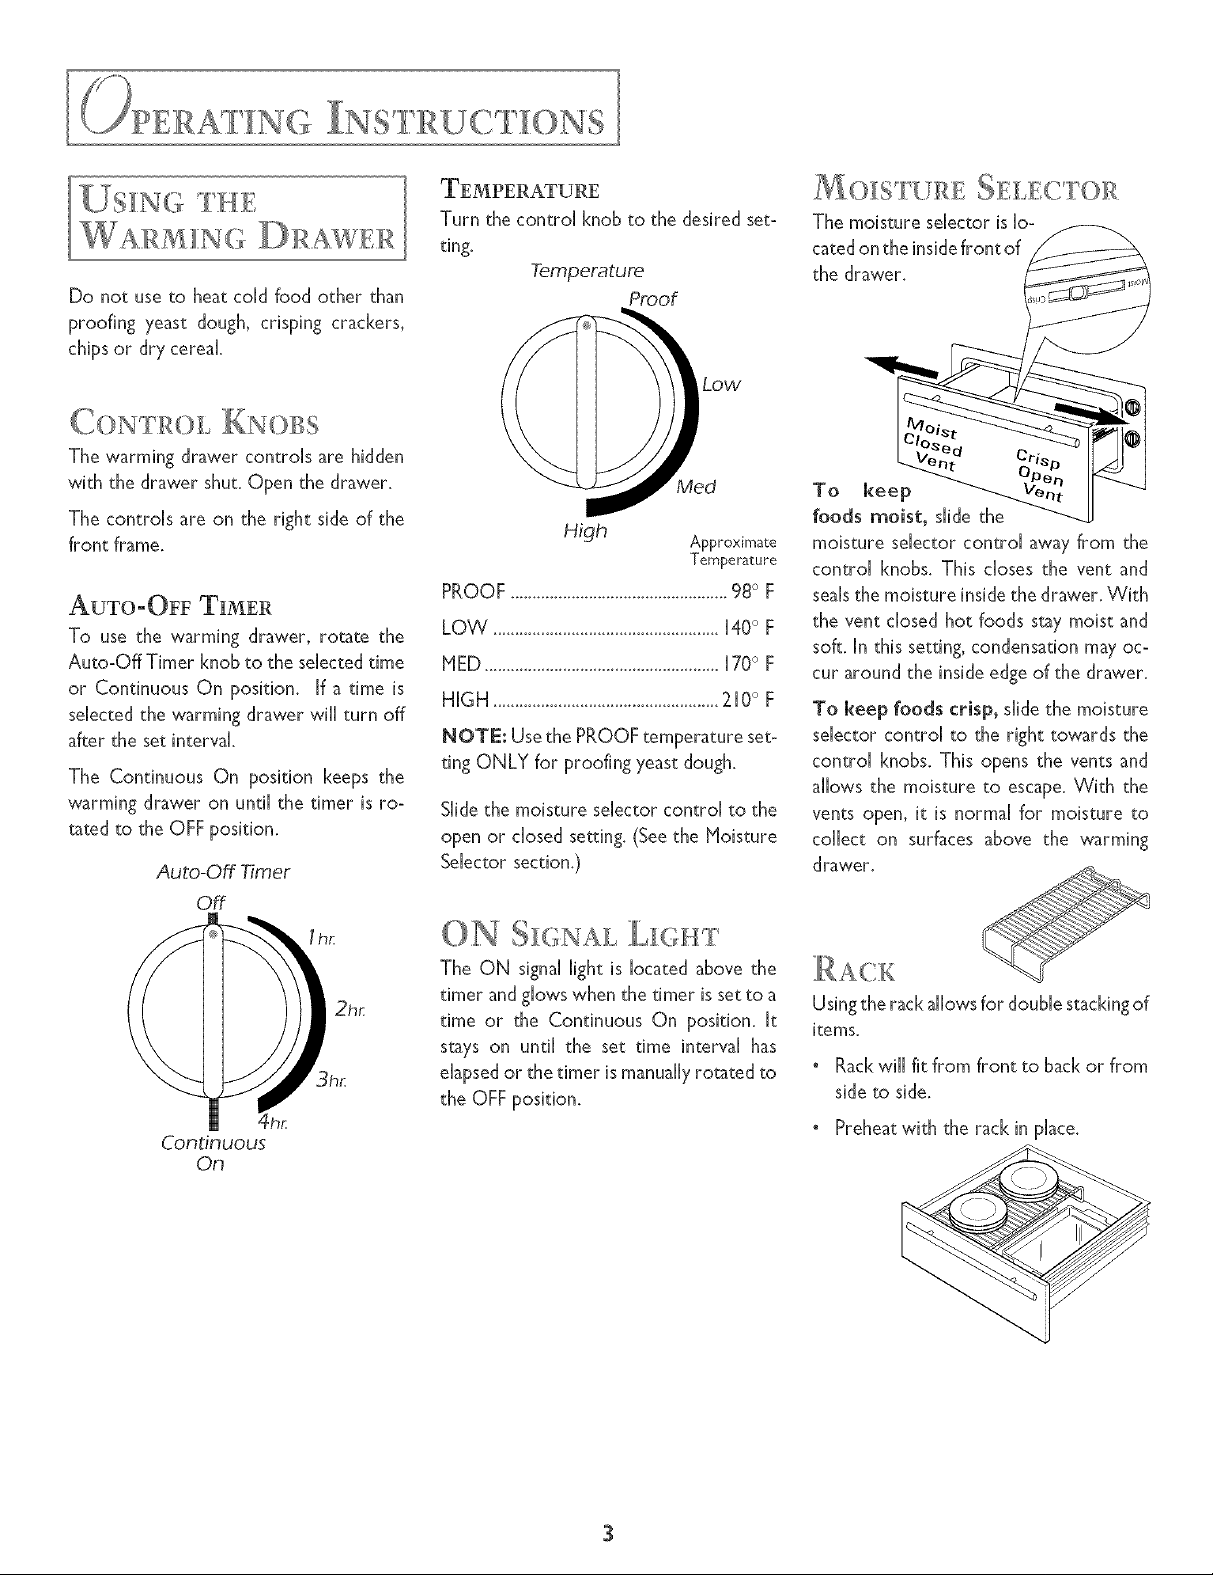
AUTO-OFF TIY_ER
To use the warming drawer, rotate the
Auto-Off Timer knob to the selected time
or Continuous On position. If a time is
selectedthe warming drawer will turn off
after the set interval
The Continuous On position keeps the
warming drawer on until the timer is ro-
tated to the OFF position.
Auto-Off Timer
Off
;I 2hr_
Continuous
On
Turn the control [<nobto the desired set-
tin&
Temperature
Proof
High Approximate
Temperature
PROOF ..................................................98° F
LOW ....................................................140° F
HED ......................................................170° F
HIGH ....................................................210° F
NOTE: Usethe PROOFtemperature set-
ting ONLY for proofing yeast dough.
Slidethe moisture selector control to the
open or dosed setting. (See the Moisture
Selector section.)
ON SH;NAL
The ON signalfight is located above the
timer andglows when the timer is setto a
time or the Continuous On position. It
stays on until the set time interval has
elapsedor the timer is manuallyrotated to
the OFF position.
_OISTURE SELEC F{,)R
The moisture selector is lo-
cated on the insidefront of
the drawer.
To keep
foods moist, slide the
moisture selector control away from the
control knobs. This closes the vent and
sealsthe moisture inside the drawer. With
the vent dosed hot foods stay moist and
soft. in this setting, condensation may oc-
cur around the insideedge of the drawer.
To keep foods crisp, she the moisture
selector control to the right towards the
control knobs. This opens the vents and
allows the moisture to escape.With the
vents open, it is normal for moisture to
collect on surfaces above the warming
drawer.
Usingthe rackallows for double stackingof
items.
• Rackwiil fit from front to backor from
side to side.
• Preheatwith the rack in place.

Dishes may be hot. Use pot holders
or mitts when removing hot dishes.
Plastic containers or plastic wrap w@
melt if in direct contact with the
drawer,
Removeservingspoons,etc before
placingcontainersinwarmingdrawer.
WHEN USING THE
WARNING DRAWER:
° DO NONine the warmingdrawer
with aluminum foil
° Allow time for the drawer to be
preheated:
- LOW ...........................8 minutes
- NED ..........................IS minutes
HIGH .........................20 minutes
° Itisnotnecessarytopreheatthedrawer
forproofing.
° Repeated opening of the drawer
allows the hot air to escape and the
food to cod. Allow extra time for
the temperature inside the drawer
to stabilizeafter adding items.
° Foodshouldbe kepthot in its cook-
ing container or transferred to a
heat-safeserving dish.
• Ahminum foil maybeusedto cover
food to prevent it from drying out.
...... T I q
BosL5 PL£!
" Towarm servingbowls andplatessetthe
contrd on LOW.
®
Use onlyheat-safe dishes.
Placethe empty dishes on the rack to
raisethem offthe bottom of the drawer.
ifyou want hotter dishesor want to heat
fine china,pleasecheck with the manu-
facturer of the dishesfor their maximum
heat tolerance.
Preheatempty serving disheswhile pre-
heatingthe drawer.
When hdding hot, cooked foods and
warming empty serving dishes at the
same time, placethe serving dishes on
thehighrack positionandthefood on the
bottom of the drawer.
To ]}ROOF YEAs'r
BREAD DOUGH
" Yeastdoughcanbeproofed inthewarm-
ing drawer.
" Placethe dish on the warming drawer
Always turn the control knob to
LOW, then immediately bad( to
PROOF.
o
Close the vent.
o
Preheatingis not re-
quired for proofing.
° Placefood in low sided dishesor pans.
• Preheat on LOW setting and open the
vent.
° Check crispness after
45 minutes. Add time
asneeded.
TEMPERATURE SELECTION
mR CRISPFOODS
To keep several different foods hot, set the
temperature for the food needing the high-
est setting.
Placethe items needingthe highest setting
on the bottom of the drawer and items
needing lessheat on the rack.
TEMPERATURE SELECTION
CHART FOR CRISP FOODS
Bacon HIGH
NED
Fried Foods HiGH
Pies,two crusts NED
Pizza HiGH
Potatoes, baked HIGH
Tortilla Chips LOW
CRISP
CRISP
CRISP
CRISP
CRISP
CRISP
CRISP
TIPS:
° Leavefood uncovered.
° Do not useplastic containers or plastic
wrap.
° Preheatprior to useaccordingto recom-
mended times.
4
(YI)PERATIN G NS3"RUCTI()NSp
TEMPERATURE SELECTION
FORN OISTFooDs
To keep several different foods hot, set the
temperature for thefood needingthe high-
est setting.
Place the items needing the highest setting
on the bottom of the drawer and items
needing less heat on the rack.
TEMPERATURE SELECTION
CHART FORMOIST FOODS
Beef, medium
and we[[ done*
Bread, soft roils
Casserdes
Cooked cereal
Eggs
Fish, seafood
Fruit
Gravy, cream
sauces
Ham
Lamb
Pancakes, waffles
Pies, one crust
HIGH
NED
NED
NED
NED
NED
NED
NED
NED
NED
NED
NED
HOIST
HOIST
HOIST
HOIST
HOIST
HOIST
HOIST
HOIST
HOIST
HOIST
HOIST
HOIST
TIPS:
° Cover food with lid or ahminum foil.
° Do not put water in the warming pan.
° Do not use phstic containers or phstic
wrap.
• Preheat prior to use according to recom-
mended times.
Food safety is an imporm0t Condderi
adon when using a warming oven. The
[owsetdng sh0u[d notbe used ifhdding
foods for more than 2.3 hours.
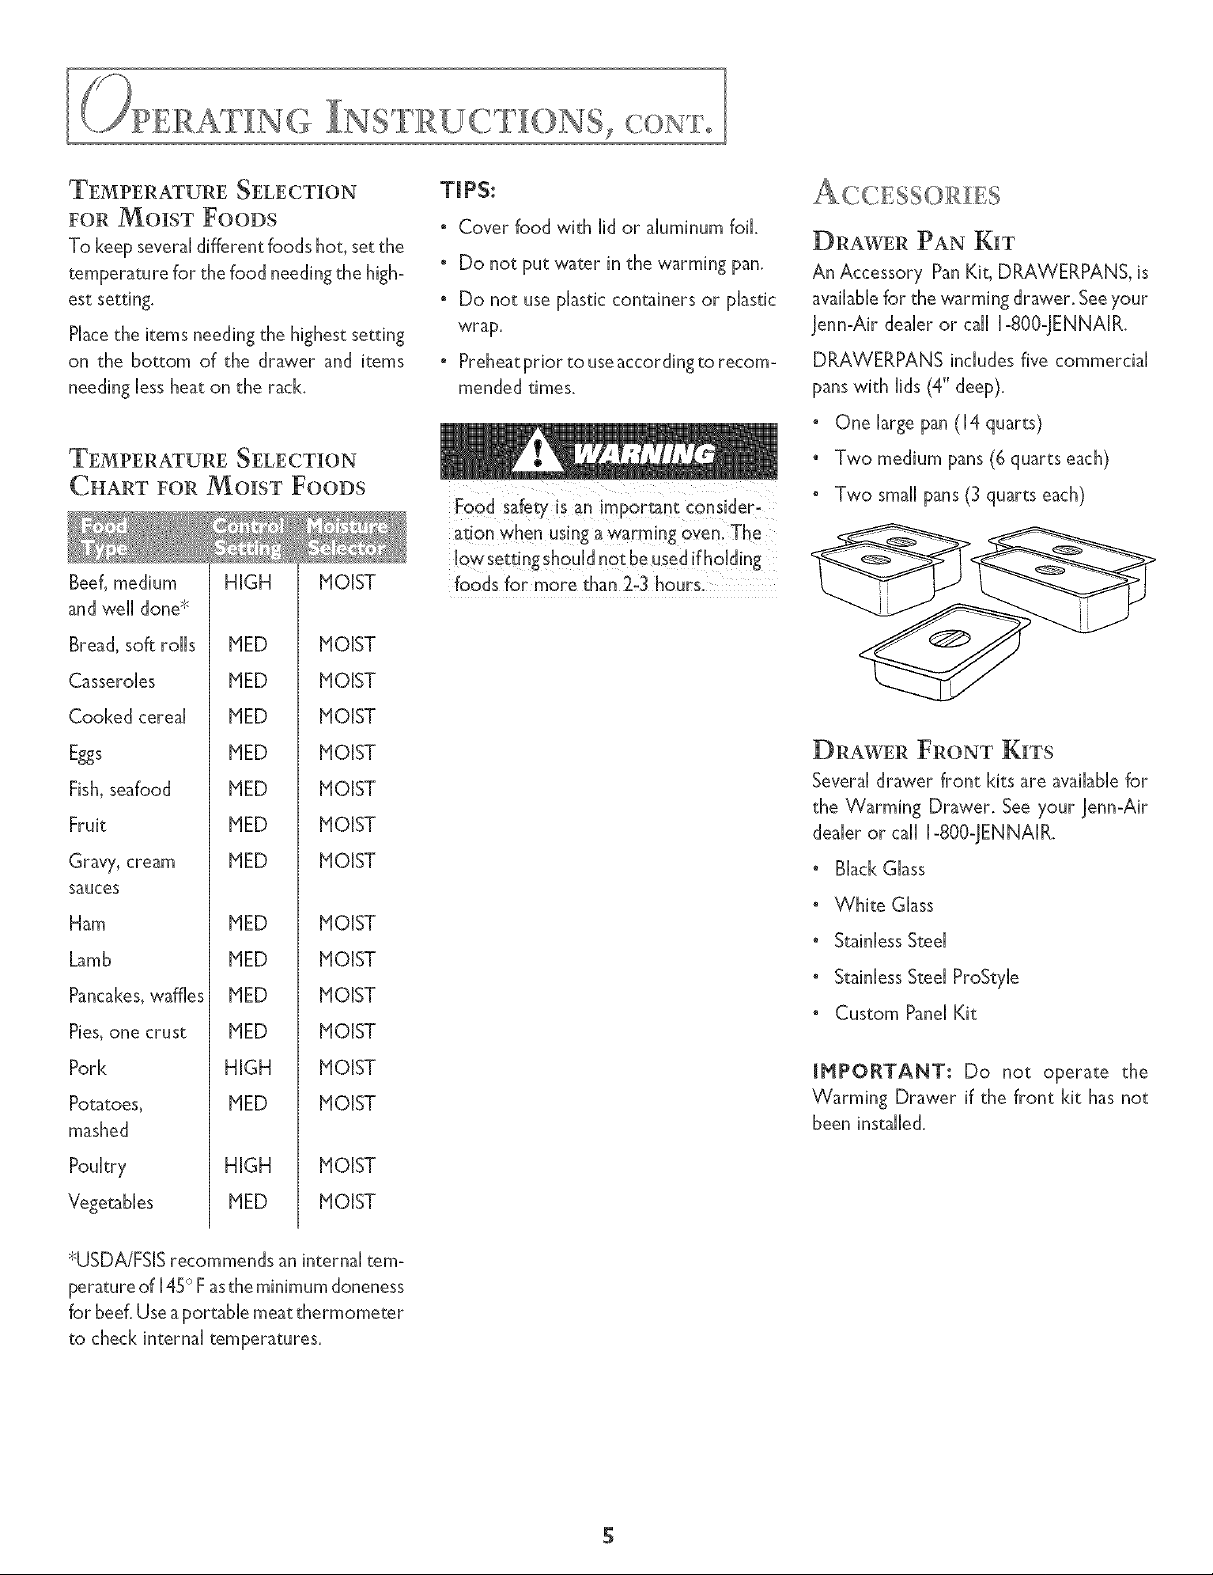
DRAWER PAN [{IT
An Accessory PanKit, DRAWERPANS, is
available for the warming drawer. See your
Jenn-Air dealer or call 1-800-JENNAIR.
DRAWERPANS includes five commercial
pans with lids (4" deep).
" One large pan([4 quarts)
" Two medium pans(6 quarts each)
• Two small pans(3 quarts each)
DRAWER FRONT [{ITS
Several drawer front kits are available for
the Warming Drawer. See your Jenn-Air
dealer or call 1-800-JENNAIR.
• Black Glass
° White Glass
° Stainless Steal
" Stainless Steel ProSty[e
° Custom Pane[ Kit
Pork
Potatoes,
HIGH
NED
HOIST
HOIST
mashed
Poukry
VegetaNes
*USDA/FSIS recommends an internal tem-
perature of 145° Fasthe minimum aloneness
for beef. Use a portable meat thermometer
to check internal temperatures.
HIGH
NED
HOIST
HOIST
INPORTANT: Do not operate the
Warming Drawer if the front kit hasnot
been installed.
& CLEANING
,//) EPORE YOU
burns,
CONTROL _NOBS
° The contrd knobs may be removed for
easier cleaning. Proof
° Before removing
the knobs for Low
cleaning, make
sure they are in _e_
the vertka[ position. @n
° Wash the knobs in soap and water but
do not soak.
• Dry and replace the knobs.
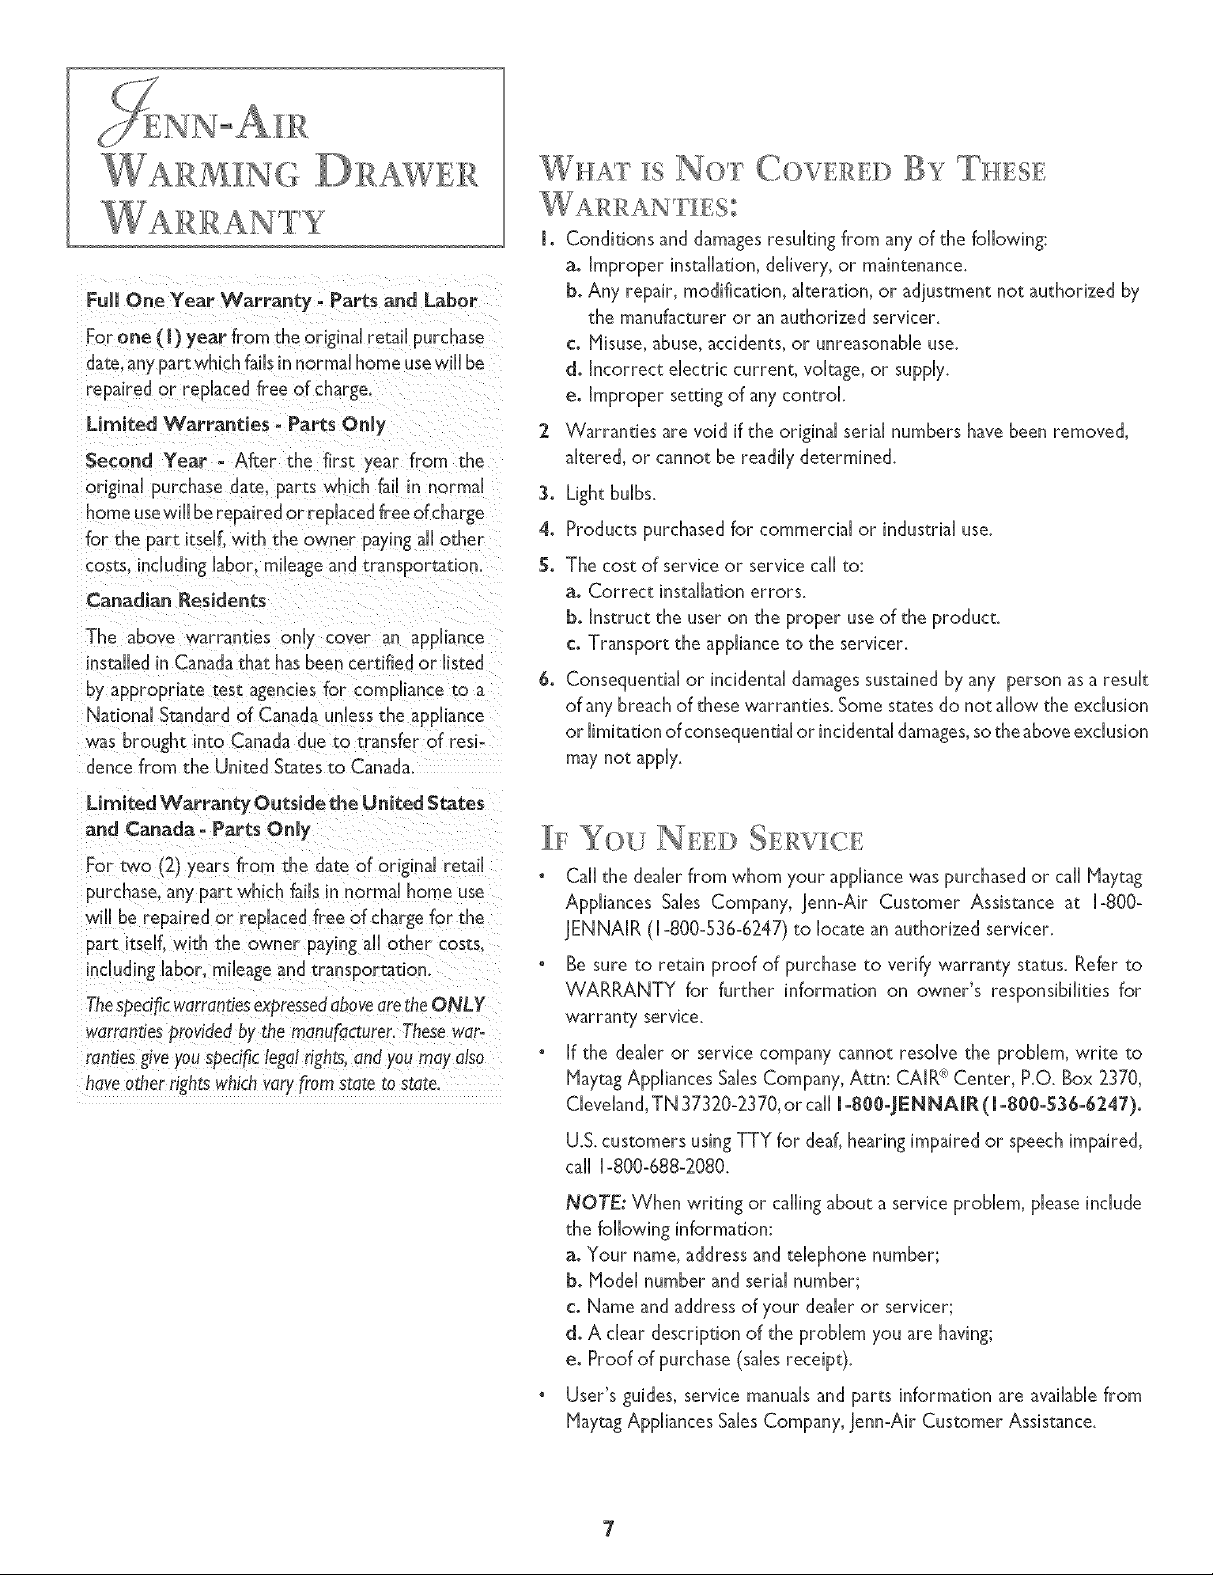
RACR
° Clean the rack with soapand water.
several hours with wet rowels. Apply
deaner with a damp sponge, rinse thor-
oughiy and dry. Always scrub hghdy in
the direction of the grain. After cleaning,
use a stainless steel polish such asStain-
less Steel blagic®>>''.
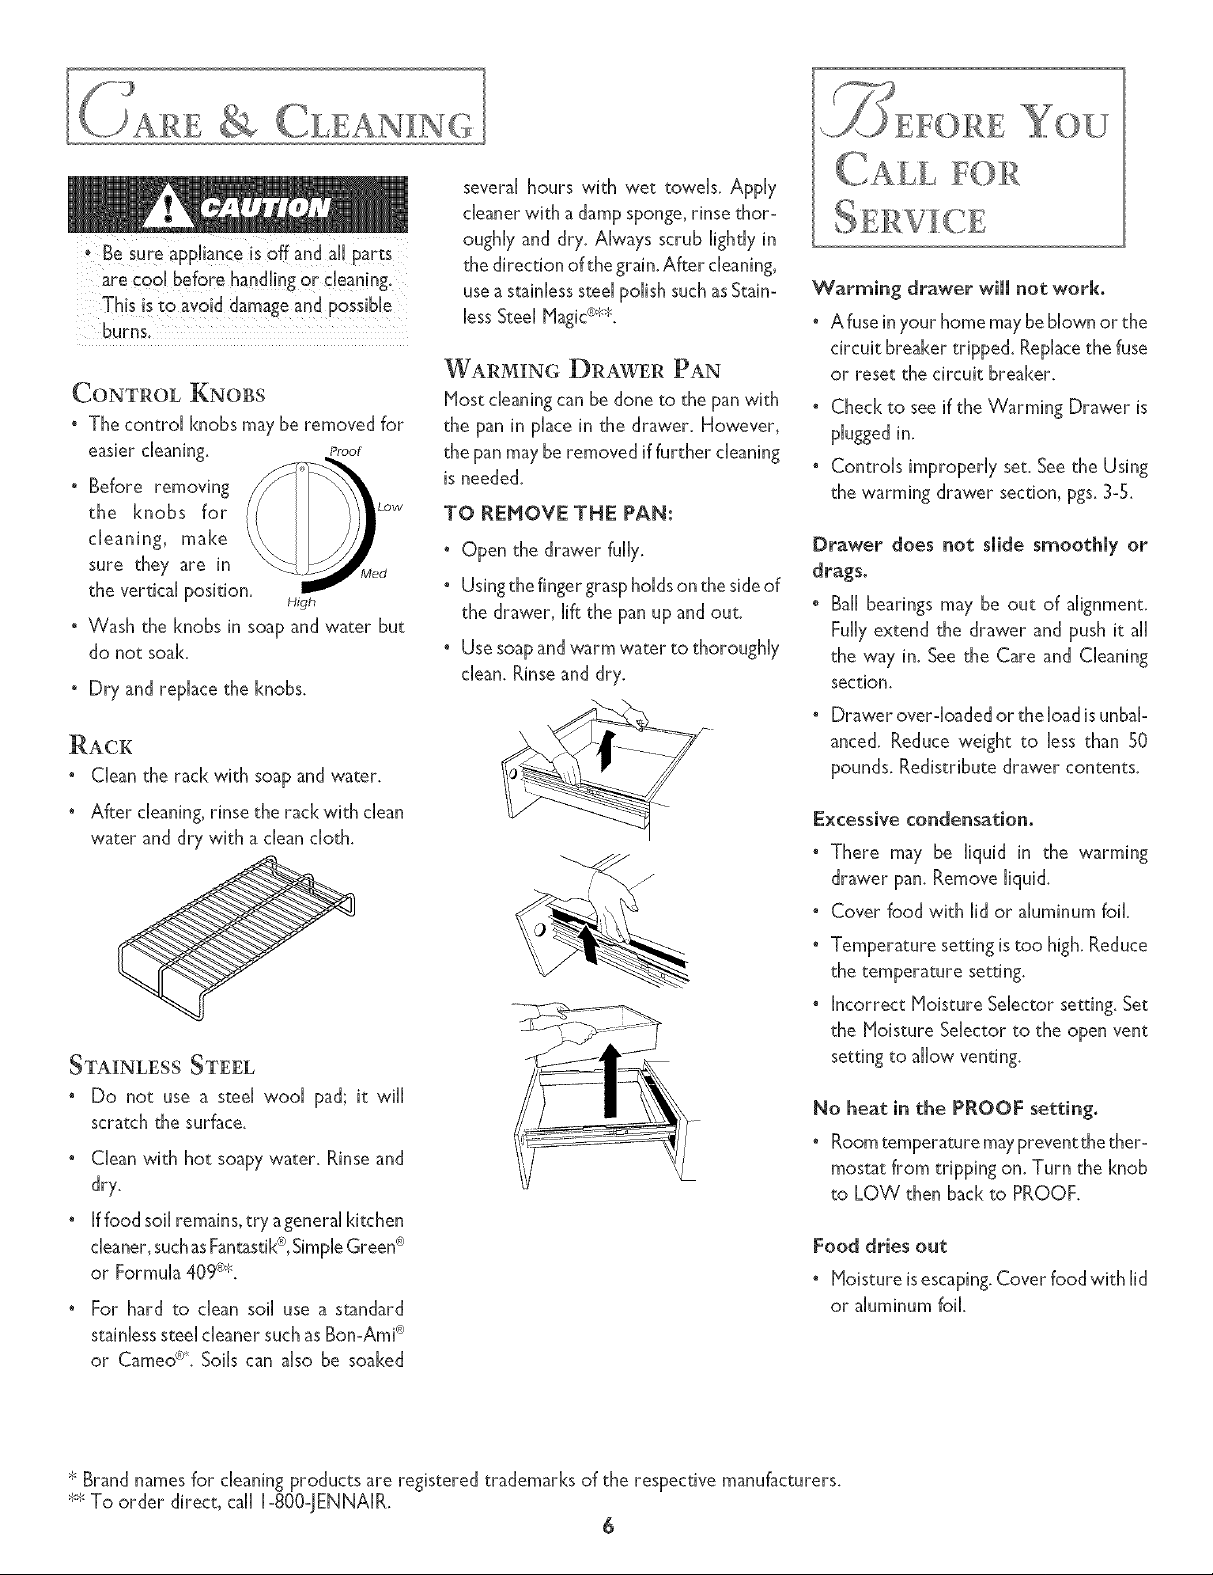
WARMING DRAWER PAN
Most cleaning can be done to the pan with
the pan in place in the drawer. However,
the pan may be removed iffurther cleaning
is needed.
TO REHOVE THE PAN:
° Open the drawer fully.
• Usingthefingergrasphdds on the sideof
the drawer, lift the pan upand out.
• Usesoapandwarm water to thoroughly
clean. Rinseand dry.
CALL
Warming drawer will not work.
• Afuseinyour homemaybeblown or the
circuit breaker tripped. Replacethe fuse
or reset the circuit breaker.
° Check to seeif the Warming Drawer is
pluggedin.
° Controls improperly set. Seethe Using
the warming drawer section, pgs.3-5.
Drawer does not slide smoothly or
drags,
* BaHbearings may be out of alignment.
Fully extend the drawer and push it ai[
the way in. See the Care and Cleaning
section.
• Drawer over-loaded or the Bad isunbal-
anced. Reduce weight to less than 50
pounds. Redistribute drawer contents.
° After cleaning,rinse the rack with dean
water and dry with a dean cloth.
STAINLESS STEEL
° Do not use a steel wool pad; it will
scratch the surface.
Clean with hot soapywater. Rinse and
dry.
iffood soil remains,try agenera[ kitchen
cleaner,suchasFantastik_,SimpleGreen®
or Formula 409®*.
For hard to dean soil use a standard
stainlesssteel deaner suchasBon-Ami®
or CamedL Soils can also be soaked
Excessive condensation,
° There may be liquid in the warming
drawer pan. Remove liquid.
° Cover food with lid or aluminum foil.
Temperature setting is mo high. Reduce
the temperature setting.
incorrect bloisture Selector setting. Set
the Moisture Sdector to the open vent
setting to allow venting.
No heat in the PROOF setting.
• Roomtemperature maypreventthe ther-
mostat from tripping on. Turn the [<nob
to LOW then back to PROOF.
Food dries out
• Moisture isescaping.Cover foodwith lid
or aluminum foil
>'Brand namesfor cleaning products are registered trademarks of the respective manufacturers.
$* To order direct, caii i-800-JENNAIR.
6
Full One Year Warranty - Parts and Labor
Forone (I) year from the original retail purchase
date,anypart which failsin normal home usewill be
repaired or replacedfree of charge.
Limited Warranties. Parts Only
Second Year - After the firs: year from the
original purchase date, parts which fail in normal
homeusewill berepaired or replacedfreeof charge
for the part itse[Lwith the owner payingall other
costs, including labor, mileageandtransportation.
Canadian t_esidents
The above warranties on y cover an appliance
mstalled inCanadathat hasbeen certified or listed
by appropriate test agenciesfor compliance to a
National Standard of Canadaunlessthe appliance
was brought into Canadadue to transfer of resi-
dencefrom the United Statesto Canada,
WH£r ;s N,> C ,>W ED By THESE
1. Conditions and damagesresulting from any of the following:
a. Improper installation, delivery, or maintenance.
b. Any repair, modification, alteration, or adjustment not authorized by
the manufacturer or an authorized servicer.
coMisuse,abuse,accidents,or unreasonableuse.
do Incorrect electric current, voltage, or supply.
e° Improper setting of any control.
2 Warranties arevoid if the original serial numbers havebeen removed,
akered, or cannot be readily determined.
3° Light bulbs.
4. Products purchased for commercial or industrial use.
S° The cost of service or service ca[[to:
a° Correct installation errors.
boInstruct the user on the proper use of the product.
c° Transport the applianceto the servicer.
6. Consequential or incidental damagessustainedby any person as a result
of any breachof these warranties. Somestatesdo not allow the exclusion
or [imitation of consequentialor incidentaldamages,sotheaboveexclusion
may not apply.
Limited Warranty Outside the United States
and Canada- Parts Only
For two 12)years kom the date of original retail
purchase,any part which fails in normal home use
will be repaired or reo[acedfree of chargefor the
part itse[L with the owner payingall other costs.
includinglabor, mileageand transportation.
ThespeciftcwarrantiesexpressedabovearetheONLY
warran_Jesprovidedbythe manufacturer.Thesewar°
rantJesgiveyou specificlegal fights, and you may also
have other fights which varyf?omstate to state
YOU N:E[:D S[;:RVI[C::E
° Ca[[the dealer from whom your apphancewaspurchasedor call Maytag
Appliances Sales Company, Jenn-Air Customer Assistance at [-800-
JENNA[R ([-800-536-6247) to locate an authorized servicer.
• Be sure to retain proof of purchase to verify warranty status. Refer to
WARRANTY for further information on owner's responsibilities for
warranty service.
• ff the dealer or service company cannot resolve the problem, write to
Maytag Appliances Sales Company, Attn: CA[R_ Center, P.O. Box 2370,
Cleveland, TN 37320-2370, or call 1-800-JEN NA[R (1-800-536-6247).
U.S.customers using TTY for deaf, hearing impaired or speech impaired,
call 1-800-688-2080.
NOTE: When writing or callingabout a serviceproblem, pleaseinclude
a. Your name, addressand telephone number;
b. Model number and serial number;
c. Name and addressof your dealer or servicer;
d. A dear description of the problem you are having;
eo Proof of purchase (salesreceipt).
User's guides, service manualsand parts information are availablefrom
MaytagAppliances SalesCompany, Jenn-Air Customer Assistance.
7
 Loading...