

Jenn-Air JUDFP242HL00, JUD24FRECX00, JUD24FCERS00, JUD24FCECX00, JUD24FRERS00 Owner’s Manual

JENN-AIR® DOUBLE REFRIGERATOR DRAWERS/
REFRIGERATOR/FREEZER DRAWERS/
CAJÓN REFRIGERADOR DOBLE
CAJÓN REFRIGERADOR/CONGELADOR JENN-AIR
®
DOUBLE TIROIR RÉFRIGÉRÉ
TIROIRS DE RÉFRIGÉRATION/CONGÉLATION JENN-AIR
®
W10741583C/8336460125000C
For questions about features, operation/performance, parts, accessories, or service, call:
1-800-JENNAIR (1-800-536-6247) or visit our website at www.jennair.com.
In Canada, call: 1-800-JENNAIR (1-800-536-6247), or visit our website at www.jennair.ca.
USE & CARE GUIDE
Si tiene preguntas respecto a las características, funcionamiento, rendimiento, partes, accesorios o servicio técnico, llame al:
En Canadá, llame al: 1-800-JENNAIR (1-800-536-6247), o visite nuestro sitio de internet www.jennair.ca.
MANUAL DE USO Y CUIDADO
1-800-JENNAIR (1-800-536-6247) o visite nuestro sitio de internet www.jennair.com.
GUIDE D’UTILISATION ET D’ENTRETIEN
Au Canada, pour assistance, installation ou service, composez le 1-800-JENNAIR (1-800-536-6247)
ou
visitez notre site web à www.jennair.ca.
Table of Contents/Índice/Table des matières......................................................................................2

TABLE OF CONTENTS
REFRIGERATOR DRAWERS SAFETY..........................................3
Proper Disposal of Your Old Refrigerated Appliance..................3
DESIGN SPECIFICATIONS............................................................4
INSTALLATION REQUIREMENTS................................................5
Tools and Parts ............................................................................5
Location Requirements................................................................5
Electrical Requirements ...............................................................5
Water Supply Requirements........................................................6
Product Dimensions.....................................................................6
Custom Overlay Drawer Panels...................................................7
INSTALLATION INSTRUCTIONS..................................................8
Unpack the Refrigerator Drawers ................................................8
Connect Water Supply.................................................................9
Move the Refrigerator Drawers to Final Location........................9
Level the Refrigerator Drawers ..................................................10
Install Custom Overlay Panel.....................................................10
Complete Installation .................................................................10
ÍNDICE
SEGURIDAD DE LOS CAJONES REFRIGERADOS ..................19
Cómo deshacerse adecuadamente
de su aparato refrigerado viejo..................................................20
ESPECIFICACIONES DE DISEÑO ..............................................20
REQUISITOS DE INSTALACIÓN.................................................21
Piezas y herramientas ................................................................21
Requisitos de ubicación.............................................................21
Requisitos eléctricos..................................................................21
Requisitos del suministro de agua.............................................22
Medidas del producto................................................................22
Paneles de los cajones recubiertos a la medida.......................23
INSTRUCCIONES DE INSTALACIÓN.........................................24
Cómo desempacar los cajones refrigerados.............................24
Conexión del suministro de agua..............................................24
Mueva los cajones refrigerados a su posición final...................25
Nivelación de los cajones refrigerados......................................26
Cómo instalar el panel recubierto a la medida..........................26
REFRIGERATOR
DRAWERS USE ............................................................................11
Normal Sounds...........................................................................11
Ensuring Proper Air Circulation..................................................11
Using the Controls......................................................................11
Ice Maker and Water Filtration System......................................13
REFRIGERATOR DRAWERS CARE............................................14
Cleaning......................................................................................14
Power Interruptions....................................................................14
Vacation Care.............................................................................14
TROUBLESHOOTING ..................................................................15
ASSISTANCE OR SERVICE.........................................................16
In the U.S.A. ...............................................................................16
In Canada ...................................................................................16
Accessories ................................................................................16
PRODUCT DATA SHEETS...........................................................17
WARRANTY ..................................................................................18
Complete la instalación..............................................................27
USO DE LOS CAJONES REFRIGERADOS ................................27
Sonidos normales.......................................................................27
Cómo asegurar la debida circulación de aire............................27
Uso de los controles ..................................................................27
Fábrica de hielo y sistema de filtración de agua .......................29
CUIDADO DE LOS CAJONES REFRIGERADOS.......................30
Limpieza .....................................................................................30
Cortes de corriente.....................................................................31
Cuidado durante las vacaciones................................................31
SOLUCIÓN DE PROBLEMAS......................................................31
AYUDA O SERVICIO TÉCNICO...................................................33
En los EE.UU. .............................................................................33
En Canadá..................................................................................33
Accesorios..................................................................................33
HOJA DE DATOS DEL PRODUCTO ...........................................34
GARANTÍA.....................................................................................35
TABLE DES MATIÈRES
SÉCURITÉ DES TIROIRS RÉFRIGÉRÉS....................................37
Mise au rebut correcte de votre vieil appareil réfrigéré.............38
SPÉCIFICATIONS DU DESIGN ...................................................38
EXIGENCES D’INSTALLATION...................................................39
Outillage et pièces......................................................................39
Exigences d’emplacement.........................................................39
Spécifications électriques..........................................................40
Spécifications de l’alimentation en eau .....................................40
Dimensions du produit...............................................................40
Panneaux décoratifs personnalisés de tiroirs............................41
INSTRUCTIONS D’INSTALLATION ............................................43
Déballage des tiroirs réfrigérés ..................................................43
Raccordement de l'alimentation en eau....................................43
Déplacement des tiroirs réfrigérés à leur emplacement final....44
Réglage de l'aplomb des tiroirs réfrigérés.................................44
Installation du panneau décoratif personnalisé.........................45
Achever l'installation ..................................................................45
2
UTILISATION DES TIROIRS RÉFRIGÉRÉS................................45
Sons normaux ............................................................................45
Pour assurer une circulation d'air correcte................................45
Utilisation des commandes........................................................46
Machine à glaçons et système de filtration d’eau .....................48
ENTRETIEN DES TIROIRS RÉFRIGÉRÉS..................................49
Nettoyage ...................................................................................49
Pannes de courant .....................................................................49
Entretien avant les vacances .....................................................49
DÉPANNAGE.................................................................................50
ASSISTANCE OU SERVICE.........................................................51
Aux États-Unis............................................................................51
Au Canada..................................................................................51
Accessoires ................................................................................51
FEUILLES DE DONNÉES SUR LE PRODUIT.............................52
GARANTIE.....................................................................................53
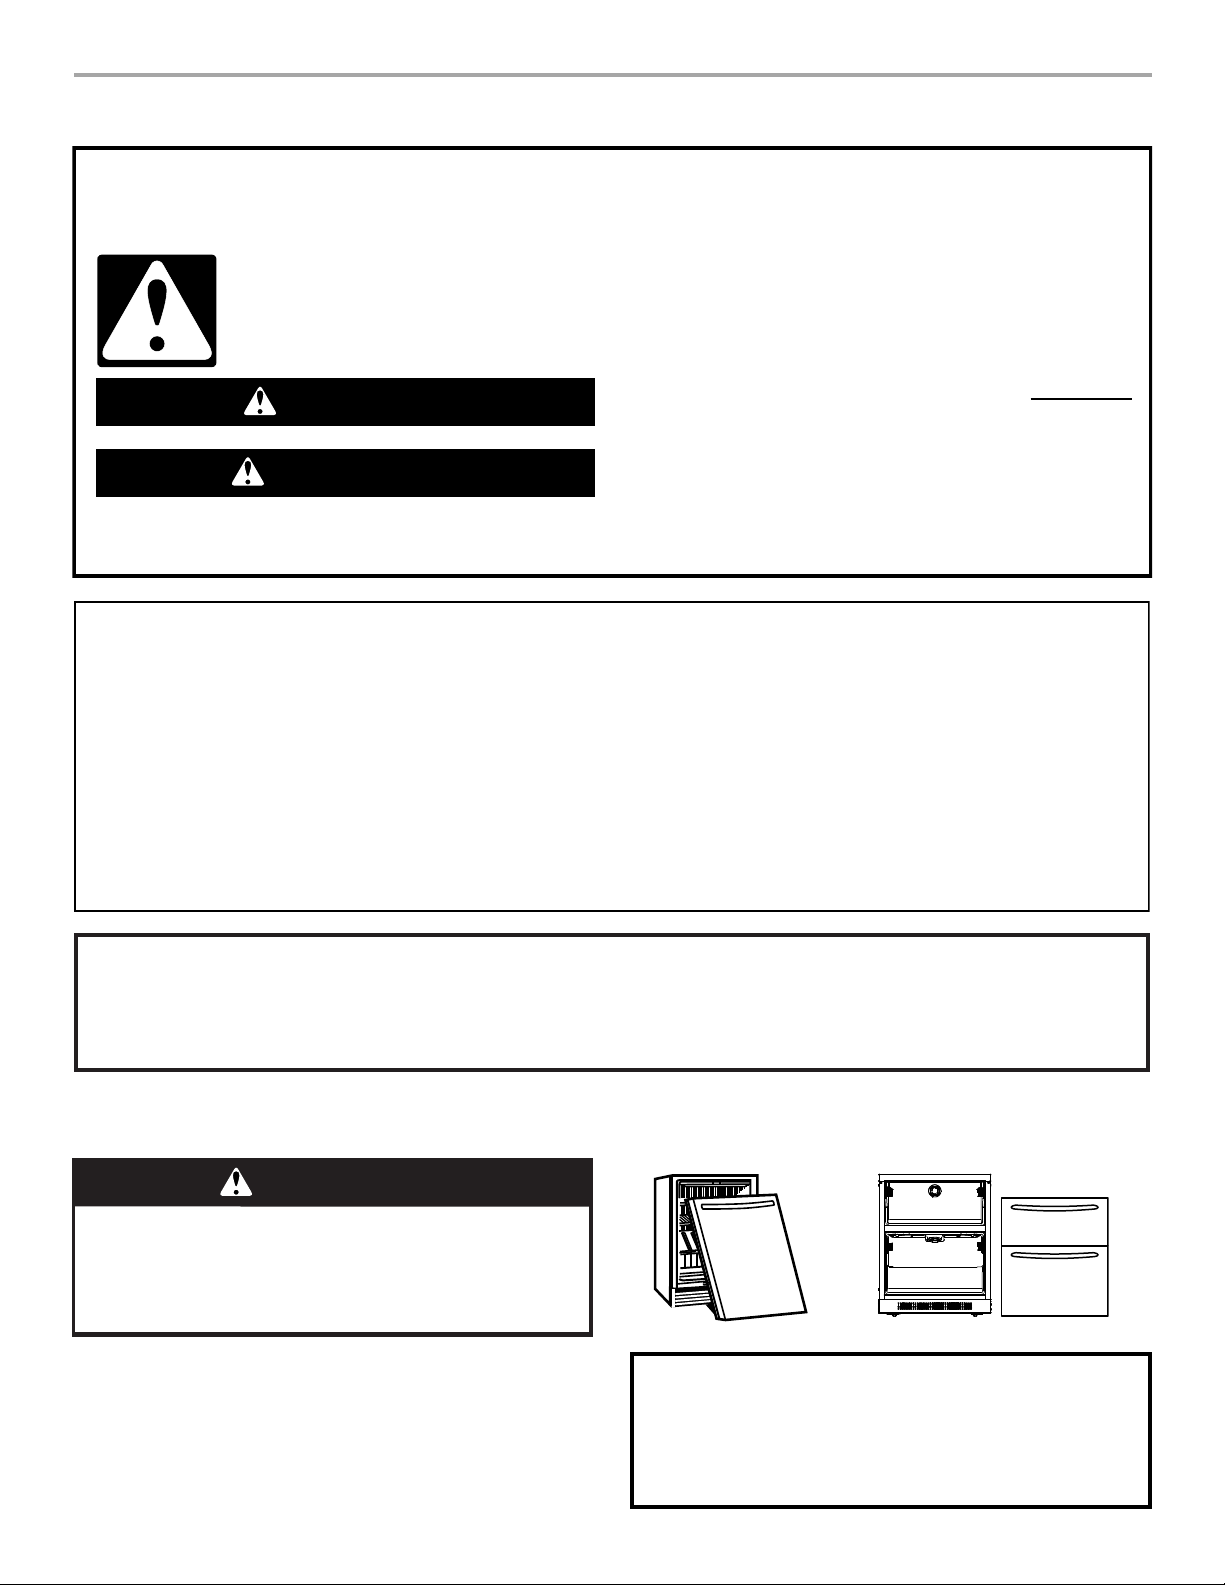
REFRIGERATOR DRAWERS SAFETY
You can be killed or seriously injured if you don't immediately
You
can be killed or seriously injured if you don't
follow
All safety messages will tell you what the potential hazard is, tell you how to reduce the chance of injury, and tell you what can
happen if the instructions are not followed.
Your safety and the safety of others are very important.
We have provided many important safety messages in this manual and on your appliance. Always read and obey all safety
messages.
This is the safety alert symbol.
This symbol alerts you to potential hazards that can kill or hurt you and others.
All safety messages will follow the safety alert symbol and either the word “DANGER” or “WARNING.”
These words mean:
follow instructions.
instructions.
DANGER
WARNING
IMPORTANT SAFETY INSTRUCTIONS
WARNING:
To reduce the risk of fire, electric shock, or injury when using your refrigerator drawer(s), follow these basic
SAVE THESE INSTRUCTIONS
■ Plug into a grounded 3 prong outlet.
■ Do not remove ground prong.
■ Do not use an adapter.
■ Do not use an extension cord.
■ Disconnect power before servicing.
■ Replace all parts and panels before operating.
■ Remove door or drawer(s) from your old refrigerated
appliance.
■ Use nonflammable cleaner.
■ Keep flammable materials and vapors, such as gasoline,
away from refrigerator drawer(s).
■ Use two or more people to move and install refrigerator
drawer(s).
precautions:
State of California Proposition 65 Warnings:
WARNING: This product contains one or more chemicals known to the State of California to cause cancer.
WARNING: This product contains one or more chemicals known to the State of California to cause birth defects or other
reproductive harm.
WARNING
Suffocation Hazard
Remove door or drawer(s) from your old refrigerated
appliance.
Failure to do so can result in death or brain damage.
Important information to know about disposal of
refrigerants:
Dispose of refrigerator in accordance with Federal and Local
regulations. Refrigerants must be evacuated by a licensed,
EPA certified refrigerant technician in accordance with
established procedures.
Proper Disposal of Your Old
Refrigerated Appliance
Before You Throw Away Your Old
Refrigerated
Remove the door or drawer(s).
Appliance:
IMPORTANT: Child entrapment and suffocation are not problems
of the past. A junked or abandoned refrigerated appliance is still
dangerous–even if it will sit for “just a few days.” If you are getting
rid of your old refrigerated appliance, please follow these
instructions to help prevent accidents.
3
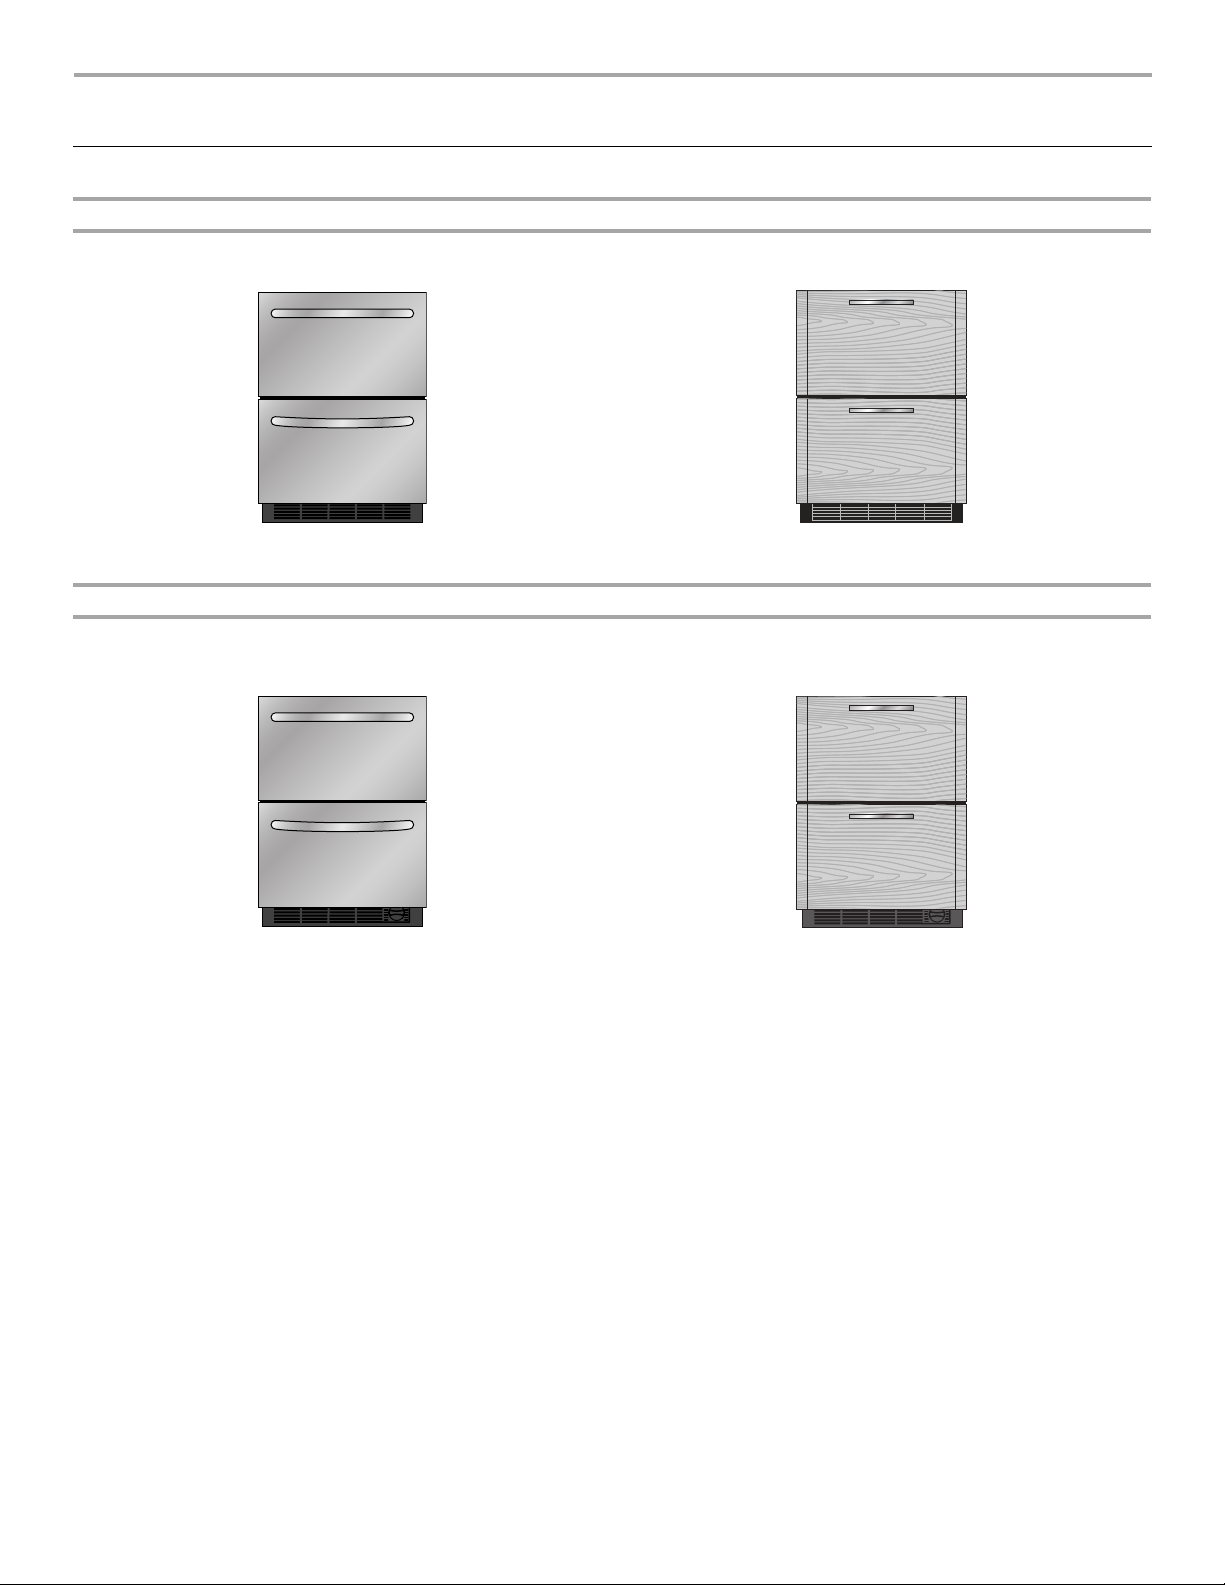
DESIGN SPECIFICATIONS
24" Drawer Models
Double Refrigerator Drawers
Two refrigerator drawers provide additional storage options in the kitchen or other areas of the home.
Euro Series
JUD24FR*S
Refrigerator/Freezer Drawers (with ice maker and water filter)
Upper refrigerator drawer and lower freezer drawer provide additional storage options in the kitchen or other areas of the home.
Factory-installed ice maker in lower drawer ensures a constant supply of ice on hand at all times.
Euro Series
JUD24FC*S
Overlay - Custom Panels and Handles Required
JUD24FR*X
Overlay - Custom Panels and Handles Required
JUD24FC*X
4
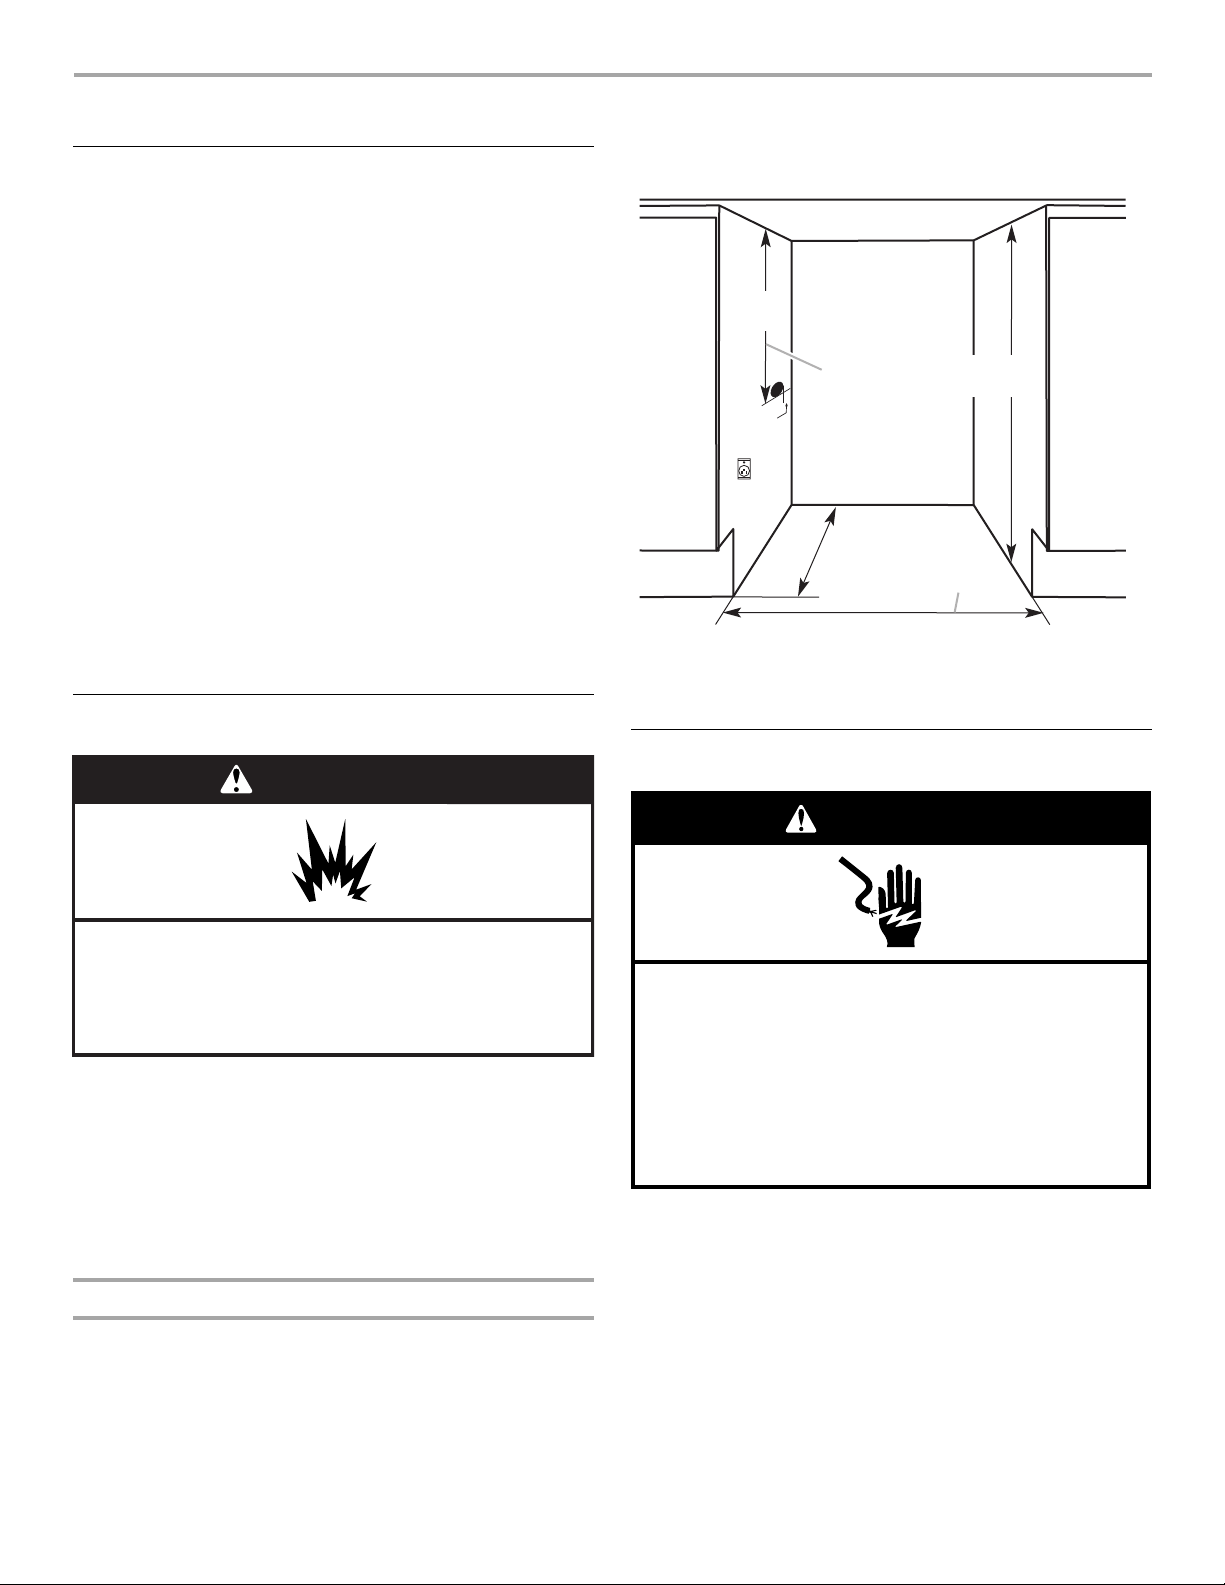
INSTALLATION REQUIREMENTS
WARNING
Explosion Hazard
Keep flammable materials and vapors, such as
gasoline, away from refrigerator drawer(s).
Failure to do so can result in death, explosion, or fire.
A
343/8" (873 mm) min.
35" (889 mm) max.
B
143/4"
(375 mm)
1
/2"
(13 mm)
24
" (609.6 mm) min.
24
"
(609.6 mm)
min.
Electrical Shock Hazard
Plug into a grounded 3 prong outlet.
Do not remove ground prong.
Do not use an adapter.
Do not use an extension cord.
Failure to follow these instructions can result in death,
fire, or electrical shock.
WARNING
Tools and Parts
Tools Needed:
Gather the required tools and parts before starting installation.
Read and follow the instructions provided with any tools listed
here.
■ Cordless drill
■ ¹⁄₈" Drill bit
Additional Tools Needed (Style 2 - Overlay only):
■ Scissors
■ Pencil
Parts Needed (Style 2 - Overlay only):
■ Custom Overlay Drawer Panels —
See “Custom Overlay Drawer Panels.”
■ Hardware
Parts Supplied:
■ Hooks (8)
■ Screws (16)
Location Requirements
■ Tap e me asu re
■ Level
■ Phillips screwdriver
■ Scribe
■ Self-tap wood screws (4)
■ If the floor of the opening is not level with the kitchen floor,
shim the opening to make it level with the kitchen floor.
Critical Dimensions:
A. Utility opening
B. Minimum opening width
NOTES:
■ For the refrigerator drawers to be flush with the front of the
base cabinets remove any baseboards or moldings from the
rear of the opening. See “Product Dimensions” and later in
this section “Opening Dimensions (both styles).”
■ It is recommended that you do not install the refrigerator
drawers near an oven, radiator, or other heat source.
■ Do not install in a location where the temperature will fall
below 55°F (13°C).
Opening Dimensions (both styles)
■ Height dimensions are shown with the leveling legs extended
to the minimum height of ¹⁄₄" (6
drawers.
NOTE: When leveling legs are fully extended to 1" (25 mm)
below the refrigerator drawers, add ³⁄₄" (19
dimensions. See “Product Dimensions.”
mm) below the refrigerator
mm) to the height
Electrical Requirements
Before you move your refrigerator drawers into the final location,
it is important to make sure you have the proper electrical
connection.
Recommended grounding method
A 115 Volt, 60 Hz., AC only, 15- or 20-amp fused, grounded
electrical supply is required. It is recommended that a separate
circuit serving only your refrigerator drawers be provided. Use
an outlet that cannot be turned off by a switch. Do not use an
extension cord.
IMPORTANT: If this product is connected to a GFCI
(Ground
Fault Circuit Interrupter) equipped outlet, nuisance
tripping of the power supply may occur, resulting in loss of
cooling. Food quality and flavor may be affected. If nuisance
tripping has occurred, and if the condition of the food appears
poor, dispose of it.
5
Water Supply Requirements
15"
(380 mm)
15"
(380 mm)
34
1
/8
"
(868 mm)
30¼
"
(766 mm)
1
/4
"
(6 mm)
15"
(380 mm)
15"
(380 mm)
34
1
/8
"
(868 mm)
30¼
"
(766 mm)
1
/4
"
(6 mm)
(Refrigerator/Freezer Drawers only)
Gather the required tools and parts before starting installation.
Read and follow the instructions provided with any tools listed
here.
IMPORTANT:
■ If you turn ON the refrigerator before the water line is
connected, turn OFF the ice maker.
■ All installations must meet local plumbing code requirements.
■ Use copper tubing and check for leaks. Install copper tubing
only in areas where the household temperatures will remain
above freezing.
TOOLS NEEDED: Flat-blade screwdriver, ⁷⁄₁₆" and ¹⁄₂" open-end
wrenches or two adjustable wrenches, ¹⁄₄" nut driver and drill bit,
cordless drill.
NOTE: Your refrigerator dealer has a kit available with a
¹⁄₄" (6 mm) saddle-type shutoff valve, a union, and copper tubing.
Before purchasing, make sure a saddle-type valve complies
with your local plumbing codes. Do not use a piercing-type or
³⁄₁₆" (4.76
mm) saddle valve which reduces water flow and clogs
more easily.
Water Pressure
A cold water supply with water pressure of between 30 and
psi (207 and 827 kPa) is required to operate ice maker. If
120
you have questions about your water pressure, call a licensed,
qualified plumber.
Reverse Osmosis Water Supply
IMPORTANT: The pressure of the water supply coming out of
a reverse osmosis system going to the water inlet valve of the
refrigerator needs to be between 30
kPa).
827
If a reverse osmosis water filtration system is connected to your
cold water supply, the water pressure to the reverse osmosis
system needs to be a minimum of 40
If the water pressure to the reverse osmosis system is less than
to 60 psi (276 to 414 kPa):
40
■ Check to see whether the sediment filter in the reverse
osmosis system is blocked. Replace the filter if necessary.
■ Allow the storage tank on the reverse osmosis system to refill
after heavy usage.
If you have questions about your water pressure, call a licensed,
qualified plumber.
and 120 psi (207 and
to 60 psi (276 to 414 kPa).
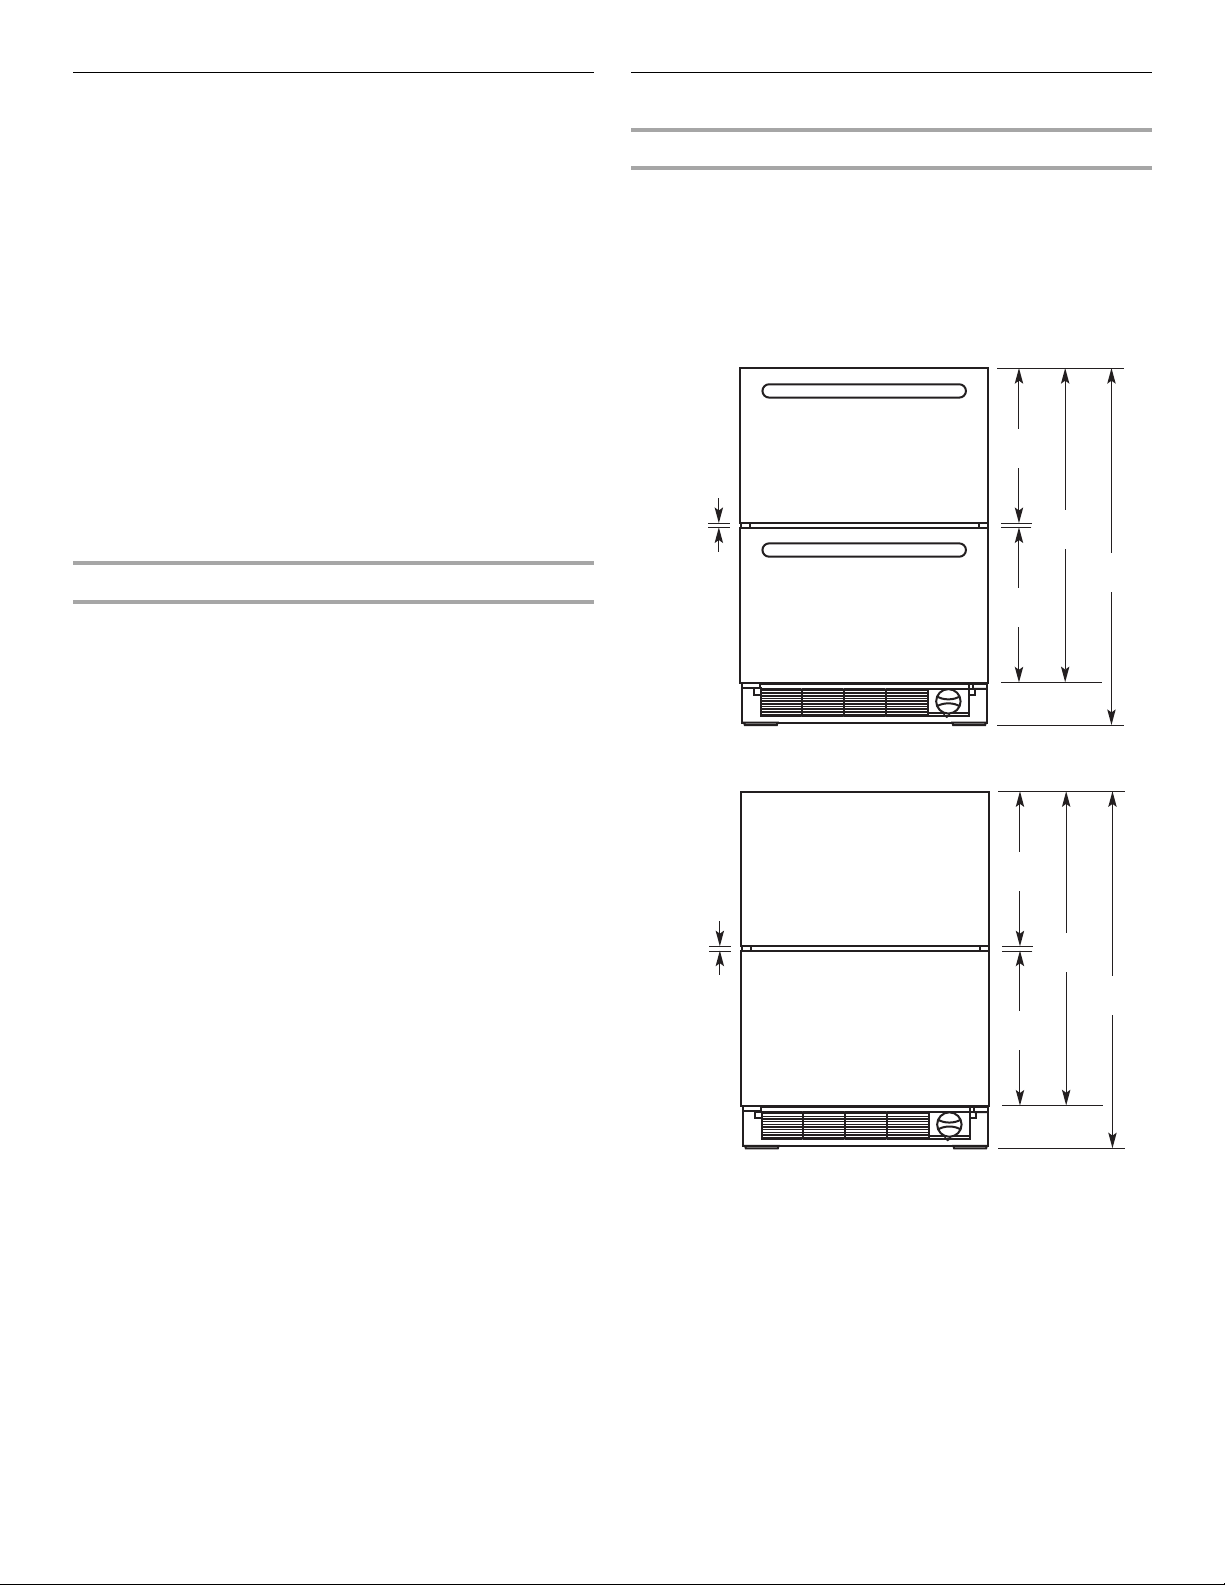
Product Dimensions
Drawer Height Dimensions
■ Height dimensions are shown with the leveling legs extended
to ¹⁄₄" (6
■ When leveling legs are fully extended to 1" (25 mm) below
the refrigerator drawers, add ³⁄₄" (19 mm) to the height
dimensions.
■ The power cord is 60" (1.52 m) long.
Style 1 - Euro Series (front view)
Style 2 - Overlay (front view)
mm) below the refrigerator drawers.
6
 Loading...