Page 1
@_ d _ _ f (__ _! i_ !i! !i_ ¸ _i i _i i i_, i i _¸¸ il ¸ ii!iii!i ¸¸¸¸ !! _ iil i!ii_
F o r Future Assistance .............................. I
Safety Instructi o ns ............................... 1 - 3
Controls a t a G lance ............................ 4 - 7
Oven Operation .................................. 8 - 14
Oven C o ntr o ls .................................... 8
Oven Vent & Light ............................. 9
Oven Fans ........................................... 9
Baking Chart ...................................... 9
Oven Racks ...................................... I0
Broiling ............................................. 11
Clock C o ntr o lled
Oven Cooking ............................. 12
Drying (se l ect models) ................ 13 - 14
Care and Cleaning ........................... 15 -1 8
Self - Clean O ven .......................... 15 - 16
Cleaning Chart ........................... 1 7- i8
Cleaning Products ............................ 18
Maintenance .................................... 1 9- 20
Before You Call for Service .............. 21 - 22
Warranty ................................................ 23
Page 2
F o r Futur e Assistanc e
• • • • • • • • • • • • • • • • • • • • • • • • • • • • • • • • • • • • • •
Congratulations on your choice of a Jenn-Air gas wall oven.
Your complete satisfaction is very important to us.
Read this user ' s guide carefully . It is intended to help you
operate and maintain your new wall oven.
In addition, you will find a booklet entitled " Cooking Made
Simple ." It contains information on selecting bakeware and
provides baking, roasting and broiling tips.
Save ti m e and m oney . Check the "Before You Call" section
of this guide. It lists causes of minor operating problems that
you can correct yourself.
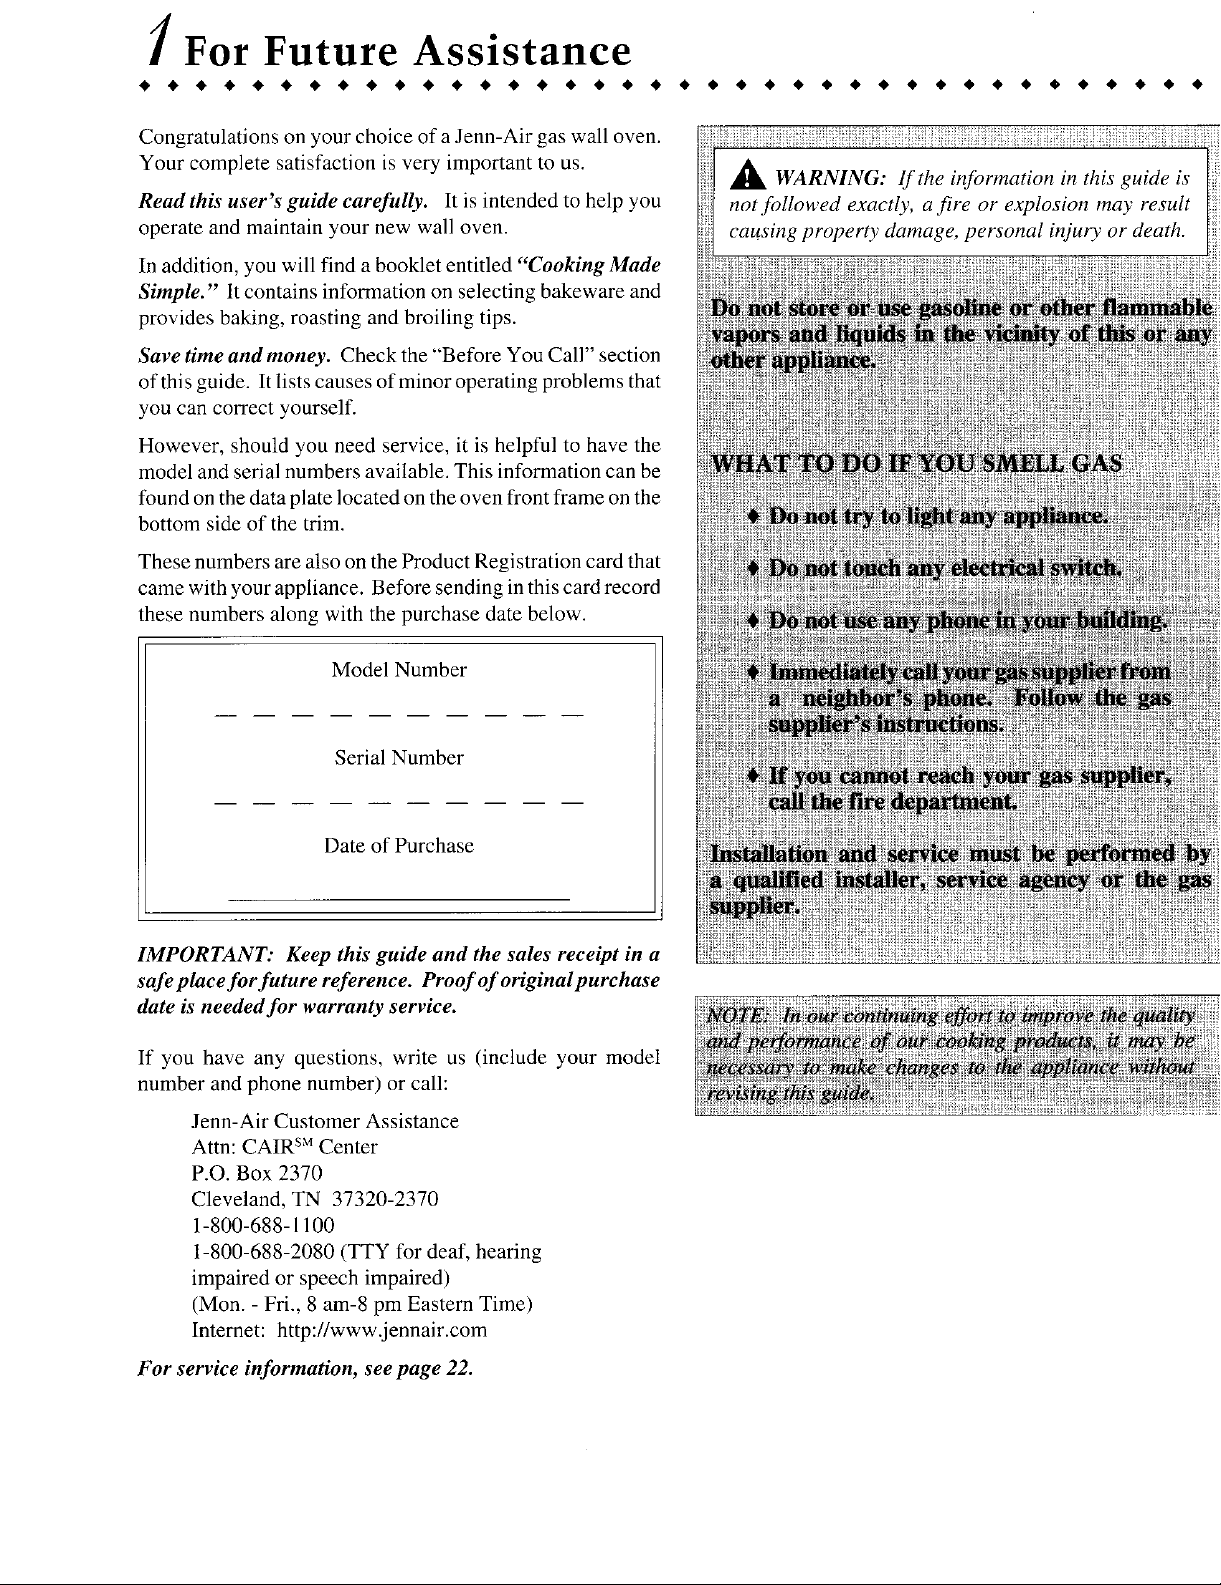
However, should you need service, it is helpful to have the
model and serial numbers available. This information can be
found on the data plate located on the oven front frame on the
bottom side of the trim.
These numbers are also on the Product Registration card that
came with your appliance. Before sending in this card record
these numbers along with the purchase date below.
Model Number
Serial Number
Date of Purchase
IMPORTANT: Keep this guide and the sales receipt in a
safe place fo r future reference . Proof of original purchase
date is needed for warranty service .
I f you h av e any qu es ti o n s, wri t e us ( inc l u de you r mo del
n u mber a n d pho n e nu mber) or call :
Jenn-Air Customer Assistance
Attn: CAIR TM Center
P.O. Box 2370
Cleveland, TN 37320-2370
1-800-688-1100
1-800-688-2080 (TTY for deaf, hearing
impaired or speech impaired)
(Mon.- Fri., 8 am-8 pm Eastern Time)
Internet: http: // www.jennair.com
For service information, see page 22 .
Page 3
Important Safety Instructions
The following instructions are based on safety cons i derations • Many plastics are vulnerable to heat. Keep plastics away
and must be strictly followed to eliminate the potential risks from parts of the appliance that may become warm or hot.
of fire, electric shock, or personal injury. Please retain this
guide for future reference.
I n s t a ll ation an d R e p air • Turn off app l iance to avoid spreading the flame.
• Installer -- please leave this guide with the appliance . • Use dry chemical or foam-type extinguisher or baking soda
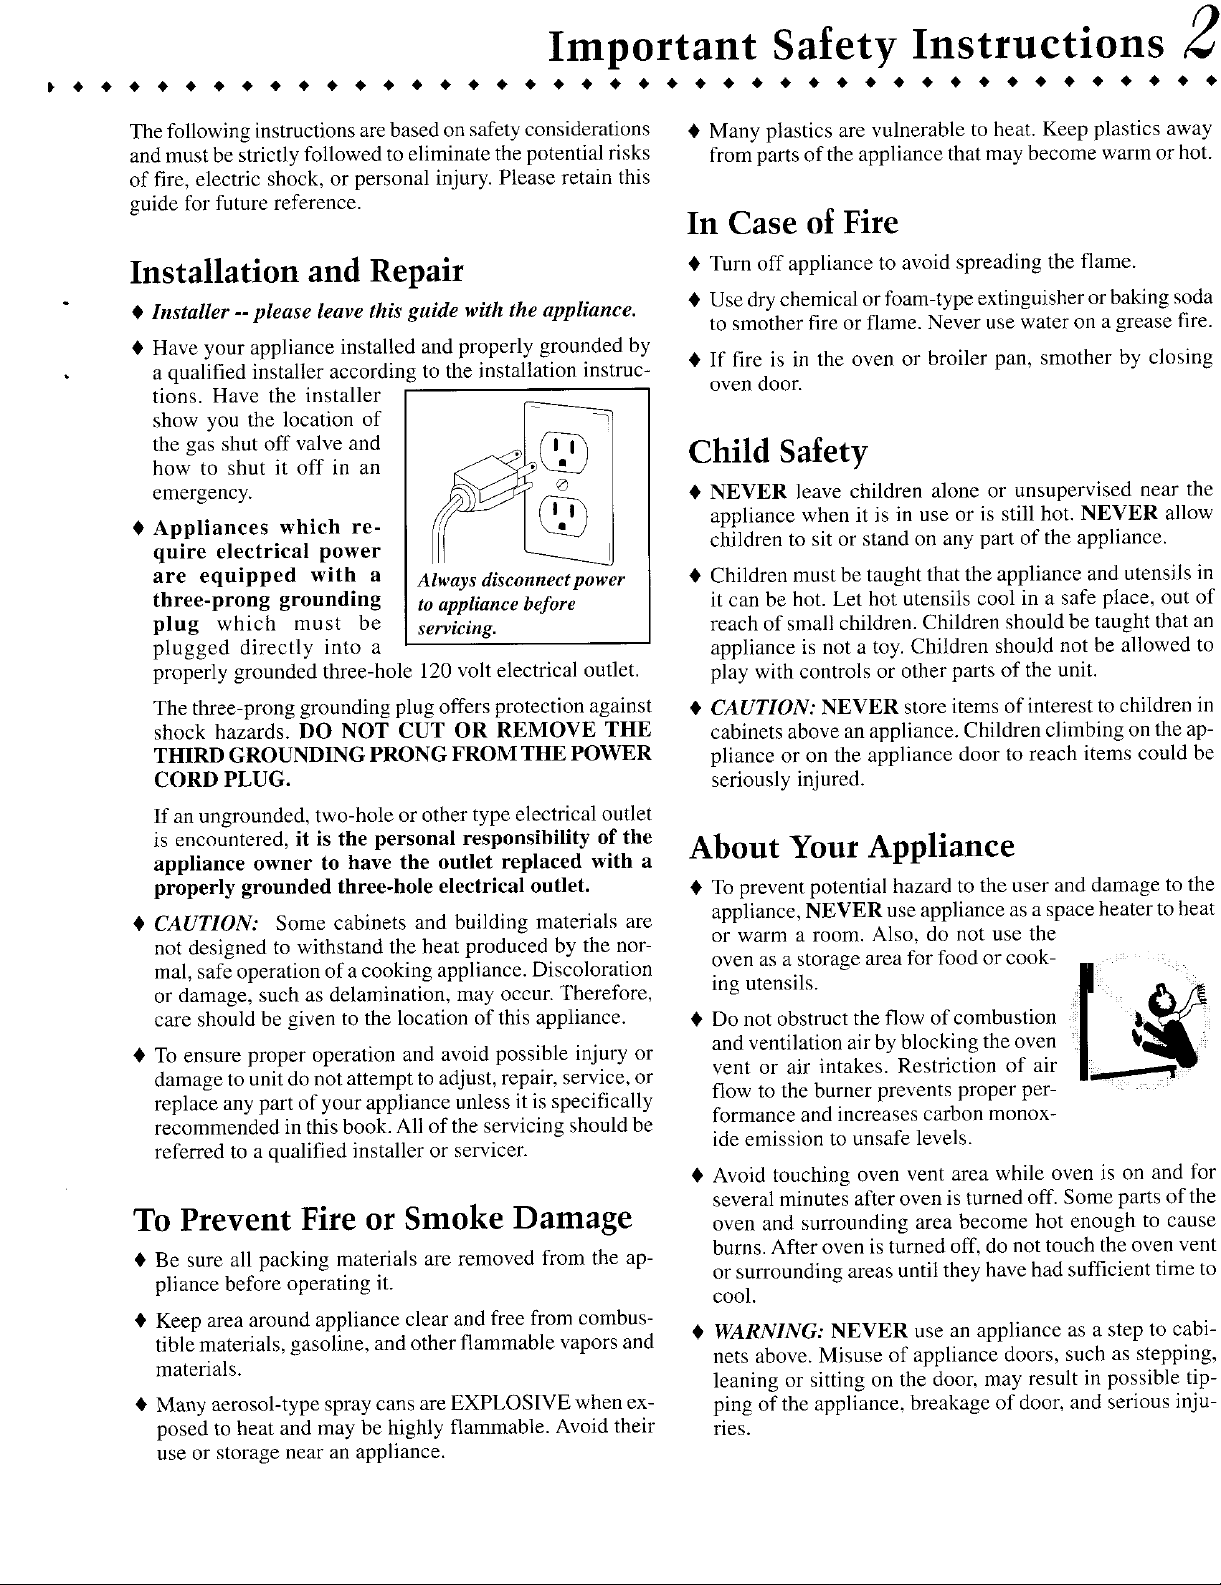
• Have your appliance installed and properly grounded by
a qualified installer according to the installation instruc- • If fire is in the oven or broiler pan, smother by closing
tions. Have the installer oven door.
show you the location of
the gas shut off valve and / _ Child Sa f ety
how to shut it off in an
• App l iance s w h i c h r e - children to sit or stand on any part of the appliance.
emergency. _ ¢ • NEVER leave children alone or unsupervised near the
quir e e l ectr i ca l p ow er
a r e eq ui pp ed wit h a Always disconnect power • Children must be taught that the appliance and utensils in
t hree-prong gro u n d ing to appliance before it can be hot. Let hot utensils cool in a safe place, out of
plug which must be servicing , reach of small children. Children should be taught that an
plugged directly into a appliance is not a toy. Children should not be allowed to
properly grounded three-hole 120 volt electrical outlet, play with controls or other parts of the unit.
The three-prong grounding plug offers protection against • CAUTION: NEVER store items of interest to children in
shock hazards. DO NOT CUT OR REMO V E T H E cabinets above an appliance. Children climbing on the ap-
THIRD GROUNDING PRONG FROM THE POWER pliance or on the appliance door to reach items could be
CORD PLUG. seriously injured.
If an ungrounded, two-hole or other type electrical outlet
In Case of Fire
to smother fire or flame. Never use water on a grease fire.
appliance when it is in use or is still hot. NEVER allow
is encountered, i t is the pers o nal r e sp o nsibili t y o f t he About You r Appliance
applian c e owner t o have the o utlet replaced with a
properly gr o unde d t hree-hole elec t rical outle t , • To prevent potential hazard to the user and damage to the
O CAUTION: Some cabinets and building materials are appliance, NEVER use appliance as a space heater to heat
not designed to withstand the heat produced by the nor- or warm a room. Also, do not use the
mal, safe operation of a cooking appliance. Discoloration oven as a storage area for food or cook- 11 , 0 , ,- _
or damage, such as delamination, may occur. T herefore, ing utensils.
care should be given to the location of this appliance. • Do not obstruct the flow of combustion I ¢
• To ensure proper operation and avoid possible injury or and ventilation air by blocking the oven I, -- ._
damage to unit do not attempt to adjust, repair, service, or vent or air intakes. Restriction of air
replace any part of your appliance unless it is specifically flow to the burner prevents proper per-
recommended in this book. All of the servici n g should be formance and increases carbon monox-
referred to a qualified installer or servicer.
To Prevent Fire or Smoke D amag e oven and surrounding area become hot enough to cause
• Be sure all packing materials are removed from the ap- burns. After oven is turned off, do not touch the oven vent
pliance before operating it. cool.
• Keep area around appliance clear and free from combus-
tible materials, gasoline, and other flammable vapors and • WARNING: NEVER use an appliance as a step to cabi-
materials, leaning or sitting on the door, may result in possible tip-
• Many aerosol-type spray cans are EXPLOSIVE when ex- ping of the appliance, breakage of door and serious inju-
posed to heat and may be highly flammable. Avoid their ries.
use or storage near an appliance.
ide emission to unsafe levels.
• Avoid touching oven vent area while oven is on and for
several minutes after oven is turned off. Some parts of the
or surrounding areas until they have had sufficient time to
nets above. Misuse of appliance doors, such as stepping,
Page 4
Safety Instructions
• • • • • • • • • • • • • • • • • • • • • • • • • • • • • • • • • • • • • • 1
• Do not touch a hot oven light bulb with a damp cloth as • This appliance has been tested for safe performance us-
the bulb could break. Should the bulb break, disconnect ing conventional cookware. Do not use any devices or
power to the appliance before removing bulb to avoid elec- accessories that are not specifically recommended in this
trical shock, guide. Do not use add-on oven convection systems. The
use of devices or accessories that are not expressly rec-
ommended in this guide can create serious safety haz-
Cooking Safety ards, result in performance problems, and reduce the life
• NEVER heat an unopened container in the oven. Pres- of the components of the appliance.
sure build-up may cause container to burst resulting in
serious personal injury or damage to the appliance. Cleaning Sa f ety
• Use dry, sturdy potholders. Damp potholders may cause
burns from steam. Dish towels or other substitutes should • Turn off all controls and wait for appliance parts to cool
never be used as potholders because they can trail across
hot burners and ignite or get caught on appliance parts.
• Do not let cooking grease or other flammable materials noxious fumes if applied to a hot surface.
accumulate in or near the appliance, hood or vent fan.
Clean hood frequently to prevent grease from accumulat-
ing on the hood or filter. When flaming foods under the
hood turn the fan off as the fan may spread the flame. Sel f -Clean Oven
• NEVER wear garments made of flammable material or
loose fitting or long hanging-sleeved apparel while cook- • Clean only parts listed in this guide. ......
ing. Clothing may ignite or catch utensil handles. • Do not clean door gasket. The door gas- _r.:_.. ,.
• Always place oven racks in the desired positions while ket is essential for a good seal. Care [.]____J_ [ _!)
oven is cool. Slide oven rack out to add or remove food, should be taken not to rub, damage, or
using dry, sturdy potholders. Always avoid reaching into move the gasket. Do not use oven clean ..... _
the oven to add or remove food. If a rack must be moved ers of any kind in or around any part of ....
while hot, use a dry potholder. Always turn the oven off the self-clean oven.
at the end of cooking. • Before self-cleaning the oven, remove broiler pan, oven
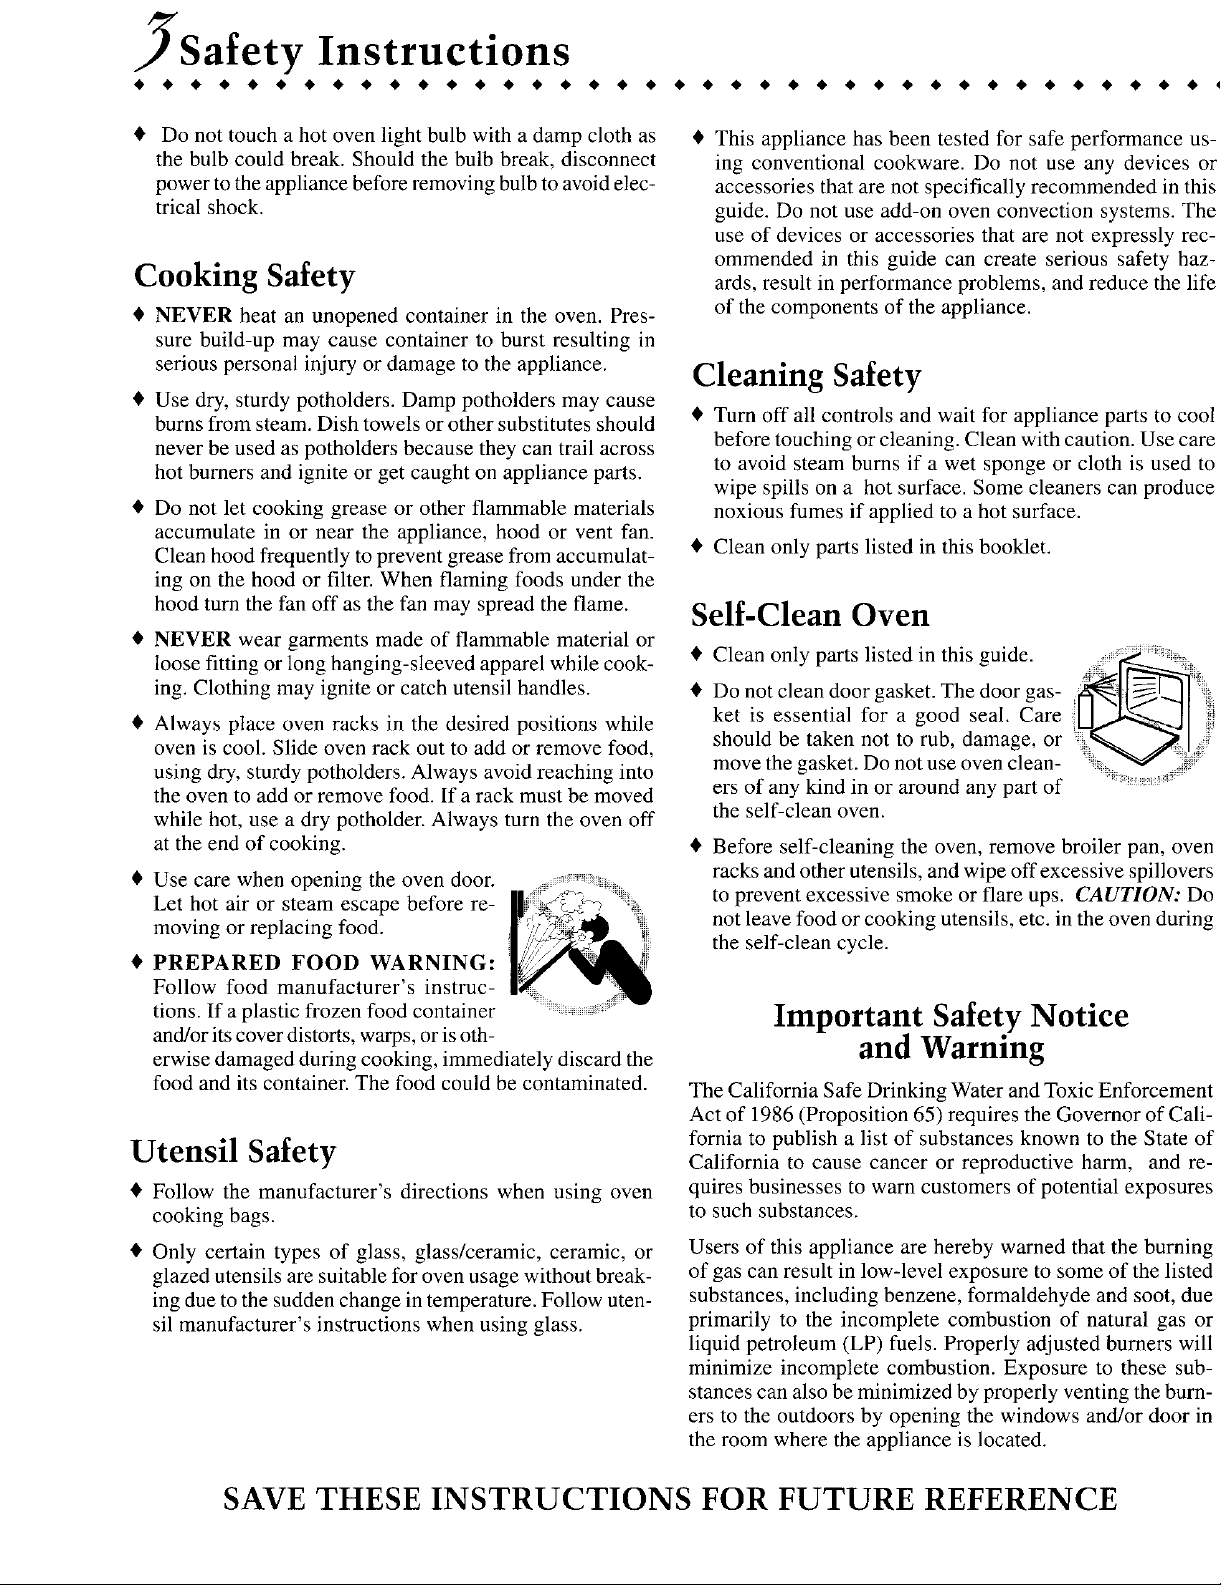
• Use care when opening the oven door. ..... racks and other utensils, and wipe off excessive spillovers
Let hot air or steam escape before re- to prevent excessive smoke or flare ups. CAUTION: Do
moving or replacing food. _ii the self-clean cycle.
• PREPARED FOOD WARNING:
Follo w foo d manu f actu r e r's in s t r uc-
before touching or cleaning. Clean with caution. Use care
to avoid steam burns if a wet sponge or cloth is used to
wipe spills on a hot surface. Some cleaners can produce
• Clean only parts listed in this booklet.
not leave food or cooking utensils, etc. in the oven during
tion s. If a pla s tic frozen food containe r Important Safety Notice and / o r it s cove r d i s to r t s, w arp s , o r i s ot h - and Warning
erw i s e damage d d u r ing coo k ing , imme d iately d i s ca rd t h e
foo d an d it s containe r. T h e foo d could b e contaminate d. Th e Califo r nia Safe D r in k ing Wate r an d T o x ic Enfo r cement
Act of 1986 ( P r opo s ition 6 5) r equi r e s t h e Gove rn o r of Cali-
fo r nia to pu b li sh a li s t o f s u bs tance s k no w n to t h e State o f
Utensil Safety Calif o rn i a to cau s e cance r o r r ep r o d uctive h a r m , an d r e-
• Follo w t h e manufactu r e r's di r ection s wh en u s ing oven quire s b u s ine ss e s to w a r n cu st ome rs of potential e x po s u res
coo k ing b ag s. to s uc h s u bs tance s.
• O nly ce r tain type s o f gla ss, gla ss / ce r amic, ce r amic, o r U s e rs of t h i s appliance a r e h e r e b y w a r ne d t h at t h e b u r ning
glaze d uten s il s a r e s uita b le for oven u s age w it h out b rea k - of ga s can r e s ult in lo w -level expo s u r e to s ome of t h e li s te d
ing due to t h e s u dd en c h ange in tempe r atu r e . Follo w u t en- s u bs tance s, including b en z ene , f o r mal d e h y d e an d s oot, due
s il manufacture r ' s in s t r uct i on s wh en u s ing gla ss, p r ima r ily to t h e incomplete com b u s tion of natu r al ga s o r
liqui d pet r oleum ( LP ) fuel s. P r ope r ly ad j u s te d b urne rs w ill
minimize incomplete com b u s tion . Expo s u r e to t h e s e s u b -
s tance s can al s o b e minimize d b y p r ope r ly venting t h e b urn-
e rs to t h e out d oo rs b y opening t h e w in d o ws an d/ o r door in
t h e r oom wh e r e t h e appliance i s locate d .
SAVE T HESE INSTRUCT IO NS FOR FUTURE REFERENCE
Page 5
Con t r ol s a t a G l anc e
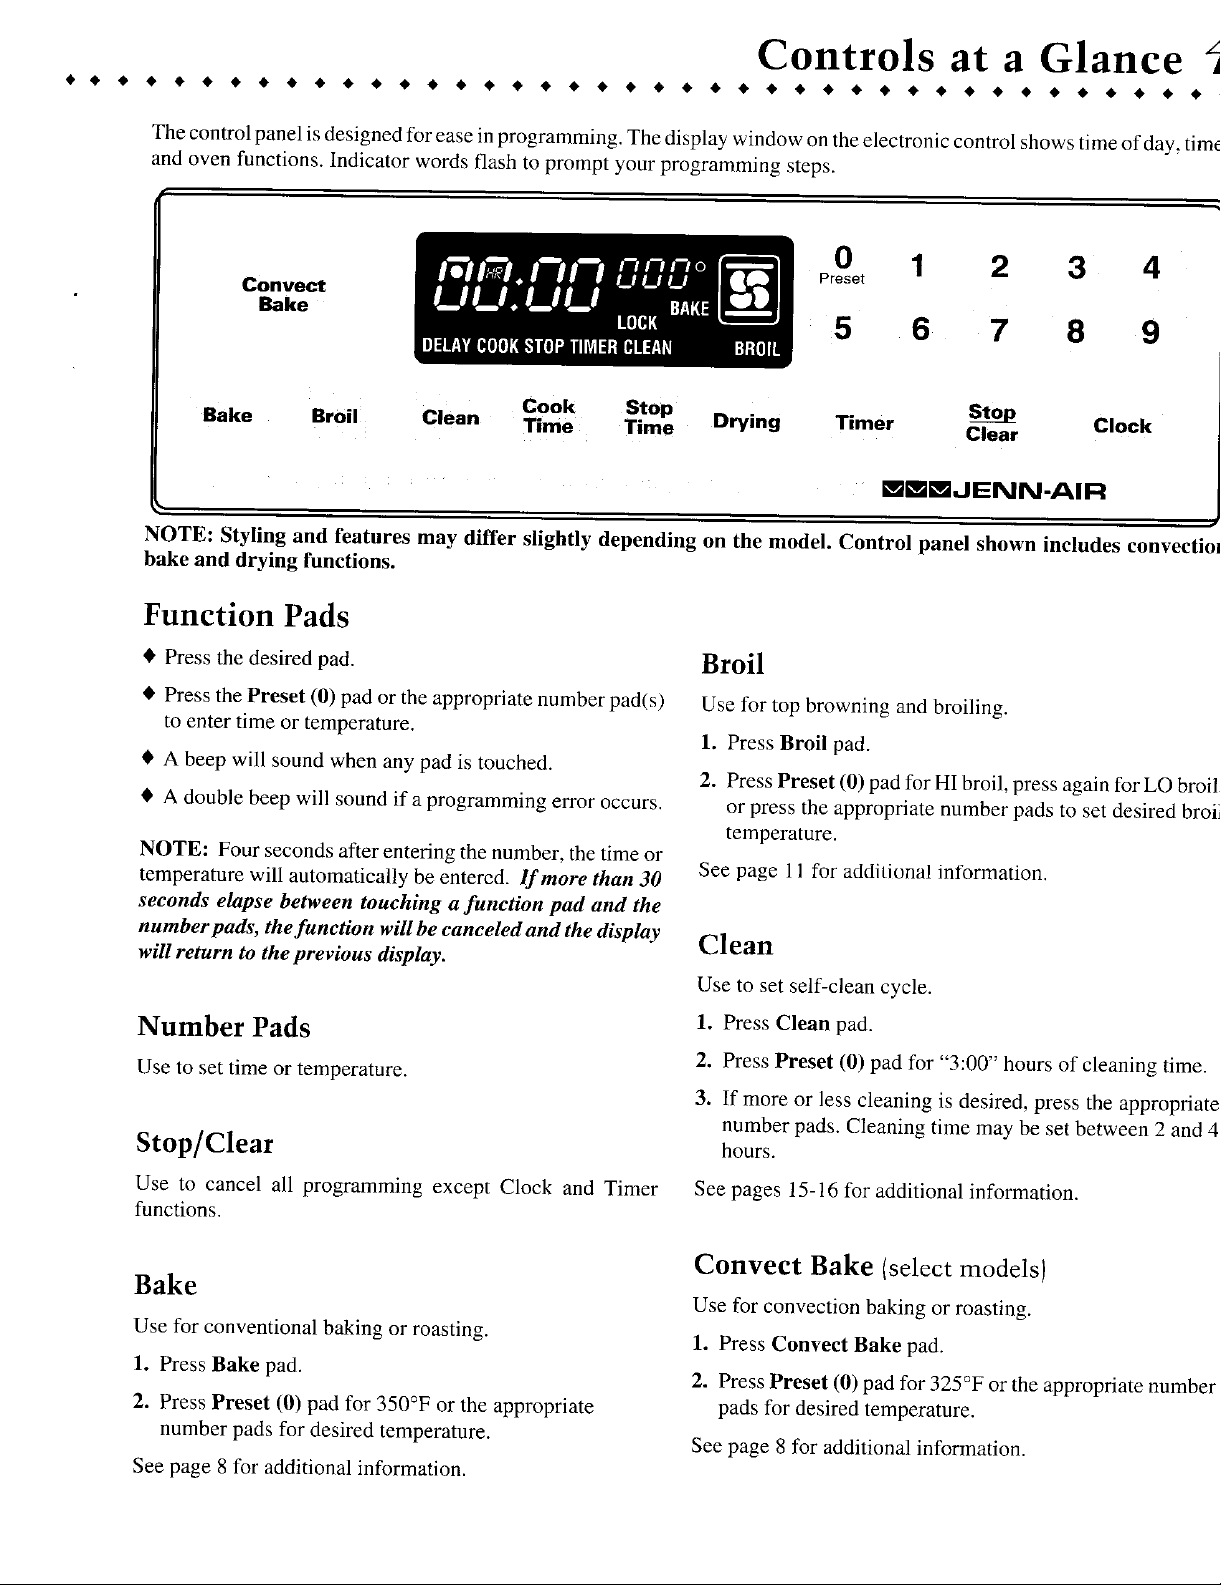
The c ontrol panel is designed for ease in programming. The display window on the electronic control shows time of day, time
and oven functions. Indicator words flash to prompt your programming steps.
0 1 2 3 4
Conve c t Preset
Sak e 5 6 7 8 9
Bake Broil Clean Time Time Clear Clock
NOTE: Styling and features m ay differ slightly depending on t h e model . Control panel s h own includes convectio l
bake and drying functions.
Cook Stop Dryi n g Timer Stop
EE L_ JENN-AIR
Function Pads
• P ress the des i red pa d. Broil
• Press the Pr e s e t ( 0 ) pad or the appropriate number pad(s) Use for top browning and broiling.
to enter time or temperature.
• A beep will sound when any pad is t ouched.
• A double beep will sound if a programming error occurs, or press the appropriate number pads to set desired broil
NOT E: Four seconds after entering the number, the time or
t emperature w ill au t omatically be entered. If m ore than 30 See page 11 f o r additional information.
seconds elapse between touching a function pad and the
number pads , the func ti on will be canceled and the display Clean
will return to the previous display .
1. Press Broi l pad.
2. Press Pr e s e t ( 0 ) pad for HI broil, press again for LO broil ,
temperature.
Use t o set se lf - c le an cycl e.
Number P ads 1. P ress Clean p a d.
Use t o se t tim e o r te m per atu re.
2. P ress Preset (0 ) p a d fo r " 3 :00" h ou rs o f cl e anin g t im e.
3. I f m ore o r l ess cl e aning i s des i red, press t he a ppropr iat e
num ber p a ds. Cl e an i n g ti me m ay be se t be t wee n 2 an d 4
Stop / Clear hours.
Use t o can ce l all progr amm i n g except Cl o c k an d Tim er S ee p a ges 1 5 - 16 f or a dd itional i nfo r mat i on .
f u nction s.
Convect Bake (select modelsl
Bake Use fo r c o nv ec ti o n b a ki n g or ro a s tin g.
U se f or co n v e nti o nal b a ki n g o r roa s tin g. 1 . P ress Con v ect Bake pa d.
1. P ress Bake p a d. 2. P ress Preset ( 0 ) pad f or 3 25°F or t he a ppropr ia te n um ber
2. P ress Preset (0 ) pa d f o r 3 50° F or t he a ppropr iat e p a ds f or desired t e m per atu re.
n u m ber p a ds fo r des i red t e m per atu re. S ee p a ge 8 f or a ddi t i onal in form ati on.
S ee p ag e 8 f or a d d i ti o nal i nfo rm ati o n .
Page 6
C o n t ro l s at a G l a n ce
• • • • • • • • • • • • • • • • • • • • • • • • • • • • • • • • • • • • • • •
Drying (s e l e ct mode ls ) Sett ing the Timer
Us e to d r y o r d ehyd rat e f ood s s u c h as fr uit s, v e g e t able s a nd U se t o s et an d then s i gn al t he co m pletion o f a time pe r iod u p
herbs, t o 99 h o urs and 5 9 minutes (99:59).
1. Press Drying pad. The timer can be used independently of any other oven
2. Press Preset ( 0 ) pad for 140°F or the appropriate number activity and can be set while another oven function is operat-
pads for the drying temperature desired, ing. The timer does not control the oven .
See page 13-14 for additional information.
C oo k Time / Stop Time
Use to program the oven to start and stop automatically, ber of minutes or hours and minutes appear in the display.
1. Press Bake or Conveet Bake pad. Press the appropriate
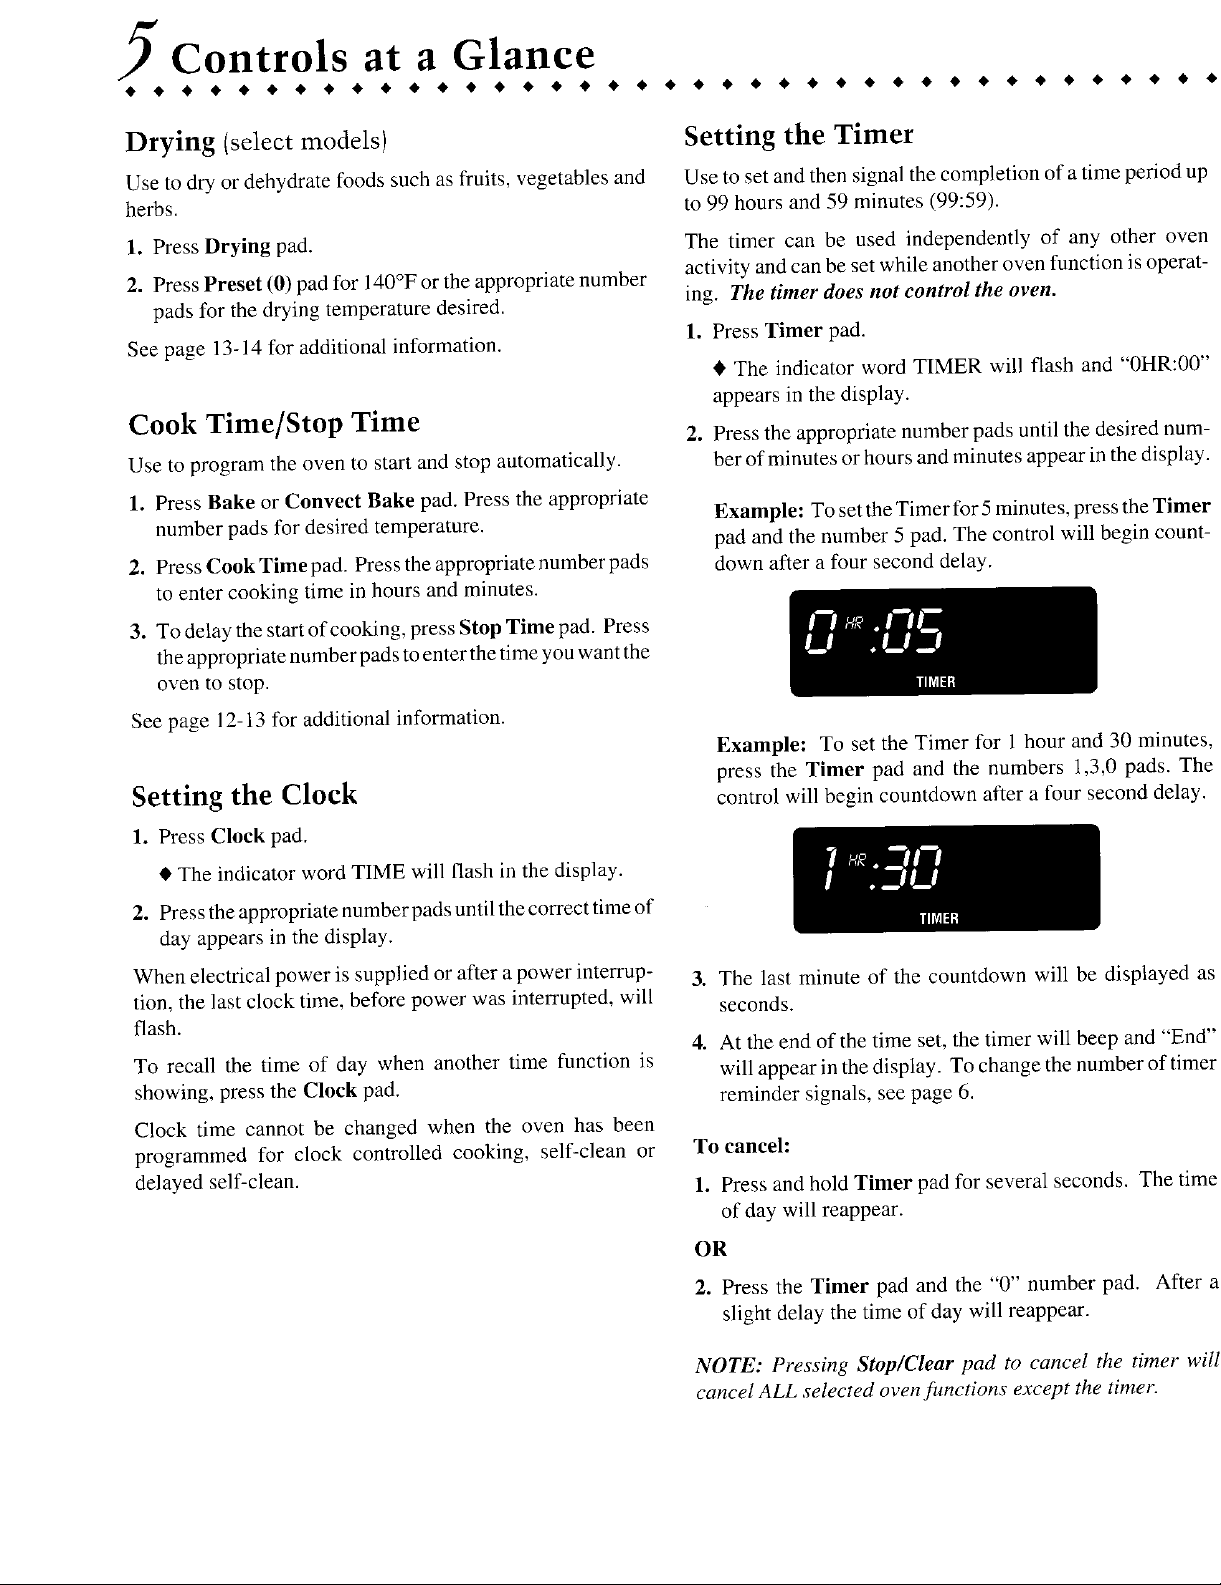
number pads for desired temperature. Example: To set the Timer for 5 minutes, press the Timer
2. Press Cook T i m e pad. Press the appropriate number pads down after a four second delay.
to enter cooking time in hours and minutes.
3. To delay the start of cooking, press Stop Tim e pad. Press
the appropriate number pads to enter the time you want the
oven to stop.
1. Press Timer pad.
• The indicator word T IMER will flash and "0HR:00"
appears in the display.
2. Pr e ss t he app ro p r ia t e nu m be r pads until t h e d e s i r ed nu m -
pad and the number 5 pad. The control will begin count-
See page 12-13 for additional information.
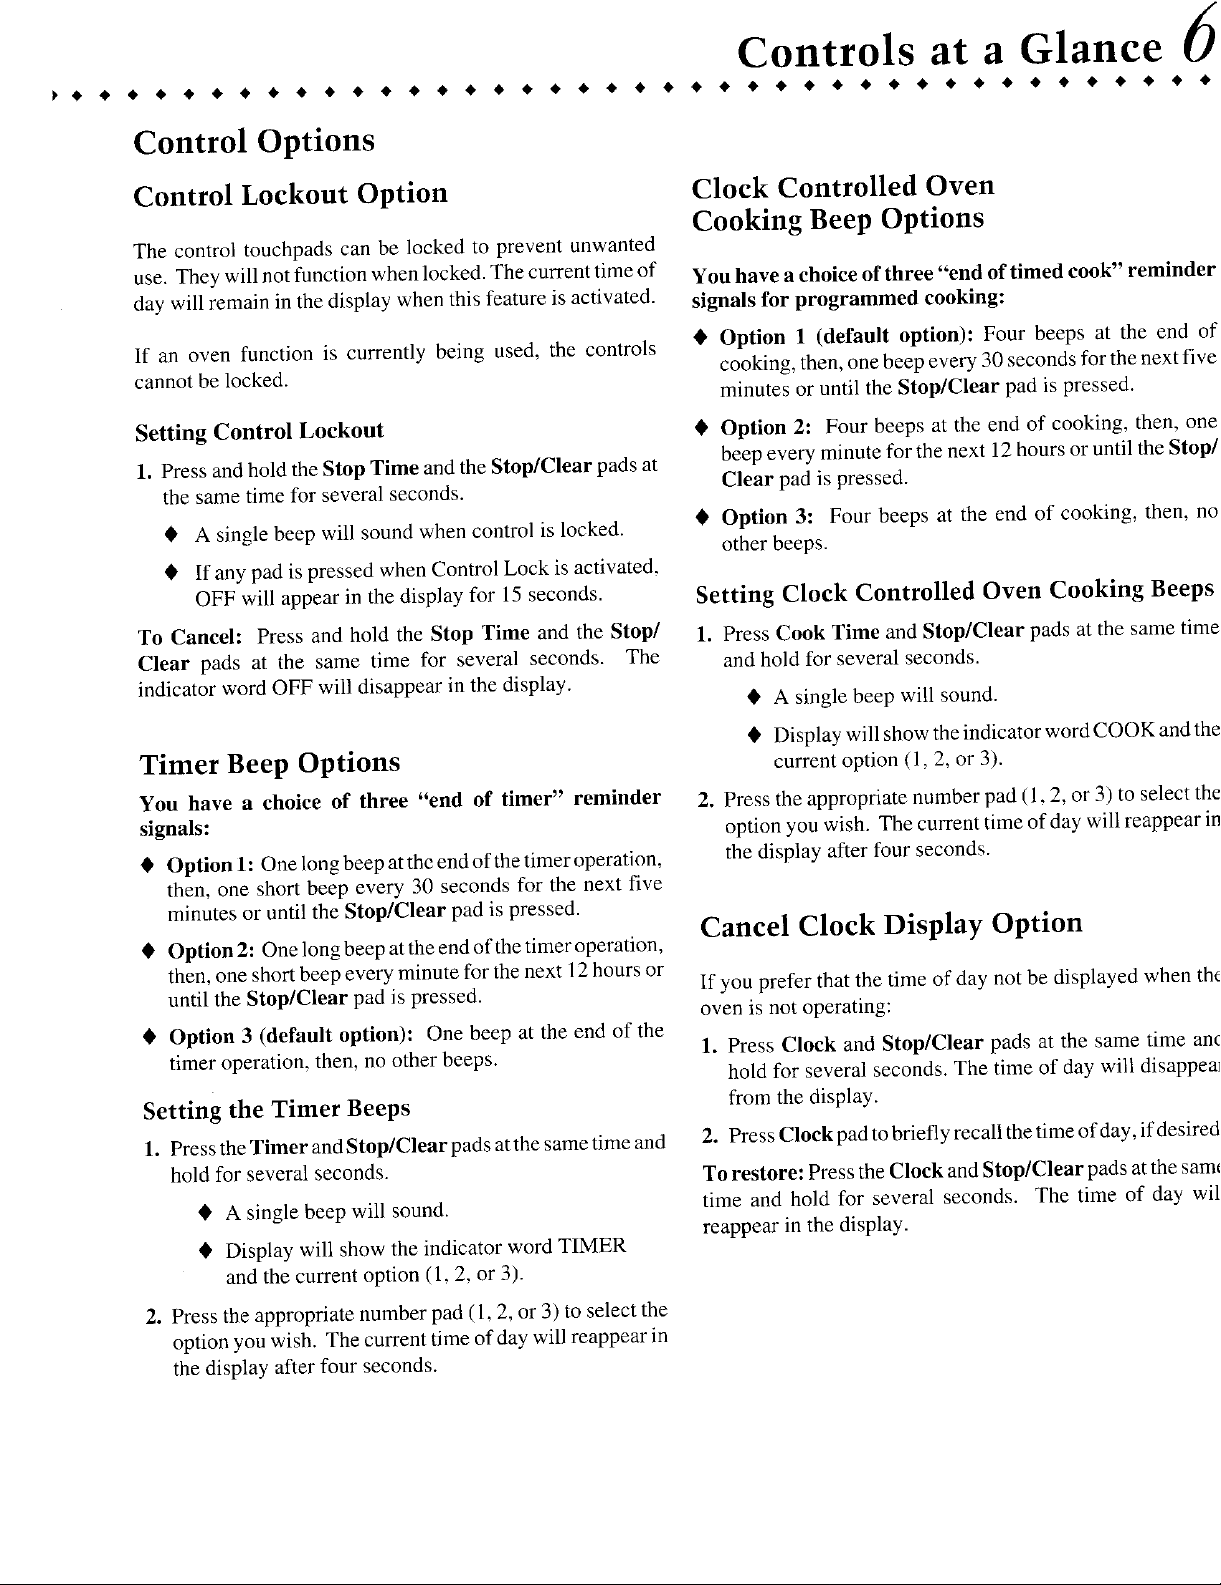
Exampl e : To set the Timer for 1 hour and 30 minutes,
press the Tim e r pad and the numbers 1,3,0 pads. The
Setting the Clock control will begin countdown after a four second delay.
1. Press Clock pad.
t The indicator word TIME will flash in the display.
2. Press the appropriate number pads until the correct time of
day appears in the display.
When electrical power is supplied or after a power interrup- 3. The last minute of the countdown will be displayed as
tion, the last clock time , before power was interrupted, will seconds.
flash.
4. At the end of the time set, the timer will beep and "End"
T o recall the time of day when another time function is will appear in the display. To change the number of timer
showing, press the Clock pad . reminder signals, see page 6.
Clock time cannot be changed when the oven has been
programmed for clock controlled cooking, self-clean or To cancel:
delayed self-clean. 1. Press and hold Timer pad for several seconds. The time
of day will reappear.
OR
2. Press the Timer pad and the "0" number pad. After a
slight delay the time of day will reappear.
NOTE: Pressing Stop pad to cancel the timer wil l
cancel ALL s elected oven functions except the timer .
Page 7
Contro l s at a G l ance
C ontrol O ption s
C ontrol Lockou t O p t ion C lock Con t rolled O ven
The control touchpads can be locked to p revent unwanted
use. The y wi l l no t function wh e n locked. Th e current t ime of Y ou hav e a c h o i c e of t hree "en d o f ti med coo k" r e min d er
da y w ill r emain in th e di s p l ay whe n t hi s fe atur e i s a c ti v ated, signals for p r og r amme d cooking:
I f an o v en f un ction i s c urr en t ly b e i n g u s ed, t he c on tr ol s • Op tion 1 (de f ault o p tion ) : Fou r b eep s at th e end o :
ca n n ot b e l o ck e d , c oo k i ng, th e n , o n e beep ev e r y 3 0 sec o n d s fo r th e ne xt fi w
Setting Cont r ol Lockout • O ption 2: Fou r beep s at t he end of coo k in g , t he n , o n_
1. Pr e ss a nd h ol d the Stop Time and the Stop / Clear pad s a t beep e v e r y minu t e f o r th e n e x t 1 2 h ou rs o r until the Stop _
the same time for several seconds. C lea r pad is pressed.
Cook ing Beep O p t ion s
m inute s o r u n t i l t he Stop / Clea r pad i s p r e ss e d .
• A single beep will sound when control is locked. • O pti on 3 : Four beeps at the end of cooking, then, nc
• If any pad is pressed when Control Lock is activated,
OFF will appear in the display for 15 seconds. Setting Clo c k Cont r olled Oven C o oking Beeps
To Can c el : Press and h o l d t he S top T i m e and the S top / 1 . Press C o o k T i m e and S top / C l ear pads a t the same t ime
Clear pads at the same time for several seconds. The and hold for several seconds.
indicator word OF F will disappear in the display.
other beeps.
• A single beep will sound.
• Display will show the indicator word COOK and th
Ti m er Beep Opti o ns curre n t option (1 , 2, or 3).
You have a choice of three "end o f timer" remind e r 2. Press the appropriate number pad (1,2, or 3) to select th
signals: option you wish. T he current time of day will reappear il
• O pt i o n 1 : One long beep a t t he e n d of the t imer operation, the displa y after four seconds.
then, one short beep every 30 seconds for the next five
minutes or until the S t op C lear pad is pressed.
• Option2: Onelongbeepattheendofthetimeroperation,
then, one short beep every minute for the next 12 hours or
until the St o p / Clear pad is pressed. If you prefer that the time of day not be displayed when th
• O p tion 3 (default option): One beep at the end of the
timer operation, then, no other beeps. 1. Press C lock and S t op /C lear pads at the same time an
Cancel Clock Display Option
oven is not operating:
hold for several seconds. The time of day will disappe_
Setting the Timer Beeps from the display.
1. Press the Timer and Stop / Clear pads at the same time and 2 . Press C lock pad to briefly recall the time of day, ifdesirec
hold for several seconds. To restore : Press the Clock and Stop / Clear pads at the san:
• A single beep will sound, time and hold for several seconds. The time of day wi
• Display will show the indicator word TIMER
and the c u rren t o pti o n ( 1, 2 , o r 3 ) .
reappear in the display.
2 . Pr ess t he a ppropr ia te num b er p a d ( 1 , 2, o r 3 ) t o sele c t t he
o pt i o n y ou w i sh. T he c u rr ent ti me of d ay w i l l re a ppe a r i n
th e d i sp lay af ter f o ur se c o nds .
Page 8
C o ntro l s at a G l anc e
Automatic Oven Turn Off Option Oven Temperature Adjustment Option
The oven will automatically turn off after 12 hours, if you Ifyouthinktheovenshouldbehotterorcooler, youcanadjust
accidentally leave it on. You can deactivate this feature, if it yourself. To decide how much to change the thermostat, set
desired, the oven temperature 25°F higher or lower than the tempera-
T o E limi nat e 1 2 Ho ur T urn Off : ture in your recipe, then bake. The results of the "test" should
1. Press the Clock pad and hold for several seconds until "12"
appears in the display. The indicator word TIME will flash To A d jus t th e Th e rmos t at :
in the display. 1. Press the Bak e pad.
2. Press any number pad until 8888 appears in the display.
Current time of day will reappear in the display after four 2. Enter 550 ° by pressing the number pads "5, 5, 0".
seconds. 3. Press and hold the Bake pad for several seconds until 0 °
To r e stor e: Press the Clock pad and hold for several seconds appears in the display.
or until 8888 appears. Press" 1" number pad. "12" will appear t_ If the oven temperature was previously adjusted, the
briefly in the display followed by the current time of day. change will be displayed. For example, if the oven tem-
give you an idea of how much to adjust the thermostat.
perature was reduced by 15 °, the display will show
-15 ° .
4. Press any number pad to change the temperature. Each
time a pad is pressed, the temperature changes by 5°F.
I_ Press repeatedly to reach +35°F. Continue pressing to
reduce the temperature up to -35°F.
5. When you have made the adjustment, press the Sto p / Cl e ar
pad and the time of day will reappear in the display. The
oven will now bake at the adjusted temperature.
NOTE : Do not change the temperature setting more than
10 ° at one time before testing the oven.
It is not necessary to readjust the oven temperature if there is
a power interruption. This adjustment will not affect broil or
clean temperatures.
Page 9
• • • • • • • • • • • • • • • • • • • • • • • • • • • • • • • • • • • • • • • • •
Ove n Ope ration
Your Jenn-Air wall oven is equipped with pilotless ignition. • When the oven is preheated, the oven will beep and the
With this type of ignition system, the gas automatically shuts preheat indicator light will go off in the display. Allow
off and the oven will not operate daring a p ower failure . 7-14 minutes for the oven to preheat.
A lighted match will not light the oven burner . No attempt
should be made to operate the oven during a power failure .
Se tti ng t he C o n t ro l s f o r Bak i n g , 4 . At the end of cooking, turn the oven off by pressing the
- - - sDo as * ;n " an d Co nv e ct io n v, ,, s na t - ;n - St o p / Clear pad. Remove food from oven. The oven will
and
D , ;,x, oas _ ns. NOTE: If you forget to turn off the oven, it will automa t ical l y
continu e oper ating until t he Stop / Clear p a d is pressed.
* Convection cooking available on select models only. turn off at the end of 12 hours. If you wish to deactivate this
1. Place oven racks on proper rack positions. (See page 10.)
2. Press Bake or Convect Bake pad.
• The indicator word BAKE will flash.
• 000 and the oven icon ] I will appear, pad and pressing a number pad. the display willreturn _the
U U U
_ l ._ ll _ t BAKE
C._-i n ,-, nn
• When convection cooking is selected, a fan icon appr o priate B a k e or Co nv ect Bak e pad an d the appropriate
_ w ill also appe a r, n umber pads for the desired o ven temperature.
3. P ress the Preset (0) p a d to set 350°F automatically. When slightly from yo u r 01d oven. This i s normal . Every oven has
convection cooking, 325°F will be automatically set when its own characteristics. "
Preset (0) is pressed. Or press the appropriate number
pads for the desired oven temperature. • During some extended o v en cooking operations, you may
• The temperature can be set from 100 ° to 550 ° F.
• A fter four seconds the oven will begin to heat.
- the bake icon (top and bottom bars) will light;
- a red preheat indicator will light; prepared m ix directio n s. Bakin g tim e w il l be th e same or
- an d 100° or the actual o v e n t emper a t u re, wh ic he v er
is higher, will appear in the display, pa g e 9_ )
- whenconvectioncookingthefanicon _w il lbegin • When c onv e c t ion roas ti ng, ro a s tin g t i m es a r e gener all y
to rotate. 2 5 -3 0 % l e ss. ( Maintain conven ti onal masting tempera-
PREHEAT BAKE t u res.
INDICATOR ICON
._ ll _ l BAKE
• The temperature in the display will incre a se in 5 °
increments until the oven reaches the preset
temperature.
feature, see page 7.
O ff more than 30 seconds elapse between preSsing a function
previous display.
• To recall the set temperature during preheat, press the appro-
priate Ba k e or Cn nveet Bake pad, The set temperature Will:
be displayed briefly and then return to the ongoing pr o gram,
T o Change the _ven l_ture duri n g cooking, p_gS _ahe
• You may find t hat the cooking times and temperatures vary
heara '_popping" sou n d when the oven:burner cycles, This is
• T h e conve c tion fan tur ns on five minutes af t e r setting th e
contr o ls . This i s nor m a l .
• : See "Co oki n g Ma de Simp l e " booklet for recommen d ed
t oasting _empemture and limes, and additional baking, roast,
ing and convection cooking tips .
Page 10
Ov e n O p e rati on
Convection Cooking of Frozen Oven Fans
Convenience Foods (select modelsl
A cooling fan w i ll automati c ally turn on during some cook-
• Preheating the oven is n ot necessary, ing and alI cleaning operations. It is used to help keep internal
parts o n the control panel c o o l . T he fan will automat i cally
• F o ll o w package recommendations for oven temperature, turn off when parts have c oo led. The fan may continue to
foil covering and the use o f c o okie sheets. C o ok i ng times operate after the oven has been turned off. This is norma l .
will be sim i lar. (See chart below f o r some exceptions.)
A co nve ctio n fan (select mode l s) is used to c i rculate hot air
• M o st foods are c oo ked on rack positi o n #3. i n the o ven when the convecti o n feature is selected. It
• For multiple rack co o king w i th convection, use racks #2 automatica l ly turns on five m i nutes after the CO N VEC T
and 4 or #1, 3 and 5. P i zzas should be placed on co o kie BAKE pad is pressed and will turn off when C O NVEC T
sheets. B AK E is canceled.
NOTE: The convection fan will automatically stop whenever
the oven door is opened.
Ba k i ng Ch a r t
3 400 ° 13-18
3 450 ° 15-25
3 400 ° 13 - 18
* The times given are based on specific brands of foods. Actual
tunes will depend on the ones you cook.
3 325 ° 20-25 350 ° 28-33
3 325 ° 26-30 350 ° 30-40
O v en Vent 2 350 ° 28 40 375 ° 30-42
W hen t he ove n is i n u s e , n ev er b loc k t he ve nt o p en i n g. 3 350°-40 0 c 45-6C 375°-425 c 45-60
The oven vent is located above the co n trol panel. When the
oven is in use, this area may feel warm or hot to the touch. Do 1 325°-375c 35-45 350°-400 c 45-60
not p l ace plastics n ear the vent opening as heat from the vent
could distort or melt the plastic. 3 325°-350 ° 6-10 350°-375 c 8 -12
3 325°-375 ° 4-8 350-400 ° 7-11
3 325 ° 20-2¢ 350 ° 25-35
Oven Light
The ove n light automatical l y comes on when- _ 2 350 ° 17-23 375 ° 20-30
ever the oven door is opened. When the door
is closed, press the rocker switch on the
control panel. 2 325°-350 ° 35-5( 350°-375 ° 50-60
3 350°-375 ° 7-12 375°-400 ° 9-16
3 375°-400 ° 7-11 400°-425 ° 8-15
3 350°-400 ° 15-20 375°-425 ° 15-25
3 400 ° 45-50 425 ° 55-65
3 325 ° :_5-55 350 ° 55-65
* The times given are based on specific brands of mixes or rccipcs
used. Actual times will depend on the ones you bake.
** The Convect Bake temperature is 25°F lower than
recommended on package mix or recipe.
Page 11
• • • • • • • • • • • • • • • • • • • • • • • • • • • • • • • • • • • • • • • • 4
O v en Ope ra t i o n
Oven Racks
MU L T I PLE RA C K C OOK IN G:
Two rack: (Se l ec t mode l s with con v e c t i on b a king a nd a ll
convention al models)
The oven racks are designed with a lock-stop edge. Convec- Use rack posi t ions 2 and 4, or 1 and 4.
tion models have three racks. Conventional bake models Three rack: (Convection baking only, select models)
have two racks. Use rack positions 1,3 and 5. See illustration left column
To remove: Pull rack straight '_L_ o ,- k,__
stop po s ition; lift up on the
fron t of the rack and pull out. A half rack, t o increase oven ca-
ou t until i t stops a t t he lock- Half Rack Accesso r y To replace: Place rack on the m sory. I t fits in the lef t , upper pot-
rack support in the oven; tilt the front end up slightly; slide tionoftheovenandprovides space
rack back until it clears the lock-stop position; lower front for a vegetable dish when a large
and slide back into the oven. roaster is on the lower rack. Con-
Do no t cover an entire rac k w ith alu m inu m foil orplacefoil "HALFRACKJC" Accessor y Kit
on the oven bottom . Baking results will be affected and for convection models, or the
damage may occur to the oven bottom . "H A LFRA C K"Ac c essory Kitfo r
.- pacity, is available as an acces-
tact your Jenn-Air dealer for the
conventional models.
R ac k P o sit i ons
- 2
Th r e e rack conv e ction bak i ng (s elect m o dels ) .
RACK 5 (h i gh e s t p osi ti on ) :
Us ed f or t o a s ting br ead o r broi lin g t h in , non-fatty f oods.
RACK 4:
Us e d fo r mos t br oiling .
RACK 3:
Used for m o st bak e d go o ds on a cookie sheet o r jelly roll
pan, layer cakes, fruit pies, or frozen convenience foods.
R AC K 2:
Used for roasting small cuts of mea t , casseroles, baking
loaves of bread, bundt cakes or custard pies.
RACK 1:
Used for roasting large cuts of meat and poultry, frozen
pies, dessert souffles or angel food cake.
5
4
3
1
Page 12
] if O ve n Op era tion
B r oiling
For best re s ults, use a pan designed for broiling. For a ddi-
t i on al broiling t ips , refer t o t he " C ooking Made Simple"
booklet.
Se tting th e C o ntr ol s for Br o i l ing
1 . Place the oven rack on the proper rack position. (See
following chart.) Close t he oven door. 4 HI 8-9 6-8
3 HI 10-12 9-10
2. Press the Broil pad.
• The indicator word BROIL will flash. 000 and the oven
icon _ will
appear.
4 HI 7-8 4-6
4 LO 11-12 10-12
4 HI 3-4 1-2
3 . Press the Prese t ( 0 ) pad to enter HI broil. Press again to
set L O broil.
• The oven has a variable broil feature which means a
specific broil temperature can be selected. To select a 4 LO 6-7 5-6
specific temperature, press the appropriate number
pads for the temperature desired after 000 appears in the N o te : This chart is a suggested guide. The times may vary
display, with food being cooked.
• Four seconds after entering HI, L O, or a temperature,
the broil icon will come on and the indicator word
BROIL will remain in the display.
BROIL
ICO N
4 . Cook food according to t he following broiling cha r t.
5. Press the Stop / Clea r pad to turn off oven when food is
cooked .
3 LO 16-18 9-1 0
Page 13
Ove n O p e rati o n ]2
Clock Con tr olled Oven Cooking
The clock controlled oven cooking feature is used to turn the 3 . Pres s t he Cook Time pad. The indicator word s COOK
oven offa t ap r eset time of da y or dela y t he sta rt and t hen t urn TIME will flash and the displa y wil l show "0HR:00" .
off t he oven.
4. Press appropria t e number pads to en t er cooking hours and
The clock mus t be fun ct ioning and se t a t t he c orrec t t ime minute s .
of da y for t his fea t ure t o opera t e c orrec t l y. Example: If cooking t ime selected for baking is 2 hours
The fea t ure can be used with either oven cooking or self-
c l eaning. See page 16 fo r ins t ruc t ions on dela y ing the sta rt of
a clean cycle.
and 30 minu t es, t he displa y will s how:
5. At the end of the programmed Cook Time, t he oven will
shut off automatically, "End" will appear in the display and
a beep will be heard four times. Press the Sto p /C lear pad.
If the program is not canceled, there will be one beep every
30 seconds for five minutes. (If you wish to change the
reminder signal at the end of clock controlled cooking, see
page 6.)
To Delay the Start and Turn O ff Automatically:
1-4. F o llo w p r e c e ding s t e p s 1 - 4 .
5. P re s s t he Stop Time p ad . Indicato r w o r ds S TO P and T IME
will fla sh . Di sp lay will sh o w t he calculat e d s to p tim e b a se d
on t he cur re nt tim e o f day and t he cook tim e th at you
e nt e r e d pr e viou s ly.
6. P ress t he a p prop r iat e pads to e nt e r t he tim e you wis h t he
ov e n to s to p. A s to p tim e can only be acc e pt e d f o r lat e r in
Setting the Controls the day .
To Start Immediately and Turn Off Automatically: Example: If at 10 : 0 0 you se t the ov e n for 3 5 0 ° F and 2
h our s and 3 0 minut e s o f cooking tim e, t he calculat e d stop
1. P ress t he Bake o r Convect Bake* pad . tim e w ould be " 1 2: 30 ".
• The indicator w ord BA K E w ill fla sh. I f you want t he s top tim e to b e 1 : 00 , p re ss t he nu m b e r pads
• 000 and the oven icon will appear, along with the indicator words DELAY, STOP TIME.
• When convection cooking is selected, a fan icon
_ will also appear.
* Convection cooking available on select models only.
"1,0,0". Four seconds later, the display will show 1:00
2. Press the Preset (0) pad to set 350 ° F. (When convection
cooking, 325°F will be automatically set.) Or press the
appropriate number pads for the desired oven temperature.
Page 14
Ove n Operat ion
7. A t t he end of t he de lay e d per i od, t he DE LA Y ind icat or
w o rd w i ll go off an d the o v e n w i l l be g i n t o he at .
8. A t the en d o f the cl o c k c o nt ro ll ed Co ok T im e, t he o v e n wi ll
sh ut o ff au toma ti ca ll y, "End" w ill a ppe a r in the d i spl a y an d
a beep wi ll be he a r d f o u r t i m es. P ress the Stop / Clear p a d.
I f t he progr am is no t canc e l ed, t here w i ll be on e bee p e v er y
30 sec on ds for five minutes. (If you wish to ch a nge the
reminder signals at the end of clo c k controlled co o king, see
page 6.)
D r y in g (select models)
For best results, use t h e drying rack provided with your
w ail oven. It allows air to circulate evenly around the
food.
The c o nv e cti o n fan w il l oper at e d u r ing the dr yin g pr oc ed u re.
Setting the Controls for Drying
1. Press t he Drying p ad .
• 000, the o v en i con an d c o nv e ction fan icon L ' _ will
appear.
2. Press t he Prese t (0) pad for 140°F or press the appropria t e
number pads for the desired drying temperature.
• The temperature may be set between 100 ° and 200°F.
• If the temperature is set for under 100°F or over 200°F,
the control will beep twice and defa u lt to IO0°F or
200 ° F respec t ively.
4. When drying is complete, turn the o ven off by pressing the
St o p / Clear pad.
Page 15
O ven Ope ra t ion ]z ]
Firm Varieties: Graven Wash, peel if desired, core and slice 4-8 hours Pliable to crisp. Dried
Stein, Granny Smith, into 1 / 8" slices, apples store best when they
Jonathan, Winesap, are slightly crisp.
Rome Beauty, Newton.
Blenheim / Royal most Wash, halve, and remove pits. 18-24 hours Soft, pliable.
common. Tilton also good.
Firm Varieties Peel and cut into 1 / 4" slices. 17-24 hours. Pliable to crisp.
Lambert, Royal Ann, Wash and remove stems. Halve and 18-24 hours. Pliable and leathery.
Napoleon, Van or Bing. remove pits.
Freestone Varieties. Halve and remove pits. Peeling is 24-36 hours Pliable and leathery.
optional but results in better-looking
dried fruit.
Bartlett Peel, halve and core. 24-36 hours Soft and pliable.
Fresh or canned. Wash, peel and remove thorny eyes. Canned: Soft and pliable.
Slice lengthwise and remove the small 14-18 hours
core. Cut crosswise into 1 / 2" slices. Fresh:
12-16 hours
Select rough-skinned fruit. Wash well. Thinly peel the outer 1 / 16" 1-2 hours Tough to brittle.
Do not dry the peel of fruit to 1 / 8" of the peel. Do not use the
marked "color added", white bitter pith under the peel.
Plum, Roma Halve, remove seeds. Place tomatoes 12-18 hours Tough to crisp.
skin side up on rack. Prick skins.
Danvers Ha f Long, Do not use carrots with woody fiber or 4-8 hours Tough to brittle.
Imperator, Red Cored pithy core. Wash, trim tops and peel if
Chantenay desired. Slice crosswise or diagonally
in 1 / 4" slices. Steam blanch for 3 min.
Ancho, Anaheim Wash, halve and seed. Prick 4-6 hours Pods shouldappearshriveled,
skin several times, dark red and crisp.
Rinse in cold water. Leave stems on 1-3 hours 3tittle and crumbly.
until leaves are dry, then discard.
Cut leaves 3 to 4 from top plant 2-5 hours Brittle and crumbly.
just as buds appear. Rinse leaves in
cold water.
* F r ui t s require an an t iox i dan t t o preven t disco l ora t ion and loss of nu t rien t s . Refer t o t he no t es on page 13 for specific me t hods .
**Au t oma t ic Oven Turn Off will no t occur during dr y ing func t ions .
" of
Page 16
Care and C l ea n ing
Self-Clean Oven
To prevent damage, do not clean or rub the gasket around
A S
• Do not use commercial oven c _ ners On t he s elf-c!e h n
The se l f -cl e a n cycl e u ses a bo v e n or mal coo k in g t emper atu res
to a u t o matically c le an t he e n t i re ov e n int er io r. 2. P ress the Clean p a d.
I t i s n or mal fo r ex c ess iv e fl a re -u ps an d sm o k ing to o cc ur wi ll show " : " alo ng with the ov e n i c o n _.
d u r in g cl e aning i f t he o v e n i s he avily s oil e d . It is bet t er t o
cl e an t he ov e n re gula r ly r a ther t h an t o w ait until t here i s a
he avy b uil d -u p of s oil in the o v e n . "door".
Du r i ng t he cl e aning pr oc ess, t he k itc he n sho u ld be we ll an av er a ge soiled o v en.
v e ntilat ed to help e li m ina te no r mal o d o rs a ss oc i at ed w it h
cl e aning . • The cl e ani ng ti me can be va r i ed depe n d in g o n t he
Before Self-Cleaning for heavy soi l .
el f ,- C lean C AU T IO NS the oven door . The gasket is designed to se a l in heat during
..... the clean cycle.
Wipe up excess grease or spillovers from the oven bottom to
: ' ' : : prevent excessive smoking, flare-ups or flaming during the
clean cycle.
Wipe up sugary and acid spillovers such as sweet potatoes,
tomato or milk-based sauces. Porcelain enamel is acid re-
sistant, not acid proof. The poreelain f i nish m ay discolor if
' ' : ' : ; acid spills are not wiped up prior to a self - clean cycle .
Setting t h e Cont r ols f or a Self-Clean C y cle
1. Cl o se the ov e n door.
• The ind icato r w o rd CL E AN wi l l fl a sh. The d i sp lay
• I f the do o r h a s n o t been c l o sed, the d i sp lay w ill show
3. P ress Preset (0) p a d f or " 3 :00" ho u rs o f c le an i n g ti me f o r
am o un t o f so il . P ress t he a ppr o pr iat e num ber p a ds t o se t
any amount of t i m e be t ween 2 an d 4 h ou rs. "2:00" ho u rs
of clean i ng for light soil, up to " 4:00" hours of cleaning
Turn off the oven light before cleaning as the light may burn • Four seconds after entering the cleaning time, the oven
out during the clean cycle, door will automatically lock. The indicator word LOCK
will appear in the display along with the clean icon (top
Remove broiler pan, all pans and the oven racks from the and bottom bars).
oven. The oven racks will discolor and may not slide easily
after a self - clean cycle .
Clean oven frame, door
frame (area outside the door
gasket) and around the open-
ing in the door gasket with a
nonabrasive cleaning agent
such as Bon Ami or deter-
gent and water. These areas
are not exposed to clea n ing
temperatures and should be
cleaned to prevent soil from baking on during the clean cycle.
Page 17
Car e an d C lean i ng
4 . When the cleaning time has been completed, the indicator If you want the stop time to be 1:00, press the number pads
word CLEAN will turn oft. The indicator word LOCK will "1,0,0". Four seconds later the display will show 1:00 and
remain on until the oven has cooled. When the oven has the indicator word DELAY.
cooled, the indicator word LOCK will turn off and the door
will automatically unlock.
6 . When the oven begins to clean, the clean icon (top and
bottom bars) will come on. The indicator word DELAY
Automatic lock is still engaged, will go off.
Door cannot be opened until
LOCK is no l onger displayed. 7 . When the clean t i me has been completed, the indicator
word CLEAN will turn off. The indicator word LOCK will
Aft e r S el f -Cle anin g remain on until the oven has cooled. When the oven has
About one hour after the end of the clean cycle, the lock
will disengage and the LOCK indicator word will turn off
At this point, the door can be opened . TO Ca n cel Sel f - C lea n
Some soil may leave a light gray, powde r y ash which can be
removed with a damp cloth. If soil remains, it indicates that 1. Press the Sto p /C lear pad. The door will be locked while
the clean cy c le was not long enough. The soil will be re- the LOCK indicator word remains in the display.
moved during the next clean cycle. Depending on the length of time the oven had been
If the oven racks were left in the oven and do not slide cleaning, it may take up to an hour for the oven to cool
smoothly after a clean cycle, wipe racks and embossed rack down. When the oven is cool, the door will automatically
supports with a small amount of vegetable oil to restore ease unlock and it can be opened.
of movement.
A white discoloration may appear after cleaning if acid or
sugary foods were not wiped up before the clean cycle. This
discoloration is normal and will NOT affect performance.
cooled, the indicator word LOCK will turn offand the door
will automatically unlock.
To D el ay the S t ar t of a C l e an Cy c le
1-3. Follow steps I-3 on page 15.
4. Press the Stop Ti m e pad. Indicator words STOP TIME
will flash in the display and the calculated stop time will
also appear in the display.
5. Press the appropriate number pads to enter the stop time s 0 me Smoke
you desire. (A stop time can only be accepted for later in
the day.)
Exa m ple: If at 9:00 you set the oven to clean for three
hours, the calculated stop time would be "12:00". The
display will show:
Page 18
t • • • • • • • • • • • • • • • • • • • • • • • • • • • • • • • • • • • • •
C ar e an d C l eaning
Never cover insert with alumi n um foil as this prevents the fat from draining to the pan below .
O P lace soapy cloth over insert and pan; let soak to loosen soil.
OWash in warm soapy water. Use soap filled scouring pad to remove stubborn soil.
• Broiler pan and insert can be cleaned in dishwasher.
• . • * • • • • • • • . • • • • • • • • • • * • • * • • • • • • • . • ° . • • • • • • • • • • • • • • • ,
• To activate "Control Lockout" for cleaning, see page 6.
• Wipe with a damp cloth and dry.
• Glass cleaners may be used if sprayed on a cloth first. DO NOT spray directly on controlpad
and display area .
• Never use oven cleaners, abrasive or caustic cleaning agents on exterior finish of wall oven.
• Avoid using excessive amounts of water which may seep under or behind glass.
• Wash with soap and water or glass cleaner. Rinse with clear water and dry.
• Do not use abrasive materials such as scouring pads, steel wool or powdered cleaning agents.
They will damage glass.
• Wash with soap and water, a glass cleaner, or mild liquid sprays.
• To prevent scratching or dulling of the finish, do not use mildly abrasive, abrasive, harsh or
caustic cleaners su c h as oven cleaners.
• Follow instructions on pages 15-16 for Self-Cleaning Oven.
• Porcelain enamel is glass fused on metal and may crack or chip if misused. Porcelain
enamel is acid resistant, n o t acid proof. Wipe acid or sugar stains as soon as the oven is
cool as these stains may discolor or etch the porcelain. Do not use metallic scouring pads as
they will scratch the porcelain. Oven cleaners cannot be used on the self clean oven finish.
• To remove occasional spillovers between cleanings, use a plastic soap-filled scouring pad;
rinse well.
• Clean with soapy water.
• Remove stubborn soil with cleansing powder or soap-filled scouring pad. R inse and dry.
Racks will permanently discolor and may not slide smoothly if left in the oven during a self-
clean operation. If this occurs, wipe the rack and embossed rack supports with a small
amount of vegetable oil to restore ease of movement, then wipe off excess oil.
Page 19
Care and C l eaning ] 8
• When cool, clean with soap and water, rinse and dry.
• Use a glass cleaner and a soft cloth.
NOTE: Never use oven cleaners , abrasive o r caustic liquid or powdered cleansers on plastic
NOTE: To prevent staining or discoloratio n, wipe up fa t , grease or acid (tomato, lemon,
f inishes . These clea n ing agents will scratch or ma r finish .
vinegar, milk, f r uit juice, m arinade) i mm ediately with a dry paper towel or cloth .
C l eaning Products
Because ofthe many new cleaning products introduced in the • Multi - Surf a ce Cle an ers - Formula 409 Glass & Surface,
marketplace each year, it is not possible to list all products Windex Glass & Surface.
that can be safely used to clean this appliance. Listed below
are just a few examples of recommended products, and water.
• Nonabrasive Cleaners - Bon Ami, paste of baking soda
ALWAYS READ THE MANUFACTURER'S INSTRUC- • Mildly Abrasive Powder or Liquid Cleaners - Ajax, Bar-
TIONS to be sure the cleaner can be safely used on this
appliance. If the cleaner is recommended for use on plastic, glass, or
To determine if a cleaning product is safe, test a small porcelain finishes, it can be used on the same type of
inconspicuous area using a very light pressure to see if the appliance finish.)
surfa c e may scrat c h or dis c olor. This is particul a rly impor t ant • Nonabrasive or Scratehless Plas ti c or Nylon Scouring
f or por c el ain e nam e l , h ig h ly po li shed, sh i n y , p aint ed, or
pl a s tic s u r fac es. Sc ru ng e Sc r u b S p on ges, Sc o tc h -B r it e N o Sc r atc h Pa ds.
The following brands may help you to make an appropriate • Abrasive Scouring Pads - S .O. S ., B r il lo St ee l Wo ol Soa p,
selection: Scotc h -B r it e W o o l S o a p Pa ds.
• Glass Cleaners - Cinch, Glass Plus, Windex. (Brand namesfor the above cleaning p r oducts are registered
• Dishwashing Liquid Detergents - Dawn, Ivory, Joy.
• Mild Liquid Spray Cleaners - Fantastik, Formula 409.
keepers Friend, Cameo, Soft Scrub, Smart Cleanser. (Note:
Pads or Sponges - C hore Boy Pla s tic C le anin g Puf f,
trademarks of the respective manufacturers . )
Page 20
] 9 Main te nanc e
• • • • • • • • • • • • • • • • • • • • • • • • • • • • • • • • • • • • • • •
Oven Door Oven Window
To protect the ove n door w in dow:
1. Do not use abrasive cleaning agents such as steel wool
scouring pads or powdered cleansers as they may scratch
the glass.
2 . Do not hit the glass with pots, pans, furniture, toys, or other
objects.
3. Do not close the oven door until the oven racks are in
place.
Scratching, hitting, jarring or stressing the glass may weaken
its structure causing an increased risk of breakage at a later
date.
T o r emove:
1. When cool, open the oven door to the first stop position Ov en L ight
(opened about four inches).
2. Grasp door at each side. Do not use the door handle to lift
door.
3. Lift up evenly until door clears hinge arms.
1. Gr a sp doo r at e ac h si d e.
2. A l ign s lot s in t he d o or w it h t he
hi ng e a r m s o n t he ov e n .
3. Sl i d e t he d oo r do w n onto t he
h ing e a r m s until t he d oo r i s com-
T o re place:
p l e t e ly se at ed on t he h ing es. To replace oven light bulb:
Pu sh d ow n on t he to p c or n ers of the d oo r t o com p l e t e ly 1. When ov e n i s co o l , h ol d b ul b cov er in p lac e, the n s l i d e
se at doo r on h in ges. D o or sho ul d no t a ppe a r c r oo ke d , w ir e ret a i n er o ff c o v er .
NOTE: The oven door on a new wall oven may feel NOTE:Bulbcoverwillfall
"spongy" when it is closed. This is normal and will if not held in place while J / _ / "_ " "_
decrease with use. removing wire retainer. / _ /" _,o ,_ -- _ ]
2. Remove bulb cover and I
light bulb. RErA , NEv W , AE R
3. Replace with a 40 watt appliance bulb.
4. Replace bulb cover and secure with wire retainer.
5 . Reconnect power to wall oven. Reset clock.
B ULB COVER
Page 21
Maintenance
• • • • • • • • • • • • • • • • • • • • • • • • • • • • • • • • • • • • • • • •
Oven Bottom How to Remove Wa ll Oven
for C l eaning and Servicin g
Protect oven bottom against spillovers, especially acid or
sugary spills, as they may discolor the porcelain enamel. Use F o ll o w these pr o cedures:
the correct pan size to avoid spillovers and boilovers. D o n o t
place a luminum f o il directly o n t he o ven b o t to m.
The oven bottom on a conventional bake wall oven may be
removed for easier cleaning. NOTE: T h e ov e n b ot t o m on 3, Disconnect gas supply tubing to appliance.
co nve ct i o n mode ls is n ot rem ov abl e. 4 . Remove the screws that secure the wall oven to the
To r em ov e : When coo l , re- cabinet. Remove fr o m cabinet.
m o ve the oven racks. Slide the 5 . Reverse procedure t o reinstall. If gas line has been discon-
two catches, located at each 2"_ nected, checkforgasleaksafterrec o nnection.(SeeInstal-
rear comer of the oven bot- lation Instructions for gas leak test method.)
tom, toward the front of the
oven.
Lift the rear edge o f the oven t 3 _
bottom slightly, then slide it
back until the front edge of the oven bottom clears the oven
front frame. Remove oven bottom from oven.
1. Shut off gas supply to appliance.
2. Disconnect electrical supply to appliance.
T o re p la c e: Fit the front edge of the oven bottom into the
oven front frame. Lower the rear of the oven bottom and slide
the two catches back to lock the oven bottom in place.
Page 22
[ Before You Call For Service
C heck t h e following lis t to be su r e a se r vice cal l is n ecessa r y.
Part or all o f the appliance does not work. Food not broiling properly.
0 Check or re-set circuit breaker. Check or replace fuse. 0 Check to make sure con t rols are properly set. See page 11.
Check power supply. _ Check oven ra c k positions. See page 11.
• Ch e c k if o ven co ntr o ls have been properly set. See pages • Alumi n um foil was incorrectly used. Never line the broiler
8 and 11. pan insert with foil.
• Check if oven door is unlocked after a self-clean cycle.
See p a g e s 15-16. O v e n m a ke s a popping sound when tu r ned o ff .
O Check if oven is set for a delayed cook or clean program. • This is normal w i th some types of gas. It is NOT a s a fety
See page 12. hazard and will NOT damage the appliance.
B aking res u l t s are n o t w h a t yo u expec t ed. Ov e n sm o kes ex c e s s i vely during br o i l in g .
I_ Check the oven temperature selected. Make sure oven is
preheated when recipe or directions recommend preheat, mation.
• Check rack positions. See page 10.
0Food too close to flame. See page 11 for more infor-
• Broiler insert covered with aluminum foil.
• Use correct pan. Dark pans produce dark browning. Shiny • Excess fat not trimmed from meat prior to broiling.
pans produce light browning. See "Cooking Ma d e
Simple" booklet for more information on bakeware. • A soiled broiler pan was used.
• Check the use of foil in the oven. Never use foil to cover
an entire oven rack. Place a small piece of foil on the rack
below the pan to catch spillovers .
• Check pan placement. Stagger pans when using two racks. 15-16.
Allow 1- 2 inches between pans and oven walls.
• Make sure the oven vent has not been blocked. See page
9 for location. I, Check if door is closed.
For co n vection baking reduce recommended b aking tem-
perature by 25°F. Oven d i d n ot c lean pr o perly.
Baking results diffe r f rom previous oven.
• Temperatures often vary between a new oven and an old were not removed prior to the self-clean cycle.
one. As ovens age, the oven temperature often "drifts" and
may become hotter or cooler. See page 7 for instructions
on adjusting the oven temperature, Oven do or w i ll n ot o pen a ft er self-clean cycle.
NOTE: It is not recommended to adjust the temperature • Oven interior is still hot. Allow about one hour for the
if only one or two recipes are in question, oven to cool after the completion of a self-clean cycle. The
O ven will not sel f -clean.
• Check to make sure controls are set properly. See pages
• Check to make sure the cycle is not set for a delayed start.
• Longer cleaning time may be needed.
• Excessive spillovers, especially sugary and or acid foods,
door can be opened when the LOCK indicator word is not
displayed.
Page 23
Before You Call for Service
Moistu re c on d e nsati on on ove n window.
0 This is n o rmal when c o oking f oo d high in m o isture.
Excessive moisture was used when cleaning the window.
Strong odor or light smoke when oven is turned on.
This is normal for a new wall oven and will disappear after
a few uses. Initiating a clean cycle will "burn oft _' the
smells more quickly. Turning on a ventilation fan will help
remove the smoke and /o r odor.
# Excessive food soils on the oven bottom. Use a self-clean
cycle.
A fan so und can be h ea r d.
• This is normal. A fan automa t ically turns on when the
oven is operated to cool the clock controls. It may continue
after the oven is t urned off.
" F " plus a number appears in display.
This is c a lled a fa ult code. I f a fault code a ppe a rs in the
d i spl ay a nd beeps soun d , press t he Stop / Clear p a d. I f t he
fault code and beeps continue, disconnect power to the
wall oven. Wait a few minutes, then reconnect power to
the oven. If the fault code and beeps still continue, discon-
nect power t o the appliance and call an authorized servicer. _
• If the oven is heavily soiled, excessive flare-ups may
result in a fault code during a clean cycle. Press Stop /
C lea r pad and allow the oven to cool for one ho u r, then
reset the clean cycle. If the fault code and beeps still
continue, disconnect power to the appliance a nd call an :':
authorized servicer.
i
Page 24
Warranty
Fu l l One Yea r Wa rra nty - Parts a n d L a b or
F o r one (l ) year f r om t he or i g i na l re t a il pu rc h a se d at e, an y par t wh ic h f ail s in no r ma l h om e u se w ill be rep ai red o r rep lac ed
f ree o f c h a rge.
Limited Warranties - Parts Only
Second Year - Aft er t he firs t y e a r f r om t he o r iginal p u r c h a se d at e, p art s wh ic h f a i l in n orm a l ho m e use wi ll be r ep ai red o r
rep lac ed f ree o f c h a rge f or t he p a r t i tse lf , w it h t he o wner p ayin g a l l o ther co s t s, i n clu d ing la b or , mil e a ge an d tran sp o r tation .
Th i r d Thro u gh F ifth Yea r - From the orig in a l p urchase da te , parts l i sted below whi c h fa i l i n n ormal home u se will be
repaired o r replaced free o f charge f o r t he part itself, wi t h the ow n er pay i ng a l l o ther c o sts , in c l ud in g l ab o r , m ileage and
transp o rtat io n.
• Ele ct r o n ic C o n t r ol s
• E l e ct r ic He ati ng E l emen t s : Br oi l a n d bake el e ments o n e lectric c oo ki n g appl i ances.
Cana di an Res id en t s
The ab o ve warranties o nly c o ver an appliance installed in Canada that ha s been cer t ified or listed by appropr i ate t es t agen-
c ie s for comp li ance to a Nat io nal Standard o f Canada unless t he appliance was br o ught i n t o Canada due t o transfer o f
residence fr o m the United States t o Canada.
L i m it e d W ar ran t y O ut s id e t he Un it e d S t a t es an d Can ad a - P ar t s On l y
For two (2) years fr om the d ate o f or i g i na l reta i l purcha s e, any part which fails in n o rmal h o me use will be repaired o r
replaced free of charge for the par t i tself, w i th the ow n er paying all oth e r cos t s, i n c l uding l abor , mileage and transportat i on.
The specific warranties expressed above are the ONLY warranties provided b y the manufacturer : These warranties give you
specific legal rights, and you may al s o have other rights which vary from state to state .
W h at i s Not C overed By
The s e Warrantie s :
1. Cond i t io ns an d d amag es r e s ulting f rom any of t he 3. Li gh t b ul bs.
follo w in g: 4. P r o d uct s p u r c h a sed f or comme r c i al o r in dus t r ial u se.
a. Im pr o p e r in st a l la t ion , deliv er y , o r maint e nanc e.
b . Any repair, modification, a lteration, or adjus t ment 5. The cost of service or service call to:
not authorized by the manufacturer or an a. Correct installation errors.
authorized servicer, b. Instruct the user on the proper use of the product.
e. Misuse, abuse, accidents, or unreasonable use. e. Transport the appliance to the servicer.
d . Incorrect electric current, voltage, or supply. 6 . Consequential or incidental damages sustained by any
e. Improper setting of any control.
2 . Warranties are void if the original serial numbers have Some states do not allow the exclusion or limitation of
been removed, altered, or cannot be readily consequential or incidental damages, so the above
determined, exclusion may not apply.
person as a result of any breach of these warranties.
mBmJ ENN-AIR
403 WEST FOURTH STREET NORTH • PO BOX 39 ° NEWTON , IA 502 0 8
P r i nted i n US A Part N O 8111 P324 - 60
O1998 Jenn-Air 07 / 98 / A


 Loading...