

Jenn-Air FCE10500, FCE30510, FCE10510, FCE30500 Use And Care Manual
mmmJENN.AIR
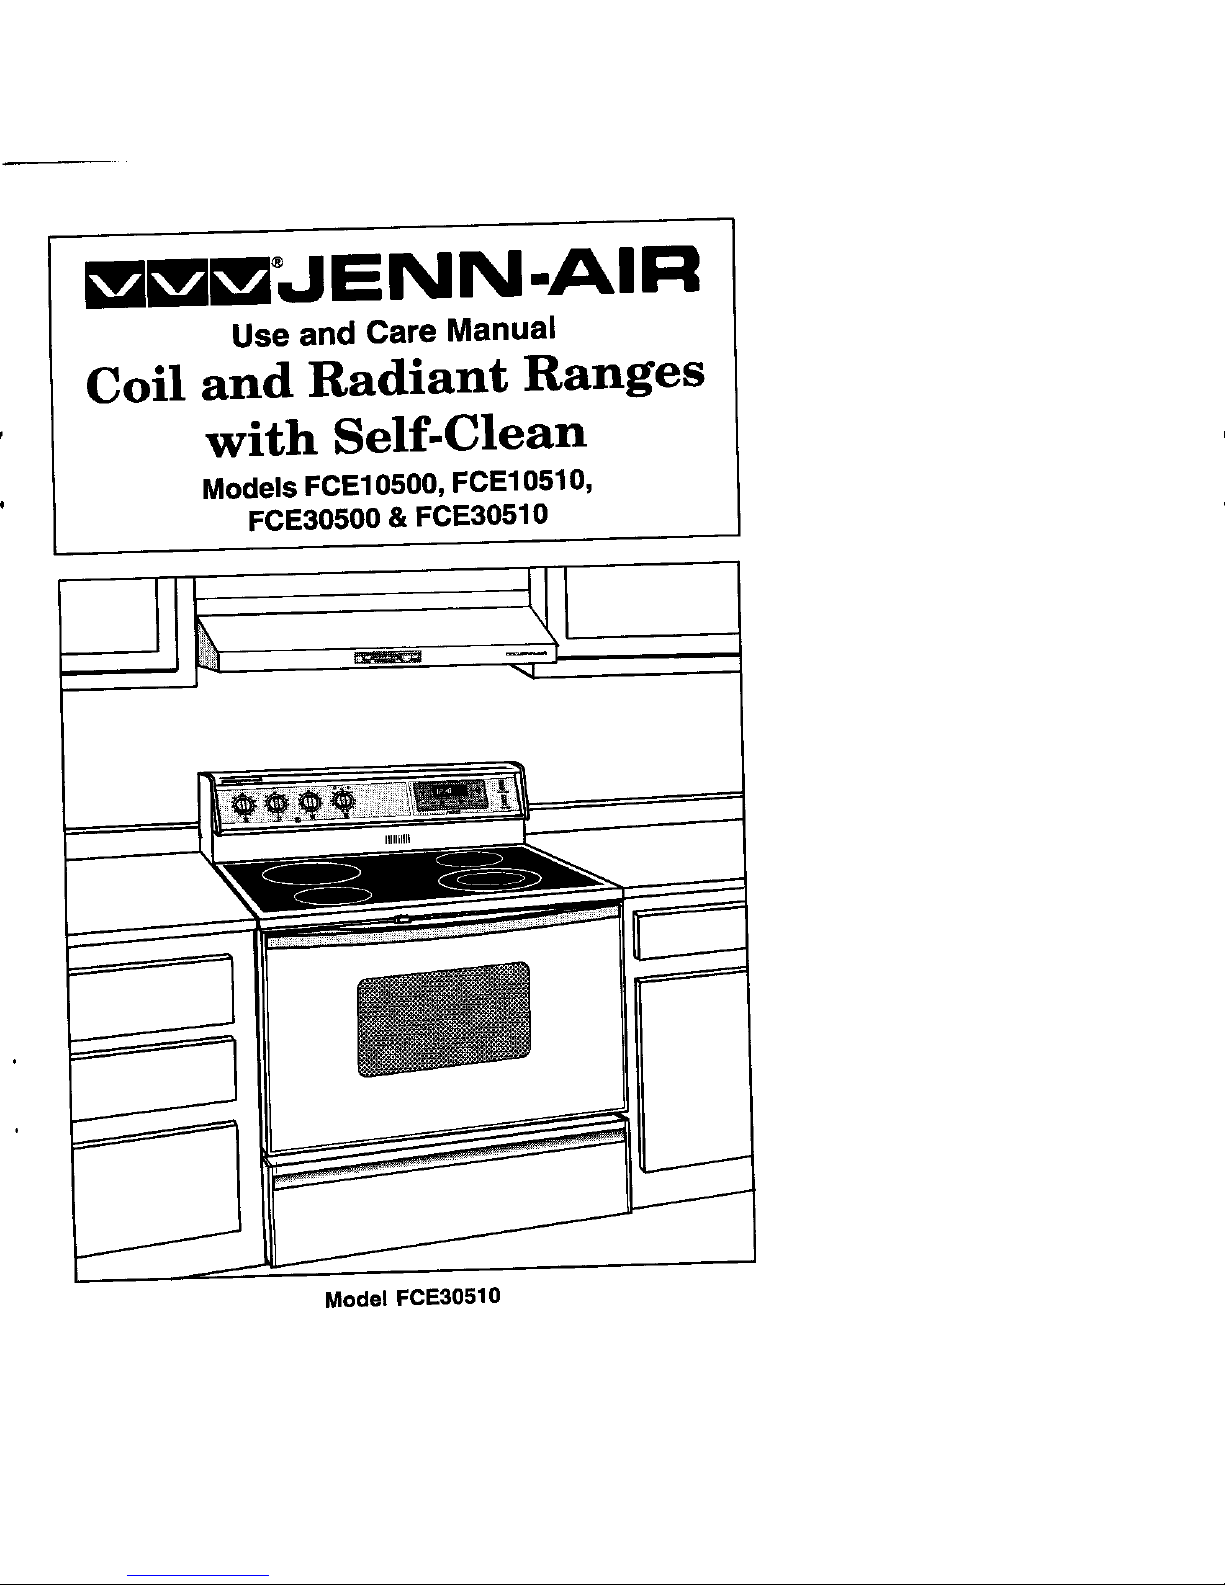
Use and Care Manual
Coil and Radiant Ranges
' with Self-Clean
, Models FCE10500, FCE10510,
FCE30500 & FCE30510
Model FCE30510
Congratulationsonyourchoiceof a Jenn-Airelectricrange.
Model PCEf0500 and FCEt05tO -Your rangehas 4 coil elements.
ModelFCE30500 -Your rangehas 4 radiantelementswiththermalimiters.
ModelPCE30510-Your rangehas 3 radiantelementsand1 dualradiantelement.
Your electronicovenfeaturesflexibilityinbaking,broiling,andself-cleaning.
Beforeyou begincookingwithyournew range,pleasetake afew minutestoread and
becomefamiliarwiththeinstructionsinthisbook. Byfollowingtheinstructionscarefully,
you willbe able to fully enjoy and properlymaintainyour rangeand achieve excellent
resultswiththe foodyou prepare,
Shouldyouhave anyquestionsaboutusingyourJenn-Airrange,writeto us. Besure
toprovidethemodelnumber,Jenn-Air Customer Assistance, c/o MaytagCustomer
Service,P.O. Sex 2370, Cleveland, TN 37320-2370
Model Number
SerialNumber
(Numbersapl0ear on the S0flal Plate_ocatedbehindthestoragedraweronthe frontfrltme.)
Date Purchased
JENN-AIR DEALER PROM WHOM PURCHASED
Address
City
Phone.
AUTHORIZED JENN-AIR SERVICE CONTRACTOR
Address
City
Phone
Important: Retain proofof purchase documentsfor warrantyservice.
2

Appliance Usage
Cooktop&OvenControls...................................................8
CleaningYour Range.................................................. 34-35
OtherHintsonCaringforYour Range........................ 36-37
AdjustingOven Temperature........................................37
LightBulbReplacement................................................36
Safety Precautions.......................................................... 4-7
ServiceInformation..................................................... 38-39
Cooktop Usage
Coil.................................................................................... 12
ControlsSettings.................................................................9
Cookware.................................................................... 10-11
RadiantElement.......................................................... 13-15
Oven Usage
Baking
General Recommendations..........................................24
BakingChart................................................................. 25
Broiling........................................................................ 28-29
Cleaning
Self-Cleaning........................................................... 30-33
OvenControls&Operations.................................. 16-17,20
ClockControls............................................ 18-19 & 22-23
RackPositions..............................................................21
Roasting
GeneralRecommendations..........................................26
RoastingChart.............................................................. 27
Read before operating your range
All appliances - regardless of the manufacturer - have the potential
through improper or careless use to create safety problems. Therefore
the following safety precautions should be observed:
1. Be sure your appliance is properly installed and grounded by a
qualified technician.
2. Never use your appliance for warming or heating the room.
3. Children should not be left alone or unattended in area where
appliance is in use. They should never be allowed to sit or stand on
any part of the appliance.
4. Wear proper apparel. Loose-fitting or hanging garments should
never be worn while using the appliance.
5. Do not repair or replace any part of the appliance unless specifically
recommended in this manual. All other servicing should be referred
to an authorized Jenn-Air Service Contractor.
6. Flammable materials should not be stored in an oven or near
surface units.
7. Do not use water on grease fires. Smother fire or flame or use dry
chemical or foam-type extinguisher.
8. Use only dry potholders. Moist or damp potholders on hot surfaces
may result in burns from steam. Do not let potholder touch hot
heating elements. Do not use a towel or other bulky cloth.
9. Use proper pan size. Many appliances are equipped with one or
more surface units of different size. Select cookware having flat
bottoms large enough to cover the surface unit heating element.
The use of undersized cookware will expose a portion of the heating
element to direct contact and may result in ignition of clothing.
Proper relationship of cookware to heating element will also improve
efficiency and performance.
10. Never leave surface units unattended at high heat settings. Boil
over may cause smoking and greasy spillovers that may ignite.
11. On conventional element ranges make sure that drip pans are in
place. Absence of these pans during cooking may subject wiring or
components underneath to damage.
4
12. Do not use aluminumfoil to line surface unit drip pans or oven
bottom. /nstaJJationof these |Jnersmay resuJtin an electric shock
orfire hazard.
13. Glazed cookware - only certain types of glass, glass-ceramic,
ceramic, earthenware, or ether glazed cook-wareare suitable for
cooktop surface without breaking due to the sudden change in
temperature. Use only such cookware as you know has been
approvedforthis purpose,
14. Cookwarehandlesshouldbe turned inwardand not extendover
adjacent surface heating elements to avoid burns, ignition of
flammablemater(afsand spillagedueto unintentionalcontactwith
the cookware,
15. Do not soakor immerseremovableheatingelementsin water.
16. CAUTION - Do notstoreitems of interestto childrenin cabinets
aboverange- childrenclimbingon therangeto reachitemscould
beseriouslyinjured.
17. Donottouchsurfaceunitsorareasnear units,heatingelementsor
interiorsurfacesof oven. Surfaceunitsorheatingelementsmaybe
hoteventhoughtheyaredarkincolor,Areasnearsurfaceunitsand
interiorsurfaces of an oven may becomehot enoughto cause
bums. Duringand after use, do nottouchor let clothingorother
flammable materials contact these areas untilthey have had
sufficienttimetocool, Othersurfacesmay becomehotenoughto
causebums- amongthese surfacesare the cooktop,upperdoor
frameandglass,ovenventopeningandsurfacesneartheopening,
ovendoor,and ovenwindow.
18. Do not cook on glass-ceramiccookingsurface if the cooktopis
broken. Cleaning solutionsand spillovers may penetrate the
brokencooktopand createa shockhazard. Contactanauthorized
Jenn-AJrService Contractor.
19. Clean glass-ceramic cooktops with caution, if wet sponge or
cloth is used towipe spillson a hot cooking area, be careful to
avoid steam burns. Some cleansers can produce noxious
fumes if applied to a hot surface.
20. Do not operate with damaged cooking element after any
productmalfunction untilproper repair has been made.
21. Keep all switches "OFF" when unitis not in use.
22. Use care when opening oven door. Let hof air or steam escape
before removing or replacing food.
S
23. Do not heat unopened food containers. Build-up of pressure
may cause container to burst and result in injury.
24. Keep oven vent ducts unobstructed.
25. Always place oven racks in desired location while oven iscool.
If rack must be moved while oven is hot, do not let potholder
contact hot heating element in oven.
26. Do not clean door gasket. The door gasket is essential for a
good seal. Care should be taken not to rub, damage, or move
the gasket.
27. Do not use oven cleaners. No commercial oven cleaner or
oven liner protective coating of any kind should be used in or
around any part of the oven.
28. Clean only parts listed in this manual.
29. CAUTION: BEFORESELF-CLEANINGTHEOVEN, REMOVE
FOOD, BROILER PAN AND OTHER UTENSILS.
30. Do not allow aluminum foil to contact heating elements.
31. PREPARED FOOD WARNING: Follow food manufacturer's
instructions. If a plastic frozen food container and/or its film
cover distorts, warps or is otherwise damaged during cooking,
immediately discard the food and its container. The food could
be contaminated.
32. This appliance has been tested for safe performance using
conventional cookware. Do not use any devices or accessories
that are not specifically recommended in this manual. Do not
use eyelid covers for the surface units, stovetop grills, or add-
on convection systems. The use of devices or accessories
that are not expressly recommended inthis manual can cause
serious safety hazards, result in performance problems, and
reduce the life of the components of the appliance.
33. WARNING: To reduce the risk of tipping of the appliance, the
appliance must be secured by a properly installed anti-tip
device. To check ifdevice isinstalled properly: Use aflashlight
and look underneath the range to see that one of the rear
leveling legs is engaged in the bracket slot. When removing
appliance for cleaning, be sure anti-tip device is engaged
when range is replaced. The anti-tip device secures the rear
leveling leg to the floor, when properly engaged.
6
IMPORTANT SAFETY NOTICE AND WARNING
The California Safe Drinking Water and Toxic Enforcement Act of
1986 (Proposition 65) requires the Governor of California to
publish a list of substances known to the State of California to
cause cancer or reproductive harm, and requires businesses to
warn customers of potentialexposures to such substances. Users
ofthisappliance are hereby warned that when the oven isengaged
in the self-clean cycle, there may be some low level exposure to
some ofthe listedsubstances, includingCarbon Monoxide. Expo-
suretothese substancescan be minimized by properlyventingthe
range to the outdoors duringthe self-clean cycle.
- SAVE THESE INSTRUCTIONS-
7

Clock Controls &
SurfaceControla MinuteTlmer
LIgM
Ught
• Use to provide variable heat to cooktopheatingelements.(See p.9)
• Use to set oven for baking,broiling,and self-cleaning.(See p. 16-17, 20)
• Features time of day, minutetimer, and ovenclock controls. (See p. 18-19)
• Use toturn oven andcooldoppanel lightson and off.(See p. 17)
• Use to latchtheoven doorfor self-clean.(See p. 31)
• Sincethe controls are abush-turn type, they must bepushed in before turning. Toset (from
the OFF position), push in on control knob and turn in either direction to desired setting.
• When control is in any position, other than OFF, it may be turned in any direction without
pushingin.
• NoteModelFCE30510only: Fortherightfrontdualelementcontrol, pushinonthecontrol
knob and turn to the left for the large element or to the right for the small e{ement,
• A red indicator light will glow when a surface heating element is ON.
The Hot $urface Light will glow redto indicate thata cooking area is hot. This light wiltremain on
untilthe area has cooled.
I o
1./2/ \. \.
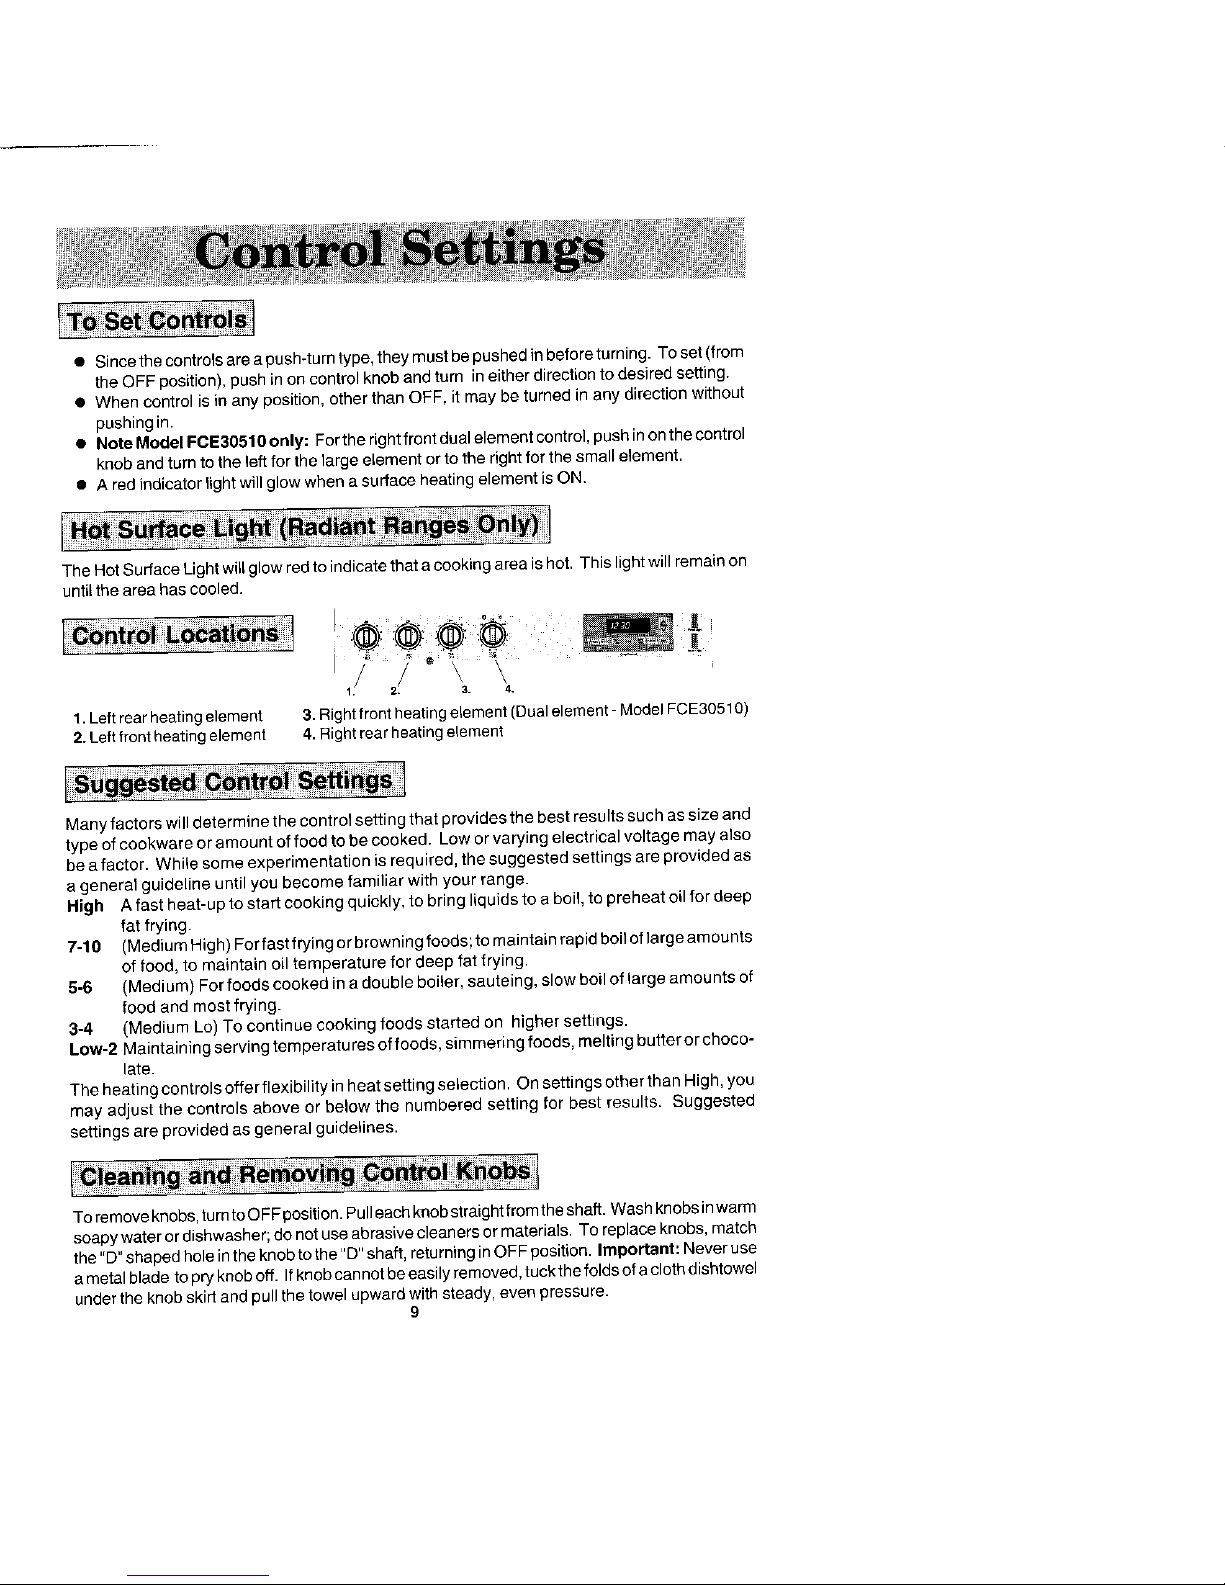
1. Left rear heating element 3. Right front heating element (Dual element -Model FCEg0510)
2.Left frontheating element 4.Rightrear heating element
Many factors will determine the control setting that provides the best resuIts such as size and
type ofcookware or amount of food to be cooked. Low or varying electrical voltage may also
be a factor. While some experimentation is required, the suggested settings are provided as
ageneral guideline until you become fami/iar with your range.
High A fast heat-up to start cooking quickly, to bring liquids to a boil, to preheat oil for deep
fat frying.
7-10 (Medium High) For fast frying or browning foods;to maintain rapid boilof large amounts
of food, to maintain oil temperature for deep fat frying.
5-6 (Medium) For foods cooked in a double boiler, sauteing, slow boil of large amounts of
food and most frying.
3-4 (Medium Lo) To continue cooking foods started on higher settings.
Low-2 Maintaining serving temperatures of foods, simmering foods, melting butter or choco-
late.
The heating controls offer flexJbJlityJnheat settJegselecfion. Onsetti ngs other than HJgh, you
may adjust the controls above or below the numbered setting for best results. Suggested
settings are provided as general guidelines.
Toremove knobs,tum to OFF position.Pull each knob straightfrom the shaft.Wash knobsinwarm
soapy water or dishwasher; de not use abrasive cleaners or materials. To replace knobs, match
the "D"shaped hole inthe knob to the "D"shaft, returning in OFF position. Important: Neveruse
ametal blade to pry knoboff. If knob cannot beeasily removed, tuck the folds of acloth dishtowel
underthe knob skirt andpull the towel upward with steady, even pressure.
9
To achieve optimumcookingperformance,use heavy gauge, flat, smooth bottom
cookpotsthatconformtothe diameterofthe coilor radiant element(nomorethenone
inchoverhang).Propercookpotswillminimizecookingtimes,use lesselectricity,cook
foodmore evenlyand requirelesswater oroil.
Cookpotswiththin,unevenbottomsdonotadequatelyconductheatfromthe element
tothefoodin thecook.potswhichresultsinhotspots,burnedorunderdonefood, Using
bad cookpotsalso requiresmorewater, time, and energytocookfood.
• Select heavy gauge cookpots. Usuallyheavy gaugecookpotswillnotchange
shapewhen heated.
• Use cookpots with fiat, smoothbottoms. Thetwowaystodetermineifcookpots
havea flat, smoothbottom arethe rulertest and the cookingtest.
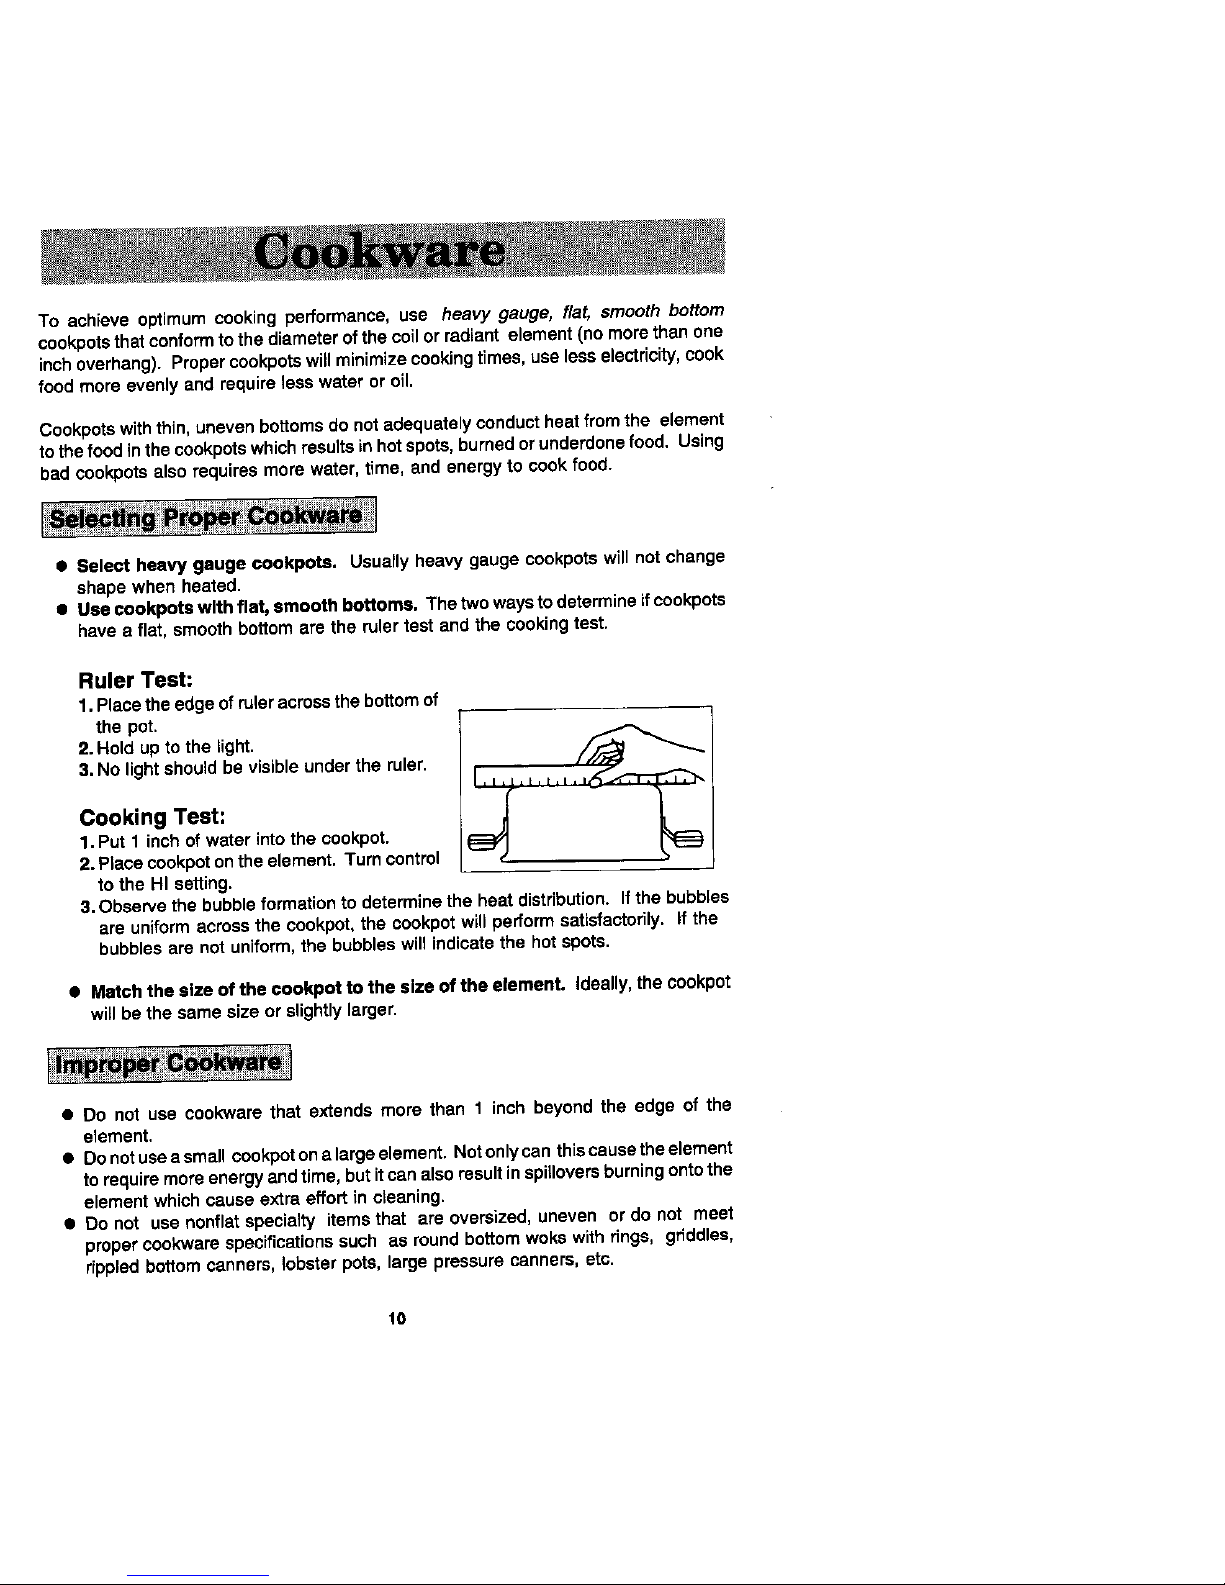
Ruler Test:
1.Placethe edgeofru(eracrossthebottomof
the pot.
2. Hold up to the _ight. _-,..-'_u__
3.No lightshouldbe visibleunderthe ruler.
CookingTest:
1.Put 1 inch of waterintothe oookpot.
2. Placecookpotontheelement. Turncontrol
to the HI setting.
3.Observethe bubbleformationto determinethe heatdistribution.Ifthe bubbles
areuniformacrossthe cookpot,the cookpotwillperformsatisfactorily. If the
bubblesare notuniform,the bubbles will indicatethe hotspots.
• Match the size of the eookpot to the size of the element, ideally,thecookpot
willbe the same size orslightlylarger.
• Do not use cookwarethat extends more than 1 inch beyondthe edge of the
element.
• Donotusee smallcookpotone largeelement.Notonlycanthiscausetheelement
torequiremoreenergyandtime,butitcanalsoresultinspilloversburningontothe
elementwhichcause extra effortincleaning.
• Do not use nonfletspecialty itemsthat are oversized,uneven or do not meet
propercookwarespecificationssuch as roundbottomwokewithrfngs, grfddles,
rippledbottomcanners,lobsterpots,large pressurecanners,etc.
10
Heavy gaugecookpotswithflat, smoothbottomswillusuallywork in a similarway.
However,therearesome differencesinthecookingperformanceofvariousmaterials.
• Aluminum cookpotsheatquicklyandevenly. Bestsuitedforsimmering,braising,
boilingandfrying.
• Stainless steel cookpotswill evenly distributeheat if constructedof tri-ply or
combinedwith other metals such as aluminum and copper. Use for cooking
functionssimitarto aluminum.
• Cast iron cookpotsare slow to heat but cook more evenly once temperature is
reached. Use for longterm low heat cooking or for browning and frying.
• Glass ceramic, earthenware, heat-proof glass or glazed cookpots can be used if
recommended by the manufacturer for cookpot cooking. Do not use with trivets.
Best used on lowto medium contrel settings.
• Porcelain enamel-on-steel or porcelain enamel-on-cast iron should be used
accordingto manufacturer'sdirections. Do not allow toboil dry.
tt
• Do notdropheavy cookwareonthe cooktopsurface.
• The useof largepans onthe largeelement on High for extendedperiodsoftime
cancause damagetothe cooktopanddrippans, as wellas shortenthe lifeof the
element.
• Do not use wire trivets or any kindof heat retardingpad betweenthe pan and
element. Reducethe controlsettinginstead.
• Specialcookingequipmentwithoutflat bottoms,suchas theOrientalwok, should
notbe usedon thecooktop. UseJenn-Airflatbottomwokaccessory,ModelAO142.
• Bringwaterto boilat High setting;after boilinghasbegun,reduce heatto lowest
settingthat willmaintainboiling.
• Make certaincannerfits overcenterof surfaceunit.
• Flat-bottomedcannersgivethe best canningresults.
• Use canning recipesfroma reputablesourcesuch as the manufacturerof your
cannerand manufacturersofcanningjars.
• Remember that canning is a process that creates large amountsof steam. Be
carefulandfollowequipmentinstructionstoavoidburnsfromsteamor hotcanners.
• Rememberthatifyourarea haslowvoltageattimes,canningmaytakelongerthan
indicatedby the directions.
12
 Loading...