

Page 1

JENN-AIR CARTRIDGES AND ACCESSORIES
JENN-AIR CARTRIDGES AND ACCESSORIES
USER
USER
G U I D E
G U I D E
TABLE OF CONTENTS
Important Safety Instructions ............................................... 1-2
Electric Cooktop Cartridges ................................................ 2-5
Accessories ................................................................................... 5
Electric Griddle ............................................................................ 6
Warranty .......................................................................................7
Guide de l’utilisateur................................................................... 8
Guía del Usuario ....................................................................... 16
®
Form No. A/11/00 Part No. 8111P421-60 74005584 Litho U.S.A .
Page 2

IMPORTANT SAFETY INSTRUCTIONS
READ BEFORE OPERATING YOUR COOKTOP OR RANGE
Installer: Please leave this manual
with this appliance.
Consumer: Please read and keep this
manual for future reference. Keep
sales receipt and/or cancelled check
as proof of purchase.
Model Number
–– ␣ ––␣ ––␣ –– ␣ ––␣ –– –– ␣ ––␣ ––
Serial Number
–– ␣ ––␣ ––␣ –– ␣ ––␣ –– –– ␣ ––␣ ––
Date of Purchase
_______________________________
If you have questions, call:
Jenn-Air Customer Assistance
1-800-688-1100
1-800-688-2080 ( U.S. TTY for hear-
ing or speech impaired)
(Mon.-Fri., 8 am-8 pm Eastern Time)
Internet: http://www.jennair.com
For service information, see page 7.
In our continuing effort to
improve the quality and performance of our cooking
products, it may be necessary
to make changes to the appliance without revising this
guide.
All appliances - regardless of the
manufacturer - have the potential
through improper or careless use to
create safety problems. Therefore the
following safety precautions should be
observed when operating your JennAir accessories and cartridges:
GENERAL
PRECAUTIONS
NEVER use your appliance for warming or
heating the room.
Wear proper apparel. Loose-fitting or hanging garments should never be worn while
using the appliance.
Do not repair or replace any part of the
appliance unless specifically recommended
in this manual. All other servicing should
be referred to an authorized Jenn-Air
Servicer.
Flammable materials should not be stored
near surface units.
Use only dry potholders. Moist or damp
potholders on hot surfaces may result in
burns from steam. Do not let potholder
touch hot heating elements. Do not use a
towel or other bulky cloth.
NEVER leave surface units unattended at
high heat settings. Boil over causes smoking and greasy spillovers that may ignite.
Keep all switches "OFF" when unit is not in
use.
IN CASE OF FIRE
Turn off appliance and ventilating hood to
avoid spreading the flame. Extinguish flame
then turn on hood to remove smoke and
odor.
• Smother fire or flame in a pan with a lid
or cookie sheet.
NEVER pick up or move a flaming pan.
Do not use water on grease fires. Use baking soda, a dry chemical or foam-type extinguisher to smother fire or flame.
1
CHILD SAFETY
NEVER leave children alone or unsupervised near the appliance when it is in use
or is still hot.
NEVER allow children to sit or stand on
any part of the appliance as they could be
injured or burned.
NEVER store items of interest to children
in cabinets above an appliance. Children
climbing on the appliance to reach items
could be seriously injured.
COIL ELEMENTS
On conventional element cooktops, make
sure that drip pans are in place. Absence
of these pans during cooking may subject
wiring or components underneath to damage.
NEVER use aluminum foil to line surface
unit drip pans or grill basin. Installation of
these liners may result in an electric shock
or fire hazard.
Glazed cookware - only certain types of
glass, glass-ceramic, ceramic, earthenware,
or other glazed cookware are suitable for
cooktop surface without breaking due to
the sudden change in temperature. Follow
utensil manufacturer’s instructions when
using glass.
Cookware handles should be turned inward
and not extend over adjacent surface heating elements to avoid burns, ignition of flammable materials and spillage due to unintentional contact with the cookware.
Do not soak or immerse removable heating elements in water.
Page 3
RADIANT AND
HALOGEN ELEMENTS
NEVER cook on glass-ceramic cooking
surface if the cooktop is broken. Cleaning
solutions and spillovers may penetrate the
broken cooktop and create a shock hazard. Contact a qualified technician immediately.
Clean glass-ceramic cooktops with caution.
If wet sponge or cloth is used to wipe spills
on a hot cooking area, be careful to avoid
steam burns. Some cleansers can produce
noxious fumes if applied to a hot surface.
UTENSIL SAFETY
Use proper pan size. Many appliances are
equipped with one or more surface units
of different size. Select cookware having
flat bottoms large enough to cover the surface unit heating element. The use of undersized cookware will expose a portion
of the heating element to direct contact
and may result in ignition of clothing. Proper
relationship of cookware to heating element will also improve efficiency and performance.
SAVE THESE
INSTRUCTIONS
FOR
FUTURE
REFERENCE
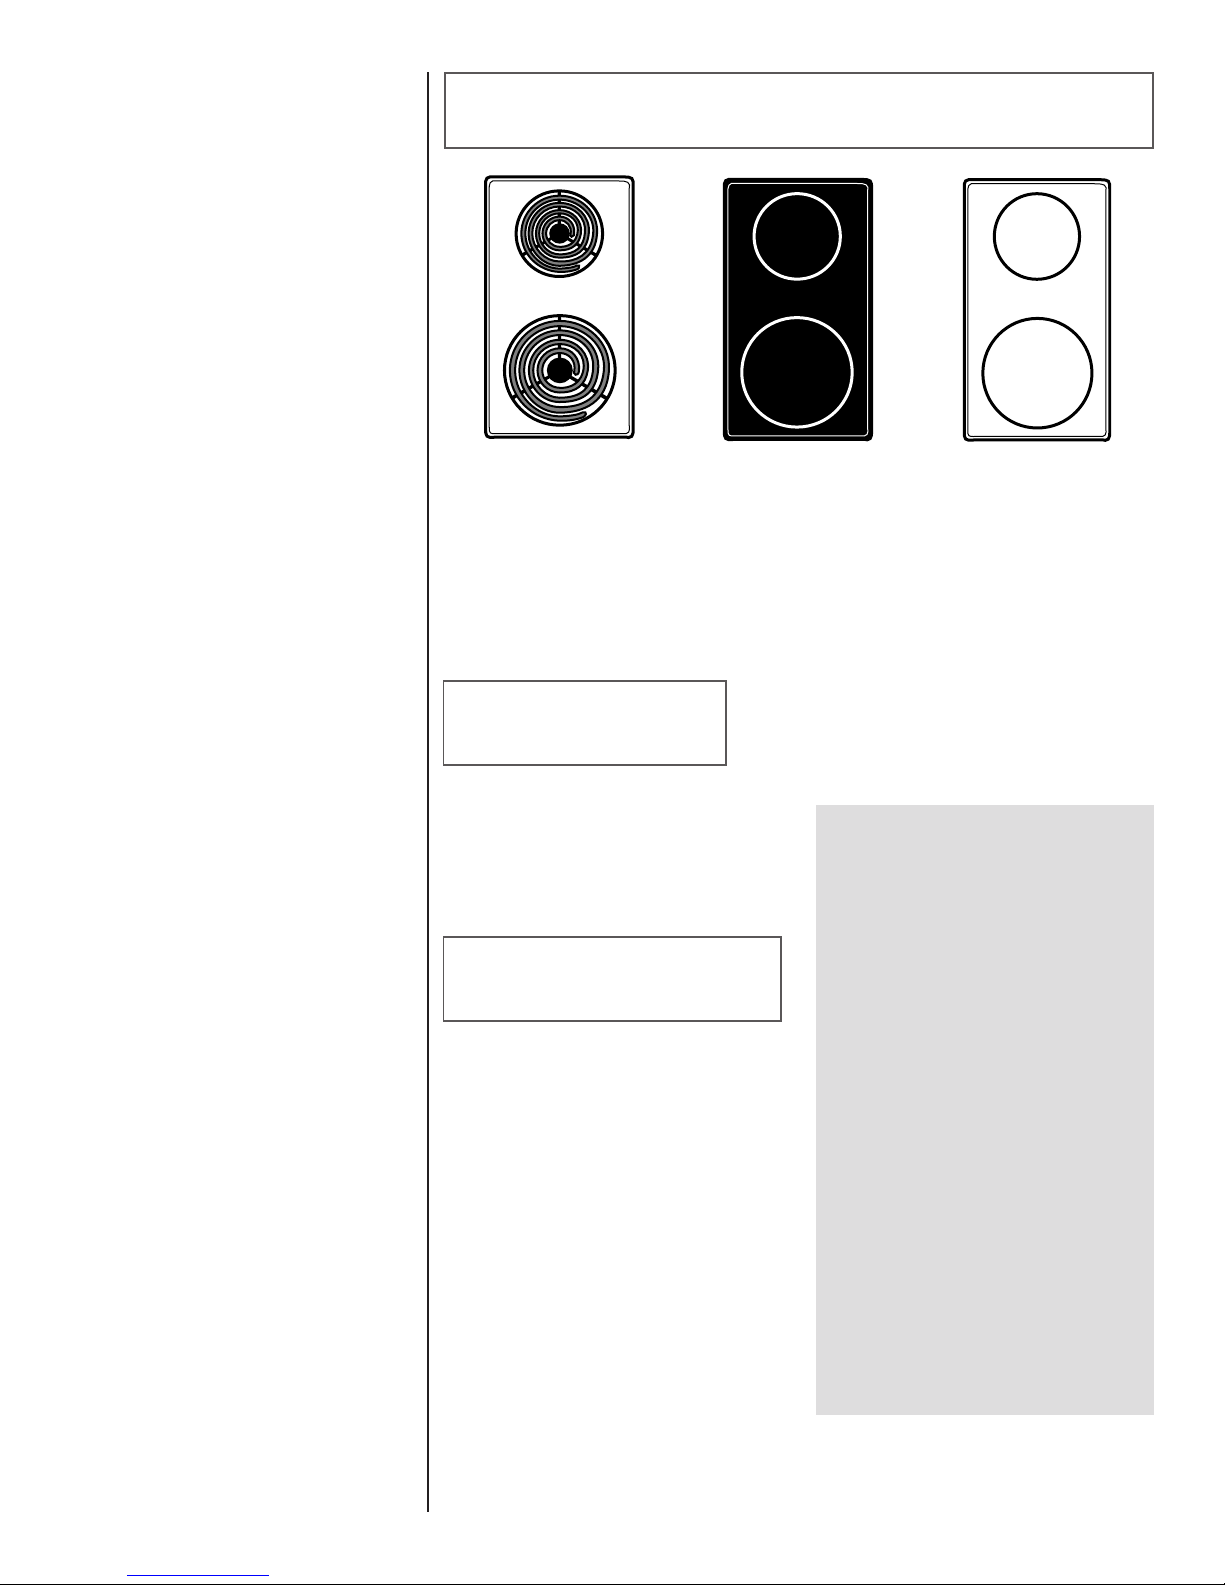
ELECTRIC COOKTOP CARTRIDGES
C
ONVENTIONAL COIL
JEA7000ADB (black) JEA8130ADB (black) JEA8120ADB (black)
JEA7000ADW (white) JEA8130ADW (white) JEA8120ADW (white)
JEA7000ADS (stainless) Expressions® Collection: Expressions® Collection:
Expressions® Collection: AH151B/W AR141B/W
AC110B/W
CONVENTIONAL
COIL ELEMENTS
The conventional coil cartridge is the most
versatile of the cartridges. When an element is on, it will cycle on and off to maintain the heat setting.
RADIANT AND
HALOGEN ELEMENTS
The two cooking areas are identified by
circles on the glass-ceramic cooktop. When
an element is turned on, the cooktop will
heat up and the red glow of the heating
element can be seen through the glass-ceramic top. (NOTE: On halogen model, a circular halogen bulb will glow instantly.) It is
normal to see the red glow of the element
whenever it cycles on. The element will
cycle on and off for all control settings except Hi. However, it may also cycle on Hi
if improper cookware is used.
:H
ALOGEN
:R
CAUTIONS:
• DO NOT use wire trivets, fire rings,
pads or any such items between the
cookware and the element.
• DO NOT cook foods directly on
cooktop.
• DO NOT allow pan to boil dry as
this could damage the cooktop and
the pan.
• DO NOT slide heavy metal or glass
cookware across glass-ceramic surface since these may scratch the surface.
• DO NOT use or place plastic items
anywhere on cooktop.
• DO NOT use cartridge in the event
a break has occurred.
• DO NOT drop heavy cookware on
the cooktop surface.
ADIANT
:
2
Page 4

ELECTRIC COOKTOP CARTRIDGES, CONT.
SELECTING PROPER
COOKWARE
• Select heavy gauge cookware. Gen-
erally heavy gauge cookware will not
change shape when heated.
• Use cookware with flat, smooth
bottoms. To determine if the cookware
is flat, place the edge of a ruler on the
bottom. Hold up to the light. No light
should be visible between the edge of
the ruler and the pan. Reject any pans
that do not fit flush against ruler's edge.
• Match the size of the cookware to
the size of the element. Cookware
should be the same size or slightly larger.
IMPROPER COOKWARE
• DO NOT use cookware that extends
more than one inch beyond the cooking
area.
• Cookware that is smaller in diameter
than the cooking area should not be used.
Not only can this cause the element to
require more energy and time, but can
also result in spillovers burning onto the
cooking area resulting in a cleaning chore.
• DO NOT use specialty items that are
nonflat, oversized, uneven or do not meet
proper cookware specifications such as
round bottom woks with rings, griddles,
rippled bottom canners, lobster pots,
large pressure canners, etc. Large utensils, such as pressure canners or oversized skillets, should be used only on
conventional coil cartridges.
• Glass-ceramic, earthenware, heat proof
glass or glazed cookware may scratch the
glass-ceramic cooktop and therefore are
not recommended.
• NOTE: On halogen cartridge only, alu-
minum pans may cause the element to
cycle even when the control setting is
Hi.
COOKING
PROCEDURES
All Cartridges:
• Before first use clean cooktop cartridge.
(See detailed instructions, pg. 4.)
• For best results, always use recommended cookware.
• Different cooktops and different amounts
of food being prepared will influence the
control settings needed for best results.
(See cooktop or range use and care guide
for typical control settings.) For fastest
cooking, start with the surface control
on Hi for one minute; then turn the control to the desired setting. Covering pans,
whenever possible, speeds cooking and
is more energy efficient.
Radiant and Halogen Cartridges:
• The glass-ceramic cooking area retains
heat for a period of time after the elements have been turned off. Put this retained heat to good use. Turn elements
off a few minutes before food is completely cooked and use the retained heat
to complete the cooking. Because of this
heat retention characteristic, the elements will not respond to changes in heat
settings as quickly as coil elements. In
the event of a potential boilover, remove
the pan from the cooking area.
• When preparing foods which can be easily scorched or over-cooked, start cooking at a lower temperature setting and
gradually increase temperature as
needed.
• A higher setting than normal may be necessary when using cookware made with
material that is slow to conduct heat, such
as cast iron.
• A lower setting can be used when cooking small quantities of foods or when
using a pan that conducts heat quickly.
TO AVOID DAMAGE TO THE
GLASS-CERAMIC COOKTOP –
Radiant and Halogen Cartridges Only:
• Do not use glass pans. They may scratch
the surface.
• Do not allow plastic, sugar or foods with
high sugar content to melt onto the hot
cooktop. Should this happen, clean immediately. (See Cleaning, pages 4 & 5.)
• Never let a pan boil dry as this will damage the surface and pan.
• Never use cooktop as a work surface or
cutting board. Never cook food directly
on the surface.
• Do not slide aluminum pans across a hot
surface. The pans may leave marks which
need to be removed promptly. (See
Cleaning, pages 4 & 5.)
• Make sure the surface and the pan bottom are clean before turning on to prevent scratches.
• To prevent scratching or damage to the
glass-ceramic top, do not leave sugar, salt
or fats on the cooking area. Wipe the
cooktop surface with a clean cloth or
paper towel before using.
• Do not slide heavy metal pans across the
surface since these may scratch.
• Do not use foil or foil-type containers.
Foil may melt onto the glass. If metal melts
on the cooktop, do not use. Call an authorized Jenn-Air Servicer.
• If a spillover occurs while cooking, immediately clean the spill from the cooking area while it is hot to prevent a tough
cleaning chore later. Using extreme care,
wipe spill with a clean dry towel.
• Do not use abrasive cleansing powders
or scouring pads which will scratch the
cooktop.
• Do not use chlorine bleach, ammonia or
other cleansers not specifically recommended for use on glass-ceramic.
3
Page 5

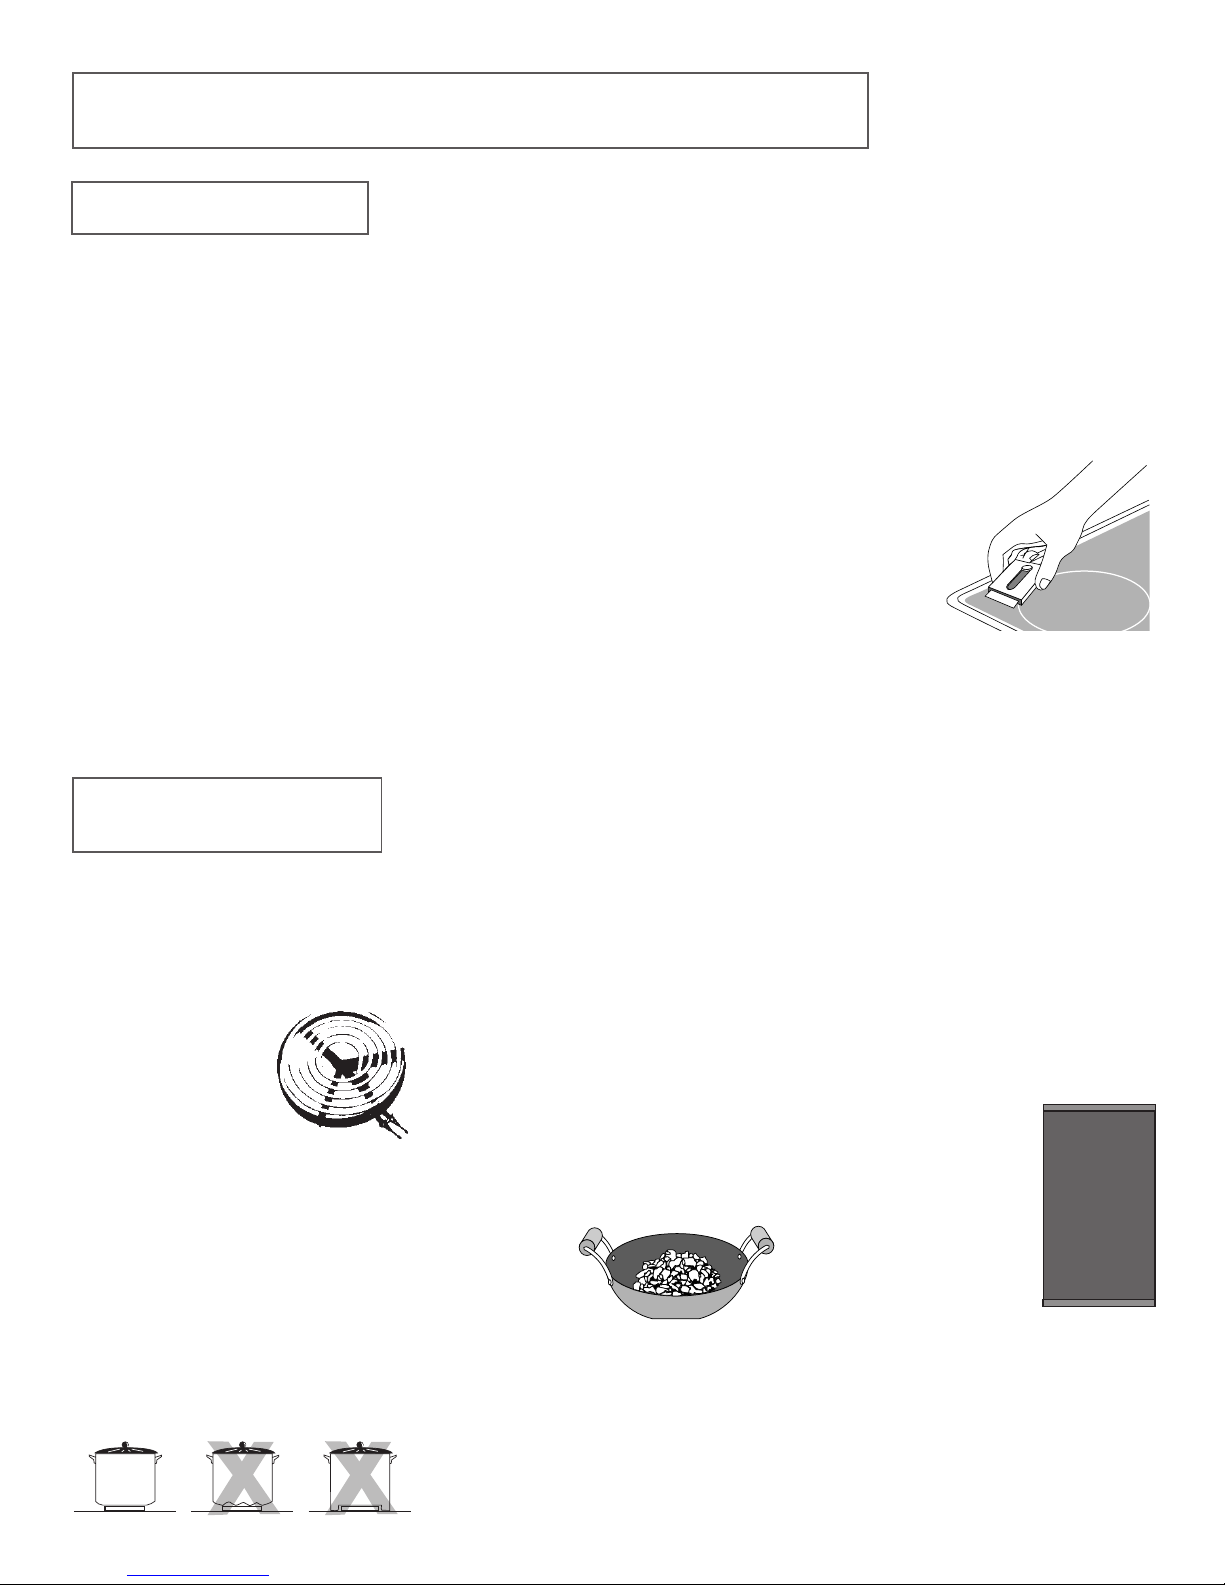
CLEANING
• Be sure appliance is off and all
parts are cool before handling or
cleaning. This is to avoid damage
and possible burns.
• The cooktop cartridge DOES NOT
need to be removed for normal cleaning.
• NEVER immerse cartridge in water to
clean. This can damage wiring. A drain
hole within the cartridge permits drainage of normal spills into the porcelain
basin pan where they will drain into the
grease container. The bottom of the
cartridge may be wiped clean with detergent solution if necessary.
CONVENTIONAL COIL
CARTRIDGE –
HEATING ELEMENTS
• Under normal conditions, most soil will
burn off elements. The heating elements
unplug for your convenience in cleaning
the drip pans. Lift slightly and pull away
from receptacle. DO NOT IMMERSE IN
WATER. To replace elements, push completely into the receptacle. Make sure
the elements fit flat.
DRIP PANS
• To keep the like-new appearance, clean
frequently and never allow anything to burn
on twice. Remove soiled pans (first re-
move heating element). Clean lightly
soiled pans with soap and water or clean
in dishwasher.
• Difficult to remove spots can be cleaned
by rubbing lightly with soapy S.O.S.* pads
or nonabrasive cleaners such as Bon
Ami*. To help release burned on soil, soak
in a solution of 1/2 cup ammonia and 1
gallon warm water or boil in 2 quarts of
water for 20 minutes. (All drip pans cannot be boiled at once because element
being used must have a drip pan in place.)
• Do not use abrasive cleansers, steel wool
or cleansers not recommended for use
on chrome. Blue/gold staining of the drip
pans indicates improper cookware selection and/or using excessively high heat
and cannot be removed.
PORCELAIN COOKTOP
• The porcelain enamel used on your
cooktop is acid resistant, not acid proof.
Therefore, acidic foods (such as vinegar,
tomato, milk, etc.) spilled on the cooktop
should be wiped up immediately with a
dry cloth.
• Wash cool cooktop with warm soapy
water and rinse. Polish with a dry cloth.
• Do not use abrasive or caustic cleaning
agents which may permanently damage
the finish.
• NEVER wipe off a warm or hot porcelain enamel surface with a damp cloth.
STAINLESS STEEL COOKTOP
• Before using the cooktop, remove all
pieces of plastic covering the top. Use a
glass cleaner to remove any film residue
from the top and inside the rim area supporting the drip pan. If residue is left on
cooktop, it can be burned onto cooktop
and be difficult to remove.
• DO NOT USE ANY CLEANING
PRODUCT CONTAINING CHLORINE BLEACH.
• ALWAYS WIPE WITH THE GRAIN
WHEN CLEANING.
• Daily Cleaning/Light Soil –– Wipe
with one of the following - soapy water,
white vinegar/water solution, Formula
409 Glass and Surface Cleaner* or a similar glass cleaner - using a sponge or soft
cloth. Rinse and dry. To polish and help
prevent fingerprints, follow with Stainless
Steel Magic Spray (Jenn-Air Model A912,
Part No. 20000008)**.
• Moderate/Heavy Soil –– Wipe with
one of the following - Bon Ami*, Smart
Cleanser*, or Soft Scrub* - using a damp
sponge or soft cloth. Rinse and dry. Stubborn soils may be removed with a damp
Scotch-Brite* pad; rub evenly with the
grain. Rinse and dry. To restore luster
and remove streaks, follow with Stainless Steel Magic Spray.
• Discoloration –– Using a damp sponge
or soft cloth, wipe with Cameo Stainless
Steel Cleaner*. Rinse immediately and
dry. To remove streaks and restore luster, follow with Stainless Steel Magic
Spray.
RADIANT AND HALOGEN
CARTRIDGE –
GLASS-CERAMIC SURFACE
• NEVER use oven cleaners, chlorine bleach,
ammonia or glass cleaners with ammonia.
NOTE: Call an authorized servicer if the glassceramic top should crack, break or if metal
or aluminum foil should melt on the cooktop.
• Allow the cooktop to cool before cleaning.
• General – Clean cooktop after each use,
or when needed, with a damp paper towel
and Cooktop Cleaning Creme* (Part No.
20000001)**. Then, buff with a clean dry
cloth.
cont.
* Brand names for cleaning products are registered trademarks of the respective manufacturers.
**To order direct, call 1-800-688-8408.
4
Page 6
ELECTRIC COOKTOP CARTRIDGES, CONT.
CLEANING, CONT.
NOTE: Permanent stains will develop if soil
is allowed to cook on by repeatedly using
the cooktop when soiled.
• Heavy Soils or Metal Marks –
Dampen a “scratchless” or “never
scratch” scrubber sponge. Apply
Cooktop Cleaning Creme* (Part No.
20000001)** and scrub to remove as
much soil as possible. Apply a thin layer
of the creme, cover with a damp paper
towel and let stand 30 to 45 minutes.
Scrub again, then buff with a clean dry
cloth.
* Brand names for cleaning products are registered trademarks of the respective manufacturers.
**To order direct, call 1-800-688-8408.
NOTE: Only use a CLEAN, DAMP
“scratchless” pad that is safe for non-stick
cookware. The pattern and glass will be damaged if the pad is not damp, if the pad is
soiled, or if another type of pad is used.
• Burned-on or Crusty Soils – Scrub
with a “scratchless” or “never scratch”
scouring pad and Cooktop Cleaning
Creme* (Part No. 20000001)**. Hold a
razor blade scraper at 30° angle and
scrape any remaining soil. Then, clean as
described above.
• Melted Sugar or Plastic – Immediately
ACCESSORIES
NOTE: Do not use the razor blade for daily
cleaning as it may wear the pattern on the
glass.
turn element to LOW and scrape sugar
or plastic from hot surface to a cool area.
Then turn element OFF and allow to cool.
Clean residue with razor
blade scraper and
Cooktop Cleaning
Creme* (Part No.
20000001)**.
BIG POT
CANNING ELEMENT
Model A145A
The canning element accessory makes it possible
to use large or oversized,
flanged or rippled bottom
canners with the conventional coil cartridge.
Follow these procedures when
canning:
• Bring water to boil at Hi setting; after
boiling has begun, reduce heat to lowest
setting that will maintain boiling.
• Make certain canner fits over center of
surface unit.
• Flat-bottomed canners give the best canning results.
• Use canning recipes from a reputable
source such as the manufacturer of your
canner and manufacturers of canning jars.
• Canning is a process that creates large
amounts of steam. Follow equipment instructions to avoid burns from steam or
hot canners.
• If your area has low voltage at times, canning may take longer than indicated by
the directions.
WOK
Model A0142
Use Jenn-Air’s flat
bottom wok accessory for optimum results.
Model AO142 wok has a nonstick finish,
wood handles, cover, steaming rack, rice
paddles, cooking tips and recipes.
ELECTRIC GRILL
ACCESSORY
Model JEA8000ADB
Includes grill element, two grill grates and
basin liner pan.
GRILL COVER
Model A341
The grill cover protects
the grill when not in use.
It is available in textured
steel in black or white
with molded handles.
RIGHT WRONG WRONG
5
Page 7
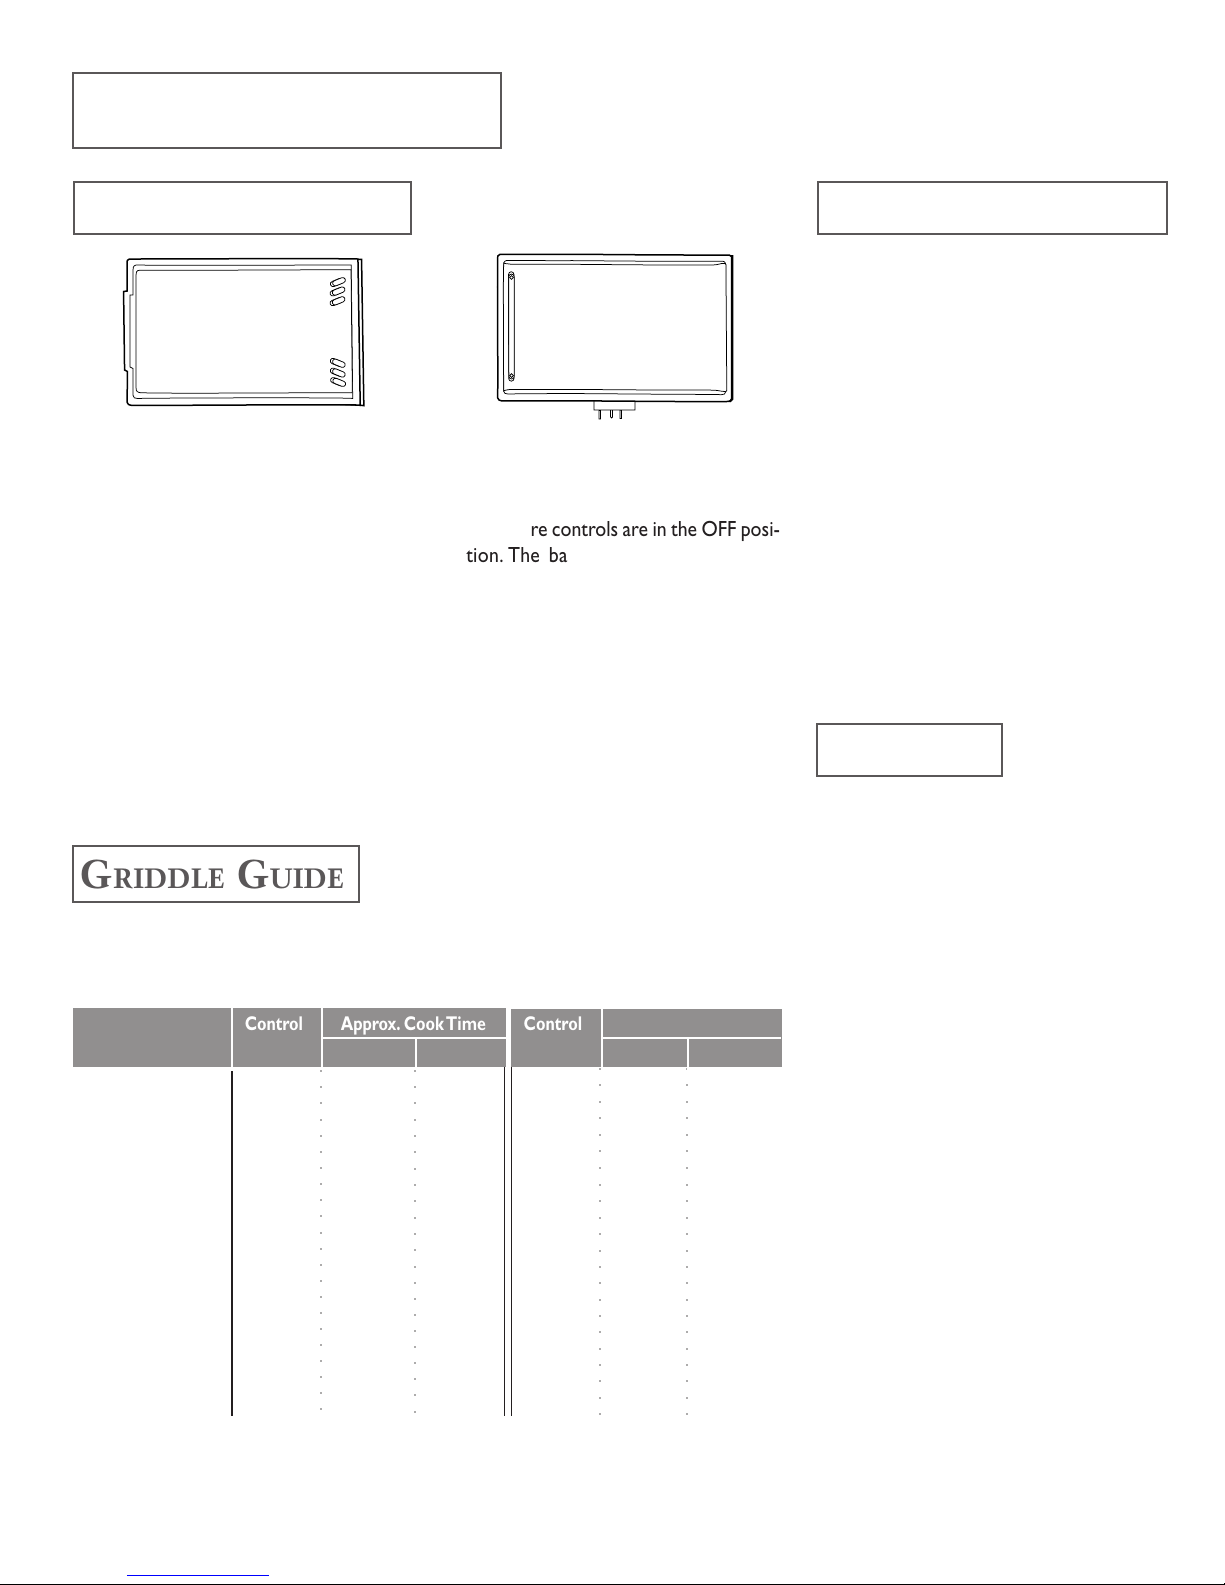
ELECTRIC GRIDDLE
INSTALLATION
MODEL JEA8200ADX
1. Make sure controls are in the OFF posi-
tion. The basin should be empty and
clean. Insert basin pan and grill element.
2. Place griddle over grill element so drain
holes are in front. This will permit excess grease to drain into the grease container.
EXPRESSIONS
®
COLLECTION
MODEL AO310
1. Make sure controls are in the OFF posi-
tion. The basin should be empty and
clean.
2. Slide the griddle towards the receptacle
until the terminal plug is completely engaged. The griddle should rest on the
basin.
NOTE: The liner pan may remain in
place but is not necessary.
USING THE GRIDDLE
1. Before the first use, wash your new
griddle in hot soapy water, rinse and dry.
Then "condition" the surface by wiping
on a thin coating of cooking oil or shortening. Remove excess oil or shortening
by wiping again with another paper towel.
DO NOT use cooking sprays on the
griddle surface.
2. Preheat the griddle as noted in the
charts.
3. Use nonmetallic spatulas or utensils
while cooking to prevent damaging the
finish.
4. When cooking meats, use the downdraft
fan or range hood to capture smoke.
CLEANING
GRIDDLE GUIDE
G
RIDDLE
Preheat 5 minutes Preheat 5-10 minutes at specified
Control Approx. Cook Time Control Approx. Cook Time
Food Items Setting Side 1 Side 2 Setting Side 1 Side 2
Sausage Patties Hi 4-5 min. 2-4 min. 9-10 4-5 min. 2-4 min.
Bacon Hi 3-5 min. 2-3 min. 10 3-5 min. 2 min.
Ham Slice Hi 4 min. 4 min. 9 4 min. 2 min.
Hamburgers Hi 5-6 min. 5-6 min. 9 6 min. 5 min.
Fish Sticks Hi 5 min. 4-5 min. 8 5-7 min. 5-6 min.
Hot Dogs 10 5-6 min. 4-5 min. 10 5-6 min. 4-5 min.
Buns Hi 2-3 min. ----- 9 3 min. ----French Toast 10 3-4 min. 2-3 min. 10 2-3 min. 2-3 min.
Grilled Sandwiches 10 4-5 min. 3-4 min. 9 4 min. 3 min.
Pancakes 10 2-3 min. 1-2 min. 10 2 min. 1-2 min.
Eggs 6-7 2-3 min. (1) min. 7 2-3 min. (1) min.
AO310 G
on Hi. setting – Do not preheat on Hi.
○○○○○○○○○○○○○○○○○○○○○○
○○○○○○○○○○○○○○○○○○○○○○
RIDDLE
JEA8200ADX
○○○○○○○○○○○○○○○○○○○○○○
○○○○○○○○○○○○○○○○○○○○○○
NOTE: DO NOT IMMERSE THE TERMINAL PLUG IN WATER (MODEL AO310
ONLY). SEE BOTTOM OF GRIDDLE FOR
FURTHER INSTRUCTIONS.
1. Once the griddle has cooled (DO NOT
IMMERSE A HOT GRIDDLE IN COLD
WATER), wash with soap or detergent
in hot water in the sink. Be sure to remove all food residue before cooking on
the griddle again.
2. Remove stubborn spots with a plastic
mesh puff or pad. For best results, use
only those cleaning products which state
they are recommended for use when
cleaning nonstick surfaces. Do not use
steel wool or coarse scouring pads.
3. DO NOT wash in dishwasher.
Note: These are suggested guides for control settings and times. Factors, such as low
voltage, size of food and food temperature, may affect the times and control settings which
provide the best results.
6
Page 8

JENN-AIR
WARRANTY
Full One Year Warranty - Parts and Labor
For one (1) year from the original retail pur-
chase date, any part which fails in normal home
use will be repaired or replaced free of charge.
Limited Warranties - Parts Only
Second Year - After the first year from the origi-
nal purchase date, parts which fail in normal home
use will be repaired or replaced free of charge
for the part itself, with the owner paying all other
costs, including labor, mileage and transportation.
Third Through Fifth Year - From the original
purchase date, parts listed below which fail in normal home use will be repaired or replaced free of
charge for the part itself, with the owner paying
all other costs, including labor, mileage and transportation.
• Glass-ceramic Cooktop: Due to thermal
breakage.
• Electric Heating Elements: Elements on
coil, radiant and halogen cartridges.
Canadian Residents
The above warranties only cover an appliance installed in Canada that has been certified or listed
by appropriate test agencies for compliance to a
National Standard of Canada unless the appliance
was brought into Canada due to transfer of residence from the United States to Canada.
Limited Warranty Outside the United
States and Canada - Parts Only
For two (2) years from the date of original retail
purchase, any part which fails in normal home use
will be repaired or replaced free of charge for the
part itself, with the owner paying all other costs,
including labor, mileage and transportation.
The specific warranties expressed above are the
ONLY warranties provided by the manufacturer.
These warranties give you specific legal rights, and
you may also have other rights which vary from state
to state.
WHAT IS NOT COVERED BY THESE
WARRANTIES:
1. Conditions and damages resulting from any of the following:
a. Improper installation, delivery, or maintenance.
b. Any repair, modification, alteration, or adjustment not authorized by
the manufacturer or an authorized servicer.
c. Misuse, abuse, accidents, or unreasonable use.
d. Incorrect electric current, voltage, or supply.
e. Improper setting of any control.
2 Warranties are void if the original serial numbers have been removed,
altered, or cannot be readily determined.
3. Products purchased for commercial or industrial use.
4. The cost of service or service call to:
a. Correct installation errors.
b. Instruct the user on the proper use of the product.
c. Transport the appliance to the servicer.
5. Consequential or incidental damages sustained by any person as a result
of any breach of these warranties. Some states do not allow the exclusion
or limitation of consequential or incidental damages, so the above exclusion may not apply.
IF YOU NEED SERVICE
• Call the dealer from whom your appliance was purchased or call Maytag
Appliances Sales Company, Jenn-Air Customer Assistance at 1-800-6881100 to locate an authorized servicer.
• Be sure to retain proof of purchase to verify warranty status. Refer to
WARRANTY for further information on owner’s responsibilities for warranty service.
• If the dealer or service company cannot resolve the problem, write to
Maytag Appliances Sales Company, Attn: CAIR
Cleveland, TN 37320-2370, or call 1-800-688-1100.
U.S. customers using TTY for deaf, hearing impaired or speech impaired,
call 1-800-688-2080.
NOTE: When writing or calling about a service problem, please include
the following information:
a. Your name, address and telephone number;
b. Model number and serial number;
c. Name and address of your dealer or servicer;
d. A clear description of the problem you are having;
e. Proof of purchase (sales receipt).
• User’s guides, service manuals and parts information are available from
Maytag Appliances Sales Company, Jenn-Air Customer Assistance.
®
Center, P.O. Box 2370,
7
Page 9

ACCESSOIRES ET MODULES JENN-AIR
ACCESSOIRES ET MODULES JENN-AIR
GUIDE
GUIDE
DE L’UTILISATEUR
DE L’UTILISATEUR
TABLE DES MATIÈRES
Instructions de sécurité importantes ................................9-10
Modules de table de cuisson électrique ........................ 10-13
Accessoires ................................................................................ 13
Plaque chauffante ...................................................................... 14
Garantie ...................................................................................... 15
Guía del Usuario ....................................................................... 16
®
Page 10

Installateur: Remettre ce manuel au
propriétaire.
Consommateur: Lire le manuel; le
conserver pour consultation
ultérieure. Conserver la facture
d’achat ou le chèque encaissé comme
preuve de l’achat.
Numéro de modèle
–– ␣ ––␣ ––␣ –– ␣ ––␣ –– –– ␣ ––␣ ––
Numéro de série
–– ␣ ––␣ ––␣ –– ␣ ––␣ –– –– ␣ ––␣ ––
Date d’achat
_______________________________
Pour toute question, contacter:
Service-client Jenn-Air
1-800-688-1100
(Lundi - vendredi, 8 h - 20 h -- heure
de l’Est)
Site Internet: http://www.jennair.com
Pour le service après-vente, voir
page 15.
Dans le cadre de nos pratiques
d’amélioration constante de la
qualité et de la performance de
nos produits de cuisson, des
modifications de l’appareil qui ne
sont pas mentionnées dans ce
guide ont pu être introduites.
INSTRUCTIONS DE SÉCURITÉ
IMPORTANTES
LIRE ATTENTIVEMENT AVANT D’UTILISER
LA
TABLE DE CUISSON OU LA CUISINIÉRE
L’utilisation inappropriée ou inattentive
de tout appareil ménager (quel que soit
le fabricant) peut entraîner des problèmes de sécurité. Par conséquent, les
précautions suivantes doivent être
respectées lors de l’utilisation des modules et accessoires Jenn-Air:
PRÉCAUTIONS
GÉNÉRALES
NE JAMAIS utiliser l’appareil comme source
de chaleur pour le chauffage de la pièce.
Porter des vêtements appropriés. Les vêtements
amples ou à longues manches ne doivent jamais
être portés lors de l’utilisation de l’appareil.
Ne pas réparer ou remplacer une pièce de
l’appareil à moins que cela soit spécifiquement
recommandé dans ce manuel. Tout entretien et
réparation doivent être exécutés par un
réparateur agréé Jenn- Air.
Il ne faut pas ranger de matériaux inflammables
près de cet appareil.
Utiliser des maniques sèches seulement. Des
maniques humides peuvent provoquer la formation de vapeur brûlante. Ne pas laisser les
maniques toucher les éléments chauds. Ne pas
utiliser une serviette ou autre chiffon épais.
NE JAMAIS laisser les appareils sans surveillance lorsqu’ils sont à une puissance maximale.
Les débordements peuvent provoquer de la
fumée et des projections de graisse qui peuvent
prendre feu.
Laisser toutes les commandes sur «OFF»
(ARRÊT) quand l’appareil n’est pas utilisé.
EN
CAS D’INCENDIE
Interrompre le fonctionnement de l’appareil et
de la hotte de ventilation pour minimiser le risque d’extension des flammes. Éteindre les
flammes, puis mettre la hotte en marche pour
évacuer la fumée et l’air vicié.
• Utiliser un couvercle ou une plaque à biscuits
pour étouffer les flammes d’un feu qui se déclare
dans un ustensile de cuisine.
9
• NE JAMAIS saisir ou déplacer un ustensile
de cuisine enflammé.
Ne pas projeter de l’eau sur un feu de graisse.
Utiliser du bicarbonate de sodium, ou un
extincteur à mousse ou à produit chimique sec
pour éteindre les flammes.
SÉCURITÉ POUR LES
ENFANTS
NE JAMAIS laisser des enfants seuls ou sans
supervision lorsque l’appareil est en service ou
encore chaud.
NE JAMAIS laisser un enfant s’asseoir ou se
tenir sur une partie quelconque de l’appareil. Il
pourrait se blesser ou se brûler.
NE JAMAIS ranger des articles pouvant
intéresser l’enfant dans une armoire au-dessus
de l’appareil. Un enfant qui grimpe sur l’appareil
pour atteindre un objet pourrait gravement se
blesser.
ÉLÉMENTS EN SPIRALE
S’assurer que les cuvettes de propreté sont bien
en place sur les surfaces de cuisson à éléments
classiques. L’absence de ces cuvettes pendant la
cuisson pourrait endommager le câblage et les
pièces se trouvant en dessous.
NE JAMAIS utiliser de feuille d’aluminium pour
garnir les cuvettes de propreté ou la cavité du
gril. L’installation de ce revêtement peut entraîner
des décharges électriques ou risques de feu.
Seuls certains matériaux en verre, vitrocéramique,
céramique ou certains ustensiles vitrifiés/émaillés
peuvent être utilisés sur la table de cuisson sans
risque de bris sous l’effet du choc thermique.
Observer les instructions du fabricant lors de
l’utilisation d’un ustensile en verre.
Pour éviter les risques de brûlure, d’inflammation
de matières et de renversement par contact non
intentionnel avec un ustensile, ne pas orienter la
poignée d’un ustensile vers un brûleur adjacent;
orienter toujours la poignée vers l’intérieur de la
table de cuisson.
Ne pas tremper ou immerger les éléments
chauffants amovibles dans l’eau.
Page 11

ÉLÉMENTS RADIANTS
ÉLÉMENTS AUX
ET
HALOGÉNES
NE JAMAIS cuire sur une table de cuisson en
vitrocéramique si celle-ci est cassée. Les solutions de nettoyage et les produits déversés
peuvent pénétrer dans la surface et entraîner
une décharge électrique. Immédiatement
contacter un technicien compétent.
Prendre des précautions lors du nettoyage des
surfaces en vitrocéramique. Faire attention à
ne pas se brûler par de la vapeur produite avec
une éponge ou un chiffon mouillé, utilisé pour
essuyer des renversements sur une zone de
cuisson chaude. Certains produits de nettoyage
donnent des vapeurs nocives lorsqu’ils sont
appliqués sur une surface chaude.
MODULES DE TABLE DE CUISSON
ÉLECTRIQUE
É
LÉMENT CONVENTIONNELHALOGÉNES
EN SPIRALE
JEA7000ADB (noir) JEA8130ADW (white) JEA8120ADW (blanc)
JEA7000ADW (blanc) Collection Expressions®: Collection Expressions®:
JEA7000ADS (acier inoxydable) AH151B/W AR141B/W
Collection Expressions®:
AC110B/W
:
JEA8130ADB (noir) JEA8120ADB (noir)
:R
ADIANTS
:
SÉCURITÉ DES
USTENSILES
Utiliser des ustensiles de la bonne dimension.
De nombreux appareils ménagers comportent
un ou plusieurs éléments de tailles différentes.
Choisir un ustensile à fond plat, de taille
suffisante afin qu’il recouvre tout l’élément
chauffant. L’emploi d’ustensiles de trop petite
taille expose une partie de l’élément qui pourrait
alors mettre le feu à un vêtement. Le bon rapport entre la surface de l’ustensile et de
l’élément amé liore également l’efficacité et les
rendements.
CONSERVER CES
INSTRUCTIONS
POUR
TION ULTÉRIEURE
CONSULTA-
ÉLÉMENTS CONVEN-
TIONNELS EN SPIRALE
Le module avec éléments conventionnels en
spirale est le plus polyvalent. Quand un élément
est allumé, il s’allume et s’éteint par intermittence pour maintenir la température au réglage
voulu.
ÉLÉMENTS RADIANTS
ET AUX HALOGÉNES
Les deux zones de cuisson sont identifiées par
des cercles sur la surface en vitrocéramique.
Quand un élément est allumé, la surface devient
chaude et une lueur rougeoyante de l’élément
chauffant est visible. (REMARQUE: Sur le
modèle aux halogènes, la lampe circulaire luit
instantanément.) Il est normal de voir la lueur
rouge de l’élément à chaque fois qu’il se rallume.
L’élément s’allume et s’éteint pour tous les
réglages à l’exception du réglage Hi (max.).
Cependant, si un ustensile inapproprié est utilisé,
il peut aussi s’éteindre et s’allumer en alternance
sur ce réglage Hi (max.).
PRÉCAUTIONS:
• NE PAS utiliser de supports métalliques,
anneaux ou tout autre article semblable
entre l’ustensile et l’élément.
• NE PAS cuire d’aliments directement sur
la table de cuisson.
• NE PAS laisser le liquide dans l’ustensile
s’évaporer complè tement, au risque
d’endommager la table de cuisson et
l’ustensile.
• NE PAS faire glisser les ustensiles lourds,
en métal ou en verre sur la surface en
vitrocéramique, au risque de rayer la surface.
• NE PAS utiliser ou placer des articles
en plastique sur la table de cuisson.
• NE PAS utiliser de module s’il est
endommagé.
• NE PAS laisser tomber d’ustensile lourd
sur la table de cuisson.
10
Page 12

MODULES DE TABLE DE CUISSON ÉLECTRIQUE, SUITE
CHOIX D’USTENSILES
APPROPRIÉS
• Choisir des ustensiles à parois épaisses.
Normalement, les ustensiles en matériau épais
ne se déforment pas lorsquils sont chauffés.
• Utiliser des ustensiles à fond plat et lisse.
Mettre une règle contre le dessous de
l’ustensile pour établir si le fond est plat. Puis,
tenir l’ustensile devant une source de lumière.
La lumière ne devrait pas être visible entre le
bord de la règle et l’ustensile. Ne pas utiliser
d’ustensile dont le fond n’est pas rectiligne
comme le bord de la règle.
• Faire correspondre la taille de l’ustensile
à la dimension de l’élément. Les ustensiles
doivent être de la même dimension ou
légèrement plus grands.
USTENSILES INAPPROPRIÉS
• NE PAS utiliser d’ustensiles dont le diamètre
est supé rieur à celui de la zone de cuisson par
plus de un pouce.
• Les ustensiles dont le diamètre est plus petit
que celui de la table de cuisson ne doivent pas
être utilisés. Sinon, en plus de l’énergie et du
temps gaspillés, un nettoyage supplémentaire
sera nécessaire en cas de renversement, pour
éliminer les aliments brûlés.
• NE PAS utiliser d’articles spéciaux qui ne sont
pas plats, de configuration irrégulière,
surdimensionnés ou ne ré pondant pas aux
spécifications d’ustensiles appropriés comme
woks à fond rond avec anneaux, plaques de
cuisson, marmites à conserves à fond ondulé,
marmites à homard, grands fait-tout, etc. Les
gros ustensiles comme les autocuiseurs ou les
poêles surdimensionnées doivent être utilisées
seulement sur les modules conventionnels en
spirale.
• Les ustensiles en vitrocéramique, céramique,
grès, ou vitrifiés/émaillés ou en verre résistant
à la chaleur peuvent rayer la surface
vitrocéramique et par conséquent, ne sont pas
recommandés.
• REMARQUE: Les ustensiles en aluminium
peuvent (sur le module aux halogènes
seulement) faire s’allumer et s’éteindre
l’élément de façon intermittente, même si le
réglage est sur Hi (max.).
MÉTHODES DE
CUISSON
Tous les modules:
• Avant d’utiliser un module de cuisson pour
la première fois, le nettoyer. (Voir instructions
détaillées page 12.)
• Pour de meilleurs résultats, utiliser toujours
les ustensiles recommandés.
• Le type de table de cuisson et les différentes
quantités d’aliments à préparer, affecteront les
réglages né cessaires pour obtenir les
meilleurs résultats. (Voir le manuel d’entretien
et d’utilisation de la cuisinière ou de la table
de cuisson pour obtenir les réglages typiques.)
Pour une cuisson rapide, commencer en
mettant la commande sur Hi pendant une
minute; puis baisser la commande au réglage
voulu. Mettre un couvercle sur les ustensiles
tant que cela est possible, la cuisson sera plus
rapide et plus efficace en énergie.
Modules radiants et aux halogènes
• La zone de cuisson en vitrocéramique conserve la chaleur pendant un certain temps
une fois l’élément éteint. Tenter de faire bon
emploi de cette chaleur. Éteindre les é léments
quelques minutes avant la fin de la cuisson
totale des aliments. Puisque ces éléments
retiennent la chaleur pendant un certain
temps, ils ne réagissent pas aux changements
de réglage aussi rapidement que les éléments
en spirale. Retirer l’ustensile de la zone de
cuisson s’il y a un risque de débordement.
• Lors de la préparation de nourritures qui
peuvent être facilement brûlées ou trop cuites,
commencer la cuisson à basse température
et augmenter graduellement la température.
• Un réglage plus élevé que normal peut être
nécessaire si l’on utilise des ustensiles faits de
matériaux peu conducteurs comme la fonte.
• Un réglage inférieur peut être utilisé pour la
cuisson de petites quantités d’aliments ou si
l’ustensile utilisé est très conducteur.
TABLE
VITROCÉRAMIQUE
Modules radiants et aux halogènes
seulement:
• Ne pas utiliser de récipients en verre. Ils risquent
• Ne pas laisser de plastique, sucre ou aliments à
• Ne jamais laisser le liquide s’évaporer dans un
• Ne jamais utiliser la table de cuisson comme
• Ne pas faire glisser de récipients en aluminium
• S’assurer que la surface et que le fond de
• Pour éviter de rayer ou d’endommager la sur-
• Ne pas faire glisser d’ustensiles en métal lourd
• Ne pas se servir de récipient en papier alu-
• Si un renversement se produit lors de la cuisson,
• Ne pas utiliser de poudres de nettoyage abra-
• Ne pas utiliser de produits de blanchiment
POUR NE PAS ENDOMMAGER LA
DE CUISSON EN
–
de rayer la surface.
contenu élevé en sucre, fondre sur la table de
cuisson chaude. Si cela se produisait, nettoyer
immédiatement. (Voir nettoyage, pages 12 et 13.)
ustensile, au risque d’endommager la surface et
l’ustensile.
plan de travail ou planche à découper. Ne jamais
cuire directement la nourriture sur cette surface.
sur la surface. Ces récipients peuvent laisser des
marques qui devront être enlevées rapidement.
(Voir nettoyage, pages 12 et 13.)
l’ustensile sont propres avant de mettre en
marche, afin d’éviter de rayer la surface.
face en vitrocéramique, ne pas laisser dessus,
de sucre, sel ou graisse. L’essuyer avec un linge
ou un papier essuie-tout propre avant de
l’utiliser.
sur la surface car ceci risque de la rayer.
minium ou matériau identique. Ce matériau risque de fondre sur le verre. Si du métal fond sur
la table de cuisson, ne pas s’en servir. Appeler
un réparateur agréé Jenn-Air.
le nettoyer immédiatement alors que la surface
est encore chaude afin d’éviter plus de dégâts
par la suite. User de prudence, et essuyer le
renversement avec un linge propre et sec.
sives ni de tampons récureurs qui risquent de
rayer la table de cuisson.
chlorés, ammoniaque ou autres produits de
nettoyage non recommandés spécialement pour
la vitrocéramique.
11
Page 13

NETTOYAGE
• S’assurer que l’appareil est arrêté et
que toutes les pièces ont refroidi
avant toute manipulation au
nettoyage, afin d’éviter tout
dommage et risque de brûlures.
• Le module n’A PAS besoin d’ÊTRE enlevé
pour être habituellement nettoyé.
• NE JAMAIS tremper le module dans l’eau
pour le nettoyer. Cela pourrait endommager
le câblage. Un trou d’évacuation dans le
module permet d’évacuer tout produit
renversé dans le bac de récupération où
les produits écoulés se regroupent dans le
contenant à graisse. Le fond du module peut
être nettoyé au besoin avec une solution
de détergent.
MODULE CONVENTIONNEL
À ÉLÉMENTS EN SPIRALE –
ÉLÉMENTS CHAUFFANTS
• Dans des conditions normales, la plus grande
partie de la saleté s’élimine en brûlant. Les
éléments chauffants se dé branchent pour
permettre le nettoyage des cuvettes de
propreté. Soulever légèrement l’élément
chauffant et le tirer de la prise. NE PAS LE
TREMPER DANS L’EAU. Pour remettre en
place les éléments, les enfoncer complètement
dans la prise. S’assurer que les éléments sont
bien à plat.
CUVETTES DE PROPRETÉ
• Pour qu’elles restent comme neuves, les
nettoyer fréquemment et ne jamais y laisser
des produits brûler deux fois. Retirer les cuvettes salies (en enlevant d’abord l’élément
chauffant). Nettoyer légèrement les cuvettes
salies avec de l’eau et du savon ou les nettoyer
au lave-vaisselle.
• Les taches difficiles à enlever peuvent être
nettoyé es en frottant légèrement avec des tampons S.O.S.* savonneux ou des produits de
nettoyage non abrasifs comme Bon Ami*. Pour
aider à libérer la saleté attachée, tremper les
cuvettes de propreté dans une solution
composée d’1/2 tasse d’ammoniaque et d’un
gallon d’eau tiède, ou les faire bouillir dans deux
litres d’eau pendant 20 minutes. (Toutes les cuvettes de propreté ne peuvent pas être mises à
bouillir en même temps parce que l’élément
utilisé doit avoir une cuvette en place.)
• Ne pas utiliser de produits de nettoyage abrasifs,
laine d’acier ou produits non recommandés pour
le chrome. Des taches bleues/dorées sur les
cuvettes indiquent un mauvais choix des
ustensiles ou bien une chaleur excessive, et ne
peuvent être enlevées.
SURFACE EN ÉMAILVITRIFIÉ
• L’émail utilisé sur cette table de cuisson possède
une certaine résistance à l’acide mais qui n’est
pas illimitée. Par conséquent, des nourritures
acides (comme vinaigre, tomate, lait, etc.)
renversées sur la surface doivent être nettoyées
immédiatement avec un linge sec.
• Laver la surface refroidie avec de l’eau savonneuse tiède et rincer. La polir avec un linge sec.
• Ne pas utiliser d’agents de nettoyage abrasifs
ou caustiques qui pourraient endommager le fini
de façon permanente.
• NE JAMAIS essuyer une surface émaillée
chaude ou tiè de avec un linge humide.
SURFACE EN ACIER INOXYDABLE
• Avant d’utiliser la table de cuisson, enlever tout
le plastique recouvrant le dessus. Se servir d’un
produit de nettoyage du verre pour retirer les
résidus se trouvant sur le dessus et à l’intérieur
du rebord supportant la cuvette de propreté.
S’il restait du plastique sur la table de cuisson, il
pourrait brûler et serait difficile à enlever.
• NE PAS UTILISER DE PRODUITS DE
NETTOYAGE CONTENANT DU JAVELLISANT.
• POUR NETTOYER L’ACIER, ESSUYER
TOUJOURS DANS LE SENS DE LA TEXTURE.
• Nettoyage journalier/saleté légère –
Essuyer avec l’un des produits suivants: eau
savonneuse, vinaigre blanc/eau, produit de
nettoyage pour verre et surface Formula 409*
ou un produit semblable – avec un linge souple
et une éponge. Rincer et sécher. Pour polir et
enlever les marques de doigts, faire suivre par
Stainless Steel Magic Spray (Jenn-Air modèle
A912, pièce n° 20000008)**.
• Saleté modérée/épaisse – Essuyer avec l’un
des produits suivants: Bon Ami*, Smart
Cleanser* ou Soft Scrub* – à l’’aide d’un linge
souple ou d’une éponge humide. Rincer et
sécher. Les taches rebelles peuvent être enlevées
avec un tampon Scotch-Brite* humidifié. Frotter
uniformément dans le sens du métal. Rincer et
sécher. Pour redonner du lustre et enlever les
rayures, faire suivre par Stainless Steel Magic
Spray.
• Décoloration – À l’aide d’une éponge humide
ou d’un linge souple, essuyer avec Cameo Stainless Steel Cleaner*. Rincer immédiatement et
sécher. Pour retirer les marques et redonner
du lustre, faire suivre par Stainless Steel Magic
Spray.
MODULE Á ÉLÉMENTS
RADIANTS ET AUX
HALOGÉNES –
SURFACE EN VITROCÉRAMIQUE
• NE JAMAIS utiliser de produit de nettoyage du
four, javellisant, ammoniaque ou produits de
nettoyage pour verre contenant de l’ammoniaque.
REMARQUE: Prendre contact avec un réparateur
agréé si la surface en vitrocéramique se fendille, se
casse ou si de l’aluminium ou du métal fond sur la
surface.
• Laisser la table de cuisson refroidir avant de la
nettoyer.
• Généralités – nettoyer la table de cuisson
après chaque emploi ou au besoin, avec du
papier essuie-tout humidifié et un produit de
nettoyage pour vitrocéramique. Puis, essuyer
avec un linge sec et propre.
suite
*Les noms de marque des produits de nettoyage sont des marques déposées des différents fabricants.
** Pour commander directement, composer le 1-800-688-2002.
12
Page 14

MODULES DE TABLE DE CUISSON ÉLECTRIQUE, SUITE
NETTOYAGE, SUITE
REMARQUE: Des marques permanentes vont
se produire si la saleté reste sur la table de cuisson
et est cuite de façon répétée.
• Saleté épaisse ou marques métalliques
– Humidifier une éponge à récurer «ne rayant
pas». Appliquer du Cooktop Cleaning Creme
(pièce n° 20000001)** et frotter pour retirer
autant de saleté que possible. Appliquer une
mince couche de crème, recouvrir avec du
papier essuie-tout humidifié et laisser pendant
30 à 45 minutes. Frotter à nouveau, puis essuyer
avec un linge propre et sec.
*Les noms de marque des produits de nettoyage sont des marques déposées des différents fabricants.
** Pour commander directement, composer le 1-800-688-2002.
REMARQUE: N’utiliser qu’un tampon à récurer
ne «rayant pas», PROPRE et HUMIDE, sans danger pour les ustensiles de cuisine non adhérents.
Le verre et le motif seront endommagés si le tampon n’est pas humide, s’il est souillé ou si un autre
type de tampon est utilisé.
• Saletés cuites ou desséchées – Frotter
avec un tampon à ré curer «ne rayant pas» et
Cooktop Cleaning Creme (pièce n°
20000001)**. Tenir une lame de rasoir à un
angle de 30° et gratter pour enlever toute
saleté restante. Puis, nettoyer comme il est
décrit ci-dessus.
• Plastique ou sucre fondu – Régler
ACCESSOIRES
REMARQUE: Ne pas se servir de la lame de rasoir
tous les jours, cela pourrait user le motif du verre.
immédiatement l’élément sur LOW et gratter
le sucre et le plastique de la surface chaude pour
les pousser vers une zone moins chaude. Puis,
éteindre l’élément et le laisser
refroidir. Nettoyer le
résidu avec un grattoir
à lame de rasoir et
Cooktop Cleaning
Creme (pièce n°
20000001)**.
ÉLÉMENT POUR MARMITES
DE
CONSERVES
Modèle A145A
L’élément pour marmites de
conserves permet l’utilisation de récipients de grande
taille, à fond nervuré ou à
rebords, avec le module conventionnel à
éléments en spirale.
Suivez ces méthodes pour faire des conserves:
• Amener l’eau à ébullition sur le réglage Hi
(max.); une fois que l’ébullition a commencé,
réduire la puissance de chauffage au réglage le
plus faible pour maintenir l’ébullition.
• S’assurer que le récipient s’adapte bien sur le
centre de l’élément.
• Les récipients à fond plat donnent les meilleurs
résultats.
RIGHT WRONG WRONG
OUI NON NON
• Choisir des recettes d’une source connue
• La préparation de conserves est un proces-
• Si la région connaît des baisses de tension, la
WOK
Modèle A0142
Utiliser le wok à fond
plat de Jenn-Air pour
obtenir les meilleurs résultats. Le wok modèle
AO142 comporte un fini non adhérent, des
poignées en bois, un couvercle, un support pour
cuisson à la vapeur, des spatules, des recettes
et conseils de cuisson.
GRILL ÉLÉCTRIQUE
comme le fabricant de votre récipient et les
fabricants des bocaux de conserves.
sus qui produit de grandes quantités de vapeur.
Suivre les instructions données avec les
ustensiles pour éviter de se brûler par la
vapeur ou par les récipients chauds.
préparation des conserves risque de prendre plus longtemps qu’il n’est indiqué dans
les instructions.
Modèle JEA8000ADB
Comprend un élément grilloir, deux grilles et
un bac de récupération.
COUVERCLE
DE
Modèle A341
Le couvercle de gril protège
le gril lorsqu’il n’est pas
utilisé. Il existe en acier
texturé de couleur noire ou
blanche avec poignées
moulées.
GRIL
13
Page 15

PLAQUE CHAUFFANTE
INSTALLATION
MODÉLE JEA8200ADX
1. S’assurer que les commandes sont à l’ARRÊT.
La cavité doit être vide et propre. La nettoyer
ainsi que l’élément grilloir.
2. Placer la plaque sur l’élément grilloir pour
que les orifices d’évacuation soient sur le
devant. Cela permet à la graisse de s’écouler
dans le contenant à graisse.
COLLECTION EXPRESSIONS
MODÉLE AO310
1. S’assurer que les commandes sont à l’ARRÊT.
2. Coulisser la plaque vers la prise pour bien
®
La cavité doit être vide et propre.
engager la fiche. La plaque doit reposer sur
la cavité.
REMARQUE: Le bac de récupération peut
rester en place mais cela n’est pas nécessaire.
UTILISATION DE LA
PLAQUE
1. Avant le premier emploi, laver la plaque dans
de l’eau savonneuse très chaude, rincer et
sécher. Puis préparer la surface en
badigeonnant la plaque d’une mince couche
d’huile de cuisson ou de shortening. Enlever
l’excès d’huile ou de shortening en essuyant
à nouveau avec un autre essuie-tout. NE
PAS utiliser de produit de cuisson à
vaporiser sur la surface de la plaque.
2. Préchauffer la plaque comme il est indiqué
sur les tableaux.
3. Utiliser des ustensiles ou spatules non
métalliques pour la cuisson afin de ne pas
endommager le fini.
4. Pour la cuisson de viande, utiliser la hotte
de cuisinière ou le ventilateur à aspiration
vers le bas pour capter la fumée.
GUIDE DE CUISSON SUR
LA
PLAQUE CHAUFFANTE
M
ODÈLE
Prechauffage 5 minutes Prechauffage 5 à10 minutes au réglage pré-
sur puissance Hi. cisé – ne pas préchauffer sur réglage Hi.
Articles Réglage Côté 1 Côté 2 Réglage Côté 1 Côté 2
Saucisses plates Hi 4-5 mn. 2-4 mn. 9-10 4-5 mn. 2-4 mn.
Bacon Hi 3-5 mn. 2-3 mn. 10 3-5 mn. 2 mn.
Tranche de jambon Hi 4 mn. 4 mn. 9 4 mn. 2 mn.
Hamburgers Hi 5-6 mn. 5-6 mn. 9 6 mn. 5 mn.
Bâtonnets de poisson Hi 5 mn. 4-5 mn. 8 5-7 mn. 5-6 mn.
Hot Dogs 10 5-6 mn. 4-5 mn. 10 5-6 mn. 4-5 mn.
Petits pains Hi 2-3 mn. ----- 9 3 mn. ----Pain doré 10 3-4 mn. 2-3 mn. 10 2-3 mn. 2-3 mn.
Sandwichs grillés 10 4-5 mn. 3-4 mn. 9 4 mn. 3 mn.
Crêpes 10 2-3 mn. 1-2 mn. 10 2 mn. 1-2 mn.
Oeufs 6-7 2-3 mn. (1) mn. 7 2-3 mn. (1) mn.
AO310 M
Durée de cuisson approx. Durée de cuisson approx.
○○○○○○○○○○○○○○○○○○○○○○
○○○○○○○○○○○○○○○○○○○○○○
ODÈLE
JEA8200ADX
○○○○○○○○○○○○○○○○○○○○○○
○○○○○○○○○○○○○○○○○○○○○○
NETTOYAGE
REMARQUE: NE PAS TREMPER LA FICHE
DANS L’EAU (MODÈLE AO310 SEULEMENT).
VOIR D’AUTRES INSTRUCTIONS SUR LE
DESSOUS DE LA PLAQUE.
1. Une fois que la plaque a refroidi (NE PAS
TREMPER UNE PLAQUE CHAUDE DANS
L’EAU FROIDE), la laver à l’eau chaude dans
l’évier avec du détergent ou du savon.
S’assurer de retirer tous les résidus
alimentaires avant de cuire à nouveau sur la
plaque chauffante.
2. Retirer les taches rebelles avec un tampon
plastique. Pour de meilleurs résultats,
n’utiliser que les produits de nettoyage
recommandés pour les surfaces de
nettoyage non adhérentes. Ne pas utiliser
de laine d’acier ou de tampon de
récurage très fort.
3. NE PAS laver au lave-vaisselle.
Remarque: Ces indications ne servent que de guides pour les durées et réglages. Des facteurs
comme une tension basse, la quantité d’aliment et la température de l’aliment peuvent modifier les
durées et les réglages qui assureront les meilleurs résultats.
14
Page 16

GARANTIE DE LA
CUISINIÈRE
Garantie complète d’une année – Pièces et maind’oeuvre
Durant une période d’un (1) an à compter de la date de
l’achat initial, toute pièce qui se révélerait défectueuse dans
les conditions normales d’usage ménager sera réparée/
remplacée gratuitement.
Garantie limitée - pièces seulement
Deuxième année - Après la première année suivant la
date de l’achat initial, toute pièce qui se révélerait défectueuse
dans des conditions normales d’usage ménager sera réparée
ou remplacée gratuitement (pièce seulement); le propriétaire
devra assumer tous les autres frais, y compris les frais de
main-d’oeuvre, de déplacement et de transport.
De la troisième à la cinquième année à compter de la
date de l’achat initial au détail, les pièces de la liste ci-dessous
qui se révéleraient défectueuses dans des conditions
normales d’usage ménager seront réparées ou remplacées
gratuitement (pièces seulement); le propriétaire devra
assumer tous les autres frais, y compris les frais de maind’oeuvre, de déplacement et de transport.
• Surface de cuisson en vitrocéramique: Par suite de
bris thermique.
• Éléments chauffants électriques: Éléments de surface,
de gril et de cuisson sur appareils de cuisson électrique.
Résidents canadiens
Les garanties ci-dessus couvrent un appareil installé au Canada
seulement s’il a été agréé par les agences de test habilitées
(vérification de la conformité à une norme nationale du
Canada), sauf si l’appareil a été introduit au Canada à l’occasion
d’un changement de résidence des États-Unis vers le Canada.
Garantie limitée hors des États-Unis et du Canada Pièces seulement
Pendant deux (2) ans à compter de la date de l’achat initial
au détail, toute pièce qui se révélerait défectueuse dans des
conditions normales d’usage ménager sera réparée ou
remplacée gratuitement (pièce seulement); le propriétaire
devra assumer tous les autres frais, y compris les frais de
main-d’oeuvre, de déplacement et de transport.
Les garanties spécifiques formulées ci-dessus sont les SEULES
que le fabricant accorde. Cette garantie vous confère des droits
juridiques spécifiques et vous pouvez également jouir d’autres
droits, variables d’un état à l’autre.
JENN-AIR
NE SONT PAS COUVERTS PAR CETTE GARANTIE:
1. Les dommages ou dérangements dus à:
a.Mise en service, livraison ou entretien effectués incorrectement.
b.Toute réparation, modification, altération et tout réglage non autorisés par
c.Accidents, mauvaise utilisation ou usage abusif ou déraisonnable.
d.Alimentation électrique (tension, intensité) incorrecte.
e.Réglage incorrect d’une commande.
2. Les garanties ne peuvent être honorées si les numéros de série d’origine ont
été enlevés, modifiés ou ne sont pas facilement lisibles.
3. Appareils achetés aux fins d’usage commercial ou industriel.
4. Les frais de visite d’un prestataire de service ou de service après-vente encourus
pour les raisons suivantes:
a.Correction d’erreurs de mise en service.
b.Initiation de l’utilisateur à l’emploi de l’appareil.
c.Transport de l’appareil aux locaux du prestataire de service.
5. Dommages secondaires ou indirects subis par toute personne suite au non-
respect de la garantie. Certains états ne permettent pas l’exclusion ou la limitation des dommages secondaires ou indirects; par conséquent les limitations
ou exclusions ci-dessus peuvent ne pas s’appliquer à votre cas.
SI L’INTERVENTION D’UN RÉPARATEUR EST
NÉCESSAIRE
• Contacter le revendeur chez qui l’appareil a été acheté, ou contacter Maytag
Appliances Sales Company/service-client Jenn-Air au 1-800-688-1100, pour
obtenir les coordonnées d’une agence de service agréée.
• Veiller à conserver la facture d’achat pour justifier de la validité de la garantie.
Pour d’autres informations en ce qui concerne les responsabilités du propriétaire
à l’égard du service sous garantie, voir le texte de la GARANTIE.
• Si le revendeur ou l’agence de service après-vente ne peut résoudre le problème,
écrire à Maytag Appliances Sales Company, attention CAIR
2370, Cleveland, TN 37320-2370 ou téléphoner au 1-800-688-1100.
REMARQUE: Lors de tout contact concernant un problème, fournir
l’information suivante:
a.Nom, adresse et numéro de téléphone du client;
b.Numéro de modèle et numéro de série de l’appareil;
c.Nom et adresse du revendeur ou de l’agence de service;
d.Description claire du problème observé;
e.Preuve d’achat (facture de vente).
• Les guides d’utilisation, les manuels de service et les renseignements des pièces
sont disponibles auprès de Maytag Appliances Sales Company, service-client
Jenn-Air.
le fabricant ou par un prestataire de service après-vente agréé.
®
Center, P.O. Box
15
Page 17

CARTUCHOS Y ACCESORIOS JENN-AIR
CARTUCHOS Y ACCESORIOS JENN-AIR
GUÍA
GUÍA
DEL USUARIO
DEL USUARIO
TABLA DE MATERIAS
Instrucciones Importantes sobre Seguridad................. 17-18
Cartuchos de Cubiertas de Estufas Eléctricas ............. 18-21
Accesorios ................................................................................. 21
Parrilla Eléctrica ........................................................................ 22
Garantía ...................................................................................... 23
®
Page 18

INSTRUCCIONES IMPORTANTES
SOBRE SEGURIDAD
Instalador: Por favor deje esta guía
junto con el eléctrodoméstico.
Consumidor: Por favor lea y conserve esta guía para referencia futura.
Conserve el recibo de compra y/o el
cheque cancelado como prueba de
compra.
Número de Modelo
–– ␣ ––␣ ––␣ –– ␣ ––␣ –– –– ␣ ––␣ ––
Número de Serie
–– ␣ ––␣ ––␣ –– ␣ ––␣ –– –– ␣ ––␣ ––
Fecha de Compra
_______________________________
Si tiene alguna pregunta, llame
a:
Jenn-Air Customer Assistance
1-800-688-1100
(Lunes – Viernes, 8:00 a.m. – 8:00
p.m. Hora del Este)
Internet: http://www.jennair.com
Para información sobre servicio,
ver página 23.
LEA ESTAS INSTRUCCIONES ANTES DE USAR LA CUBIERTA O LA ESTUFA
Todos los electrodomésticos – cualquiera
que sea el fabricante – tienen la
posibilidad de crear problemas de
seguridad si se usan de manera
inapropiada o negligente. Por lo tanto,
se deben observar las siguientes precauciones de seguridad cuando utilice los
accesorios y cartuchos Jenn-Air.
P
RECAUCIONES GENERALES
NUNCA utilice la estufa para entibiar o
calentar la habitación.
Use ropas adecuadas. Nunca se deben usar
ropas sueltas u holgadas cuando esté usando la
estufa.
No repare ni reemplace ninguna pieza de la
estufa a menos que sea específicamente
recomendado en este manual. Todas las otras
reparaciones deben ser realizadas por un
técnico autorizado de Jenn-Air.
No se deben guardar materiales inflamables
cerca de los elementos superiores.
Use tomaollas secos solamente. Los tomaollas
húmedos o mojados en las superficies calientes
pueden causar quemaduras a causa del vapor.
No deje que el tomaollas toque los elementos
calientes. No utilice una toalla ni ningún otro
paño abultado.
NUNCA deje desatendidos los elementos
superiores en los ajustes altos. Los derrames
causan humo y los derrames grasosos pueden
prender fuego.
Cuando la estufa no esté en uso, mantenga
todos los controles en la posición “OFF”
(Apagado).
No use agua para apagar incendios de grasa.
Use bicarbonato de soda o un extinguidor
del tipo con un producto químico o espuma
para apagar el incendio o las llamas.
S
EGURIDAD DE LOS NIÑO
NUNCA deje a los niños solos o sin
supervisión cerca de la estufa cuando esté en
uso o cuando todavía esté caliente.
NUNCA permita que los niños se sienten o
se paren en ninguna parte de la estufa pues se
pueden lesionar o quemar.
NUNCA guarde artículos que sean de interés
para los niños en los armarios situados arriba
de la estufa. Los niños que se suban a la estufa
para alcanzar algún artículo pueden sufrir una
lesión grave.
E
LEMENTOS TUBULARES
En las cubiertas con elementos convencionales,
asegúrese de que los platillos protectores estén
en sus lugares. La ausencia de estos platillos
cuando está cocinando puede dañar el
alambrado o componentes que están debajo.
NUNCA use papel de aluminio para forrar
los platillos protectores de los elementos
superiores o la bandeja de la parrilla. Si se
instala este tipo de forro se puede ocasionar
un choque eléctrico o un peligro de incendio.
Utensilios de vidrio - solamente ciertos tipos
de utensilios de vidrio, vidrio cerámico,
cerámica, gres u otros utensilios de vidrio son
adecuados para uso en la cubierta sin quebrarse
debido al cambio repentino de temperatura.
Siga las instrucciones del fabricante del utensilio
cuando utilice utensilios de vidrio.
S
En nuestro continuo afán de
mejorar la calidad y
rendimiento de nuestros
electrodomésticos, puede
que sea necesario modificar
el eléctrodoméstico sin
actualizar esta guía.
EN C
Apague la estufa y la campana extractora a fin
de evitar que las llamas se dispersen. Extinga
las llamas luego encienda la campana
extractora para expulsar el humo y el olor.
• Apague el fuego o llamas en una sartén con
ASO DE INCENDIO
una tapa o con una bandeja de hornear.
NUNCA levante ni mueva una sartén en
llamas.
17
Los mangos de los utensilios deben quedar
dirigidos hacia adentro y que no se extiendan
sobre los elementos superiores adyacentes
para evitar quemaduras, encendido de
materiales inflamables y derrames debido a
contacto accidental con el utensilio.
No remoje ni sumerja los elementos
removibles en agua.
Page 19

E
LEMENTOS RADIANTES
CARTUCHOS DE CUBIERTAS DE
ESTUFAS ELÉCTRICAS
DE H
Y
NUNCA cocine en la cubierta de vidrio
cerámico si está quebrada. Los productos
de limpieza y los derrames pueden penetrar
a través de la cubierta quebrada y crear un
peligro de choque. Póngase en contacto con
un técnico calificado inmediatamente.
Limpie las cubiertas de vidrio cerámico con
cuidado. Si se usa una esponja o un paño
mojado para limpiar derrames en una
cubierta que esté caliente, tenga cuidado a
fin de evitar sufrir quemaduras a causa del
vapor. Algunos limpiadores pueden producir
vapores nocivos cuando se aplican a una
superficie caliente.
S
EGURIDAD DE LOS
U
TENSILIOS
Use utensilios de tamaño adecuado. Muchas
estufas están equipadas con uno o más
elementos calefactores de diferentes
tamaños. Seleccione los utensilios que tengan
la base plana lo suficientemente grande para
cubrir el elemento calefactor superior. El uso
de utensilios de tamaño incorrecto dejará
una parte del elemento expuesta a contacto
directo y puede ocasionar encendido de la
ropa. La relación apropiada entre el utensilio
y el elemento calefactor tambié n mejorará
la eficacia y rendimiento.
ALÓGENO
CONSERVE ESTAS
INSTRUCCIONES
PARA
REFERENCIA
FUTURA
E
LEMENTO CONVENCIONAL
JEA7000ADB (negro) JEA8130ADB (negro) JEA8120ADB (negro)
JEA7000ADW (blanco) JEA8130ADW (blanco) JEA8120ADW (blanco)
JEA7000ADS (inoxidable) ColecciónExpressions
ColecciónExpressions
AC110B/W
ELEMENTOS TUBULARES
CONVENCIONALES
El cartucho de elemento tubular convencional
es el más versá til de los cartuchos. Cuando un
elemento está encendido, se encenderá y apagará
para mantener el ajuste de calor.
ELEMENTOS RADIANTES
Y DE HALÓGENO
Las dos áreas de la cubierta de vidrio cerámico
donde se puede cocinar están identificadas por
círculos. Cuando se enciende un elemento, la
cubierta se calienta y se puede ver el reflejo
rojo del elemento a través del vidrio cerá mico.
(NOTA: En el caso de los elementos de
halógeno, un foco circular de halógeno brillará
instantáneamente.) Es normal ver el reflejo rojo
del elemento cuando se enciende. El elemento
se encenderá y apagará para todos los ajustes
de control, excepto para ‘Hi’ (Alto). Sin embargo, también puede encenderse y apagarse en
el ajuste ‘Hi’ si se usan utensilios inadecuados.
:H
ALÓGENO
®
: AH151B/W AR141B/W
:R
®
: ColecciónExpressions®:
ADIANTE
ADVERTENCIAS:
• NO use protectores de alambre,
almohadillas ni ningún otro tipo de
estos artículos entre el utensilio y
el elemento.
• NO cocine los alimentos
directamente en la cubierta.
• NO deje que un utensilio hierva
hasta quedar seco pues esto puede
dañar la cubierta y el utensilio.
• NO deslice utensilios de metal
pesado o de vidrio a través de la
cubierta de vidrio cerámico pues
pueden rayar la cubierta.
• NO use ni coloque artículos de
plástico en ningún lugar sobre la
cubierta.
• NO use el cartucho en caso de que
haya ocurrido una rotura.
• NO deje caer utensilios pesados
sobre la superficie de la cubierta.
:
18
Page 20

CARTUCHOS DE CUBIERTAS DE ESTUFAS ELÉCTRICAS, CONT.
P
SELECCIÓN DE LOS
UTENSILIOS
ADECUADOS
• Selecciones utensilios gruesos. Por lo
general los utensilios gruesos no cambian de
forma cuando son calentados.
• Use utensilios con fondos planos y
suaves. Para determinar si el utensilio es
plano, coloque el borde de una regla en la
parte inferior. Sujétela contra la luz. No se
debe ver luz entre el borde de la regla y la
parte inferior del utensilio. No utilice ningún
utensilio cuya parte inferior no quede
totalmente plana contra el borde de la regla.
• Haga coincidir el tamaño del utensilio
con el tamañ o del elemento. Los
utensilios deben ser del mismo tamaño o
ligeramente más grandes que el elemento.
UTENSILIOS INAPROPIADOS
• NO use utensilios que se extiendan más de
una pulgada más allá del área para cocinar.
• No se deben usar utensilios cuyo diámetro
sea menor que área para cocinar. Esto no
sólo causa que el elemento requiera más
energía y más tiempo sino que también se
pueden producir derrames que se esparcen
hacia el área de cocinar resultando en que
tendrá que limpiarlos.
• NO use artículos especiales que no sean
planos, de tamaño muy grande, disparejos o
que no cumplan las especificaciones indicadas
para los utensilios apropiados, tales como
woks de fondo redondo con anillos, parrillas,
ollas de calentar conservas, etc. Los utensilios
grandes, tales como ollas a presión o sartenes
de gran tamaño deben ser usados solamente
los cartuchos tubulares convencionales.
• Los utensilios de vidrio cerámico, gres, vidrio
resistente al calor o de vidrio pueden rayar
la cubierta de vidrio cerámico y por lo tanto
no se recomiendan.
• NOTA: En los cartuchos de halógeno
solamente, los utensilios de aluminio pueden
hacer que el elemento pase por ciclos de
encendido y apagado cuando el ajuste está
en “Hi”.
PROCEDIMIENTOS
PARA COCINAR
Todos los Cartuchos:
• Antes del primer uso limpie el cartucho de
la cubierta. (Ver instrucciones detalladas, pág.
20.)
• Para obtener los mejores resultados, siempre
utilice los utensilios recomenda dos.
• Las diversas cubiertas y diversas cantidades
de alimentos que se preparan influirán los
ajustes de control necesarios para obtener
los mejores resultados. (Vea la Guía de Uso
y Cuidado de la estufa o de la cubierta para
los ajustes de control típicos.) Para cocción
más rápida, comience con el control superior en ‘Hi’ durante un minuto; luego gire el
control al ajuste deseado. Si se tapan los
utensilios, siempre que sea posible, se acelera
la cocción y se ahorra energía.
Cartuchos Radiantes y de Halógeno:
• El área de cocinar de vidrio cerámico retiene
el calor por un período de tiempo después
de que se han apagado los elementos.
Aproveche este calor retenido. Apague los
elementos unos pocos minutos antes de que
los alimentos estén listos y use el calor
retenido para finalizar la cocción. Debido a
esta característica de retención del calor, los
elementos no responderán tan rá pidamente
a los cambios que se hagan a los ajustes de
temperatura como los elementos tubulares.
En caso de un posible derrame debido a un
hervor, retire el utensilio del área de cocinar.
• Cuando prepare alimentos que se pueden
quemar o recocer fácilmente, comience a
cocinar en un ajuste de temperatura más bajo
y aumente gradualmente la temperatura
como sea necesario.
• Puede que sea necesario un ajuste más alto
que lo normal cuando use utensilios hechos
de material que sea lento para conducir el
calor, tal como de hierro forjado.
• Se puede usar un ajuste más bajo cuando
cocine cantidades pequeñas de alimentos o
cuando use un utensilio que conduce
rápidamente el calor.
ARA EVITAR QUE SE DAÑE LA
DE
CUBIERTA
Cartuchos Radiantes y de Halógeno
Solamente:
• No use utensilios de vidrio. Ellos pueden rayar
la superficie.
• No deje que se derrita plástico, azúcar o alimentos con un alto contenido de azúcar en
la cubierta caliente. Si ésto sucede, limpie inmediatamente. (Ver Limpieza, páginas 20 y 21.)
• Nunca deje que un utensilio hierva hasta
quedar seco pues puede dañar el utensilio y
la cubierta.
• Nunca use la cubierta como una superficie
de trabajo o como tabla de cortar. Nunca
cocine alimentos directamente sobre la
cubierta.
• No deslice utensilios de aluminio a través de
la cubierta caliente. Los utensilios pueden
dejar marcas que deben ser limpiadas inmediatamente. (Ver Limpieza, páginas 20 y 21.)
• Asegúrese de que la cubierta y la parte inferior del utensilio estén limpios antes de
encender la cubierta a fin de evitar rayaduras.
• Para evitar rayaduras o daño a la cubierta de
vidrio cerámico, no deje azúcar, sal o grasas
en el área de cocinar. Limpie la superficie de
la cubierta con un paño limpio o toallas de
papel antes de usarla.
• No deslice utensilios de metal pesado a través
de la cubierta pues pueden producir
rayaduras.
• No use papel de aluminio ni envases del tipo
papel de aluminio. El aluminio se puede
derretir sobre el vidrio. Si se derrite metal
sobre la cubierta, no la use. Llame a un técnico
autorizado de Jenn-Air.
• Si se produce un derrame cuando esté
cocinando, limpie inmediatamente el derrame
mientras el área de cocinar esté caliente para
evitar una limpieza más difícil posteriormente.
Usando mucho cuidado, limpie el derrame
con una toalla limpia y seca.
• No utilice polvos de limpieza abrasivos o
esponjas de restregar que rayen la cubierta.
• No use blanqueador a base de cloro,
amoníaco u otro limpiador no recomendado
específicamente para usar en vidrio cerámico.
VIDRIO CERÁMICO
–
19
Page 21

LIMPIEZA
• Asegúrese de que la estufa esté
apagada y que todas las piezas estén
frías antes de manipularla o
limpiarla. Esto es para evitar daño y
posibles quemaduras.
• NO es necesario retirar el cartucho de
la cubierta para la limpieza normal.
• NUNCA sumerja el cartucho en agua para
limpiarlo. Esto puede dañar el alambrado.
Un agujero de drenaje dentro del cartucho
permite el drenaje de los derrames
normales en un depósito de porcelana
desde donde se escurrirán al depósito de
la grasa. La parte inferior del cartucho
puede limpiarse con una solución de
detergente si es necesario.
C
ARTUCHO TUBULAR
C
ONVENCIONAL
–
ELEMENTOS CALEFACTORES
• Bajo condiciones normales, la mayoría de
la suciedad se quemará en los elementos.
Los elementos calefactores pueden
desenchufarse para facilitar la limpieza de
los platillos protectores. Levante
ligeramente y tire del elemento alejándolo
del receptáculo. NO LO SUMERJA EN
AGUA. Para volver a colocar los elementos,
inserte completamente en el receptáculo.
Asegú rese de que el elemento quede plano.
PLATILLOS PROTECTORES
• Para mantenerlos como nuevos, limpie
frecuentemente y nunca permita que algo
se queme dos veces. Retire los platillos
protectores que estén sucios (primero
retire el elemento calefactor). Limpie los
platillos protectores que no estén muy
sucios con agua y jabón o lávelos en el
lavavajillas.
• Las manchas difíciles pueden ser limpiadas
frotando suavemente con esponjas con
jabón S.O.S.* o limpiadores no abrasivos
tal como ‘Bon Ami’. Para ayudar a limpiar
la suciedad quemada, remoje en una
solución de taza de amoníaco y 1 galón
de agua tibia o hierva en 2 cuartos de
galón de agua durante 20 minutos. (No
se pueden hervir todos los platillos
protectores al mismo tiempo pues el
elemento que se esté usando debe tener
un platillo protector en su lugar.)
• No use limpiadores abrasivos, lana de
acero ni limpiadores no recomendados
para uso en cromo. Las manchas de color
azul/dorado en los platillos protectores
indica selección inapropiada de utensilios
y/o uso de calor excesivamente alto y no
se pueden eliminar.
CUBIERTA DE PORCELANA
• La porcelana esmaltada usada en su cubierta
es resistente a los ácidos, no a prueba de
ácidos. Por lo tanto, los alimentos ácidos
(tal como el vinagre, los tomates, leche, etc.)
que se derraman sobre la cubierta deben
ser limpiados inmediatam ente con un
paño seco.
• Lave la cubierta fría con agua tibia con jabón
y enjuague. Frote con una paño seco.
• No use agentes de limpieza abrasivos o
cáusticos pues pueden dañar permanentemente el acabado.
• NUNCA limpie una superficie de
porcelana esmaltada tibia o caliente con un
paño húmedo.
CUBIERTA DE ACERO
INOXIDABLE
• Antes de usar la cubierta, retire todas las
piezas de plástico que cubren la parte superior. Use un limpiador de vidrio para
sacar cualquier residuo de plá stico que
pueda quedar en la parte superior y dentro
de los anillos que sostienen a los platillos
protectores. Si quedan residuos en la
cubierta, se pueden quemar y después
serían difíciles de sacar.
• NO USE NINGUN PRODUCTO DE
LIMPIEZA QUE CONTENGA BLANQUEADOR A CASE DE CLORO.
• SIEMPRE LIMPIE EL ACERO A FAVOR
DEL GRANO.
• Limpieza Diaria/Suciedad Leve –
Limpie con uno de los siguientes – agua
con jabón, una solución de vinagre blanco
con agua, limpiador para vidrio y cubiertas
‘Formula 409’* o un limpiador similar para
superficies mú ltiples – usando una esponja
o un paño suave. Enjuague y seque. Para
lustrar y evitar marcas de los dedos, use el
producto ‘Stainless Steel Magic Spray’ (JennAir Modelo A912, Pieza No. 20000008)**.
• Suciedad Moderada/Manchas
Rebeldes – Limpie con uno de los
siguientes – ‘Bon Ami’, ‘Smart Cleanser’ o
‘Soft Scrub’* - usando una esponja húmeda
o un paño suave. Enjuague y seque. Las
manchas difíciles pueden ser quitadas con
una esponja ‘Scotch-Brite’* húmeda; frote
a favor del grano. Enjuague y seque. Para
restaurar el lustre y sacar las vetas, aplique
‘Stainless Steel Magic Spray’.
• Decoloración – Usando una esponja
mojada o un paño suave, limpie con
limpiador para acero inoxidable ‘Cameo
Stainless Steel Cleaner’*. Enjuague
inmediatamente y seque. Para sacar las
vetas y restaurar el lustre, utilice ‘Stainless
Steel Magic Spray’.
CARTUCHO RADIANTE Y DE
HALÓGENO -CUBIERTA DE
VIDRIO CERÁMICO
• NUNCA use limpiadores de horno,
blanqueador a base de cloro, amoníaco o
líquidos limpiavidrios con amoní aco. NOTA:
Llame un técnico autorizado si la cubierta de
sigue
* Brand names for cleaning products are registered trademarks of the respective manufacturers.
**To order direct, call 1-800-688-8408.
20
Page 22

CARTUCHOS DE CUBIERTAS DE ESTUFAS ELÉCTRICAS, CONT.
LIMPIEZA, CONT.
vidrio cerámico se agrieta, rompe o si se derrite
en ella met al o papel de aluminio.
• Deje que la cubierta se enfríe antes de
limpiarla.
• Generalidades - Limpie la cubierta
después de cada uso o cuando sea
necesario, con una toalla de papel húmeda
y Cooktop Cleaning Creme* (Pieza No.
20000001)**. Luego lustre con una paño
limpio y seco.
NOTA: Se desarrollarán manchas
permanentes si la suciedad se deja que se
cocine una y otra vez al usar la cubierta
cuando está sucia.
• Manchas Rebeldes o Marcas de
Metal – Humedezca una esponja de goma
que no deje marcas. Aplique Cooktop
*Los nombres de los productos son marcas registradas de sus respectivos fabricantes.
** Para pedidos directos, llame al 1-800-688-8408.
Cleaning Creme* (Pieza No. 20000001)** y
frote para sacar tanta suciedad como sea
posible. Aplique una capa delgada de la
crema, cubra con una toalla de papel hú
meda y déjela reposar durante 30 a 45
minutos. Restriegue nuevamente, luego
limpie con un paño seco y limpio.
NOTA: Solamente use esponjas LIMPIAS,
HUMEDAS y que no rayen y que sean seguras
para utensilios con acabado antiadherente. Se
dañará el diseño y el vidrio si la esponja no
está húmeda, si la esponja está sucia o si se
usa otro tipo de esponja.
• Suciedades Quemadas o Pegadas –
Restriegue con una esponja que no deje
marcas y Cooktop Cleaning Creme* (Pieza
No. 20000001)**. Sostenga un restregador
con hoja de afeitar a un ángulo de 30° y
restriegue cualquier suciedad que
permanezca. Luego limpie como se
describió anteriormente.
NOTA: No use la hoja de afeitar para limpieza
diaria pues puede desgastar el diseño del vidrio.
• Plástico o Azúcar Derretida –
Inmediatamente encienda el elemento a
temperatura BAJA y restriegue y raspe el
azúcar o el plástico de la superficie caliente
hacia un área fría. Luego apague el
elemento y deje que se enfríe.
Limpie el residuo con un
raspador con hoja de
afeitar y Cooktop
Cleaning Creme*
(Pieza No.
20000001)**.
ACCESORIOS
E
LEMENTO PARA CALENTAR
C
ONSERVAS EN OLLA
G
RANDE
Modelo A145A
El Elemento para calentar
conservas permite el uso
de utensilios de gran
tamaño o con fondo ondeado con el cartucho
tubular convencional.
Cuando prepare conservas, siga los
siguientes procedimientos:
• Haga hervir el agua en el ajuste ‘Hi’; una vez
que el agua ha empezado a hervir, reduzca el
calor al mí nimo ajuste que la mantenga
hirviendo.
• Asegúrese de que el utensilio quede centrado
sobre el elemento.
RIGHT WRONG WRONG
S´I NO NO
• Los utensilios de fondo plano dan los
mejores resultados.
• Use recetas para preparar conservas
provenientes de una buena fuente tal
como del fabricante del utensilio y
fabricantes de frascos para conservas.
• La preparación de conservas es un
proceso que crea grandes cantidades de
vapor. Siga las instrucciones de los
equipos usados a fin de evitar quemaduras
a causa del vapor o de los frascos
calientes.
• Si el voltaje a veces es bajo en su área, la
preparación de las conservas puede
tomar más tiempo que el indicado en las
instrucciones.
21
W
OK
Modelo A0142
Use el wok Jenn-Air de
fondo plano para obtener
los mejores resultados. El wok Modelo AO142
tiene un acabado antiadherente, manijas de
madera, tapa, rejilla para el vapor, paletas para
el arroz, sugerencias para cocinar y recetas.
P
ARRILLA ELÉCTRICA
Modelo JEA8000ADB
Incluye el elemento de la parrilla, dos rejillas y
una bandeja protectora.
C
UBIERTA DE LA PARRILLA
Modelo A341
La cubierta de la parrilla,
protege la parrilla cuando
no está en uso. Está
disponible en acero
texturado en negro o
blanco con manijas
moldeadas.
Page 23

PARRILLA ELÉCTRICA
INSTALACIÓN
MODELO JEA8200ADX
1. Asegúrese de que los controles estén en
la posición ‘OFF’. La bandeja protectora
debe estar vacía y limpia. Inserte la bandeja
y el elemento.
2. Coloque la parrilla sobre el elemento de
modo que los agujeros de drenaje queden
en el frente. Esto permite que el exceso
de grasa se escurra dentro del depósito
de la grasa.
COLECCIÓN EXPRESSIONS
®
MODELO AO310
1. Asegúrese de que los controles estén en
la posición ‘OFF’. La bandeja protectora
debe estar vacía y limpia.
2. Deslice la parrilla hacia el receptáculo
hasta que la clavija terminal esté
completamente enchufada. La parrilla
debe descansar sobre la bandeja.
NOTA: La bandeja puede permanecer en
su lugar pero no es necesario.
COMO USAR LA
PARRILLA
1. Antes del primer uso, lave su parrilla
nueva en agua caliente con jabón,
enjuague y seque. Luego “acondiciones”
la superficie frotándola con una capa
delgada de aceite de cocinar o grasa.
Retire el exceso de aceite o de grasa
frotándola nuevamente con una toalla de
papel. NO use sprays de cocinar en la
superficie de la parrilla.
2. Precaliente la parrilla como se indica en
las tablas.
3. Use espátulas o utensilios que no sean
metálicos a fin de evitar dañar el acabado.
4. Cuando cocine carnes, use el ventilador
de aspiración descendente o la campana
extractora para capturar el humo.
LIMPIEZA
GUÍA PARA LA PARRILLA
P
ARRILLA
Precalentar Precalentar 5-10 minutos en el ajuste
5 minutois en Hi. especificado – No precalentar en Hi.
Ajuste del Tiempo de Cocción Aprox. Ajuste del Tiempo de Cocción Aprox.
Alimentos Control Lado 1 Lado 2 Control Lado 1 Lado 2
Empanadillas de Hi 4-5 min. 2-4 min. 9-10 4-5 min. 2-4 min.
Salchicha
Tocino Hi 3-5 min. 2-3 min. 10 3-5 min. 2 min.
Rebanada de Jamón Hi 4 min. 4 min. 9 4 min. 2 min.
Hamburguesas Hi 5-6 min. 5-6 min. 9 6 min. 5 min.
Palitos de Pescado Hi 5 min. 4-5 min. 8 5-7 min. 5-6 min.
Hot Dogs 10 5-6 min. 4-5 min. 10 5-6 min. 4-5 min.
Panecillos Hi 2-3 min. ----- 9 3 min. ----Tostadas Francesas 10 3-4 min. 2-3 min. 10 2-3 min. 2-3 min.
Sandwiches a la 10 4-5 min. 3-4 min. 9 4 min. 3 min.
Parrilla
Panqueques 10 2-3 min. 1-2 min. 10 2 min. 1-2 min.
Huevos 6-7 2-3 min. (1) min. 7 2-3 min. (1) min.
AO310 P
○○○○○○○○○○○○○○○○○○○○○○○○
○○○○○○○○○○○○○○○○○○○○○○○○
ARRILLA
JEA8200ADX
○○○○○○○○○○○○○○○○○○○○○○○○
○○○○○○○○○○○○○○○○○○○○○○○○
NOTA: NO SUMERJA LA CLAVIJA TERMINAL EN AGUA (MODELO AO310
SOLAMENTE). VER LA PARTE INFERIOR
DE LA PARRILLA PARA EL RESTO DE LAS
INSTRUCCIONES.
1. Una vez que se haya enfriado la parrilla
(NO SUMERJA UNA PARRILLA
CALIENTE EN AGUA FRIA), lave con
jabón o detergente en agua caliente en el
fregadero. Asegúrese de retirar todos los
residuos de alimentos antes de cocinar
nuevamente en la parrilla.
2. Limpie las manchas rebeldes con una
esponja plástica de red o una esponja
común. Para obtener mejores resultados,
use solamente aquellos productos de
limpieza recomendados para limpiar superficies antiadherentes. No use
esponjas de lana de acero o de
restregar que sean ásperas.
3. NO lave en el lavavajillas.
Nota: Estas son las guías sugeridas para los ajustes del control y los tiempos de cocción. Tales
factores como voltaje bajo, tamaño del alimento y temperatura del alimento, pueden afectar
los tiempos y los ajustes del control que proporcionan los mejores resultados.
22
Page 24

GARANTÍA DE LA
ESTUFA JENN-AIR
Garantía Completa de Un Año – Piezas y
Mano de Obra
Durante un (1) año desde la fecha original de compra
al por menor, se reparará o reemplazará gratuitamente
cualquier pieza que falle durante uso normal en el
hogar.
Garantías Limitadas – Piezas Solamente
Segundo Año - Después del primer año de la fecha
original de compra, se reemplazará o reparará
gratuitamente las piezas que fallen durante uso normal en el hogar en lo que respecta a las piezas y el
propietario deberá pagar todos los otros costos
incluyendo mano de obra, kilometraje y transporte.
Desde el Tercero hasta el Quinto Año – A partir
de la fecha original de compra, se reparará o
reemplazará gratuitamente las piezas indicadas a
continuación que fallen durante uso normal en lo que
respecta a las piezas y el propietario deberá pagar
todos los otros costos incluyendo mano de obra,
kilometraje y transporte.
• Cubierta de Vidrio Cerámico: Debido a rotura
térmica.
• Elementos Calefactores Eléctricos: Elementos
en los cartuchos de halógeno, radiantes y tubulares.
Residentes Canadienses
Las garantías anteriores cubren solamente aquellos
electrodomésticos instalados en Canadá que han sido
certificados o aprobados por las agencias de pruebas
correspondientes para cumplimiento con la Norma
Nacional de Canadá a menos que el electrodoméstico
haya sido traído a Canadá desde los EE.UU. debido a
un cambio de residencia.
Garantía Limitada Fuera de los Estados Unidos
y Canadá – Piezas Solamente
Durante dos (2) años de la fecha de compra original
al por menor, cualquier pieza que falle durante uso
normal en el hogar será reemplazada o reparada
gratuitamente en lo que respecta a la pieza y el
propietario deberá pagar todos los otros costos
incluyendo mano de obra, kilometraje y transporte.
Las garantías específicas expresadas anteriormente son
las UNICAS garantías provistas por el fabricante. Estas
garantías le otorgan derechos legales específicos y usted
puede tener además otros derechos que varían de un
estado a otro.
LO
QUE NO CUBREN ESTAS
1. Situaciones y daños resultantes de cualquiera de las siguientes eventualidades:
a. Instalación, entrega o mantenimiento inapropiados.
b. Cualquier reparación, modificación, alteración o ajuste no autorizado por
el fabricante o por un centro de servicio autorizado.
c. Mal uso, abuso, accidentes o uso irrazonable.
d. Corriente eléctrica, voltaje o suministro incorrecto.
e. Programación incorrecta de cualquiera de los controles.
2. Las garantías quedan nulas si los números de serie originales han sido retirados,
alterados o no son fácilmente legibles.
3. Productos comprados para uso comercial o industrial.
4. El costo del servicio o llamada de servicio para:
a. Corregir errores de instalación.
b. Instruir al usuario sobre el uso correcto del artefacto.
c. Transporte del artefacto al establecimiento de servicio.
5. Los daños consecuentes o incidentales sufridos por cualquier persona como
resultado del incumplimiento de esta garantía. En algunos estados no se
permite la exclusión o limitación de daños consecuentes o incidentales, por
lo tanto la limitación o exclusión anterior puede no aplicarse en su caso.
SI N
• Llame al distribuidor donde compró su electrodoméstico o llame a Maytag
• Asegúrese de conservar el comprobante de compra para verificar el estado
• Si el distribuidor o la compañía de servicio no pueden resolver el problema,
• Las guías del usuario, manuales de servicio e información sobre las piezas
ECESITA SERVICIO
Appliances Sales Company, Jenn-Air Customer Assistance al 1-800-688-1100
para ubicar a un técnico autorizado.
de la garantía. Consulte la sección sobre la GARANTIA para mayor información
sobre las responsabilidades del propietario para servicio bajo la garantía.
escriba a Maytag Appliances Sales Company, Attn: CAIR
2370, Cleveland, TN 37320-2370 o llame al 1-800-688-1100.
NOTA: Cuando llame o escriba acerca de un problema de servicio, por favor
incluya la siguiente información.
a. Su nombre, dirección y número de teléfono;
b. Número de modelo y número de serie;
c. Nombre y dirección de su distribuidor o técnico de servicio;
d. Una descripción clara del problema que está experimentando;
e. Comprobante de compra (recibo de compra).
pueden solicitarse a Maytag Appliances Sales Company, Jenn-Air Customer
Assistance.
G
ARANTÍAS
®
‚ Center, P.O. Box
JENN-AIR • 403 West Fourth Street North • P.O. Box 39 • Newton, Iowa 50208
Form No. A/11/00 Part No. 8111P421-60 74005584 Litho U.S.A .
 Loading...