

Page 1
Operating Instructions Models DW489-C & DW499-C
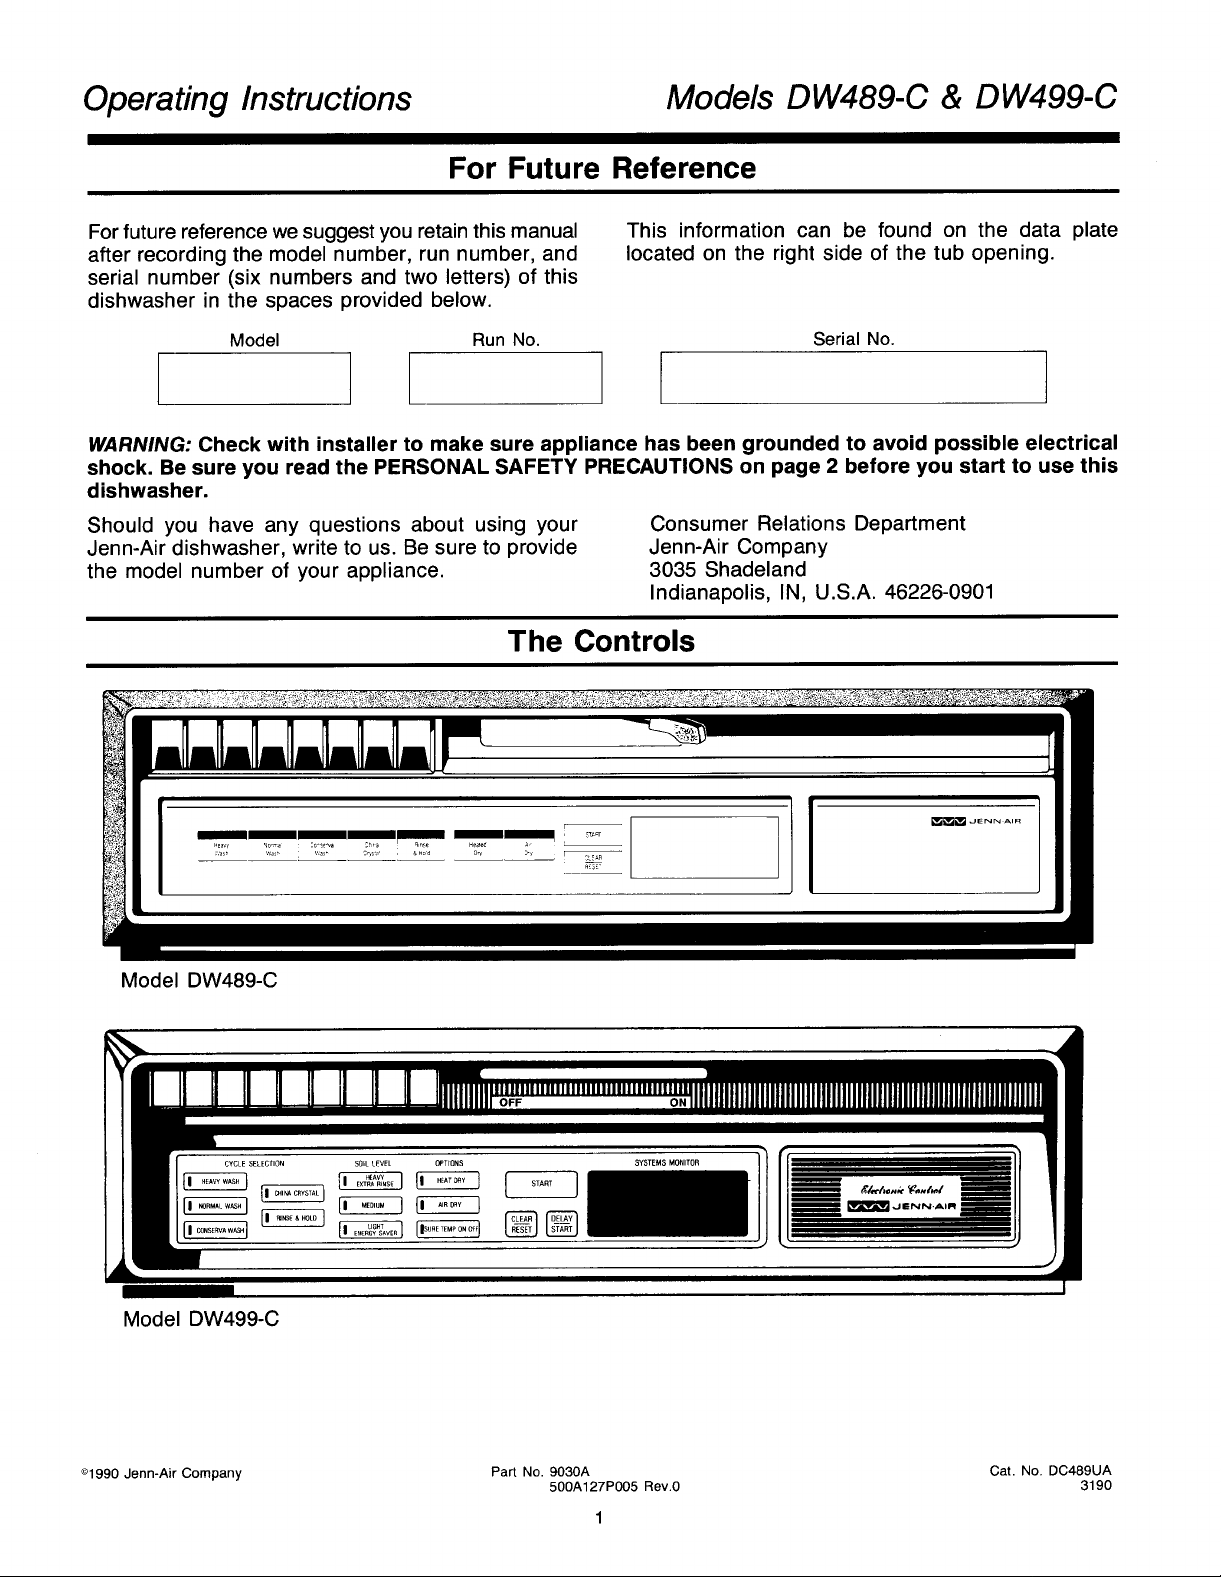
For Future Reference
Forfuture reference wesuggestyou retain this manual This information can be found on the data plate
after recording the model number, run number, and located on the right side of the tub opening.
serial number (six numbers and two letters) of this
dishwasher in the spaces provided below.
Model RunNo. SerialNo.
WARNING: Check with installer to make sure appliance has been grounded to avoid possible electrical
shock, Be sure you read the PERSONAL SAFETY PRECAUTIONS on page 2 before you start to use this
dishwasher.
Should you have any questions about using your Consumer Relations Department
Jenn-Air dishwasher, write to us. Be sure to provide Jenn-Air Company
the model number of your appliance. 3035 Shadeland
Indianapolis, IN, U.S.A. 46226-0901
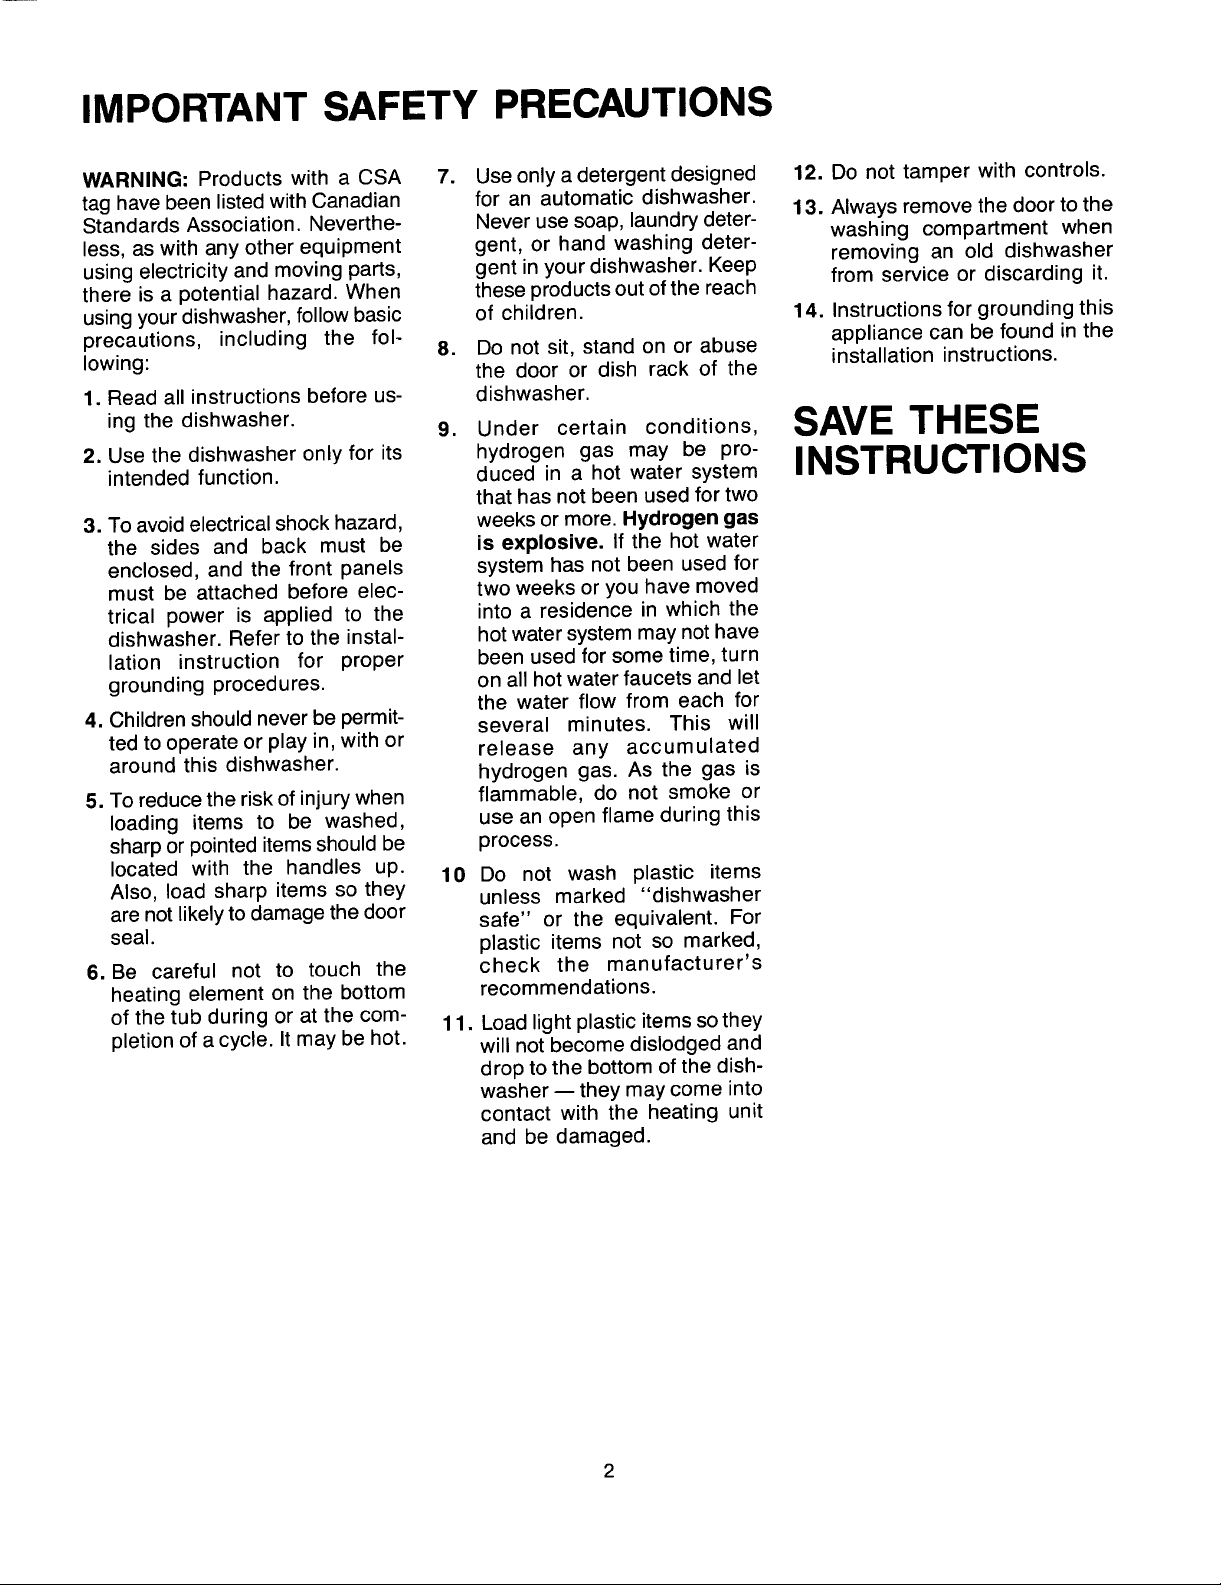
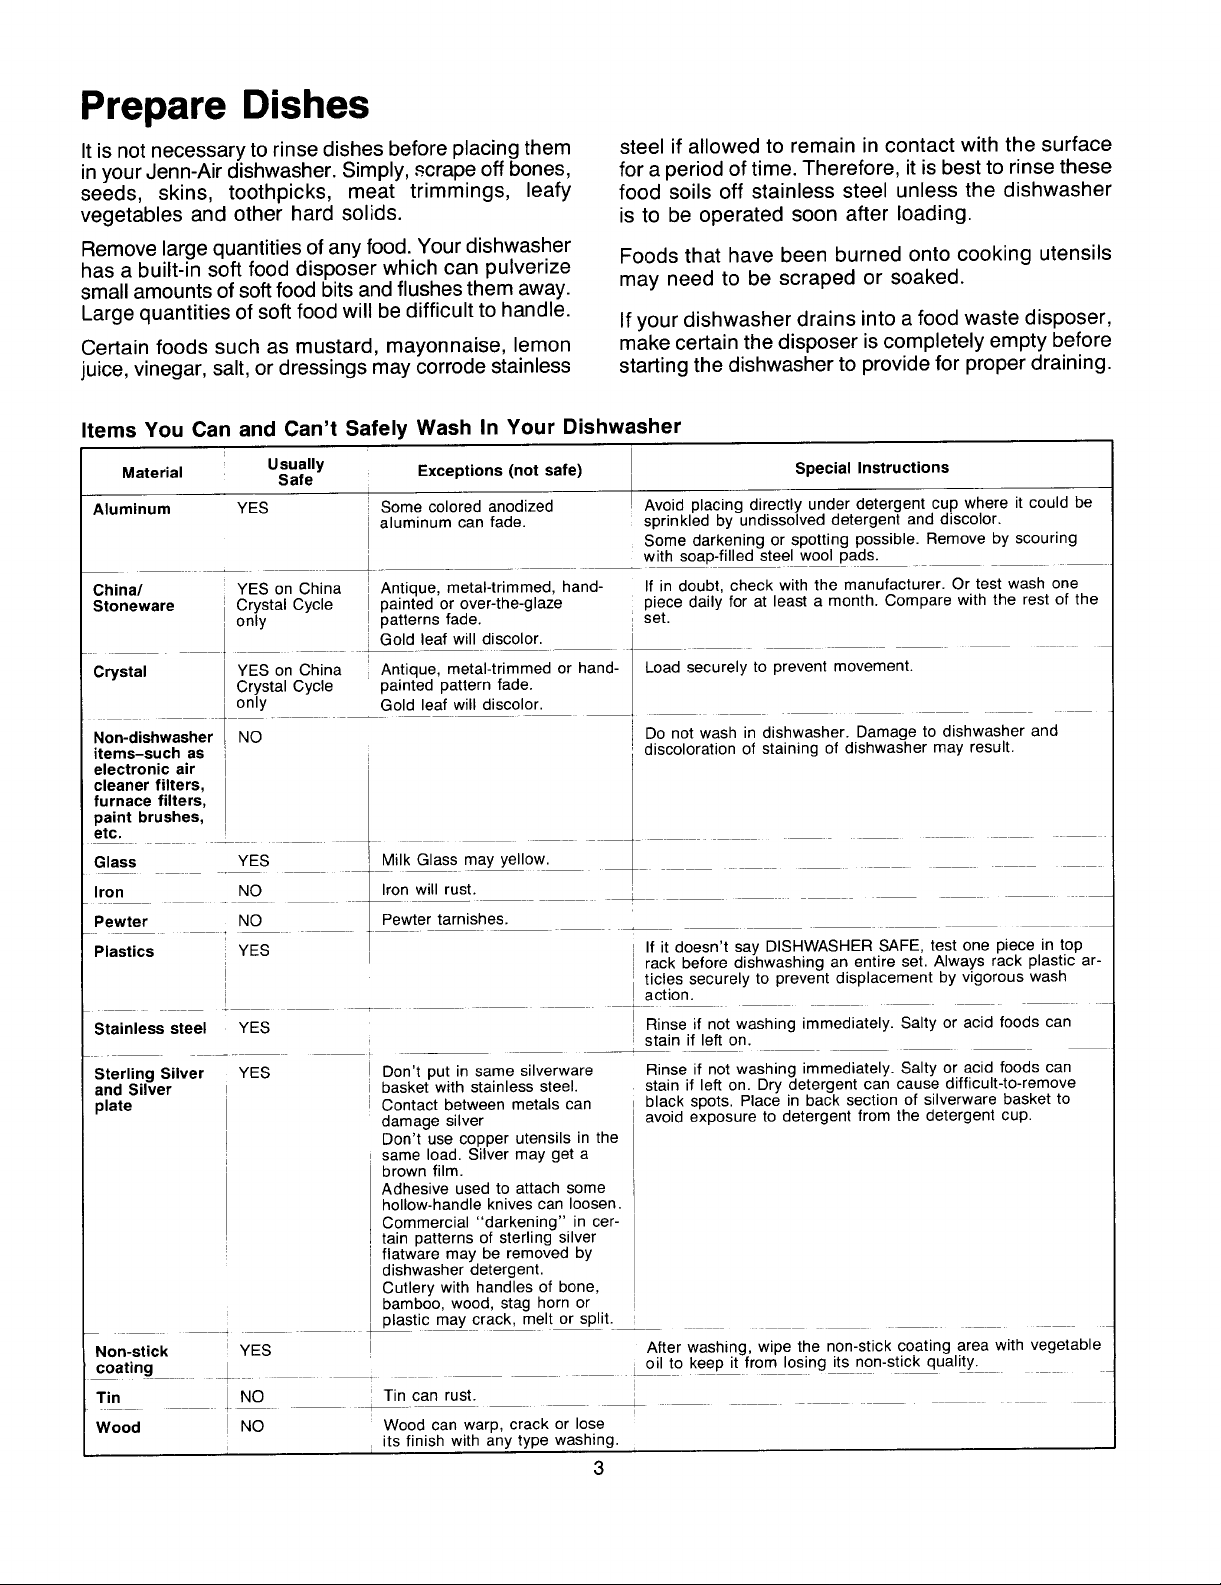
The Controls
Model DW489-C
Model DW499-C
©1990Jenn-Air Company Part No. 9030A Cat. No. DC489UA
500A127P005 Rev.0 3190
1
Page 2
IMPORTANT SAFETY PRECAUTIONS
WARNING: Products with a CSA 7. Use only a detergent designed 12. Do not tamper with controls.
tag have been listed with Canadian for an automatic dishwasher.
Standards Association. Neverthe- Never use soap, laundry deter- 13. Always remove the door to the
less, as with any other equipment gent, or hand washing deter- washing compartment when
using electricity and moving parts, gent inyour dishwasher. Keep from service or discarding it.
there is a potential hazard. When these products out of the reach
using your dishwasher, follow basic of children. 14. Instructions for grounding this
precautions, including the fol- appliance can be found in the
lowing: 8. Do not sit, stand on or abuse installation instructions.
1. Read all instructions before us- dishwasher.
the dishwasher.
ing
2. use the dishwasher only for its hydrogen gas may be pro-
intended function, duced in a hot water system INSTRUCTIONS
3. To avoid electrical shock hazard, weeks or more. Hydrogen gas
the sides and back must be is explosive. If the hot water
enclosed, and the front panels system has not been used for
must be attached before elec- two weeks or you have moved
trical power is applied to the into a residence in which the
dishwasher. Refer to the instal- hotwater system may not have
lation instruction for proper been used for some time, turn
grounding procedures, on all hot water faucets and let
4. Children should never be permit- several minutes. This will
ted tooperate or play in, with or release any accumulated
around this dishwasher, hydrogen gas. As the gas is
5. To reduce the risk of injury when flammable, do not smoke or
loading items to be washed, use an open flame during this
sharp or pointed itemsshould be process.
located with the handles up. 10 Do not wash plastic items
Also, load sharp items so they unless marked "dishwasher
are not likely to damage the door safe" or the equivalent. For
seal. plastic items not so marked,
6. Be careful not to touch the check the manufacturer's
heating element on the bottom recommendations.
of the tub during or at the com- 11. Load light plastic items so they
pletion of a cycle. It may be hot. will not become dislodged and
the door or dish rack of the
9. Under certain conditions, SAVE THESE
that has not been used for two
the water flow from each for
drop to the bottom of the dish-
washer -- they may come into
contact with the heating unit
and be damaged.
removing an old dishwasher
Page 3
Prepare Dishes
Itis not necessary to rinse dishes before placing them steel if allowed to remain in contact with the surface
in your Jenn-Air dishwasher. Simply, scrape off bones, for a period of time. Therefore, it is best to rinse these
seeds, skins, toothpicks, meat trimmings, leafy food soils off stainless steel unless the dishwasher
vegetables and other hard solids, is to be operated soon after loading.
Remove large quantities of any food. Your dishwasher Foods that have been burned onto cooking utensils
has a built-in soft food disposer which can pulverize
small amounts of soft food bits and flushes them away. may need to be scraped or soaked.
Large quantities of soft food will be difficult to handle.
Certain foods such as mustard, mayonnaise, lemon make certain the disposer iscompletely empty before
juice, vinegar, salt, or dressings may corrode stainless starting the dishwasher to provide for proper draining.
If your dishwasher drains into a food waste disposer,
Items You Can and Can't Safely Wash In Your Dishwasher
I
Material Safe
Aluminum YES Some colored anodized Avoid placing directly under detergent cup where it could be
China/ YES on China Antique, metal-trimmed, hand- If in doubt, check with the manufacturer• Or test wash one
Stoneware Crystal Cycle painted or over-the-glaze piece daily for at least a month. Compare with the rest of the
Crystal YES on China Antique, metal-trimmed or hand- Load securely to prevent movement.
Non-dishwasher NO Do not wash in dishwasher• Damage to dishwasher and
items-such as discoloration of staining of dishwasher may result.
electronic air
cleaner filters,
furnace filters,
paint brushes,
etc. _ _
Glass • YES _ Milk Glass may yellow.
Iron _ NO / Iron will rust.
Pewter NO _ Pewter tarnishes.
Plastics YES I rack before dishwashing an entire set. Always rack plastic ar-
Stainless steel YES Rinse if not washing immediately. Salty or acid foods can
Usually Exceptions (not safe) Special Instructions
aluminum can fade. sprinkled by undissolved detergent and discolor.
Some darkening or spotting possible. Remove by scouring
with soap-filled steel wool pads.
only patterns fade. set.
Crystal Cycle painted pattern fade.
only Gold leaf will discolor.
Gold leaf will discolor.
/
/
If it doesn't say DISHWASHER SAFE, test one piece in top
ticles securely to prevent displacement by vigorous wash
action.
stain if left on.
Sterling Silver YES Don't put in same silverware Rinse if not washing immediately. Salty or acid foods can
and Silver basket with stainless steel, stain if left on. Dry detergent can cause difficult-to-remove
plate Contact between metals can black spots. Place in back section of silverware basket to
Non-stick ! YES After washing, wipe the non-stick coating area with vegetable
coating _ i i oil to keep it from losing its non-stick quality.
Tin i NO i Tin can rust.
Wood ! NO Wood can warp, crack or lose
damage silver avoid exposure to detergent from the detergent cup.
Don't use copper utensils in the
same load. Silver may get a
brown film.
Adhesive used to attach some
hollow-handle knives can loosen.
Commercial "darkening" in cer-
tain patterns of sterling silver
flatware may be removed by
dishwasher detergent.
Cutlery with handles of bone,
bamboo, wood, stag horn or
plastic may crack, melt or split.
i
i It
i its finish with any type washing.
i
3
Page 4
Loading Dishes, Glasses and Cutlery
Seldom will families haveidentical dishes; the number
and type of articles used for each meal will vary DoNOTBLOCKTHISAREAOR
greatly; therefore, the following instructions and ac- LOADTALLITEMSNEXTTOIT
rangement for your particular needs.
Place
guide. With experience, you will learn the best ar- , ,
•.. all items on racks so that they face the center to
insure best washing of soiled surfaces. The wash arm
cempanying pictures should be taken as a general I_ _ l
in bottom sprays water up. The tower that rinses in ,_
center sends water out over dishes to wash items in
upper rack. The wash arm in the top sprays water
down over the dishes also.
•.. aluminum or stainless steel items away from the
very front of the lower rack. Items in this location are ... that the movement of the lower spray arm is not
sprinkled with detergent which may cause aluminum blocked by items hanging below the lower rack.
or stainless steel to spot, pit, or discolor.
•.. that the free flow of water to the detergent cup is
Make Sure not blocked by large items across the front of the lower
...dishes and silverware are not nested, rack.
•.. largeitemsinthelowerrack donotcovertheopen.... that the movement of the upper spray arm is not
ing where the center spray arm comes up. blocked by tall items in the upper rack.
Efficient Loading Patterns
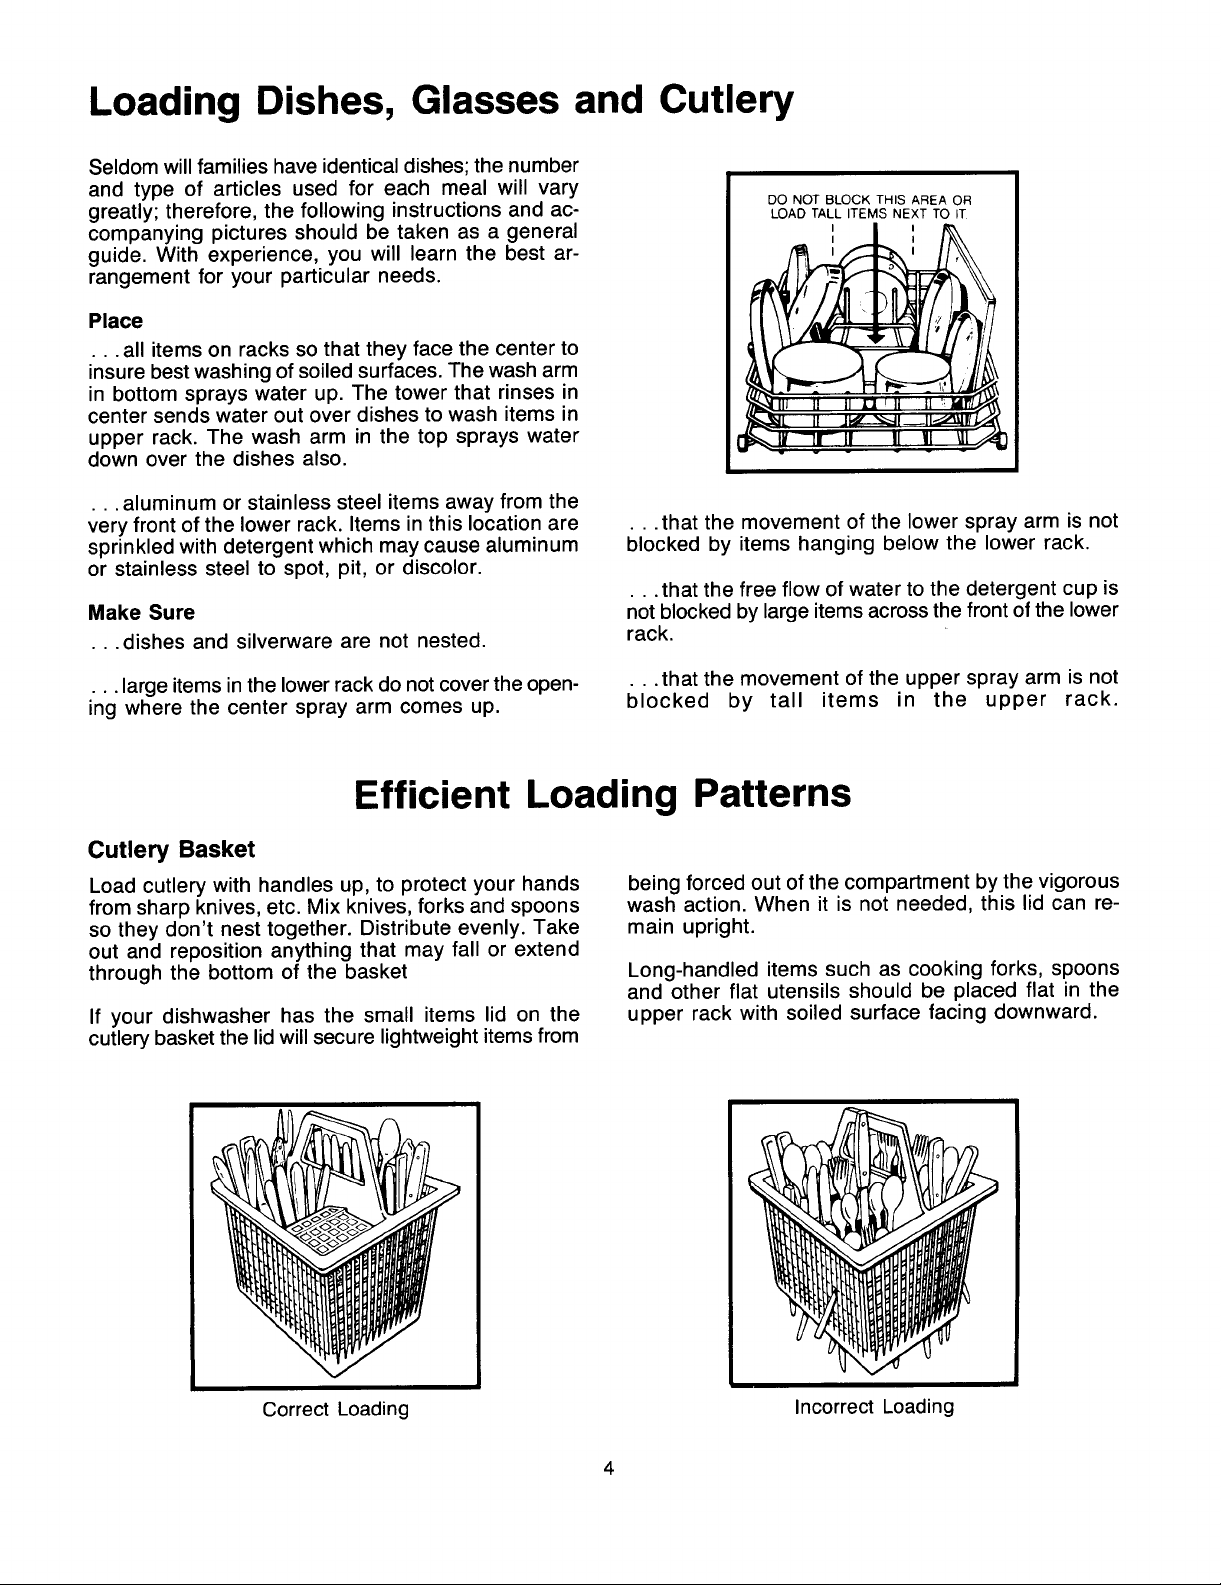
Cutlery Basket
Load cutlery with handles up, to protect your hands being forced out of the compartment bythe vigorous
fromsharp knives, etc. Mix knives, forks and spoons wash action. When it is not needed, this lid can re-
so they don't nest together. Distribute evenly. Take main upright.
out and repositionanything that may fall or extend
through the bottom of the basket Long-handled itemssuch as cooking forks, spoons
If your dishwasher has the small items lid on the upper rack with soiled surface facing downward.
cutlerybasketthe lidwillsecure lightweightitemsfrom
Correct Loading Incorrect Loading
and other flat utensils should be placed flat in the
I
Page 5
Upper Rack
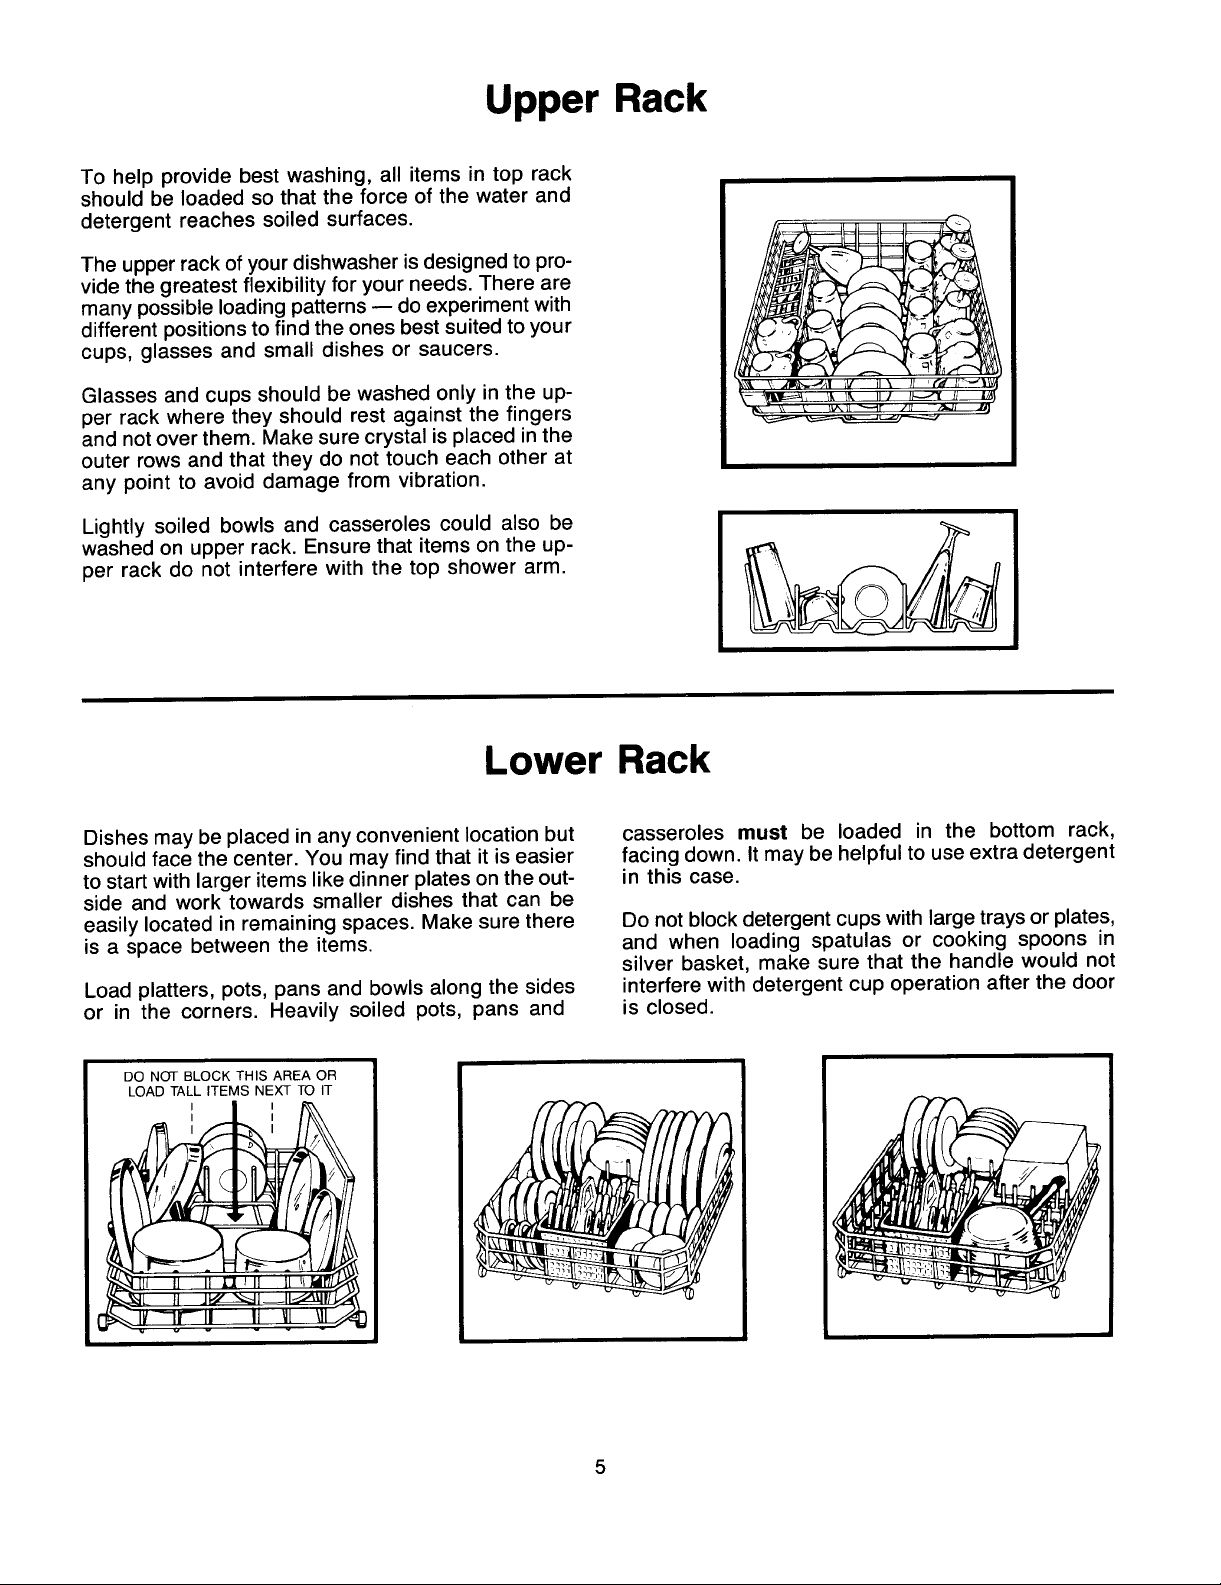
To help provide best washing, all items in top rack
should be loaded so that the force of the water and
detergent reaches soiled surfaces.
The upper rack of your dishwasher is designed to pro-
vide the greatest flexibility for your needs. There are
many possible loading patterns -- do experiment with
different positions to find theones best suited to your
cups, glasses and small dishes or saucers.
Glasses and cups should be washed only in the up-
per rack where they should rest against the fingers ___._._._____._,_.,_..___
and not over them. Make sure crystal is placed in the
outer rows and that they do not touch each other at
any point to avoid damage from vibration.
Lightly soiled bowls and casseroles could also be
washed on upper rack. Ensure that items on the up- ,_.-_ _//_
per rack do not interfere with the top shower arm.
Lower Rack
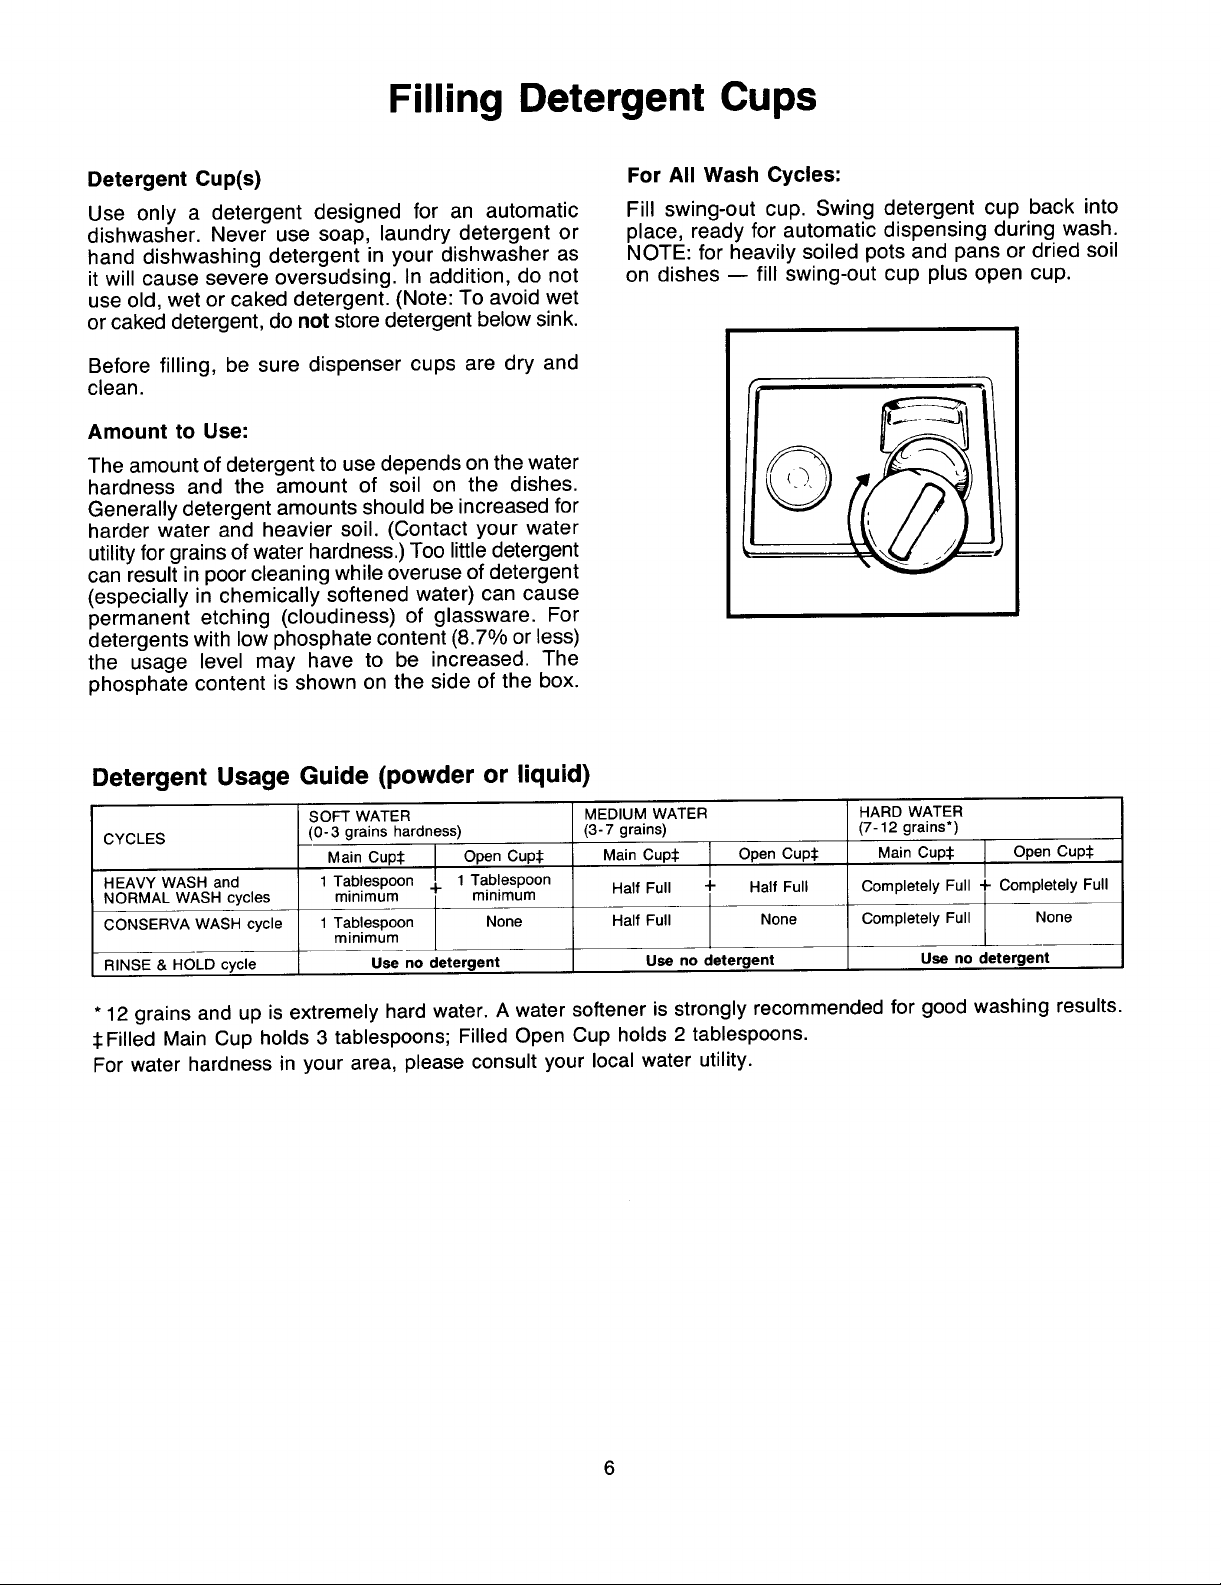
Dishes may be placed in any convenient location but casseroles must be loaded in the bottom rack,
should face the center. You may find that it is easier facing down. It may be helpful to use extra detergent
to start with larger items like dinner plates on the out- in this case.
side and work towards smaller dishes that can be
easily located in remaining spaces. Make sure there Do not block detergent cups with large trays or plates,
is a space between the items, and when loading spatulas or cooking spoons in
silver basket, make sure that the handle would not
Load platters, pots, pans and bowls along the sides interfere with detergent cup operation after the door
or in the corners. Heavily soiled pots, pans and is closed.
DO NOT BLOCK THIS AREA OR
LOAD TALL ITEMS NEXT TO IT
,,
L
5
Page 6
Filling Detergent Cups
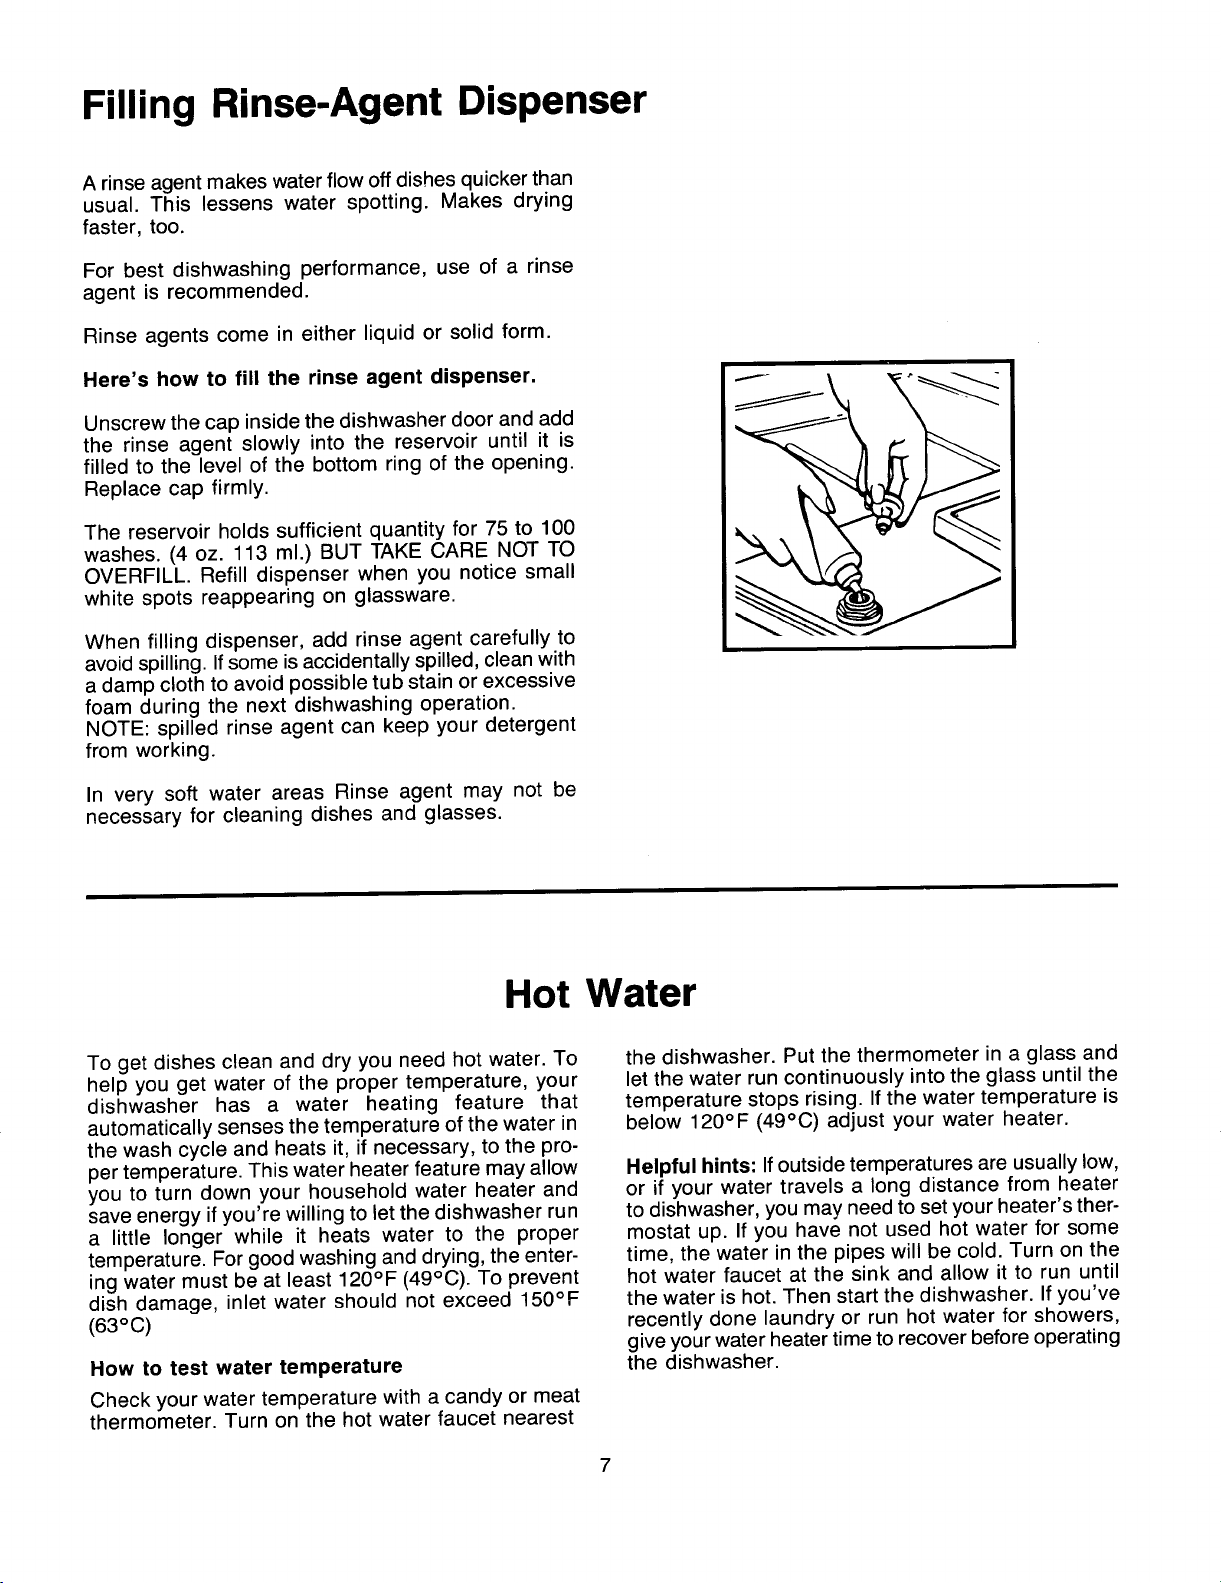
Detergent Cup(s) For All Wash Cycles:
Use only a detergent designed for an automatic Fill swing-out cup. Swing detergent cup back into
dishwasher. Never use soap, laundry detergent or place, ready for automatic dispensing during wash.
hand dishwashing detergent in your dishwasher as NOTE: for heavily soiled pots and pans or dried soil
itwill cause severe oversudsing. In addition, do not on dishes -- fill swing-out cup plus open cup.
useold, wet or caked detergent. (Note: To avoid wet
or caked detergent,do not storedetergentbelowsink.
Before filling, be sure dispenser cups are dry and
clean.
Amount to Use:
The amount of detergent to use depends on the water
hardness and the amount of soil on the dishes.
Generally detergent amounts should be increased for
harder water and heavier soil. (Contact your water
utility for grains of water hardness.) Too little detergent
can result in poor cleaning while overuse of detergent
(especially in chemically softened water) can cause
permanent etching (cloudiness) of glassware. For
detergents with low phosphate content (8.7% or less)
the usage level may have to be increased. The
phosphate content is shown on the side of the box.
Detergent Usage Guide (powder or liquid)
SOFT WATER MEDIUM WATER HARD WATFH
CYCLES (0- 3 grains hardness) (3- 7 grains) (7-12 grains*)
Main Cup:l: Open Cup:l: Main Cup:l: Open Cup:l: Main Cup:l: Open Cup:l:
HEAVY WASH and 1 Tablespoon .. 1 Tablespoon Half Full 4- Half Full Completely Full 4- Completely Full
NORMAL WASH cycles minimum minimum
CONSERVA WASH cycle 1 Tablespoon None Half Full None Completely Full None
RINSE & HOLD cycle Use no detergent Use no detergent Use no detergent
*12 grains and up isextremely hardwater. A watersoftener is stronglyrecommendedfor goodwashing results.
:l:FilledMain Cup holds3 tablespoons;Filled Open Cup holds2 tablespoons.
Forwater hardness in your area, please consultyour local water utility.
minimum
Page 7
Filling Rinse-Agent Dispenser
A rinse agent makes waterflow off dishes quicker than
usual. This lessens water spotting. Makes drying
faster, too.
For best dishwashing performance, use of a rinse
agent is recommended.
Rinse agents come in either liquid or solid form.
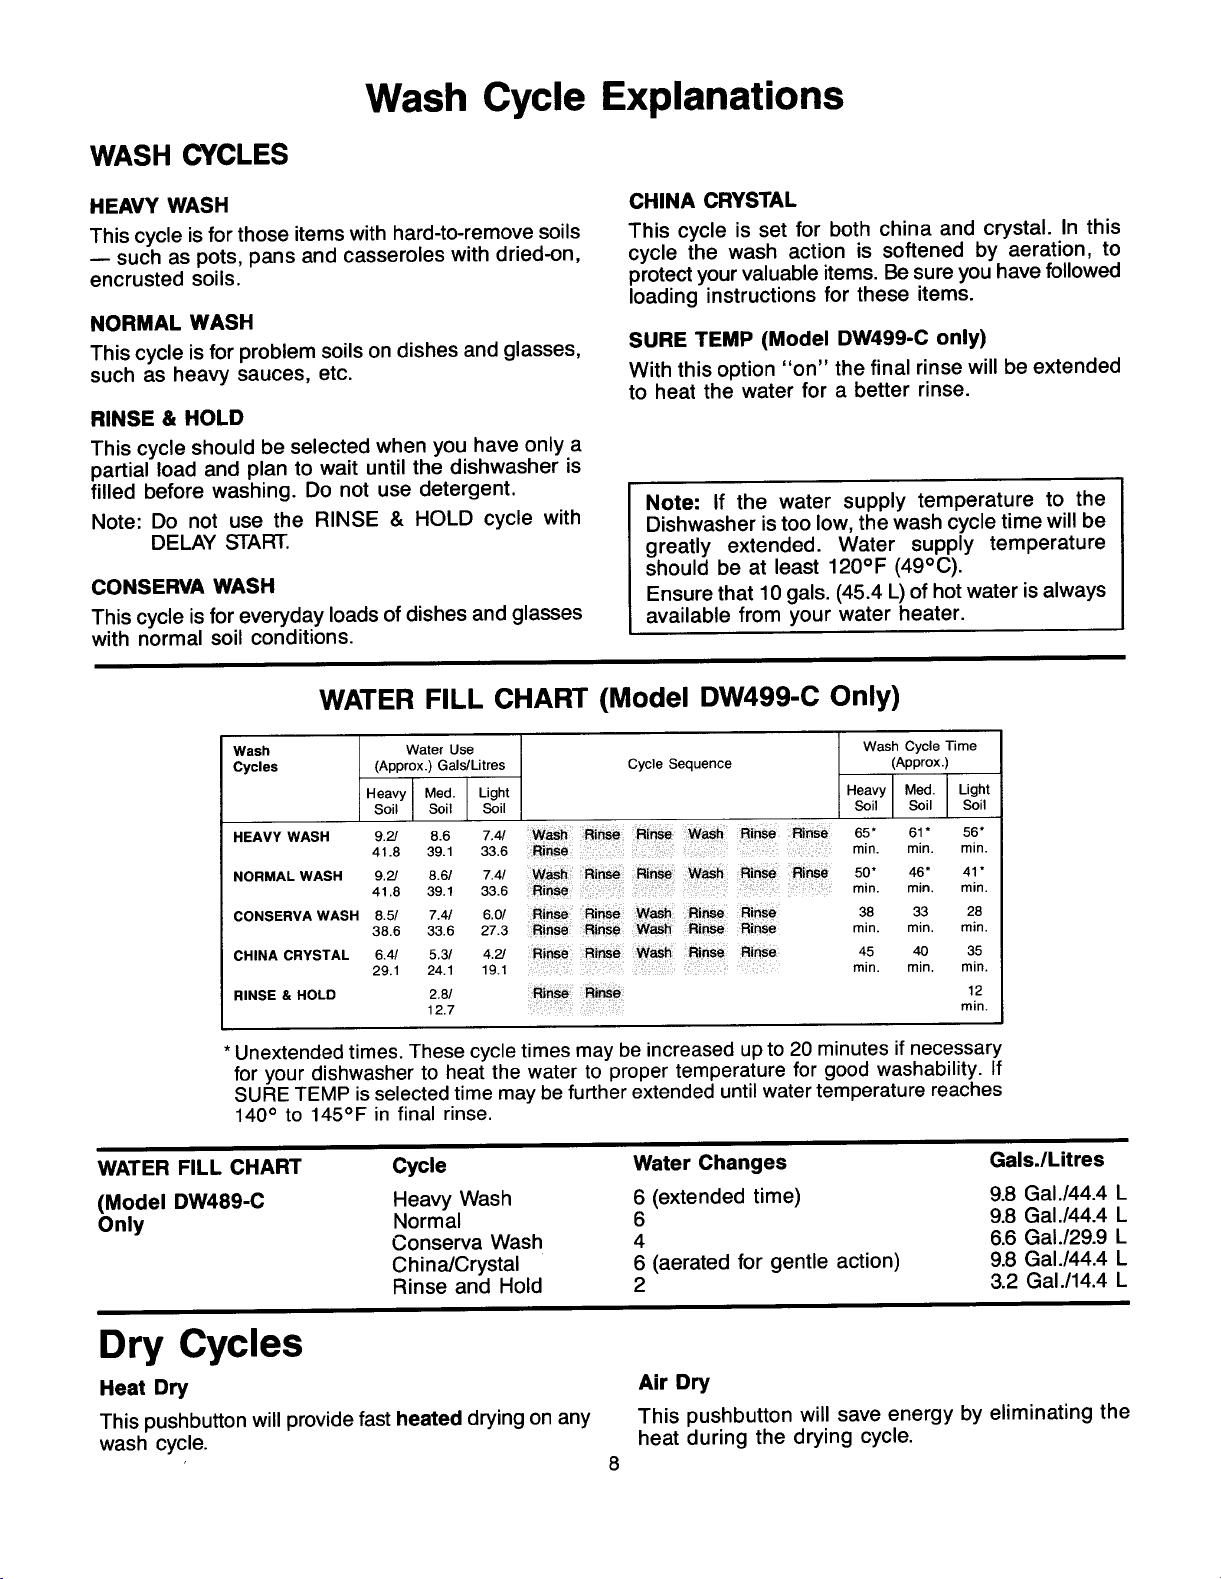
Unscrew the cap insidethe dishwasher door and add
the rinse agent slowly into the reservoir until it is
filled to the level of the bottom ring of the opening.
Here'showtofilltherinseagentdispenser. ___..._
Replace cap firmly.
washes. (4 oz. 113 ml.) BUT TAKE CARE NOT TO
The reservoir holds sufficient quantity for 75 to 100 _,_k_-__ _
OVERFILL. Refill dispenser when you notice small
white spots reappearing on glassware. ________J
When filling dispenser, add rinse agent carefully to
avoid spilling. Ifsome is accidentally spilled, cleanwith
a damp cloth to avoid possible tub stain or excessive
foam during the next dishwashing operation.
NOTE: spilled rinse agent can keep your detergent
from working.
In very soft water areas Rinse agent may not be
necessary for cleaning dishes and glasses.
Hot Water
To get dishes clean and dry you need hot water. To the dishwasher. Put the thermometer in a glass and
help you get water of the proper temperature, your let the water run continuously into the glass until the
dishwasher has a water heating feature that temperature stops rising. If the water temperature is
automatically senses the temperature of the water in below 120° F (49°C) adjust your water heater.
the wash cycle and heats it, if necessary, to the pro-
per temperature. This water heater feature may allow Helpful hints: Ifoutside temperatures are usually low,
you to turn down your household water heater and or if your water travels a long distance from heater
save energy ifyou're willing to let the dishwasher run to dishwasher, you may need to set your heater's ther-
a little longer while it heats water to the proper mostat up. If you have not used hot water for some
temperature. Forgood washing and drying, the enter- time, the water in the pipes will be cold. Turn on the
ing water must be at least 120°F (49°C). To prevent hot water faucet at the sink and allow it to run until
dish damage, inlet water should not exceed 150°F the water is hot. Then start the dishwasher. If you've
(63°C) recently done laundry or run hot water for showers,
give your water heater time to recover before operating
How to test water temperature the dishwasher.
Check your water temperature with a candy or meat
thermometer. Turn on the hot water faucet nearest
7
Page 8
Wash Cycle Explanations
WASH CYCLES
HEAVY WASH CHINA CRYSTAL
This cycle isforthose itemswithhard-to-removesoils This cycle is set for both china and crystal. In this
such as pots, pans and casseroles with dried-on, cycle the wash action is softened by aeration, to
encrusted soils, protectyourvaluableitems.Besureyouhavefollowed
loading instructions for these items.
NORMAL WASH
Thiscycle is for problemsoilsondishes and glasses, SURE TEMP (Model DW499-C only)
such as heavy sauces, etc. With this option "on" the final rinse will be extended
RINSE & HOLD
This cycle shouldbe selected when you have only a
partial load and plan to wait until the dishwasher is
filled before washing. Do not use detergent. Note: If the water supply temperature to the
Note: Do not use the RINSE & HOLD cycle with Dishwasheristoo low,the wash cycle time will be
DELAY START, greatly extended. Water supply temperature
CONSERVA WASH Ensurethat 10 gals. (45.4 L)ofhotwater isalways
This cycle isforeveryday loads of dishesand glasses available from your water heater.
with normal soil conditions.
to heat the water for a better rinse.
should be at least 120°F (49°C).
WATER FILL CHART (Model DW499-C Only)
Wash Water Use Wash Cycle Time
Cycles (Approx.) Gals/Litres Cycle Sequence (Approx.)
Heavy Meal. Light Heavy Med. Light
Soil Soil Soil Soil Soil Soil
HEAVY WASH 9.2/ 8.6 7,4/ ::Wash ::Ri:_ RinSe: 65" 61" 56"
NORMAL WASH 9.2/ 8.6/ 7.4/ Wash;; ;Ri_; ;Rinse: 50* 46* 41 *
CONSERVA WASH 8.5/ 7.4/ 6.0/ 38 33 28
CHINA CRYSTAL 6.4/ 5.3/ 4.2/ RiMe W_ 45 40 35
RINSE & HOLD 2.8/ Rin_ 12
•Unextendedtimes.These cycletimes maybe increased upto 20 minutesifnecessary
foryour dishwasherto heat the water to proper temperaturefor good washability.If
SURE TEMP isselectedtimemay be furtherextendeduntilwatertemperaturereaches
140° to 145°F in final rinse.
WATER FILL CHART Cycle Water Changes Gals./Litres
(Model DW489-C Heavy Wash 6 (extended time) 9.8 Gal./44.4 L
Only Normal 6 9.8 Gal./44.4 L
41.8 39.1 33.6 min. min. min.
41.8 39,1 33.6 min. min. min.
38.6 33.6 27.3 rain. rain. rain.
29.1 24.1 19.1 rain. rain. rain.
12,7 min.
Conserva Wash 4 6.6 Gal./29.9 L
China/Crystal 6 (aerated for gentle action) 9.8 Gal./44.4 L
Rinse and Hold 2 3.2 Gal./14.4 L
Dry Cycles
Heat Dry Air Dry
This pushbutton will provide fast heated dryingon any This pushbutton will save energy by eliminating the
wash cycle, heat during the drying cycle.
8
Page 9

How to Operate Your Dishwasher
Model DW499-C
Step 1. Load yourdishwasher with dishes, silverware ClearReset Pad
pots, pans, bowls, etc. according to the instructions
on pages 4 & 5. To change a cycle after washing starts, touch the
Step 2. Add detergent to the detergent dispenser, in the display while water is being pumped out. After
Step 3. Close and latch the door. dishwasher.
Step 4. Select a wash cycle. A number inthe Systems
Monitor will tell you how long the cycle will take. DELAY START (Model DW499-C Only)
Clear/Reset Pad to cancel cycle. "Reset" will appear
"Reset" goes out, you can reprogram and restart the
NOTE DW499-C Owners: Your dishwasher is now Step 1. Complete steps 1 - 5 at left.
automatically programmed including a Soil Level
Selection. Cycle Indicator Lights tell you the complete Step 2. Touch DELAY START pad. The Systems
program. If you're completely satisfied, skip to Monitor will read "l hrs delay". Touch pad once again
step 5. If not: for each hour desired upto 9 hours. The machine will
a. Select the soil level. You should select a change count down and start automatically at the correct time.
within 30 seconds, otherwise all panel lights will go NOTE: Do Not use DELAY STARTWITH THE RINSE
out. To relight, touch any pad or open and reclose & HOLD Cycle.
door.
b. Select an option. SURE TEMP can only be TO ADD A FORGOTTEN ITEM
selected if wash cycle is HEAVY WASH or
NORMAL WASH. Add dishes any time during the RINSE & HOLD
Cycle. With other wash cycles, add dishes before the
Step 5 Touch the Start Pad. main detergent wash portion of the cycle.
NOTE: If your dishwasher drains into a food waste
disposer, operate the disposer until it isempty before Step 1. Push door latch lever to the left.
starting the dishwasher. Step 2. Wait until the water calms. Open door.
Step 3. Add the dishes.
Note: When the dishwasher is loaded and the door Step 4. Close the door and push the latch to the far
is locked, control panel lights will come on show- right. When the door is locked, washing will continue.
ing the last settings you used.Chances are,they're NOTE: Opening the door during any cycle lessens
exactly the same settings you need for the load
you are about to do. If so, all you have to do is cleaning power because the temperature inside the
touch the Start Pad. beginning.
dishwasher is lowered. Sotry to load everything at the
Page 10

DIGITAL WORD DISPLAY
DISPLAY OF CYCLE
OF TIME ENERGY PHASE AND
TO END MONITOR OTHER USER
OF CYCLE (MODEL DW499-C ONLY) INFORMATION
1
SYSTEMS MONITOR
LOG ee i HI
WASHING
L_6 MINUTES
Check your dishwasher's
SYSTEMS MONITOR.
This is one of the most important parts of your new dishwasher.
It tells you what is going on in the dishwasher at any time and
it can alert you to possible problems. The SYSTEMS MONITOR
displays the following information.
• Gives you the number of minutes to the end of the cycle.
• Tells you the specific phase of any cycle... "WASHING",
"RINSE" or "DRYING" for examples.
• Alerts you to problems such as CUP OPEN"
• Model DW499-C Only: Shows you the relative energy used
by each cycle. Lets you choose the cycle you need that uses
the least energy.
Details on all SYSTEMS MONITOR functions appear on pages
11, 12, and 13.
How to lock dishwasher controls to prevent use by children
(Model DW499-C Only)
Your dishwasher has a "hidden" cidentally start dishwasher by
control pad. When this pad is touch- touching pads. The only control
ed twice within 3-seconds, all pads unaffected is the DELAY START. If
become inoperative and no new this selection has been made,
selections can be made until dishwasher willstartautomatically
theLoCKEDIOCkappearsiSreleased.inthe ThesYSTEMswordselected.afterwhatever delay you have .,to lock or unlock the controlpanel._/
MONITOR. Children cannot ac- /
£
Touch here twice within 3-seconds
/
CYCLESELECTION # S01L LEVEL OPTIONS SYSTEMSMONITOR
i|c,,NAc_s,A_I
L. J
II_°"M"_HII' R,NS,,HOL0t I' M,0,0Mill _'_o_I _uc
l,
10
Page 11

The Systems Monitor tells you what's happening
LABEL_0_E_'0,A,NWASH,_C0P
HRS DELAY CLEAN RINSEDONLY
i
MINUTES PLUSHEATING
DIGITALWORD
MESSAGEDISPLAY WHAT IT MEANS
NUMERALS FROM Number of minutes left in the cycle.
1 to 99 MINUTES
NUMERALS FROM Number of hours delay until start of cycle
1 to 9 HRS. DELAY (Model DW499-C Only)
Shows relative amount of energy used from LO
ENERGY MONITOR (one bar lighted) to HI (all five bars lighted).
LO HI (Model DW499-C Only)
ENERGY SAVER CONSERVA WASH, LIGHT SOIL, or AIR DRY.
WASHING Indicates detergent wash period.
RINSE Indicates rinse portion of cycle.
DRYING Indicates HEATED DRYING has been selected.
RINSED ONLY Indicates completion of RINSE & HOLD cycle. Remains on
HEATING Indicates water is being heated -- in wash or rinse period --
PLUS HEATING cycle. Cycle time may be increased (up to a maximum of
Indicated energy-efficient selection made such as
(Model DW499-C Only)
until door is unlatched.
to temperature necessary for good washability. The
minutes countdown is on hold for up to a maximum of
20-minutes when HEATING is displayed.
Indicates Sure Temp option was selected prJor to start of
20 minutes) to heat final rinse water to 145°F.
(Model DW499-C Only)
CLEAN Indicates completed cycle (except RINSE & HOLD).
LOCKED See .page 10.
Remains on until door is unlatched.
Indicated controls are locked to prevent unauthorized use.
(Model DW499-C Only)
11
Page 12

The SYSTEMS MONITOR tells you if certain things are wrong
(Model DW499-C Only)
BEFORE YOU CALL FOR SERVICE:
• Try the cycle again to see if the Code reappears. The dishwasher may correct itself.
• Electronic controls can be affected by outside interference.
Sometimes shutting on the power to the dishwasher (at the fuse or circuit breaker) will correct the problem.
Restore power after about five seconds and try the cycle again.
• Check the chart below for things you can do to correct the problem.
CODE WHAT IT MEANS WHAT TO DO
F_ Electrical power has been IF DISHWASHER WAS IN USE WHEN THE POWER
and but is now back on. 1. Unlatch the door. If the detergent cup is open, add
RESET detergent and close the cup.
CUP OPEN The detergent cup was open at 1. Unlatch the door and add detergent if spilled.
BLOCKED The dishwasher is taking longer This dishwasher is designed to automatically compensate
DRAIN than normal to drain the water for longer than normal drain times, but cycle time will be
interrupted to the dishwasher FAILURE OCCURRED:
2. Relatch the door and touch "START" then immediately
touch "CLEAR/RESET". (This will pump any remaining
water out of the machine.)
3. Select the desired cycle and rerun the load.
IF DISHWASHER WAS NOT IN USE:
1. Latch door.
2. Select desired cycle.
3. Run cycle when desired.
the start of a cycle. 2. Close cup.
3. Latch door and select cycle.
4. Touch "START".
NOTE:
If cup is latched properly and "CUP OPEN" repeats
you may start wash cycle by pressing "START" pad a
second time.
out. This is usually caused by a extended. If this code continues to appear frequently then:
blockage in the drain air gap, 1. Clean the air gap.
a kink in the drain hose, or a 2. Check for a kink in the drain hose.
stopped up drain pipe. 3. Check plumbing for slow or stopped up drains_
(NOTE: Warranty service does not cover household
drain problems.)
BLOCKED Similar to blocked drain as Locate and remove the blockage in the drain system as
DRAIN explained above, but the C2 explained above. To pump any remaining water out of
and indicates that the drain is so the machine.
C_| clogged that the dishwasher 1. Latch door.
cannot continue to operate in a 2. Select any cycle.
satisfactory manner. Dishwasher 3. Touch "START" and then immediately touch "CLEAR/
will stop. RESET". (NOTE: Warranty service does not cover
household drain problems.)
12
Page 13

CODE WHAT IT MEANS WHAT TO DO
--! Dishwasher will not go into a Restart the cycle. If C3 repeats, call for service.
--,,,I drain out period. Dishwasher
will stop.
wol There is too much water in the The dishwasher is designed to automatically pump out
dishwasher. If C4 appears after a extra water as long as the door is latched. When you hear
power failure, this is normal and the motor stop running:
the dishwasher will correct itself. 1. Unlatch the door and see if all the water is gone. (It is
normal for a small amount of water to remain in the
bottom of tub to keep the water seal lubricated.)
2. Ifyou see water entering the dishwasher, close and latch
the door. Shut off the water supply to the dishwasher.
3. Ifwater is gone and no water is entering the dishwasher,
restart cycle.
4. IfC4 repeats, shut off the water supply to the
dishwasher. Call for service.
t'_ This can be caused by either of
,,._,,.I these reasons: Unlatch the door. If there is no water in the bottom of the
Not enough water is entering
the dishwasher. • Is the dishwasher water supply turned on?
dishwasher, check the water supply to the dishwasher.
(Valve usually located under the sink.)
• Is the household water supply turned on?
• If you use well or cistern water, is the supply adequate?
or If the water supply is adequate, try the cycle again. If C5
repeats, call for service.
The drain pump could be Unlatch the door. If there is standing water in the bottom of
temporarily blocked (usually the dishwasher, relatch the door. Touch "START",then
caused by food particles such immediately touch "CLEAR/RESET" to start the pump. IfC5
as cereal), continues to appear, you may need to do this several times
to break up the blockage.
i'_' The water temperature in the Avoid showers or laundry just prior to running the
I I--
, ,I dishwasher did not reach the dishwasher. (Use the "DELAY START" feature to start
proper wash temperature. This dishwasher when the water heater is up to normal
is usually caused by lack of hot temperature.) Adjust household water heater thermostat.
water coming from the household
water heater. If C6 appears nearly every cycle and you know the water
from the household water heater is hot (140°F or more),
call for service.
_'--I The temperature sensor in the The temperature sensor needs to be replaced. Call for
! dishwasher is not functioning service.
properly. Dishwasher may
continue to be used, but it will NOTE:
not heat water automatically. You may continue to use your dishwasher. For best results,
t'_l The detergent cup did not open. 1. Unlatch and open the dishwasher door.
I I--
, ,I This is usually caused by a utensil 2. Check for utensils and dishes that could have blocked
adjust your household water heater thermostat to 140°F.
or dish. the detergent cup from opening. Rearrange if necessary.
3. Close and relatch the door. Wait for 30 seconds. This will
allow time for the cup to open by itself.
4. If the detergent cup is still closed, open it by hand and
remove the old detergent.
13
Page 14

Care and Cleaning of Dishwasher
CLEANING
Outside Inside
Clean the outside with alightly dampened cloth. The Generally, the interior of your dishwasher is self-
outside cabinet finish is durable, but it can scratch, cleaning. However, if cleaning should be
Do not use scouring pads, harsh or gritty cleansers, necessary, use a mild cleansing powder. Scour-
ing pads can mar the finish.
Control Panel
Clean with a lightly dampened cloth. Dry thoroughly
Do not use abrasive or sharp objects on the panel.
They can damage it.
cleaning,
I CAUTION: Do not touch hot element when I
I
HOW TO CHANGE COLOR PANELS
If you are redecorating, you can change your How to change door panel inserts:
dishwasher'sfrontpanels to match or blend withyour
new colors. 1. Take out three trim screws on either side of the
The panels are held in place by the decorative side 2. Slide out insert panel.
trims. Your panel is black on one side and white on
the other side. 3. Put the color you want in front. (Careful, edges may
Note: Do not operate dishwasher 4. Replace insert panel, side trim, and screws.
while changing panels or when
lower access panel is removed. How to change lower panel inserts:
_i__ 1. Removefour panel attachment screws. (Twoabove
_!_i_ 2. Remove entire panel.
"= _ 6. Replace insert panel, top trim and screws.
Change color in minutes. Just 7. Replace entire panel and four attachment screws.
remove trim and change.
dishwasher door. Remove the side trim.
be sharp.)
the panel, two below the panel.)
3. Take out three screws and remove top trim.
4. Slide out insert panel.
5. Putthe color you want in front. (Careful, edges may
be sharp.)
14
Page 15

Winterizing Your Dishwasher
Should you leave your dishwasher in an unheated residence (i.e., summer cottage)
during the winter season, the dishwasher must be winterized to prevent damage
from freezing. Ask a Service Technician to:
• Cut off electric power to dishwasher. Remove fuses or
trip circuit breaker.
• Turn off water supply.
• Disconnect water inlet line from water valve.
• Drain water from inlet line and water valve. (Use a pan
to catch the water.)
• Reconnect water inlet line to water valve.
• Remove the plastic pump cover in tub bottom and use
a sponge to soak up water in the rubber boot.
Energy-Saving Tips
Your dishwasher uses very little electric power. The power consumption of your
dishwasher can be minimized if you follow these suggestions:
1. A dishwasher will usually hold a whole day's dishes.
To save time, detergent, water and electric power,
operate the dishwasher only when it is full.
2. When you have only a partial load, use the Rinse &
Hold cycle to rinse off heavy soils.
3. Always select the shortest cycle that will remove the
soil from the load. This will be determined by use and
experience.
4. When fast drying of dishes is not necessary, press the
Heat Off pushbutton and allow them to dry by their
residual heat. This saves about 40% of the operating
power consumed in a normal wash cycle.
15
Page 16

Before You Call For Service
Experience has shown that many service calls are placed for malfunctions that could be easily corrected by
the owners ifthey only knew how. The following checklist is designed to help you find and correct these minor
problems and avoid not being able to use your new dishwasher until the serviceman arrives.
PROBLEM POSSIBLE CAUSE AND WHAT YOU CAN DO
Dishwasher won't run. A fuse in your home may be blown,or the circuit breaker tripped. Replace
fuse or reset circuit breaker. Remove any other appliances from the
circuit.
Large amounts of suds (foam) Sudsing detergents are not meant for dishwashers. USE ONLY
inside dishwasher, possible AUTOMATICDISWASHER DETERGENTS TO AVOID SUDSING.
leaking through air vent.
Water stands in the sump at A certain amount of water remaining in the tub at the end of a cycle is
the bottom of the tub. normal and keeps the pump primed, the water seal moist and active. An
To remove suds from the tub" Open the dishwasher. Let suds evaporate.
Add 1 gallon (4 litres) of cold water to the tub. Close and latch the
dishwasher. Pumpout water by slowly turning the control dial until a drain
period is reached.
excessive amount of water in the bottom of the tub could be anindication
of a minor drain hoseblockage, not allowingthe pump to drive all the water
out.
Check severalcycles to see if this is atemporary or permanent condition.
If a permanent condition, call the service department.
Dishwasher Leaks Suds can cause unit to overflow. That's why it's so important to use a
detergent that's designed for automatic dishwashers.
Spilling the rinse agent can cause foam during washing. This can lead
to overflowing. Wipe up accidental spill of rinse agent with a damp cloth.
Unusual noise Your dishwasher is designed to be one of the quietest in the industry,
however you should expect to hear the sound of water spray in the wash
and rinse cycles. The solenoid produces an audible click at the start of
the pump out cycle and there will be a hum from the motor in all cycles
except "dry".
Noises other than thesecan be considered unusual and could becaused
by items in the racks vibrating against each other or some small item
shifting from its place.
Open the dishwasher and recheck the placing of the items inthe racks
to avoid vibration.
Water vapour appearing Water vapour will appear during the drying cycle and when water is being
through the air vent beside the pumped out after a wash or rinse cycle.
door handle.
16
Page 17

PROBLEM POSSIBLE CAUSE AND WHAT YOU CAN DO
Detergent left in the dispenser Check the following:
at the end of the cycle.
1. A large platewas placedinfront of the dispenserblockingtheflowof
waterthatwouldordinarilywashthedetergentoutofthecup.Keepsmaller
itemsat the front of the rack near the detergentcups.
2. The dispensercover may not have opened due to an item leaning
against it.
Take a little extra care in loading.
3. Detergent may be old.
Shake the box of detergent, ifthere areseveral large lumps in it, it is too
old for effective use. Detergent will age very rapidly if it is kept in a damp
place e.g. under the kitchen sink.
4. Dispenser cover does notopen but was not blocked or jammed. This
is probably a mechanical malfunction and will require a service call.
Check all other possibilities first atthe end of another cycle as this condi-
tion often corrects itself.
Dark spots on silverware Detergentcrystals standing on metal may produce this condition. Remove
Dishes, glasses and flatware Improper water temperature. Water coming into the dishwasher should
are still dirty at the end of the be at least 120°F (49°C). CHECK WATERTEMPERATURE AT FAUCET
cycle. NEAREST DISHWASHER.
from silverware by vigorous rubbing with soft cloth and silver polish.
Need: meat thermometer and an 8 ounce glass.
1. Place glass under faucet nearest the dishwasher and turn on hotwater.
2. Put thermometerin glass and letwaterrun untiltemperaturestopsrising.
3. If water temperature is below 120°F (49°C), have your water heater
adjusted.
Improperly prepared dishes. Excess food soil should be removed from
dishes before loading.
Improper loading. Follow loading directions. Be sure dishwasher is not
overloaded and wash arms are turning freely.
Improper detergent, insufficient amount, or old detergent. Do not use
detergent that is hard or caked. Use only a recommended dishwasher
detergent.
Insufficient amount ofwatercoming intodishwasher.Checkwater pressure
at nearest faucet. Pressure must be a minimum of 20 pounds per square
inch. Generally,if there is sufficient pressure todraw a quart of water from
the hot water faucet in 10 seconds, the water pressure is satisfactory.
17
Page 18

PROBLEM POSSIBLE CAUSE AND WHAT YOU CAN DO
Brownstainsin cups. Tea or coffee may have been allowedto remain in cups.
Wash staineditemsbyhand withsolutionof 1/2 cup bleachand 3 cups
warm water.
Yellow or brown film. Iron deposits in water cause an over-all yellow or brown film on dishes.
Glassware becomes yellow or brown, but is still transparent. The installa-
tion of an iron filter in the water supply line removes the cause of this
problem and is the only permanent solution. For more complete infor-
mation, contact your local water conditioning company.
Yellow film on sterling or plating can result when copper utensils are
washed in the same load. Silver polish will usually remove this stain.
Black or gray marks on dishes. Aluminium deposits often leave marks when they rub againstother things.
Chipping of china and Rough handling of dishes will cause chipping. Loadwith care. Seat dishes
glassware, firmly in the racks sothey cannot bedislodged. Glassesmust lean against
Dishes and glasses do not dry. Usually caused bythe water temperature at the faucet being too low. The
Cups and glasses still have Many cups and glasses have a deep hollow in the base, which is at the
water in their bases after the top when they are loaded in the rack, where water could collect. Even
dry cycle is over. though they are hot enough todry surface moisturethey will not evaporate
Remove marks with a mild abrasive cleanser.
the pins and the rim of the glass should rest on the bottom of the rack.
When placing tall glassware and stemware in the dishwasher, check to
make certain that they will clear the top of the tub. Glasses and stemware
should always be placed in the upper rack. NEVER in the lower rack.
(Check loading suggestions.)
dishes etc. do not get hot enough to evaporate the water on them. For
best results (whennot using a heated dry cycle) water temperature should
be between 140° and 160°F (60° to 70°C).
Check water temperature and correct if necessary.
Unload the bottom rack first. Water from dishes in the top rack may be
spilling into the bottom rack.
Check for improper loading. Dishes shouldn't nest together. Avoid
overloading.
Check the rinse agent dispenser to see that it's not empty.
this larger amount in the hollow.
Use a heated dry cycle or remove carefully and wipe. Extra caution in
positioning these items when loading should eliminate this problem.
18
Page 19

PROBLEM POSSIBLE CAUSE AND WHAT YOU CAN DO
Etching - A milky film on Milky mineral films are removable by means of a vinegar rinse. If the
glassware, vinegar rinse doesn't work, the cloudiness is "etching" and can't be
Spotting and filming on The most common type of filming on dishes iscaused by minerals in the
glasses and flatware water collecting on glassware. This type of film may be removed as
removed.
Etching of some glassware is caused by using too much detergent in soft
water. This milky film-like surface cannot be removed because metal ions
have been removed from the surface of the glass. To prevent this pro-
blem, use less detergent in the detergent cup when your water supply
is naturally soft or when you use a water softener. Also, wash glassware
in shortest cycle that will get them clean.
Water temperature entering dishwasher exceeds 150°F (63°C).
explained below using a vinegar rinse or citric acid crystals.
Automatic dishwashing will remove the grease film acquired from hand
dishwashing. If spotting persists, the cause may be one or more of the
following:
• Extremely hard water
• Low water temperature
• Overloading
• Improper loading
• Use of too little detergent
• Use of too much detergent
• Use of old detergent
• Use of low-phosphate detergent
• Rinse agent container empty. Check level. Fill if necessary.
Due to varying local water conditions and personal preferences, please
try several brands of suggested detergents to find one that gives the best
results for you.
To remove stubborn spots and film from glassware:
1. Remove all metal utensilsfrom the dishwasher.
2. Do not add detergent.
3. Select HEAVYWASHcycle.
4. Startthe dishwasherand allowto run for 18 to 22 minutes.The dish-
washer will now be in the main wash.
5. Then open the doorand pour 2 cups (500 ml) of white venegar into
the bottomof the dishwasher.
6. Close the door and allow to complete the cycle.
If vinegar rinse doesn't work: Repeatasabove,except use 1/4 cup (60
ml) of citric acidcrystals insteadofvinegar. (Mostdrugstorescarry citric
acid crystals.)
Using a vinegar or citric acid crystal rinse more than twice a month?
Considera homewater softener.
19
Page 20

If Your Jenn-Air Appliance Doesn't Work, Followthese Three Steps, In Order, Until Your Problem is Solved:
1. Avoid the expense of an unnecessary service call NOTE: When writing about an unsolved service pro-
by checking to make sure - blem, please include the following information:
• . that the door is closed and the latch lever is to
the far right; (a) Your name, address, and telephone
• . that the appliance is properly plugged into a live
electrical outlet; (b) Model number, run number, and serial
•that fuse or circuit breaker is OK; replace fuse opening) of your appliance;
or reset circuit breaker if necessary; (c) Name and address of your dealer and date
•that the dial is properly set; re-read the the appliance was bought;
operating instructions if necessary. (d) A clear description of the problem you are
2. Call the authorized Jenn-Air Service Contractor having;
listed in the yellow pages or the dealer from whom (e) Water hardness, detergent brand and
your appliance was purchased, amount, water temperature, and cycle
3. Write to: Consumer Relations Department
MAYCOR
Appliance Parts and Service Co.
240 Edwards St. S.E.
Cleveland, TN 37311
number;
number (found on the right side of the tub
used.
UENN-AIR
C O M P A N Y
3035 SHADELAND • INDIANAPOLIS, IN 46226-0901
2O
Page 21

Built-In Dishwasher Warranty
FULL ONE-YEAR WARRANTY
Any part which failsin normalhomeuse duringthefirstyear after the date of originalretailpurchase,will
be repairedor replaced, free-of-chargewhen the applianceis located in the UnitedStates or Canada.
LIMITED EXTENDED WARRANTY
Any part which failsin normal homeuseafterthe first yearfromthe date oforiginalretailpurchasewill be
repaired or replaced free-of-charge for the part as follows:
• Second year
All parts *Upper Wash arm -"
Third
through fifth years Wash arm _li
A. Waterdistributionsystemincludingthe washtower,washarms (sprayarm)
and motor (as illustrated). Hub
B. Exteriorcabinet and exterior frontpanels and accessory side assembly
panels which rust.
• Third through tenth years Soft Motor
Dishwasher tub and door liner which leak due to cracking, FoodDisposer Pump
chipping, peeling or rusting. WaterDistributionSystem
The owner is responsible for labor and all other costs including transportation and shipping charges,
if any.
*3 Piece _lltower, *Hose
_onnection
*On models so equipped
OWNER'S RESPONSIBILITIES
Owner's responsibilitiesincludeproperinstallation,providingnormalcare and maintenancein accordance
withtheUse& Care instructions,providingproofofpurchaseon request,andmakingtheappliancereasonable
accessiblefor service.
WARRANTY SERVICE
Under the full warranty,servicemustbe performedbyan AuthorizedJenn-AirServiceContractor.Toobtain
service,contactthedealerfromwhomthe unitwaspurchased,an authorizedservicecontractor,orcontact
Maycor Appliance Parts and Service Company, 240 Edwards Street, Cleveland, TN 37311.Please include
modelnumber,serialnumber,anddateof originalretailpurchasein all correspondence.Servicewillbe provided
during normal business hours. All replacement parts assume the unused portion of this warranty.
U E N N-AI R
C 0 M P A N Y
3035 SHAOELANO • INDIANAPOLIS, IN 46226-0901
Page 22

DISHWASHERINSTALLATIONINSTRUCTIONS
IMPORTANT
FOLLOW THESE INSTRUCTIONS VERY CAREFULLY
ALL ROUGH-IN PLUMBING AND ELECTRICAL MUST BE COMPLETED BEFORE THE
DISHWASHER IS PLACED IN THE UNDERCOUNTER OPENING
CABINETOPENING
25 1/4" _ = _..,.-'
J" _ 1 THISWALLAREA
/ I
/ i PIPESORWIRES
/ _ 24" _ J
I MIN 24"
,! CABINET DEPTH "' _ ' ' COUNTERTOP I \ It' I
341/2 + 1/4 I
I I_ MUST ENTER INSIDE THIS AREA "_ '. : f t _,
Ji, I ill: _ I" "l"_ll"_l_';*'_'r'¢"_'_'_lli_ '1\_ ' l ]
MUSTBEFREEOF
The dishwasher is designated to fit into a cabinet opening 24"
wide, a minimum of 34" high. Thedepth should be at least 24",
so that the dishwasher front lines up with adjacent cabinet.
PLUMBING HOT WATER
ALL PLUMBING WORK MUST BE IN ACCORDANCE WITH LOCAL CODES.
DISHWASHER SHOULD NOT BE INSTALLEDIN AREA WHERE FREEZING OF WATERMAYOCCUR.
1. HOTwater inlet must not be less than3/8" outside diameter
(O.D.) copper tubing. ___.3_
2.The water valve has a 3/8 N.P.S., internal thread. We
recommend use of 90 degrees elbow for connection o1" ,//" ," I I
copper tubing
to water valve.
'_ #/ I i
ll" ,." - I ""
[_ _ _ RING. I COPPER 1'12 DA _-S_
ELBOW --_-_ _ i'_i'_-t _ I-'_'ITUBING i, I _ ' ' ":"-' " _ __/'_"_ \
COMPRESSION NUT T'_ "--I 4"
/' ;:i,,_ / ;,, 7Lvy'___N _,,
3.HandcutoffvalveinHOTwaterlineisrecommended.The f 1' j : / o_io_,/7/"_'_"W'A'C'_I-_ _--'_
dishwasher compartment for easy accessibility.
hand valve should be located adjacent to, but outside the _i l_,l_//_ / _ _
4. Inlet piping can enter from the left side, the right side, from / 2,,FROMFLOOR
the rear or from under the dishwasher as shown by the CABINETFACE---/
shadedpipe drawing. Entrymust bemadewithin theshaded 1
area as shown.
) r 'i tl :1_ H"0L[ "_. t _._'I'_ I i1[i11/
/ I I \
I "
Page 23

PLUMBING DRAIN
" "- TO PREVENT POSSIBLE DRAIN
ALL PLUMBING WORK MUST BE IN
ACCORDANCE WITH LOCAL CODES
If dishwasher is not adjacent to sink, horizontal drain line 1. A suggested method of connecting the drain hose to a
should not be longer than 10 feet and should not contain WASTE TEE or a Y branch tailpiece on the existing sink
more than three 90 ° long radius turns, trap is shown. They are made by several manufacturers
A drain hose already connected to the pump outlet issupplied purposely for electric dishwashers.
with the dishwasher. If the drain hose is not long enough and 2. When connecting the drain hose to a DISPOSER. remove
hastobe extended, usea 1/2" O.D. copper tubing with clamp, hopper plug before making connection.
THE RUBBER END OF THE DRAIN HOSE MAY BE CUT
OFF TO ACCOMODATE THE FOLLOWING SIZES OF beobtained locally and should be located on the countertop
TAILPIECE OR WASTE TEE: 5/8", 3/4" OR 1. near the sink. Air gap used must be capable of passing
3. When local codes requires the use of an AIR GAP it must
a 3/8" dia. steel ball to assure a minimum of drain line
stoppages.
FROM SINK INTO DISHWASHER OR
SYPHONING OF DISHWASHER
WATER, DRAIN LINE MUST BE
ROUTED AS FOLLOWS:
MIN 30" ABOVE THE FLOOR FOR
UNDER THE SINK CONNECTION
MIN 20" ABOVE THE FLOOR FOR
INSTALLATION DIRECTLY
THROUGH THE FLOOR.
ELECTRICAL
/ •
o / I\
/ 4": ILOC?T,O.
"_I ', IRECEPTACLE /_ O_ - _,_,oECEP_oAcLE
':- --" i I/
ALL ELECTRICAL WORK ,_ALL \_ /_. L/./
WITH LOCAL CODES
1. Use electrical cable with 2 insulated wires and ground, from under the dishwasher as shown by the shaded wires.
Minimum size No. 14 gauge. Service must enter with the shaded areas as shown.
2. Provide a separate 120 volts, 60 cycles circuit, protected 4. Alternately-- dishwasher may be connected to a grounded
with a 15 amp. fuse or circuit breaker, receptacle with 3-wire SJ, SJT, SPT-3,or HSJO service cord
3. Wiring may enter from right side, left side, from the rear or 105°C temperature rating.
_) ran _TE
GROUND.J _- BLACK (Line)
(Base or green)
of min 14 gauge - 90°C temperature rating, or 16 gauge -
Page 24

INSTALLATION
INSTALL DISHWASHER ELECTRICAL CONNECTION
1. Remove and discardfour slottedhex-head screwsthat 1. Cable Direct to Dishwasher -- A strain relief (not
hold on wooden skid. Screws are underthe wooden supplied)should be usedtoattach powersupplyto rear
skid.Laydishwasheronits back. Removefrontaccess ofdishwasherjunctionbox.Wire nutsofthe propersize
panel. (not supplied) are recommended for connecting
2, Loosenfourlevellinglegs _ incoming wires to dishwasher wires,
Turn dishwasher upright 7/8
and screwoutabout7/8". _ I Connect incoming black wire to black wire inside
and adjust leveling legs ! dishwasher junction box. Connect incoming white wire
to height that just allows a l J I I _ to white wire. Connect ground wire to ground screw.
good fit under cou ntertop.
3. Slide dishwasher into position. Distance from front of
dishwasher tub to cabinet front is 3/4". Check front of
door for correct vertical alignment. Ifdishwasher leans CAUTION: WHEN HOUSE WIRING IS ALUMINUM,
"in" or "out" at top, adjust leveling leg screws until BE SURE TO USE APPROVED ANTIOXIDANT
dishwasher is in correct vertical alignment with COMPOUND ANDALUMINUM-TO-COPPERCON-
adjacent cabinets. NECTORS.
4. Be sure the door closes properly and latch engages
afterdishwasherhasbeen installedincabinetopening.
If door strikes adjacent cabinets, or latch fails to
engage, readjust leveling screws to obtain proper WHITE-
alignment. NEUTRAL
5. When dishwasher is in proper alignment with adjacent GROUND_ •
cabinets, fasten to underside of countertop. Use the
to avoid interference with top of door.
screws supplied. Be sure screws are driven straight /_ _._ _
GROUND LIVE
2. Dishwasher with Power Cord -- Plug power cord into
3-prong grounding-type outlet. (See PREPARE
ELECTRICAL WIRING.)
CAUTION: FOR PERSONAL SAFETY, REMOVE
HOUSE FUSE OR OPEN CIRCUIT BREAKER.
BLACK--
Page 25

Power and Water Hook-Up
(Convertible Models Only)
Plug In Power Cord 3. Pull out Unicouple to reach faucet comfortably, Do not
1. Be sure to check your electrical power supply (see extend hoses to their limit -- a kink could restrict the
page 4). flow of water.
2. Pull out Power Cord from storage well and plug into 4. Attach Unicouple by pulling down ring in direction of
grounded outlet. Release ring.
Connect Unicouple To Hot Water Faucet Turn On Water
1. Be sure to check your water supply and your faucet complete safety. Under no circumstances should
adapter connection. (See page 4) extension cord.
2. Run hot water only until very hot. Turn off.
arrow as you push Unicouple firmly onto the adapter.
Turn hot water on FULL*. Position faucet over open
drain to prevent splashing of dishwasher drain water. Or
place a partially filled pot under the Unicouple, without
covering the drain. Cookware that is too large for
dishwasher could get a presoak if placed in this position.
*Tap must be turned on FULL for maximum flow. Where
single control taps are used, be sure tap handle is in HOT
WATER position only.
NOTE: Dishwasher must be grounded for
ground pin be removed from plug. Do not use
Disconnecting and Unloading
Disconnect Power Cord
(Convertible Unplug Power Cord and hand feed into storage compartment.
Models Only) Disconnect Unicouple
When Control Knob returns to OFF, cycle is completed.
1. Turn off hot water.
2. Press the pressure release lever at the side of the Unicouple to release
water pressure trapped in the fill hose, to prevent getting sprayed as
Unicouple is disconnected from the tap. (N.B.: A few drops of water will
appear at the pressure release lever, when pressed.)
3. Release Unicouple -- pull down ring and let Unicouple come free of
faucet.
4. Shake out excessive water in Unicouple and hoses.
5. Return to storage well.
RELEASE"_"3 Ih' I-"-_---_f_II_.._ _ Unloading
LEVER IIII I _ You may unload dishes immediately or store them in dishwasher, to suit
your convenience.
I
Caution: Dishes may be very warm if HEAT DRY option has been selected.
 Loading...