

Page 1
mBmJENN-AIR
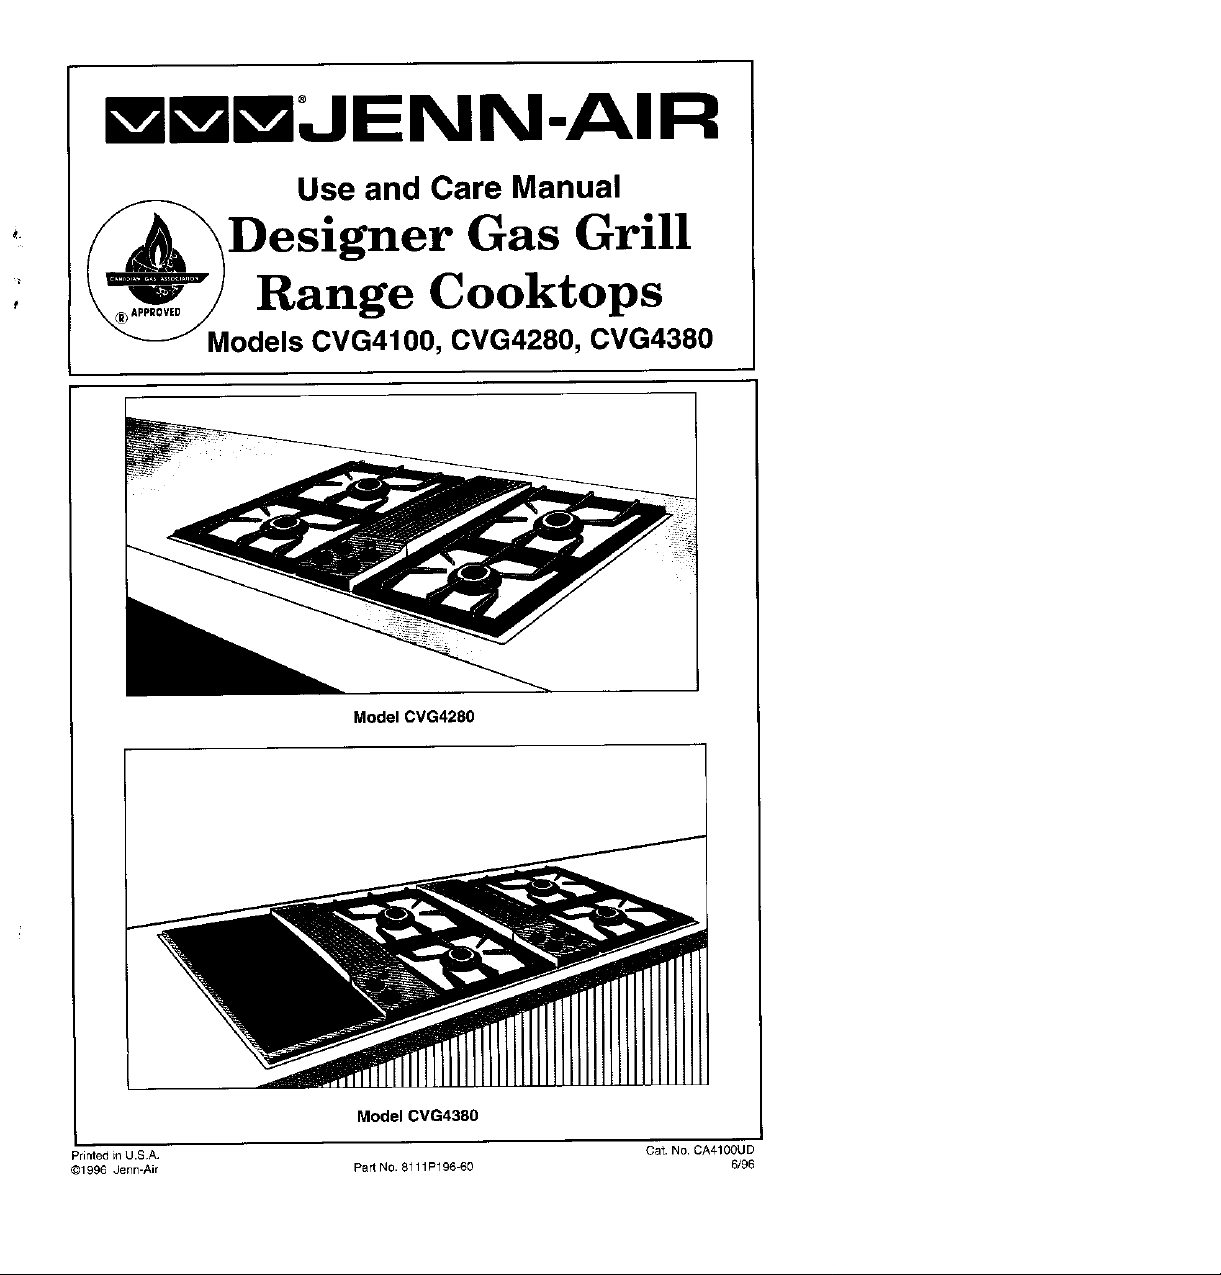
Use and Care Manual
* _Designer Gas Grill
: _ Range Cooktops
Models CVG4100, 0VG4280, CVG4380
Model CVG4280
Model CVG4380
Printedin U.SA Cat. No. CA4100UD
@1996 Jenn-Air PartNO.8111P196-60 6/96
Page 2
WARNING: If the information in this manual is
not followed exactly, a fire or explosion may
result causing property damage, personal injury
or death.
- Do not store or use gasoline or other flam-
mable vapors and liquids in the vicinity of
this or any other appliance.
- WHAT TO DO IF YOU SMELL GAS
• Do not try to light any appliance.
• Do not touch any electrical switch; do not
use any phone in your building.
• Immediately call your gas supplier from a
neighbor's phone. Follow the gas
supplier's instructions.
• Ifyou cannot reach your gas supplier, call
the fire department.
• Extinguish any open flame.
- Installation and service must be performed
by a qualified installer, service agency or the
gas supplier.
- SAVE THESE INSTRUCTIONS FOR FUTURE REFERENCE -
Page 3
Read before operating your cooktop
All appliances - regardless of the manufacturer - have the potential through
improper or careless use to create safety problems. Therefore the following safety
precautions should be observed:
1. Be sure your appliance is properly installed and grounded by a qualified
technician.
2. Never use your appliance for warming or heating the room, This warning is
based on safety considerations.
3. Children should not be left alone or unattended in area where appliance is in
use. They should never be allowed to sit or stand on any part ofthe appliance.
4. Wear proper apparel. Loose-fitting or hanging garments should never be
worn while using the appliance.
5. Do not repair or replace any part of the appliance unless specifically
recommended in this manual. All other servicing should be referred to an
authorized Jenn-Air Service Contractor.
6. De not store combustible materials, gasoline or other flammable vapors and
liquid near cooktop.
7. Do not use water on grease fires. Smother fire orflame or use dry chemical
or foam-type extinguisher.
8. Useonlydry potholders. Moistordamppotholdersonhotsurfacesmayresult
in bums from steam. De not use a towel or other bulky cloth.
9. Select cookware large enough to properly contain food and avoid boil overs
or spinovers. This will save on cleaning and prevent hazardous accumulations
offood, sinceheavysplatteringorspilloverslefton acooktopcanignite. Pan
size is especially important in deep fat frying.
10. Never leave cooktop unattended at Hi heat settings. Boil over causes
smoking and greasy spillovers that may ignite.
11. TYPE OF COOKWARE -Avoid pans that are unstable and easily tipped. In
choosing pans, look for easily-grasped handles that will stay cool. Pans that
are too heavy when filled with food can also be a hazard. If pan handles twist
and cannot be tightened, discard the pan.
12. HANDLES - Always turn pan handles to the side or back of the cooktop - not
out into the room where they are easily hit. COOKWARE HANDLES
SHOULD BE TURNED INWARD AND NOT EXTEND OVER ADJACENT
SURFACE BURNERS to minimize burns, ignition of flammable materials,
and spillage due to unintentional contact with the cookware.
13. CAUTION - Do not store items of interest to children in cabinets above
cooktop-children climbing on the cooktop to reach items could be seriously
injured.
Page 4
14. Do not touch grill and surface burner areas, or perimeter trim around cooktop.
During and after use, these areas may be hot enough to cause burns. Avoid
contact with these areas by clothing or other flammable materials until they
have had sufficient time to cool.
15. Do not heat unopened food containers. Buildup of pressure may cause
container to burst and result in injury.
16. Keep all controls "OFF" when unit is not in use.
17. Keep vent ducts unobstructed.
18. GREASE - Grease is flammable and should be handled carefully. Never
leave any cooking operation unattended. Let fat cool before attempting to
handle it. Do not allow grease to collect around the cooktop or in the vents.
Wipe up spillovers immediately.
19. Ifthe cooktop is installed near awindow, proper precautions should be taken
to prevent curtains from blowing over burners creating a FIRE HAZARD.
20. Do not use aluminum foil to line aeration tray or bumer basin. Restriction of
normal air flow may result in unsafe operation.
21. Do not use cookware on the grill section of this appliance.
22. Before servicing your appliance, disconnect power to the cooktop at the main
fuse or circuit breaker panel and at the electrical receptacle.
23. Always allow hotpans to cool in a safe place out of the reach of small children.
24. A faint gas odor may indicate a gas leak. if a gas odor is detected, shut off
the gas supply to the cooktop. Call your installer orlocal gas company to have
the possible leak checked. Never use a match or other flame to locate a
gas leak.
25. Clean only parts listed in this manual and use procedures recommended.
26. Flame size should be adjusted so itdoes not extend beyond the edge of the
cookware, this instruction is based on safety consideration.
27. This appliance has been tested for safe performance using conventional
cookware. Do not use any devices or accessories that are not specifically
recommended in this manual. Do not use eyelid covers for the surface
burners or stovetop grills. The use of devices or accessories that are not
expressly recommended in this manual can create serious safety hazards
result in performance problems and reduce the life of the components of the
appliance.
-SAVETHESEINSTRUCTIONS-
Page 5
Important Safety Notice and Warning
The California Safe Drinking Water and Toxic Enforcement.Act of 1986
(Proposition65) requiresthe GovernorofCaliforniatopublishalist ofsubstances
known to the State of California to cause cancer or reproductive harm, and
requiresbusinessestowarncustomersofpotentialexposuresto suchsubstances.
Usersof this appliance are herebywarned that burning ofgas can result in low-
levelexposuretosomeof thelistedsubstances,including benzene,formaldehyde
and soot, due primarily to the incomplete combustion of natural gas or liquid
petroleum (LP) fuels. Properly adjusted burners will minimize incomplete
combustion. Exposure to these substances can be minimized by properly
venting the burners to the outdoors.
WARNING
ElectricalGroundingInstructions
The appliance isequippedwithathree-prong grounding plugfor your protection
againstshock hazardand should be plugged directly intoa properly grounded
three-prong receptacle. Donotcutor removethegrounding prongfromthisplug.
Page 6

Congratulations on your choice of a Jenn-Air gas cooktop. The indoor grilling of meats
fish or fowl is an attractiveand healthy way to preparethese foods.
The chart below describes the differences between the models.
Model # T__peof Burners S_ed with the Unit
CVG4100 Singlegrill
CVG4280 Grilland two surface burners
CVG4380 Grill and four surface burners
Beforeyou begin cooking with your new eooktop,please take a few minutes to read and
becomefamiliar with the instructions in this book. Should you haveany questionsabout
using your Jenn-Air gas cooktop, write to us. Be sure to providethe model number.
Jenfl-Air Customer Assistance
c/o Maytag Customer Service
P.O. Box 2370
Cleveland, TN 37320-2370
Accessories
Optional .......................................................................................................... 23
Cleaning
Cooktop Parts............................................................................................ 18-20
Grill .................................................................................................................. 18
Cookware ................................................................................................................. 9
Ducting................................................................................................................... 21
Grilling
Cleaning.......................................................................................................... 18
Gdll Guide ....................................................................................................... 16
Grilling Tips ..................................................................................................... 17
Installing.......................................................................................................... 14
Usage ............................................................................................................. 15
How A Surface Burner Works .......................................................................... 10-11
How to Operate During a Power Failure ........................................................ 10
Safety Precautions ............................................................................................... 2-5
Service Information ................................................................................................ 22
Surface Burners
Installing.......................................................................................................... 13
Surface Controls.................................................................................................... 12
Ventilation System ................................................................................................... 8
6
Page 7
The built-in ventilation system removes cooking vapors, odors and smoke from foods
prepared on the cooktop, grill and gdll accessories.
Regularuse ofthis system will insurea more comfortable and less humid kitchenwhich
is free of heavy cooking odors and fumes that normally create a frequent need for
cleaning and redecorating.
• To operatethe ventilation system manually, push the switch located in front of the
air grille. Ifyoupushonthe leftsideoftheswitch,thefanwilloperate atthe Lospeed.
If you push on the right sideof the switch, the fan will operate at the Hi speed. To
turn the fan off, the switch should be returned to the middle (level) position.
• The ventilation system will operate automatically on Hi when the grill burner is in
use. Duringgrilling, the fan speedis automatically set for the Hisetting AND cannot
be changed to Lo speed or manually fumed off.
• Use the Hi fan speed for capturing steam. Use Lo fan speed for capturing smoke
when pan frying.
• The ventilation system can be used to remove strong odors from the kitchen as
when chopping onions near the air grille.
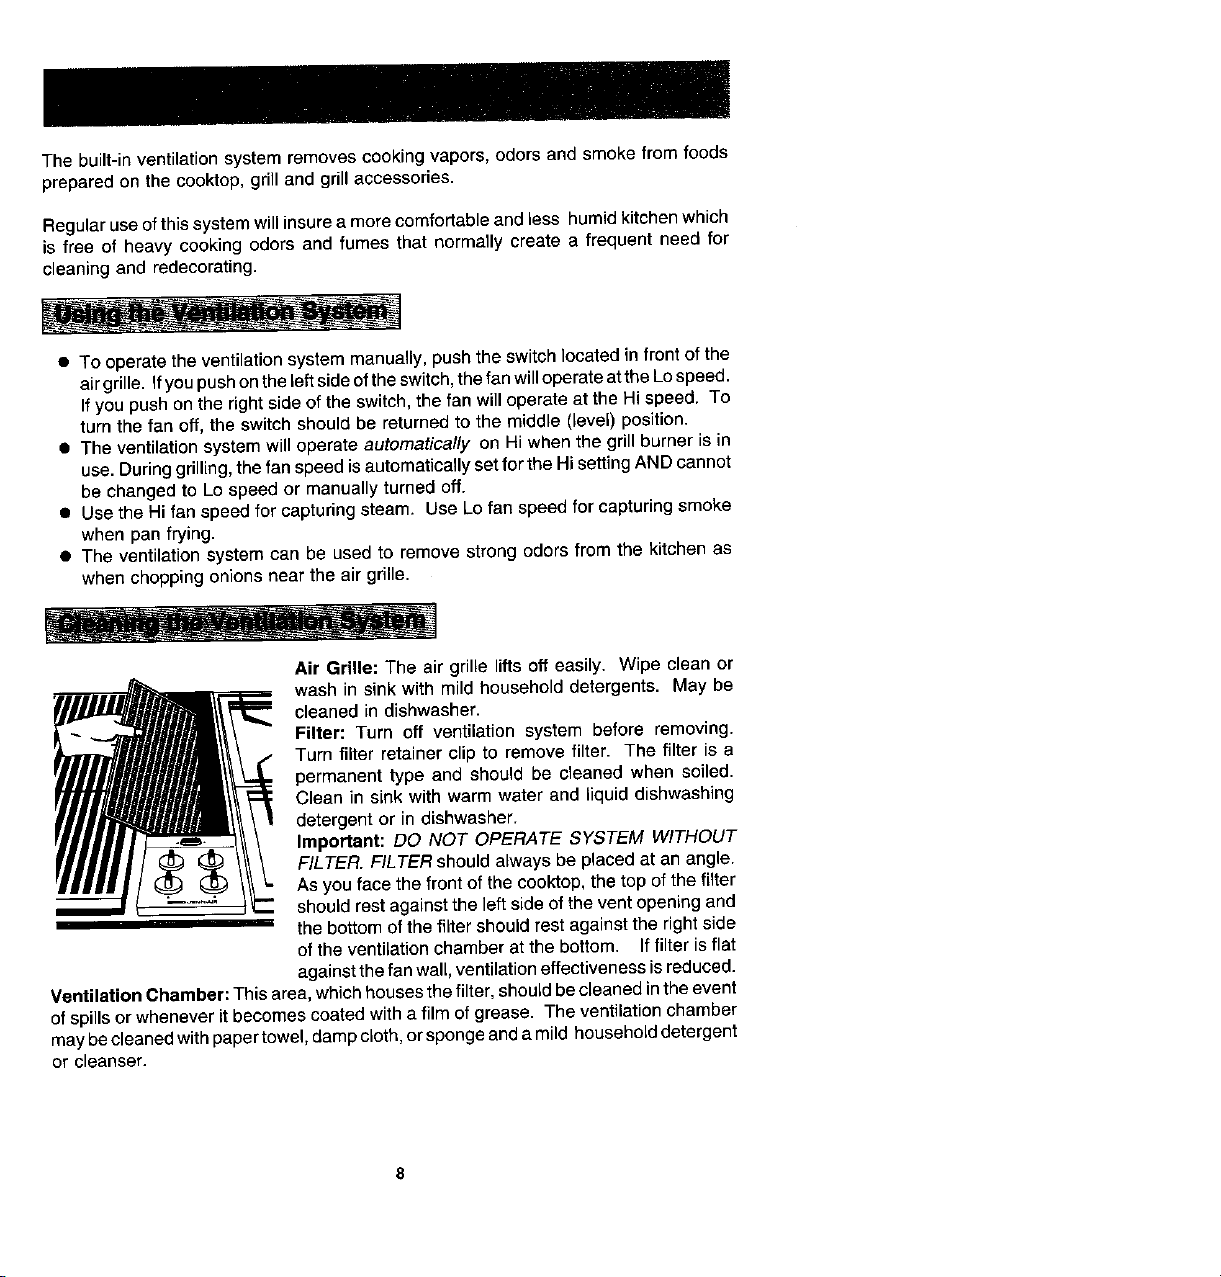
Air Grille: The air grille lifts off easily. Wipe cleanor
Filter; Turn off ventilatJonsystem before removing.
Turn filter retainer clip to remove filter. The filter is a
permanent type and should be cleaned when soiled.
Clean in sink with warm water and liquid dishwashing
detergent or in dishwasher.
- - _ Important: DO NOT OPERATE SYSTEM WITHOUT
_ I_ wash in sinkwith mild h°useh°lddetergenta"Maybes.cleaned in dishwashsr.
_= "" should rest against the left side ofthe vent opening and
Ventilation Chamber: This area,which housesthe filter, should becleaned inthe event
of spills or wheneverit becomes coated with a film of grease. The ventilation chamber
may becleanedwith papertowel, dampcloth,or sponge and a mild household detergent
or cleanser.
_ _ FILTER. FlLTERshould a_waysbe placed at an angle.
• . As you face the front of the cooktop, the top of the filter
the bottom ofthe filter should rest against the rightside
of the ventilation chamber at the bottom. If filter is flat
againstthe fanwalk,ventilationeffectiveness isreduced.
Page 8

To achieveoptimum cooking performance use cookpots withfiat bottomsand tight fitting
covers. Flame size should be adjusted so it does not extend beyond the edge of the
cookware. This instruction isbased on safety considerations. Adjusting the size of the
flame to fit the size of the cookware also helps to save fuel.
CAUTION: DoNOTallow large pans to contact or extend over the control knobs. Heat
trapped between large pans and control knobs could possibly cause damage to the
control knobs.
Important: Leave a minimum of 1 1/2"between sideof pan and surrounding surfaces,
such as countertop backsplash or side walls, to allow heatto escape to avoid possible
damage to these areas.
• Aluminum cookware heats evenly and quickly. A slightly larger flame size can be
used. Theflame can beadjusted soitcomestotheedgeofthecookware. However,
the flame should NEVER be adjusted so that itextends beyond the bottom of the
cookware.
• Stainless steel cookware with copper or aluminum cores heat evenly and fairly
quickly. The flame size should beadjustedto extend only halfway betweencenter
and edge of the cookware bottom for best results.
• Cast iron cookware heats slowly.
• Checkmanufacturer's recommendations before using porcelain on steel, porcelain
on cast iron, glass, glass/ceramic, earthenware, or other glazed cookpots.
If the cookware is covered, less fuel will be needed; therefore, a lower flame size can
be used.
Note: Food will not cook any faster when more than the amount of heat needed to
maintain a gentle boil is used.
Page 9

Your new cooktop bumers have been preset for an "average" set of conditions. Regional
variances in gas pressure and atmospheric conditions such as height above sea level
may affect your initial flame performance•
When the control knob is turned on, gas enters the mixer tube and mixes with air. This
air and gas mixture flows to the burner head and is lighted by a spark from the solid state
igniter•
A properly adjusted burner with clean ports will light within a few seconds, The cone-
shaped flame will be dear blue in color with a clearly defined inner cone. There should
be no trace of yellow in the flame. A yellow flame indicates an improper mixture of air
and gas. Ifyour flame does not resemble the "correct" flame as described above, follow
the air shutter adjustment instructions below.
The variable surface controls for the surface burners and grill burner provide flexibility
in heat setting selection,
Note: The grill can be replaced with an optional surface burner module, Model AG202.
Surface Burners
In case of prolonged power failure, you can manually light the surface burner by holding
alighted match nearthe burner ports and slowly turning the control knob counterclockwise
(after depressing) until the gas ignites. There is no fan so smoke and condensation can
gather.
Grill
IN CASE OF POWER FAILURE DO NOT USE GRILL• VENTILATION SYSTEM WiLL
NOT OPERATE•
Air Shutter Adjustment
To Adjust Surface Burner Air Shutter (Some models):
Loosen fastening screw with a phillips 8URFACEBURNERROTATEAIR
screwdriver and rotate air shutter to increase A_aSHU_TER SHU_ERON
or decrease the size of the air opening. As the SCREW MAKEA_R
appearance• Adjustrnent is satisfactory when A_RS.U_E,
a clearly defined, even blue flarne results at AIROPENING TO
the Hi flame setting. Afteradjustrnent, tighten A_a_ "_CLOSEOPeNw
screw•
10
MJXEF_HEAD TC
Page 10

To adjust grill burner air shutters and surface burner air shutters (Some
models):
Theleft handair shuttercontrolsthe rearhaft ofthe grill burner orthe rearsurface burner.
The right handshutter controls thefront half ofthe grillburner or thefrontsurface burner.
Slide air shutter backward or forward to
increaseordecreasethesizeofthe airopening. A_RSHUTrER
screwdriver blade may be required to make
this adjustment. Observe change in flame A_R_,_-_jL_ "_
appearance as the air shutter is moved. AJ_SHUTrER_/--_SSE_SCREWOR_VEnBLADE
Adjustment is satisfactory when a clearly INSLOTAND]%'VISTWITH
SLIGHT pRESSURE TO ,_LLOW
defined, even blue flame results at the Hi AIR_HUTrERTOSLIDEEASILY
flame settfng. The snug fit of the air shutter
assures it will remain positioned correctly,
On any burner, closing the air shutter too far will cause the flame to become soft and
yellow tipped. Opening the air shutter too wide will cause the flame to blow away from
the burner ports. Proper adjustment will produce a sharp, clearly defined even. blue
flame.
Lo Flame Adjustment
This appliance has been shipped from the factory with Lo and Mealflame settings
adjusted for use with natural gas and average installations.There is a wide variety of
conditionscaused byaltitude and gas mixturescontrolled byutility companies which will
vary and affect the gas flame and performance. Adjustments should be made at time
of installation. If conditions change, follow the procedures outlined below to adjust the
Lo setting.
1. Light burner and set control knob for low flame,
2. Remove control knob from valve stem,
CAUTION: Never use a metal blade to pry
knoboff. If knobcannot be easily removed
tuckthefolds ofa cloth dishtowelunder the
knob skirt and pull the towel upward with
steady, even pressure.
3. tnsert a slender, thin-blade screwdriver
intothe recess at center of valve stem and
engage blade with slot in adjusting screw.
4. Turn center stem adjusting screw slightly
to set flame size. Note: Turn clockwise to
reduce or counterclockwise to increase
flame size.
5. Replace control knob when adjustment is
completed.
Proper adjustment will produce a stable, steady blue flame of minimum size. The final
adjustment should be checked by turning knob from Hi to Lo several times without
extinguishing the flame. This adjustment, at the Lo setting,will automatically provide
the proper flame size at Med setting.
11
Page 11

• Since the controls are a push-turn type, they must be pushed down before turning.
To set (from the OFF position), push down on control knob and immediately turn
counterclockwise to the LITE position until burner ignites. After ignition, turn knob
clockwise to desired setting.
• Igniter will continue to spark until knob is turned clockwise back to or past Hi position
on knob.
Left Side or Single Grill
The Lo controls are set for the grill burner. Thus, when using a surface burner, the
control knobs may be turned to a position lower than the Lo setting.
Right Side
Only surface burners may be used on the right side. Use the right surface burners on Hi
for large quantity cooking and canning because the BTU rate is higher. Also use the right
surface burners on Lo for sauces and delicate items because the Lo setting has a lower
BTU rate. Note CVG4380 Models: The center bay is also designated for surface burners
only. (See Right Side notes above.)
CAUTION: Do NOT allow large pans to extend over the control knobs. Heat trapped
between large pans and control knobs could possibly cause damage to the control
knobs.
The controls offer flexibility in heat setting selection. An infinite number of settings exist
between Hi and Lo. At the Hi setting, a detent may be felt. For all settings other than Hi,
simply adjust your flame for best results.
The size and type of cookware and the amount and type of food being cooked will influence
the setting needed for best results. Suggested settings are provided as guidelines.
Hi: A fast heat to start cooking quickly, to bring liquids to
(Med. High) For fast frying or browning of foods, to maintain rapid
Med: For most frying, sauteing, and slow boil of large ___
(Med. Lo) For simmering, maintaining boil of small amounts of
Lo: Maintaining serving temperature of foods, melting _.._.N._
a boil, to preheat oil for deep fat frying. (_/_°_
boil of large amounts of food, to maintain oil
temperature for deep fat frying.
amounts of food.
food.
butter or chocolate.
12
Page 12

1. Be sure control knobs are turned off.
2. if the grill burner and grill grates are in place, remove before installing a surface
burner module. Clean burner basin of any grease accumulation. (See page 19 for
cleaning recommendations.)
3. Position the burner assembly with the mixer tube openings toward the orifices. Slide
the burner assembly toward the orifices until opening for igniter is over the igniter.
Lower into place until side openings are resting on the burner supports and igniter
is centered between the two flash tubes.
4. Install the aeration tray by inserting the prong at the end of the pan into the opening
in the end of the burner basin. Lower the opposite end into the cooktop.
Note: Before first use, read the Surface Burner Grates Care instructions found on
p. 19.
1. Control knobs should be in the OFF position and the cooktop should be cool.
2. Remove the aeration tray by lifting up the front end on the right side (back end on
the left side) until the top clears the opening of the cooktop by about 5 inches
3. Hold aeration tray by the sides and slide away to remove the prong from the opening
and clear the surface burners.
4. Lift up on the sides of the surface burner assembly bracket about 2 inches. Slide
away from the orifices.
5. A storage tray, Model AG350, is available and can be used for storing a surface
burner module.
assembly. Model AG202 air shutters have been adjusted for compatibility on
NOTE: Optional surface burner assembly, Model AG202, can replace the grill burner
NOTE: Do not disassemble the surface burner assembly.
the left side.
13
Page 13

The grill consists of two black grill grates and a grill burner. Only install the grill on the
left side of your cooktop.
1. Beforeinstalling grillcomponents, be certain control knobs are inthe OFF position.
2. Position the grill burner with mixer tube openings toward the orifices. Slide the
burner towardsthe orificesuntilthe igniteris inbetween front and rear grillsections.
Lower into place until side openings are resting on the burner support pins.
3. Place the grill grates on the top of the cooktop.
remove theprotective shipping coating. Heat the grill on Hi for 10minutes and
NOTE: Before usingthe grill for the first time, heat the E-ven HeatTM grill burner to
use the vent system to remove any additional smoke during cooling.
1. Removegrill components once they are cool. Be surecontrol knobs are inthe OFF
position.
2. Remove grill grates.
3. Remove grill burner.
14
Page 14

• Before the first use, wash your new grill grates in hot soapy water, rinse and dry.
Then "season" the surface by wiping on a thin coating of cooking oil. Remove
excess oil by wiping again with another paper towel. This procedure should be
repeated when: a) cleaning inthe dishwasher since the detergent may remove
seasoning,or b) anytime a sugar-based marinade (for example, barbecue sauce)
is going to be used.
• Usenonmetallic spatulas or utensils to prevent damaging the Excalibur ®nonstick
grill grate finish.
• Preheat the grill on Hi for 5 or 10 minutes. Preheating improves the flavor and
appearance of meats and quickly sears the meat to help retain the juices,
• Excessive amounts of fat should be trimmed from meats. Some fat is necessary
to produce the smoke needed for that smoked, "outdoor" flavor. However,
excessive fat can create cleaning and flare-up problems.
• Allowing excessive amounts of grease or drippings to constantly flame voids the
warranty on the grill grates. Excessive flare-ups indicate that either the grill interior
needs to be cleaned or that excessive amounts of fat are in the meat or the meat
was not properly trimmed.
• Grease drippings will occasionally ignite to produce harmless puffs of flame for a
second or two. This is a normal part of the cooking process.
• NEVER LEAVE GRILL UNA'I-rENDED DURING GRILL OPERATION.
Should sustained flare-upoccur:
1. Turn on FAN manually.
2. Immediatelyturngrillcontrolknobsto OFF position.
3. Removemeat fromgrill.
IMPORTANT
• Do notuse aluminumfoil insidethe grillarea.
• Do notusecharcoalor woodchips inthe grillarea,
• Do notallowburnerbasin to becomeoverloadedwithgrease. Clean after each
use.
• Donotcovergratescompletelywithmeat. Leaveairspacebetweeneachsteak,
etc,to allowproperventilationas well as preventflare-ups,
15
Page 15

Preheat grill on Hi, 5 or 10 minutes, for best flavor.
16
Page 16

With yourJenn-Air grill literally any food you've considered "at its best" when prepared
outdoors can now be prepared indoors with less fuss and great flavor.
The following suggestions are good rulesto follow and will increase your enjoyment of
the equipment.
• Be sure to follow directions on page 15 for using the grill.
• Suggestedcooking times and control settings are approximate due to variations
in meats. Experience willquicklyindicate cooking times aswell aswhichsettings
work best.
• For best results, buy topgrade meat. Meatthat is at least 3/4inch will grill better
than thinner cuts.
• Score fat on edges of steak, but do not cut into meat, to prevent curling while
cooking.
• For theattractive "branded" lookon steaks, be sure grill is preheated. Allow one
sideof meatto cookto desired doneness, or untiljuices appear onthe top surface,
before turning. Turn steaks and hamburgers just once. Manipulating food
causes loss ofjuices.
• When basting meats or applying sauces to foods, remember that exsessive
amounts wind up inside your grill end do not improve the food flavor. Apply
sauces during the last 15 to 20 minutes of cookingtime unless recipe specifies
otherwise. Plus, any time a sugar-based marinade, (for example, barbecue
sauce) isgoing to be used, the grates should be "seasoned" priorto preheating
(see page 15).
• There are many meat marinadeswhich will helptenderize less expensive cutsof
meat for cooking on the grill.
• Certainfoods,such aspoultryand non-oilyfish, may need some extra fat. Brush
with oil or meltedbutter occasionally while grilling.
• Usetongs with long handles or spatulas for turning meats. Do not use forks as
these pierce the meat, allowing juices to be lost.
• To help retainmeatjuices, salt after turning meat or after cooking is completed.
17
Page 17

Theknobs onthe control panelcan beremoved withthe controls inthe OFF position. Pull
each knob straightfrom the shaft. Washknobs in warm soapy water or dishwasher; do
not use abrasive cleansers or materials. To replaceeach knob, match flat part of knob
opening with the flat of the shaft, returning in OFF position.
Important: Never use a metal blade to pry knob off. Ifknob cannot be easily removed,
tuck the folds of a cloth dishtowel under the knob skirt and pull the towel upward with
steady, even pressure.
Use mild cleansers, such as soapy water or mild liquid sprays, such as 409. Wipe with
sponge, damp cloth or paper towel. Do not scrub with S.O.S. pads or abrasive
cleansers.
Besurethe grilliscoolandcontrols areoff. These are madefromcastaluminum and are
coated with the Excalibur_ nonstickfinish.
• Afterthe grillgrates havecooled,wipe offgrateswith apapertowel. Wash coolgrates
(DONOT IMMERSEHOTGRILL GRATES INWATER)with soapordetergent in hot
water in thesink or wash them inthe dishwasher. Be sureto removeall food residue
beforecooking on the grill grates again.
• Removestubborn spots with a plastic mesh puff or pad. For best results, useonly
those cleaning products which state they are recommended for use whencleaning
nonstick surfaces.
• Ifgrates arewashed in the dishwasher, season with oil prior to grilling.
• Donotusemetalbrushesorabrasivescouringpadsorotherscrubbersintendedto
clean outdoor charcoal grills. These will remove the finish as well as scratch the
grates. Do not clean in the self-cleaning oven or use oven cleaners on the grates.
Thegrill bumer should be cleaned after each use. Itcan be cleaned with a soapy S.O.S.
pad or in the dishwasher. Rinseand dry thoroughly before using again. For heavy soil,
burner should be cleaned firstwith a soapy S.O.S. pad, rinsedanddried. Then it can be
cleaned in a self-clean ovenfor 2 hours.
NOTE: toothpickCheckto bedirectlySureintoallburnereachport.p°rtsare open. To open clogged ports, insert a
18
Page 18

Thesurface burnerassembly includes burner basinsurface burner grates,aerationtray,
and surfaceburners. The burner basinis located underthe grill and surface burners and
should be cleaned after each use of the grill.
• Toremovelightsoil, cleanwithsoapywaterorwithcleanerssuchasFantasticor409.
Foreasier cleanup, a) spray with household cleaner; b) cover with paper towels; o)
add small amount of water to keep the paper towel moist; d) cover and walt 15
minutes; a) wipe clean.
• Toremovemoderatesoil, scrub withComet, BonAmi,a softscrubcleanserorplastic
scrubber.
• To removestubborn soil, spray with an ovencleaner per manufacturer's directions;
let soak overnight; wipe clean; rinse and dry.
NOTE:
• The porcelain enamel used on your cooktop is acid resistant, not acid proof.
Therefore, acid foods (such as vinegar, tomato, milk, etc.) spilled on the cooktop
should be wiped up immediately with a dry cloth.
• Do NOT use abrasive cleaners, S.O.S. or Brillo pads.
• Remove sugar spills immediately.
• Do NOT clean in a self-clean oven.
• Check to be sure all burner ports are open. To open clogged porte, insert a
toothpick directly intoeach port.
Although the burner grate Lsdurable, it will gradually lose its shine and/or discolor,
regardlessofthe careyou take of it. This isdueto its exposureto the hightemperature
ofthe gasflames.
To preservethe porcelain enamel finish as long as possible, have a pan on the grate
before you turn on the burner, and Lowerthe flame when food reaches the desired
cooking temperature.
19
Page 19

• Tocleanlightsoil,wipewithsoapycloth or nonabrasivecleanser,suchasSoft Scrub.
Rinse,buff withsoft cloth; polishwith glass cleanerif necessary.
• To cleanmoderatesoil or discolorationof thesurface (excessive heatwill cause a
golden discoloration), clean with Zud, Bar Keepers Friend,or Luneta (Jenn-Air
ModelA9t 2, Part No.712191). With a spongeor cloth,rubcleanserwiththe grain
to avoid streakingthe surface. Rinsewell,buff dry; polishwitha glass cleanerif
necessary to remove cleanser residue and smudge marks.
• Heavy soil,such as burned on foodsoil, can be removed byfirst cleaning asper the
instructionsfor moderatesoil. Stubborn stainscan be removedwith a dampScotch-
Britescour-pad; rub evenlywith the grainto avoidstreaking thesurface. Rinsewell,
buff with drycloth; polish with glasscleaner ifnecessaryto removecleanser residue
and smudge marks. Scotch-Brite is also useful in buffing and removing minor
scratches.
i
• Itisimportantto keep igniterportopenings on burnersclearand freeof obstructions
to avoid ignitionfailure and possible gas buildup. If the port openingsare blocked,
usea toothpick to remove food particles.
• The igniter cap and stem can be cleaned with warm soapy water and a plastic
scrubber. The wireelectrode inside thecap canbecleaned withasmalrbrush. Rinse
and dry.
A drain jar is located belowthe grill basin pan
under the countertop. Check periodically to
preventspillovers. Unscrewand remove. Ifjar
isbroken, replace with any heat tempered jar,
such as a canning jar, which has a standard
Ora,nJa,;
screw neck.
Serial Plate: Do notclean.
2O
Page 20

Jenn-Air's ventilation system is designed to capture both cooking fumes and smoke
while grilling. If the system does not, these are some ducting installation situations to
check:
• 6" diameter round or 31/4" x 10" rectangular ducting should be used for duct lengths
10'-60'. Note: 5" diameter round ducting must be used if the duct length is 10'
or Jess.
• No more than three 90° elbows should be used. Distance between elbows should
be at least 18".
• Recommended Jenn-Air wall cap should be used. Make sure damper moves freely
when ventilation system is operating.
• There should be a minimum clearance of 8" for eooktop installed near a side wall.
If there is not an obvious improper installation, there may be a concealed problem such
as a pinched joint, obstruction in the pipe, etc. Installation is the responsibility of the
and questions should be addressed first by the installer. The installer should
very carefully check the ducting installation instructions.
21
Page 21

Check the forlowing list to be sure a service call is really necessary.
If grill or surface burner fails to light:
• checktobe sureunit is properlyconnectedto power supply,
• checkfora blowncircuitfuseor atrippedmain circuit breaker.
• check to besure burner ports or ignition ports are not clogged.
• check to besure igniter is clicking. If igniter doesn't click, turn control
knob off and clean iginitor.
• check to besure appliance regulator is set for correct fuel.
• check to besure inlet pressure is adequate.
If the flame is uneven:
• burner portsmay be clogged.
• flamesetting may need to be adjusted (see p. 11).
If grill or surface burner flame lifts off the ports:
• shutter on the mixer tube needs to be closed untilflame settles on the burner
ports (see pp. 10-11),
If grill or surface burner flame is yellow in color:
• shutter on the mixer tube needs to be openeduntil yellow disappears
(see pp. 10-11).
22
Page 22

D-C
Griddle - Model AG302 _ j,,"_'_
Serf-draining grJddJemakes many favorite foods
easier to fix. Family-sized surface lets you
cook several pancakes, hamburgers, orgrilled
sandwiches at the same time.
[ ,r"_
Wok - Model AO142
Ideal for stir-frying, steaming, braising, and __.._,. "_"--._
stewing. Wok has nonstick finish, wood
handles, cover, steaming rack, rice paddles
and cooking tips. \ /
Surface Burner Module - Model AG202
includes surface burner assembly, aeration
trey, and two surface burner grates.
Grill Cover - Model AG341
Attractive grill cover protects grill when not in
use. Textured steel with molded handles.
NOTE: Only these accessories are approved for use with your gas grill-range. DO
NOT USE Jenn-A r electric gr II-range accessores on your gas gr -range.
23
Page 23

 Loading...