

JBL SCL-3, SCL-4 Owner's And Installer's Manual
JBL® SCL-3
®
JBL
In-Wall Loudspeakers
OWNER’S AND INSTALLER’S
MANUAL
SCL-4

CONTENTS
Introduction ................................................................................................. 2
Included ...................................................................................................... 2
Speaker placement ...................................................................................... 3
Left and right speakers .......................................................................... 3
Center channel speakers ........................................................................ 3
Ambient surround speakers .................................................................... 4
5.1-channel systems .............................................................................. 5
6.1-channel systems .............................................................................. 5
7.1-channel systems .............................................................................. 6
General installation notes ............................................................................. 6
Connecting the speakers to the rest of your system ...................................... 6
Rear enclosure installation ........................................................................... 7
Front baffle assembly installation into back box............................................. 8
Specifications ............................................................................................ 10
INTRODUCTION
THANK YOU for purchasing the JBL® SCL-3 and/or SCL-4 In-Wall loudspeakers. For more than 65 years, JBL
engineers have been providing audio equipment for homes, concert halls, recording studios and movie theaters
around the world, and JBL products have become the hands-down choice of leading recording artists and sound
engineers. The SCL-3 and SCL-4 are the latest members of the JBL Synthesis Home Theater system. To get the best
performance from your new loudspeakers, please read these instructions thoroughly.
PACKAGE CONTENTS
EACH JBL SCL-3 and SCL-4 PACKAGE CONTAINS:
• 1 – Loudspeaker
• 1 – JBL Logo set
• 2 – Center baffle screw (SCL-3 one screw is extra/spare due to special length)
• 13 – Baffle screws (SCL-4)
• 8 – Baffle screws (SCL-3)
• 1 – Set of 4 Security Plates (SCL-4 only). For SCL-3,
security plates included with pre-construction wall bracket
• 1 – Grille
• 1 – User Manual
• 1 – Back Box with mounting brackets attached
If you suspect that there has been shipping damage, report it immediately to your dealer. We recommend that you
keep the box and packing materials for future use.
2
SPEAKER PLACEMENT
RCL
Positioning your loudspeakers properly is critical in order to achieve the sonic performance of a home theater. Please
read the following section for guidance in correct and optimal placement.
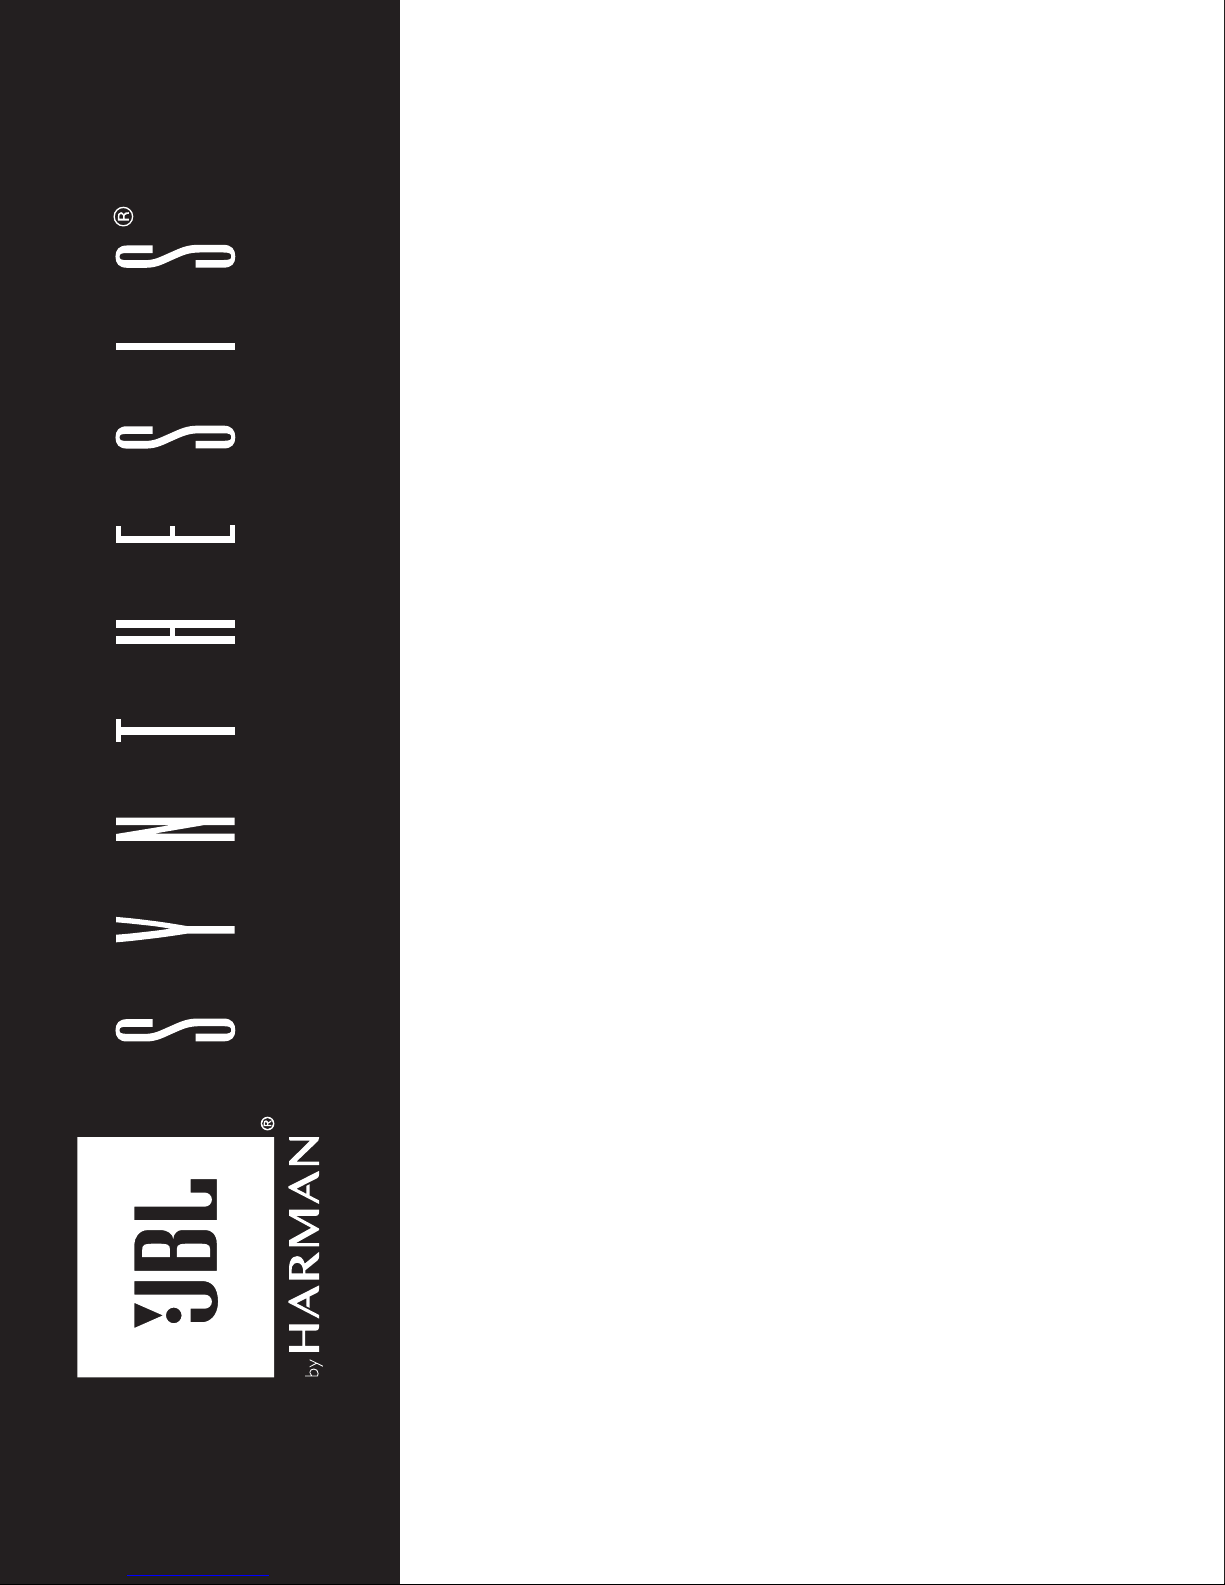
LEFT AND RIGHT SPEAKERS
If you have purchased a Synthesis home theater system, then the SCL-3 or SCL-4 models could serve as your front
left and right main speakers. Since they have been designed for uniform coverage and maximum dispersion of sound,
they should be placed with the center of the speakers at about the same height on screen as the actors would be, to
aid in the illusion that the actors’ voices are coming directly from their on-screen images. Ideally, the speakers will be
placed about 60 degrees apart from each other, viewed from the listening position, so that the distance between the
speakers is the same as each speaker’s distance from the listener (Figure 1). Although their acoustic coverage area
allows mounting the systems in any of the four possible orientations where necessary (horn located above, below, or
to the sides of the woofers), the preferred orientation is with the horn above the woofer(s). This will depend greatly on
mounting location height and room boundaries.
English
VIEWING
POSITION
FLOOR PLAN
Figure 1
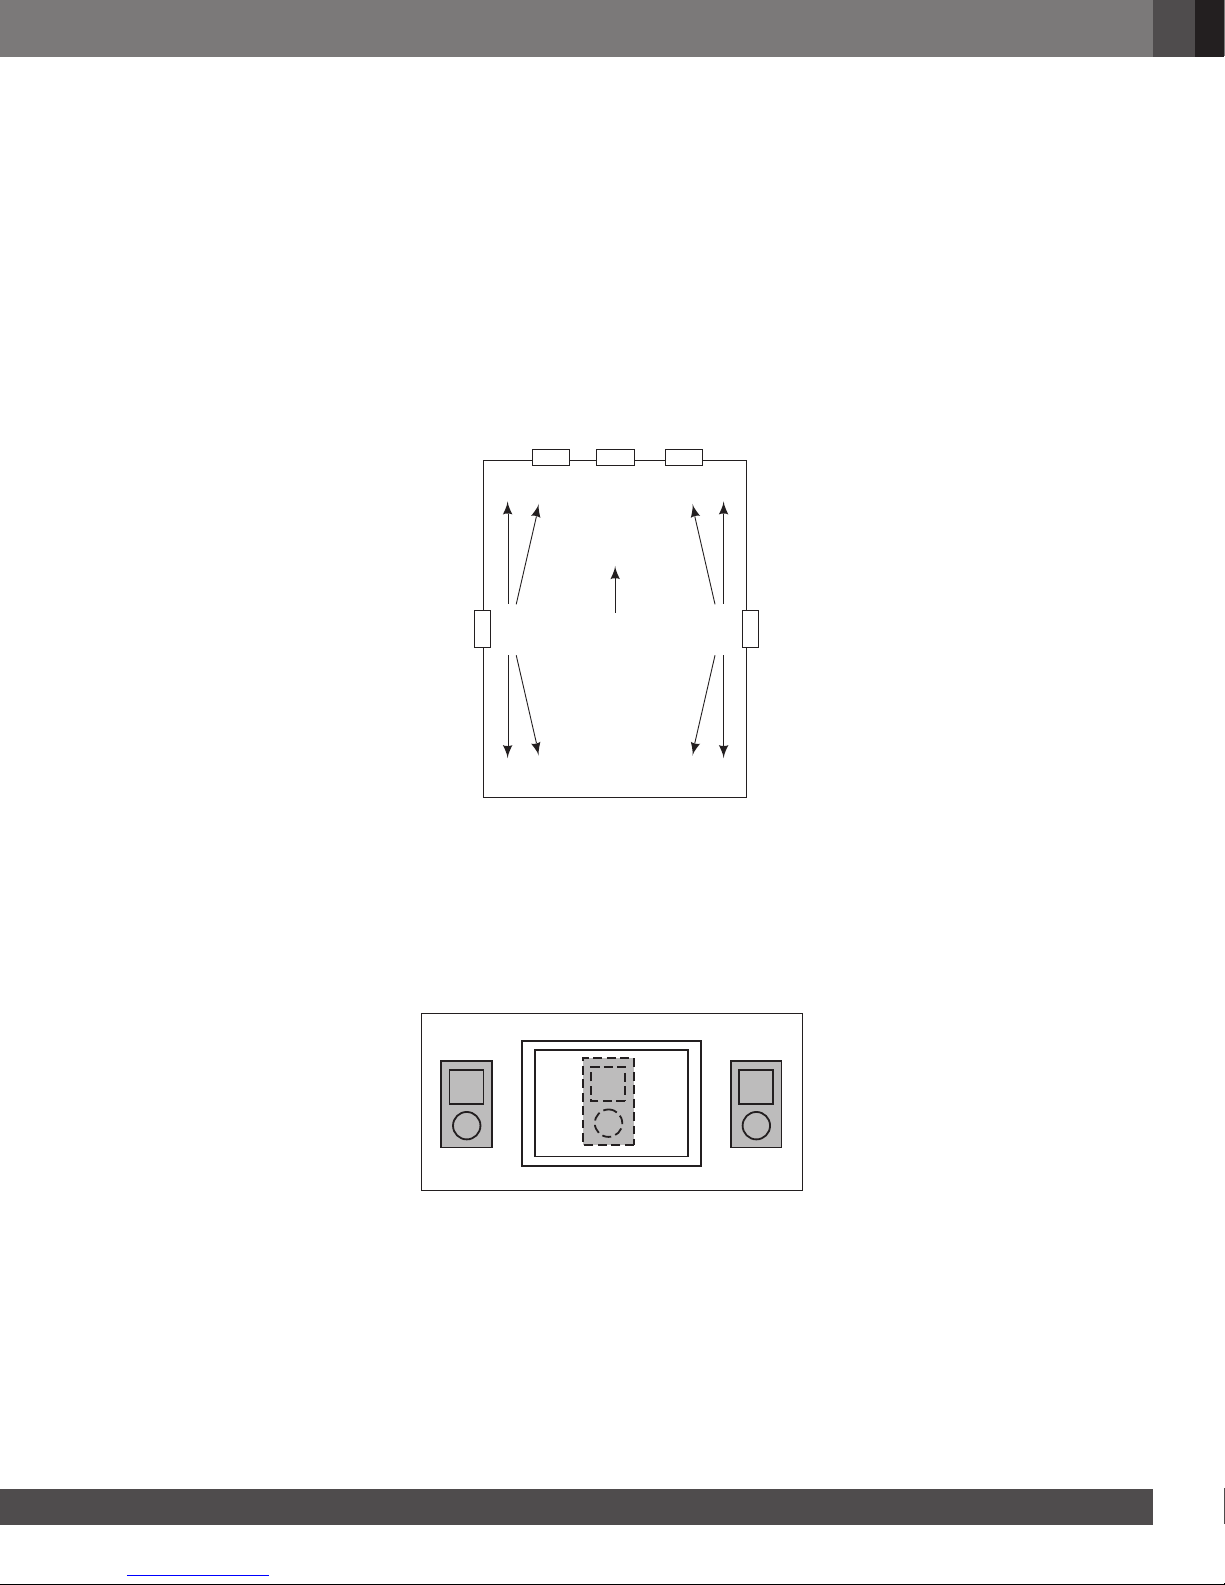
CENTER CHANNEL SPEAKERS
SCL-4: If you have purchased the SCL-4 for the center position, be sure to place it vertically (horn above or
below woofer) during installation in order to take advantage of its sound-dispersion characteristics. If you mount it
horizontally, it will not provide the most optimized horizontal dispersion pattern. If the speaker is being used with a
perforated projection screen, it should be mounted behind the center of the screen with the horizontal “center” axis
aligned as close as possible to the center axis of the Left and Right channel speakers (See Figure 2).
Figure 2
www.jbl.com
3
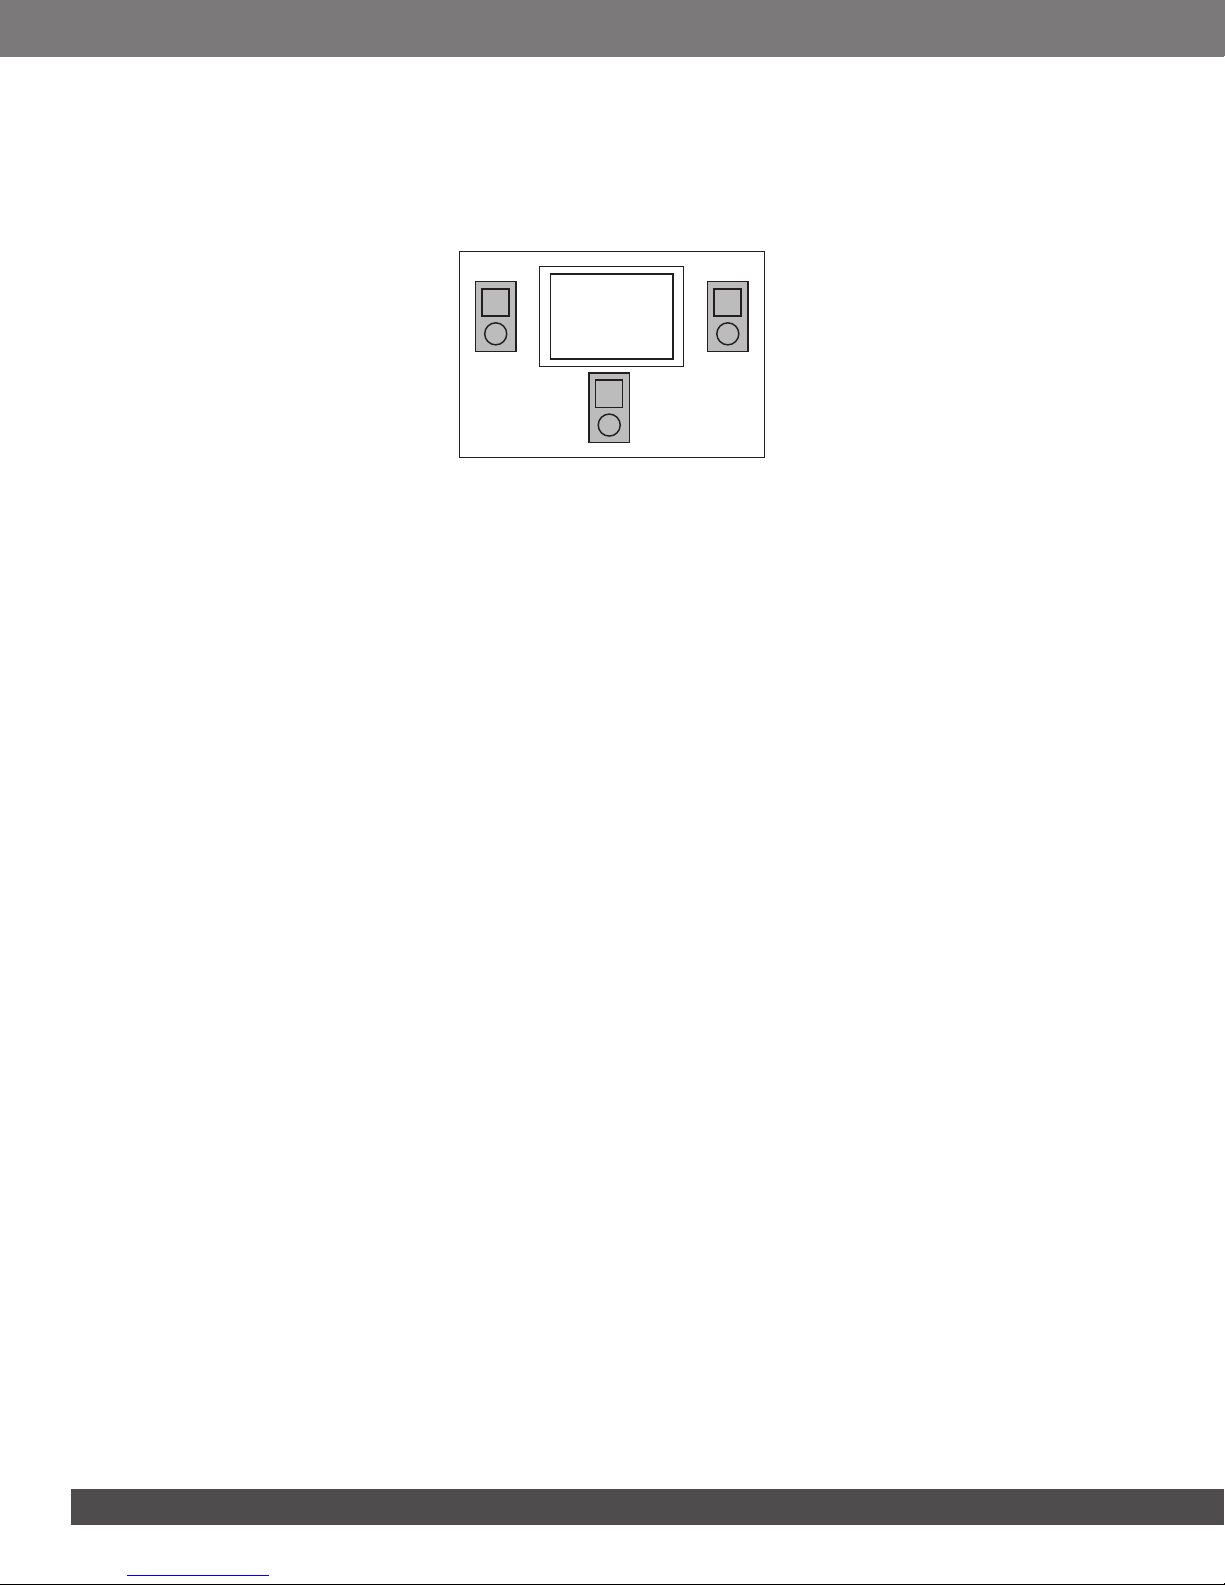
If a non-perforated projection screen, plasma display or other fixed video device is being used in the installation, the
more compact alternative would be the SCL-3 model. Otherwise the SCL-4 could still be used in vertical orientation
and mounted directly below and as close as possible to the video display (See Figure 3). In either situation however,
the left and Right channel speakers may need to be lowered slightly to minimize the vertical positional difference. The
inverse of this mounting method will also work (center channel located above the screen or video display).
Figure 3
SCL-3: If you have purchased the compact SCL-3 model to use for the center channel speaker, be sure to position
it vertically (horn above or below the woofers) during installation in order to take advantage of its sound-dispersion
characteristics. If you mount it horizontally (horn to left or right of woofers), it will not provide the most optimized
dispersion pattern. Similar to the SCL-4 center channel installation, the SCL-3 horizontal “center” axis should be
aligned as close as possible to the center axis of the Left and Right channel speakers (See Figure 2).
If a non-perforated projection screen, plasma display or other fixed video device is being used in the installation, then
the recommended location as described above is directly below and as close as possible to the video display (See
Figure 3). Again, the inverse of this method will work also.
NOTE: It is extremely important to place the center, left and right speakers at the same height. The HDI horn
containing the high frequency compression driver in the center channel speaker should be no more than 2 feet higher
or lower than those in the left and right speakers. This preserves the “localization integrity” of “sound pans” in which
the sound appears to move from left to center to right. If the program material also appears to travel up and down, it
can destroy the illusion of panning effects and so should be avoided.
AMBIENT SURROUND SPEAKERS
Although it has been common for many years to use a number of surround speakers in commercial movie houses,
until recently, the traditional home theater configuration called for 5.1 channels. The newer surround formats that are
appearing in consumer audio equipment are calling for more complicated 6.1- and 7.1-channel systems now including
height channel locations. The advantages of using additional speakers are many. Additional channels enable a more
versatile use of directivity for a more accurate surround presentation. Also, a higher overall sound-pressure level can
be achieved with less energy expenditure from any individual speaker. Placement of the surround speakers remains
critical.
4
4
 Loading...