

Page 1

S7165.S5165.S820.OM.qxd 4/16/09 10:36 AM Page 1
SYNTHESIS
®
S7165/S5165/S820
OWER
P
AMPLIFIER
USER
MANUAL
S
’
Page 2

S7165.S5165.S820.OM.qxd 4/16/09 10:36 AM Page 2
CONTENTS
IMPORTANT SAFETY INSTRUCTIONS . . . . . . . . . . . . . . . . . . . . . . . . . . . . . . . . . . . . . . . . . . . . . . . . . . . . . . . . . . . . . . . . . . . . . . . 3
INTRODUCTION AND FEATURES . . . . . . . . . . . . . . . . . . . . . . . . . . . . . . . . . . . . . . . . . . . . . . . . . . . . . . . . . . . . . . . . . . . . . . . . . . . 8
OPERATION AND CONTROLS . . . . . . . . . . . . . . . . . . . . . . . . . . . . . . . . . . . . . . . . . . . . . . . . . . . . . . . . . . . . . . . . . . . . . . . . . . . 10
CONNECTING YOUR JBL SYNTHESIS®SYSTEM . . . . . . . . . . . . . . . . . . . . . . . . . . . . . . . . . . . . . . . . . . . . . . . . . . . . . . . . . . . . . . 13
SYNTHESIS TWO ARRAY . . . . . . . . . . . . . . . . . . . . . . . . . . . . . . . . . . . . . . . . . . . . . . . . . . . . . . . . . . . . . . . . . . . . . 14
SYNTHESIS THREE ARRAY . . . . . . . . . . . . . . . . . . . . . . . . . . . . . . . . . . . . . . . . . . . . . . . . . . . . . . . . . . . . . . . . . . . . . 14
SYNTHESIS FOUR . . . . . . . . . . . . . . . . . . . . . . . . . . . . . . . . . . . . . . . . . . . . . . . . . . . . . . . . . . . . . . . . . . . . . . . . . . 14
SYNTHESIS PROJECT ARRAY™ . . . . . . . . . . . . . . . . . . . . . . . . . . . . . . . . . . . . . . . . . . . . . . . . . . . . . . . . . . . . . . . . . . 14
SYNTHESIS ONE ARRAY . . . . . . . . . . . . . . . . . . . . . . . . . . . . . . . . . . . . . . . . . . . . . . . . . . . . . . . . . . . . . . . . . . . . . . 15
SYNTHESIS ATLAS™ . . . . . . . . . . . . . . . . . . . . . . . . . . . . . . . . . . . . . . . . . . . . . . . . . . . . . . . . . . . . . . . . . . . . . . . . . 15
SYNTHESIS K2® . . . . . . . . . . . . . . . . . . . . . . . . . . . . . . . . . . . . . . . . . . . . . . . . . . . . . . . . . . . . . . . . . . . . . . . . . . . 16
SYNTHESIS EVEREST . . . . . . . . . . . . . . . . . . . . . . . . . . . . . . . . . . . . . . . . . . . . . . . . . . . . . . . . . . . . . . . . . . . . . . . . 17
TROUBLESHOOTING . . . . . . . . . . . . . . . . . . . . . . . . . . . . . . . . . . . . . . . . . . . . . . . . . . . . . . . . . . . . . . . . . . . . . . . . . . . . . . . . . 18
SPECIFICATIONS . . . . . . . . . . . . . . . . . . . . . . . . . . . . . . . . . . . . . . . . . . . . . . . . . . . . . . . . . . . . . . . . . . . . . . . . . . . . . . . . . . . . 19
2
Page 3
S7165.S5165.S820.OM.qxd 4/16/09 10:36 AM Page 3
IMPORTANT SAFETY INSTRUCTIONS!
1. Read these instructions.
2. Keep these instructions.
3. Heed all warnings.
4. Follow all instructions.
5. Do not use this apparatus near water.
6. Clean only with a dry cloth.
7. Do not block any ventilation openings. Install in
accordance with the manufacturer’s instructions.
8. Do not install near any heat sources such as radiators,
heat registers, stoves or other apparatus (including
amplifiers) that produce heat.
9. Do not defeat the safety purpose of the polarized or
grounding-type plug. A polarized plug has two blades with
one wider than the other. A grounding-type plug has two
blades and a third grounding prong. The wide blade or the
third prong is provided for your safety. If the provided plug
does not fit into your outlet, consult an electrician for
replacement of the obsolete outlet.
10. Protect the power cord from being walked on or
pinched, particularly at plugs, convenience receptacles
and the point where they exit from the apparatus.
11. Only use attachments/accessories specified by the
manufacturer.
12. Use only with the cart, stand, tripod,
bracket or table specified by the manufacturer or sold with the apparatus. When a
cart is used, use caution when moving the
cart/apparatus combination to avoid injury from tip-over.
13. Unplug this apparatus during lightning storms or when
unused for long periods of time.
14. Refer all servicing to qualified service personnel.
Servicing is required when the apparatus has been
damaged in any way, such as power supply cord or plug
is damaged, liquid has been spilled or objects have fallen
into the apparatus, or the apparatus has been exposed to
rain or moisture, does not operate normally or has been
dropped.
15. Do not expose this apparatus to dripping or splashing
and ensure that no objects filled with liquids, such as
vases, are placed on the apparatus.
16. To completely disconnect this apparatus from the
AC Mains, disconnect the power supply cord plug from
the AC receptacle.
17. The mains plug of the power supply cord shall remain
readily operable.
18. Do not expose batteries to excessive heat such as
sunshine, fire or the like.
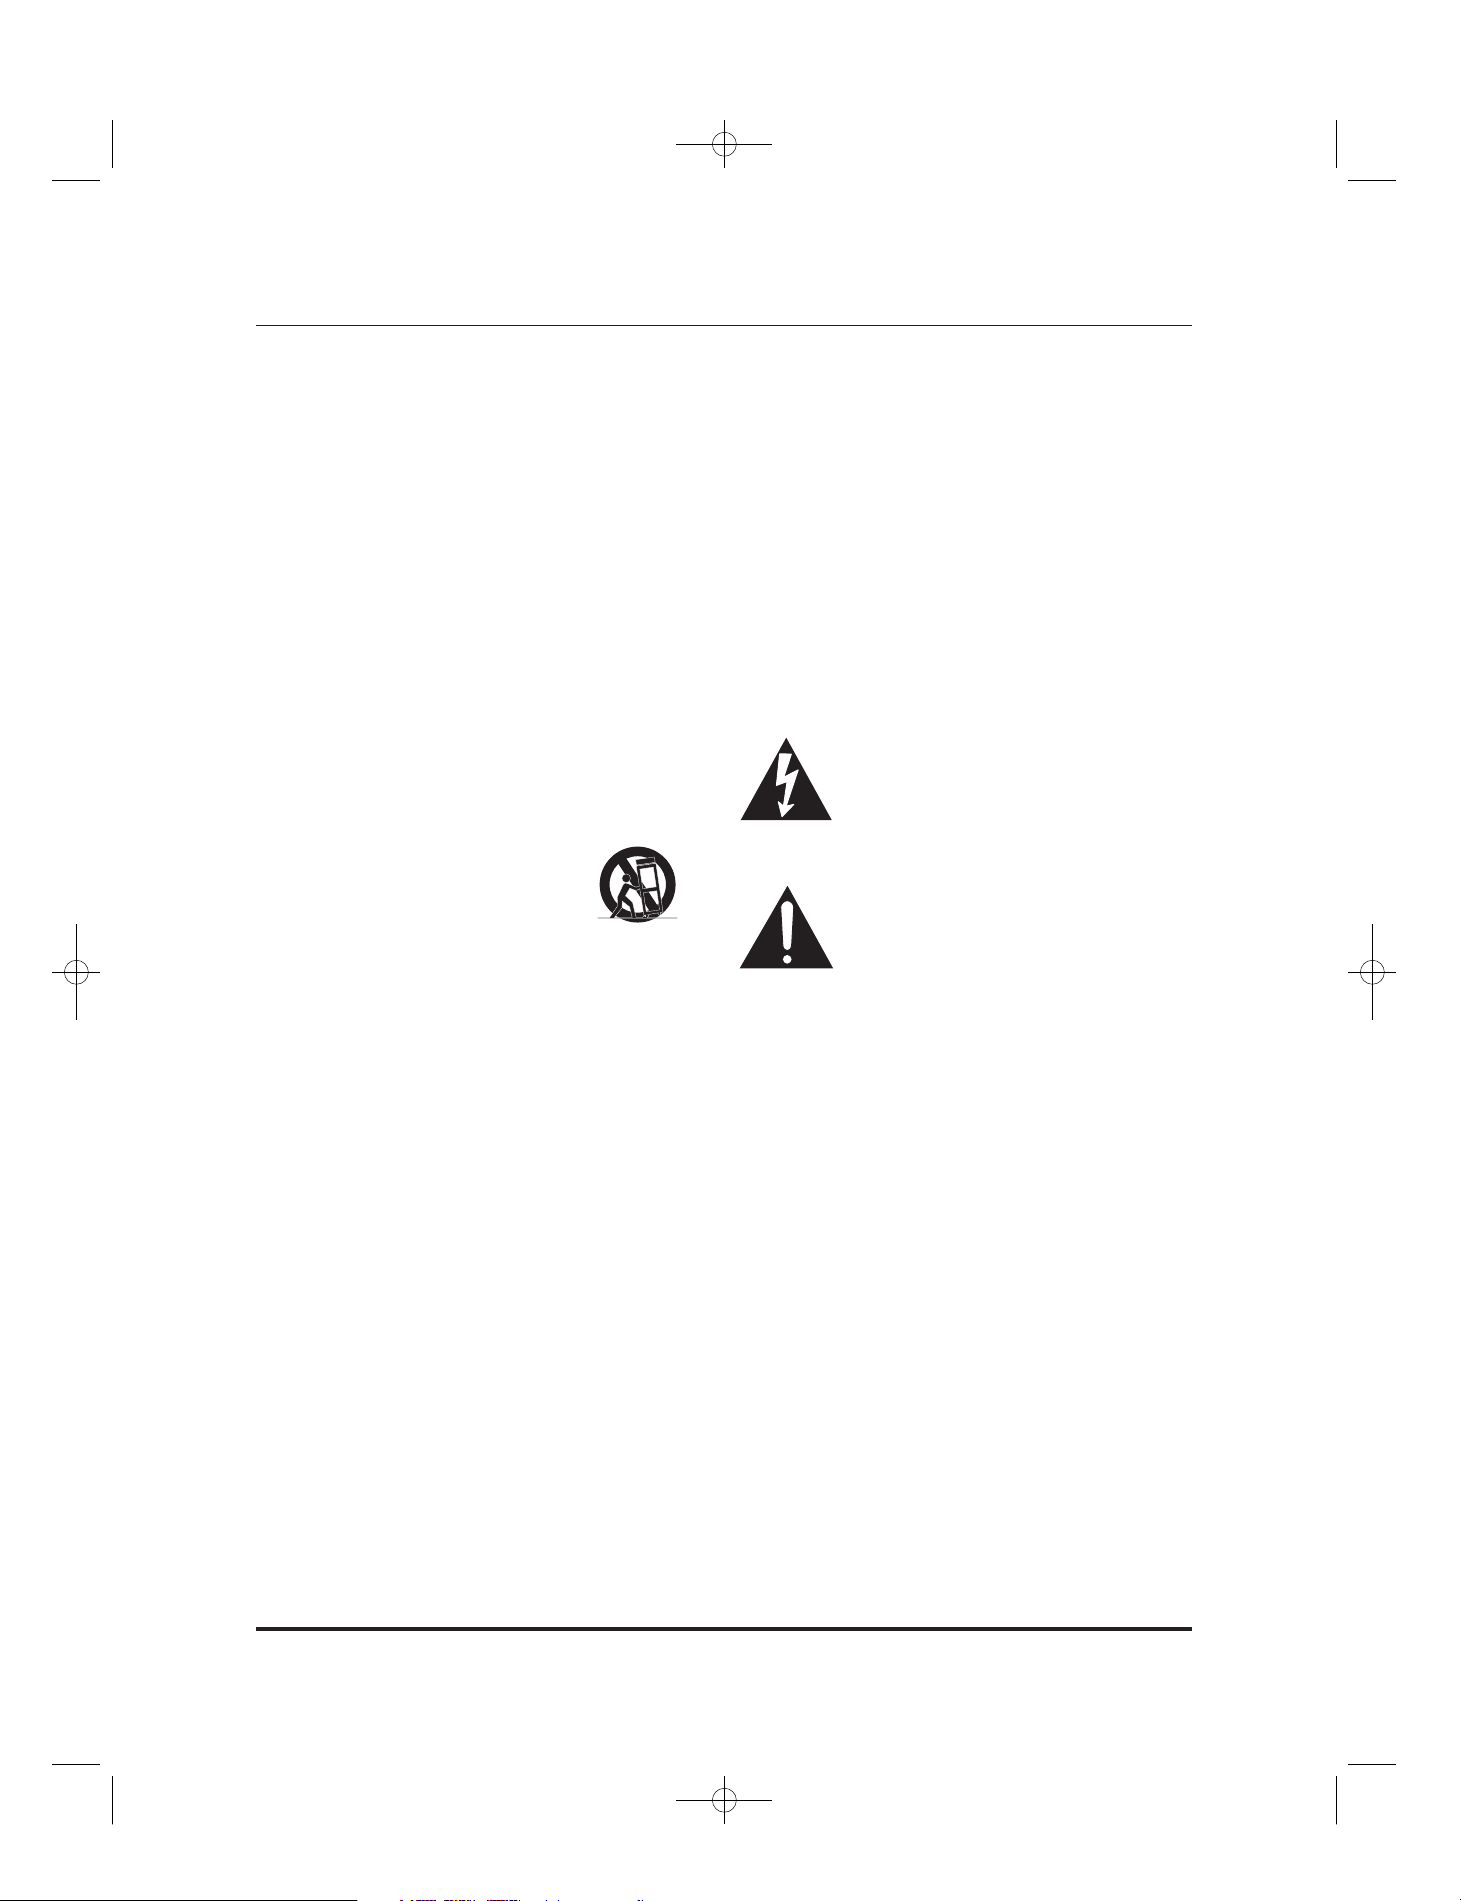
The lightning flash with arrowhead symbol,
within an equilateral triangle, is intended to
alert the user to the presence of uninsulated
“dangerous voltage” within the product’s
enclosure that may be of sufficient magnitude to constitute
a risk of electric shock to persons.
The exclamation point within an equilateral
triangle is intended to alert the user to the
presence of important operating and maintenance (servicing) instructions in the literature
accompanying the product.
WARNING: To reduce the risk of fire or electric shock, do
not expose this apparatus to rain or moisture.
3
Page 4
S7165.S5165.S820.OM.qxd 4/16/09 10:36 AM Page 4
IMPORTANTES CONSIGNES DE SÉCURITÉ!
1. Lisez les instructions.
2. Conservez les instructions.
3. Observer toutes les mises en garde.
4. Suivez toutes les instructions.
5. N’utilisez pas cet appareil près d’une source d’eau.
6. Nettoyez uniquement à l’aide d’un tissu sec.
7. Ne bloquez aucune prise d’air de ventilation de l’appareil.
Installez l’appareil conformément aux instructions du fabricant.
8. N’installez pas l’appareil près des sources de chaleur telles que les
radiateurs, les bouches d’air chaud, les cuisinières ou de tout appareil
produisant de la chaleur (y compris les amplificateurs).
9. N’annulez pas les mesures de sécurité de la fiche polarisée ou de
la fiche de masse. Une fiche polarisée a deux fourches dont l’une est
plus épaisse que l’autre. Une fiche de masse a deux fourches et une
troisième fourche de masse. La fourche épaisse ou la troisième
fourche est fournie pour votre sécurité. Si la fiche fournie ne s’incorpore pas à votre sortie, contactez un électricien pour le remplacement
de la sortie désuète.
10. Veuillez à ce que l’on ne puisse pas marcher sur les cordons
d’alimentation ou qu’ils ne soient pas coincés sous ou derrière des
objets notamment au niveau des fiches, des douilles et aux endroits
où ils sortent de l’appareil.
11. Utilisez uniquement les organes auxiliaires/accessoires
recommandés par le fabricant.
12. Utilisez-le uniquement avec le chariot, l’étal,
le trépied, le support ou la table recommandés
par le fabricant ou fournis avec l’appareil.
Lorsqu’un chariot est utilisé, faire très attention
lors du déplacement de l’ensemble chariot/appareil pour éviter
des blessures dues à des inclinaisons involontaires.
Français
13. Débranchez cet appareil pendant les orages ou en cas de non
utilisation prolongée.
14. Confiez tous les entretiens et dépannages au personnel du service
compétent. L’entretien est indispensable lorsque l’appareil a subi des
dommages à certains points, notamment lorsque le cordon d’alimentation ou la fiche sont endommagés, lorsque le liquide a été déversé
ou les objets sont tombés à l’intérieur de l’appareil, lorsque l’appareil
a été exposé à la pluie ou à l'humidité, lorsqu’il ne fonctionne pas bien,
ou lorsqu’il est tombé.
15. L’appareil ne doit pas être exposé au ruissellement ou aux éclaboussures et aucun objet rempli de liquide tel que le vase, ne doit être
placé sur l’appareil.
16. Pour déconnecter totalement cet appareil du secteur, débranchez
la fiche du cordon d'alimentation de la prise murale.
17. La fiche du cordon d’alimentation doit rester facilement accessible.
18. Les piles ne doivent pas être exposées à une chaleur excessive
comme les rayons du soleil, un feu ou similaire.
L’éclair fléché au centre d’un triangle équilatéral prévient
l'utilisateur de la présence de courants élevés dans
l’appareil, pouvant constituer un risque d’électrocution
en cas de mise en contact avec les composants internes.
Le point d’exclamation au centre d’un triangle équilatéral
prévient l’utilisateur de la présence d’instructions importantes dans le mode d’emploi concernant la mise en
œuvre et l’entretien de l’appareil.
ATTENTION: Pour réduire les risques d’électrocution, n’exposez pas
cet appareil à la pluie ou à l’humidité.
¡
NSTRUCCIONES DE SEGURIDAD IMPORTANTES!
I
1. Lea las instrucciones.
2. Guarde las instrucciones.
3. Respete las advertencias.
4. Siga las instrucciones.
5. No debe utilizarse el equipo cerca del agua.
6. Limpiar con un paño seco.
7. No deben bloquearse las aberturas de ventilación. Instale el
equipo según las instrucciones del fabricante.
8. No debe instalarse cerca de fuentes de calor, como pueden ser
radiadores, estufas u otros aparatos que produzcan calor, incluidos
los amplificadores.
9. No debe inhabilitarse la función de seguridad del conector polar-
izado o de toma a tierra. El conector polarizado posee dos patillas,
una más ancha que la otra. El conector de toma a tierra posee dos
patillas y una tercera clavija de toma a tierra. La patilla más ancha
o la tercera clavija se proporcionan para su seguridad. Si la patilla
más ancha o la tercera clavija no encajan en la base, solicite a un
electricista que sustituya la toma mural.
13. Desenchufe el aparato durante tormentas eléctricas o cuando
no vaya a ser utilizado durante un periodo de tiempo prolongado.
14. Asegúrese de que todas las reparaciones las realiza personal
cualificado. Será necesario realizar reparaciones cuando el equipo
haya resultado dañado de algún modo, si el cable de alimentación o
el enchufe están dañados, si se han derramado líquidos o si un objeto
ha caído sobre el equipo, si el equipo ha estado expuesto a la lluvia
o la humedad, si no funciona normalmente o si se ha caído al suelo.
15. No debe exponerse el aparato a goteo ni salpicaduras y debe
asegurarse de que no se coloca sobre el equipo ningún objeto que
contenga líquido como por ejemplo un jarrón.
16. Para desconectar totalmente el aparato de la red de corriente alterna,
desconecte el enchufe del cable de alimentación del conector de CA.
17. El enchufe de red del cable de alimentación tiene que estar fácil-
mente accesible.
18. No exponga las baterías a fuentes de calor demasiado intensas,
como luz solar, fuego, etc.
10. Los cables de alimentación eléctrica deberán instalarse de
forma que no se puedan pisar ni aplastar por objetos apoyados
sobre o contra ellos, prestando especial atención a los cables en
su conexión a los enchufes y en su salida del equipo.
11. Utilizar exclusivamente los accesorios especificados por el
fabricante.
constituir un riesgo de descarga eléctrica.
12. Utilizar exclusivamente con el carro, estante,
trípode, soporte o mesa especificados por el fabricante o distribuidos con el producto. Cuando se
utilice un carro, preste atención al mover el carro
con el aparato para evitar daños producidos por la caída del equipo.
ADVERTENCIA: Para reducir el riesgo de descarga eléctrica no debe
exponerse el equipo a la lluvia ni a la humedad.
Español
El símbolo del rayo con la punta de flecha, dentro de un
triángulo equilátero, pretende alertar al usuario de la
presencia de “voltaje peligroso” no aislado en el interior
del producto, cuya magnitud puede ser suficiente para
El signo de exclamación dentro de un triángulo equilátero
pretenden alertar al usuario de la existencia de instruc-
ciones de funcionamiento y mantenimiento importantes
en la documentación que acompaña al producto.
4
Page 5
S7165.S5165.S820.OM.qxd 4/16/09 10:36 AM Page 5
ISTRUZIONI IMPORTANTI PER LA SICUREZZA!
1. Leggere queste istruzioni.
2. Conservare queste istruzioni.
3. Osservare tutte le avvertenze.
4. Seguire tutte le istruzioni.
5. Non utilizzare l’apparecchio in prossimità di acqua.
6. Pulire solo con uno straccio secco.
7. Non bloccare nessuna delle aperture di ventilazione. Installare
secondo le istruzioni del costruttore.
8. Non installare vicino a nessuna fonte di calore come radiatori,
termoregolatori, stufe o altri dispositivi (inclusi amplificatori) che
producono calore.
9. Non disabilitare questa misura di sicurezza della spina polarizzata
o del tipo con messa a terra. Una spina polarizzata ha due denti ed
uno è più grande dell’altro. La spina con messa a terra ha due denti
ed un terzo per la messa a terra. Se la spina fornita non si inserisse
correttamente nella propria presa di corrente, rivolgersi all’elettricista
per sostituire la presa obsoleta.
10. Proteggere il cavo di alimentazione in modo che non sia calpestato
o schiacciato, specialmente vicino alle spine, ai connettori e al punto
in cui fuoriesce dal apparecchio.
11. Usare solo collegamenti e accessori raccomandati
dal costruttore.
12. Utilizzare soltanto con carrelli, bassi, treppiedi, staffe
o tavoli raccomandati dal costruttore oppure venduti
insieme al prodotto. Quando si utilizza un carrello, fare attenzione a
quando si sposta la combinazione carrello/apparecchio per evitare
danni per il ribaltamento.
13. Scollegare la spina dell’apparecchio durante i temporali con fulmini
oppure quando viene inutilizzato per un lungo periodo di tempo.
14. Rivolgersi per la manutenzione a personale qualificato. La
manutenzione è necessaria quando l’apparecchio è stato danneggiato
in qualsiasi modo, come danneggiamento del cavo di alimentazione
o della spina, del liquido è stato versato sull’apparecchio o degli
oggetti vi sono caduti sopra, l’apparecchio è stato esposto a pioggia
o umidità, non funziona normalmente o è caduto.
15. Non esporre il presente apparecchio a gocciolamenti o spruzzi
ed assicurarsi che nessun oggetto pieno di liquidi, come per esempio
un bicchiere, venga situato su di esso.
16. Per scollegare completamente questo apparecchio dall’alimentazione
AC principale, scollegare la spina dell’alimentazione dalla presa AC.
17. La spina principale dell’alimentazione deve essere sempre disponibile.
18. Non esporre le batterie a calore eccessivo come la luce del sole,
fuoco o simili.
per le persone.
AVVERTENZA: Per evitare rischi di incendio o di scossa elettrica, non
esponete l’apparecchio alla pioggia o all’umidità.
Italiano
Il simbolo del lampo a freccia all’interno di un triangolo
equilatero segnala all’utente la presenza, all’interno
dell’apparecchio, di alta tensione pericolosa non isolata
quanto basta per costituire un rischio di scossa elettrica
Il punto esclamativo all’interno di un triangolo equilatero
segnala all’utente la presenza di importanti istruzioni
di funzionamento e di manutenzione (assistenza) nella
documentazione allegata all’apparecchio.
WICHTIGE SICHERHEITSHINWEISE!
1. Bitte lesen Sie diese Bedienungsanleitung aufmerksam durch.
2. Heben Sie die Bedienungsanleitung auf.
3. Alle Warnhinweise auf dem Produkt und in der Bedienungsanleitung
müssen unbedingt beachtet werden.
4. Befolgen Sie bitte unbedingt alle Bedien- und Gebrauchshinweise.
5. Benutzen Sie dieses Produkt nicht in Wassernähe.
6. Verwenden Sie zur Reinigung nur ein trockenes Tuch.
7. Schlitze und Öffnungen im Gehäuse dienen der Entlüftung und sorgen
für zuverlässigen Betrieb. Daher dürfen sie nicht abgedeckt werden.
Stellen Sie dieses Produkt so auf, wie vom Hersteller empfohlen.
8. Stellen Sie das Produkt nicht in der Nähe von Wärmequellen auf
(Heizstrahler, Heizkörper, Öfen oder Endstufen).
9. Stromstecker mit Polcodierung oder Schutzleiter (Schuko) dienen Ihrer
Sicherheit und sollten wie vom Hersteller beabsichtigt genutzt werden.
Stromstecker mit Polcodierung sind mit zwei Kontaktstiften unterschiedlicher Breite ausgestattet. Stromstecker mit Schutzleiter haben
zwei Kontaktstifte und eine dritte Kontaktfläche für die Masse. Der breitere Kontaktstift und der Massekontakt dienen Ihrer Sicherheit. Passt das
mitgelieferte Stromkabel nicht in die Steckdose sollten Sie sich an Ihren
Elektriker wenden – er wird Ihnen eine passende Dose montieren.
10. Netzleitungen sollte man immer so verlegen, dass niemand auf
sie tritt und nicht durch irgendwelche Gegenstände eingeklemmt
werden. Stellen Sie das Gerät immer so auf, dass das Netzkabel am
Austrittspunkt nicht abknickt.
11. Verwenden Sie ausschließlich Befestigungen und Zubehör, das
der Hersteller empfiehlt.
12. Benutzen Sie ausschließlich fahrbare oder sonstige
Untergestelle, dreibeinige Standfüße, Untersetzbügel
oder Tische, die der Hersteller empfiehlt oder diesem
Produkt beigelegt sind. Verwenden Sie ein fahrbares Untergestellt,
müssen Sie darauf achten, dass dieses nicht umkippt (Verletzungsgefahr!).
Deutsch
13. Trennen Sie dieses Produkt von der Stromversorgung wenn ein
Gewitter droht, oder wenn Sie das Gerät längere Zeit nicht verwenden
(z.B. während des Urlaubs).
14. Überlassen Sie bitte Reparaturen qualifizierten Servicetechnikern.
In folgenden Fällen müssen Sie das Gerät sofort von der Stromversorgung
trennen und danach eine autorisierte Werkstatt aufsuchen: defektes
Netzkabel oder Netzstecker, ins Gehäuse sind Gegenstände oder
Flüssigkeiten eingedrungen, das Gerät wurde Regen oder Wasser
ausgesetzt, das Gerät arbeitet nicht einwandfrei oder fiel herunter.
15. Schützen Sie dieses Gerät vor Spritzwasser. Achten Sie bitte
darauf, dass keine Gefäße, die Flüssigkeiten enthalten (z.B. Vasen),
auf dem Gerät abgesetzt werden.
16. Möchten Sie dieses Gerät vollständig vom Stromnetz trennen,
müssen Sie das Netzkabel aus der Steckdose ziehen.
17. Der Stecker des Stromkabels sollte stets frei zugänglich sein.
18. Setzen Sie Batterien keiner großen Hitze (z.B. direkte
Sonneneinstrahlung oder Feuer) aus.
Das Blitzsymbol in einem gleichschenkligen
Dreieck warnt vor nicht isolierten Komponenten
mit gefährlicher Stromspannung im Gerätegehäuse,
die zu ernsthaften Personenschäden führen kann.
Das Ausrufungszeichen in einem
gleichschenkligen Dreieck kennzeichnet
wichtige Hinweise für die Nutzung und
Wartung Ihres Gerätes.
WARNUNG: Setzen Sie dieses Gerät keinem Regen oder Feuchtigkeit
aus, um Stromschlag und/oder Feuer zu vermeiden.
5
Page 6
S7165.S5165.S820.OM.qxd 4/16/09 10:36 AM Page 6
VIGTIG SIKKERHEDSINFORMATION!
1. Denne sikkerhedsvejledning læses grundigt.
2. Denne sikkerhedsvejledning opbevares til senere brug.
3. Alle advarsler skal overholdes.
4. Alle instruktioner skal følges.
5. Produktet må ikke benyttes tæt på vand.
6. Produktet må kun rengøres med en tør klud.
7. Ventilationsåbninger må ikke blokeres eller tildækkes. Produktet
skal installeres i henhold til producentens anvisninger.
8. Produktet må ikke installeres tæt på varmekilder som radiatorer,
varmeriste, ovn/komfur eller andre apparater (også effektforstærkere)
der udstråler varme.
9. En ægte jordforbindelse kan øge sikkerheden og kan have betydning
for lydkvaliteten. Ved tobens el-stik bør man eksperimentere ved at
lytte med stikket vendt først den ene vej og så den anden vej. Brug
den stilling der giver bedst lyd. Hvis stikket på den medfølgende lysnetledning ikke passer til dine stikkontakter, bør du kontakte produktets
leverandør.
10. Lysnetledningen skal placeres, så den ikke trædes på eller
klemmes. Pas især godt på ved stikket, stikdåser og dér hvor
ledningen kommer ud af produktet.
11. Brug kun ekstraudstyr/tilbehør som er anvist af
producenten.
12. Brug kun vogn, stand, trefod, beslag eller bord
anvist af producenten eller som sælges sammen med
produktet. Ved brug af vogn udvises forsigtighed ved
flytning af vognen/apparatet for at undgå skader ved væltning.
Dansk
13. Sluk og træk stikket ud når det lyner eller hvis apparatet ikke skal
bruges gennem længere tid.
14. Al service henvises til autoriseret værksted. Service kræves ved
enhver skade på apparatet, f.eks. skade på lysnetledning eller – stik,
indtrængen af væske eller fremmede genstande i produktet, hvis produktet har været udsat for regn eller fugt, hvis produktet ikke fungerer
korrekt ved normal betjening eller hvis produktet har været udsat for
slag eller fald.
15. Apparatet må ikke udsættes for dryp eller stænk. Genstande der
indeholder væske, f.eks. vaser, må ikke stilles på apparatet.
16. Apparatet frakobles helt fra lysnet ved at trække stikket ud af
kontakten.
17. Lysnetledningens stik skal være frit tilgængeligt.
18. Batterier må ikke udsættes for stærk varme fra sollys, ild eller
lignende.
Lynsymbolet med pilespids i ligesidet trekant er beregnet
til at advare brugeren om tilstedeværelsen af uisoleret
”farlig spænding” i apparatet som kan være kraftig nok til
at udgøre risiko for elektrisk stød.
Udråbstegn i ligesidet trekant er beregnet til at gøre
brugeren opmærksom på at der findes vigtige betjenings-
og sikkerhedsinstruktioner i ldet skriftlige materiale som
følger med produktet.
ADVARSEL: For at reducere risiko for brand eller elektrisk stød, må
apparatet ikke udsættes for regn eller fugt.
VIKTIGA SÄKERHETSINSTRUKTIONER!
1. Läs igenom instruktionerna.
2. Behåll dessa instruktioner.
3. Hörsamma alla varningar.
4. Följ dessa instruktioner.
5. Använd inte enheten nära vatten.
6. Rengör endast med en torr trasa.
7. Blockera inga ventilationsöppningar. Installera enligt tillverkarens
instruktioner.
8. Installeras inte i närheten av värmekällor som radiatorer, värmeele-
ment, ugnar eller andra enheter (inklusive förstärkare) som avger
värme.
9. Bortse inte från säkerhetseffekten med den polariserade och
jordade kontakten. En polariserad kontakt har två blad med ena
bredare än det andra. En jordad kontakt har två blad och ett tredje
jord-stift. Det breda bladet eller det tredje stiftet är för din säkerhet.
Om den medföljande kontakten inte passar i ditt uttag, rådgör med
en elektriker för att ersätta det felaktiga uttaget.
10. Se till att strömkabeln är placerad så att den inte trampas eller
kläms, speciellt vid kontakter, uttaget eller där den är ansluten till
enheten.
11. Använd bara tillbehör enligt tillverkarens
specifikationer.
12. Använd den bara på vagnen, ställningen,
tripoden, fästen eller bordet enligt tillverkarens
specifikationer eller som sålts tillsammans
med enheten. När en vagn används måste du vara försiktig när du
flyttar vagnen och apparaten, så att de inte välter och skadar dig.
Svensk
13. Koppla ur enheten vid åskväder eller om den inte ska användas
under lång tid.
14. Låt all service utföras av kvalificerad servicetekniker. Service
krävs då enheten skadats på något sätt, t ex strömkabeln eller
kontakten är skadad, vätska har spillts ut över enheten, enheten
har exponerats för regn eller fukt, enheten inte fungerar som den
ska eller har tappats i golvet.
15. Exponera inte enheten för dropp eller skvättar och se till att inga
föremål fyllda med vätska, t ex vaser, är placerade på enheten.
16. För att helt koppla ur enheten från växelströmsförsörjningen,
ta ur strömkabeln från växelströmsingången på enheten.
17. Huvudkontakten på strömkabeln kan vara kvar i eluttaget.
18. Exponera inte batterier för hög värme som direkt solljus, eld
eller liknande.
Blixtsymbolen med en pil i änden, i en liksidig triangel,
är för att varna användare för icke isolerad “farlig
spänning” på enhetens hölje som kan vara av sådan
kraft att det innebär en risk för elektrisk stöt.
Utropstecknet inom en liksidig triangel är för att
uppmärksamma användare på viktiga drift och under-
hålls-instruktioner som finns i de dokument
som medföljer produkten.
VARNING: För att minska risken för eldsvåda eller elektriska stötar,
utsätt aldrig enheten för regn eller fukt.
6
Page 7

S7165.S5165.S820.OM.qxd 4/16/09 10:36 AM Page 7
TÄRKEITÄ TURVAOHJEITA!
1. Lue nämä ohjeet.
2. Säilytä nämä ohjeet.
3. Huomioi kaikki varoitukset.
4. Noudata kaikkia ohjeita.
5. Älä käytä laitetta kosteissa tiloissa tai veden lähellä.
6. Pyyhi laite puhtaaksi kuivalla liinalla.
7. Jäähdytysilman kiertoon tarvittavia rakoja ja aukkoja ei saa peittää.
Noudata valmistajan antamia asennusohjeita.
8. Älä sijoita laitetta lämmönlähteiden, kuten lämmittimien, lämminil-
maritilöiden, uunien tai muiden lämpöä tuottavien laitteiden läheisyyteen.
9. Käytä turvallisuussyistä polarisoitua tai maadoitettua pistoketta.
Polarisoidussa pistokkeessa toinen piikki on leveämpi. Maadoitetussa
pistokkeessa on kaksi piikkiä ja kolmas on maadoituspiikki. Leveämpi
kolmas piikki ovat turvallisuussyistä pistokkeessa. Jos pistoke
ei sovi pistorasiaan, pyydä sähköasentajalta uusi pistorasia vanhanmallisen tilalle.
10. Vedä virtajohdot niin, etteivät ne ole kulkuväylillä, voi joutua puris-
tuksiin esineiden alle tai niitä vasten. Varmista, etteivät virtajohdon
pistotulppa, takalevyn pistorasiat tai virtajohdon liitos laitteeseen voi
vaurioitua.
11. Käytä vain valmistajan hyväksymiä lisälaitteita.
12. Käytä vain valmistajan hyväksymiä tai laitteen
mukana myytäviä vaunuja, jalustoja, kannattamia ja
pöytiä. Vaunua käyttäessäsi ole varovainen, ettei
vaunu/sähkölaite–yhdistelmä kaadu liikuteltaessa ja aiheuta vahinkoa.
Suomi
13. Ukkosen aikana tai jos poistut kotoa pidemmäksi ajaksi laite
kannattaa irrottaa verkkojännitteestä.
14. Laitteen huolto on sallittua vain valtuutetulle henkilökunnalle.
Huoltoa tarvitaan, kun laite on vahingoittunut tai jos esimerkiksi virtajohto tai pistoke on vahingoittunut tai jos nestettä on roiskunut laitteen
päälle tai jos laitteen sisään on pudonnut esineitä tai jos laite altistunut
sateelle tai kosteudelle tai jos laite ei toimi normaalisti tai jos se on
pudonnut.
15. Estä nesteen vuotaminen tai roiskuminen laitteen päälle. Älä sijoita
laitteen päälle maljakkoa tai muuta nesteellä täytettyä astiaa.
16. Laite irrotetaan kokonaan sähköverkosta irrottamalla virtajohto
pistorasiasta.
17. Virtajohto pitää voida irrottaa vaivattomasti ja turvallisesti.
18. Älä altista paristoja tai akkuja auringonpaisteelle, tulelle tai muulle
kuumuudelle.
Tasasivuisen kolmion sisällä oleva salamanuolitunnus on
tarkoitettu on tarkoitettu varoittamaan käyttäjää tuotteen
kotelon sisäisistä eristämättömistä jännitteistä. Jännitteet
saattavat olla niin voimakkaita, että ne aiheuttavat vakavan sähköiskun vaaran.
Kolmion sisällä oleva huutomerkki ilmoittaa, että käyttöohjeissa on erityisen tärkeitä käyttö- tai huolto-ohjeita
kohteeseen liittyen.
VAROITUS: Laitetta ei saa jättää alttiiksi sateelle tai
muulle kosteudelle, jotta sähköiskun vaara vältetään.
VIKTIGE SIKKERHETSINSTRUKSER!
1. Les disse instruksene.
2. Ta vare på disse instruksene.
3. Respekter alle advarsler.
4. Følg alle instrukser.
5. Bruk ikke dette apparatet i nærheten av vann.
6. Rengjør bare med en tørr klut.
7. Ventilasjonsåpninger må ikke blokkeres. Installeres i henhold til
produsentens instrukser.
8. Må ikke installeres i nærheten av varmekilder som radiatorer, varm-
luftventiler, ovner eller andre apparater (inkludert effektforsterkere)
som produserer varme.
9. Ikke bryt sikringssystemet i polarisert eller jordet støpsel. Et
polarisert støpsel har to poler der den ene er bredere enn den andre.
Et jordet støpsel har to poler pluss en tredje pol for jording. Den brede
polen eller den tredje polen er der for din sikkerhet. Hvis støpselet
som følger med Ikke passer din stikkontakt bør du ta kontakt med en
elektriker for å skifte stikkontakt.
10. Pass på at strømledningen ikke tråkkes på eller kommer i klem,
spesielt ved støpselet, ved strømuttak/grenkontakter og der ledningen
kommer ut av apparatet.
11. Bruk bare tilleggsutstyr/tilbehør som er spesifisert
av produsenten.
12. Bruk bare sammen med tralle, stativ, tripod, brakett
eller bord som er spesifisert av produsenten eller solgt
sammen med apparatet. Når en tralle brukes bør man
være forsiktig når tralle og apparat flyttes sammen for å unngå skade
pga velt.
Norsk
13. Koble apparatet fra strøm i tordenvær eller når apparatet ikke
brukes over lang tid.
14. La kvalifisert servicepersonale ta seg av alle reparasjoner.
Service er nødvendig når apparatet har blitt skadet, for eksempel
hvis strømledning eller støpsel er skadet, væske har blitt tømt eller
gjenstander har falt ned i apparatet, apparatet har blitt utsatt for regn
eller fuktighet, ikke virker normalt eller har blitt utsatt for fall/støt.
15. Ikke utsett dette apparatet for drypp eller skvett, og pass på at
ingen væslefylte gjenstander, som f eks vaser, plasseres på apparatet.
16. For å koble dette apparatet fullstendig fra strømnettet trekker man
strømledningens støpsel ut av strømkontakten.
17. Strømledningens støpsel skal være lett tilgjengelig.
18. Ikke utsett batterier for sterk varme, som f eks solskinn, ild eller
lignende.
Symbolet med et lyn med pilhode i en liksidet trekant er
et varsel til brukeren om at det finnes uisolert “farlig
spenning” inne i produktet som kan være kraftig nok til
utgjøre en risiko for støt for personer.
Utropstegnet inne i en likesidet trekant er et varsel til
brukeren om at det finnes viktige instrukser for bruk
og vedlikehold i informasjonen som følger med produktet.
ADVARSEL: For å redusere risikoen for brann eller
elektrisk støt må dette apparatet ikke utsettes for regn eller fuktighet.
7
Page 8

S7165.S5165.S820.OM.qxd 4/16/09 10:36 AM Page 8
INTRODUCTION AND FEATURES
INTRODUCTION
Thank you for purchasing this JBL Synthesis®S7165/S5165/S820 power amplifier! You have chosen a product that
embodies the best of what JBL has discovered about the emotional power of audio reproduction in more than
sixty years of preeminence in the field. This amplifier has been designed and crafted to provide the user with a high
level of sonic performance; special attention has been paid to minimize the number of components in the audio
signal path, resulting in extremely low distortion, excellent transient response and wide dynamic range. Synthesis
products set new benchmarks in audio technology, and, when used as part of a complete JBL Synthesis system,
will bring the ambience and acoustics of some of the world’s greatest concert halls and theaters into your home.
To obtain the best performance from this amplifier, please be sure to completely read this user’s manual and use
the S7165/S5165/S820 only in accordance with its instructions.
WARNING: Always make sure that two people lift the unit together. Never attempt to lift the unit by
yourself.
to the unit that is not covered under warranty.
Failure to follow this instruction may result in personal injury or irreparable damage
®
FEATURES
The JBL Synthesis S7165/S5165/S820 power amplifier features the following:
Multichannel Operation
•
All Synthesis amplifiers have been designed to integrate well into the world of multichannel audio. They are
designed to reproduce the front left and right, center, subwoofer and ambient channels, to produce a truly
enveloping sound field. They are a solid foundation on which to build a high-performance home cinema system
that will astound the listener with its power and realism. The S7165 is designed to be used in all Synthesis
systems that require seven channels of amplification, the S5165 is designed to be used in all Synthesis systems
that require five channels of operation, and the S820 is a 2-channel amplifier that can also be operated in bridged
mode as an extraordinarily powerful single-channel amplifier.
•
High Power Capability
The S7165/S5165 provides a satisfying 160 watts per channel of distortion-free audio (<0.03% THD) into 8 ohms.
The S820 provides a truly satisfying 200 watts per channel of clean audio (<0.03% THD) into 8-ohm loads, and
800 watts when operated in bridged mode into an 8-ohm load, making it ideal for powering subwoofers. Because
of their power capabilities, all Synthesis amplifiers have an extremely wide dynamic range, an element critical to
realistic home cinema. Sound levels equal to those at original performances are easily re-created in even the
largest of home listening environments.
•
Auto Turn-On and Power-Sequencing Circuitry
When used in a JBL Synthesis system, the S7165/S5165/S820 can be turned on automatically whenever the
surround processor is activated. No longer do you have to get out of that chair to turn on the various pieces of
equipment in your entertainment system; just one touch on the remote control of the surround processor, and
you’re a few seconds away from a truly impressive audio presentation!
Modern amplifiers produce more power per channel (and frequently have more channels) than those of the
traditional two-channel stereo era. Due to the high current demands of power amplifiers at the instant of turn-on,
the S7165, S5165 and S820 amplifiers are equipped with power-sequencing circuits that turn on each unit in
sequence, avoiding the large instantaneous current demand (and possible house circuit-breaker tripping) that
would occur should they all turn on at the same instant.
8
Page 9

S7165.S5165.S820.OM.qxd 4/16/09 10:36 AM Page 9
FEATURES
• Quiet Cooling
The S7165/S5165/S820 utilizes a fan to cool the amplifier channels, ensuring long-term reliability. To reduce fan
noise to an absolute minimum, a thermal sensing and control circuit that senses increases in temperature within
the amplifier and powers a fan at a speed proportional to that temperature increase has been incorporated in the
S7165/S5165/S820. When the S7165/S5165/S820 is used at lower volume levels, the fan turns very slowly –
and quietly. At high listening levels (and the higher operating temperatures this creates within any amplifier), the
sensing circuitry causes the fan to turn faster, producing increased cooling. As a result, the fan is never turning
faster than necessary, and most of the noise that is generated is masked by the program being listened to.
•
Comprehensive and Isolated Circuit Protection
The S7165/S5165/S820 amplifier employs sophisticated protection circuitry (one for each channel) that senses
many possible fault conditions, such as shorted loudspeaker wires or excess power demand, and turns the affected channel(s) and their blue front-panel indicators off until the fault condition is removed, at which time normal
operation is automatically restored. While protection of this sort is not uncommon in today’s well-designed
amplifiers, a remarkable feature of the S7165/S5165/S820’s protection circuitry is that it is optically coupled to
the signal circuit; there is no direct electrical connection between the signal path and the protection circuitry.
As a result, there can be no coloration of the music, no interaction between protection and amplification,
until certain thresholds are exceeded, at which point the channel(s) will turn off completely.
• Balanced and Single-Ended Inputs
Both balanced on XLR and single-ended (unbalanced) on RCA inputs are available for each channel input.
This allows the amplifier to be used with preamplifiers such as the SDP-5 with RCA outputs and SDP-40HD
preamplifiers with XLR outputs.
9
Page 10

¡
™
£
S7165.S5165.S820.OM.qxd 4/16/09 10:36 AM Page 10
OPERATION AND CONTROLS
NOTE: The S5165 is shown; S7165 and S820 are similar in appearance.
0 POWER SWITCH
Pushing this button is all that is required to turn on the S5165/S7165/S820 if it is not part of a JBL Synthesis Series
system. If the amplifier is used as part of a JBL Synthesis Series system, the
be used to automatically turn the amplifier on and off, and the power switch should be left in the On position by
pushing the button in. See the explanation for the
on the S5165/S7165/S820.
Power Trigger In/Out Jacks 6 for more information on turning
Power Trigger In/Out Jacks 6 will
1 STANDBY INDICATOR
This indicator, immediately above the front-panel power switch, will glow red when the amplifier is in the “standby”
mode, whether operating as part of a Synthesis system or not. When the S7165/S5165/S820 is in the “on” mode,
this light will shut off and the blue “on” mode indicators will light.
2 POWER INDICATORS (BLUE)
These indicators will light up when the power amplifier is in the “on” mode. Each monitors the operation of one
channel, and will be extinguished if that channel’s protection circuitry is activated.
3 INPUT JACKS
The output signals from the Synthesis digital processor and equalizer are connected to the input jacks in a Synthesis
system. See the connection diagrams on pages 14–18 for detailed connection instructions. If using the XLR inputs,
be sure to wire the XLR using the EIA standard of Pin 1 as ground, Pin 2 as positive and Pin 3 as negative.
4 SPEAKER TERMINALS
Connect the speakers to these terminals, following the normal convention: Wire the “+” side of the speaker to
the red terminal, and the “–” side to the black terminal. Wire the speakers with the proper polarity; reversing any
speaker’s connections will not damage either the speaker or the amplifier, but will result in poor low-frequency
performance and imprecise imaging.
If using the S820 in bridged mono mode, connect the speaker to the center red terminals only;
made to the black terminals. Wire the “+” terminal of the speaker to the left red terminal, and the “–” terminal
of the speaker to the right red terminal.
In bridged mode, speakers connect only to the “hot” (red) amplifier output connectors, and neither can
be connected to ground under any circumstances, as damage to the S820 will result.
no connection is
10
Page 11

5165
TRIGGER
IN
3-24 VDC
OUT
CHASSIS
GROUND
WARNING: FOR CONTINUED PROTECTION AGAINST RISK OF FIRE
REPLACE WITH SAME TYPE OF FUSE AND RATING
ATTENTION: UTILISER UN FUSIBLE DE RECHANGE DE MÉME TYPE REGLAGE CORRECT
PUSH
3
2
1
PUSH
3
2
1
PUSH
3
2
1
PUSH
3
2
1
PUSH
3
2
1
FUSE
FUSE
T6.3AL, 250V
6.3A SLO-BLO
T6.3AL, 250V
6.3A SLO-BLO
120V 60Hz
900W
120V 60Hz
900W
S5165
•
§
¶
ª
¢
∞
7165
6
7
6
7
TRIGGER
IN
3-24 VDC
OUT
CHASSIS
GROUND
WARNING: FOR CONTINUED PROTECTION AGAINST RISK OF FIRE
REPLACE WITH SAME TYPE OF FUSE AND RATING
ATTENTION: UTILISER UN FUSIBLE DE RECHANGE DE MÉME TYPE REGLAGE CORRECT
PUSH
3
2
1
PUSH
3
2
1
PUSH
3
2
1
PUSH
3
2
1
PUSH
3
2
1
PUSH
3
2
1
PUSH
3
2
1
FUSE
FUSE
120V 60Hz
1200W
T8AL, 250V
8A SLO-BLO
T8AL, 250V
8A SLO-BLO
S7165
•
§
¶
ª
¢
∞
820
TRIGGER
BRIDGED
BRIDGED
MINIMUM IMPEDANCE
4 OHMS STEREO
MINIMUM IMPEDANCE
8 OHMS BRIDGED MONO
ATTENTION:
VOIR LE CAHIER D'INSTRUCTION
MODE
BRIDGED
MONO
STEREO
IN
3-24 VDC
OUT
CHASSIS
GROUND
T6.3AL, 250V
6.3A SLO-BLO
T6.3AL, 250V
6.3A SLO-BLO
120V 60Hz
800W
PUSH
3
2
1
PUSH
3
2
1
FUSE
FUSE
S820
•
¶
¢
∞
§
ª
‚
S7165.S5165.S820.OM.qxd 4/16/09 10:36 AM Page 11
OPERATION AND CONTROLS
IMPORTANT!
• Make speaker connections before applying power.
• To prevent any possible short-circuit condition between output terminals, the stripped length of speaker wire
should not exceed 15mm, so that no bare wires are exposed.
WARNING: Terminals marked with the flash symbol
are hazardous when live. External wiring connected
to those terminals requires installation by trained personnel,
and the use of ready-made lead cords.
NOTE: The minimum load impedance that this amplifier can handle safely is 8 ohms per channel. Using lower
11
impedance loads can damage the unit and will void your warranty!
WWiirree--RRuunn LLeennggtthh MMiinniimmuumm GGaauuggee
Up to 20' 16
Up to 50' 14
Up to 100' 12
Page 12

S7165.S5165.S820.OM.qxd 4/16/09 10:36 AM Page 12
OPERATION AND CONTROLS
5 EXTERNAL FUSES
AC mains fuses are located on the back panel of the amplifier. These fuses will not blow unless the amplifier is
asked to produce more power than its design allows for a prolonged period or to prevent excessive current draw,
which could damage internal components during a fault condition.
The amplifier has been designed to operate under virtually all conditions. Even momentary short-circuiting of
the output (speaker) connections will not ordinarily damage the output circuitry (although it will activate internal
protection circuitry and cause one or more of the front-panel LED indicators to be extinguished until the circuit
resets automatically).
FUSE REPLACEMENT
To remove the fuse, turn off the power switch and disconnect the power plug from the AC mains. Unscrew the
fuse holder cap and remove the fuse; install the new fuse and secure the holder cap; and reconnect the AC mains.
If after replacing the fuse the unit is inoperative, service is required; contact your JBL Synthesis dealer.
WARNING: Always unplug the amplifier from the AC mains before removing any fuse.
IMPORTANT: Never install a fuse that has a higher rating than that specified on the back panel of the
amplifier or in the owner’s manual.
6 POWER TRIGGER IN/OUT
If you are using the S7165/S5165/S820 amplifier as part of a JBL Synthesis system, it is necessary to use these
jacks to interconnect to other system components so that Power On/Off can be transmitted from one unit to the
next, starting at the surround processor, through all amplifiers. Follow the connection diagrams on the following
pages for detailed information regarding these connections. Make connections to these jacks only as shown in the
diagrams. If these jacks are used in any other manner, e.g., to control electric screens, the unit can be damaged
and the warranty will be void. For specific electrical information on these jacks, contact JBL Synthesis Customer
Service at 516.594.0300 (USA only).
Do not plug anything into these jacks if you’re not using the S7165/S5165/S820 with a JBL Synthesis system.
7 AC INLET
Your S7165/S5165/S820 is shipped with an IEC-type removable power cord that mates with the AC inlet on the rear
panel. To ensure proper operation, use the supplied power cord. This amplifier is NOT a multivoltage unit; using
a power cord that is not compatible with the correct voltage of the model for your country will void the warranty.
WARNING: This amplifier must be connected to an AC outlet with a protective earthing connection.
8 CHASSIS GROUND
The S7165/S5165/S820 amplifier is provided with a chassis ground connection terminal, which is commonly used
to provide a common audio ground point to ensure that all grounds are at the same potential. This can be useful to
provide a single ground path for each audio component in the system, and should be used if experiencing a low-level
hum or buzz, which is normally caused by a voltage potential difference between two points in an audio ground circuit.
9 STEREO/MONO SWITCH (S820 ONLY)
If you are using the S820 as a stereo power amplifier, connect the signal output(s) from the system equalizer or
surround processor to these jacks and set the
the S820 in the bridged mode, connect the signal output from the equalizer to the Ch. 1 jack only, and put the
Stereo/Mono Switch 9 in the Mono position.
Stereo/Mono Switch 9to the Stereo position. If you are using
12
Page 13

SDP-40
SDEC-4000
S820
S7165/S5165
Top
1
2
3
4
S7165.S5165.S820.OM.qxd 4/16/09 10:37 AM Page 13
CONNECTING YOUR JBL SYNTHESIS SYSTEM
PHYSICAL CONSIDERATIONS
Installation of the S7165/S5165/S820 is a straightforward process.
IMPORTANT: The amplifier must be installed following the directions described below. To ensure
adequate performance and safety, never install the amplifier with less free space around the amplifier
than that specified.
IMPORTANT: For rack-mounting, we recommend using four 10-32, 1"-long screws.
NOTE: Heavy equipment should not be supported solely by the front mounting locations. It is recommended that
additional rear support be used.
WARNING: To prevent injury, this apparatus must be securely attached to the floor/wall in accordance
with the installation instructions.
WARNING: Always make sure that two people lift the unit together. Never attempt to lift the unit by
yourself.
to the unit that is not covered under warranty.
Failure to follow this instruction may result in personal injury or irreparable damage
The S7165/S5165/S820 power amplifier has been designed to be mounted in EIA standard racks or stacked
freestanding as long as there is 4 inches (10cm) of free space around the amplifier (top, sides and rear). If the
S7165/S5165/S820 is being mounted in a rack, it is
suggested that its feet be removed prior to installation.
If the S7165/S5165/S820 will be stacked with other
components, use the feet that came attached to the
unit. This will ensure that there is sufficient air space
underneath so that heat can be dissipated effectively.
Make sure the amplifiers are located in a well-ventilated,
cool area. Be certain that the front and rear panels are
not obstructed, as the cooling fan brings air in from
the front and expels it at the rear. It is very important
not to obstruct the airflow from the center front panel;
heat buildup and premature failure may occur.
Use the simplified connection diagrams on the
following pages to help you understand how to connect
the S7165/S5165/S820 amplifier to a JBL Synthesis
system. These diagrams are intended to show the signal
flow through the system. For more detail in making
these connections, please refer to the JBL Synthesis
Certified Dealer Installation Manual.
Connect power trigger and audio cables between
system components, as shown on the following pages.
Make sure that on all power amplifiers the Power
switches are in the depressed (ON) position and that
the
Manual On/Auto On switches are in the Auto On
position. Operated in this mode, all of the components
will turn on with one touch of the Power switch on the
surround processor’s remote control.
4.1 JBL SYNTHESIS: SUGGESTED RACK-MOUNTING
13
Page 14

7165
6
7
6
7
TRIGGER
IN
3-24 VDC
OUT
CHASSIS
GROUND
WARNING: FOR CONTINUED PROTECTION AGAINST RISK OF FIRE
REPLACE WITH SAME TYPE OF FUSE AND RATING
ATTENTION: UTILISER UN FUSIBLE DE RECHANGE DE MÉME TYPE REGLAGE CORRECT
PUSH
3
2
1
PUSH
3
2
1
PUSH
3
2
1
PUSH
3
2
1
PUSH
3
2
1
PUSH
3
2
1
PUSH
3
2
1
FUSE
FUSE
120V 60Hz
1200W
T8AL, 250V
8A SLO-BLO
T8AL, 250V
8A SLO-BLO
820
TRIGGER
BRIDGED
BRIDGED
MINIMUM IMPEDANCE
4 OHMS STEREO
MINIMUM IMPEDANCE
8 OHMS BRIDGED MONO
ATTENTION:
VOIR LE CAHIER D'INSTRUCTION
MODE
BRIDGED
MONO
STEREO
IN
3-24 VDC
OUT
CHASSIS
GROUND
T6.3AL, 250V
6.3A SLO-BLO
T6.3AL, 250V
6.3A SLO-BLO
120V 60Hz
800W
PUSH
3
2
1
PUSH
3
2
1
FUSE
FUSE
S820
S7165
SDP-5
SDEC-3000
S/PDIF INPUTS
IR IN
TRIGGER
OUTPUTS
OUT
S/PDIF
S/N
RS-232
2
1
VIDEO
S-VIDEOAUDIO
INPUTS
(L)
(R)
(C)
(SUB)
(LS)
(RS)
L
R
(L)
(R)
(C)
(SUB)
(LS)
(RS)
Y
PR PB
Y
PR PB
Y
PR PB
INPUT 1
INPUT 3
INPUT 2
Y
PR PB
OUTPUT
1
2
3
4
1212
34
1
2
3
4
5
12345678
CENTER
FRONT
SIDE
REAR
L
R
L
R
SUBWOOFER
MAIN
VIDEO
ZONE 2
VIDEO
AUDIO
1
SDP-5 Digital Surround Processor/Controller
JBL, Inc. Northridge, CA
Assembled in USA
AC 100-240V ~ 50-60 HZ, 60W
OUTPUTS
2
TUV
US
C
RISK OF ELECTRIC SHOCK
DO NOT OPEN
ATTENTION
RISQUE DE CHOC
ELECTRIQUE
NE PAS OUVRIR
CAUTION
To Ethernet hub
(for system calibration)
S7165.S5165.S820.OM.qxd 4/16/09 10:37 AM Page 14
CONNECTING YOUR JBL SYNTHESIS SYSTEM
SDEC-3000: Synthesis Two Array*, Synthesis Three Array, Synthesis Four, Synthesis Project Array
*NOTE: If using the Synthesis Two Array, please see SAM1HF/SAM2LF manual for connection of SAM12x passive crossover.
NOTE: Although the
SDP-5 is shown here,
connections for the
SDP-40HD are similar.
14
Page 15

S820
(BRIDGED)
S820
(BRIDGED)
S7165
S7165
SDEC-4500P
SDEC-4500X
To Ethernet hub
(for system calibration)
To Ethernet hub
(for system calibration)
SDP-40 HD
MICROPHONE INPUTS
1 2
2 1
1 2
1 (OSD)
2
Fix
Var Fix
Var
RS 232
IR IN
TRIGGER OUTPUTS
3 4
RECORD OUTPUTS
MAIN OUTPUTS
VIDEOVIDEO
CENTER
SUBWOOFER
LFE
MAIN AUDIO OUTPUTS
SIDE
REAR
AUX
FRONT
ZONE 2
ZONE 2
AUDIO
AUDIO
S/PDIF
MAIN
AUDIO
OUTPUTS
AUDIO VIDEOS-VIDEO
AES/EBU
S/PDIF
FRONT LFECENTER SUBWOOFER
SIDE
AUX
REAR
L R
L R
L R
L R L R L R
L
R
L
R
L
R
L
R
L
R
L
R
(C)
(SUB)
(LS)
(RS)
(L)
(R)
L
R
1 2 3 4 5
1 2 3
4 5 6
1 2 3
4 5 6
1 2 3 4 5 6 7 8
INPUTS COMPONENT VIDEO
INPUT 1 INPUT 2
INPUT 4
INPUT 3
OUTPUT
Y PR PB
Y PR PB
Y PR PB Y PR PB
Y PR PB
7165
6 7
6
7
TRIGGER
IN
3-24 VDC
OUT
CHASSIS
GROUND
WARNING: FOR CONTINUED PROTECTION AGAINST RISK OF FIRE
REPLACE WITH SAME TYPE OF FUSE AND RATING
ATTENTION: UTILISER UN FUSIBLE DE RECHANGE DE MÉME TYPE REGLAGE CORRECT
PUSH
3
2
1
PUSH
3
2
1
PUSH
3
2
1
PUSH
3
2
1
PUSH
3
2
1
PUSH
3
2
1
PUSH
3
2
1
FUSE
FUSE
120V 60Hz
1200W
T8AL, 250V
8A SLO-BLO
T8AL, 250V
8A SLO-BLO
7165
6
7
6
7
TRIGGER
IN
3-24 VDC
OUT
CHASSIS
GROUND
WARNING: FOR CONTINUED PROTECTION AGAINST RISK OF FIRE
REPLACE WITH SAME TYPE OF FUSE AND RATING
ATTENTION: UTILISER UN FUSIBLE DE RECHANGE DE MÉME TYPE REGLAGE CORRECT
PUSH
3
2
1
PUSH
3
2
1
PUSH
3
2
1
PUSH
3
2
1
PUSH
3
2
1
PUSH
3
2
1
PUSH
3
2
1
FUSE
FUSE
120V 60Hz
1200W
T8AL, 250V
8A SLO-BLO
T8AL, 250V
8A SLO-BLO
820
TRIGGER
BRIDGED
BRIDGED
MINIMUM IMPEDANCE
4 OHMS STEREO
MINIMUM IMPEDANCE
8 OHMS BRIDGED MONO
ATTENTION:
VOIR LE CAHIER D'INSTRUCTION
MODE
BRIDGED
MONO
STEREO
IN
3-24 VDC
OUT
CHASSIS
GROUND
T6.3AL, 250V
6.3A SLO-BLO
T6.3AL, 250V
6.3A SLO-BLO
120V 60Hz
800W
PUSH
3
2
1
PUSH
3
2
1
FUSE
FUSE
820
TRIGGER
BRIDGED
BRIDGED
MINIMUM IMPEDANCE
4 OHMS STEREO
MINIMUM IMPEDANCE
8 OHMS BRIDGED MONO
ATTENTION:
VOIR LE CAHIER D'INSTRUCTION
MODE
BRIDGED
MONO
STEREO
IN
3-24 VDC
OUT
CHASSIS
GROUND
T6.3AL, 250V
6.3A SLO-BLO
T6.3AL, 250V
6.3A SLO-BLO
120V 60Hz
800W
PUSH
3
2
1
PUSH
3
2
1
FUSE
FUSE
S7165.S5165.S820.OM.qxd 4/16/09 10:37 AM Page 15
CONNECTING YOUR JBL SYNTHESIS SYSTEM
SDEC-4500: Synthesis One Array, Synthesis Atlas
NOTE: Connect power trigger
as shown on page 14.
15
Page 16

S820
S820
S820
S820 S820
S820
S820
S820
S820
S820
SDEC-4500P
SDEC-4500X
SDP-40HD
MICROPHONE INPUTS
1 2
2 1
1 2
1 (OSD)
2
Fix
Var Fix
Var
RS 232
IR IN
TRIGGER OUTPUTS
3 4
RECORD OUTPUTS
MAIN OUTPUTS
VIDEOVIDEO
CENTER
SUBWOOFER
LFE
MAIN AUDIO OUTPUTS
SIDE
REAR
AUX
FRONT
ZONE 2
ZONE 2
AUDIO
AUDIO
S/PDIF
MAIN
AUDIO
OUTPUTS
AUDIO VIDEOS-VIDEO
AES/EBU
S/PDIF
FRONT LFECENTER SUBWOOFER
SIDE
AUX
REAR
L R
L R
L R
L R L R L R
L
R
L
R
L
R
L
R
L
R
L
R
(C)
(SUB)
(LS)
(RS)
(L)
(R)
L
R
1 2 3 4 5
1 2 3
4 5 6
1 2 3
4 5 6
1 2 3 4 5 6 7 8
INPUTS COMPONENT VIDEO
INPUT 1 INPUT 2
INPUT 4
INPUT 3
OUTPUT
Y PR PB
Y PR PB
Y PR PB Y PR PB
Y PR PB
To Ethernet hub
(for system calibration)
To Ethernet hub
(for system calibration)
820
TRIGGER
BRIDGED
BRIDGED
MINIMUM IMPEDANCE
4 OHMS STEREO
MINIMUM IMPEDANCE
8 OHMS BRIDGED MONO
ATTENTION:
VOIR LE CAHIER D'INSTRUCTION
MODE
BRIDGED
MONO
STEREO
IN
3-24 VDC
OUT
CHASSIS
GROUND
T6.3AL, 250V
6.3A SLO-BLO
T6.3AL, 250V
6.3A SLO-BLO
120V 60Hz
800W
PUSH
3
2
1
PUSH
3
2
1
FUSE
FUSE
820
TRIGGER
BRIDGED
BRIDGED
MINIMUM IMPEDANCE
4 OHMS STEREO
MINIMUM IMPEDANCE
8 OHMS BRIDGED MONO
ATTENTION:
VOIR LE CAHIER D'INSTRUCTION
MODE
BRIDGED
MONO
STEREO
IN
3-24 VDC
OUT
CHASSIS
GROUND
T6.3AL, 250V
6.3A SLO-BLO
T6.3AL, 250V
6.3A SLO-BLO
120V 60Hz
800W
PUSH
3
2
1
PUSH
3
2
1
FUSE
FUSE
820
TRIGGER
BRIDGED
BRIDGED
MINIMUM IMPEDANCE
4 OHMS STEREO
MINIMUM IMPEDANCE
8 OHMS BRIDGED MONO
ATTENTION:
VOIR LE CAHIER D'INSTRUCTION
MODE
BRIDGED
MONO
STEREO
IN
3-24 VDC
OUT
CHASSIS
GROUND
T6.3AL, 250V
6.3A SLO-BLO
T6.3AL, 250V
6.3A SLO-BLO
120V 60Hz
800W
PUSH
3
2
1
PUSH
3
2
1
FUSE
FUSE
820
TRIGGER
BRIDGED
BRIDGED
MINIMUM IMPEDANCE
4 OHMS STEREO
MINIMUM IMPEDANCE
8 OHMS BRIDGED MONO
ATTENTION:
VOIR LE CAHIER D'INSTRUCTION
MODE
BRIDGED
MONO
STEREO
IN
3-24 VDC
OUT
CHASSIS
GROUND
T6.3AL, 250V
6.3A SLO-BLO
T6.3AL, 250V
6.3A SLO-BLO
120V 60Hz
800W
PUSH
3
2
1
PUSH
3
2
1
FUSE
FUSE
820
TRIGGER
BRIDGED
BRIDGED
MINIMUM IMPEDANCE
4 OHMS STEREO
MINIMUM IMPEDANCE
8 OHMS BRIDGED MONO
ATTENTION:
VOIR LE CAHIER D'INSTRUCTION
MODE
BRIDGED
MONO
STEREO
IN
3-24 VDC
OUT
CHASSIS
GROUND
T6.3AL, 250V
6.3A SLO-BLO
T6.3AL, 250V
6.3A SLO-BLO
120V 60Hz
800W
PUSH
3
2
1
PUSH
3
2
1
FUSE
FUSE
820
TRIGGER
BRIDGED
BRIDGED
MINIMUM IMPEDANCE
4 OHMS STEREO
MINIMUM IMPEDANCE
8 OHMS BRIDGED MONO
ATTENTION:
VOIR LE CAHIER D'INSTRUCTION
MODE
BRIDGED
MONO
STEREO
IN
3-24 VDC
OUT
CHASSIS
GROUND
T6.3AL, 250V
6.3A SLO-BLO
T6.3AL, 250V
6.3A SLO-BLO
120V 60Hz
800W
PUSH
3
2
1
PUSH
3
2
1
FUSE
FUSE
820
TRIGGER
BRIDGED
BRIDGED
MINIMUM IMPEDANCE
4 OHMS STEREO
MINIMUM IMPEDANCE
8 OHMS BRIDGED MONO
ATTENTION:
VOIR LE CAHIER D'INSTRUCTION
MODE
BRIDGED
MONO
STEREO
IN
3-24 VDC
OUT
CHASSIS
GROUND
T6.3AL, 250V
6.3A SLO-BLO
T6.3AL, 250V
6.3A SLO-BLO
120V 60Hz
800W
PUSH
3
2
1
PUSH
3
2
1
FUSE
FUSE
820
TRIGGER
BRIDGED
BRIDGED
MINIMUM IMPEDANCE
4 OHMS STEREO
MINIMUM IMPEDANCE
8 OHMS BRIDGED MONO
ATTENTION:
VOIR LE CAHIER D'INSTRUCTION
MODE
BRIDGED
MONO
STEREO
IN
3-24 VDC
OUT
CHASSIS
GROUND
T6.3AL, 250V
6.3A SLO-BLO
T6.3AL, 250V
6.3A SLO-BLO
120V 60Hz
800W
PUSH
3
2
1
PUSH
3
2
1
FUSE
FUSE
820
TRIGGER
BRIDGED
BRIDGED
MINIMUM IMPEDANCE
4 OHMS STEREO
MINIMUM IMPEDANCE
8 OHMS BRIDGED MONO
ATTENTION:
VOIR LE CAHIER D'INSTRUCTION
MODE
BRIDGED
MONO
STEREO
IN
3-24 VDC
OUT
CHASSIS
GROUND
T6.3AL, 250V
6.3A SLO-BLO
T6.3AL, 250V
6.3A SLO-BLO
120V 60Hz
800W
PUSH
3
2
1
PUSH
3
2
1
FUSE
FUSE
820
TRIGGER
BRIDGED
BRIDGED
MINIMUM IMPEDANCE
4 OHMS STEREO
MINIMUM IMPEDANCE
8 OHMS BRIDGED MONO
ATTENTION:
VOIR LE CAHIER D'INSTRUCTION
MODE
BRIDGED
MONO
STEREO
IN
3-24 VDC
OUT
CHASSIS
GROUND
T6.3AL, 250V
6.3A SLO-BLO
T6.3AL, 250V
6.3A SLO-BLO
120V 60Hz
800W
PUSH
3
2
1
PUSH
3
2
1
FUSE
FUSE
S7165.S5165.S820.OM.qxd 4/16/09 10:37 AM Page 16
CONNECTING YOUR JBL SYNTHESIS SYSTEM
SDEC-4500: Synthesis K2
NOTE: Although the
SDP-40HD is shown
here, connections for
the SDP-5 are similar.
16
Page 17

S820
S820
S820
S820 S820
S820
S820
S820
S820
S820
SDEC-4500P
SDEC-4500X
SDP-40HD
MICROPHONE INPUTS
1 2
2 1
1 2
1 (OSD)
2
Fix
Var Fix
Var
RS 232
IR IN
TRIGGER OUTPUTS
3 4
RECORD OUTPUTS
MAIN OUTPUTS
VIDEOVIDEO
CENTER
SUBWOOFER
LFE
MAIN AUDIO OUTPUTS
SIDE
REAR
AUX
FRONT
ZONE 2
ZONE 2
AUDIO
AUDIO
S/PDIF
MAIN
AUDIO
OUTPUTS
AUDIO VIDEOS-VIDEO
AES/EBU
S/PDIF
FRONT LFECENTER SUBWOOFER
SIDE
AUX
REAR
L R
L R
L R
L R L R L R
L
R
L
R
L
R
L
R
L
R
L
R
(C)
(SUB)
(LS)
(RS)
(L)
(R)
L
R
1 2 3 4 5
1 2 3
4 5 6
1 2 3
4 5 6
1 2 3 4 5 6 7 8
INPUTS COMPONENT VIDEO
INPUT 1 INPUT 2
INPUT 4
INPUT 3
OUTPUT
Y PR PB
Y PR PB
Y PR PB Y PR PB
Y PR PB
To Ethernet hub
(for system calibration)
To Ethernet hub
(for system calibration)
820
TRIGGER
BRIDGED
BRIDGED
MINIMUM IMPEDANCE
4 OHMS STEREO
MINIMUM IMPEDANCE
8 OHMS BRIDGED MONO
ATTENTION:
VOIR LE CAHIER D'INSTRUCTION
MODE
BRIDGED
MONO
STEREO
IN
3-24 VDC
OUT
CHASSIS
GROUND
T6.3AL, 250V
6.3A SLO-BLO
T6.3AL, 250V
6.3A SLO-BLO
120V 60Hz
800W
PUSH
3
2
1
PUSH
3
2
1
FUSE
FUSE
820
TRIGGER
BRIDGED
BRIDGED
MINIMUM IMPEDANCE
4 OHMS STEREO
MINIMUM IMPEDANCE
8 OHMS BRIDGED MONO
ATTENTION:
VOIR LE CAHIER D'INSTRUCTION
MODE
BRIDGED
MONO
STEREO
IN
3-24 VDC
OUT
CHASSIS
GROUND
T6.3AL, 250V
6.3A SLO-BLO
T6.3AL, 250V
6.3A SLO-BLO
120V 60Hz
800W
PUSH
3
2
1
PUSH
3
2
1
FUSE
FUSE
820
TRIGGER
BRIDGED
BRIDGED
MINIMUM IMPEDANCE
4 OHMS STEREO
MINIMUM IMPEDANCE
8 OHMS BRIDGED MONO
ATTENTION:
VOIR LE CAHIER D'INSTRUCTION
MODE
BRIDGED
MONO
STEREO
IN
3-24 VDC
OUT
CHASSIS
GROUND
T6.3AL, 250V
6.3A SLO-BLO
T6.3AL, 250V
6.3A SLO-BLO
120V 60Hz
800W
PUSH
3
2
1
PUSH
3
2
1
FUSE
FUSE
820
TRIGGER
BRIDGED
BRIDGED
MINIMUM IMPEDANCE
4 OHMS STEREO
MINIMUM IMPEDANCE
8 OHMS BRIDGED MONO
ATTENTION:
VOIR LE CAHIER D'INSTRUCTION
MODE
BRIDGED
MONO
STEREO
IN
3-24 VDC
OUT
CHASSIS
GROUND
T6.3AL, 250V
6.3A SLO-BLO
T6.3AL, 250V
6.3A SLO-BLO
120V 60Hz
800W
PUSH
3
2
1
PUSH
3
2
1
FUSE
FUSE
820
TRIGGER
BRIDGED
BRIDGED
MINIMUM IMPEDANCE
4 OHMS STEREO
MINIMUM IMPEDANCE
8 OHMS BRIDGED MONO
ATTENTION:
VOIR LE CAHIER D'INSTRUCTION
MODE
BRIDGED
MONO
STEREO
IN
3-24 VDC
OUT
CHASSIS
GROUND
T6.3AL, 250V
6.3A SLO-BLO
T6.3AL, 250V
6.3A SLO-BLO
120V 60Hz
800W
PUSH
3
2
1
PUSH
3
2
1
FUSE
FUSE
820
TRIGGER
BRIDGED
BRIDGED
MINIMUM IMPEDANCE
4 OHMS STEREO
MINIMUM IMPEDANCE
8 OHMS BRIDGED MONO
ATTENTION:
VOIR LE CAHIER D'INSTRUCTION
MODE
BRIDGED
MONO
STEREO
IN
3-24 VDC
OUT
CHASSIS
GROUND
T6.3AL, 250V
6.3A SLO-BLO
T6.3AL, 250V
6.3A SLO-BLO
120V 60Hz
800W
PUSH
3
2
1
PUSH
3
2
1
FUSE
FUSE
820
TRIGGER
BRIDGED
BRIDGED
MINIMUM IMPEDANCE
4 OHMS STEREO
MINIMUM IMPEDANCE
8 OHMS BRIDGED MONO
ATTENTION:
VOIR LE CAHIER D'INSTRUCTION
MODE
BRIDGED
MONO
STEREO
IN
3-24 VDC
OUT
CHASSIS
GROUND
T6.3AL, 250V
6.3A SLO-BLO
T6.3AL, 250V
6.3A SLO-BLO
120V 60Hz
800W
PUSH
3
2
1
PUSH
3
2
1
FUSE
FUSE
820
TRIGGER
BRIDGED
BRIDGED
MINIMUM IMPEDANCE
4 OHMS STEREO
MINIMUM IMPEDANCE
8 OHMS BRIDGED MONO
ATTENTION:
VOIR LE CAHIER D'INSTRUCTION
MODE
BRIDGED
MONO
STEREO
IN
3-24 VDC
OUT
CHASSIS
GROUND
T6.3AL, 250V
6.3A SLO-BLO
T6.3AL, 250V
6.3A SLO-BLO
120V 60Hz
800W
PUSH
3
2
1
PUSH
3
2
1
FUSE
FUSE
820
TRIGGER
BRIDGED
BRIDGED
MINIMUM IMPEDANCE
4 OHMS STEREO
MINIMUM IMPEDANCE
8 OHMS BRIDGED MONO
ATTENTION:
VOIR LE CAHIER D'INSTRUCTION
MODE
BRIDGED
MONO
STEREO
IN
3-24 VDC
OUT
CHASSIS
GROUND
T6.3AL, 250V
6.3A SLO-BLO
T6.3AL, 250V
6.3A SLO-BLO
120V 60Hz
800W
PUSH
3
2
1
PUSH
3
2
1
FUSE
FUSE
820
TRIGGER
BRIDGED
BRIDGED
MINIMUM IMPEDANCE
4 OHMS STEREO
MINIMUM IMPEDANCE
8 OHMS BRIDGED MONO
ATTENTION:
VOIR LE CAHIER D'INSTRUCTION
MODE
BRIDGED
MONO
STEREO
IN
3-24 VDC
OUT
CHASSIS
GROUND
T6.3AL, 250V
6.3A SLO-BLO
T6.3AL, 250V
6.3A SLO-BLO
120V 60Hz
800W
PUSH
3
2
1
PUSH
3
2
1
FUSE
FUSE
S7165.S5165.S820.OM.qxd 4/16/09 10:37 AM Page 17
CONNECTING YOUR JBL SYNTHESIS SYSTEM
SDEC-4500: Synthesis Everest
NOTE: Although the
SDP-40HD is shown
here, connections for
the SDP-5 are similar.
17
Page 18

S7165.S5165.S820.OM.qxd 4/16/09 10:37 AM Page 18
TROUBLESHOOTING
Problem: Amplifier does not turn on. Neither the red nor blue indicator lights are on.
Make sure that the amplifier is plugged in, and verify that there is the proper voltage at the wall outlet.
Problem: The red indicator lights, but the blue indicators do not light up when the Power switch is depressed.
1. If the amplifier is being used in a Synthesis system, make sure that the surround processor is turned on and
that all of the necessary power trigger cables are connected between the various system components. Refer
to the “CONNECTING YOUR JBL SYNTHESIS SYSTEM” section for reference.
2. If the amplifier is not being used with a Synthesis system, make sure the power switch is fully pressed in.
Problem: There is no sound from the speakers, but the amplifier is on (blue indicators lit).
1. Make sure that the surround processor or equalizer is on, and that the correct source has been connected
and selected.
2. Make sure that the correct outputs are connected from the surround processor or equalizer to the amplifier.
3. Make sure that the speakers are connected to the correct terminals. Check for short circuits at both ends of
the speaker cables.
Problem: Not all of the amplifiers turn on in a Synthesis system.
1. Make sure that all required power trigger cables are connected between system components. Refer to the
“CONNECTING YOUR JBL SYNTHESIS SYSTEM” section.
2. Make sure that each amplifier has its switch in the On position.
Problem: Insufficient audio from the speakers. Check that the output levels of the surround processor or
equalizer are set properly.
Problem: Insufficient bass.
Verify that the speakers have been wired to the amplifier with the correct polarity.
Problem: Audible hum from the speakers.
1. Check the power outlets and make sure that there is a solid earth ground present. (The services of an electrician
may be required.)
2. Make sure that all signal cables are routed away from power cords.
3. If these suggestions fail, experiment by running ground wires between the rear-panel screws of the amplifiers
and the other system components, such as the surround processor or signal processing package.
If you still encounter difficulty after trying the above suggestions, call your JBL Synthesis Authorized Dealer or
JBL Synthesis at 516.594.0300 (USA only), or visit www.jblsynthesis.com, for further assistance.
18
Page 19

S7165.S5165.S820.OM.qxd 4/16/09 10:37 AM Page 19
SPECIFICATIONS
S7165 / S5165 S820
RATED POWER OUTPUT: 160W PER CHANNEL INTO 8 OHMS, 200W PER CHANNEL INTO 8 OHMS,
THD: < 0.03%, 20HZ – 20KHZ < 0.03%, 20HZ – 20KHZ
INPUT IMPEDANCE: >28K OHMS 28K OHMS
SENSITIVITY: 1.1V IN = 100 WATTS OUT 1.1V IN = 100 WATTS OUT
FREQUENCY RESPONSE: 20HZTO20KHZ (+0.5/–1DB) 20HZTO20KHZ (+0/–0.25DB)
S/N RATIO (A-WEIGHTED AT RATED POWER):≥100DB
DAMPING FACTOR:
POWER BANDWIDTH 1% THD: 5HZ – 100KHZ, + 0, – 3DB5HZ – 100KHZ, + 0, – 3DB
INTERMODULATION DISTORTION: 0.03% 0.03%
ALL CHANNELS DRIVEN 800W IN BRIDGED MODE INTO 8 OHMS
1.3V IN = 150 WATTS OUT 1.55V IN = 200 WATTS OUT
≥
100DB
≥
400
≥
400
GENERAL
DIMENSIONS (H X W X D): 7-1/4" X 19" X 21-1/2" (184MM X 484MM X 546MM) 7-1/4" X 19" X 18-1/2" (184MM X 484MM X 470MM)
NET WEIGHT (120V): S7165: 92 LB (42KG)/S5165: 83 LB (38KG) 62 LB (28KG)
NET WEIGHT (230V): S7165: 95 LB (43KG)/S5165: 84 LB (38KG) 62 LB (28KG)
PACKAGED WEIGHT (120V): S7165: 106 LB (48KG)/S5165: 96 LB (44KG) 72 LB (33KG)
P
ACKAGED WEIGHT (230V): S7165: 108 LB (49KG) /S5165: 97 LB (44KG) 72 LB (33KG)
Features, specifications and appearance are subject to change without notice.
JBL, JBL Synthesis, Synthesis and K2 are trademarks of Harman International Industries, Incorporated, registered in the United States and/or other countries.
Atlas and Project Array are trademarks of Harman International Industries, Incorporated.
19
Page 20

S7165.S5165.S820.OM.qxd 4/16/09 10:37 AM Page 20
Harman High-Performance A/V
1718 W. Mishawaka Rd.
Elkhart, IN 46517
8500 Balboa Boulevard
Northridge, CA 91329
516.594.0300
Technical Support: 516.594.0300
www.jblsynthesis.com
© 2009 Harman International Industries, Incorporated.
All rights reserved.
Part No. 34 -JBL-0024 Rev. D
Declaration of Conformity
We, Harman Consumer Group, Inc.
2, route de Tours
72500 Ch
â
teau du Loir
France
declare in own responsibility that the products described
in this owner’s manual are in compliance with technical
standards:
EN 55013:2001+A1:2003
EN 55020:2002+A1:2003
EN 61000-3-2:2000
EN 61000-3-3:1995+A1:2001
EN 60065:2002
Laurent Rault
Harman Consumer Group,Inc.
Ch
â
teau du Loir, France 4/ 09
 Loading...