

JBL GT-BassPro12 User manual

GT-BassPro12
powered automotive subwoofer
OWNER’S MANUAL
INTRODUCTION
Thank you for choosing the JBL® GT-BassPro12 powered automotive
subwoofer. The GT-BassPro12 has been designed to deliver great
bass performance from a compact, easily installed powered subwoofer
enclosure.
To get the best performance from your GT-BassPro12, we strongly
recommend that installation be entrusted to a qualified professional.
Although these instructions explain how to install the GT-BassPro12 in a
general sense, they do not show specific installation methods that may be
required for your particular vehicle. If you do not have the necessary tools
or experience, do not attempt the installation yourself. Instead, please
ask your authorized JBL car audio dealer about professional installation.
In order that we may better serve you should you require warranty
service, please retain your original sales receipt and register your
GT-BassPro12 online at www.jbl.com.
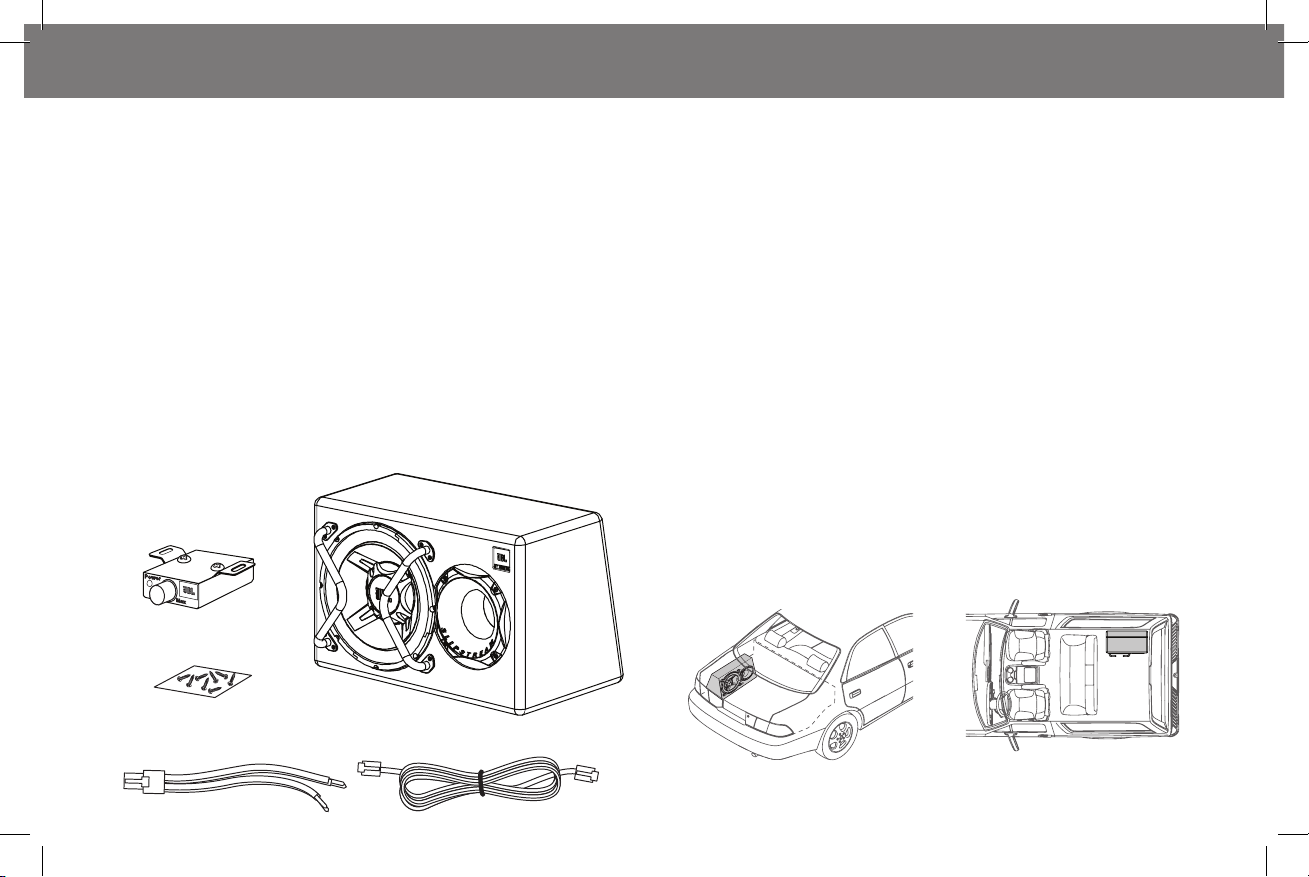
INCLUDED ITEMS
Remote
Level Control
Mounting
Screws
GT-BassPro12
Powered Subwoofer
INSTALLING THE SUBWOOFER
INSTALLATION WARNINGS AND TIPS
• Always wear protective eyewear when using tools.
• Disconnect the vehicle’s negative (–) battery terminal before starting
the installation.
• Check clearances on both sides of a planned mounting surface. Be
sure that screws or wires will not puncture brake lines, fuel lines or
wiring harnesses, and that wire routing will not interfere with the safe
operation of the vehicle.
• When making electrical connections, make sure they are secure and
properly insulated.
• I f you must replace the GT-BassPro12’s fuse, be sure to use the same
type of fuse and current rating as that of the original.
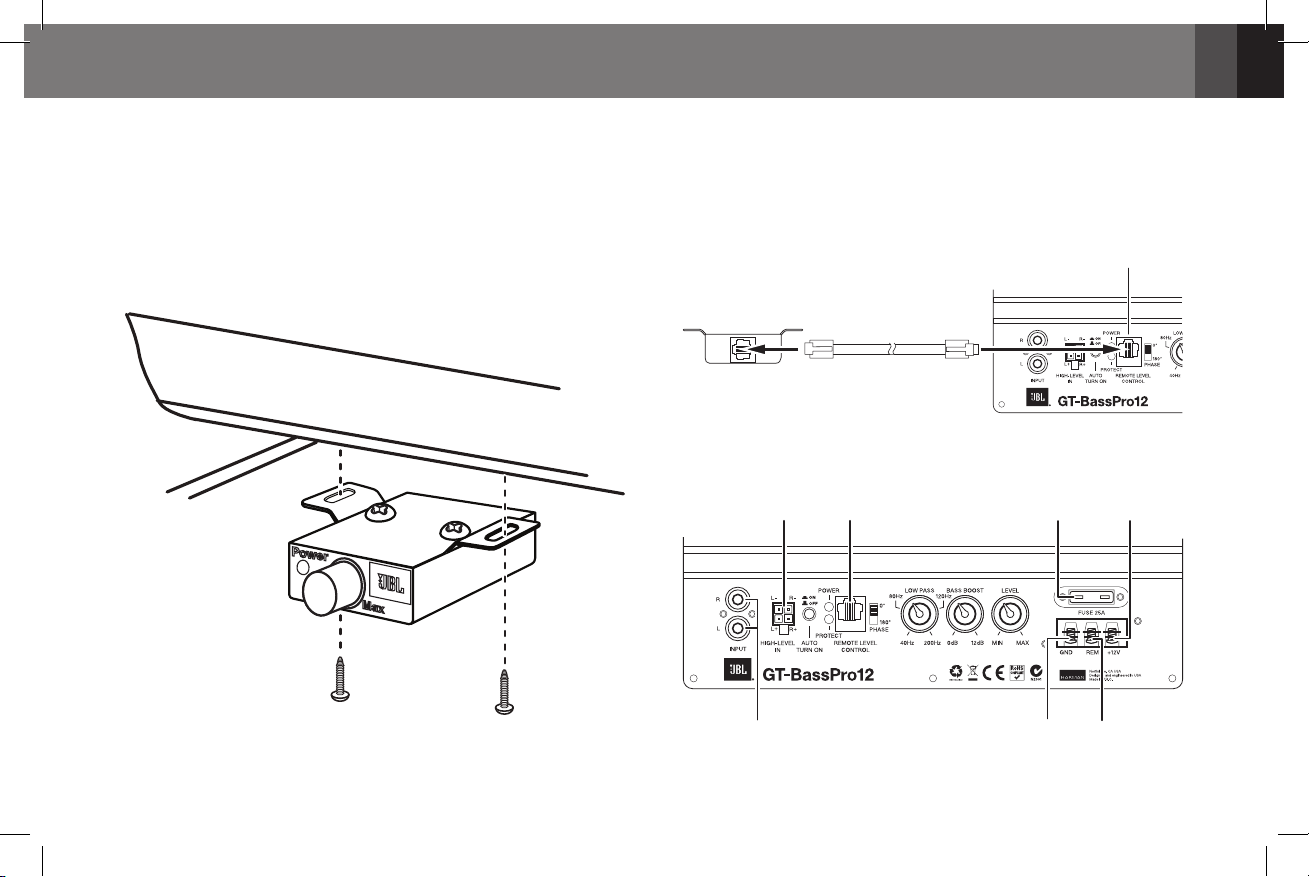
MOUNTING THE SUBWOOFER
Choose a location for the subwoofer that doesn’t interfere with cargo,
a fold-down rear seat or the trunk lid. The best location is usually a
corner of the trunk or cargo area, as shown in the illustrations. Choose a
mounting location in the front of the vehicle for the remote level control.
High-Level Input
Wiring Harness
2
Remote
Level Control
Cable
Englis h
MOUNTING THE REMOTE LEVEL CONTROL
You may mount the remote level control under the dashboard or inside
the glove box or console.
Select a mounting location that allows easy access to the remote level
control while driving. Using the level control itself as a template, mark and
drill holes in the mounting surface. Attach the level control using two of
the provided mounting screws.
Route the supplied remote level control cable behind the dashboard or
other interior panels and under the carpet. Do not route the cable outside
the vehicle. Connect the cable between the GT-BassPro12’s Remote
Level Control connector and the connector on the remote level control.
Remote
Level Control
Connector
Remote
Level Control
Remote Level Control
Cable (supplied)
CONNECTIONS
High-Level
Input
Connector
Remote
Level Control
Connector Fuse
+12V
Connector
Line-Level
Input
Connectors
Ground
Connector
Remote
Turn-On
Connector
www.jbl.com
3
 Loading...