Jaycar XC9064, XC9062 User Manual

XC9062 XC9064

RPi Retro Arcade Setup
Hardware installation
The XC9064 and XC9062 arcade machines work in a similar fashion in terms of hardware setup. You must use a bootable Raspberry PI (XC9001) and mount it inside of the case.
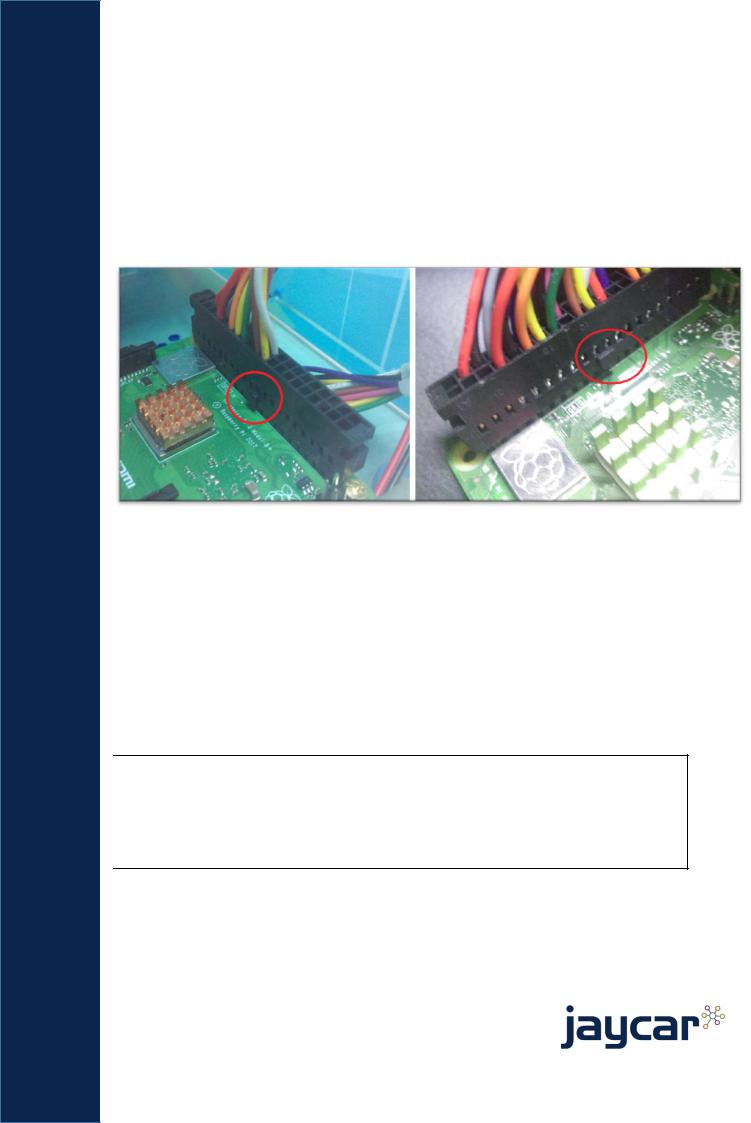
Both units have an IDE connector available, which provides pin-outs for the button and joysticks on the console. Connect the IDE connector so that the tab is facing into the centre of the pi, as shown below:
Once connected and booted up, you can navigate to the terminal to install the required gpio drivers.
In RetroPie, you can do this by pressing the Ctrl-Alt and F4 key; this changes view to a virtual terminal window, which you can run ‘emulationstation’ to go back to RetroPie.
Installing software (internet connectivity required)
The latest version of GPIONext can be found here:
https://github.com/mholgatem/GPIOnext/
This is a collection of python scripts hosted on github. You can install by following these simple commands once you have connected to the internet:
sudo apt update
sudo apt install git python3-dev -y
git clone https://github.com/mholgatem/GPIOnext.git cd GPIOnext
sudo chmod +x * sudo ./install.sh
When you run the install script; it will then ask you if you want to configure a joystick now, which you can do; make player 1 as joystick 1 (and for XC9062, make player 2 as joystick 2 by running gpionext config again). The button presses won’t matter, as you will have to re-configure from within Retropie by going to the Start Menu and pressing “Input Configuration.”
Australia |
New Zealand |
|
www.jaycar.com.au |
www.jaycar.co.nz |
|
techstore@jaycar.com.au |
techstore@jaycar.co.nz |
|
1800 022 888 |
0800 452 922 |
Page 1 of 1 |
 Loading...