

Page 1

Troubleshooting Data
Troubleshooting Manual
AquaLink® RS
All Button and
OneTouch
™
Control Systems
Pool/Spa Combination Systems
Pool/Spa Only Systems
Dual Equipment Systems
FOR YOUR SAFETY - This product must be installed and serviced by a pro fes sion al pool/
spa service technician. The procedures in this manual must be followed ex act ly. Failure to
follow warning notices and instructions may result in property damage, serious injury, or
death.
6919E
WARNING
Page 2

Page 2
Page 3

Table of Contents
Section 1. Important Safety Instructions ........ 4
Section 2. Control Panel Overview ................. 6
2.1 Indoor Control Panel ..........................................6
2.2 Controller ...........................................................6
2.3 Reset Switch ......................................................6
Section 3. Controller ....................................... 8
3.1 Diagnostics ........................................................8
3.2 Controller Troubleshooting ...............................10
3.3 Heater Operation ..............................................13
Section 4. Power Center .............................. 14
4.1 Overview ..........................................................14
4.2 Power Center Troubleshooting .........................15
4.3 Main Power Center PCB ..................................16
Section 5. Auxiliary Power Center ................ 18
5.1 Overview ..........................................................18
5.2 DIP Switches ....................................................19
5.3 Water Temperature Sensor ..............................21
5.4 3 HP Relay .......................................................23
5.5 Two Speed Relay .............................................25
5.6 Light Dimming Relay ........................................27
Page 3
Section 6. Jandy Valve Actuator ................... 29
6.1 Operation ..........................................................29
Section 7. Troubleshooting ........................... 31
7.1 Quick Check List ..............................................31
7.2 Controller Inoperable, Display Blank ................33
7.3 All Lights Lit on Controller ................................34
7.4 Some Controller Buttons Do Not Operate ........35
7.5 Three Amp Fuse Keeps Failing ........................36
7.6 Heater Doesn't Fire ..........................................37
Section 8. Flow Charts ................................... 38
8.1 OneTouch Menu Flow Chart .............................38
8.2 All Button Menu Flow Chart ..............................39
8.3 All Button Cancel Flow Chart ...........................40
Section 9. Wiring Diagrams ........................... 41
9.1 AquaLink RS Pool/Spa Combination and Pool/
Spa Only ...........................................................41
9.2 AquaLink RS Dual Equipment ..........................42
9.3 AquaLink RS Auxiliary Power Center ...............43
Section 10. Power Center Bezel ...................... 44
Page 4

Page 4
Section 1. Important Safety Instructions
READ AND FOLLOW ALL INSTRUCTIONS
Lire la notice technique.
All electrical work must be performed by a licensed electrician and conform to all national, state, and local codes.
When installing and using this electrical equipment, basic safety precautions should always be followed, including the
following:
DANGER
To reduce the risk of injury, do not remove the suction fittings of your spa or hot tub. Never operate a spa or hot
tub if the suction fittings are broken or missing. Never replace a suction fitting with one rated less than the flow rate
marked on the equipment assembly.
WARNING
Prolonged immersion in hot water may induce hyperthermia. Hyperthermia occurs when the internal temperature
of the body reaches a level several degrees above the normal body temperature of 98.6° F. The symptoms of
hyperthermia include dizziness, fainting, drowsiness, lethargy, and an increase in the internal temperature of the
body. The effects of hyperthermia include: 1) unawareness of impending danger; 2) failure to perceive heat; 3)
failure to recognize the need to exit spa; 4) physical inability to exit spa; 5) fetal damage in pregnant women; 6)
unconsciousness resulting in a danger of drowning.
WARNING
To Reduce the Risk of Injury -
a) The water in a spa should never exceed 104°F (40°C). Water temperatures between 100°F (38°C) and 104°F
(40°C) are considered safe for a healthy adult. Lower water temperatures are recommended for young children
and when spa use exceeds 10 minutes.
b) Since excessive water temperatures have a high potential for causing fetal damage during the early months of
pregnancy, pregnant or possibly pregnant women should limit spa water temperatures to 100°F (38°C).
c) Before entering a spa or hot tub, the user should measure the water temperature with an accurate
thermometer since the tolerance of water temperature-regulating devices varies.
d) The use of alcohol, drugs, or medication before or during spa or hot tub use may lead to unconsciousness with
the possibility of drowning.
e) Obese persons and persons with a history of heart disease, low or high blood pressure, circulatory system
problems, or diabetes should consult a physician before using a spa.
f) Persons using medication should consult a physician before using a spa or hot tub since some medication
may induce drowsiness while other medication may affect heart rate, blood pressure, and circulation.
WARNING
Risk of electric shock - Install the power center at least five (5) feet (152.4cm) from the inside wall of the pool
and/or hot tub using non-metallic plumbing. Canadian installations must be at least three (3) meters from the water.
Children should not use spas or hot tubs without adult supervision.
Do not use spas or hot tubs unless all suction guards are installed to prevent body and hair entrapment.
People using medications and/or having an adverse medical history should consult a physician before using a spa
or hot tub.
Danger d'electrocution - Les installations canadiennes doivent se trouver à au moins trois (3) mètres de l’eau.
Ne pas laisser les enfants utiliser une cuve de relaxation sans surveillance.
Pour éviter que les cheveux ou une partie du corps puissent être aspirés, ne pas utiliser une cuve de relaxation si
les grilles de prise d'aspiration ne sont pas toutes en place.
Les personnes qui prennent des médicaments ou ont des problèmes de santé devraient consulter un médecin
avant d’utiliser une cuve de relaxation.
AVERTISSEMENT
Page 5

Page 5
WARNING
People with infectious diseases should not use a spa or hot tub.
To avoid injury, exercise care when entering or exiting the spa or hot tub.
Do not use drugs or alcohol before or during the use of a spa or hot tub to avoid unconsciousness and possible
drowning.
Pregnant or possibly pregnant women should consult a physician before using a spa or hot tub.
Water temperature in excess of 100°F/38°C may be injurious to your health.
Before entering a spa or hot tub measure the water temperature with an accurate thermometer.
Do not use a spa or hot tub immediately following strenuous exercise.
Prolonged immersion in a spa or hot tub may be injurious to your health.
Do not permit any electric appliance (such as a light, telephone, radio, or television) within 5 feet (1.5 m) of a spa
or hot tub.
The use of alcohol, drugs or medication can greatly increase the risk of fatal hyperthermia in hot tubs and spas.
Water temperature in excess of 100°F/38°C may be hazardous to your health.
AVERTISSEMENT
Les personnes atteintes de maladies infectieuses ne devraient pas utiliser une cuve de relaxation.
Pour éviter des blessures, user de prudence en entrant dans une cuve de relaxation et en sortant.
Pour éviter l’évanouissement et la noyade éventuelle, ne prendre ni drougue ni alcool avant d’utiliser une cuve de
relaxation ni quand on s’y trouve.
Les femmes enceintes, que leur grossesse soit confi rmée ou non, devraient consulter un médecin avant d’utiliser
une cuve de relaxation.
Il peut être dangereux pour la santé de se plonger dans de l’eau à plus de 38°C/100°F.
Avant d’utiliser une cuve de relaxation mesurer la témperature de l’eau à l’aide d’un thermomètre précis.
Ne pas utiliser une cuve de relaxation immédiatement après un exercice fatigant.
L’utilisation prolongée d’une cuve de relaxation peut être dangereuse pur la santé.
Ne pas placer d'appareil électrique (luminaire, téléphone, radio, téléviseur, etc) à moins de 1.5m de cette cuve de
relaxation.
La consommation d’alcool ou de drogue augmente considérablement les risques d’hyperthermie mortelle dans une
cuve de relaxation.
Il peut etrê dangereux pour la santé de se plonger dans de l’eau à plus de 38°C/100°F.
WARNING
To avoid injury ensure that you use this control system to control only packaged pool/spa heaters which have builtin operating and high limit controls to limit water temperature for pool/spa applications. This device should not be
relied upon as a safety limit control.
CAUTION
A terminal bar marked "GROUND" is provided within the power center. To reduce the risk of electrical shock,
connect this terminal bar to the grounding terminal of your electric service or supply panel with a continuous
copper conductor having green insulation and one that is equivalent in size to the circuit conductors supplying this
equipment, but no smaller than no. 12 AWG (3.3mm). In addition, a second wire connector should be bonded with
a no. 8 AWG (4.115mm) copper wire to any metal ladders, water pipes, or other metal within five (5) feet (1.52m) of
the tub.
CAUTION
A ground-fault circuit-interrupter must be provided if this device is used to control underwater lighting fixtures. The
conductors on the load side of the ground-fault circuit-interrupter shall not occupy conduit, boxes, or enclosures
containing other conductors unless the additional conductors are also protected by a ground-fault circuitinterrupter. Refer to local codes for complete details.
Attention installer: Install to provide drainage of compartment for electrical components.
SAVE THESE INSTRUCTIONS
Page 6

Page 6
Section 2. Control Panel Overview
2.1 Indoor Control Panel
The indoor control panel serves as a means of turning equipment on and off, entering programs to run equipment
automatically at selected times, and displaying what is going on in the rest of the system. Programs (and other
information entered through the controller) are stored in a memory chip on the power center board, even during a
power interruption (however long).
2.2 Controller
The power center supplies the controller 10 VDC via the two (2) outside wires (red and green) of the four (4)
conductor cables. If the voltage drops below 8 VDC, the display will flicker on and off. The two (2) inner wires
(yellow and black) provide the two-way communication link between the controller and the power center. They
communicate via serial communication, using signals like the standard "RS-485".
If either of the communication wires (inner pair) is broken or misconnected, but the power supply wires (the outer
pair) are connected properly, the controller will stop responding. It may show a steady screen of information, and stop
responding to its buttons. If power is then interrupted, the controller will lock up. The way it locks up will depend on
the type of controller.
1. Locked-up All Button. All LEDs will be on and the text will resemble the following: "6700 REV C".
2. Locked-up OneTouch. The screen will be covered with dots, with a line of text that resembles the following:
"Firmware Rev XXX".
2.3 Reset Switch
1. All Button Controller. Pressing the reset switch, located on the left side, will momentarily display the software
part numbers and revision letters for both the controller's micro controller chip and the power center's fi rmware
chip. The reset switch also resets the micro controller, but does not remove any programming, AUX labels, etc.
2. OneTouch Controller. The reset switch can be used to show the revision code for the fi rmware for both the
controller's micro controller chip and the power center's fi rmware chip.
Page 7

Figure 1. All Button Controller (Front View)
Page 7
Display Module
Micro Controller
Figure 2. All Button Controller (Back View)
Jumpers for
Multiple Controllers
Green
Yellow
Black
Red
W 2
W 1 W 1
Controller 1
Controller 2
Jumper Settings for
Multiple Controllers
W 1
W 2
W 2
Controller 3
W 2
W 1
Controller 4
Figure 3. OneTouch Controller (Front View)
Page Up/
OneTouch 1
Back/
OneTouch 2
Page Down/
OneTouch 3
Cancel Delay
Button*
*Items Hidden by Cover
Figure 4. OneTouch Controller (Face Plate Removed)
Reset
Switch*
Moves Highlighted Bar
Up or Down
Highlight Bar
Selects
Highlighted
Items
W 2
W 1
Controller 1
W 2
Controller 2
Jumper Settings for
Multiple Controllers
Controller 3
W 1
Controller 4
W 2
W 1
W 2
W 1
Page 8

Page 8
Section 3. Controller
3.1 Diagnostics
The AquaLink system has an internal self-checking process, which can display its current status on the indoor control
panel. Use the following steps to get to this "diagnostics" information:
1. All Button: Use the buttons along the lower left side of the controller.
a. Press MENU, BACK, and BACK again until SYSTEM SETUP displays on the screen.
b. Press ENTER (*), BACK, and BACK again until DIAGNOSTICS displays on the screen.
c. Press ENTER, and read the information that is presented in order.
NOTE To step through the information faster, press an arrow key (for example, Up). If you make a mistake, select CANCEL
before selecting ENTER again. When done, the controller will return automatically to its normal operating cycle.
2. OneTouch: From the main OneTouch screen, use the Up or Down arrow button.
a. Highlight MENU (press Select).
b. Highlight HELP (press Select), highlight DIAGNOSTICS (press Select).
c. Press BACK when done.
Information displayed includes identification of the exact model number (shown as a four (4) digit firmware number)
and firmware revision letter, and the status of the battery, temperature sensors, and other devices that are currently
working on-line (communicating with the power center). If an LX or LXi heater is on-line, information about its error
condition (if any) will also be shown here.
Page 9

Page 9
Possible Online
Devices
As Shown in
Diagnostics While
Possible Unit
Numbers
Unit Order*
Important?
Revision Usable
Online
All Button CONTROL PANEL 1,2,3,4 No* C
AquaLink PC CONTROL PANEL 4 4 Yes** C
OneTouch ONETOUCH 1,2,3,4 No I
Wireless
ONETOUCH 1,2,3,4 No I
OneTouch***
Serial Adapter SERIAL ADAPTR 1,2, No I
PHASTLink Serial
SERIAL ADAPTR 1,2 No I
Adapter
SpaLink
®
RS SPALINK 1,2,3 No G
Dual Spa Side Switch SPA SW BOARD ---- ---- C
Tele-Link
Auxiliary Power
®
TELELINK 1 1 ---- C
REMOTE PWRCNTR 1,2,3 Yes
Center
LX Heater LX HTR 1,2 Yes H
AquaPure
®
AquaPure 1 ---- I
Chlorinator
AquaPalm™ AQUAPALM 1 ---- MMM
RS InterLink ---- ---- N
LXi Heater LXi HTR 1,2 Yes N
Earliest PPD
Table 1. Diagnostics Table
* Unit order. Yes means that the unit number must be set correctly or the device will not work properly. The unit number is set by
slide-on jumpers, a DIP switch, or a wire, depending on the type of device.
**If an AquaLink PC is online, there must NOT be an All Button or OneTouch jumpered, as in number 4.
***Wireless OneTouch is shown as any other OneTouch. Its jumpers must not match the jumpers in any other OneTouch.
Page 10

Page 10
3.2 Controller Troubleshooting
3.2.1 Display Is Not Illuminated
Check the voltage between the red and green wires at the red terminal bar (terminals 1 and 4). If the voltage is
between 8 and 10 VDC, check the polarity. The red wire is positive (+) and the green wire is negative (-). If the
voltage and polarity are correct, replace the control panel. If the voltage is less than 8 VDC, go to the power center.
1. At the power center, check the voltage between the red and green wires at the red terminal bar (terminals 1 and 4).
See Figure 5. If the voltage is between 8 and 10 VDC and the polarity is correct, but there is less than 7 VDC at
the indoor control, check the wires for the following:
a. Broken or shorted red or green wires.
b. Wire size. The minimum gauge for one control no more than 300 feet away from the power center is 22 AWG.
To ensure a lower drop in current, use larger wire (16 to 20 AWG)
2. If the voltage is less than 7 VDC, check the following:
a. Transformer secondary wires (two yellows). See Figure 6. If the voltage is less than 22 VAC, check the
incoming (primary power) to the system.
b. If the power to the transformer primary is less than 105 VAC, contact the power supply company.
c. If the voltage to the transformer primary is above 105 VAC, but the transformer secondary is less than 22
VAC, replace the transformer.
d. If the secondary voltage is 24 to 28 VAC, turn off the power.
e. Remove the fuse from its holder and do a continuity test. If there is no continuity, unplug all the Jandy Valve
Actuators (JVAs), replace the fuse (3.15 amp), and turn on the power. If the fuse blows with all JVAs unplugged,
the circuit board is damaged and needs to be replaced. If the fuse does not blow, plug a JVA cord into the Intake
JVA Socket. Test the JVA by switching to SPA. If the fuse holds, remove the tested JVA and plug the next JVA
into the Intake JVA Socket. Continue until all JVAs have been tested or the fuse blows.
Page 11

Check for broken or loose
wires on terminals 1 and 4
(red and green) of the red
4-pin terminal bar.
Green
Wire
S1
S2
4321
RESET
AUTO
SERVICE
TIME OUT
Red
Wire
4321
P
TER PUM
AUX
FIL
654321
1
AUX
2
UX 3
A
10987654321
RS6 & RS8 ONLY
RS8 ONLY
6
4
UX
AUX
A
AUX 5
Page 11
POOL MODE
SPA MODE
AUX 7
SPA DRAIN
SOLAR
HEATER
SPA FILL
Figure 5. Checking Voltage at Red Terminal Bar
24 – 28 VAC
Yellow wires
Fuse
3.15 amp
Secondary
Transformer
Primary
105 – 130 VAC
Figure 6. Transformer Primary and Secondary Voltages
Page 12

Page 12
3.2.2 Control Not Communicating with Power Center PCB
The following conditions indicate that the control is not communicating with the power center PCB:
1. All Button Control: All the circuit LEDs are illuminated and the display is locked on a part number and revision
letter.
2. OneTouch Control: The screen is covered with dots and displays a fi rmware version number.
Communication problems can be caused by the following:
1. Broken communication wire(s). These wires are connected to the red terminal bar at terminals two (2) and three
(3 ) (yellow and black). See Figure 7.
2. The microprocessor was hit by a power surge. Turn off all power to the system. (If the PCB is prior to Revision N,
disconnect the nine (9) volt battery.) Wait two (2) minutes and then turn the power on. If this frees up the system,
you will need to reset the time and date, except with a Revision N board. Programming will not be lost. It is
advisable to install a Surge Protection Kit.
Check for broken
yellow or black wires.
Check for broken
yellow or black wires.
654321
AUX
AUX 2
10987654321
RS6 & RS8 ONLY
3
4
AUX
AUX 5
RS8 ONLY
AUX 6
AUX
POOL MODE
7
SPA MODE
SPA DRAIN
SOLAR
HEATER
SPA FILL
4321
4321
RESET
S1
AUTO
UX 1
TER PUMP
A
FIL
SERVICE
TIME OUT
S2
Figure 7. Checking Communication Problems between Control and Power Center PCB
Page 13

Page 13
3.3 Heater Operation
The pool and spa heater LED and the solar LED are two-color LEDs. Green indicates the heater is enabled but not on.
Red indicates the signal to the heater relay is being sent. A heater or solar LED will remain green for the following
reasons:
1. Thermostat setting has been reached.
2. Thermostat setting is below the water temperature.
3. Water temperature sensor has failed.
4. Other body of water is circulating (i.e., pool heater is enabled but spa is circulating).
To eliminate the control system as the cause of the heating problem, insert both wires to the heater into the same
terminal of the green terminal bar, as shown in Figure 8. If the heater does not operate, the problem is in the wires or
the heater, not the control system. Reinsert wires into the correct terminals after the test.
4321
FILTER PUMP
654321
A
AUX 1
UX 2
4321
S1
S2
RESET
AUTO
SERVICE
TIME OUT
10987654321
RS6 & RS8 ONLY
3
4
UX
UX 5
AUX
A
A
RS8 ONLY
7
AUX 6
AUX
SOLAR
HEATER
Figure 8. Connecting Both Heater Wires to the Same Terminal for Testing
POOL MODE
SPA MODE
SPA DRAIN
SPA FILL
To Heater
Page 14

Page 14
Section 4. Power Center
4.1 Overview
The power center PCB is the true brain of the system. The micro-controller on the PCB is constantly sending signals
through the communication wires to the control panel and polling the system to determine which circuits should be on
and which should be off.
4.1.1 Driver Chips
The driver chips can be thought of as a series of small relays. When one of the driver chips receives a signal, it closes
a contact which passes 24 to 32 VDC to the appropriate relay coil socket, in this case AUX 1. Each relay driver chip
activates a specifi c set of relay coil sockets (see the chart below). If a driver chip fails, it is usually caused by either
shorted relay coil wires, a shorted relay coil, or a relay not designed for the 24 VDC coil voltage (i.e., 24 VAC rather
than 24 VDC). The relay coil provides resistance (approximately 300 Ohms); if there is no resistance, the driver chip
circuit will be damaged.
4.1.2 Reset Button
Pressing the reset button, located in the upper left hand corner of the power center bezel, resets the power center
micro-controller. This also changes the time and date to the default settings for PCBs prior to Rev N. Pressing this
button will not remove any programming, AUX labels, etc.
4.1.3 EEPROM
All programming, labeling, temperature settings, etc., are stored within an EEPROM (Electronically Erasable Programmable Read Only Memory) chip. This chip is located on the PCB and will retain all settings indefi nitely, even if
power is lost for an extended period. If the Power Center PCB is prior to Rev N, a 9-volt battery will keep the clock
running during power outages.
4.1.4 Battery
If the power is off for more than 34 hours, the battery will drain below 6.3 volts. This is insuffi cent to keep the clock
running, therefore, the date and time will be lost. If the PCB is Rev N or newer, a three (3) volt lithium battery will
keep the clock running during a power outage. If the line power is off for more than three (3) years, this battery may
drain to the point where it will no longer keep the clock running. Even if the battery is dead, the user inputs (Pro-
grams, Labels, Temperature Settings, etc.) will never be lost.
Page 15

Page 15
4.2 Power Center Troubleshooting
4.2.1 Loss of Power
Check the power center transformer for the proper voltage.
1. Disconnect the transformer from the power center PCB. Check the voltage on the secondary transformer (the
two (2) outside yellow wires). The two (2) outside wires provide the 24 to 28 VAC to the PCB.
2. If there is less than 22 VAC at the secondary wires, check the voltage at the primary (black and white) wires for
105 to 130 VAC. If there is no voltage on the primary, check the supply source (the circuit breaker).
3. If there is 105 to 130 VAC on the primary and no voltage on the secondary, replace the transformer. Note: the
transformer and/or its fuse can be damaged by a short circuit. Water in the JVA can cause a short. A cut or spliced
JVA cord can cause a short. A damaged chip on the PCB (usually a driver chip) can cause a short.
The two (2) outside wires provide the 24 to 28 VAC to
the PCB. The center wire is a ground. There is a four
(4) amp fuse between the secondary leads hidden
behind the transformer secondary cover.
Secondary 24
to 28 VAC
Figure 9. Transformer Voltage Test
Power Center
Transformer
4 Amp
Fuse
Primary 105
to 130 VAC
Page 16

Page 16
4.3 Main Power Center PCB
4.3.1 PCB Circuit Layout
1. JVA Relays (K2 - K5)
2. Low Voltage Heater Relay
3. 3.15 amp fuse. Fuse will blow to protect the transformer when there is a short circuit in the JVA(s) or the circuit
board driver chip is damaged.
4. CPU Board
5. U2 Communication Chip. This chip will be damaged if a lightning strike hits the four (4) conductor wires. It will
turn brown when damaged. This chip is mounted on the PCB board and is located underneath the top edge of the
CPU board.
6. Sprinkler Module Connector
7. Battery (3 Volt Lithium)
8. Spare Auxiliary. Operates with pool/spa combo units only. With fi rmware prior to Rev. I this socket is on when
the fi lter pump is on and the system is in pool mode. It turns off when the spa is activated. With Rev. I or newer,
turning on dip switch 6 will reverse the operation of this socket (i.e. on in spa mode and off in pool mode).
2
6
3
1
Figure 10. Main Power Center PCB, Back View
S1
S2
4321
RESET
AUTO
SERVICE
TIME OUT
4321
P
TER PUM
FIL
1
AUX
4
654321
2
AUX3
AUX
7
10987654321
RS6 & RS8 ONLY
RS8 ONLY
6
UX
UX4
UX5
A
AUX
A
A
5
POOL MODE
7
SPA MODE
SPA DRAIN
SOLAR
HEATER
SPA FILL
Figure 11. Main Power Center PCB, Front View
8
Page 17

Page 17
4.3.2 PCB Voltages
1. From Power Center to Controller, between terminals one (1) and four (4) of the two (2) red terminal blocks = 8 to
10 VDC.
2. To JVA 2444 = 24 to 28 VAC*.
3. To Relay Coils = 24 to 32 VDC*.
4. Transformer Primary = 105 to 130 VAC.
5. Transformer Secondary = 24 to 28 VAC.
* Never measure voltage at the socket.
Auto Light
Transformer
Connection
24 VAC
Connection to
Controller
10 VDC
4321
S1
S2
RESET
AUTO
SERVICE
TIME OUT
Aux 2
Aux 1
Filter Pump
Relay Sockets
24 VDC
4321
FILTER PUMP
Aux 3
Aux 4
1
AUX
Aux 6
Aux 5
Spa
Side
Switch
654321
3
4
2
UX
A
AUX
AUX
Aux 7
JVA Sockets
Sensors
and
Heater
10987654321
RS6 & RS8 ONLY
RS8 ONLY
AUX 6
AUX 7
AUX 5
Intake
Return
Cleaner
HEATER
Solar
24 VAC
POOL MODE
SPA MODE
SPA DRAIN
SOLAR
SPA FILL
Spare
Elect. Htr.
Solar Pump
Relay Sockets
24 VDC
Valves Light
Figure 12. PCB Voltages
Page 18
Page 18
Section 5. Auxiliary Power Center
5.1 Overview
An auxiliary power center provides control for systems that need to run more relays (and/or JVAs) than can be
handled by the main power center. The main one is still the central "brain" of the system; it sends control signals to
the auxiliary power center PCB through the 4-wire bus (red connector). Those control signals tell the auxiliary power
center which of its relays to turn on, and it provides the power for them. There are no temperature sensors or DIP
switches in the auxiliary power center, and it has no battery (as it depends on the time keeping that’s done by the main
power center).
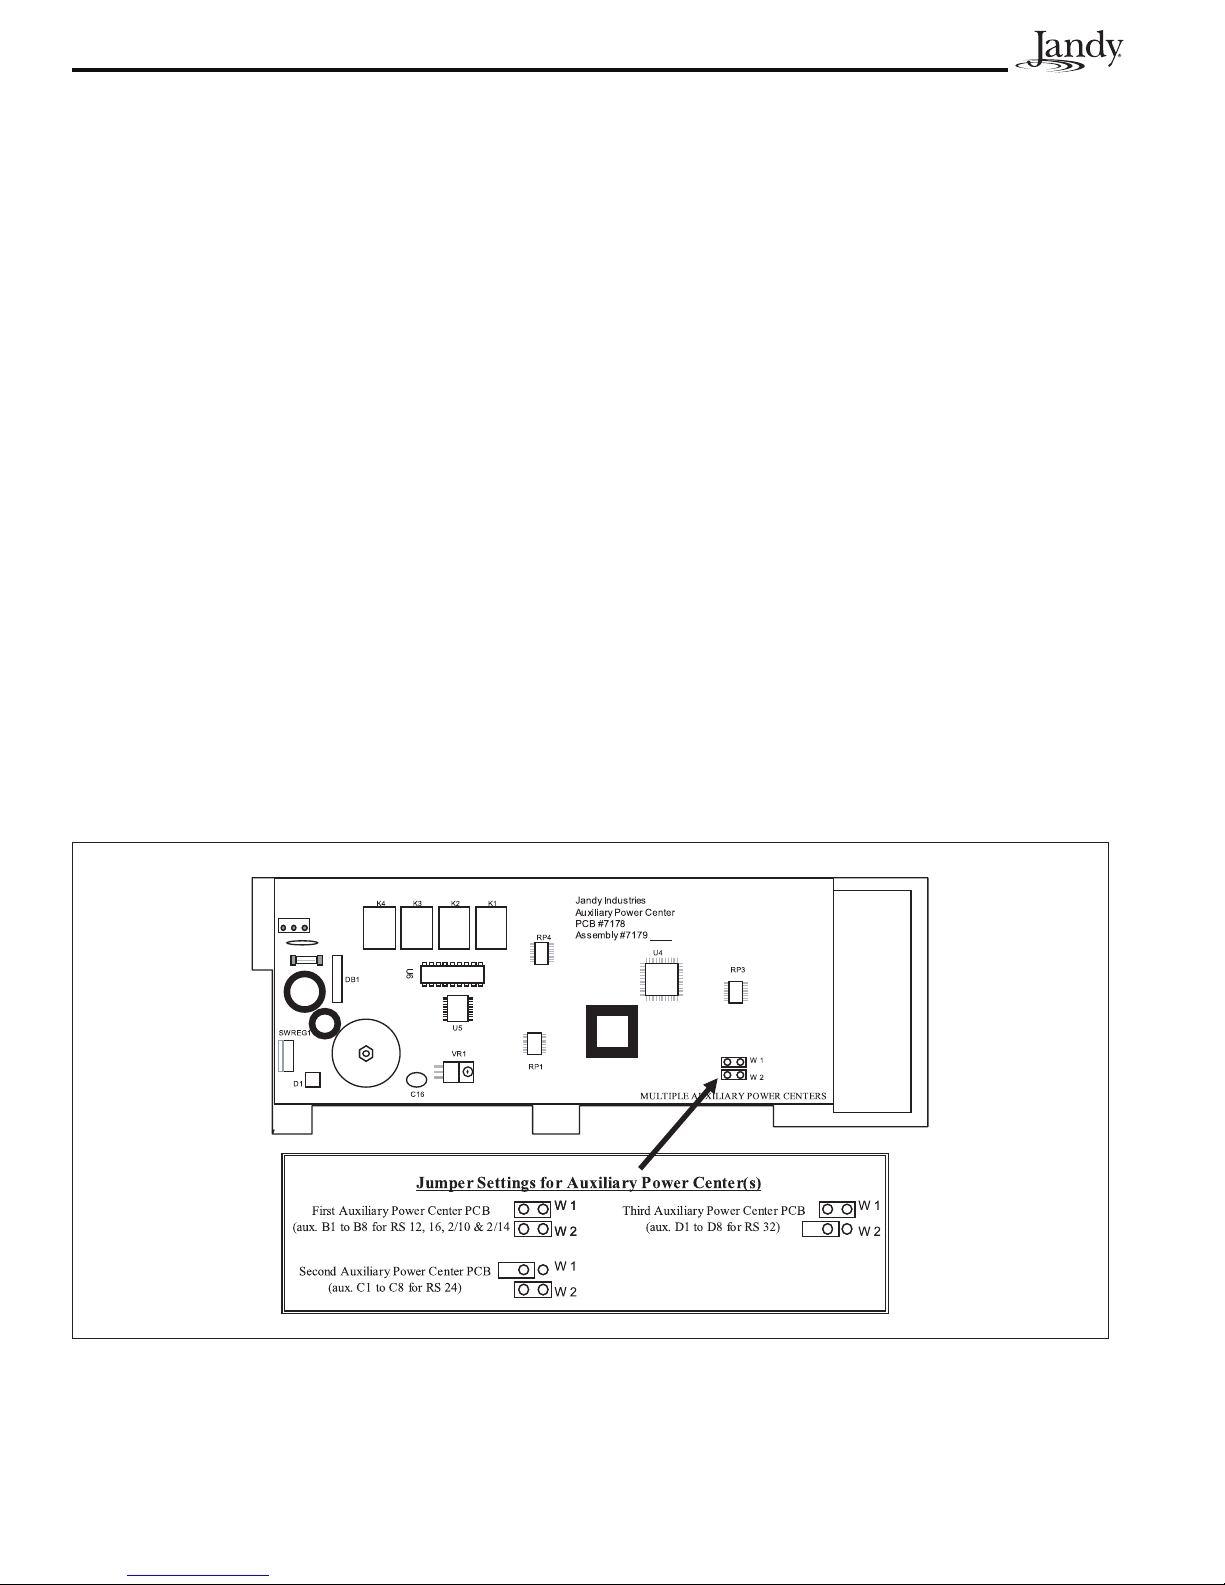
5.1.1 Jumpers
Jumpers “W1” and “W2”: these are slide-on jumpers on the back side of the auxiliary power center board. They
identify the board and must be set correctly, or the board will not respond properly to commands from the main power
center PCB. (See below for jumper settings.)
5.1.2 Driver Chip
A driver chip (U6) drives the relays, just like the similar chips on the main power center. It is in a socket, to simplify
replacement in case of damage.
5.1.3 Switch
The left-most (bottom) switch on the auxiliary power center bezel works just like the one on the main power center,
changing from AUTO to SERVICE to TIME OUT (3 hour) and back to AUTO.
5.1.4 JVA Sockets
The (4) JVA sockets are driven together with the fi rst (4) auxiliary relays here (they are not independent). Dimming:
use the second four (4) auxiliary sockets (B5 – B8) for light dimming relays, rather than the fi rst four. (See section on
Light Dimming, later in this manual.)
Figure 13. Auxiliary Power Center
Page 19

Page 19
5.2 DIP Switches
All DIP switches are located on the left side of the power center bezel. To change a setting, turn off the power and
move the approprate switch from left (OFF) to right (ON).
OFF ON
S1
S2
4321
RESET
AUTO
SERVICE
TIME OUT
Figure 14. Dip Switches
S1 DIP Switch # OFF ON
1
2
3
4
Aux. 1 = Any equipment Aux. 1 = Pool cleaner
Aux. 2 = Any equipment Aux. 2 = Low speed for a two (2) speed fi lter
Aux. 3 = Any equipment Aux. 3 = Spa spillover effect. Combo controls
Heater cool down operates. Heater cool down disabled.
4321
FILTER PUMP
654321
1
AUX 2
AUX
10987654321
RS6 & RS8 ONLY
4
AUX 3
AUX
AUX 5
RS8 ONLY
7
UX
AUX 6
A
HEATER
POOL MODE
SPA MODE
SPA DRAIN
SOLAR
SPA FILL
pump. Filter pump circuit becomes high speed.
only.
5
Normal operation Factory adjustment. When this switch is on, tem-
perature delays are eliminated and solar temperature is displayed. Do not leave this switch in the
ON position.
6
7
Spare Aux has power when fi lter pump is in
Pool Mode, goes off when in Spa Mode.
Spare Aux has power when fi lter pump circuit is
in Spa Mode, goes off when in Pool Mode.
Spare No change on Combo or Only controls (see Dual
Equipment DIP Switch settings).
8
S2 DIP SWITCH OFF ON
1
2 NOT USED
3 NOT USED
4 NOT USED
After thermostat setting has been reached, the
heater will remain off for three (3) minutes.
The AquaLink RS will be able to control
a Solar Heating system (If a solar sensor
is connected to the solar sensor input).
After thermostat setting has been reached, the
heater will remain off for fi ve (5) minutes.
The AquaLink RS will be able to control a
Heat Pump. (The AquaLink RS will not be
able to control a Solar Heating system.)
Table 2. Pool and Spa Combination Controls
Page 20

Page 20
DIP Switch # OFF ON
1
2
3
4
5
6
7
8
Aux. 1 = Any equipment Aux. 1 = Pool cleaner
Aux. 2 = Any equipment Aux. 2 = Low speed for a two speed fi lter pump.
Aux. 3 = Any equipment Aux. 3 = Spa spillover effect. Combo controls
Heater cool down operates. Heater cool down disabled.
Normal operation Factory adjustment. When this switch is on, tem-
Spare No change.
Spare No change.
After thermostat setting has been reached, the
heater will remain off for three (3) minutes.
Table 3. Pool or Spa Only Controls
DIP Switch # OFF ON
Filter pump circuit becomes high speed.
only.
perature delays are eliminated and solar temperature is displayed. Do not leave this switch in the
ON position.
After thermostat setting has been reached, the
heater will remain off for fi ve (5) minutes.
1
2
3
4
5
6
7
Aux. 1 = Any equipment Aux. 1 = Pool cleaner
Aux. 2 = Any equipment Aux. 2 = Low speed for a two speed fi lter pump.
Spare No change.
Heater cool down operates. Heater cool down disabled.
Normal operation Factory adjustment. When this switch is on, tem-
Separate pool and spa heaters Sharing one heater
No solar system installed. Air temperature
displayed.
8
After thermostat setting has been reached, the
heater will remain off for three (3) minutes.
Table 4. Dual Equipment Controls
Filter pump circuit becomes high speed.
perature delays are eliminated and solar temperature is displayed. Do not leave this switch in the
ON position.
Changes air sensor to solar sensor. Air temperature no longer displayed. AquaLink RS Adjustable Freeze Kit must be added fro freeze protection.
After thermostat setting has been reached, the
heater will remain off for fi ve (5) minutes.
Page 21

Page 21
5.3 Water Temperature Sensor
5.3.1 Troubleshooting
When the Power Center PCB is put in Service or Time Out Mode, the thermostat setting will automatically be
switched to 104° F for testing. If the heater circuit is activated and the water heater temperature is less than 104° F, the
LED above the heater button should turn on. If it does not fi re, the problem is caused by either the Water Temperature
Sensor or the PCB. Test the sensor as indicated below.
Remove the green terminal bar from the Power Center PCB. Place a good thermometer in the fl ow of water for the
body of water to be tested (e.g. pool skimmer) and turn on the fi lter pump. Set your test meter to resistance at or above
20 K Ohms. Test between terminals fi ve (5) and six (6) on the green terminal bar. Compare the reading to the chart. If
the reading and chart do not match, replace the sensor.
Temp Resistance Temp Resistance
50°F
51°F
52°F
53°F
54°F
55°F
56°F
57°F
58°F
59°F
60°F
61°F
62°F
63°F
64°F
65°F
66°F
67°F
68°F
69°F
70°F
71°F
72°F
73°F
74°F
75°F
76°F
77°F
19.898 K Ohms
19.435 K Ohms
18.871 K Ohms
18.382 K Ohms
17.902 K Ohms
17.473 K Ohms
16.988 K Ohms
16.549 K Ohms
16.150 K Ohms
15.710 K Ohms
15.314 K Ohms
14.923 K Ohms
14.547 K Ohms
14.193 K Ohms
13.823 K Ohms
13.477 K Ohms
13.138 K Ohms
12.813 K Ohms
12.492 K Ohms
12.186 K Ohms
11.893 K Ohms
11.593 K Ohms
11.309 K Ohms
11.032 K Ohms
10.765 K Ohms
10.502 K Ohms
10.250 K Ohms
10.000 K Ohms
78°F
79°F
80°F
81°F
82°F
83°F
84°F
85°F
86°F
87°F
88°F
89°F
90°F
91°F
92°F
93°F
94°F
95°F
96°F
97°F
98°F
99°F
100°F
101°F
102°F
103°F
104°F
9.735 K Ohms
9.483 K Ohms
9.284 K Ohms
9.079 K Ohms
8.864 K Ohms
8.655 K Ohms
8.450 K Ohms
8.253 K Ohms
8.057 K Ohms
7.871 K Ohms
7.687 K Ohms
7.509 K Ohms
7.335 K Ohms
7.166 K Ohms
7.001 K Ohms
6.840 K Ohms
6.685 K Ohms
6.531 K Ohms
6.384 K Ohms
6.238 K Ohms
6.099 K Ohms
5.963 K Ohms
5.829 K Ohms
5.700 K Ohms
5.572 K Ohms
5.449 K Ohms
5.327 K Ohms
Table 5. Temperature and Resistance Chart
Page 22

Page 22
To
Solar Sensor
To
Water Sensor
Water, Air or Solar Sensor
is a 10 K Ohms Thermistor
Part Numbers
7790 - 15’
7786 - 50’
7791 - 125’
S1
S2
To
Air Sensor
4321
RESET
AUTO
SERVICE
TIME OUT
4321
TER PUMP
FIL
654321
1
AUX
AUX
10987654321
RS6 & RS8 ONLY
3
2
AUX
AUX 4
RS8 ONLY
UX 5
AUX 6
AUX 7
A
HEATER
POOL MODE
SPA MODE
SPA DRAIN
SOLAR
SPA FILL
“Ears”
Date Code
Solar Sensor Part Numbers
7908 - 15’
7932 - 50’
7933 - 125’
Figure 15. Water Temperature Sensor
Page 23

Page 23
5.4 3 HP Relay
5.4.1 Operation
1. A standard 3 HP Relay's coil is supplied with 24 VDC from the power center PCB via one (1) of the driver chips.
When 24 VDC is received by the relay's coil wires, it closes the contacts that complete the circuit to turn on the
equipment (i.e., power supplied to Line 1 goes out Load 1 to the equipment). See Figure 16.
2. Standard 3 HP Relays may be wired to activate a 120 VAC circuit (i.e. Line 1/Load 1) or a 240 VAC circuit (i.e.
Line 1/Load 1 and Line 2/Load 2).
Note If a relay's coil wires are shortened, or an AC relay coil is plugged into a relay socket, when that circuit is activated, it will
damage one of the relay driver chips on the power center PCB.
Specifi cations
Maximum Contact Ratings:
3 HP at 240 VAC
1 1/2 HP at 120 VAC
1500 watts (per contact) - Incandescent
Relay coil - 24 VDC
Resistance across coil - 300 Ohms
Amperage draw of coil - 0.10 Amps
2 4 6 8
Line 1 Load 1 Line 2 Load 2
Figure 16. 3 HP Relay
Page 24

Page 24
654321
2
UX
AUX 3
A
10987654321
RS6 & RS8 ONLY
RS8 ONLY
5
UX 6
UX
A
AUX 4
A
POOL MODE
AUX 7
SPA MODE
SPA DRAIN
SOLAR
HEATER
SPA FILL
4321
4321
RESET
S1
AUTO
SERVICE
TIME OUT
FILTER PUMP
1
AUX
S2
Figure 17. 3 HP Relay Wiring
654321
AUX
AUX 2
10987654321
RS6 & RS8 ONLY
3
4
AUX
AUX 5
RS8 ONLY
UX 6
A
AUX 7
POOL MODE
SPA MODE
SPA DRAIN
SOLAR
HEATER
SPA FILL
4321
4321
RESET
S1
AUTO
UX 1
TER PUMP
A
FIL
SERVICE
TIME OUT
S2
Page 25

Page 25
5.5 Two Speed Relay
5.5.1 Operation
The two speed relay operates in conjunction with a standard relay to operate a two speed pump/motor. The
1.
standard relay is the on/off relay and the two speed relay is the switching relay. Activating the relay coil for the
standard relay will complete the contact circuit between Line 1 and the motor common, Line 2 and the two speed
relay common. If the two speed relay coil wires are deactivated, the motor runs at high speed. When the two speed
relay coil is activated, the motor switches to low speed.
2. If the two speed motor is the fi ltration pump, plug the relay coil wires for the standard relay into the fi lter pump
relay socket. Next, plug the two speed relay coil wires into the Auxiliary 2 socket. Finally, turn on DIP switch 2 to
set the circuitry to two speed operation. This will interlock the low speed and high speed together. If low speed is
activated, the control will turn on high speed fi rst for three (3) minutes (to prime the system) before switching to
low.
3. If the two speed motor is in a dual equipment system, plug the relay coil wires for the standard relay into the
Auxiliary 7 socket. Next, plug the two speed relay coil wires into the Auxiliary 2 socket. Finally, turn on DIP
Switch 2 to set the circuitry to two speed operation.
Note: Turn off the power to the system before moving any DIP Switches.
Specifi cations
Maximum Contact Ratings:
2 HP at 240 VAC
1 HP at 120 VAC
1500 watts (per contact) - Incandescent
Relay coil - 24 VDC
Resistance across coil - 128 Ohms
Amperage draw of coil - 0.20 Amps
Figure 18. Two Speed Relay
Page 26

Page 26
654321
2
UX
UX
A
A
10987654321
RS6 & RS8 ONLY
3
4
5
UX
UX
A
A
RS8 ONLY
AUX 6
AUX 7
POOL MODE
SPA MODE
SPA DRAIN
SOLAR
HEATER
SPA FILL
4321
4321
RESET
S1
AUTO
TER PUMP
AUX 1
FIL
SERVICE
TIME OUT
S2
Low Speed
High Speed
Common
240 VAC Two-Speed
Filter Pump Motor
654321
AUX 3
AUX 2
10987654321
RS6 & RS8 ONLY
RS8 ONLY
6
AUX
AUX 7
AUX 4
AUX 5
POOL MODE
SPA MODE
SPA DRAIN
SOLAR
HEATER
SPA FILL
4321
4321
RESET
S1
S2
AUTO
SERVICE
TIME OUT
P
AUX 1
FILTER PUM
Low Speed
High Speed
Common
Figure 19. Two Speed Relay Wiring
120 VAC Two-Speed
Filter Pump Motor
Page 27

Page 27
5.6 Light Dimming Relay
5.6.1 Operation
The controller signals the light dimming relay to turn "fully on", "partially dimmed", or "completely off" by sending
a specifi c number of pulses in a set period of time to the light dimming relay. The circuitry of the light dimming relay,
which requires 120 VAC to operate, interprets the number and timing of pulses to determine whether the light should
be on, off, or dimmed.
The circuitry of the light dimming relay is driven by the 120 VAC power from the circuit breaker for the light. Unlike a standard relay, which receives a constant 24 VDC to its coil to hold the relay contacts closed (and which opens
when that voltage is removed), the light dimming relay receives only signal pulses on the relay coil wires, and it is the
circuitry on the relay that actually turns the light on and off and dims it. Therefore, if the light is fully on or dimmed,
unplugging the relay coil wires to the light dimming relay will not turn the light off. The light will remain on as long
as 120 VAC is supplied to the relay.
Note: In addition to needing a light dimming relay installed, the auxiliary to operate the light dimming circuit must be assigned at
the indoor controller.
Page 28

Page 28
Specifi cations
Voltage: 12 to 120 VAC
Wattage: 1000 maximum
Note: a maximum of four (4) light dimming relays can be installed in each power center.
Note A Standard Relay can be mounted
(piggybacked) on top of the Dimmer
Relay to allow for a total of eight (8)
Relays in Power Center. Screw the
654321
4321
LTER
I
F
10987654321
RS6 & RS8 ONLY
RS8 ONLY
UMP
3
P
1
X
U
UX 4
UX
A
A
AUX 2
A
POOL MODE
7
5
SPA MODE
X
X
U
U
AUX 6
A
A
SPA DRAIN
SOLAR
HEATER
SPA FILL
4321
RESET
S1
SERVICE
TIME OUT
S2
Standard Relay to the top of the Dimmer
Relay before the Dimmer Relay is placed
in the Power Center.
Figure 20. Wiring 120 V Light Dimming
654321
10987654321
4321
4321
AUTO
S1
S2
RS6 & RS8 ONLY
RESET
SERVICE
TIME OUT
RS8 ONLY
P
UM
3
7
5
P
1
X 6
X
X
X 4
X 2
X
R
U
U
UX
AU
AU
AU
A
AU
A
TE
A
L
FI
SOLAR
HEATER
Caution: Parts of the light dimming relay get
HOT during operation. Keep some space
between loose wires and the relay.
POOL MODE
SPA MODE
SPA DRAIN
SPA FILL
Figure 21. Wiring Low Voltage Light Dimming
Page 29

Page 29
Section 6. Jandy Valve Actuator
6.1 Operation
One leg of a 24 VAC transformer secondary supplies voltage to the common terminal of a SPDT (single-pole, doublethrow) relay. The N.C. (normally closed) terminal of that relay is connected to the red wire of the JVA cord, and the
N.O. (normally open) terminal is connected to the white wire of the JVA cord. The completion of the circuit is through
the black (common) wire of the JVA cord.
When the coil of the SPDT relay is de-energized, voltage is supplied from one leg of the transformer secondary to
the common terminal of the relay and then down the red wire of the JVA cord to the toggle switch at the rear of the
JVA. The toggle switch then routes the voltage to either the lower microswitch (toggle in ON 1 position), the upper
microswitch (toggle in ON 2 position), or to neither microswitch (toggle in OFF position). If the voltage is routed to
the lower microswitch, and that microswitch is closed, the voltage passes through the motor to the black wire and then
back to the other leg of the transformer secondary to complete the circuit. The motor will then rotate clockwise, turning the gear train (and ultimately the output shaft) until the lower cam comes in contact with the lower microswitch,
which opens the circuit and stops the motor. If the voltage is routed to the upper microswitch, the motor rotates in the
opposite direction until the upper cam lobe comes into contact with the upper microswitch, which stops the rotation.
If the coil of the SPDT relay is energized, the voltage travels through the white wire to the toggle switch, which as
above, routes it either to the lower microswitch for clockwise rotation or upper microswitch for counterclockwise
rotation, with the voltage traveling back to the black wire to complete the circuit.
The capacitor, which is wired in parallel with the motor, keeps the motor rotating in the correct direction and ensures
that the JVA rotates with the proper torque.
Page 30

Page 30
Figure 23. JVA Internal Wiring
Page 31

Section 7. Troubleshooting
7.1 Quick Check List
Symptom Problem Possible Solution
Power Center override switches
operate when in Service or Time
Out Mode, but the Controller is
completely dead. No lights on, no
display.
Mis-wired four (4) conductor wires.
Broken four (4) conductor wires.
Broken red or green wire.
Page 31
The wire polarity is incorrect
(Red +, Green -)
The voltage is incorrect. It should be
8 to 10 VDC.
All LEDs are on at the All Button
Controller and the part # and revision
letter of the Controller software are
shown or with a OneTouch Controller the screen shows only a Firmware Revision Code and the rest of
the screen is all dots. The override
switches at the Power Center operate
as they should.
All LEDs are on at the All Button
Controller and the part # and revision
letter of the Controller software are
displayed or with a OneTouch the
screen shows only a Firmware Revision Code and the rest of the screen
is black. The override switches at the
Power Center do not operate at all.
Some buttons (All Button Only)
do not operate from the Controller,
nor from the Power Center override
switches.
Controller is not communicating with
the Power Center PCB.
Broken black or yellow wire.
1. Damaged or improperly
installed fi rmware chip.
2. Damaged Power Center
fi rmware chip.
Wrong fi rmware chip installed at the
Power Center PCB.
Prior to Rev N, the fi rmware chip
could be installed incorrectly. Damaged communication chip.
1. Check alignment of the fi rmware
chip.
2. If fi rmware chip is installed cor-
rectly, replace the Power Center
PCB.
Check part number and revision
letter by pressing the Reset button
at the Controller. The second part
number and revision letter displayed
is for the fi rmware chip indicating
which model.
System is locked up. Microprocessor locked. Turn off power to the system. Dis-
Table 6. Quick Check List.
connect the battery and turn on the
power. Reconnect battery and (prior
to Rev N), reset time and date.
Page 32

Page 32
Symptom Problem Possible Solution
System sometimes does not run programmed on and off times.
One button on the Spa Side Remote
does not operate.
Controller model is Dual Equipment,
message scrolls "Adjustable Freeze
Sensor Not Installed".
System comes on at times that are
not programmed.
Heater will not fi re. Heater LED will
not light in Service Mode
Power outage with dead battery. At the Controller, check battery
level. With software level Rev. F or
newer, battery status is located in
Diagnostics section of System Setup
Menu
Check programming fi rst. If the Spa
Side Remote is programmed cor-
See Troubleshooting the Spa Side
Remote.
rectly, the button may be shorted.
Normal operation when a Dual
Equipment model is controlling a
solar system and an adjustable freeze
Either install the adjustable freeze
sensor, or wait 24 hours and this
message will go away.
sensor is not installed.
Phantom programs. From the Control Panel review
programs. Look for overlapping
programs.
Water temperature sensor not in-
Check water temperature.
stalled or defective
Table 6. Quick Check List (continued)
Page 33

7.2 Controller Inoperable, Display Blank
Page 33
Check voltage
on red terminal
bar between the
outside two terminals (red and
green wires).
Is voltage 8 to
10VDC?
No LEDs
are on at the
All Button
Control-
ler or the
OneTouch
display is
blank.
Check voltage
across secondary of transformer (two
yellow wires
of orange 3-pin
connector).
Is voltage 24
VAC?
Ye s
At Power
Center,
move override switch
from Auto
to Service. Do
override
switches
operate?
No
Ye s
No
Turn off power
and remove
3.15 amp fuse.
Check for continuity. Is there
continuity?
Ye s
No
Go to the Control-
Ye s
ler and measure
the voltage between the same
two terminals. Is
the voltage 8 to 10
No
VDC?
The power supply is damaged and
the PCB at the Power Center will
need to be replaced.
Remove, align and carefully reinstall
the fi rmware chip. Test system, if still
not operable, replace Power Center
PCB and fi rmware chip.
Ye s
No
Unplug all
JVAs and replace fuse, and
turn on power.
Does fuse fail
again?
Ye s
Controller PCB
will need to be
replaced.
Wires are broken
or in the wrong
place.
Remove
both relay
driver chips
and replace
the fuse.
Ye s
No
Replace transformer.
If fuse blows
again: PCB is
damaged. If
fuse doesn't
blow, driver
chips are bad.
Replace appropriate component.
Check JVAs for
spliced wires, water
damage or incorrect
voltage. Plug JVAs
in one at a time, if
fuse blows again
replace that JVA.
Check voltage to primary of
transformer. Is primary 110
VAC?
No
Check circuit
breaker and system
power wires.
Page 34

Page 34
7.3 All Lights Lit on Controller
Carefully recheck all four (4)
conductor wires for breaks or poor
connections. Especially the black
and yellow wires. Are these wires
broken or wired wrong?
Go to the in house Controller.
Check Reset button on the left side
of the Controller for damage.
Ye s
All Button LEDs
are all on or
OneTouch shows
"Firmware Rev
code" and rest of
screen is all dots,
but the Con-
troller does not
operate.
Go to the Power
Center. Switch
from Auto to Service. Do Power
Center override
switches operate?
Correct the
wiring problem.
Ye s
No
Are multiple
Controllers
installed?
Turn off power,
remove the battery
at the Power Center
and turn on the
power again. Does
Controller operate?
Ye s
No
Recheck the jumpers on
the Controllers. Each
Controller jumper must
be set differently so each
has a different address.
Replace the battery
and recheck the
Ye s
system.
Problem may be in
the Controller PCB
No
or Power Center
PCB. Replace the
Power Center PCB
fi rst.
Turn off power.
Remove Power
Center Bezel/
PCB. Remove
fi rmware chip
from PCB.
Inspect legs for
damage and
carefully align
and reinstall the
fi rmware chip.
No
Turn on power.
Change from
Auto to Service.
Do the override
switches operate?
Ye s
No
Turn off power
again and disconnect the battery.
Turn power on
again. Do the
override switches
operate?
Go to the Controller and check its
operation. Does
Controller operate?
Ye s
Replace fi rmware chip and try sys-
No
tem. If system still does not operate,
replace the Power Center PCB.
Ye s
No
Check Controller
operation.
Operate system.
Return to the
beginning of
this page.
Page 35

7.4 Some Controller Buttons Do Not Operate
Page 35
Some buttons on
Controller do not
operate (LEDs
for those buttons
don't light).
Press button that
does not operate.
Does the display
read Locked?
Ye s
Press Reset button
on left side of Controller. The second
number and Revision letter is that of
the Power Center
fi rmware chip.
Does the Part#
for fi rmware chip
match the model of
AquaLink RS? See
chart below.
Ye s
No
Go to the
Power Center and look
at the LED
above the
button. Is the
LED on?
No
Press Cancel Button, then
select Lockouts, then select Device to unlock.
Ye s
No
Contact Jandy for correct fi rmware chip.
Replace Controller PCB.
Replace Power Center fi rmware chip.
Model Description
Part #
Rev. C to
Rev II
Part #
Rev J to
Rev MMM
AquaLink RS 16, 24, 32 P & S Pool and Spa Combination 7202 8166
AquaLink RS 12 P & S Pool and Spa Combination 7201 8165
AquaLink RS 8 P & S Pool and Spa Combination 6520 8156
AquaLink RS 6 P & S Pool and Spa Combination 6521 8157
AquaLink RS 4 P & S Pool and Spa Combination 6522 8158
AquaLink RS 16, 24, 32 P or S Pool or Spa Only System 7215 8168
AquaLink RS 12 P or S Pool or Spa Only System 7214 8167
AquaLink RS 8 P or S Pool or Spa Only System 6523 8159
AquaLink RS 6 P or S Pool or Spa Only System 6524 8160
AquaLink RS 4 P or S Pool or Spa Only System 6525 8161
AquaLink RS 2/14, 2/22, 2/30 Dual Separate Equipment System 7217 8170
AquaLink RS 2/10 Dual Separate Equipment System 7216 8169
AquaLink RS 2/6 Dual Separate Equipment System 6526 8162
Table 7. Models, Descriptions and Part Numbers
Part #
Rev N and
Later
E0260811
E0260810
E0260801
E0260802
E0260803
E0260813
E0260812
E0260804
E0260805
E0260806
E0260815
E0260814
E0260807
Page 36

Page 36
7.5 Three Amp Fuse Keeps Failing
Three Amp Fuse on
the Power Center
PCB keeps failing.
Turn off power and
remove both relay
driver chips. Replace
the fuse and turn on
power. Does fuse fail
again?
Ye s
Disconnect
all JVAs and
replace fuse.
Does fuse fail
again?
Ye s
No
Replace Power
Center PCB.
Replace both relay
driver chips.
No
Check JVA cords.
Are JVA cords
spliced?
Replace cords.
Ye s
No
Are all actuators
JVA 2440 ?
Ye s
No
Open up each JVA
and inspect each for
water damage or
shorted wires. Repair
as necessary.
Replace with correct
JVAs.
Page 37

7.6 Heater Doesn't Fire
Page 37
NOTE: Before proceeding, check
Controller display. If the display
reads "Shorted" or "Open" on
Water Temperature Sensor, check
the water temperature sensor
resistance (see Chart on page 10).
Switch system back to
Auto and go to the
Controller. Turn on the
pool fi ltration pump
and enable the pool
heater. Is the red LED
on above the pool
heater button?
Ye s
Go to the Power
Center. Switch
Heater
doesn't
fi re.
from Auto to
Service. Turn on
the fi lter pump
and heater. Does
the heater fi re?
No
Does the LED above
the heater button turn
on?
Recheck heater
operation. Is
the heater now
operating?
Ye s
No
Press the menu button, scroll to TEMP
SETTINGS and check
the pool thermostat
setting. Is the pool
thermostat set higher
than the water temperature?
From the green 10 pin
terminal bar of the
Power Center PCB,
remove and twist
together the two heater
wires. Does the heater
fi re?
Ye s
No
Ye s
No
Ye s
No
Sporadic operation can
be traced to one or more
loose connections, including those within the heater.
Check all connections.
Disconnect the battery,
turn off, then on power to
the system. Recheck the
heater. If the heater still
does not fi re, the Power
Center or Controller PCB
may be damaged. Replace
the Power Center PCB
fi rst.
Either the Power Center
PCB or Controller PCB
is damaged. Replace the
Power Center PCB fi rst.
Reset the thermostat
higher than the water
temperature and retest
system.
Ye s
Replace the Power
Center PCB.
Either the wires to
the heater are not
No
connected properly
or the problem is
actually the heater.
Ye s
Replace the Power
Center PCB.
Remove water temperature sensor
wires and check its resistance (see
Table 5, Temperature and Resistance
Chart). Is resistance within specifi ca-
tion?
No
Replace Water
Temperature Sensor.
Page 38

Page 38
Section 8. Flow Charts
8.1 OneTouch Menu Flow Chart
SPRINKLERS
EQUIPMENT
ON/OFF
ONETOUCH ON/OFF
HELP
PROGRAM
SET TEMP
SET TIME
SET AQUAPURE†
DISPLAY LIGHT
LOCKOUTS
PASSWORD
PROGRAM GROUP
MENU/HELP
SYSTEM
SETUP
†
BOOST
t Items seen only with optional equipment
tt Mode only displayed when DIP switch S1-3 is set to ON
ttt DIP switch S2-1 must be ON. See differences between heat pumps controlled via RS485 or solar pump relay
tttt Heat pump is controlled via the solar pump relay
ttttt Heat pump is controlled via the RS485
* Items seen only in Revision "N"
** Not available on Export Models
SELECT
EQUIPMENT
ALL OFF
SELECT
EQUIPMENT
SET MONTH, DAY,
YEAR & TIME
ENTER
PASSWORD
†
††††
†††††
ONETOUCH 1
ONETOUCH 2
ONETOUCH 3
SET TIME
MODE
OK
GO BACK
ONETOUCH
LABEL AUX
AQUAPURE
FREEZE PROTECTION
AIR TEMP
SEASONAL ADJUST
DEGREES F/C
DAYLIGHT SAVINGS
TEMP CALIBRATE
IN FLOOR CLEAN
SOLAR HEAT PRIORITY
HEAT PUMP PRIORITY
PUMP LOCKOUT
ASSIGN JVAs
COLOR LIGHTS
DIMMERS**
SPA SWITCH**
SPA LINK**
DUSK SETUP
SPRINKLERS
A/B SWITCH
ALL OFF TIME
PRODUCT INFO
CLEAR MEMORY
HEAT PUMP
HEAT PUMP
DEVICE RUNTIME
MAINTAIN TEMP
ON
OFF
††
ENABLED
DISABLED
SET TEMP
†
†
†††
1
2
3
ENABLE
DISABLE
LOW TEMP
CANCEL TODAY
MANUAL START
ENABLE PROGRAM
DISABLE PROGRAM
ADD PROGRAM
DELETE
CHANGE
SET POOL*
SET SPA*
SYSTEM
SPA SWITCH
SPA LINK
DEVICES
CHANGE PASSWORD
SELECT NAME
CUSTOM NAME
SET DEVICES
POOL
SPILLOVER
1
2
3
START
GO BACK
SET TEMP
ENABLED
DISABLED
ENABLED
DISABLED
ENABLED
DISABLED
JANDY LIGHT
SAM/SAL LIGHT
COLOR LOGIC
PROGRAM 1
PROGRAM 2
PROGRAM 3
HEAT MODE
CHILL MODE
FEATURE
OFF TIME
SELECT
EQUIPMENT
POOL HEAT
SPA HEAT
†
CHILL
MAINTAIN
HOURS
ENA
DIS
SELECT DEVICE
SELECT
DEVICE
SELECT
DEVICE
FAHRENHEIT
CELCIUS
ENA
DIS
ON
OFF
OFF
ON
SPA MODE
CLEAN MODE
ALL OFF
ONETOUCH 4
ONETOUCH 5
ONETOUCH 6
SYSTEM
SPA SWITCH
SPA LINK
DEVICES
ENA
DIS
SELECT
DEVICE
FILTRATION
CHLORINATION
SPRINKLE RS
FILL LINE
CLEANER
ENABLED
DISABLED
ASSIGN TO AUX
DUSK CTRL
DURATION
TIME ADJUST
YOUR LOCATION
YOUR TIME ZONE
SET DEVICES
SET TIME
ON
OFF
KEYS
SERVICE
DIAGNOSTICS
OFF
POOL
SPA
LOCK
SELECT DEVICESELECT DEVICE
ON
OFF
INTAKE
RETURN
CLEANER
SOLAR
SET TIME
0:30 TO 2:00 HOURS
OFF
UNLK
GROUP A
GROUP B
AUTO PGRM GROUP
LABEL GROUP
GENERAL LABELS
LIGHT LABELS
WTRFALL LABELS
CUSTOM LABELS
(TYPE PERSONALIZED
DESCRIPTION)
ON
SELECT LOCATION
OFF
SELECT EQUIPMENT
MODEL
SENSORS
REMOTES
ERRORS
ON
OFF
2 MIN. DELAY
LOCK
UNLK
PAC IFI C
MOUNTAIN
CENTRAL
EASTERN
SELECT
LABEL
Page 39

8.2 All Button Menu Flow Chart
Page 39
PROGRAM
REVIEW
SET TEMP
SET TIME
SET AQUAPURE
†
BOOST
LOCKOUTS
PGM GROUP
DISPLA Y LIGHT
SELECT
EQUIPMENT
SET YEAR, DAY
HOUR & MINUTE
†
GROUP A
GROUP B
ALL OFF TIME
LABEL AUX
AQUAPURE
AQUAPURE MODE
SET POOL*
SET SPA*
†
ON ALL DAYS
ON WEEKENDS
ON WEEKDAYS
ON SPECIFIC DAY
START
PAU SE
STOP
SELECT EQUIPMENT
SET TIME FOR BOOST
†
POOL TEMP
SPA TEMP
MAINTAIN TEMP
ON
OFF
SYSTEM
SPA SWITCH
SPA LIN K
DEVICE
FEATURE ON
FEATURE OFF
POOL
SPILLOVER
PROGRAMS
TEMP SET
ALL OFF TIME
SPA SWITCH
SPA LINK
FRZ PROTECT
AUX LABELS
DIMMERS
COLOR LIGHTS
JVA ASSIGNS
LOCKOUTS
SOLAR HEAT PRIORITY
IN FLOOR CLN
MAIN LABEL MENU
SEE SECTION 8 FOR
AN EXPANDED LIST
SYSTEM SETUP
ALL OFF
SPA SWITCH**
SPA LINK**
FRZ PROTECT
AIR TEMP
DAYLIGHT SAVINGS
DEGREES F/ C
TEMP CAL
ASSIGN JVA
COLOR LIGHTS
SET DIMMERS**
IN FLOOR CLN
SOLAR HEAT PRIORITY
PUMP LOCKOUT
DIAGNOSTICS
CHOOSE JVA
1 SPA LINK
2
SPA
3
SPA
CHOOSE BUTTON
CHOOSE LIGHT
ON
OFF
†
DIAGNOSTIC READOUT
LINKS
LINKS
ON
OFF
CHOOSE BUTTON
ON
OFF
1 SWITCH
2 SWITCHES
3 SWITCHES
ON
OFF
TEMP DOWN
TEMP UP
SELECT EQUIPMENT
ON
OFF
ASSIGN ITEMS
TEMP SETTINGS
FAHRENHEIT
CELSIUS
CLEAR MEMORY
t Items seen only with optional equipment
* Items seen only in Revision "M"
** Not available on export models
WARNING! CLEARS ALL MEMORY
Page 40

Page 40
8.3 All Button Cancel Flow Chart
PROGRAMS
FRZ PROTECT
AUX LABEL
CANCEL BUTTON
DIMMERS*
Select device to
be cancelled
Press enter to
remove all devices
except pump from
freeze protection, or
cancel to abort
Select AUX to
remove label from
Press enter to
cancel dimmers,
or cancel to abort
CANCEL SOME
CANCEL ALL
Label removed
Select AUX to
remove dimmer
from
JVA ASSIGN
LOCKOUTS
SOLAR PRIORITY
IN FLOOR CLN
*Not Available for Export Models
CLEANER JVA
No JVAs assigned
to AUXs
SOLAR JVA
SYSTEM
SPA SWITCH
UNLOCKED
SPA LINK
DEVICE
Page 41

Section 9. Wiring Diagrams
9.1 AquaLink RS Pool/Spa Combination and Pool/Spa Only
RS Power Center Wiring Diagram for Pool and Spa and Only Models
For Optional Multiplex PCB
Connect red four-pin connector
to Multiplex Board
Green
Black
Red
Yellow
Green
Black
Yellow
4321
4321
To Controller
(red terminal bar)
RESET
AUTO
SERVICE
TIME OUT
Aux. 1
F. Pump
Relay Sockets (24 VDC output)
Aux. 2
Aux. 3
FILTER PUM
Aux. 4
P
AUX
Aux. 5
1
Red
Black
Green
Red
654321
To Remote
(brown terminal bar)
3
2
UX
AUX
A
Aux. 6
Aux. 7
Used
Used
Not
Not
White
Brown
Blue
10 9 8 7 6 5 4 3 2 1
To Sensors, etc.
(green terminal bar)
RS6 & RS8 ONLY
4
AUX
AUX 5
Intake JVA
(24 VAC output)
AUX 6
JVA Sockets
S1 DIP SWITCH SETTINGS
Factory Setting
#
OFF
1
Aux1
2
1 SPD Filter Pump
3
Aux 3
4
Cool Down
5
Normal
6
Spare Aux (Pool Mode)
7
See Manual
8
Gas Heater
S2 DIP SWITCH SETTINGS
Factory Setting
#
OFF
1
Solar Heat Priority
2
Not Used
3
Not Used
4
Not Used
Service Controller Connector
When Turned
ON
Cleaner
2 SPD Filter Pump
Spa Spillover
Disabled
See Manual
Spare Aux (Spa Mode)
See Manual
Heat Pump
When Turned
ON
Heat Pump Priority
Not Used
Not Used
Not Used
S1
S2
Freeze/
Air Sensor
Red
Black
Return J
Water Temp .
Red
RS8 ONLY
AUX
Sensor
Solar
Red
Black
7
VA
Cleaner J
Sensor
Heater
Low Voltage
Black
SOLAR
HEATER
A
V
A
V
Solar J
Solar Pump
Relay Sockets
(24 VDC output)
POOL MODE
SPA MODE
SPA DRAIN
SPA FILL
Spare
Elect. Heater
Page 41
Relay Socket
r
PDA Power Center Wiring Diagram
DIP SWITCH SETTINGS
Factory Setting
#
OFF
1
Aux1
2
1 SPD Filter Pump
3
Aux 3
4
Cool Down
5
Normal
6
Spare Aux (Pool Mode)
7
See Manual
8
Gas Heater
When Turned
ON
Cleaner
2 SPD Filter Pump
Spa Spillover
Disabled
See Manual
Spare Aux (Spa Mode)
See Manual
Heat Pump
For Optional Multiplex PCB
Connect red four-pin connector
to Multiplex Board
Relay Sockets (24 VDC output) Relay Sockets (24 VDC output)
F. Pump
Red
Black
Ye llow
Green
Black
Red
4321 654321
To Controller
(red terminal bar)
Aux. 1 Aux. 2 Aux. 3
RESET
AUTO
SERVICE
TIME OUT
To Remote
(brown terminal bar)
FILTER PUMP
Green
White
Brown
Blue
Not Used
10987654321
1
UX
UX
A
AUX 2
A
3
Freeze/
Air Senso
Water Temp.
Sensor
Not Used
Red
Black
Red
Black
To Sensors, etc.
(green terminal bar)
RS6 & RS8 ONLY
AUX 5
AUX 4
Solar
Red
IMPORTANT INSTALLATION INSTRUCTIONS:
Enclosure: Rainproof (Type 3R, IPX3) suitable for swimming pool/spa applications.
1. Installation must be by a qualified electrician and must comply with all national, state, and local codes.
2. Power Center must be mounted at least five (5) feet away from the inside edge of the pool.
Canadian installations must be at least three (3) meters from the water.
Les installation Canadiennes dolvent se trouver à au moins trois (3) mètres de l’eau.
3. Install to provide drainage of compartments for electrical components.
4. After wiring, install panels over wiring compartments and keep Power Center door closed.
5. For technical information, call Jandy Pool Products, Inc. at 707-776-8200 ext. 260.
Sheet #7192, Rev. H
Sensor
Black
6
UX
A
Elect.
Heater
Solar
Return
oltage
V
Low
Heater
RS8 ONLY
UX
A
Intake
JVA
(24 VAC output)
7
Aux. 6Aux. 5Aux. 4
JVA
JVA
Cleaner
Solar
JVA
Pump
JVA Sockets
HEATER
6000 Condor Drive • Moorpark, CA USA 930201
Relay Sockets
(24 VDC output)
POOL MODE
SPA MODE
SPA DRAIN
SOLAR
SPA FILL
Aux. 7
Battery
(9Volt)
707.776.8200 • Fax 707.763.7785
Litho in USA © Jandy Pool Products, Inc. 0703
RELAY
Line One
Load One
Line Two
Load Two
CAUTION
Read Installation Manual completely
before installing. This product must
be wired in accordance with the
Installation Manual.
ATTENTION
Lire la notice technique.
WARNING
To reduce the risk of injury, do not permit
children to use this product unless they
are closely supervised at all times. Water
temperature in excess of 100°F/38°C
may be injurious to your health.
AVERTISSEMENT
Pour réduire le risque de blessures, ne
pas permettre aux enfants d’utiliser ce
produit à moins qu’ils soient supervisés
de près en tout temps. Des températures
de l’eau supérieures à 38°C/100°F peuvent présenter un danger pour la santé.
Page 42

Page 42
9.2 AquaLink RS Dual Equipment
AquaLink RS Dual Equipment
(2/6, 2/10, 2/14) Conversion Wiring Diagram
Service Controller
Connector
S1 DIP SWITCH SETTINGS
Factory Setting
#
OFF
1
Aux1
2
1 SPD Filter Pump
3
Not Used
4
Cool Down
5
Normal
6
Heaters
7
No Solar
8
Gas Heater
S2 DIP SWITCH SETTINGS
Factory Setting
#
OFF
1
Solar Heat Priority
2
Not Used
3
Not Used
4
Not Used
When Turned
ON
Cleaner
2 SPD Filter Pump
Not Used
Disabled
See Manual
Shared Heater
Solar Installed
Heat Pump
When Turned
ON
Heat Pump Priority
Not Used
Not Used
Not Used
S1
S2
. Pum
F
Relay Sockets (24 VDC output)
Network Connectors
Connect red four-pin connectors
from Controllers or Remotes
Green
Yellow
4321
To Controller
(red terminal bar)
RESET
AUTO
SERVICE
TIME OUT
p
Aux. 1
Aux. 2Aux.
Black
Red
Green
4321
TER PUM
FIL
3
Aux. 4
Yellow
P
Aux. 5
Black
Red
X1
AU
Aux. 6
Red
654321
(brown terminal bar)
UX 2
A
Spa Pump
Black
Green
White
To Spa Side
AUX 3
Adjustable Fr Sensor
Brown
Blue
Red
Black
10 9 8 7 6 5 4 3 2 1
To Sensors and Heater
(green terminal bar)
4
X
U
A
6
UX
A
AUX 5
Intake JVA
Return J
JVA Sockets
(24 VAC output)
Freeze/Air Solar Sensor
Pool Temp Sensor
Spa Temp Sensor
Pool Low Voltage Heater
Black
Red
Red
Black
SPA PUMP
POOL HEATER
SPA HEATER
VA
Cleaner JVA
Solar
p
VA
J
Spa Heater Interface Board
Solar Pum
Relay Sockets
(24 VDC output)
SOLAR
(Dual Heaters Only)
Spare
AUTO/SERVICE/TIME OUT Button
System must be in SERVICE or TIME OUT mode for these buttons to operate.
Pressing this button switches between the
three (3) modes outlined below.
AUTO
Mode
Normal operation. Leave the system in
this mode unless you are servicing the
pool or the system. Power Center
buttons (above) do not work.
SERVICE
Mode
In-house Controller is locked out.
Allows manual operation of equipment
using the buttons above. This mode will
POOL PUMP
Button
Turns the Filter Pump on and off.
SPA PUMP
Button
Turns the Filter Pump on and off.
AUX
Buttons
Turns on and off auxiliary equipment
as labeled. AUX 7 socket is the Spa
Pump Relay Socket.
stay on until the button is pressed again.
TIME OUT
Mode
Allows service person to override all
programs and lock out indoor Controller
for three (3) hours. Any equipment turned on
will remain on, any equipment left off will
remain off.
Operation will automatically switch
back to AUT O mode after three (3) hours.
NOTE: Safety Interlocks are not in effect
when service or time mode is active.
IMPORTANT INSTALLATION INSTRUCTIONS:
1. Installation must be by a qualified electrician and must comply with all national, state, and local codes.
2. Power Center must be mounted at least five (5) feet away from the inside edge of the pool.
3. Install to provide drainage of compartments for electrical components.
4. After wiring, install panels over wiring compartments and keep Power Center door closed.
5. For indoor or outdoor use.
For technical information, call Jandy Pool Products, Inc., at 707-776-8200, ext. 260.
POOL SPA HEATER
and
Buttons
Turns the heater on and off. The switch
on the heater must be on, the heater
thermostat should be turned to max.,
and the filter pump must be running
for heater to fire.
SOLAR
Button
Activates optional JVA (valve actuator)
plugged into the "solar JVA" socket,
and activates optional relay plugged
into the "solar pump" socket.
Sheet #7255, Rev. G
6000 Condor Drive • Moorpark, CA USA 93021
707.776.8200 • Fax 707.763.7785
Litho in USA © Jandy Pool Products, Inc. 0711
CAUTION
Read Installation Manual completely
before installing. This product must
be wired in accordance with the
Installation Manual.
ATTENTION
Lire la notice technique.
WARNING
To reduce the risk of injury, do not
permit children to use this product
unless they are closely supervised
at all times. Water temperature in
excess of 100°F/38°C may be
injurious to your health.
AVERTISSEMENT
Pour réduire le risque de blessures,
ne pas permettre aux enfants d’utiliser ce
produit à moins qu’ils soient supervisés
de près en tout temps. Des températures
de l’eau supérieures à 38°C/100°F peuvent présenter un danger pour la santé.
Page 43

9.3 AquaLink RS Auxiliary Power Center
Page 43
To Power Center #1
(or Indoor Control Panel)
Yellow
Green
Black
Re d
4321
Relay Sockets (24 VDC output)
Aux B 2 Aux B3 Aux B 4
age wire in this compartment)
Aux B 1 R elay
Aux B 1
Aux B 4 R elay
Relay Sockets (24 VDC output)
Aux B 5 R elay
Aux B 2
JV A
Aux B 1
JV A
JV A S ockets
(24 VAC output)
Aux B 4
Aux B 3
JV A
Aux B 8Aux B 7Aux B 6Au x B 5
Aux B 8 R elay
JV A
Low Voltage Raceway (do not run high volt
Aux B 2 R elay
Line One
Load One
Line Two
Load Two
Aux B 3 R elay
Grounding Bar
Aux B 6 R elay Aux B 7 R elay
System Powe r
120 VAC P ower
Wire Nut to
Page 44
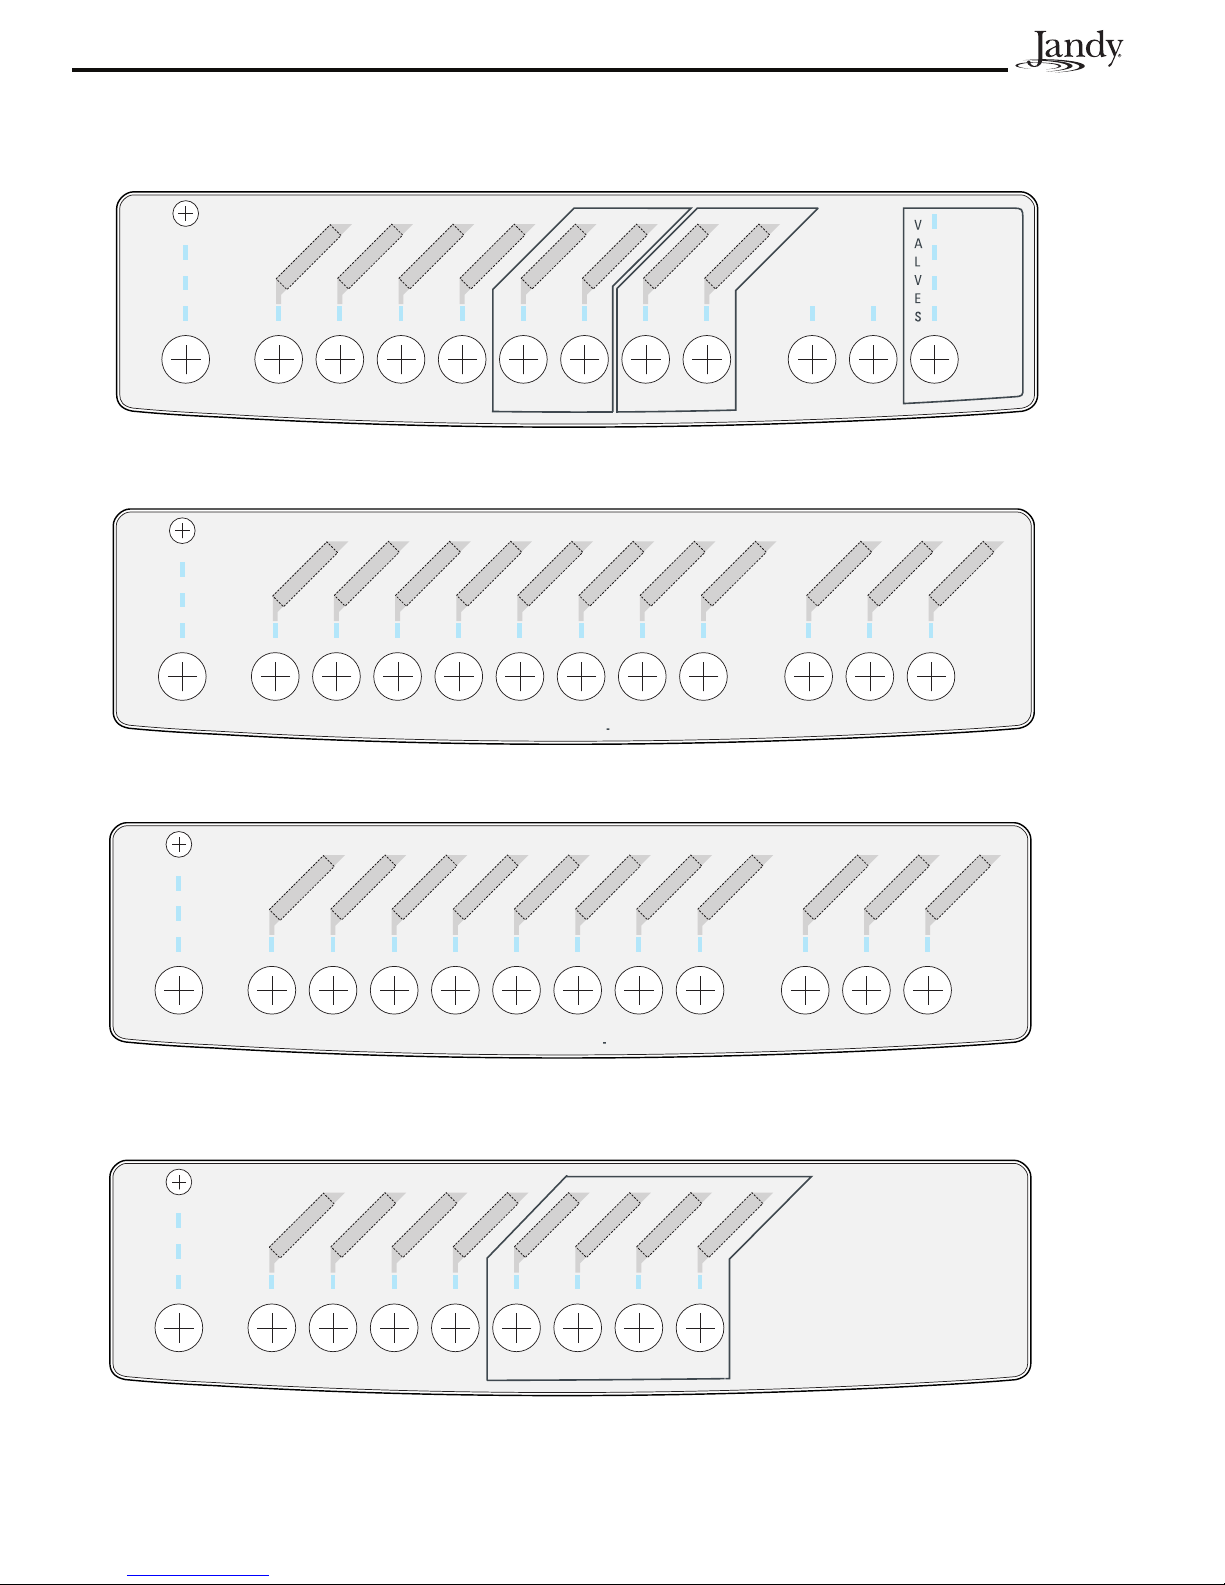
Page 44
6762
6762
Section 10. Power Center Bezel
RESET
AUTO
SERVICE
TIME OUT
RESET
AUTO
SERVICE
TIME OUT
FILTER PUMP
RS6 & RS8 ONLY
5
X 1
UX 2
AU
A
X 3
U
A
4
X
U
A
X
U
A
RS8 ONLY
6
X
AU
7
UX
A
HEATER
Pool/Spa Combination and Pool/Spa Only, Part # 6762
SPA P
P
M
U
HE
L
OO
P
3
2
UMP
P
L
O
PO
AUX 1
UX
A
AUX
4
X
AU
5
X
AU
6
UX
A
Dual Equipment, Part # 6782
SOLAR
R
E
AT
POOL MODE
SPA MODE
SPA DRAIN
SPA FILL
TER
R
HEA
A
P
S
A
OL
S
RESET
AUTO
SERVICE
TIME OUT
RESET
AUTO
SERVICE
TIME OUT
P
M
1
L PU
OO
P
X
AU
2
UX
A
3
UX
A
AUX
4
AUX
5
UX 6
A
UMP
P
A
P
S
Dual Equipment with Shared Heater, Part # 7024
RS16 & RS2/14 ONLY
4
B
B1
UX
A
B2
X
AU
B3
UX
A
X
AU
5
B
UX
A
UX B6
A
B7
UX
A
X
U
A
TER
HEA
B8
E
ALV
V
R
A
OL
S
Figure 25. Power Center Bezel Options
Auxiliary, Part # 7209
Page 45

Notes
Page 45
Page 46

Page 46
Notes
Page 47

Notes
Page 47
Page 48

LIMITED WARRANTY
Thank you for purchasing Jandy pool and spa products. Jandy Pool Products, Inc. warrants all parts to be free
from manufacturing defects in materials and workmanship for a period of one (1) year from the date of retail
purchase, with the following exceptions:
AquaLink
•
Never Lube® valves are warranted for the life of pool and/or spa on which they were originally installed.
•
AquaPure Electronic Chlorine Generator Electrolytic Cells carry a five (5) year limited warranty on a prorated basis.
•
®
RS units installed with Jandy Surge Protection Kits will be covered for two (2) years.
®
This warranty is limited to the first retail purchaser, is not transferable, and does not apply to products that have
been moved from their original installation sites. The liability of Jandy Pool Products, Inc. shall not exceed the
repair or replacement of defective parts and does not include any costs for labor to remove and reinstall the
defective part, transportation to or from the factory, and any other materials required to make the repair. This
warranty does not cover failures or malfunctions resulting from the following:
1. Failure to properly install, operate or maintain the product(s) in accordance with our published Installation,
Operation and Maintenance Manuals provided with the product(s).
2. The workmanship of any installer of the product(s).
3. Not maintaining a proper chemical balance in your pool and/or spa [pH level between 7.2 and 7.8, Total
Alkalinity (TA) between 80 to 120 ppm, Total Dissolved Solids (TDS) less than 2000 not including salt ppm].
4. Abuse, alteration, accident, fire, flood, lightning, rodents, insects, negligence or acts of God.
5. Scaling, freezing, or other conditions causing inadequate water circulation.
6. Operating the product(s) at water flow rates outside the published minimum and maximum specifications.
7. Use of non-factory authorized parts or accessories in conjunction with the product(s).
8. Chemical contamination of combustion air or improper use of sanitizing chemicals, such as introducing
sanitizing chemicals upstream of the heater and cleaner hose or through the skimmer.
9. Overheating; incorrect wire runs; improper electrical supply; collateral damage caused by failure of O-Rings,
DE grids, or cartridge elements; or damage caused by running the pump with insufficient quantities of water.
®
LIMITATION OF LIABILITY:
This is the only warranty given by Jandy Pool Products, Inc. No one is authorized to make any other warranties
on behalf of Jandy Pool Products , Inc. THIS WARRANTY IS IN LIEU OF ALL OTHER WARRANTIES ,
EXPRESSED OR IMPLIED, INCLUDING BUT NOT LIMITED TO ANY IMPLIED WARRANTIES OF FITNESS
FOR A PARTICULAR PURPOSE AND MERCHANTABILITY. JANDY POOL PRODUCTS, INC. EXPRESSLY
DISCLAIMS AND EXCLUDES ANY LIABILIT Y FOR CONSEQUENTIAL , INCIDEN TAL, INDIRECT OR
PUNITIVE DAMAGES FOR BREACH OF ANY EXPRESSED OR IMPLIED WARRANTY. This warranty gives
you specific legal rights. You may also have other rights that vary by state or province.
WARRANTY CLAIMS:
For prompt warranty consideration, contact your dealer and provide the following information: proof of purchase,
model number, serial number and date of installation. The installer will contact the factory for instructions
regarding the claim and to determine the location of the nearest designated service center. If the dealer is not
available, you can locate a service center in your area by visiting www.jandy.com or by calling our technical
support department at (707) 776-8200 extension 260. All returned parts must have a Returned Materia l
Authorization number to be evaluated under the terms of this warranty.
Jandy Pool Products, Inc.
6000 Condor Drive, Moorpark, CA, USA 93021 • 707.776.8200 FAX 707.763.7785
6919E
Litho in U.S.A. © 2007 Jandy Pool Products, Inc. 0711
 Loading...