


V01-01-2017
EN – FR – DE – NL – RU – ES – IT – AR

2

3
Translation of original user instructions
EN-
New Self automatic self-service frame slicer ................................................................................... 5
FR- Notice d’utilisation originale
Trancheuse automatique à cadres self-service New Self ............................................................. 17
DE- Übersetzung der Originalanleitung
Automatische SB-Schneidemaschine New Self ............................................................................. 29
NL- Vertaling van de originele gebruikershandleiding
Automatische snijmachine met kaders voor zelfbediening New Self .......................................... 41
RU- Перевод оригинального руководства по эксплуатации
Автоматическая рамочная хлеборезка с самообслуживанием New Self .............................. 53
ES- Traducción del manual de uso original
Cortadora automática a cuadros autoservicio New Self ............................................................... 65
IT- Traduzione delle informazioni sull'utilizzo originali
Taglierina automatica a telai self-service New Self ....................................................................... 77
ﻲﺳﻧر- ﻲﻠﺻﻷا مادﺧﺗﺳﻻا لﯾﻟد ﺔﻣﺟرﺗ
ﺔﻋﺎﻄﻗ ﻦﯿﺠﻋ ﺔﯿﻜﯿﺗﺎﻣﻮﺗوأ تارﺎﻃﺈﺑ ﺔﻣﺪﺧ ﺔﯿﺗاذ New Self ......................................................................................... 89

4

5
New Self automatic self-service frame slicer
1 BEFORE COMMISSIONING ......................................................................................................... 6
2 WARRANTY .................................................................................................................................. 6
3 WARNINGS ................................................................................................................................... 7
4 TECHNICAL SPECIFICATIONS ................................................................................................... 8
4.1 Technical specifications .................................................................................................................... 8
4.2 Details of materials in direct contact with dough. ........................................................................... 8
5 INSTALLATION AND COMMISSIONING ..................................................................................... 9
5.1 Unpacking the machine: .................................................................................................................... 9
5.2 Positioning: ......................................................................................................................................... 9
5.3 Electrical connection: ........................................................................................................................ 9
5.4 Commissioning: ................................................................................................................................ 10
5.5 Danger: .............................................................................................................................................. 10
6 CONTROLS AND SAFETY FEATURES ..................................................................................... 11
6.1 Controls: ............................................................................................................................................ 11
6.2 Work area: ......................................................................................................................................... 11
6.3 Safety features: ................................................................................................................................. 11
7 OPERATION ................................................................................................................................ 11
8 MAINTENANCE ........................................................................................................................... 12
8.1 Daily, by a trained operator. ............................................................................................................ 12
8.2 Every 25,000 loaves and/or at least once a year, by an approved agent. ................................... 12
8.3 Blade replacement. ........................................................................................................................... 12
9 CONSUMABLES ......................................................................................................................... 13
9.1 List of CONSUMABLES .................................................................................................................... 13
10 MALFUNCTIONS ..................................................................................................................... 14
11 LIST OF COMPONENTS IN ILLUSTRATIONS ....................................................................... 15
English
6
1 BEFORE COMMISSIONING
Thank you for choosing a JAC system. It is essential that you read these instructions
before installing and commissioning this machine. This will protect you and avoid damaging
your machine.
These instructions refer to various illustrations in order to make them easier to understand.
These illustrations are at the end of the instructions. Please refer to them whenever you see
the following symbols: (fig.X, n°Y).
To ensure that your machine gives you full satisfaction over the coming years, we
invite you to familiarise yourself with the following advice:
- Enlist the help of your approved agent for installation, commissioning and service support.
- In order to be covered by the 5-year warranty (see terms and conditions set out below),
please have your dealer fill in the service booklet when your machine is being installed. The
service booklet is at the back of your machine.
2 WARRANTY
All JAC products are covered by a 5-year warranty.
This warranty is valid for all parts on your machine, including electronic components but
excluding consumables. The warranty takes effect on the date the equipment is installed.
Subject to the following restrictive conditions:
- Equipment acquired from an approved dealer;
- Installation carried out by an approved agent;
- Equipment used in accordance with the instructions for use and for the intended purpose
for which it was manufactured;
- Equipment serviced on a daily basis in compliance with the instructions for use;
- Regular servicing by the approved agent in compliance with service specifications, with
at least one service a year (servicing chargeable to the user).
- Exclusive use of genuine JAC parts.
If there is no record of servicing by an approved agent and/or if the service booklet
has not been filled in correctly, warranty cover will be limited to one year.
This warranty does not cover:
- Replacement of consumables (§9);
- Parts not accepted as defective by our company;
- Problems due to improper use of the equipment;
- Problems due to installation not carried out by an approved agent;
- Parts or problems due to transit damage or improper handling.
Repairing and/or replacing defective parts during the warranty period does not
bring about an extension of said warranty.
English
English
7
3 WARNINGS
It is most important that these user instructions be kept with the machine for any future
reference. Should this machine be sold or transferred to another user, please ensure that the
user instructions are handed over so that the new user can be familiarised with its operation
and the warnings associated with it.
These warnings are given for your safety and that of others. We would therefore
ask you to read them carefully before installing and using the machine.
This machine has been designed for use by authorised adults. Please therefore ensure
that children do not touch it or use it as a toy.
This machine is intended for self-service use.
It is dangerous to modify or attempt to modify the specifications of this machine.
After having installed this machine, please ensure that it is not standing on the power
cable.
Follow the instructions given for its use.
This machine must be stored and used in an indoor room, protected from moisture and
heat.
This machine must be adequately illuminated to operate it.
The noise level of this machine does not exceed 75 dB(A) in accordance with EN ISO
3744.
This machine must be used by one person at a time (unless otherwise specified).
This machine is intended for slicing baked bread which has cooled down.
This machine is not intended for the following breads and the following materials:
- Warm bread, stale bread.
- Frozen or partially thawed bread.
- Wholemeal breads with a hard crust and other types of bread with a hard crust.
- Rye breads.
- Non-edible products such as wood, plastic and similar materials.
- Any food that is not included in the bread and loaf cake category.
The machine may be damaged when cutting bread or materials for which the
machine is not intended.
Always disconnect the mains supply before cleaning the machine inside/outside
and when carrying out maintenance.
This machine is heavy. Take all necessary safety precautions when handling it.
English
8
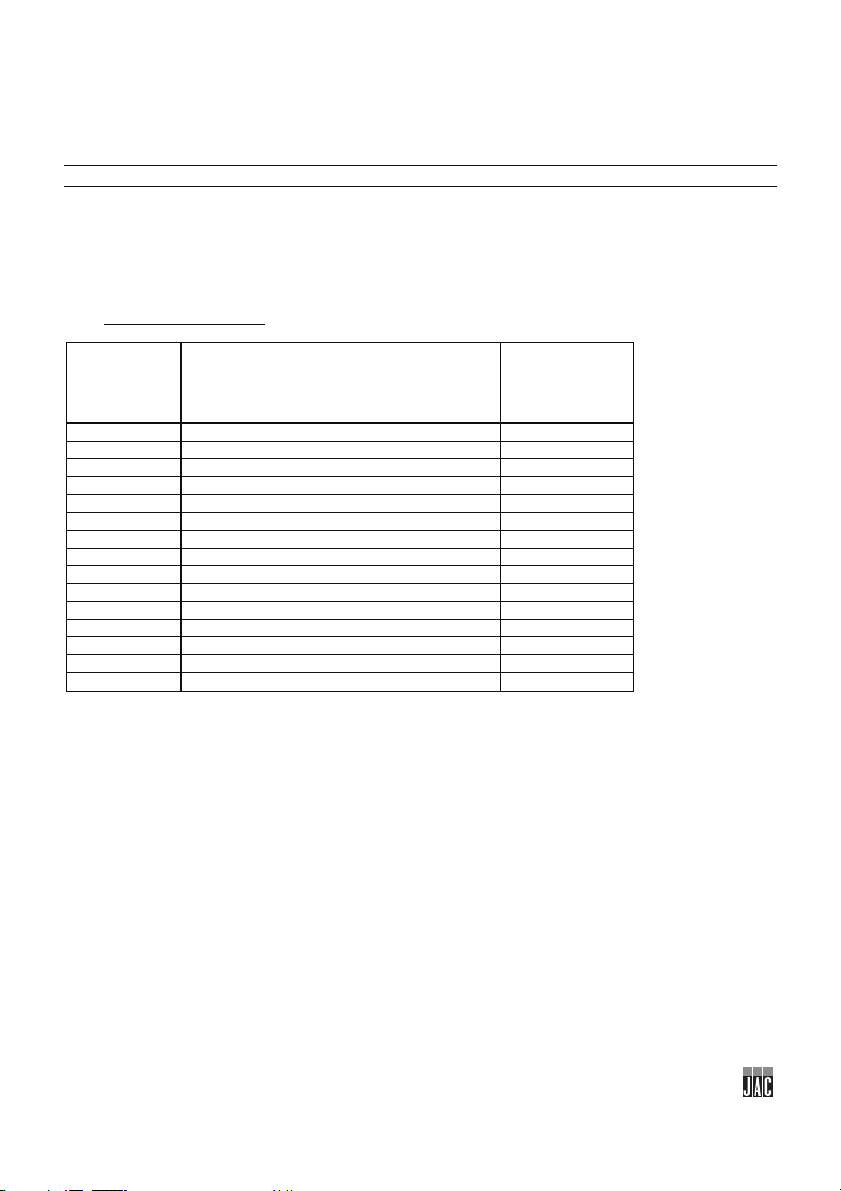
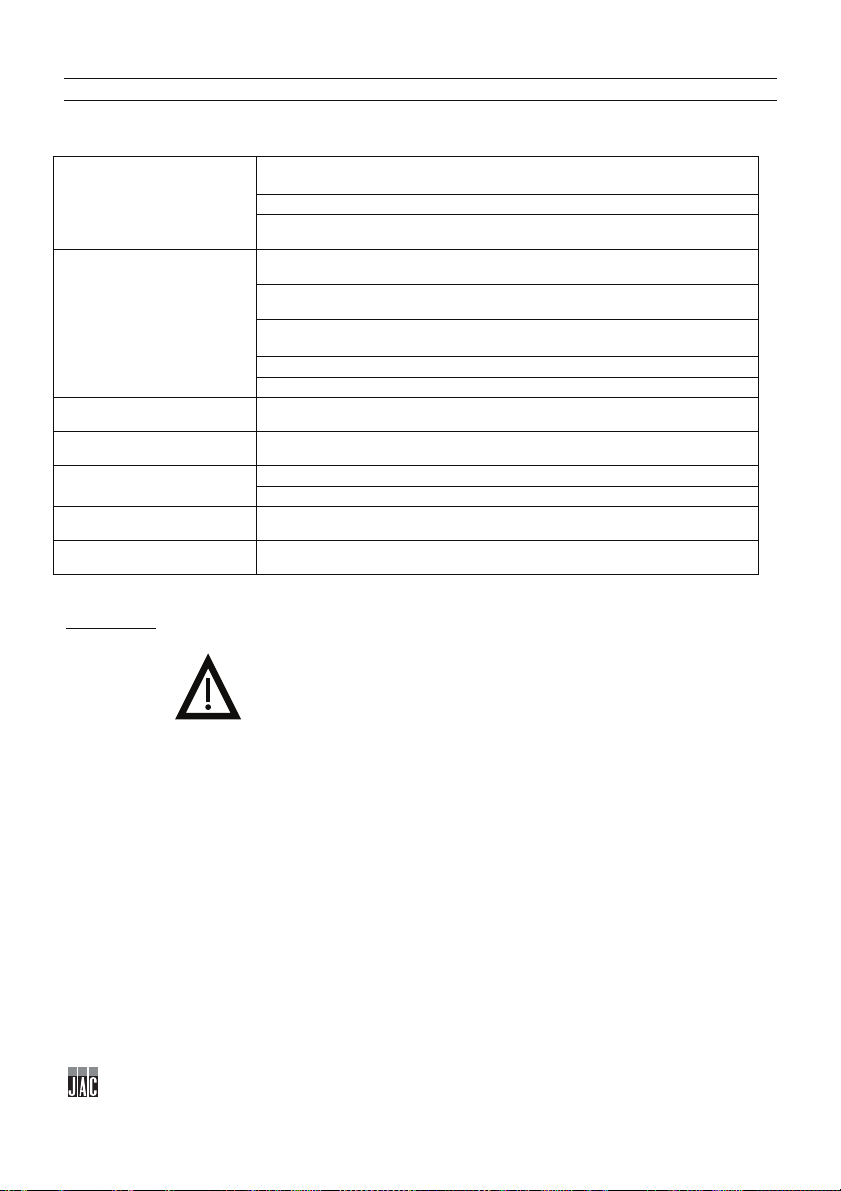
4 TECHNICAL SPECIFICATIONS
NEW SELF 450
NEW SELF 450M
Height (mm)
1267
1267
Width (mm)
598
598
Depth (mm)
892
892
Entry channel length (mm)
Entry channel width (mm)
440
440
Entry channel height (mm)
160
160
Packaging (mm)
800 x 860 x 1600
800 x 860 x 1600
Net weight + packing (kg)
230
240
Motor power rating (kW)
0.49
1.1
Motor type
Single-phase or three-phase
Three-phase
220 V - 50 Hz (A)
5
-
380 V - 50 Hz (A)
3.2
3.2
Capacity (loaves/hour)
200<500
200<500
Noise level (dB)
<75
<75
Heavy duty motor
optional
JACSTOP
optional
Users' explanatory notice
optional
4 cm added height
Daily incremental counter
optional
Special colour
optional
Special blades
optional
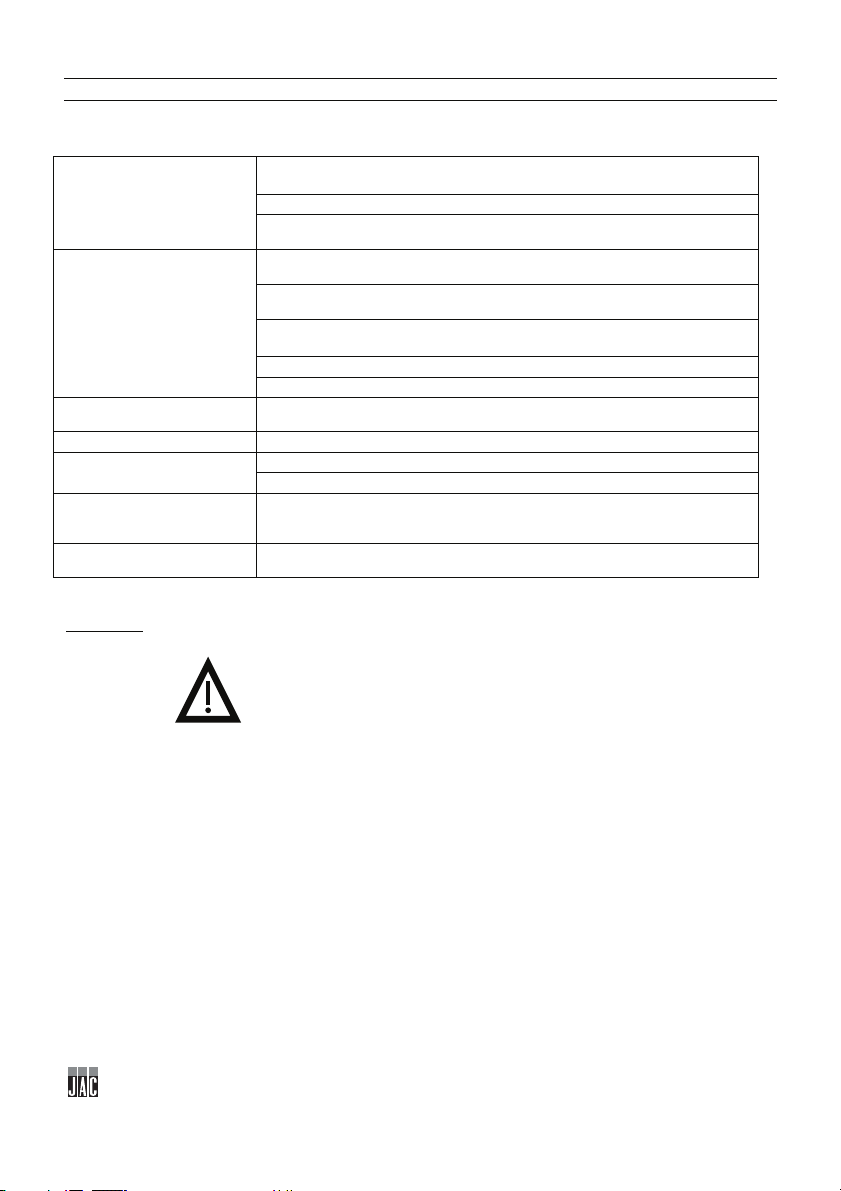
4.1 Technical specifications
Net weight (kg) 210 220
310 300
4.2 Details of materials in direct contact with dough.
Rear table: STAINLESS STEEL 430
Loaf pusher: STAINLESS STEEL 430
Loaf holder: STAINLESS STEEL 430
Blades: Steel
Delivery table: STAINLESS STEEL 430
Bagger: STAINLESS STEEL 430
optional
English

9
5 INSTALLATION AND COMMISSIONING
5.1 Unpacking the machine:
Machines are delivered from our works on pallets, strapped and protected with cardboard. First of all,
the packaging must be examined and any damage caused in transit must be declared directly to the
carrier.
A. Remove the cardboard and the packaging bag from the machine.
B. Remove straps, taking particular care when they are released by cutting.
C. Detach the machine from its pallet by removing the wooden battens wedging the castors.
D. Take the machine off the pallet. Make sure you do this with at least two people in order to
lower it as gently as possible onto the floor.
After unpacking your machine, check that it has not been damaged in transit. Notify
us of any defects.
5.2 Positioning:
In order to achieve excellent performance and long-term reliability, choose a location that is:
Well ventilated, shielded from direct sunlight and away from sources of heat, with a flat and
sturdy surface free from vibration.
5.3 Electrical connection:
IMPORTANT: This machine must be earthed.
It is recommended that the system be protected with a fuse and an RCD.
Your mains electricity supply to the machine must be protected as indicated below:
- North America: 15 A protection;
- Rest of the world: 16 A protection.
For machines equipped with a variable speed drive, it is imperative that they be connected to a
junction box on a circuit fitted with a 300 mA RCD.
Note: Any problem resulting from any other type of connection will not be covered under warranty.
Before connecting your machine to the mains supply and in order to prevent the motor from burning
out when it is switched on, it is important to check that the mains supply matches the machine
specification (see machine nameplate).
This machine complies with Machinery Directives 2006/42, 2006/95, 2004/108 and is CE marked as
proof of this.
Please familiarise yourself with the safety pictograms displayed on the machine:
English
10
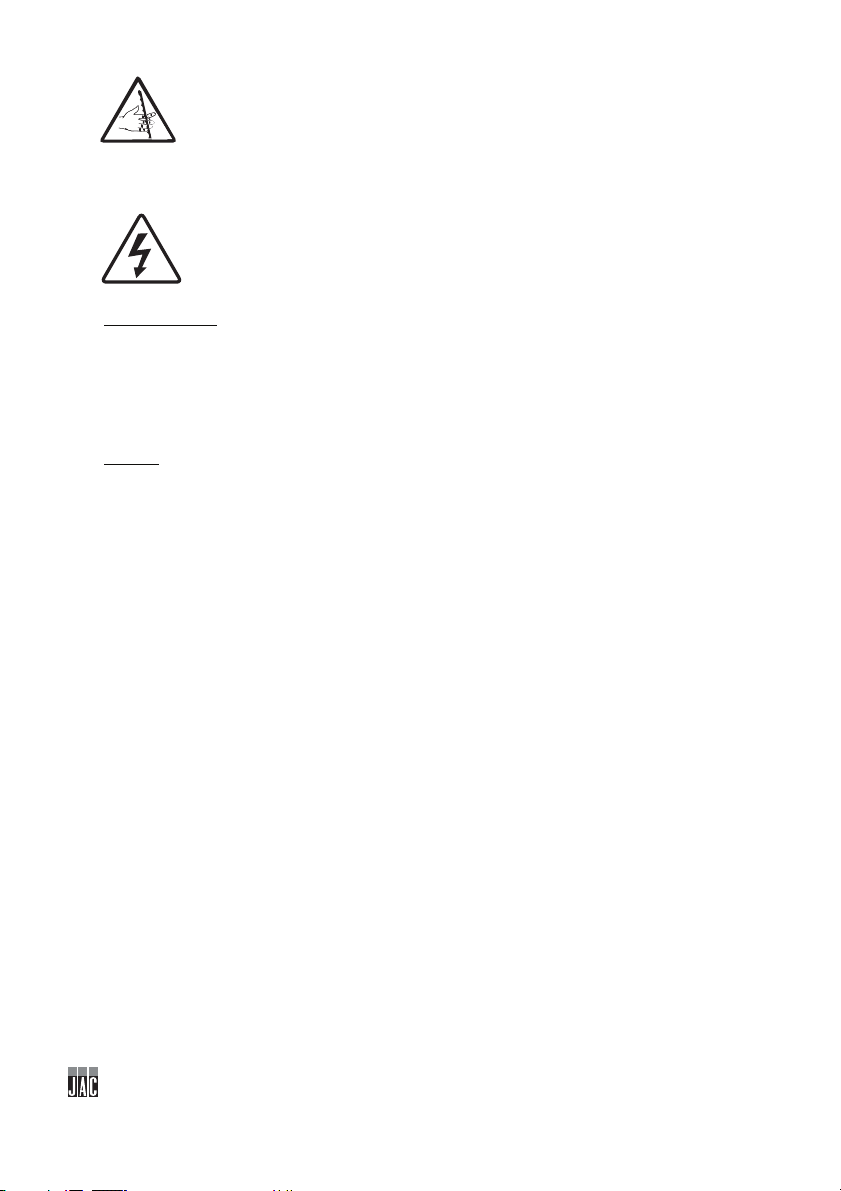
This pictogram indicates a cut hazard. You will find it at the front of the machine
around the loaf positioning area (fig.10, n°20).
You will find the circuit diagram for the machine on the back of the electrical
enclosure door (fig.10, n°22).
This pictogram indicates an electrocution hazard. Please isolate the machine
before carrying out any work on it. You will find it at the back of the machine close
to the power cable and inside the machine on the electrical enclosure (fig.10,
n°21).
5.4 Commissioning:
Before commissioning, ensure that there are no extraneous objects interfering with the machine’s
moving parts.
For machine operation, please refer to the “Operation” chapter.
5.5 Danger:
If the user or the machine is in danger, you must use the main isolator switch to cut the power supply
to the machine.
Remove the plug from the power socket before any maintenance and/or servicing work.
Do not touch the blade, even if it is stationary.
To replace the blade, have the work done by your approved dealer.
Always wear cut-resistant gloves when replacing blades or when working in the vicinity of the blade.
Any maintenance work or replacement of parts must be carried out by a qualified individual.
English

11
6 CONTROLS AND SAFETY FEATURES
6.1 Controls:
As your machine is fully automatic, closing the top cover operates machine start-up.
6.2 Work area:
The work area is at the front of the machine (fig.3, n°17).
6.3 Safety features:
This machine is equipped with:
A mechanical safety switch
Located at the back of the top cover
Which stops the machine when the top cover is opened (fig.1, n°1).
A mechanical interlock
Which prevents the top cover from being opened while the machine is in operation.
A mechanical interlock
Which prevents the front cover from being opened while the machine is in operation (fig.7, n°19).
A mechanical safety switch
Located at the bottom of the machine, above the crumb tray
Which prevents the machine from starting when the front door is opened (fig.1, n°5).
7 OPERATION
Braked castors must be locked while the machine is in operation (fig.1, n°13).
Switch on the power to the machine at the start of the day using the emergency stop
(fig.1, n°10).
Operating procedure (fig.4,5)
A. Open the top cover (fig.1, n°1).
B. Place the loaf on the rear table (fig.1, n°3), between the blades and the moving section, and close
the lid. Closing the lid activates the slicing process.
C. The front cover unlocks at the end of the slicing cycle. Open it and retrieve the sliced loaf.
NB: Some machines are equipped (as an option) with a JAC Stop (an automatic slice holding system)
(fig.6, n°18).
Tip: Have a qualified individual check blade tension after the first few days of operation.
Capacity: Number of loaves sliced per day: 6,000 (depending on the type of bread).
Loaf size (L x W x H) (cm): min.: 12 x 6 x 6 - max.: 44 x 31 x 16
English

12
8 MAINTENANCE
8.1 Daily, by a trained operator.
A. Check whether you need to empty the crumb tray.
B. Clean the tables (fig.1, n°6, 3) using a brush.
C. Use a dry cloth to clean the inside.
D. Use a damp cloth to clean the outside.
8.2 Every 25,000 loaves and/or at least once a year, by an approved agent.
A. Remove the plug from the socket (fig.2, n°16).
B. Check the condition of the cutting blades (fig.1, n°4).
C. If you notice a deterioration in cutting quality, the cutting blades must be replaced (JAC part
number: 610001, 6110011 in the JAC Spare Parts catalogue).
D. If the blades need to be replaced, do so in accordance with the blade replacement procedure
(fig.8, 9).
NB: Do not overtighten the blades, as this risks distorting the frames.
E. Sweep and vacuum the inside of the machine.
F. Check bearing condition, then lubricate them.
G. Lubricate the actuator joints.
Check that your approved agent has recorded his work in your service booklet in order to maintain
your 5-year warranty cover.
8.3 Blade replacement.
(fig.8,9)
Always wear cut-resistant gloves (EN 388:2003 version B= 5) and safety footwear when replacing the
blade or when working in the vicinity of the blade.
Having ensured that the plug on your machine (fig.2, n°16) has been disconnected from the mains:
Open the front door (fig.1, n°5).
Remove the stainless steel table from the front of the machine.
A. Remove the bagging paddle.
B. Unscrew the JAC Fix slice holding system on both sides and remove it.
C. Unscrew the front table on the inner sides of the machine.
D. Pivot the front table towards you.
E. Remove the front table.
F. Unscrew the cover.
G. Open the cover that protects the blade holder frames.
H. On the left-hand inner side, pivot the frame screw cap so that you can insert the 8 mm Allen
key from the outside of the machine. Remove screw A securing the front frame link.
I. Lay the frame down forwards. Replace the blades on the rear frame (place something to
protect yourself on the front frame blades). Remove the locknuts on screws B (Misch
machines). Remove the blade-tightening Allen screws B. Replace the blades, checking that
they locate correctly in the swing arm pins. Retighten the blades by tightening screws B, using
the blades remaining on the frame as a reference. Then tighten the nuts (machine fitted with
lubrication option).
In order not to distort the frame and avoid the risk of dangerous breakages, only replace 1 to 3
blades at a time alternating from left to right.
Resume the procedure from point I for the front frame and refit the front frame and the cover sections.
English
13
Connect your machine to the mains supply; it is now ready.
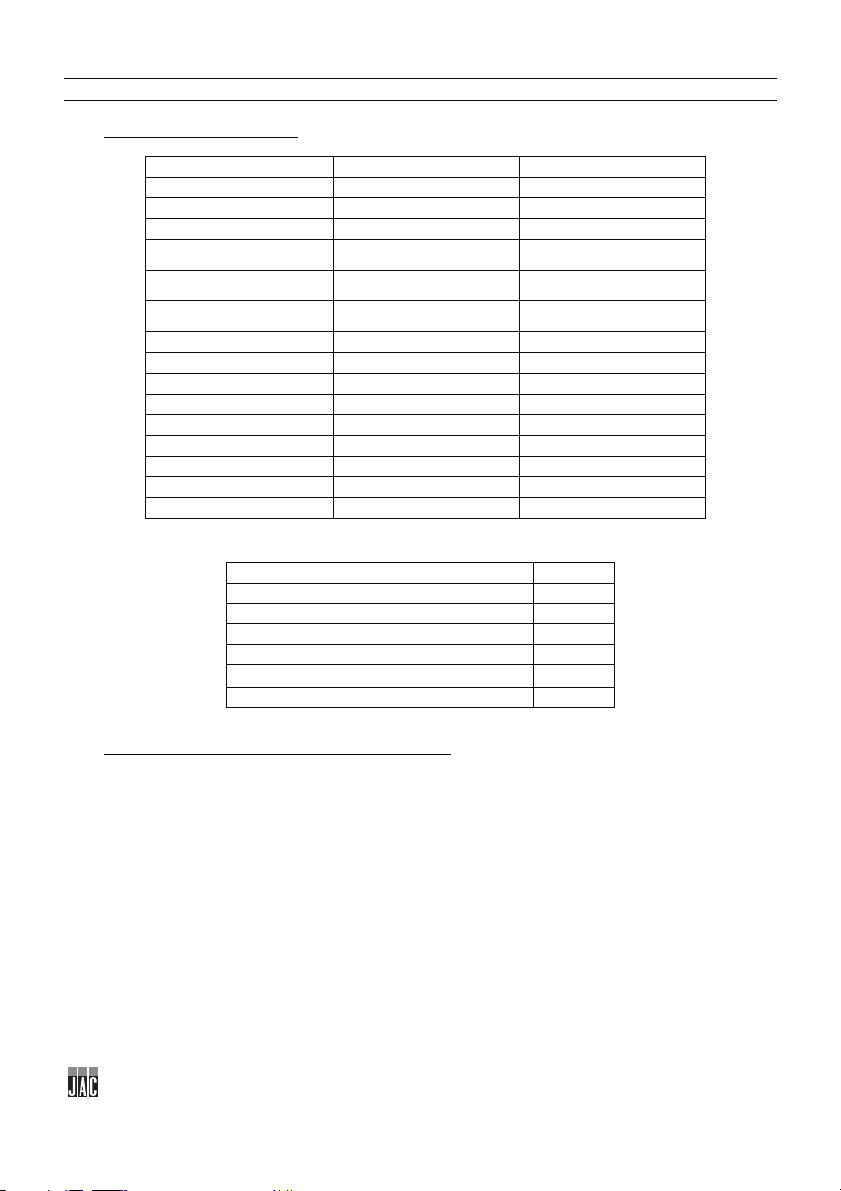
5310020
SPRING, Ø 9 X 28 MM
ALL
7390031
RETAINING BAR FLAP
ALL
7390030
JAC STOP FLAP
ALL
5740162
FRAME LINK WITH BEARINGS
ALL
6110001
JAC KNIFE, 13 MM/0.5 MM
NEW SELF 450
6110011
JAC KNIFE, 13 MM/0.5 MM + TEFLON
NEW SELF 450M
5690221
REAR COVER FRONT PAD
ALL
5690222
REAR COVER RH REAR PAD
ALL
5690223
REAR COVER LH REAR PAD
ALL
5315014
GAS SPRING, 10 N
ALL
7240031
BELT
ALL
5690010
SLIDE PAD, 100 MM
ALL
5690151
LOAF HOLDER PAD
ALL
5310019
LOAF HOLDER SPRING
ALL
6120002
PUSHER FELT PAD
NEW SELF 450M
Check that your approved agent has recorded his work in your service booklet in order to maintain
your 5-year warranty cover.
9 CONSUMABLES
When ordering spare parts, check with your approved agent which part is required based on the
spare parts catalogue issued by the manufacturer.
Always quote the machine serial number shown on the nameplate.
Your agent will place the orders with JAC.
9.1 List of CONSUMABLES
ITEM CODE DESCRIPTION MODEL
English
14
10 MALFUNCTIONS
Problem
Check
Close the top cover.
The machine is running, but
Feed in a loaf that is sufficiently firm.
If the blades are misaligned, adjust the blades and frames.
The bread vibrates between
the blades
The bread is cut too slowly
Check whether the blades need replacing (fig.8,9).
If the blades are misaligned, adjust the blades and frames.
Check whether the blades need replacing (fig.8,9).
The bread emerges very
the blades
The bread is squashed
coming out of the blades
The machine is not running
Connect the machine using the cable (fig.2, n°16).
Close the front cover.
Check whether the blades need replacing (fig.8,9).
the loaves are damaged or
cut unevenly
The bread tears
slowly or remains between
Leave the bread to cool down for a few hours.
Feed in a loaf of the specified size.
If the blades are misaligned, adjust the blades and frames.
Check whether the blades need replacing (fig.8,9).
Check whether the blades need replacing (fig.8,9).
WARNING: The machine must be isolated from the power supply before attempting any work on it.
Should the problem persist, please contact your technician.
English

15
11 LIST OF COMPONENTS IN ILLUSTRATIONS
Figure
Item
Description
1
Top cover
2
Loaf pusher
3
Rear table
4
Blades
5
Front cover
6
Delivery table
7
Front bumper
8
Crumb tray
9
Bagger
10
Counter
11
Oil counter reset
12
Oil level indicator (Misch)
13
Castor
14
Rear panel
15
Electrical enclosure panel
16
Power cable
3
17
Work area
6
18
JAC Stop slice holding system
7
19
Front cover lock
20
“Cut hazard” sign
21
“Electrocution hazard” sign
22
Circuit diagram
1
2
10
English

16

17
Trancheuse automatique à cadres self-service New Self
1 AVANT LA MISE EN SERVICE ................................................................................................... 18
2 GARANTIE ................................................................................................................................... 18
3 AVERTISSEMENTS .................................................................................................................... 19
4 CARACTERISTIQUES TECHNIQUES ........................................................................................ 20
4.1 Caractéristiques techniques ............................................................................................................ 20
4.2 Détail des matériaux en contact direct avec la pâte ...................................................................... 20
5 INSTALLATION ET MISE EN SERVICE ..................................................................................... 21
5.1 Déconditionnement de la machine ................................................................................................. 21
5.2 Emplacement .................................................................................................................................... 21
5.3 Raccordement électrique ................................................................................................................. 21
5.4 Mise en service ................................................................................................................................. 22
5.5 Danger ............................................................................................................................................... 22
6 ORGANE DE COMMANDE ET DE SECURITE .......................................................................... 23
6.1 Organe de commande ...................................................................................................................... 23
6.2 Zone de travail .................................................................................................................................. 23
6.3 Organes de sécurité ......................................................................................................................... 23
7 UTILISATION ............................................................................................................................... 23
8 ENTRETIEN ................................................................................................................................. 24
8.1 Journalier par un utilisateur formé ................................................................................................. 24
8.2 Toutes les 25 000 coupes et/ou 1 fois par an au minimum, par un agent agréé ........................ 24
8.3 Changement des lames .................................................................................................................... 24
9 CONSOMMABLES ...................................................................................................................... 25
9.1 Liste des CONSOMMABLES ............................................................................................................ 25
10 INCIDENTS DE FONCTIONNEMENT ..................................................................................... 26
11 LISTE DES COMPOSANTS SUR LES FIGURES ................................................................... 27
Français

18 18
1 AVANT LA MISE EN SERVICE
Merci d’avoir choisi une solution JAC. Veuillez impérativement lire ce mode d’emploi avant
d’installer et de mettre en service cette machine. Vous pourrez ainsi vous protéger et éviter
de détériorer votre machine.
Cette notice fait référence à différentes figures afin de faciliter la compréhension des
instructions. Ces figures se trouvent en fin de notice. Veuillez vous y référer dès que vous
rencontrez les symboles suivants (fig.x, n°y).
Pour que votre machine vous donne entière satisfaction au cours des prochaines
années, nous vous invitons à prendre connaissance des conseils suivants :
- Faites-vous aider par votre agent agréé pour l’installation, la mise en service et le suivi.
- Afin de pouvoir bénéficier de la garantie de 5 ans (voir conditions reprises ci-après),
faites compléter le carnet d’entretien par votre distributeur lors de l’installation de votre
machine. Ce carnet d’entretien se trouve à l’arrière de votre machine.
2 GARANTIE
JAC offre une garantie de 5 ans sur tous ses produits.
Cette garantie est valable sur toutes les pièces de votre machine, pièces électroniques
incluses, hors consommables. La garantie prend effet à la date d’installation du matériel.
Sous les conditions restrictives suivantes :
- matériel acquis auprès d’un revendeur agréé ;
- installation effectuée par un agent agréé ;
- utilisation du matériel conformément aux indications du mode d’emploi et dans le but
pour lequel il a été fabriqué ;
- matériel quotidiennement entretenu conformément aux indications du mode d’emploi ;
- entretiens suivis par l’agent agréé conformément aux spécifications d’entretien avec, au
minimum, un entretien par an (entretien à charge de l’utilisateur) ;
- utilisation exclusive des pièces d’origine JAC.
S’il n’y a pas de suivi d’entretien par un agent agréé et/ou que le carnet d’entretien
n’est pas correctement complété, la garantie se limite à un an.
Cette garantie ne couvre pas :
- le remplacement des consommables (§9) ;
- les pièces non reconnues défectueuses par nos services ;
- les problèmes résultant d’une utilisation anormale du matériel ;
- les problèmes résultant d’une installation non effectuée par un agent agréé ;
- les pièces ou les problèmes résultant d’un dégât de transport ou d’une manutention
inappropriée.
Une réparation et/ou un remplacement de pièces défectueuses effectué(es) durant
la période de garantie n’a (n’ont) pas pour effet de prolonger ladite garantie.
Français
Français
19
3 AVERTISSEMENTS
Il est très important que cette notice d'utilisation soit conservée avec l'appareil pour toute
future consultation. Si cet appareil devait être vendu ou transféré à une autre personne,
assurez-vous que la notice d'utilisation soit remise de façon à ce que l'utilisateur puisse être
informé de son fonctionnement et des avertissements s'y rapportant.
Ces avertissements sont donnés pour votre sécurité et pour celle d'autrui. Nous
vous prions donc de bien vouloir les lire attentivement avant d'installer et d'utiliser
l'appareil.
Cette machine a été conçue pour être utilisée par des adultes autorisés. Veillez donc à
ce que les enfants n'y touchent pas ou qu'ils ne l'utilisent pas comme un jouet.
Cette machine est prévue pour un usage Self-Service.
Il est dangereux de modifier ou d'essayer de modifier les caractéristiques de cette
machine.
Après l’installation de cette machine, assurez-vous qu’elle ne repose pas sur le câble
d'alimentation.
Suivez les instructions données pour l'utilisation.
Cette machine doit être stockée et utilisée à l’intérieur, dans un local à l’abri de l’humidité
et de la chaleur.
Cette machine doit être suffisamment éclairée pour effectuer le travail.
Cette machine a un niveau sonore inférieur à 75 dB(A), suivant la norme EN ISO 3744.
Cette machine doit être utilisée par une seule personne à la fois (sauf prescription
contraire).
Cette machine est destinée au tranchage de pains cuits et tempérés.
Cette machine n’est pas destinée aux pains et matériaux suivants :
- pains chauds, pains rassis ;
- pains congelés, ou partiellement décongelés ;
- pains complets avec une croûte dure et d'autres types de pain avec une croûte dure ;
- pains de seigle ;
- produits non comestibles comme le bois, le plastique et matériaux similaires ;
- tout aliment qui ne fait pas partie de la catégorie des pains ou des cakes.
La machine peut être endommagée lors de la coupe de pains ou matériaux non
autorisés.
Toujours débrancher la prise de courant avant de procéder au nettoyage
intérieur/extérieur de l'appareil et aux opérations de maintenance.
Cet appareil est lourd. Prenez toutes les précautions de sécurité lors de sa manutention.
Français
20 20
4 CARACTERISTIQUES TECHNIQUES
NEW SELF 450
NEW SELF 450M
Hauteur (mm)
1267
1267
Largeur (mm)
598
598
Profondeur (mm)
892
892
Longueur du canal d'entrée
(mm)
Largeur du canal d'entrée
(mm)
Hauteur du canal d'entrée
(mm)
Colisage (mm)
800 x 860 x 1600
800 x 860 x 1600
Poids net (kg)
Poids NET + emballage (kg)
230
240
Puissance moteur (kW)
0,49
1,1
Type moteur
Monophasé ou triphasé
Triphasé
220v - 50Hz (A)
5
-
380v - 50Hz (A)
3,2
3,2
Capacité (pains/heure)
200<500
200<500
Niveau sonore (dB)
<75
<75
Moteur renforcé
option
JACSTOP
Affiche explicative
option
Surélévation de 4 cm
option
Compteur journalier
option
Couteaux spéciaux
option
4.1 Caractéristiques techniques
310 300
440 440
160 160
210 220
Couleur spéciale option
4.2 Détail des matériaux en contact direct avec la pâte
Table arrière : INOX 430
Pousse-pains : INOX 430
Presse-pains : INOX 430
Lames : Acier
Table de réception : INOX 430
Ensachoir : INOX 430
Français
option

21
5 INSTALLATION ET MISE EN SERVICE
5.1 Déconditionnement de la machine
Les machines sont livrées, sorties de nos ateliers, sur palettes, sanglées et protégées par du carton.
Avant toute chose, l'emballage doit être observé et tout dommage dû au transport doit être déclaré
directement au livreur.
A. Retirer le carton ainsi que le sachet d’emballage de la machine.
B. Enlever les sangles en faisant particulièrement attention à la détente de ces dernières lors de
leur sectionnement.
C. Désolidariser la machine de sa palette en enlevant les lattes de bois qui bloquent les roulettes.
D. Descendre la machine de la palette. Veiller à faire cette manipulation à au moins deux
personnes afin d’amortir au mieux le contact avec le sol.
Après déballage de la machine, vérifier qu'elle n'a pas subi de dommages pendant le
transport. Nous signaler toute anomalie.
5.2 Emplacement
Pour obtenir d'excellentes performances et une fiabilité à long terme, choisir un emplacement :
Bien ventilé, à l'abri du rayonnement solaire direct et éloigné des sources de chaleur, avec une
surface plane et robuste exempte de vibrations.
5.3 Raccordement électrique
IMPORTANT : Mise à la terre obligatoire.
Il est conseillé de protéger l'installation avec un fusible et un disjoncteur différentiel.
Votre installation électrique alimentant la machine doit être protégée comme indiqué ci-dessous :
- Amérique du Nord : Protection 15A ;
- Reste du monde : Protection 16A.
Pour les machines équipées d’un variateur, celles-ci doivent être impérativement raccordées à une
boîte de dérivation sur une ligne équipée d’un différentiel de 300mA.
Note : Tout problème résultant d’un autre type de raccordement ne sera pas pris en compte par la
garantie.
Avant de connecter la machine au réseau et afin d'éviter une mise hors service du moteur à la mise
sous tension, il est important de vérifier la concordance du réseau d'alimentation avec les
caractéristiques de la machine (voir plaque signalétique de celle-ci).
Cet appareil est conforme aux Directives Machines 2006/42, 2006/95, 2004/108 et porte le marquage
CE attestant cette conformité.
Veuillez prendre connaissance des pictogrammes de sécurité figurant sur la machine :
Français
22 22
Pictogramme signalant un risque de coupure. Vous le retrouverez à l’avant de la
machine autour de la zone de dépose du pain (fig.10, n°20).
Vous trouverez le schéma électrique de la machine sur le verso de la porte du
coffret électrique (fig.10, n°22).
Pictogramme signalant un risque d’électrocution. Veuillez débrancher la machine
avant toute intervention sur celle-ci. Vous retrouverez ce pictogramme à l’arrière
de la machine à proximité du câble d’alimentation et à l’intérieur de la machine sur
le coffret électrique (fig.10, n°21).
5.4 Mise en service
Avant la mise en service, s’assurer de l'absence de tout objet parasite sur les parties en mouvement
de la machine.
Pour l’utilisation de la machine, se reporter au chapitre « Utilisation ».
5.5 Danger
En cas de danger pour l’utilisateur ou pour la machine, utiliser l’interrupteur général pour couper
l’alimentation de la machine.
Retirer la fiche de la prise électrique avant toute opération de maintenance et d’entretien.
Ne pas toucher la lame, même à l’arrêt.
Pour le changement de lame, faire faire l’opération par votre distributeur agréé.
Veiller à toujours porter des gants de protection anti-coupure lors du remplacement des lames ou lors
d’une opération au voisinage des lames.
Toute opération de maintenance ou de remplacement de pièce doit être effectuée par une personne
qualifiée.
Français

23
6 ORGANE DE COMMANDE ET DE SECURITE
6.1 Organe de commande
Votre machine étant totalement automatique, la fermeture du capot supérieur actionne la mise en
marche de la machine.
6.2 Zone de travail
La zone de travail se situe devant la machine (fig.3, n°17).
6.3 Organes de sécurité
Cette machine est équipée :
D’un interrupteur de sécurité mécanique
Se trouvant à l’arrière du capot supérieur
Qui arrête la machine lorsqu’on ouvre le capot supérieur (fig.1, n°1).
D’un verrouillage mécanique
Empêchant l’ouverture du capot supérieur pendant le fonctionnement de la machine.
D’un verrouillage mécanique
Empêchant l’ouverture du capot avant pendant le fonctionnement de la machine (fig.7, n°19).
D’un interrupteur de sécurité mécanique
Se trouvant dans le bas de la machine, au-dessus du bac à mies
Qui empêche la machine de démarrer lorsqu’on ouvre la porte avant (fig.1, n°5).
7 UTILISATION
Les roulettes pourvues d'un frein doivent être bloquées pour l'utilisation (fig.1, n°13).
En début de journée, mettre la machine sous tension à l’aide de l’arrêt d’urgence
(fig.1, n°10).
Procédure d’utilisation (fig.4, 5)
A. Ouvrir le capot supérieur (fig.1, n°1).
B. Placer le pain sur la table arrière (fig.1, n°3), entre les lames et la partie mobile et fermer le
couvercle. La fermeture du couvercle active le processus de coupe.
C. En fin de cycle de coupe, le capot avant se déverrouille. L’ouvrir et récupérer le pain coupé.
NB : Certaines machines sont équipées (en option) d’un JAC Stop (système automatique de maintien
des tranches) (fig.6, n°18).
Conseil : Après les premiers jours de travail, faire contrôler la tension des lames par une personne
qualifiée.
Capacité : Nombre de pains coupés par jour : 6000 (en fonction du type de pain).
Dimensions du pain (L x l x h) (cm) : min. 12 x 6 x 6 - max. 44 x 31 x 16
Français

24 24
8 ENTRETIEN
8.1 Journalier par un utilisateur formé
A. Vérifier s’il ne faut pas vider le bac à miettes.
B. Nettoyer les tables (fig.1, n°6, 3) à l’aide d’une brosse.
C. Utiliser un chiffon sec pour le nettoyage intérieur.
D. Pour l’entretien extérieur, utiliser un chiffon humide.
8.2 Toutes les 25 000 coupes et/ou 1 fois par an au minimum, par un agent agréé
A. Retirer la fiche de la prise (fig.2, n°16).
B. Vérifier l’état des lames de coupe (fig.1, n°4).
C. Si une dépréciation de la qualité de la coupe est notée, il faut procéder au remplacement des
lames de coupe (référence JAC : 610001,6110011 du catalogue de Pièces de Rechange JAC).
D. Si elles sont à changer, remplacer les lames conformément à la procédure de changement
des lames de coupe (fig.8, 9).
NB : Ne pas tendre les lames à l’excès, au risque de déformer les cadres.
E. Nettoyer à la brosse et aspirer l’intérieur de la machine.
F. Vérifier l’état des roulements, ensuite graisser ceux-ci.
G. Graisser les articulations du vérin.
Bien vérifier que votre agent agréé enregistre son intervention dans votre carnet d’entretien afin de
conserver votre garantie de 5 ans.
8.3 Changement des lames
(fig.8, 9)
Veiller à toujours porter des gants de protection anti-coupure (Norme EN 388 : 2003 indice B= 5) et
des chaussures de sécurité lors du remplacement de la lame ou lors d’une opération au voisinage
des lames.
Après s’être assuré que la fiche de la machine (fig.2, n°16) est bien déconnectée du secteur :
Ouvrir la porte avant (fig1, n°5).
Retirer la table inox à l’avant de la machine.
A. Retirer la palette d’ensachage.
B. Dévisser des deux côtés le système de maintien des tranches JAC Fix et le retirer.
C. Dévisser la table avant sur les côtés intérieurs de la machine.
D. Faire pivoter la table avant vers soi.
E. Retirer la table avant.
F. Dévisser la coiffe.
G. Ouvrir la coiffe qui protège les cadres support lames.
H. Sur le côté gauche intérieur, faire pivoter le cache-vis de cadre afin de pouvoir rentrer la clé 6
pans creux de 8 mm par l’extérieur de la machine. Desserrer la vis A qui fixe la biellette au
cadre avant.
I. Coucher le cadre vers l’avant. Remplacer les lames du cadre arrière (déposer de quoi se
protéger sur les lames du cadre avant). Desserrer les contre-écrous des vis B (machines
Misch). Desserrer les vis B 6 pans creux qui tendent les lames. Remplacer les lames en
contrôlant qu’elles soient bien placées dans l’ergot des balanciers. Retendre les lames en
serrant les vis B avec, comme repère pour la tension, les lames restées sur le cadre. Serrer
ensuite les écrous (machine équipée de l’option huilage).
Afin de ne pas déformer le cadre et de ne pas risquer de casses dangereuses, ne remplacer
que 1 à 3 lame(s) à la fois en alternant de gauche à droite.
Français
25
5310020
RESSORT Ø9X28MM
TOUTES
7390031
FLAPS BARRE DE RETENUE
TOUTES
7390030
FLAPS JAC STOP
TOUTES
5740162
BIELLETTE DE CADRE AVEC ROULEMENTS
TOUTES
6110001
COUTEAU JAC 13MM/0,5MM
NEW SELF 450
6110011
COUTEAU JAC 13MM/0,5MM + TEFLON
NEW SELF 450M
5690221
PATIN AVANT CAPOT ARRIERE
TOUTES
5690222
PATIN ARRIERE DROIT CAPOT ARRIERE
TOUTES
5690223
PATIN ARRIERE GAUCHE CAPOT ARRIERE
TOUTES
5315014
RESSORT A GAZ 10N
TOUTES
7240031
COURROIE
TOUTES
5690010
PATIN DE GLISSIERE 100MM
TOUTES
5690151
PATIN PRESSE PAIN
TOUTES
5310019
RESSORT PRESSE-PAIN
TOUTES
6120002
FEUTRE POUSSOIR
NEW SELF 450M
Recommencer la procédure du point I pour le cadre avant et remonter le cadre avant ainsi que les
éléments d’habillage.
Connecter la machine au réseau électrique, la machine est prête.
Bien vérifier que votre agent agréé enregistre son intervention dans votre carnet d’entretien afin de
conserver votre garantie de 5 ans.
9 CONSOMMABLES
Lors d’une commande d’une pièce de rechange, vérifier avec votre agent agréé de quelle pièce il
s’agit sur la base du catalogue de pièces de rechange émis par le fabricant.
Toujours préciser le numéro de machine comme indiqué sur la plaque signalétique.
Votre agent effectue les commandes auprès de JAC.
9.1 Liste des CONSOMMABLES
CODE ARTICLE LIBELLE MODELE
Français
26 26
10 INCIDENTS DE FONCTIONNEMENT
Problème
Vérification
Fermer le capot supérieur
Introduire un pain assez ferme
Si les lames sont désalignées, régler les lames et les cadres
Le pain vibre dans les
lames
Le pain se coupe trop
lentement
Si les lames sont désalignées, régler les lames et les cadres
Vérifier s’il ne faut pas remplacer les lames (fig.8, 9)
Le pain sort très lentement
ou reste dans les lames
Le pain est écrasé en sortie
des lames
Brancher la machine à l’aide du câble (fig.2, n°16)
La machine ne tourne pas
Fermer le capot avant
Vérifier s’il ne faut pas remplacer les lames (fig.8, 9)
La machine fonctionne,
mais les pains sont
endommagés ou coupés de
manière irrégulière
Le pain se déchire
Laisser le pain refroidir quelques heures
Introduire un pain aux dimensions acceptées
Si les lames sont désalignées, régler les lames et les cadres
Vérifier s’il ne faut pas remplacer les lames (fig.8, 9)
Vérifier s’il ne faut pas remplacer les lames (fig.8, 9)
Vérifier s’il ne faut pas remplacer les lames (fig.8, 9)
ATTENTION : La machine doit obligatoirement être mise hors tension pour toute intervention.
Si le problème persiste, veuillez contacter votre technicien.
Français

27
11 LISTE DES COMPOSANTS SUR LES FIGURES
Figure
Bulle
Nom
1
Capot supérieur
2
Pousse-pains
3
Table arrière
4
Lames
5
Capot avant
6
Table de réception
7
Pare-chocs
8
Bac à mies
9
Ensachoir
10
Compteur
11
Reset compteur d’huile
12
Voyant niveau d’huile (Misch)
13
Roulettes
14
Tôle arrière
15
Tôle coffret électrique
16
Câble d’alimentation
3
17
Zone de travail
6
18
Système de maintien tranches JAC Stop
7
19
Verrouillage capot avant
20
Signalétique « risque de coupure »
21
Signalétique « risque d’électrocution »
22
Schéma électrique
1
2
10
Français

28

29
Automatische SB-Schneidemaschine New Self
1 VOR DER INBETRIEBNAHME ................................................................................................... 30
2 GARANTIE ................................................................................................................................... 30
3 WARNHINWEISE ........................................................................................................................ 31
4 TECHNISCHE DATEN ................................................................................................................. 32
4.1 Technische Daten ............................................................................................................................. 32
4.2 Materialien der Teile, die in Kontakt mit dem Schnittgut kommen .............................................. 33
5 INSTALLATION UND INBETRIEBNAHME ................................................................................. 33
5.1 Auspacken der Maschine: ............................................................................................................... 33
5.2 Aufstellung: ....................................................................................................................................... 33
5.3 Anschluss an die Stromversorgung: .............................................................................................. 33
5.4 Inbetriebnahme: ................................................................................................................................ 34
5.5 Gefahr: ............................................................................................................................................... 34
6 BEDIENELEMENT UND SICHERHEITSVORRICHTUNG .......................................................... 35
6.1 Bedienelement: ................................................................................................................................. 35
6.2 Arbeitsbereich: ................................................................................................................................. 35
6.3 Sicherheitseinrichtungen: ............................................................................................................... 35
7 BEDIENUNG ................................................................................................................................ 35
8 INSTANDHALTUNG .................................................................................................................... 36
8.1 Täglich durch einen eingewiesenen Bediener: .............................................................................. 36
8.2 Nach 25.000 Schnitten und/oder mindestens ein Mal jährlich durch einen zugelassenen
Vertreter: ....................................................................................................................................................... 36
8.3 Austausch der Messer ..................................................................................................................... 36
9 ERSATZTEILE ............................................................................................................................. 37
9.1 ERSATZTEILLISTE ........................................................................................................................... 37
10 STÖRUNGEN UND FEHLER ................................................................................................... 38
11 LISTE DER ABGEBILDETEN TEILE UND FUNKTIONEN ..................................................... 39
Deutsch
30 30
1 VOR DER INBETRIEBNAHME
Vielen Dank, dass Sie sich für ein Gerät von JAC entschieden haben. Bitte lesen Sie diese
Bedienungsanleitung vor der Installation und Inbetriebnahme dieser Maschine aufmerksam
durch. Dies dient zu Ihrer Sicherheit und zum Schutz der Maschine vor Schäden.
Diese Bedienungsanleitung enthält Verweise auf verschiedene Abbildungen, die das
Verständnis der Anleitungen erleichtern. Die Abbildungen befinden sich am Schluss der
Bedienungsanleitung. Bitte schlagen Sie die jeweilige Abbildung anhand des angegebenen
Verweises (Fig. X, Nr. Y) nach.
Damit Sie sich viele Jahre an dieser Maschine erfreuen können, möchten wir Sie
bitten, die folgenden Hinweise zu berücksichtigen:
- Lassen Sie sich bei der Installation, der Inbetriebnahme und der weiteren Nutzung von
Ihrem zugelassenen Vertreter unterstützen.
- Um die Garantie von fünf Jahren (siehe nachfolgende Garantiebestimmungen) in
Anspruch nehmen zu können, lassen Sie bitte von Ihrem Vertriebshändler bei der Installation
Ihrer Maschine das Wartungsheft ausfüllen. Das Wartungsheft befindet sich an der Rückseite
Ihrer Maschine.
2 GARANTIE
JAC bietet auf alle seine Produkte eine Garantie von fünf Jahren.
Diese Garantie erstreckt sich auf alle Teile Ihrer Maschine, auch auf die elektronischen
Bauteile, außer Verschleißteile. Die Garantiefrist beginnt zum Zeitpunkt der Installation der
Anlage.
Es gelten die folgenden Beschränkungen:
- Das Produkt wurde bei einem zugelassenen Vertragshändler erworben.
- Die Installation wurde von einem zugelassenen Vertreter vorgenommen.
- Das Produkt wurde im Rahmen seines bestimmungsgemäßen Gebrauchs und
entsprechend der Bedienungsanleitung verwendet.
- Das Produkt wurde täglich entsprechend den Vorgaben der Bedienungsanleitung
instandgehalten.
- Die Wartung wird durch einen zugelassenen Vertreter entsprechend den
Wartungsvorgaben durchgeführt und findet mindestens einmal jährlich statt (auf Kosten des
Anwenders).
- Es werden ausschließlich Originalersatzteile von JAC verwendet.
Sofern keine Wartung durch einen zugelassenen Vertreter erfolgt bzw. das
Wartungsheft nicht ordnungsgemäß ausgefüllt ist, ist die Garantie auf ein Jahr
begrenzt.
Diese Garantie deckt nicht:
- den Ersatz von Verschleißteilen (siehe Abschnitt 9);
- Teile, die unser Kundendienst nicht als defekt anerkennt;
Deutsch
Deutsch

31
- Probleme, die sich aus einer ungewöhnlichen Nutzung des Produktes ergeben;
- Probleme, die darauf zurückzuführen sind, dass die Installation nicht durch einen
zugelassenen Vertreter durchgeführt wurde;
- Beschädigungen oder Probleme, die auf einen Transportschaden oder auf die
unsachgemäße Handhabung des Produktes zurückzuführen sind.
Die Durchführung einer Reparatur und/oder der Ersatz defekter Teile während der
Garantiefrist führen nicht zur Verlängerung der Garantiefrist.
3 WARNHINWEISE
Bitte bewahren Sie diese Bedienungsanleitung unbedingt mit Ihrem Gerät zum späteren
Nachlesen auf. Bei Verkauf oder Weitergabe Ihres Gerätes übergeben Sie bitte diese
Bedienungsanleitung an den neuen Besitzer bzw. Benutzer, damit dieser über die
Funktionsweise des Gerätes und die Warnhinweise informiert ist und diese befolgen kann.
Diese Warnhinweise dienen zu Ihrer Sicherheit und der Sicherheit anderer. Bitte
lesen Sie die Warnhinweise vor der Installation und Verwendung Ihres Gerätes
aufmerksam durch.
Diese Maschine ist für die Verwendung durch befugte erwachsene Personen bestimmt.
Stellen Sie sicher, dass die Maschine nicht von Kindern berührt oder als Spielzeug benutzt
wird.
Diese Maschine wird im Self-Service eingesetzt.
Eine Modifizierung bzw. versuchte Modifizierung der Eigenschaften und Merkmale dieser
Maschine ist gefährlich.
Stellen Sie nach der Installation dieser Maschine sicher, dass diese nicht auf dem
Netzkabel steht.
Befolgen Sie stets die Anleitungen zur Bedienung und Verwendung.
Die Maschine ist in einem Innenraum und gegen Feuchtigkeit und Hitze geschützt
aufzustellen.
Die Maschine muss zur Durchführung der Arbeiten ausreichend ausgeleuchtet sein.
Der Geräuschpegel der Maschine liegt unter 75 dB(A) und entspricht damit der
EN ISO 3744.
Die Maschine darf nicht von mehreren Personen gleichzeitig benutzt werden (es sei
denn, die Anleitung gibt etwas Anderes vor).
Die Maschine dient zum Schneiden abgekühlter Brotlaibe.
Diese Maschine darf nicht zum Schneiden der folgenden Brote, Artikel und
Materialien verwendet werden:
- Warmes Brot, altbackenes Brot
- Gefrorenes oder halb aufgetautes Brot
- Vollwertbrot mit harter Kruste und andere Brotsorten mit harter Kruste
Deutsch

32 32
- Roggenbrot
NEW SELF 450
NEW SELF 450M
Höhe (mm)
1267
1267
Breite (mm)
598
598
Tiefe (mm)
892
892
Länge der Schneidkammer
(mm)
Breite der Schneidkammer
(mm)
Höhe der Schneidkammer
(mm)
Verpackungsmaße (mm)
800 x 860 x 1600
800 x 860 x 1600
Nettogewicht (kg)
210
220
Nettogewicht + Verpackung
(kg)
Motorleistung (kW)
0,49
1,1
Motortyp
380 V - 50 Hz (A)
3,2
3,2
Kapazität (Brote/Stunde)
Geräuschpegel (dB)
<75
<75
Verstärkter Motor
Option
JACSTOP
Option
Bedienhinweis
Option
Erhöhung um 4 cm
Option
Tageszähler
Option
Spezialmesser
Option
- Ungenießbare Produkte wie Holz, Kunststoff oder Ähnliches
- Lebensmittel, die nicht zur Gruppe der Backwaren (speziell Brote und Kuchen)
gehören.
Die Verwendung der Maschine zum Schneiden nicht zulässiger Brote, Artikel und
Materialien kann zur Beschädigung der Maschine führen.
Vor Reinigungsarbeiten innen und außen am Gerät und vor Wartungsarbeiten
immer den Netzstecker ziehen.
Dieses Gerät ist sehr schwer. Beim Transport und Bewegen des Gerätes sind
angemessene Vorsichtsmaßnahmen zu ergreifen.
4 TECHNISCHE DATEN
4.1 Technische Daten
310 300
440 440
160 160
Deutsch
230 240
Einphasig oder dreiphasig dreiphasig
220 V - 50 Hz (A) 5 -
200<500 200<500
Sonderfarbe Option

33
4.2 Materialien der Teile, die in Kontakt mit dem Schnittgut kommen
hinterer Tisch: EDELSTAHL 430
Brotschieber: EDELSTAHL 430
Brotpresse: EDELSTAHL 430
Messer: Stahl
Ausgabetisch: EDELSTAHL 430
Brotablage: EDELSTAHL 430
5 INSTALLATION UND INBETRIEBNAHME
5.1 Auspacken der Maschine:
Unsere Maschinen werden zur Lieferung ab Werk auf Paletten verpackt, mit Umreifungsbändern
gesichert und mit einer Kartonverpackung geschützt. Prüfen Sie die Verpackung bei Erhalt auf
Beschädigungen und teilen Sie dem Spediteur etwaige Transportschäden direkt mit.
A. Entfernen Sie die Kartonverpackung und die Folie von der Maschine.
B. Entfernen Sie die Umreifungsbänder und bedenken Sie dabei, dass diese beim
Durchschneiden aufspringen.
C. Lösen Sie die Maschine durch Entfernen der Holzleisten, welche die Räder sichern, von der
Palette.
D. Heben Sie die Maschine von der Palette. Dies muss durch mindestens zwei Personen
erfolgen, so dass die Maschine möglichst sicher auf dem Boden abgesetzt werden kann.
Die Maschine nach dem Auspacken auf Transportschäden überprüfen. Melden Sie
uns bitte alle Fehler und Schäden.
5.2 Aufstellung:
Um eine hohe Leistung, eine lange Lebensdauer und einen zuverlässigen Betrieb sicherzustellen,
sollte der Aufstellort wie folgt beschaffen sein:
Gut belüftet, vor direkter Sonneneinstrahlung geschützt, in ausreichender Entfernung zu
Wärmequellen, mit ebenem, tragfähigen und schwingungsfreien Boden.
5.3 Anschluss an die Stromversorgung:
WICHTIG: Die Erdung der Maschine ist vorgeschrieben.
Wir empfehlen den Schutz der Anlage durch eine Sicherung und einen FISchutzschalter.
Ihr Stromnetz zur Versorgung der Maschine muss folgendermaßen geschützt werden:
- Nordamerika: Schutz 15 A;
- Rest der Welt: Schutz 16 A.
Maschinen mit Stromrichter müssen zwingend über einen FI-Schutzschalter für 300 mA
angeschlossen werden.
Deutsch

34 34
Hinweis: Probleme und Störungen, die sich durch abweichende Ausführung des Anschlusses
ergeben, sind nicht durch die Garantie gedeckt.
Prüfen Sie vor dem Anschließen der Maschine an das Stromnetz unbedingt, ob die Stromversorgung
für die Maschine geeignet ist (siehe Angaben auf dem Typenschild), um einen Motorausfall beim
Einschalten zu vermeiden.
Dieses Gerät entspricht den Maschinenrichtlinien 2006/42, 2006/95, 2004/108 und ist daher mit dem
CE-Zeichen gekennzeichnet.
Bitte beachten Sie die an der Maschine angebrachten Warnsymbole:
Warnsymbol zur Anzeige der Schneidgefahr. Dieses Warnsymbol befindet sich
auf der Vorderseite der Maschine im Bereich der Brotaufnahme. (Fig. 10, Nr. 20)
Den Schaltplan der Maschine finden Sie auf der Rückseite der Schaltkastentür.
(Fig. 10, Nr. 22)
Warnsymbol zur Anzeige der Gefahr eines tödlichen Stromschlags. Die Maschine
vor jedem Eingriff vom Stromnetz nehmen. Das Warnsymbol ist an der Rückseite
der Maschine neben dem Netzanschluss sowie im Inneren der Maschine auf dem
Schaltkasten angebracht. (Fig. 10, Nr. 21)
5.4 Inbetriebnahme:
Vor der Inbetriebnahme sicherstellen, dass sich keine Fremdkörper auf den beweglichen Teilen der
Maschine befinden.
Weitere Informationen zur Verwendung der Maschine erhalten Sie im Abschnitt „Bedienung“.
5.5 Gefahr:
Bei einer Gefahr für den Anwender oder die Maschine ist die Maschine über den Hauptschalter
auszuschalten.
Vor Wartungs- oder Instandsetzungsmaßnahmen den Netzstecker ziehen.
Die Klinge niemals berühren, und zwar auch dann nicht, wenn die Maschine abgeschaltet ist.
Das Messer muss von einem zugelassenen Vertreter ausgetauscht werden.
Tragen Sie beim Austausch der Messer und bei Arbeiten direkt im Bereich des Messers stets
Schutzhandschuhe, um sich gegen Schnittverletzungen zu schützen.
Wartungsmaßnahmen und der Austausch von Ersatzteilen dürfen nur durch eine qualifizierte Person
erfolgen.
Deutsch

35
6 BEDIENELEMENT UND SICHERHEITSVORRICHTUNG
6.1 Bedienelement:
Da es sich um eine vollautomatische Maschine handelt, wird sie durch das Schließen der oberen
Abdeckung eingeschaltet.
6.2 Arbeitsbereich:
Der Arbeitsbereich befindet sich an der Vorderseite der Maschine (Fig. 3, Nr. 17).
6.3 Sicherheitseinrichtungen:
Diese Maschine ist mit folgenden Sicherheitseinrichtungen ausgestattet:
einem mechanischen Sicherheitsschalter,
der sich hinter der oberen Abdeckung befindet
und die Maschine anhält, wenn die obere Abdeckung geöffnet wird (Fig. 1, Nr. 1);
einer mechanischen Verriegelung,
die das Öffnen der oberen Abdeckung während des Maschinenbetriebs verhindert;
einer mechanischen Verriegelung,
die das Öffnen der vorderen Abdeckung während des Maschinenbetriebs verhindert (Fig. 7, Nr. 19);
einem mechanischen Sicherheitsschalter,
an der Maschinenunterseite oberhalb des Krümelbehälters
und der den Betrieb der Maschine bei geöffneter Vordertür verhindert (Fig. 1, Nr. 5).
7 BEDIENUNG
Vor dem Betrieb die mit Bremsen versehenen Räder feststellen (Fig. 1, Nr. 13).
Die Maschine bei Tagesbeginn über den Not-Aus einschalten
(Fig. 1, Nr. 10).
Bedienung (Fig. 4, 5)
A. Die obere Abdeckung (Fig. 1, Nr. 1) öffnen.
B. Das Brot auf dem hinteren Tisch (Fig. 1, Nr. 3) zwischen den Messern und dem beweglichen Teil
ablegen und den Deckel schließen. Durch das Schließen des Deckels wird der Schneidprozess
aktiviert.
C. Am Ende des Schneidzyklus wird die vordere Abdeckung entriegelt. Diese öffnen und das
geschnittene Brot entnehmen.
HINWEIS: Manche Maschinen sind optional mit einem JAC Stop ausgestattet (automatisches
System zum Halten der Scheiben) (Fig. 6, Nr. 18).
Tipp: Nach den ersten Betriebstagen die Spannung der Messer durch eine qualifizierte Person
überprüfen lassen.
Kapazität: Anzahl der geschnittenen Brote pro Tag: 6.000 (je nach Brotsorte).
Deutsch

36 36
Brotgrößen: (L x L x H) (cm): min. 12 x 6 x 6 - max. 44 x 31 x 16
8 INSTANDHALTUNG
8.1 Täglich durch einen eingewiesenen Bediener:
A. Prüfen, ob das Krümelfach geleert werden muss.
B. Die Tische (Fig. 1, Nr. 6, 3) mit einer Bürste reinigen.
C. Den Innenbereich mit einem trockenen Tuch reinigen.
D. Zur Reinigung außen ein feuchtes Tuch verwenden.
8.2 Nach 25.000 Schnitten und/oder mindestens ein Mal jährlich durch einen zugelassenen Vertreter:
A. Den Stecker aus der Steckdose ziehen (Fig. 2, Nr. 16).
B. Den Zustand der Messer überprüfen (Fig. 1, Nr. 4).
C. Soweit die Schneidqualität nachgelassen hat, muss das Messer ausgetauscht werden (JAC
Bestellnummer: 610001,6110011 Ersatzteilkatalog JAC)
D. Das Messer ist entsprechend dem für den Austausch der Messer vorgeschriebenen Verfahren
auszutauschen (Fig. 8, 9).
HINWEIS: Die Messer nicht zu stark spannen - andernfalls können die Rahmen verformen.
E. Mit der Bürste reinigen und den Innenbereich der Maschine absaugen.
F. Den Zustand der Lager überprüfen und diese schmieren.
G. Die Zylindergelenke schmieren.
Hier bitte sicherstellen, dass Ihr zugelassener Vertreter diese Maßnahmen im Wartungsheft festhält,
um Ihren Garantieanspruch von fünf Jahren zu erhalten.
8.3 Austausch der Messer
(Fig. 8, 9)
Beim Austausch der Messer oder bei Arbeiten in der Umgebung der Messer müssen
Schnittschutzhandschuhe (Norm EN 388: 2003, Index B = 5) sowie Sicherheitsschuhe getragen
werden.
Sich zunächst vergewissern, dass der Netzstecker der Maschine (Fig. 2, Nr. 16) gezogen ist.
Die vordere Tür öffnen (Fig. 1, Nr. 5).
Den Edelstahltisch an der Vorderseite der Maschine herausziehen.
A. Das Beutelblech entfernen.
B. Das System zum Halten der Scheiben JAC Fix an beiden Seiten abschrauben und entnehmen.
C. Den vorderen Tisch an den Innenseiten der Maschine abschrauben.
D. Den vorderen Tisch zu sich drehen.
E. Den vorderen Tisch herausziehen.
F. Die Abdeckung abschrauben.
G. Die Abdeckung der Messertragrahmen öffnen.
H. An der linken Innenseite die Schraubenabdeckungen vom Rahmen wegdrehen, um den
Innensechskantschlüssel von 8 mm von außen ansetzen zu können. Die Schraube A
abschrauben, die das Gestänge des vorderen Rahmens hält.
I. Den Rahmen nach vorne umklappen. Die Messer des hinteren Rahmens austauschen (einen
Schutz auf die Messer des vorderen Rahmens legen). Die B-Gegenmuttern lösen (Misch-
Maschinen). Die sechs Innensechskantschrauben B zum Spannen der Messer lösen. Die
Messer austauschen und dabei darauf achten, dass sie ordnungsgemäß auf dem
Führungszapfen der Ausleger sitzen. Die Messer durch Anziehen der B-Schrauben wieder
Deutsch

37
spannen und sich dabei an der Spannung der verbleibenden Messer im Rahmen orientieren.
5310020
FEDER Ø 9 X 28 MM
ALLE
7390031
FLAPS HALTERIEGEL
ALLE
7390030
FLAPS JAC STOP
ALLE
5740162
RAHMENGESTÄNGE MIT LAGERN
ALLE
6110001
JAC-MESSER 13 MM/0,5 MM
NEW SELF 450
6110011
JAC-MESSER 13 MM/0,5 MM + TEFLON
NEW SELF 450M
5690221
VORDERER GLEITSCHUH ABDECKUNG HINTEN
ALLE
5690222
HINTERER GLEITSCHUH RECHTS ABDECKUNG
HINTEN
5690223
HINTERER GLEITSCHUH LINKS ABDECKUNG HINTEN
ALLE
5315014
GASFEDER 10N
ALLE
7240031
RIEMEN
ALLE
5690010
GLEITSCHUH 100 MM
ALLE
5690151
GLEITSCHUH BROTPRESSE
ALLE
5310019
FEDER BROTPRESSE
ALLE
6120002
FILZ SCHIEBER
NEW SELF 450M
Anschließend die Muttern anziehen (Maschinen mit Schmiersystem).
Um den Rahmen nicht zu verformen und um zu verhindern, dass es zu gefährlichen Schäden
kommt, nur ein bis drei Messer auf ein Mal und abwechselnd von links nach rechts
austauschen.
Für den vorderen Rahmen das Verfahren ab Punkt I wiederholen und den vorderen Rahmen und die
Verkleidungselemente wieder einsetzen.
Die Maschine mit dem Stromnetz verbinden. Die Maschine ist betriebsbereit.
Hier bitte sicherstellen, dass Ihr zugelassener Vertreter diese Maßnahmen im Wartungsheft festhält,
um Ihren Garantieanspruch von fünf Jahren zu erhalten.
9 ERSATZTEILE
Um Ersatzteile für Ihre Maschine zu bestellen, lassen Sie von Ihrem Vertreter anhand des
Ersatzteilkatalogs des Herstellers prüfen, um welche Teile es sich genau handelt.
Dazu immer die Maschinennummer übermitteln, die auf dem Typenschild steht.
Ihr Vertreter bestellt das Ersatzteil dann bei JAC.
9.1 ERSATZTEILLISTE
ARTIKELCODE BEZEICHNUNG MODELL
ALLE
Deutsch

38 38
10 STÖRUNGEN UND FEHLER
Problem
Fehlersuche
Die obere Abdeckung schließen.
Schneiden Sie nur ausreichend feste Brote.
Wenn die Messer nicht ausgerichtet sind, die Messer und Rahmen
einstellen.
Das Brot vibriert zwischen
den Messern.
Wenn die Messer nicht ausgerichtet sind, die Messer und Rahmen
einstellen.
Das Brot wird zu langsam
geschnitten.
Wenn die Messer nicht ausgerichtet sind, die Messer und Rahmen
einstellen.
Möglicherweise müssen die Messer ausgetauscht werden (Fig. 8, 9)
Das Brot wird nur sehr
Messer stecken.
Das Brot wird am Ende der
zusammengedrückt.
Die Maschine funktioniert
nicht.
Die Maschine funktioniert,
das Brot wird jedoch
zerdrückt oder
ungleichmäßig geschnitten.
Das Brot wird zerrissen.
langsam ausgegeben oder
bleibt im Bereich der
Messer
Die Maschine über das Kabel anschließen (Fig. 2, Nr. 16).
Die vordere Abdeckung schließen.
Möglicherweise müssen die Messer ausgetauscht werden (Fig. 8, 9)
Lassen Sie das Brot einige Stunden lang abkühlen.
Schneiden Sie nur Brote passender Größe.
Möglicherweise müssen die Messer ausgetauscht werden (Fig. 8, 9)
Möglicherweise müssen die Messer ausgetauscht werden (Fig. 8, 9)
Möglicherweise müssen die Messer ausgetauscht werden (Fig. 8, 9)
VORSICHT: Vor allen Eingriffen an der Maschine ist die Maschine zwingend von der
Stromversorgung zu trennen.
Bei Anhalten des Problems wenden Sie sich bitte an Ihren Servicetechniker.
Deutsch

39
11 LISTE DER ABGEBILDETEN TEILE UND FUNKTIONEN
Abbildung
Nummer
Bezeichnung
1
Obere Abdeckung
2
Brotschieber
3
hinterer Tisch
4
Messer
5
vordere Abdeckung
6
Ausgabetisch
7
Stoßdämpfer
8
Krümelfach
9
Brotablage
10
Zähler
11
Reset Ölzähler
12
Ölstandsanzeige (Misch)
13
Rolle
14
Blech hinten
15
Schließblech Schaltkasten
16
Netzkabel
3
17
Arbeitsbereich
6
18
System zum Halten der Scheiben JAC Stop
7
19
Verriegelung vordere Abdeckung
20
Hinweis „Schneidgefahr“
21
Hinweis „Gefahr eines Stromschlags“
22
Schaltplan
1
2
10
Deutsch

40

41
Automatische snijmachine met kaders voor zelfbediening New Self
1 VÓÓR DE INBEDRIJFSTELLING ............................................................................................... 42
2 GARANTIE ................................................................................................................................... 42
3 WAARSCHUWINGEN ................................................................................................................. 43
4 TECHNISCHE EIGENSCHAPPEN .............................................................................................. 44
4.1 Technische eigenschappen ............................................................................................................. 44
4.2 Materiaal dat rechtstreeks in contact komt met het deeg . ........................................................... 44
5 INSTALLATIE EN INBEDRIJFSTELLING .................................................................................. 45
5.1 De machine uit de verpakking halen: ............................................................................................. 45
5.2 Plaatsing: ........................................................................................................................................... 45
5.3 Elektrische aansluiting: ................................................................................................................... 45
5.4 Inbedrijfstelling: ................................................................................................................................ 46
5.5 Gevaar: .............................................................................................................................................. 46
6 BEDIENINGS- EN VEILIGHEIDSPANEEL ................................................................................. 47
6.1 Bedieningspaneel: ............................................................................................................................ 47
6.2 Werkzone: .......................................................................................................................................... 47
6.3 Veiligheidsvoorzieningen: ............................................................................................................... 47
7 GEBRUIK ..................................................................................................................................... 47
8 ONDERHOUD .............................................................................................................................. 48
8.1 Dagelijks door een opgeleide gebruiker. ........................................................................................ 48
8.2 Om de 25.000 snij-acties en/of minimaal één keer per jaar door een erkende verdeler. ........... 48
8.3 Vervanging van de bladen. .............................................................................................................. 48
9 VERBRUIKSGOEDEREN ............................................................................................................ 49
9.1 Lijst met VERBRUIKSGOEDEREN .................................................................................................. 49
10 STORINGEN ............................................................................................................................ 50
11 LIJST MET ONDERDELEN OP DE AFBEELDINGEN ............................................................ 51
Nederlands

42 42
Nederlands
1 VÓÓR DE INBEDRIJFSTELLING
2 GARANTIE
Bedankt dat u hebt gekozen voor een JAC-oplossing. Neem deze gebruikershandleiding
grondig door voordat u deze machine installeert en in werking stelt. Zo kunt u uzelf
beschermen en schade aan uw machine vermijden.
Deze handleiding verwijst naar diverse afbeeldingen zodat u de instructies beter kunt
begrijpen. Deze afbeeldingen bevinden zich op het einde van de handleiding. Raadpleeg ze
wanneer u de volgende symbolen tegenkomt (fig.X, n°Y).
Om nog jarenlang van uw machine te kunnen genieten, raden we u aan om de
volgende adviezen na te leven:
- Doe een beroep op uw erkende verdeler voor de installatie, inbedrijfstelling en opvolging.
- Om te kunnen genieten van de garantie van vijf jaar (zie verder voor de voorwaarden),
moet u bij de installatie van uw machine het onderhoudsboekje laten invullen door uw
verdeler. Dit onderhoudsboekje bevindt zich aan de achterkant van uw machine.
JAC biedt een garantie van vijf jaar op al zijn producten.
Deze garantie is geldig voor alle onderdelen van uw machine, waaronder de elektronische
onderdelen, maar uitgezonderd de verbruiksgoederen. De garantie treedt in werking op de
installatiedatum van het materiaal.
Onder de volgende beperkende voorwaarden:
- Het materiaal moet bij een erkende verdeler zijn aangekocht.
- De installatie moet door een erkende verdeler zijn uitgevoerd.
- Het materiaal moet worden gebruikt in overeenstemming met de aanwijzingen in de
gebruikershandleiding en voor het doel waarvoor het werd geproduceerd.
- Het materiaal moet dagelijks worden onderhouden in overeenstemming met de
aanwijzingen in de gebruikershandleiding.
- Ten minste één keer per jaar moet onderhoud worden uitgevoerd door de erkende
verdeler en dit in overeenstemming met de onderhoudsspecificaties (onderhoud ten laste van
de gebruiker).
- Alleen originele JAC-onderdelen mogen worden gebruikt.
Als er geen onderhoud wordt uitgevoerd door een erkende verdeler en/of het
onderhoudsboekje niet correct wordt ingevuld, is de garantie beperkt tot één jaar.
Het volgende valt niet onder deze garantie:
- De vervanging van verbruiksgoederen (§9).
- Defecte stukken die door onze diensten niet worden erkend.
- Problemen ten gevolge van een abnormaal gebruik van het materiaal.
- Problemen doordat de installatie niet door een erkende verdeler is uitgevoerd.
- De onderdelen of problemen die het gevolg zijn van transportschade of een ongepaste
behandeling.
Nederlands

43
Een reparatie en/of een vervanging van defecte onderdelen tijdens de
garantieperiode verlengt deze garantie niet.
3 WAARSCHUWINGEN
Het is heel belangrijk dat deze gebruikershandleiding bij het apparaat wordt bewaard
zodat ze later kan worden geraadpleegd. Als dit apparaat wordt verkocht of aan een andere
persoon wordt overgedragen, zorg er dan voor dat de gebruikershandleiding wordt
overhandigd zodat de gebruiker op de hoogte is van de werking ervan en van de daarin
vermelde waarschuwingen.
Deze waarschuwingen worden gegeven voor uw veiligheid en die van anderen. We
vragen u dan ook ze aandachtig te lezen voordat u het apparaat installeert en gebruikt.
Deze machine werd ontworpen om door bevoegde volwassenen te worden gebruikt.
Zorg er dus voor dat kinderen de machine niet aanraken en niet als speelgoed beschouwen.
Deze machine is voorbehouden voor zelfbediening.
Het is gevaarlijk om de eigenschappen van deze machine te wijzigen of te proberen
wijzigen.
Zorg er na de installatie van deze machine voor dat ze niet op het netsnoer staat.
Volg de meegeleverde gebruiksinstructies.
Deze machine moet worden bewaard en gebruikt in een ruimte die niet vochtig of warm
wordt.
Deze machine moet voldoende verlicht zijn om het werk uit te voeren.
Deze machine heeft een geluidsniveau van minder dan 75 dB(A) conform de norm EN
ISO 3744.
Deze machine mag slechts door één persoon tegelijkertijd worden gebruikt (behoudens
tegengestelde instructie).
Deze machine is bedoeld voor het snijden van gebakken en lauw brood.
Deze machine is niet bedoeld voor het volgende brood en materiaal:
- Warm brood, oud brood
- Bevroren of half ontdooid brood
- Volkorenbrood met harde korst en andere soorten brood met een harde korst
- Roggebrood
- Niet-eetbare producten zoals hout, plastic en soortgelijk materiaal
- Elk voedingsmiddel dat niet hoort tot de categorie brood of cake
De machine kan beschadigd raken als niet toegestaan brood of materiaal wordt
gesneden.
Nederlands

44 44
Haal altijd de stekker uit het stopcontact vooraleer u de buiten- of binnenkant van
NEW SELF 450
NEW SELF 450M
Hoogte (mm)
1267
1267
Breedte (mm)
598
598
Diepte (mm)
892
892
Lengte van het
toevoerkanaal (mm)
Breedte van het
toevoerkanaal (mm)
Hoogte van het
toevoerkanaal (mm)
Verpakking (mm)
800 x 860 x 1600
800 x 860 x 1600
Nettogewicht (kg)
Nettogewicht + verpakking
(kg)
Motorvermogen (kW)
0,49
1,1
Motortype
Eenfasig of driefasig
Driefasig
220 V - 50 Hz (A)
5
-
380 V - 50 Hz (A)
Capaciteit (broden/uur)
200<500
200<500
Geluidsniveau (dB)
<75
<75
Versterkte motor
JACSTOP
optie
Gebruikershandleiding
optie
Verhoging van 4 cm
optie
Dagteller
Speciale messen
optie
het apparaat schoonmaakt of onderhoud uitvoert.
Dit apparaat is zwaar. Neem alle veiligheidsmaatregelen tijdens het onderhoud.
4 TECHNISCHE EIGENSCHAPPEN
4.1 Technische eigenschappen
310 300
440 440
160 160
210 220
230 240
3,2 3,2
4.2 Materiaal dat rechtstreeks in contact komt met het deeg .
Plank achteraan: INOX 430
Broodduwer: INOX 430
Broodpers: INOX 430
Bladen: Staal
Opvangplank: INOX 430
Broodplank: INOX 430
Nederlands
optie
optie
Speciale kleur optie

45
5 INSTALLATIE EN INBEDRIJFSTELLING
5.1 De machine uit de verpakking halen:
De machines worden uit onze ateliers op pallets, verankerd en met karton beschermd geleverd. U
moet eerst en vooral de verpakking bekijken en elke transportschade onmiddellijk aan de koerier
melden.
A. Verwijder het karton en de verpakkingszak van de machine.
B. Verwijder de riemen en let daarbij met name op de terugslag wanneer ze worden
doorgesneden.
C. Maak de machine los van de pallet door de houten latten te verwijderen die de wieltjes
blokkeren.
D. Haal de machine van de pallet. Doe dit met minstens twee personen zodat de machine niet
met een harde schok op de grond terechtkomt.
Na het uitpakken van uw machine moet u nakijken of ze tijdens het transport geen
schade heeft opgelopen. Meld ons elke afwijking.
5.2 Plaatsing:
Voor uitstekende prestaties en betrouwbaarheid op lange termijn moet u een plaats kiezen die:
Goed verlucht is, niet blootgesteld is aan direct zonlicht en uit de buurt is van warmtebronnen,
met een vlak, stevig en trillingsvrij oppervlak.
5.3 Elektrische aansluiting:
BELANGRIJK: Verplichte aarding.
Er wordt aangeraden om de installatie te beveiligen met een zekering en
differentieelschakelaar.
Uw elektriciteitsinstallatie die stroom levert aan de machine moet als volgt worden beveiligd:
- Noord-Amerika: Beveiliging 15 A
- Rest van de wereld: Beveiliging 16 A
Machines die uitgerust zijn met een regelaar moeten worden aangesloten op een aftakdoos op een
lijn die uitgerust is met een differentieelschakelaar van 300 mA.
Opmerking: Elk probleem dat te wijten is aan een andere soort aansluiting wordt niet gedekt door de
garantie.
Voordat u uw machine op het net aansluit en om een storing van de motor bij het onder spanning
zetten te vermijden, is het belangrijk dat u controleert of het elektriciteitsnet overeenstemt met de
eigenschappen van de machine (zie het identificatieplaatje).
Dit apparaat is conform de machinerichtlijnen 2006/42, 2006/95, 2004/108 en draagt de CEmarkering die hiervan getuigt.
Nederlands

46 46
Houd rekening met de veiligheidspictogrammen op de machine:
Pictogram dat wijst op een mogelijke stroomonderbreking. Dat vindt u aan de
voorkant van de machine in de zone waar het brood wordt geplaatst (fig.10, n°20).
U vindt het elektrische schema van de machine op de achterkant van de deur van
de schakelkast (fig.10, n°22).
Pictogram dat wijst op gevaar voor elektrocutie. Trek de machine vóór elke
interventie uit. Deze is terug te vinden aan de achterkant van de machine in de
buurt van het netsnoer en binnenin de machine op de schakelkast (fig.10, n°21).
5.4 Inbedrijfstelling:
Zorg er vóór de inbedrijfstelling voor dat er zich geen enkel storend voorwerp bevindt op de
bewegende onderdelen van de machine.
Raadpleeg het hoofdstuk "Gebruik" voor informatie over het gebruik van de machine.
5.5 Gevaar:
Als er gevaar is voor de gebruiker of voor de machine, moet u de hoofdschakelaar gebruiken om de
stroomtoevoer naar de machine te onderbreken.
Haal de stekker uit het stopcontact voordat u onderhoud uitvoert.
Raak het blad niet aan, ook niet als het stilstaat.
Het blad mag alleen worden vervangen door uw erkende verdeler.
Draag altijd snijbestendige veiligheidshandschoenen tijdens de vervanging van de bladen of tijdens
een handeling in de buurt van de bladen.
Elk onderhoud of vervanging van een onderdeel moet door een bevoegde persoon worden
uitgevoerd.
Nederlands

47
6 BEDIENINGS- EN VEILIGHEIDSPANEEL
6.1 Bedieningspaneel:
Als uw machine volautomatisch is, start de machine wanneer de bovenste klep wordt gesloten.
6.2 Werkzone:
De werkzone bevindt zich voor de machine (fig.3, n°17).
6.3 Veiligheidsvoorzieningen:
Deze machine is uitgerust met:
Een mechanische veiligheidsschakelaar
Die bevindt zich aan de achterkant van de bovenste klep.
Deze stopt de machine wanneer de bovenste klep wordt geopend (fig.1, n°1).
Een mechanische vergrendeling
Deze verhindert dat de bovenste klep opent wanneer de machine werkt.
Een mechanische vergrendeling
Deze verhindert dat de klep vooraan opent wanneer de machine werkt (fig.7, n°19).
Een mechanische veiligheidsschakelaar
Deze bevindt in de onderkant van de machine boven de kruimelbak
Deze verhindert dat de machine start wanneer de deur vooraan wordt geopend (fig.1, n°5).
7 GEBRUIK
Voor het gebruik moeten de met een rem uitgeruste zwenkwielen worden vastgezet (fig.1, n°13).
Zet de machine in het begin van de dag onder spanning met de noodstop
(fig.1, n°10).
Gebruiksprocedure (fig.4,5)
A. Open de bovenste klep (fig.1, n°1).
B. Plaats uw brood op de plank achteraan (fig.1, n°3), tussen de bladen en het mobiele deel en sluit
het deksel. Door het sluiten van het deksel begint de snijprocedure.
C. Op het einde van de cyclus wordt de klep vooraan ontgrendeld. Open de klep en neem uw
gesneden brood.
NB: Bepaalde machines zijn uitgerust (als optie) met een JAC-stop (automatisch fixeersysteem) (fig.6,
n°18).
Advies: Laat na de eerste werkdagen de spanning van de bladen nakijken door een bekwaam
persoon.
Capaciteit: Aantal gesneden broden per dag: 6000 (afhankelijk van het broodtype).
Afmetingen van het brood (b x l x h) (cm): min. 12 x 6 x 6 - max. 44 x 31 x 16
Nederlands

48 48
8 ONDERHOUD
8.1 Dagelijks door een opgeleide gebruiker.
A. Controleer of u de kruimelbak niet moet leegmaken.
B. Maak de planken schoon (fig.1, n°6, 3) met een borstel.
C. Gebruik een droge doek om de binnenkant schoon te maken.
D. Gebruik een vochtige doek om de buitenkant schoon te maken.
8.2 Om de 25.000 snij-acties en/of minimaal één keer per jaar door een erkende verdeler.
E. Haal de stekker uit het stopcontact (fig.2, n°16).
F. Controleer de staat van de snijbladen (fig.1, n°4).
G. Als de snijkwaliteit daalt, vervang dan de snijbladen (JAC-referentie: 610001, 6110011 in de
reserveonderdelencatalogus van JAC)
H. Als ze moeten worden vervangen, vervang de bladen dan conform de vervangingsprocedure
voor snijbladen (fig.8, 9).
NB: Span de bladen niet overmatig, dit kan de kaders vervormen.
I. Maak schoon met een borstel en stofzuig de binnenkant van de machine.
J. Controleer de staat van de lagers en smeer ze in.
K. Smeer de vijzelgewrichten in.
Controleer goed of uw erkende verdeler zijn interventie in uw onderhoudsboekje heeft genoteerd
zodat u uw garantie van vijf jaar behoudt.
8.3 Vervanging van de bladen.
(fig.8.9)
Draag altijd snijbestendige veiligheidshandschoenen (norm EN 388: 2003 index B= 5) en
veiligheidsschoenen tijdens de vervanging van het blad of tijdens een handeling in de buurt van het
blad.
Nadat u er zeker van bent dat de stekker van uw machine (fig.2, n°16) uit het stopcontact is gehaald.
Open de deur vooraan (fig.1, n°5).
Neem de tafel in roestvrij staal aan de voorkant van de machine weg.
A. Neem de verpakkingsplank weg.
B. Schroef aan beide kanten het JAC Fix-systeem los dat de boterhammen op hun plaats houdt
en verwijder het.
C. Schroef de plank vooraan los aan de binnenkanten van de machine.
D. Draai de plank vooraan naar u toe.
E. Neem de plank vooraan weg.
F. Schroef de kap los.
G. Open de kap die de kaders van de bladen beschermt.
H. Laat aan de linkerbinnenkant de schroefdeksel van het kader draaien zodat u de sleutel met
binnenzeskant van 8 mm via de buitenkant van de machine kunt inbrengen. Draai schroef A
los die de verbindingsstang van het kader vooraan op zijn plaats houdt.
I. Haal het kader naar voren. Vervang de bladen van het kader achteraan (plaats iets om u te
beschermen tegen de bladen van het kader vooraan). Draai de contramoeren van de
schroeven B los (Misch-machines). Draai schroeven B met holle binnenzeskant los die de
bladen spannen. Vervang de bladen en ga daarbij na of ze goed worden geplaatst in de stift
van de persen. Span de bladen opnieuw aan door de schroeven B vast te draaien, waarbij de
bladen op het kader blijven als merkteken voor de spanning. Draai vervolgens de moeren vast
(machine uitgerust met smeringoptie).
Nederlands

49
Om het kader niet te vervormen en geen risico op gevaarlijke breuken te lopen, mag u slechts
5310020
VEER Ø9X28 MM
ALLE
7390031
FLAPS VEILIGHEIDSSTANG
ALLE
7390030
FLAPS JAC-STOP
ALLE
5740162
VERBINDINGSSTANG VAN KADER MET
WIELTJES
6110001
JAC-MES 13 MM/0,5 MM
NEW SELF 450
6110011
JAC-MES 13 MM/0,5 MM + TEFLON
NEW SELF 450M
5690221
GLIJDER VOORAAN KLEP ACHTERAAN
ALLE
5690222
GLIJDER ACHTERAAN RECHTS KLEP
ACHTERAAN
5690223
GLIJDER ACHTERAAN LINKS KLEP ACHTERAAN
ALLE
5315014
GASVEER 10 N
ALLE
7240031
RIEM
ALLE
5690010
SCHUIFGLIJDERS 100 MM
ALLE
5690151
GLIJDER BROODPERS
ALLE
5310019
VEER BROODPERS
ALLE
6120002
VILTDUWER
NEW SELF 450M
1 tot 3 bladen tegelijkertijd vervangen en moet u links en rechts afwisselen.
Herbegin de procedure vanaf punt I. voor het kader vooraan en plaats het kader vooraan evenals de
afwerkingselementen terug op hun plaats.
Sluit de machine aan op het net. De machine is klaar.
Controleer goed of uw erkende verdeler zijn interventie in uw onderhoudsboekje heeft genoteerd
zodat u uw garantie van vijf jaar behoudt.
9 VERBRUIKSGOEDEREN
Ga bij de bestelling van een reserveonderdeel met uw verdeler na om welk stuk het gaat op basis
van de reserveonderdelencatalogus van de fabrikant.
Geef altijd het machinenummer op zoals vermeld op het identificatieplaatje.
Uw verdeler voert de bestellingen uit bij JAC.
9.1 Lijst met VERBRUIKSGOEDEREN
ARTIKELCODE OMSCHRIJVING MODEL
ALLE
ALLE
Nederlands

50 50
10 STORINGEN
Probleem
Controle
Sluit de bovenste klep.
Plaats een redelijk stevig brood.
Als de bladen niet goed zijn uitgelijnd, stel dan de bladen en kaders af.
Het brood trilt in de bladen
Als de bladen niet goed zijn uitgelijnd, stel dan de bladen en kaders af.
Het brood wordt te traag
gesneden
Het brood wordt
Als de bladen niet goed zijn uitgelijnd, stel dan de bladen en kaders af.
Controleer of de bladen niet moeten worden vervangen (fig.8,9).
Het brood komt traag naar
buiten of blijft in de bladen
Het brood wordt bij het
verpletterd
aan op het stopcontact aan (fig.2, n°16).
De machine werkt niet
De machine werkt maar het
brood wordt beschadigd of
onregelmatig gesneden
stukgescheurd
verlaten van de bladen
Sluit de machine met een kabel
Sluit de klep vooraan.
Controleer of de bladen niet moeten worden vervangen (fig.8,9).
Laat het brood enkele uren afkoelen.
Plaats brood met toegelaten afmetingen.
Controleer of de bladen niet moeten worden vervangen (fig.8,9).
Controleer of de bladen niet moeten worden vervangen (fig.8,9).
Controleer of de bladen niet moeten worden vervangen (fig.8,9).
OPGELET: Bij elke tussenkomst moet de machine uit het stopcontact worden uitgetrokken
Als het probleem zich blijft voordoen, neem dan contact op met uw technicus.
Nederlands

51
11 LIJST MET ONDERDELEN OP DE AFBEELDINGEN
Afbeelding
Nummer
Naam
1
Klep bovenaan
2
Broodduwer
3
Plank achteraan
4
Bladen
5
Klep vooraan
6
Opvangplank
7
Bumper
8
Kruimelbak
9
Broodplank
10
Teller
11
Reset van olieteller
12
Controlelampje oliepeil (Misch)
13
Wieltje
14
Plaat achteraan
15
Plaat van de schakelkast
16
Netsnoer
3
17
Werkzone
6
18
JAC Stop-systeem om sneden op hun plaats te houden
7
19
Vergrendeling klep vooraan
20
Plaatje "gevaar voor stroomonderbreking"
21
Plaatje "gevaar voor elektrocutie"
22
Elektrisch schema
1
2
10
Nederlands

52

53
Автоматическая рамочная хлеборезка с самообслуживанием New Self
1 ПЕРЕД ВВОДОМ В ЭКСПЛУАТАЦИЮ .................................................................................... 54
2 ГАРАНТИЯ .................................................................................................................................. 54
3 ПРЕДУПРЕЖДЕНИЯ .................................................................................................................. 55
4 ТЕХНИЧЕСКИЕ ХАРАКТЕРИСТИКИ ....................................................................................... 56
4.1 Технические характеристики ........................................................................................................ 56
4.2 Подробности о материалах, находящихся в непосредственном контакте с тестом. ........ 57
5 УСТАНОВКА И ВВОД В ЭКСПЛУАТАЦИЮ ............................................................................ 57
5.1 Распаковка машины ....................................................................................................................... 57
5.2 Место установки ............................................................................................................................. 57
5.3 Электрическое подключение ........................................................................................................ 57
5.4 Ввод в эксплуатацию ..................................................................................................................... 58
5.5 Опасность ........................................................................................................................................ 58
6 ОРГАНЫ УПРАВЛЕНИЯ И ПРЕДОХРАНИТЕЛЬНЫЕ УСТРОЙСТВА ................................. 59
6.1 Органы управления ........................................................................................................................ 59
6.2 Рабочая зона .................................................................................................................................... 59
6.3 Предохранительные устройства ................................................................................................. 59
7 ЭКСПЛУАТАЦИЯ ....................................................................................................................... 59
8 ТЕХНИЧЕСКОЕ ОБСЛУЖИВАНИЕ .......................................................................................... 60
8.1 Ежедневное, выполняется пользователем, прошедшим подготовку. ................................. 60
8.2 Через каждые 25 000 нарезок и (или) не реже 1 раза в год; выполняется
аккредитованным специалистом. ........................................................................................................... 60
8.3 Замена лезвий ................................................................................................................................. 60
9 РАСХОДНЫЕ МАТЕРИАЛЫ ..................................................................................................... 61
9.1 Список РАСХОДНЫХ МАТЕРИАЛОВ ........................................................................................... 61
10 НЕПОЛАДКИ В РАБОТЕ ....................................................................................................... 62
Русский

54 54
1 ПЕРЕД ВВОДОМ В ЭКСПЛУАТАЦИЮ
Благодарим за то, что выбрали компанию JAC. Перед установкой машины и ее
вводом в эксплуатацию обязательно прочтите настоящее руководство. Таким образом
вы сможете защитить себя и избежать повреждений машины.
В настоящем руководстве содержатся ссылки на различные изображения,
облегчающие понимание инструкций. Эти изображения находятся в конце руководства.
Обращайтесь к ним, когда встретите в тексте следующие обозначения следующего
вида: (fig.X, n°Y).
Для обеспечения бесперебойной работы машины в будущем предлагаем
ознакомиться с представленными ниже правилами.
— Для установки машины, ее ввода в эксплуатацию и контроля работы обращайтесь
к аккредитованному специалисту.
— Для сохранения 5-летней гарантии на машину (см. необходимые условия далее)
дистрибьютор должен заполнить журнал технического обслуживания при установке
машины. Журнал технического обслуживания находится с тыльной части машины.
2 ГАРАНТИЯ
Компания JAC предоставляет 5-летнюю гарантию на всю свою продукцию.
Гарантия распространяется на все детали машины, в том числе электронные, кроме
расходных материалов. Гарантия вступает в силу с даты установки оборудования.
Гарантия действует при соблюдении следующих ограничительных условий:
- приобретение оборудования у аккредитованного дистрибьютора;
— выполнение установки аккредитованным специалистом;
— использование оборудования в соответствии с указаниями в руководстве по
эксплуатации и по назначению, предусмотренному при производстве;
— ежедневное обслуживание оборудования в соответствии с указаниями в
руководстве по эксплуатации;
— выполнение технического обслуживания аккредитованным специалистом в
соответствии с требованиями по техническому обслуживанию не реже одного раза в
год (производится за счет пользователя);
— использование исключительно оригинальных деталей производства компании
JAC.
При отсутствии контроля технического обслуживания со стороны
аккредитованного специалиста и (или) в случае неправильного ведения журнала
технического обслуживания действие гарантии ограничивается одним годом.
Гарантия не распространяется:
- на замену расходных материалов (§9);
— на детали, признанные неисправными не нашей компанией;
— на проблемы, возникшие вследствие неправильной эксплуатации оборудования;
Русский
Русский

55
— на проблемы, возникшие вследствие установки машины не аккредитованным
специалистом;
— на детали или проблемы, связанные с нанесением ущерба во время
транспортировки или ненадлежащим обращением при погрузочно-разгрузочных
работах.
Ремонт и (или) замена неисправных деталей, выполненные в течение
гарантийного периода, не могут послужить причиной продления данной гарантии.
3 ПРЕДУПРЕЖДЕНИЯ
Настоящее руководство следует сохранить для получения справочной информации
при дальнейшей эксплуатации машины. В случае продажи или передачи машины
другому лицу следует удостовериться, что руководство по эксплуатации передается
вместе с ней, чтобы пользователь мог получить информацию о ее работе и связанных
с ней предупреждениях.
Предупреждения изложены для обеспечения вашей безопасности и
безопасности других лиц. Просим вас внимательно прочесть эти
предупреждения перед установкой и эксплуатацией машины.
Машина разработана для использования совершеннолетними лицами с
соответствующим разрешением. Поэтому нужно следить за тем, чтобы дети не
прикасались к машине и не использовали ее в качестве игрушки.
Данная машина предусмотрена для эксплуатации в режиме самообслуживания.
Опасно вносить изменения в характеристики машины или предпринимать
соответствующие попытки.
После установки машины убедитесь в том, что она не стоит на кабеле
электроснабжения.
Соблюдайте данные инструкции по эксплуатации.
Машина должна храниться и использоваться в помещении, защищенном от
сырости и жары.
Машина должна быть обеспечена достаточным освещением для выполнения
работы.
Уровень шума машины ниже 75 дБ(A) согласно стандарту EN ISO 3744.
Машина не должна использоваться несколькими операторами параллельно (если
не предписано иное).
Данная машина предназначена для нарезки печеного и выдержанного хлеба.
Данная машина не предназначена для следующих материалов и видов хлеба:
- Горячий хлеб, черствый хлеб.
- Замороженный или частично размороженный хлеб.
- Цельнозерновой хлеб с твердой коркой и другие виды хлеба с твердой коркой.
Русский

56 56
- Ржаной хлеб.
NEW SELF 450
NEW SELF 450M
Высота (мм)
1267
1267
Ширина (мм)
598
598
Глубина (мм)
892
892
Длина входного канала
(мм)
Ширина входного канала
(мм)
Высота входного канала
(мм)
Упаковка (мм)
800 x 860 x 1600
800 x 860 x 1600
Масса нетто (кг)
210
220
Масса нетто +
упаковка (кг)
Мощность мотора (кВт)
0,49
1,1
Однофазный или
трехфазный
220 В, 50 Гц (A)
5
-
380 В, 50 Гц (A)
Производительность
(буханок/час)
Уровень шума (дБ)
< 75
< 75
Усиленный мотор
опция
JACSTOP
опция
Инструкция с пояснениями
опция
Подъем на 4 см
опция
Счетчик ежедневной наработки
опция
Специальный цвет
Специальные ножи
опция
- Несъедобные изделия из древесины, пластмассы и аналогичных материалов.
- Любые продукты питания, не входящие в категорию хлебных или кексовых
изделий.
Нарезка перечисленных видов хлеба или материалов может привести к
повреждению машины.
Всегда отключайте машину от сети электропитания перед выполнением
чистки внутренних/внешних поверхностей и операций по техническому
обслуживанию.
Машина тяжелая. Принимайте все необходимые меры предосторожности при
транспортировке и погрузочно-разгрузочных работах.
4 ТЕХНИЧЕСКИЕ ХАРАКТЕРИСТИКИ
4.1 Технические характеристики
310 300
440 440
160 160
Русский
Тип мотора
230 240
Трехфазный
3,2 3,2
200 < 500 200 < 500
опция

57
4.2 Подробности о материалах, находящихся в непосредственном контакте с тестом.
Задняя полка: НЕРЖ. 430
Толкатель буханок: НЕРЖ. 430
Пресс для буханок: НЕРЖ. 430
Лезвия: сталь
Полка приемки: НЕРЖ. 430
Устройство для упаковки в пакеты: НЕРЖ. 430
5 УСТАНОВКА И ВВОД В ЭКСПЛУАТАЦИЮ
5.1 Распаковка машины
Машины из наших цехов поставляются на поддонах, закрепленные ремнями и в защитной
картонной коробке. Прежде всего следует осмотреть упаковку на предмет наличия
повреждений, полученных во время транспортировки, и сообщить о них непосредственно
экспедитору.
A. Удалите картонную коробку и упаковочный пакет машины.
B. Снимите ремни, обратив особое внимание на их ослабление при разрезании.
C. Открепите машину от поддона, сняв деревянные рейки, фиксирующие колесики.
D. Снимите машину с поддона. В этой операции должны участвовать не менее двух
человек для обеспечения максимально плавного соприкосновения машины с полом.
После распаковки машины убедитесь, что она не подвергалась повреждениям
во время транспортировки. Сообщайте нам о любых дефектах.
5.2 Место установки
Для обеспечения долгосрочной высокой производительности и надежности машины следует
правильно выбрать место установки.
Оно должно быть хорошо проветриваемым, защищенным от воздействия прямых
солнечных лучей, удаленным от источников тепла, с ровной и прочной поверхностью, не
подвергающейся вибрации.
5.3 Электрическое подключение
ВАЖНО! Обязательно наличие заземления.
Рекомендуется защитить электрическую установку с помощью плавкого
предохранителя и дифференциального автоматического выключателя.
Электрическая установка, обеспечивающая питание машины, должна быть защищена
следующим образом:
— Северная Америка: защита 15 А;
— остальные страны: защита 16 А.
Русский

58 58
Машины, оборудованные регулятором скорости, обязательно должны подключаться к
разветвительной коробке на линии с дифференциальным автоматом 300 мА.
Примечание. Любые проблемы, возникшие в связи с иным видом подключения, не будут
покрываться гарантией.
Перед подключением машины к электросети и во избежание выхода мотора из строя в момент
подключения следует убедиться в соответствии электросети характеристикам машины (см.
заводской щиток).
Машина соответствует директивам о безопасности машин и оборудования 2006/42, 2006/95,
2004/108 и имеет подтверждающую маркировку ЕС.
Ознакомьтесь с пиктограммами техники безопасности, имеющимися на машине.
Пиктограмма, предупреждающая об опасности пореза. Она находится в
передней части машины, рядом с зоной выгрузки хлеба. (fig. 10, n°20)
Электросхема машины находится на обратной стороне дверцы отсека
электрощитка. (fig.10, n°22)
Пиктограмма, предупреждающая об опасности поражения электрическим
током. Отключайте машину перед выполнением любых работ. Пиктограмма
находится сзади машины, рядом с кабелем питания и внутри машины на
отсеке электрощитка. (fig.10, n°21)
5.4 Ввод в эксплуатацию
Перед вводом в эксплуатацию убедитесь в отсутствии любых посторонних предметов на
подвижных частях машины.
Для получения ответов на все вопросы, касающиеся эксплуатации машины, см. раздел
«Эксплуатация».
5.5 Опасность
В случае возникновения опасности для пользователя или для машины следует отключить
электропитание с помощью главного выключателя.
Извлеките штекер из электрической розетки перед выполнением любых операций по
техническому или периодическому обслуживанию.
Не прикасайтесь к лезвию, даже если машина выключена.
Для замены лезвия обратитесь к аккредитованному дистрибьютору.
Обязательно надевайте защитные перчатки, предохраняющие от порезов, при выполнении
операций в непосредственной близости от лезвия или при замене лезвий.
Все операции по техническому обслуживанию или замене деталей должны осуществляться
квалифицированным сотрудником.
Русский

59
6 ОРГАНЫ УПРАВЛЕНИЯ И ПРЕДОХРАНИТЕЛЬНЫЕ УСТРОЙСТВА
6.1 Органы управления
Поскольку машина полностью автоматическая, она включается с закрытием верхней крышки.
6.2 Рабочая зона
Рабочая зона находится перед машиной (fig.3, n°17).
6.3 Предохранительные устройства
Оборудование на данной машине:
Механический аварийный выключатель
Находится сзади от верхней крышки.
Останавливает машину при открытии верхней крышки (fig.1, n°1).
Механический запор
Препятствует открытию верхней крышки во время работы машины.
Механический запор
Препятствует открытию передней крышки во время работы машины (fig. 7, n°19).
Механический аварийный выключатель
Находится в нижней части машины, над баком для крошек.
Препятствует включению машины при открытии передней дверцы (fig.1, n°5).
7 ЭКСПЛУАТАЦИЯ
Перед началом эксплуатации колесики, оснащенные тормозом, должны быть заблокированы
(fig.1 n°13).
В начале рабочего дня машину следует включить с помощью кнопки аварийного
останова.
(fig.1, n°10).
Порядок эксплуатации (fig.4, 5)
А. Откройте верхнюю крышку (fig.1, n°1).
В. Поместите буханку на заднюю полку (fig.1, n°3) между лезвиями и подвижной частью и
закройте крышку. Закрытие крышки активирует процесс нарезки.
С. В конце цикла передняя крышка разблокируется. Откройте ее и заберите нарезанный хлеб.
ОБРАТИТЕ ВНИМАНИЕ! Некоторые машины оборудованы в виде опции системой JAC Stop
(автоматической системой поддержки ломтей) (fig.6, n°18).
Рекомендация. После первых дней эксплуатации поручите квалифицированному специалисту
проверить натяжение лезвий.
Производительность. Количество буханок, нарезаемых в день: 6000 (в зависимости от типа
хлеба).
Русский

60 60
Размеры буханки (Д x Ш x В) (см): мин. 12 x 6 x 6, макс. 44 x 31 x 16.
8 ТЕХНИЧЕСКОЕ ОБСЛУЖИВАНИЕ
8.1 Ежедневное, выполняется пользователем, прошедшим подготовку.
A. Проверьте заполненность бака для крошек.
B. Очистите полки (fig.1, n°6, 3) с помощью щетки.
C. Протрите сухой салфеткой внутренние поверхности.
D. Протрите влажной салфеткой внешние поверхности.
8.2 Через каждые 25 000 нарезок и (или) не реже 1 раза в год; выполняется аккредитованным
специалистом.
A. Извлеките штекер из розетки (fig.2, n°16).
B. Проверьте состояние лезвий (fig.1, n°4).
C. При констатации снижения качества нарезки закажите замену лезвий (артикул JAC:
610001,6110011 в каталоге запасных частей компании JAC).
D. Если лезвия подлежат замене, эта операция должна быть выполнена в соответствии с
процедурой замены режущих лезвий (fig.8, 9).
ОБРАТИТЕ ВНИМАНИЕ! Натяжка лезвий не должна быть избыточной, это может
привести к деформации рамок.
E. Очистите внутренние поверхности машины с помощью щетки и пылесоса.
F. Проверьте состояние подшипников, смазку подшипников.
G. Смажьте шарнирные соединения установочного домкрата.
Проверьте внесение аккредитованным специалистом записей о выполненной работе в журнал
технического обслуживания для сохранения 5-летней гарантии.
8.3 Замена лезвий
(fig.8, 9)
Обязательно надевайте защитные перчатки, предохраняющие от порезов (стандарт EN 388:
2003, индекс B = 5), и защитную обувь во время выполнения замены лезвия или операций в
непосредственной близости от лезвия.
Убедитесь, что штекер машины (fig.2, n°16) отсоединен от электросети.
Откройте переднюю дверцу (fig.1, n°5).
Снимите полку из нержавеющей стали в передней части машины.
A. Снимите полку для упаковки.
B. Открутите с обеих сторон винты системы поддержки ломтей JAC Fix и снимите ее.
C. Открутите винты передней полки по бокам внутри машины.
D. Поверните полку к себе.
E. Снимите переднюю полку.
F. Открутите винты кожуха.
G. Откройте кожух, защищающий рамки суппорта лезвий.
H. С левой стороны внутри поверните заглушку винта рамки, чтобы можно было вставить
торцевой ключ для 6-угольного углубления на 8 мм снаружи машины. Открутите винт A,
фиксирующий стержень передней рамки.
I. Уложите рамку вперед. Замените лезвия задней рамки (накройте чем-нибудь лезвия
передней рамки, чтобы не порезаться). Ослабьте контргайки винтов B (на машинах
Misch). Ослабьте винты B с 6-гранным углублением под торцевой ключ,
Русский

61
обеспечивающие натяжение лезвий. Замените лезвия, следя за тем, чтобы они
5310020
SPRING, Ø 9 X 28 MM
ALL
7390031
RETAINING BAR FLAP
ALL
7390030
JAC STOP FLAP
ALL
5740162
FRAME LINK WITH BEARINGS
ALL
6110001
JAC KNIFE, 13 MM/0.5 MM
NEW SELF 450
6110011
JAC KNIFE, 13 MM/0.5 MM + TEFLON
NEW SELF 450M
5690221
REAR COVER FRONT PAD
ALL
5690222
REAR COVER RH REAR PAD
ALL
5690223
REAR COVER LH REAR PAD
ALL
5315014
GAS SPRING, 10 N
ALL
7240031
BELT
ALL
5690010
SLIDE PAD, 100 MM
ALL
5690151
LOAF HOLDER PAD
ALL
5310019
LOAF HOLDER SPRING
ALL
6120002
PUSHER FELT PAD
NEW SELF 450M
правильно расположились в выступах противовесов. Восстановите натяжение лезвий,
затянув винты B, используя в качестве ориентира лезвия, оставшиеся на рамке. После
этого зажмите гайки (на машинах, оборудованных опцией смазывания).
Во избежание деформации рамки и опасных поломок одновременно следует заменять
не более 1–3 лезвий, чередуя левую и правую стороны.
Выполните ту же процедуру, начиная с пункта I, для передней рамки и установите ее на место
вместе с другими элементами корпуса машины.
Подключите машину к электросети. Машина готова к работе.
Проверьте внесение аккредитованным специалистом записи о выполненной работе в журнал
технического обслуживания для сохранения 5-летней гарантии.
9 РАСХОДНЫЕ МАТЕРИАЛЫ
При заказе запасной части проверьте вместе с аккредитованным специалистом, о какой
детали идет речь, по каталогу запасных частей, выпускаемому производителем.
Всегда уточняйте номер машины, указанный на заводском щитке.
Заказ в компании JAC может разместить ваш аккредитованный специалист.
9.1 Список РАСХОДНЫХ МАТЕРИАЛОВ
ITEM CODE DESCRIPTION MODEL
Русский

62 62
10 НЕПОЛАДКИ В РАБОТЕ
Проблема
Проверка
Закрыть верхнюю крышку.
Загрузить достаточно твердую буханку.
Если лезвия сместились, отрегулировать лезвия и рамки.
Буханка вибрирует между
лезвиями.
Хлеб нарезается слишком
медленно.
Если лезвия сместились, отрегулировать лезвия и рамки.
Проверить, не нужно ли заменить лезвия (fig.8, 9).
Буханка выходит
лезвиями.
Буханка выходит из
лезвий раздавленной.
Подключить машину с помощью кабеля (fig.2, n°16).
Машина не работает
Закрыть переднюю крышку.
лезвия (fig.8, 9).
Машина работает, но
буханки разрушаются или
нарезаются неровно.
Буханка разрывается.
слишком медленно или
остается между
Проверить, не нужно ли заменить
Дать хлебу остыть несколько часов.
Загрузить буханку подходящих размеров.
Если лезвия сместились, отрегулировать лезвия и рамки.
Проверить, не нужно ли заменить лезвия (fig.8, 9).
Проверить, не нужно ли заменить лезвия (fig.8, 9).
Проверить, не нужно ли заменить лезвия (fig.8, 9).
ВНИМАНИЕ! Перед выполнением любых ремонтных работ машина должна быть отключена от
электроснабжения.
Если проблема не устраняется, обратитесь к вашему техническому специалисту.
Русский

63
11 СПИСОК КОМПЛЕКТУЮЩИХ НА ИЗОБРАЖЕНИЯХ
Изображение
Номер
Название
1
Верхняя крышка
2
Толкатель буханок
3
Задняя полка
4
Лезвия
5
Передняя крышка
6
Полка приемки
7
Буфер
8
Бак для крошек
9
Устройство для упаковки в пакеты
10
Счетчик
11
Сброс счетчика масла
12
Индикатор уровня масла (Misch)
13
Колесико
14
Задняя пластина
15
Пластина электрощитка
16
Кабель питания
3
17
Рабочая зона
6
18
Система поддержки ломтей JAC Stop
7
19
Запор передней крышки
20
Пиктограмма «Опасность пореза»
Пиктограмма «Опасность поражения
электрическим током»
22
Электросхема
1
2
10
21
Русский

64

65
Cortadora automática a cuadros autoservicio New Self
1 ANTES DE LA PUESTA EN SERVICIO ...................................................................................... 66
2 GARANTÍA .................................................................................................................................. 66
3 ADVERTENCIAS ......................................................................................................................... 67
4 CARACTERÍSTICAS TÉCNICAS ................................................................................................ 68
4.1 Características técnicas ................................................................................................................... 68
4.2 Detalle de materiales en contacto directo con la masa. ............................................................... 68
5 INSTALACIÓN Y PUESTA EN SERVICIO .................................................................................. 69
5.1 Desembalaje de la máquina: ............................................................................................................ 69
5.2 Ubicación: ......................................................................................................................................... 69
5.3 Conexión eléctrica: ........................................................................................................................... 69
5.4 Puesta en servicio: ........................................................................................................................... 70
5.5 Peligro: .............................................................................................................................................. 70
6 CUADRO DE CONTROL Y DE SEGURIDAD ............................................................................. 71
6.1 Cuadro de control: ............................................................................................................................ 71
6.2 Área de trabajo: ................................................................................................................................ 71
6.3 Cuadro de seguridad: ....................................................................................................................... 71
7 USO .............................................................................................................................................. 71
8 LIMPIEZA ..................................................................................................................................... 72
8.1 Diaria por un usuario formado. ....................................................................................................... 72
8.2 Cada 25 000 cortes y/o 1 vez al año como mínimo, por un agente autorizado .......................... 72
8.3 Cambio de las cuchillas. .................................................................................................................. 72
9 CONSUMIBLES ........................................................................................................................... 73
9.1 Lista de CONSUMIBLES ................................................................................................................... 73
10 INCIDENTES DE FUNCIONAMIENTO .................................................................................... 74
11 LISTA DE COMPONENTES DE LAS FIGURAS ..................................................................... 75
Español

66 66
1 ANTES DE LA PUESTA EN SERVICIO
Gracias por elegir una solución JAC. Lea con atención este manual de uso antes de
instalar y poner en servicio esta máquina. De esta forma, usted puede protegerse y evitar el
deterioro de su máquina.
Este manual hace referencia a distintas figuras con el fin de facilitar la comprensión de las
instrucciones. Estas figuras se encuentran al final del manual. Consúltelas cuando vea los
siguientes símbolos: fig.X, n°Y.
Para que el funcionamiento de su máquina sea satisfactorio a lo largo de los
próximos años, le invitamos a que lea los siguientes consejos:
- Solicite ayuda a su agente autorizado para la instalación, la puesta en servicio y el
seguimiento.
- Para poder beneficiarse de la garantía de 5 años (consulte las condiciones recogidas a
continuación), solicite a su distribuidor que complete la tarjeta de mantenimiento al instalar
su máquina. Esta tarjeta de mantenimiento se encuentra en la parte trasera de su máquina.
2 GARANTÍA
JAC ofrece una garantía de 5 años en todos sus productos.
Esta garantía es válida para todas las piezas de su máquina, incluidas las electrónicas,
excluyendo los consumibles. La garantía entra en vigor a partir de la fecha de instalación del
material.
Con las siguientes condiciones restrictivas:
- El material debe haberse adquirido a un revendedor autorizado.
- La instalación deberá efectuarla un agente autorizado.
- El material debe utilizarse conforme a las indicaciones del manual de uso y para la
finalidad para la que ha sido fabricado.
- El mantenimiento diario del material debe efectuarse conforme a las indicaciones del
manual de uso.
- El agente autorizado debe hacer un seguimiento del mantenimiento conforme a las
especificaciones de mantenimiento, como mínimo, una vez al año (mantenimiento a cargo
del usuario).
- Deben utilizarse exclusivamente piezas originales JAC.
Si un agente autorizado no efectúa el seguimiento del mantenimiento y/o la tarjeta
de mantenimiento no está cumplimentada correctamente, la garantía se limita a un
año.
Esta garantía no cubre:
- La sustitución de consumibles (§9).
- Las piezas que nuestros servicios no reconozcan como defectuosas.
- Los problemas derivados de un uso anormal del material.
- Los problemas derivados de una instalación no efectuada por un agente autorizado.
Español
Español

67
- Las piezas o los problemas causados por daños en el transporte o por un mantenimiento
inadecuado.
Una reparación y/o una sustitución de piezas defectuosas efectuadas durante el
periodo de garantía no supondrá la prolongación de dicha garantía.
3 ADVERTENCIAS
Es muy importante conservar este manual de uso junto con el aparato para futuras
consultas. Si este aparato se vende o se transfiere a otra persona, asegúrese de que se le
entrega también el manual de uso para que el usuario pueda estar informado de su
funcionamiento y de las advertencias que se recogen aquí.
Estas advertencias se dan por su seguridad y la de los demás. Le rogamos que las
lea con atención antes de instalar y utilizar el aparato.
Esta máquina está diseñada para su uso por adultos autorizados. Asegúrese de que los
niños no la toquen o que no la usen como un juguete.
Esta máquina está diseñada para un uso de autoservicio.
Es peligroso modificar o intentar modificar las características de esta máquina.
Después de instalar la máquina, asegúrese de que no aplasta el cable de alimentación.
Siga las instrucciones de uso.
Esta máquina debe almacenarse y utilizarse dentro de un local, protegida de la humedad
y del calor.
Esta máquina debe estar suficientemente iluminada para efectuar el trabajo.
Esta máquina tiene un nivel sonoro inferior a 75 dB(A) según la norma EN ISO 3744.
Esta máquina debe utilizarla una sola persona a la vez (salvo indicación contraria).
Esta máquina está diseñada para el corte de panes cocidos y templados.
Esta máquina no está destinada a los siguientes panes y materiales:
- Panes calientes, panes duros.
- Panes congelados o parcialmente descongelados.
- Panes completos con una corteza dura y otros tipos de pan con corteza dura.
- Panes de centeno.
- Productos no comestibles como la madera, el plástico y materiales similares.
- Cualquier otro alimento que no forme parte de la categoría de panes o bizcochos.
La máquina puede sufrir daños al cortar panes o materiales no permitidos.
Desconecte siempre la toma de corriente antes de proceder a la limpieza interior y
exterior del aparato y a las operaciones de mantenimiento.
Español

68 68
NEW SELF 450
NEW SELF 450M
Altura (mm)
1267
1267
Anchura (mm)
598
598
Profundidad (mm)
892
892
Longitud del canal de
entrada (mm)
Anchura del canal de
entrada (mm)
Altura del canal de entrada
(mm)
Embalaje (mm)
800 x 860 x 1600
800 x 860 x 1600
Peso neto (k)
210
220
Peso neto + embalaje (k)
230
240
Potencia del motor (kW)
0,49
1,1
Tipo de motor
Monofásico o trifásico
Trifásico
220 v - 50 Hz (A)
5
-
380 v - 50 Hz (A)
3,2
3,2
Capacidad (panes/hora)
Nivel sonoro (dB)
<75
<75
Motor reforzado
Opcional
JACSTOP
Cartel explicativo
Opcional
Sobreelevación de 4 cm
Opcional
Contador diario
Opcional
Cuchillas especiales
Este aparato es pesado. Tome todas las precauciones de seguridad durante su
mantenimiento.
4 CARACTERÍSTICAS TÉCNICAS
4.1 Características técnicas
310 300
440 440
160 160
200<500 200<500
4.2 Detalle de materiales en contacto directo con la masa.
Tabla trasera: INOX 430
Empujador de pan: INOX 430
Rodillo: INOX 430
Cuchillas: Acero
Tabla de recepción: INOX 430
Embolsador: INOX 430
Español
Opcional
Color especial Opcional
Opcional

69
5 INSTALACIÓN Y PUESTA EN SERVICIO
5.1 Desembalaje de la máquina:
Las máquinas que salen de nuestros talleres se entregan en palés atados y protegidos con cartón.
Antes de realizar cualquier acción, debe observarse el embalaje e informar al transportista de
cualquier daño debido al transporte.
A. Quite el cartón y el plástico de embalaje de la máquina.
B. Quite las cinchas prestando especial atención a su distensión al seccionarlas.
C. Separe la máquina del palé levantando los listones de madera que bloquean las ruedas.
D. Baje la máquina del palé. Efectúe esta operación entre dos personas como mínimo para
amortiguar al máximo el contacto con el suelo.
Después de desembalar su máquina, compruebe que no ha sufrido daños durante el
transporte. Infórmenos de cualquier anomalía.
5.2 Ubicación:
Para obtener un rendimiento excelente y una fiabilidad a largo plazo, elija una ubicación que esté:
Bien ventilada, protegida de los rayos directos del sol y alejada de fuentes de calor, con una
superficie plana y robusta y sin vibraciones.
5.3 Conexión eléctrica:
IMPORTANTE: La toma de tierra es obligatoria.
Es aconsejable proteger la instalación con un fusible y un disyuntor diferencial.
La instalación eléctrica que suministra energía a la máquina debe estar protegida tal y como se
indica a continuación:
- América del Norte: Protección 15 A.
- Resto del mundo: Protección 16 A.
Las máquinas equipadas con un variador deben estar conectadas obligatoriamente a una caja de
derivación en una línea equipada con un diferencial de 300 mA.
Nota: La garantía no cubrirá cualquier problema ocasionado por una conexión de otro tipo.
Antes de conectar su máquina a la red y con el fin de evitar una avería del motor al encenderla, es
importante comprobar la adecuación de la red de alimentación a las características de la máquina
(consulte la placa informativa de la máquina).
Este aparato cumple con las directivas sobre máquinas 2006/42, 2006/95 y 2004/108 y lleva el
marcado CE que lo certifica.
Consulte los pictogramas de seguridad que figuran en la máquina:
Español

70 70
Pictograma que indica un riesgo de corte. Lo encontrará en la parte delantera de
la máquina, alrededor de la zona de colocación del pan (fig.10, n°20).
Encontrará el esquema eléctrico de la máquina en la parte trasera de la puerta de
la caja eléctrica (fig.10, n°22).
Pictograma que indica un riesgo de electrocución. Desconecte la máquina antes
de hacer cualquier intervención. Lo encontrará en la parte trasera de la máquina,
cerca del cable de alimentación y dentro de la máquina en la caja eléctrica (fig.10,
n°21).
5.4 Puesta en servicio:
Antes de la puesta en servicio, asegúrese de que no queda ningún objeto sobrante en las partes en
movimiento de la máquina.
Para utilizar la máquina, consulte el apartado «Uso».
5.5 Peligro:
En caso de peligro para el usuario o para la máquina, debe utilizar el interruptor general para cortar
la alimentación de la máquina.
Quite el enchufe de la toma de corriente antes de efectuar cualquier operación de mantenimiento y
de limpieza.
No toque la cuchilla incluso si la máquina está parada.
Para cambiar la cuchilla, solicite la intervención de su distribuidor autorizado.
Lleve siempre guantes de protección anticorte al sustituir las cuchillas o cuando trabaje cerca de la
cuchilla.
Cualquier operación de mantenimiento o de sustitución de piezas debe efectuarla una persona
cualificada.
Español

71
6 CUADRO DE CONTROL Y DE SEGURIDAD
6.1 Cuadro de control:
Su máquina es totalmente automática, por lo que el cierre de la tapa superior pone en marcha la
máquina.
6.2 Área de trabajo:
El área de trabajo está situada en la parte delantera de la máquina (fig.3, n°17)
6.3 Cuadro de seguridad:
Esta máquina está equipada con:
Un interruptor de seguridad mecánico
Situado en la parte trasera de la tapa superior
Detiene la máquina al abrir la tapa superior (fig.1, n°1)
Un bloqueo mecánico
Que impide la apertura de la tapa superior durante el funcionamiento de la máquina
Un bloqueo mecánico
Que impide la apertura de la tapa delantera durante el funcionamiento de la máquina (fig.7, n°19)
Un interruptor de seguridad mecánico
Situado en la parte inferior de la máquina, encima de la bandeja de migas
Que impide que la máquina empiece a funcionar al abrir la puerta delantera (fig.1, n°5)
7 USO
Para utilizar la máquina, las ruedas provistas de freno deben estar bloqueadas (fig.1, n°13).
Al principio del día, encienda la máquina con ayuda del botón de detención de emergencia
(fig.1, n°10)
Procedimiento de uso (fig.4,5)
A. Abra la tapa superior (fig.1, n°1).
B. Coloque el pan en la tabla trasera (fig.1, n°3), entre las cuchillas y la parte móvil y cierre la tapa.
El cierre de la tapa activa el proceso de corte.
C. Al final del ciclo, la tapa delantera se desbloquea. Ábrala y recoja el pan cortado.
NOTA: Algunas máquinas están equipadas (opcional) con un JAC Stop (sistema automático de
sujeción de rebanadas) (fig.6, n°18).
Recomendación: Después de los primeros días de trabajo, pida a una persona cualificada que
compruebe la tensión de las cuchillas.
Capacidad: Número de panes cortados al día: 6 000 (según el tipo de pan).
Tamaño del pan (l x anch. x alt.) (cm): mín. 12 x 6 x 6 - máx. 44 x 31 x 16
Español

72 72
8 LIMPIEZA
8.1 Diaria por un usuario formado.
A. Compruebe si debe vaciar la bandeja de migas
B. Limpie las tablas (fig.1, n°6, 3) con un cepillo
C. Utilice un paño seco para limpiar el interior
D. Para la limpieza exterior, utilice un paño húmedo
8.2 Cada 25 000 cortes y/o 1 vez al año como mínimo, por un agente autorizado
A. Quite el enchufe de la toma de corriente (fig.2, n°16)
B. Compruebe el estado de las cuchillas de corte (fig.1, n°4)
C. Si se percibe una bajada de la calidad de corte, es necesario sustituir las cuchillas de corte
(referencia JAC: 610001,6110011 del catálogo de Piezas de Recambio JAC)
D. Si se deben cambiar, hágalo de acuerdo con el procedimiento de cambio de las cuchillas de
corte (fig.8, 9)
NOTA: No tense las cuchillas en exceso, ya que podría deformar los marcos.
E. Limpie con un cepillo y aspire el interior de la máquina.
F. Compruebe el estado de los rodamientos y engráselos.
G. Engrase las articulaciones del elevador.
Compruebe que su agente autorizado registre su intervención en su tarjeta de mantenimiento para
conservar su garantía de 5 años.
8.3 Cambio de las cuchillas.
(fig.8,9)
Lleve siempre guantes de protección anticorte (Norma EN 388: 2003 índice B= 5) y calzado de
seguridad al sustituir la cuchilla o cuando trabaje cerca de la cuchilla.
Después de asegurarse de que el enchufe de su máquina (fig.2, n°16) está desconectado de la
corriente.
Abra la puerta delantera (fig.1, n°5).
Retire la tabla de acero inoxidable en la parte delantera de la máquina.
A. Quite el palé de embolsado.
B. Desatornille por los dos lados el sistema de sujeción de rebanadas JAC Fix y retírelo.
C. Desatornille la tabla delantera a los lados interiores de la máquina.
D. Gire la tabla delantera hacia usted.
E. Quite la tabla delantera.
F. Desatornille el forro.
G. Abra el forro que protege los marcos de soporte de las cuchillas.
H. En el lado izquierdo interior, gire la tapa del tornillo del marco para que pueda introducir la
llave hexagonal hueca de 8 mm por el exterior de la máquina. Afloje el tornillo A que sujeta la
bieleta al marco delantero.
I. Empuje el marco hacia adelante. Sustituya las cuchillas del marco trasero (coloque algo para
protegerse sobre las cuchillas del marco delantero). Afloje las contratuercas de los tornillos B
(máquinas Misch). Afloje los tornillos B hexagonales huecos que tensan las cuchillas.
Sustituya las cuchillas comprobando que estén bien colocadas en los pasadores de los
balancines. Vuelva a tensar las cuchillas apretando los tornillos B, teniendo como referencia
para la tensión las cuchillas que han quedado en el marco. Luego, apriete las tuercas
(máquina equipada con la opción de engrasado).
Español

73
Para no deformar el marco y evitar roturas peligrosas, sustituya solamente entre 1 y 3
5310020
MUELLE Ø9 X 28 MM
TODOS
7390031
SOLAPAS DE BARRA DE RETENCIÓN
TODOS
7390030
SOLAPAS JAC STOP
TODOS
5740162
BIELETA DE MARCO CON RODAMIENTOS
TODOS
6110001
CUCHILLA JAC 13 MM/0,5 MM
NEW SELF 450
6110011
CUCHILLA JAC 13 MM/0,5 MM + TEFLÓN
NEW SELF 450M
5690221
ZAPATA DELANTERA DE LA TAPA TRASERA
TODOS
5690222
ZAPATA TRASERA DERECHA DE LA TAPA TRASERA
TODOS
5690223
ZAPATA TRASERA IZQUIERDA DE LA TAPA TRASERA
TODOS
5315014
MUELLE DE GAS 10N
TODOS
7240031
CORREA
TODOS
5690010
PATÍN DE GUÍA 100 MM
TODOS
5690151
PATÍN DEL RODILLO
TODOS
5310019
MUELLE DEL RODILLO
TODOS
6120002
FIELTRO DEL EMPUJADOR
NEW SELF 450M
cuchillas a la vez alternando de izquierda a derecha.
Vuelva a empezar el procedimiento a partir del punto I para el marco delantero y vuelva a colocar el
marco delantero y los elementos de protección.
Conecte la máquina a la red eléctrica, la máquina está lista.
Compruebe que su agente autorizado registre su intervención en su tarjeta de mantenimiento para
conservar su garantía de 5 años.
9 CONSUMIBLES
Al pedir una pieza de recambio, compruebe con su agente autorizado de qué pieza se trata con base
en el catálogo de piezas de recambio del fabricante.
Indique siempre el número de máquina tal y como se indica en la placa informativa.
Su agente efectuará el pedido a JAC.
9.1 Lista de CONSUMIBLES
CÓDIGO DE ARTÍCULO ETIQUETA MODELO
Español

74 74
10 INCIDENTES DE FUNCIONAMIENTO
Problema
Comprobación
Cierre la tapa superior
Introduzca un pan lo suficientemente firme
Si las cuchillas están desalineadas, ajuste las cuchillas y los marcos
El pan vibra en las cuchillas
Si las cuchillas están desalineadas, ajuste las cuchillas y los marcos
El pan se corta demasiado
lento
Si las cuchillas están desalineadas, ajuste las cuchillas y los marcos
Compruebe si es necesario sustituir las cuchillas (fig.8,9)
El pan sale muy lentamente
o se queda en las cuchillas
El pan está aplastado al
salir de las cuchillas
, n°16)
La máquina no gira
La máquina funciona, pero
los panes están dañados o
cortados de forma irregular
El pan se rompe
Conecte la máquina con el cable (fig.2
Cierre la tapa delantera
Compruebe si es necesario sustituir las cuchillas (fig.8,9)
Deje que el pan se enfríe unas horas
Introduzca un pan con el tamaño adecuado
Compruebe si es necesario sustituir las cuchillas (fig.8,9)
Compruebe si es necesario sustituir las cuchillas (fig.8,9)
Compruebe si es necesario sustituir las cuchillas (fig.8,9)
ATENCIÓN: Para cualquier intervención, la máquina deberá estar desenchufada obligatoriamente.
Si el problema persiste, póngase en contacto con su técnico.
Español

75
11 LISTA DE COMPONENTES DE LAS FIGURAS
Figura
Número
Nombre
1
Tapa superior
2
Empujador de pan
3
Tabla trasera
4
Cuchillas
5
Tapa delantera
6
Tabla de recepción
7
Parachoques
8
Bandeja de migas
9
Embolsador
10
Contador
11
Reinicio del contador de aceite
12
Indicador del nivel de aceite (Misch)
13
Rueda
14
Chapa trasera
15
Chapa de la caja eléctrica
16
Cable de alimentación
3
17
Área de trabajo
6
18
Sistema de sujeción de rebanadas JAC Stop
7
19
Bloqueo de la tapa delantera
20
Señal «riesgo de corte»
21
Señal «riesgo de electrocución»
22
Esquema eléctrico
1
2
10
Español

76

77
Taglierina automatica a telai self-service New Self
1 PRIMA DELLA MESSA IN FUNZIONE ....................................................................................... 78
2 GARANZIA .................................................................................................................................. 78
3 AVVERTENZE ............................................................................................................................. 79
4 CARATTERISTICHE TECNICHE ................................................................................................ 80
4.1 Caratteristiche tecniche ................................................................................................................... 80
4.2 Dettaglio materiali in contatto con la pasta. .................................................................................. 80
5 INSTALLAZIONE E MESSA IN FUNZIONE ............................................................................... 81
5.1 Disimballo della macchina: .............................................................................................................. 81
5.2 Posizionamento: ............................................................................................................................... 81
5.3 Collegamento elettrico: .................................................................................................................... 81
5.4 Messa in servizio: ............................................................................................................................. 82
5.5 Pericolo: ............................................................................................................................................ 82
6 ORGANO DI COMANDO E DI SICUREZZA ............................................................................... 83
6.1 Organo di comando: ......................................................................................................................... 83
6.2 Zona di lavoro: .................................................................................................................................. 83
6.3 Organi di sicurezza: .......................................................................................................................... 83
7 UTILIZZO ..................................................................................................................................... 83
8 MANUTENZIONE ........................................................................................................................ 84
8.1 Quotidiana da parte di un utilizzatore addestrato. ........................................................................ 84
8.2 Ogni 25.000 tagli e/o 1 volta l'anno almeno, da parte di un tecnico autorizzato. ....................... 84
8.3 Sostituzione delle lame. ................................................................................................................... 84
9 COMPONENTI DI CONSUMO ..................................................................................................... 85
9.1 Elenco dei COMPONENTI DI CONSUMO ........................................................................................ 85
10 INCIDENTI DI FUNZIONAMENTO ........................................................................................... 86
11 ELENCO DEI COMPONENTI INDICATI NELLE FIGURE ...................................................... 87
Italiano

78 78
1 PRIMA DELLA MESSA IN FUNZIONE
Grazie per aver scelto una soluzione JAC. Si invita a leggere con attenzione queste note
informative prima di procedere all'installazione e alla messa in servizio di questa macchina.
Contengono informazioni su come proteggersi e come evitare il deterioramento della
macchina.
Queste informazioni fanno riferimento a diverse figure, in modo da facilitare la
comprensione delle istruzioni. Le figure si trovano al fondo delle informazioni. Si invita a farvi
riferimento quando si incontrano i seguenti simboli (fig. X, n. Y).
Per una totale soddisfazione dall'utilizzo della macchina nei prossimi anni, si invita
a tenere presenti i seguenti consigli:
- Farsi aiutare dal tecnico autorizzato per l'installazione, la messa in servizio e il follow-up.
- Per beneficiare della garanzia di 5 anni (vedere le condizioni riportate in seguito), far
compilare dal distributore, il libretto di manutenzione al momento dell'installazione della
macchina. Il libretto di manutenzione si trova nella parte posteriore della macchina.
2 GARANZIA
JAC offre una garanzia di 5 anni su tutti i suoi prodotti.
Questa garanzia è valida su tutte le parti della macchina, comprese quelle elettroniche, a
parte i componenti di consumo. La garanzia entra in vigore a partire dalla data di
installazione del materiale.
Secondo le seguenti condizioni restrittive:
- Materiale acquistato presso un rivenditore autorizzato.
- Installazione effettuata da un tecnico autorizzato.
- Utilizzo del materiale conformemente alle indicazioni sul modo di utilizzo e nel rispetto
della finalità per la quale è stato fabbricato.
- Materiale quotidianamente manutenuto nel rispetto delle indicazioni delle modalità di
utilizzo.
- Manutenzioni successive da parte del tecnico autorizzato conformemente alle specifiche
di manutenzione con, al minimo, una manutenzione l'anno (manutenzione a carico
dell'utente).
- L’utilizzo esclusivo di parti originali JAC.
Se non si eseguono interventi di manutenzione da parte di un tecnico autorizzato
e/o il libretto di manutenzione non è correttamente completato, la garanzia si limita ad
un anno.
Questa garanzia non copre:
- La sostituzione dei componenti di consumo (§9).
- Le parti non riconosciute difettose dai nostri servizi.
- I problemi derivanti da un utilizzo anomalo del materiale.
- I problemi derivanti da un'installazione non effettuata da un tecnico autorizzato.
Italiano
Italiano

79
- Le parti o i problemi derivanti da un danno di trasporto o da una manutenzione
inadeguata.
Una riparazione e/o una sostituzione di parti difettose effettuate durante il periodo di
garanzia non producono l'effetto di prolungare detta garanzia.
3 AVVERTENZE
È molto importante che le istruzioni per l'utilizzo siano conservate con l'apparecchio per
ogni consultazione futura. Se questo macchinario deve essere venduto o trasferito ad un'altra
persona, accertarsi che le istruzioni per l'utilizzo siano consegnate all'utente destinatario in
modo che possa essere informato sul funzionamento e sui messaggi di avvertenza ad esso
riferiti.
Tali avvertenze sono fornite per la vostra sicurezza e per quella altrui. Si prega di
leggerle con attenzione prima di installare e utilizzare il macchinario.
Questa macchina è stata progettata per essere utilizzata da adulti autorizzati. Accertarsi
quindi che i bambini non le si avvicinino e che non la utilizzino come un giocattolo.
Questa macchina è pensata per un utilizzo Self-Service.
È pericoloso modificare o provare a modificare le caratteristiche di questa macchina.
Accertarsi dopo averla installata, che non appoggi sul cavo di alimentazione.
Seguire le istruzioni fornite per l'utilizzo.
Questa macchina deve essere sistemata e utilizzata all'interno di un locale, al riparo da
umidità e calore.
Deve essere illuminata a sufficienza per poter funzionare.
La macchina produce un livello di rumore inferiore a 75 dB(A), conforme alla norma EN
ISO 3744.
La macchina deve essere utilizzata da una sola persona per volta (salvo prescrizioni
contrarie).
Questa macchina è destinata al taglio del pane cotto e raffreddato.
Questa macchina non è destinata ai seguenti materiali e tipi di pane:
- Pane caldo, pane raffermo.
- Pane congelato, o parzialmente decongelato.
- Pane integrale con una crosta dura e altri tipi di pane a crosta dura.
- Pane di segale.
- Prodotti non commestibili come legno, plastica e materiali simili.
- Ogni alimento che non fa parte della categoria dei tipi di pane o delle torte.
La macchina si può danneggiare con il taglio di pani o materiali non autorizzati.
Italiano

80 80
Staccare sempre il cavo di alimentazione prima di procedere alla pulizia
NEW SELF 450
NEW SELF 450M
Larghezza (mm)
598
598
Profondità (mm)
892
892
Altezza del canale
d'ingresso (mm)
Larghezza del canale
d'ingresso (mm)
Altezza del canale
d'ingresso (mm)
Imballaggio (mm)
800 x 860 x 1600
800 x 860 x 1600
Peso netto (kg)
210
220
Peso NETTO + imballaggio
(kg)
Potenza motore (kW)
Tipo di motore
Monofase o trifase
Trifase
220v - 50Hz (A)
5
-
380v - 50Hz (A)
Capacità (forme di pane/ora)
200<500
200<500
Livello sonoro (dB)
<75
<75
Motore rinforzato
opzionale
JACSTOP
opzionale
Cartello illustrativo
opzionale
Sopraelevazione di 4 cm
opzionale
Contatore giornaliero
Coltelli speciali
opzionale
interna/esterna del macchinario e alle operazioni di manutenzione.
Questo macchinario è pesante. Adottare tutte le precauzioni di sicurezza al momento
della manutenzione.
4 CARATTERISTICHE TECNICHE
4.1 Caratteristiche tecniche
Altezza (mm) 1267 1267
310 300
440 440
160 160
230 240
0,49 1,1
3,2 3,2
4.2 Dettaglio materiali in contatto con la pasta.
Ripiano posteriore: INOX 430
Spingipane: INOX 430
Premipane: INOX 430
Lame: Acciaio
Ripiano di ingresso: INOX 430
Insacchettatrice: INOX 430
Italiano
opzionale
Colore speciale opzionale

81
5 INSTALLAZIONE E MESSA IN FUNZIONE
5.1 Disimballo della macchina:
Le macchine sono consegnate, franco fabbrica, su pallet, legate con cinghie e protette con pannelli di
cartone. Prima di tutto, occorre esaminare l'imballaggio e ogni danno dovuto al trasporto deve essere
dichiarato direttamente all'addetto alla consegna.
A. Togliere il cartone e il sacchetto d'imballaggio dalla macchina.
B. Togliere le cinghie facendo particolare attenzione allo sgancio di queste ultime durante il taglio.
C. Staccare la macchina dal pallet togliendo i listelli di legno che bloccano le ruote.
D. Far scendere la macchina dal pallet. Accertarsi di essere almeno in due per questa
operazione per ammortizzare al meglio il contatto con il terreno.
Dopo il disimballo della macchina, verificare che non abbia subito danni durante il
trasporto. Segnalare ogni anomalia.
5.2 Posizionamento:
Per ottenere performance eccellenti e affidabilità a lungo termine, scegliere una posizione:
Ben ventilata, al riparo dai raggi solari diretti e lontano da fonti di calore, con una superficie
piana, robusta e priva di vibrazioni.
5.3 Collegamento elettrico:
IMPORTANTE: Messa a terra obbligatoria.
Si consiglia di proteggere l'impianto con un fusibile e un salvavita.
L'impianto elettrico che alimenta la macchina deve essere protetto secondo quanto indicato qui di
seguito:
- Nord America: Protezione 15 A;
- Resto del mondo: Protezione 16 A.
Le macchine dotate di variatore, devono necessariamente essere collegate ad una scatola di
derivazione su di una linea dotata di salvavita da 300 mA.
Nota: Ogni problema derivante da un altro tipo di collegamento non sarà preso in considerazione ai
fini della garanzia.
Prima di collegare la macchina alla rete e onde evitare una dismissione del motore all'avvio, è
importante verificare la compatibilità della rete di alimentazione con le caratteristiche della macchina
(vedere la relativa targa segnaletica).
Questo apparecchio è conforme alle direttive macchine 2006/42, 2006/95, 2004/108 e reca la
marcatura CE che attesta detta conformità.
Si invita a prendere visione della segnaletica di sicurezza che figura sulla macchina:
Italiano

82 82
Segnale che indica un rischio di taglio. Si trova davanti alla macchina nella zona
di deposito del pane (fig. 10, n. 20).
Sul retro della porta del quadro elettrico si trova lo schema elettrico della macchina
(fig. 10, n. 22).
Segnale che indica un rischio di folgorazione. Scollegare il cavo di alimentazione
prima di qualsiasi intervento sulla macchina. Si trova nella parte posteriore della
macchina vicino al cavo di alimentazione e all'interno della macchina sul quadro
elettrico (fig.10, n. 21).
5.4 Messa in servizio:
Prima della messa in servizio, accertarsi che non vi siano oggetti estranei sulle parti in movimento
della macchina.
Per l’utilizzo della macchina, fare riferimento al capitolo "Utilizzo".
5.5 Pericolo:
In caso di pericolo per l'utente o per la macchina, utilizzare l'interruttore generale per interrompere
l'alimentazione della macchina.
Estrarre la spina della presa elettrica prima di ogni operazione di manutenzione o di assistenza.
Non toccare la lama, anche all'arresto.
Per la sostituzione della lama, rivolgersi al distributore autorizzato.
Indossare sempre guanti di protezione anti-taglio per la sostituzione delle lame o per un'operazione
nelle vicinanze della lama.
Ogni operazione di manutenzione o sostituzione delle parti deve essere effettuata da una persona
qualificata.
Italiano

83
6 ORGANO DI COMANDO E DI SICUREZZA
6.1 Organo di comando:
La macchina è totalmente automatica, per cui la chiusura del coperchio superiore aziona la messa in
funzione della macchina stessa.
6.2 Zona di lavoro:
La zona di lavoro si trova davanti alla macchina (fig. 3 n. 17)
6.3 Organi di sicurezza:
Questa macchina è dotata:
Di un interruttore di sicurezza meccanico
che si trova nella parte posteriore del coperchio superiore
e che ferma la macchina quando si apre il coperchio superiore (fig. 1, n. 1).
Di una chiusura meccanica
Che impedisce l'apertura del coperchio superiore durante il funzionamento della macchina.
Di una chiusura meccanica
Che impedisce l'apertura del coperchio anteriore durante il funzionamento della macchina (fig. 7, n.
19).
Di un interruttore di sicurezza meccanico
Che si trova nella parte bassa della macchina, sopra il cassetto raccogli-briciole
e che impedisce alla macchina di partire quando si apre lo sportello anteriore (fig. 1, n. 5).
7 UTILIZZO
Per l'utilizzo, le rotelle provviste di freno devono essere bloccate (fig. 1, n. 13).
Ad inizio giornata, alimentare la macchina tramite l'arresto d'emergenza
(fig. 1, n. 10).
Procedura di utilizzo (fig. 4, 5).
A. Aprire il coperchio superiore (fig. 1, n. 1).
B. Porre il pane sul ripiano posteriore (fig.1 n. 3), tra le lame e la parte mobile e chiudere il coperchio.
La chiusura del coperchio attiva il processo di taglio.
C. Alla fine del ciclo di taglio il coperchio si sgancia. Aprire e recuperare il pane tagliato.
N.B.: Talune macchine sono dotate (opzionale) di un JAC Stop (sistema automatico di mantenimento
delle fette) (fig. 6, n. 18).
Consiglio: Dopo i primi giorni di lavoro, far controllare la tensione delle lame da una persona
qualificata.
Capacità: Numero di forme di pane tagliate al giorno: 6.000 (a seconda del tipo di pane).
Dimensioni della forma (L x l x h) (cm): min. 12 x 6 x 6 - max. 44 x 31 x 16
Italiano

84 84
8 MANUTENZIONE
8.1 Quotidiana da parte di un utilizzatore addestrato.
A. Verificare se occorre svuotare il cassetto raccogli-briciole.
B. Pulire i ripiani (fig. 1, n. 6, 3) con una spazzola.
C. Utilizzare un panno asciutto per la pulizia interna.
D. Per la manutenzione esterna, utilizzare un panno umido.
8.2 Ogni 25.000 tagli e/o 1 volta l'anno almeno, da parte di un tecnico autorizzato.
A. Staccare la presa della corrente (fig. 2, n. 16).
B. Verificare lo stato delle lame da taglio. (fig. 1, n. 4).
C. Se si nota un deterioramento della qualità del taglio occorre procedere alla sostituzione delle
lame da taglio (riferimento JAC: 610001,6110011 del catalogo di Parti di ricambio JAC).
D. Se sono da cambiare, sostituire le lame nel rispetto della procedura di sostituzione delle lame
da taglio (fig. 8, 9).
N.B.: Non tendere eccessivamente le lame, altrimenti si rischia di deformare i telai.
E. Pulire con una spazzola e aspirare l'interno della macchina.
F. Verificare lo stato dei cuscinetti, quindi lubrificarli.
G. Ingrassare le articolazioni del martinetto.
Verificare attentamente che il tecnico autorizzato registri l'intervento sul libretto di manutenzione al
fine di mantenere la garanzia di 5 anni.
8.3 Sostituzione delle lame.
(fig.8,9)
Far sempre attenzione ad indossare guanti di protezione anti-taglio (Norma EN 388: 2003 indice B=
5) e scarpe di sicurezza al momento della sostituzione della lama o di un'operazione vicino alla lama.
Dopo essersi accertati che la presa della macchina (fig. 2 n. 16) sia ben scollegata dalla corrente.
Aprire lo sportello anteriore (fig. 1, n.5).
Estrarre il ripiano inox dalla parte anteriore della macchina.
A. Staccare il pallet di insacchettatura.
B. Svitare dai due lati il sistema di mantenimento delle fette JAC Fix ed estrarlo.
C. Svitare il ripiano anteriore sui lati interni della macchina.
D. Far ruotare il ripiano in avanti verso di sé.
E. Estrarre il ripiano anteriore.
F. Svitare la cuffia.
G. Aprire la cuffia che protegge i telai di supporto lame.
H. Sul lato sinistro interno, far ruotare il copri vite del telaio in modo da poter inserire la chiave 6
ad esagono da 8 mm dall'esterno della macchina. Allentare la vite A che mantiene la bielletta
al telaio anteriore.
I. Adagiare il telaio in avanti. Sostituire le lame del telaio posteriore (proteggersi dalle lame del
telaio anteriori). Svitare i controdadi delle viti B (macchine Misch). Svitare le viti B a esagono
incassate che tendono le lame. Sostituire le lame controllando che siano ben posizionate nella
sporgenza dei bilancieri. Ridistendere le lame serrando le viti B, avendo come riferimento per
la tensione le lame rimaste sul telaio. Quindi serrare i dadi (macchina dotata dell'opzione
lubrificazione).
Per non deformare il telaio e non rischiare rotture pericolose, non sostituire più di 1 - 3 lame
per volta alternando da sinistra a destra.
Italiano

85
Ricominciare la procedura dal punto I. per il telaio anteriore e rimontare il telaio anteriore e gli
5310020
MOLLA Ø9X28MM
TUTTE
7390031
FLAPS BARRA DI RITEGNO
TUTTE
7390030
FLAPS JAC STOP
TUTTE
5740162
BIELLETTE DEL TELAIO CON CUSCINETTI
TUTTE
6110001
COLTELLO JAC 13MM/0,5MM
NEW SELF 450
6110011
COLTELLO JAC 13MM/0,5MM + TEFLON
NEW SELF 450M
5690221
PATTINO ANTERIORE COPERCHIO POSTERIORE
TUTTE
5690222
PATTINO POSTERIORE DESTRO COPERCHIO POSTERIORE
TUTTE
5690223
PATTINO POSTERIORE SINISTRO COPERCHIO POSTERIORE
TUTTE
5315014
MOLLA A GAS 10N
TUTTE
7240031
CINGHIA
TUTTE
5690010
PATTINO DI GUIDA 100MM
TUTTE
5690151
PATTINO PREMIPANE
TUTTE
5310019
MOLLA PATTINO PREMIPANE
TUTTE
6120002
FELTRO SPINGITORE
NEW SELF 450M
elementi di rivestimento.
Collegare la macchina alla rete elettrica, la macchina è pronta.
Verificare attentamente che il tecnico autorizzato registri l'intervento sul libretto di manutenzione al
fine di mantenere la garanzia di 5 anni.
9 COMPONENTI DI CONSUMO
Al momento dell'ordine di parti di ricambio, verificare con il tecnico autorizzato di quale parte si tratta
in base al catalogo delle parti di ricambio emesso dal fabbricante.
Precisare sempre il codice della macchina indicato sulla targa segnaletica.
Il tecnico effettua gli ordini presso JAC.
9.1 Elenco dei COMPONENTI DI CONSUMO
CODICE ARTICOLO VERSIONE MODELLO
Italiano

86 86
10 INCIDENTI DI FUNZIONAMENTO
Problema
Verifica
Chiudere il coperchio superiore.
Introdurre una forma molto soda.
Se le lame sono disallineate, regolare le lame e i telai.
Il pane vibra tra le lame
Se le lame sono disallineate, regolare le lame e i telai.
Il pane si taglia troppo
lentamente
Se le lame sono disallineate, regolare le lame e i telai.
Verificare se occorre sostituire le lame (fig. 8, 9).
Il pane esce molto
lame
Il pane è schiacciato
all'uscita dalle lame
Collegare la macchina con un cavo (fig. 2, n. 16).
La macchina non funziona
Chiudere il coperchio anteriore.
Verificare se occorre sostituire le lame (fig. 8, 9).
La macchina funziona, ma
le forme di pane sono
danneggiate o tagliate in
modo irregolare
Il pane si strappa
Lasciar raffreddare la forma di pane per alcune ore.
Introdurre una forma di dimensioni accettate.
Verificare se occorre sostituire le lame (fig. 8, 9).
lentamente o rimane tra le
Verificare se occorre sostituire le lame (fig. 8, 9).
Verificare se occorre sostituire le lame (fig. 8, 9).
ATTENZIONE: Per ogni intervento, la macchina deve obbligatoriamente essere scollegata
dall'alimentazione.
Se il problema persiste, contattare il proprio tecnico.
Italiano

87
11 ELENCO DEI COMPONENTI INDICATI NELLE FIGURE
Figura
Numero
Nome
1
Coperchio superiore
2
Spingipane
3
Ripiano posteriore
4
Lame
5
Coperchio anteriore
6
Ripiano di ingresso
7
Protezione
8
Cassetto raccogli-briciole
9
Insacchettatrice
10
Contatore
11
Pulsante di reset contatore olio
12
Spia livello olio (Misch)
13
Ruota
14
Lamiera posteriore
15
Lamiera quadro elettrico
16
Cavo di alimentazione
3
17
Zona di lavoro
6
18
Sistema di mantenimento fette JAC Stop
7
19
Chiusura coperchio anteriore
20
Segnaletica "rischio di taglio"
21
Segnaletica "rischio di folgorazione"
22
Schema elettrico
1
2
10
Italiano

88

89
ﺔﯾﺗاذ ﺔﻣدﺧ تارﺎطﺈﺑ ﺔﯾﻛﯾﺗﺎﻣوﺗوأ نﯾﺟﻋ ﺔﻋﺎطﻗNew Self
1لﺑﻗ لﯾﻐﺷﺗﻟا ....................................................................................................................................... 90
2نﺎﻣﺿﻟا ........................................................................................................................................... 90
3تﺎﮭﯾﺑﻧﺗ ............................................................................................................................................ 91
4تﺎﻔﺻاوﻣﻟا ﺔﯾﻧﻔﻟا ................................................................................................................................. 92
4.1تﺎﻔﺻاوﻣﻟا ﺔﯾﻧﻔﻟا .......................................................................................................................................... 92
4.2لﯾﺻﺎﻔﺗ تﺎﻣﺎﺧﻟا ﺔﺳﻣﻼﻣﻟا لﻛﺷﺑ رﺷﺎﺑﻣ نﯾﺟﻌﻠﻟ. ........................................................................................................ 92
5بﯾﻛرﺗﻟا لﯾﻐﺷﺗﻟاو ................................................................................................................................ 93
5.1كﻓ فﯾﻠﻐﺗ ﺔﻟﻷا: ............................................................................................................................................ 93
5.2ﻊﺿوﻣﻟا: ................................................................................................................................................... 93
5.3لﯾﺻوﺗﻟا ﻲﺑرﮭﻛﻟا: ......................................................................................................................................... 93
5.4لﯾﻐﺷﺗﻟا: .................................................................................................................................................... 94
5.5رطﺧ: ....................................................................................................................................................... 94
6زﺎﮭﺟ مﻛﺣﺗﻟا نﺎﻣﻷاو ............................................................................................................................. 95
6.1زﺎﮭﺟ مﻛﺣﺗﻟا: ............................................................................................................................................... 95
6.2ﺔﻘطﻧﻣ لﻣﻋ: ................................................................................................................................................ 95
6.3ةزﮭﺟأ نﺎﻣﻷا: .............................................................................................................................................. 95
7مادﺧﺗﺳﻻا ......................................................................................................................................... 95
8ﺔﻧﺎﯾﺻﻟا ............................................................................................................................................ 96
8.1ﺔﯾﻣوﯾ ﺔطﺳاوﺑ مدﺧﺗﺳﻣ بردُﻣ. ........................................................................................................................... 96
8.2لﻛ 25000 ةرﻣ ﻊﯾطﻘﺗ زﺑﺧﻠﻟ و /وأ ةرﻣ ةدﺣاو ﻰﻠﻋ لﻗﻷا لﻛ مﺎﻋ ﺔطﺳاوﺑ لﯾﻛو دﻣﺗﻌﻣ. .......................................................... 96
8.3رﯾﯾﻐﺗ تارﻔﺷﻟا. ............................................................................................................................................ 96
9ﻊطﻗ تﺎﻛﻠﮭﺗﺳﻣﻟا .................................................................................................................................. 97
9.1ﺔﻣﺋﺎﻗ تﺎﻛﻠﮭﺗﺳﻣﻟﺎﺑ .......................................................................................................................................... 97
10ثادﺣﻷا ﺔﺿرﺎﻌﻟا ءﺎﻧﺛأ لﯾﻐﺷﺗﻟا ................................................................................................................. 98
11ﺔﻣﺋﺎﻗ تﺎﻧوﻛﻣﻟﺎﺑ ةدوﺟوﻣﻟا ﻲﻓ لﺎﻛﺷﻷا .......................................................................................................... 99
ﺔﯾﺳﻧرﻔﻟا ﺔﻐﻠﻟا

90 90
ﺔﯾﺳﻧرﻔﻟا ﺔﻐﻠﻟا
لوﻠﺣ مﻛرﺎﯾﺗﺧﻻ مﻛرﻛﺷﻧJAC بﻧﺟﺗﺗو كﺳﻔﻧ ﻲﻣﺣﺗ نأ كﻧﻛﻣﯾ .ﺔﻟﻵا هذھ لﯾﻐﺷﺗو بﯾﻛرﺗ لﺑﻗ اذھ مادﺧﺗﺳﻻا لﯾﻟد ةءارﻗ نﻣ دﻛﺄﺗ .
.ﺔﻟﻵا فﻠﺗﺗ نأ اذﻛھ
ﺎﮭﯾﻟإ عوﺟرﻟا ﻰﺟرُﯾ .لﯾﻟدﻟا اذھ ﺔﯾﺎﮭﻧ ﻲﻓ ةدوﺟوﻣ لﺎﻛﺷﻷا هذھ .تﺎﻣﯾﻠﻌﺗﻟا مﮭﻓ لﯾﮭﺳﺗ لﺟأ نﻣ ﺔﻔﻠﺗﺧﻣ لﺎﻛﺷأ ﻰﻟإ لﯾﻟدﻟا اذھ رﯾﺷﯾ
.(اذﻛ مﻗرو ،اذﻛ لﻛﺷ) ﺔﯾﻟﺎﺗﻟا زوﻣرﻟا ىرﺗ نإ ﺎﻣ
:ﺔﯾﻟﺎﺗﻟا ﺢﺋﺎﺻﻧﻟا ﻰﻠﻋ عﻼطﻻا ﻰﻟإ كوﻋدﻧ ،ﺔﻣدﺎﻘﻟا تاوﻧﺳﻟا لﻼﺧ ﺔﻟﻵا هذھ ءادأ نﻋ ﺎًﻣﺎﻣﺗ ﺎًﯾﺿار نوﻛﺗ نأ لﺟأ نﻣ
.ﺔﻟﻵا فﻠﺧ ﺔﻧﺎﯾﺻﻟا رﺗﻓد دﺟوﯾ .ﺔﻟﻷا بﯾﻛرﺗ ءﺎﻧﺛأ
ﺔﻛرﺷ مدﻘﺗJAC ﮫﺗدﻣ ﺎﮭﺗﺎﺟﺗﻧﻣ لﻛ ﻰﻠﻋ ﺎًﻧﺎﻣﺿ5 .تاوﻧﺳ
.تﺎﻛﻠﮭﺗﺳﻣﻟا نود ،ﺔﯾﻧورﺗﻛﻟﻹا ﻊطﻘﻟا ﺎﮭﯾﻓ ﺎﻣﺑ ،ﺔﻟﻵا ﻊطﻗ لﻛ ﻰﻠﻋ نﺎﻣﺿﻟا اذھ يرﺳﯾ.ةدﻌُﻣﻟا بﯾﻛرﺗ ﺦﯾرﺎﺗ نﻣ نﺎﻣﺿﻟا يرﺳﯾ
:ﺔﯾﻟﺎﺗﻟا ةدﯾﻘﻣﻟا طورﺷﻟا بﺳﺣﺑ
.(مدﺧﺗﺳﻣﻟا
،ﺢﯾﺣﺻ لﻛﺷﺑ لﻣﺗﻛﻣ رﯾﻏ ﺔﻧﺎﯾﺻﻟا رﺗﻓد نأ وأ/و دﻣﺗﻌﻣ لﯾﻛو نﻣ ﺔﻧﺎﯾﺻ دﺟوﺗ مﻟ اذإ .ةدﺣاو مﺎﻋ ﻰﻠﻋ نﺎﻣﺿﻟا ةرﺗﻓ رﺻﺗﻘﺗ
:لﻣﺷﯾ ﻻ نﺎﻣﺿﻟا نﺄﺑ ﺎًﻣﻠﻋ
.نﺎﻣﺿﻟا اذھ ددﻣﯾ نأ نﺎﻣﺿﻟا ةدﻣ لﻼﺧ مﺗﯾ يذﻟا ﺔﻔﻟﺎﺗﻟا رﺎﯾﻐﻟا ﻊطﻘﻟ لادﺑﺗﺳﻻا وأ/و حﻼﺻﻹا نﺄﺷ نﻣ سﯾﻟ
1
لﯾﻐﺷﺗﻟا لﺑﻗ
- .ﺔﻌﺑﺎﺗﻣﻟاو لﯾﻐﺷﺗﻟاو بﯾﻛرﺗﻟا لﺟأ نﻣ دﻣﺗﻌﻣ لﯾﻛوﺑ نﻌﺗﺳا
- ﮫﺗدﻣو نﺎﻣﺿﻟا نﻣ ةدﺎﻔﺗﺳﻻا لﺟأ نﻣ5 تاوﻧﺳ ﺔﻧﺎﯾﺻﻟا رﺗﻓد لﺎﻣﻛﺗﺳﺎﺑ ،عزوﻣﻟا ﺔطﺳاوﺑ مﻗ ،(دﻌﺑ ةروﻛذﻣﻟا طورﺷﻟا رظﻧا)
2 نﺎﻣﺿﻟا
- ؛دﻣﺗﻌﻣ عزوﻣ نﻣ ةدﻌُﻣﻟا ءارﺷ مﺗ
- ؛دﻣﺗﻌﻣ لﯾﻛو ﺔﻓرﻌﻣﺑ بﯾﻛرﺗﻟا مﺗ
- ؛ﮫﻠﺟأ نﻣ تﻌﻧُﺻ يذﻟا ضرﻐﻟا ﻲﻓو مادﺧﺗﺳﻻا لﯾﻟد تﺎﻣﯾﻠﻌﺗﻟ ﺎًﻘﻓو ةدﻌُﻣﻟا مادﺧﺗﺳا
- لﯾﻟد تادﺎﺷرﻹ ﺎًﻘﻓو ﺎًﯾﻣوﯾ ةدﻌُﻣﻟا ﺔﻧﺎﯾﺻ مﺗﯾ؛مادﺧﺗﺳﻻا
- بﺎﺳﺣ ﻰﻠﻋ ﺔﻧﺎﯾﺻﻟا) لﻗﻷا ﻰﻠﻋ ،مﺎﻌﻟا ﻲﻓ ةرﻣ ﺔﻧﺎﯾﺻﻟا ءارﺟإ ﻊﻣ ،ﺔﻧﺎﯾﺻﻟا طورﺷﻟ ﺎًﻘﻓو دﻣﺗﻌﻣﻟا لﯾﻛوﻟا ﺔﻧﺎﯾﺻﻟا ﻊﺑﺎﺗﯾ
- نﻣ ﺔﯾﻠﺻﻷا رﺎﯾﻐﻟا ﻊطﻘﻟ يرﺻﺣﻟا مادﺧﺗﺳﻻاJAC.
- ةرﻘﻓ) تﺎﻛﻠﮭﺗﺳﻣﻟا لادﺑﺗﺳا9؛(
- ؛ﺔﻔﻟﺎﺗ ﺎﮭﻧﺄﺑ ﺔﯾﻧﻔﻟا ﺔﻣدﺧﻟا مﺳﻗ رﻘﯾ مﻟ ﻲﺗﻟا رﺎﯾﻐﻟا ﻊطﻗ
- ؛ةدﻌُﻣﻠﻟ مﯾﻠﺳﻟا رﯾﻏ مادﺧﺗﺳﻻا نﻋ ﺔﻣﺟﺎﻧﻟا تﻼﻛﺷﻣﻟا
- ؛دﻣﺗﻌﻣ لﯾﻛو ﺔﻓرﻌﻣﺑ مﺗﯾ مﻟ بﯾﻛرﺗ نﻋ ﺔﻣﺟﺎﻧﻟا تﻼﻛﺷﻣﻟا
- .ﺔﺑﺳﺎﻧﻣﻟا رﯾﻏ ﺔﻟوﺎﻧﻣﻟا وأ لﻘﻧﻟا ءﺎﻧﺛأ فﻠﺗ نﻋ ﺔﻣﺟﺎﻧﻟا تﻼﻛﺷﻣﻟا وأ رﺎﯾﻐﻟا ﻊطﻗ
ﺔﯾﺳﻧرﻔﻟا ﺔﻐﻠﻟا

91
3 تﺎﮭﯾﺑﻧﺗ
ﻲﻓ ﮫﯾﻠﻋ عﻼطﻼﻟ زﺎﮭﺟﻟا ﻊﻣ اذھ مادﺧﺗﺳﻻا لﯾﻟد ظﻔﺣ اًدﺟ مﮭﻣﻟا نﻣ ءﺎطﻋإ مﺗﯾ نأ دﻛﺄﺗﻓ ،رﺧآ صﺧﺷ ﻰﻟإ زﺎﮭﺟﻟا اذھ لﻘﻧ وأ ﻊﯾﺑ مﺗﯾﺳ نﺎﻛ اذإ .لﺑﻘﺗﺳﻣﻟا
.ﮫﺑ ﺔﻘﻠﻌﺗﻣﻟا تﺎﮭﯾﺑﻧﺗﻟاو ﮫﻠﯾﻐﺷﺗ ﺔﻓرﻌﻣ مدﺧﺗﺳﻣﻟا ﻊﯾطﺗﺳﯾ ثﯾﺣﺑ اذھ مادﺧﺗﺳﻻا لﯾﻟد
ﺧﺗﺳاو بﯾﻛرﺗ لﺑﻗ هﺎﺑﺗﻧﺎﺑ ﺎﮭﺗءارﻗ ءﺎﺟرﻟا .نﯾرﺧﻵا ﺔﻣﻼﺳ ﻰﻠﻋو كﺗﻣﻼﺳ ﻰﻠﻋ ﺎًﺻرﺣ تﺎﮭﯾﺑﻧﺗﻟا هذھ ءﺎطﻋإ مﺗ.زﺎﮭﺟﻟا ماد
.ﺔﺑﻌﻠﻛ ﺎھوﻣدﺧﺗﺳﯾ نأ وأ لﺎﻔطﻷا ﺎﮭﺳﻣﻠﯾ ﻻأ ﻰﺟرﯾ .ﺎﮭﻣادﺧﺗﺳﺎﺑ مﮭﻟ حوﻣﺳﻣ نوﻐﻟﺎﺑ صﺎﺧﺷأ ﺎﮭﻣدﺧﺗﺳﯾ ﻲﻛﻟ ﺔﻟﻵا هذھ مﯾﻣﺻﺗ مﺗ
Self-Service.
.ةرارﺣﻟاو ﺔﺑوطرﻟا نﻋ دﯾﻌﺑ نﺎﻛﻣ لﺧاد ﺔﻟﻵا هذھ مادﺧﺗﺳاو نﯾزﺧﺗ بﺟﯾ
EN ISO 3744.
.(ﺔﻔﻟﺎﺧﻣ تﺎﻣﯾﻠﻌﺗ دﺟوﯾ مﻟ ﺎﻣ) دﺣاوﻟا تﻗوﻟا ﻲﻓ دﺣاو صﺧﺷ ﺔﻟﻵا هذھ مدﺧﺗﺳﯾ نأ بﺟﯾ
.ﺔﻧﺎﯾﺻﻟا تﺎﯾﻠﻣﻋ لﺑﻗو زﺎﮭﺟﻠﻟ ﻲﺟرﺎﺧﻟا/ﻲﻠﺧادﻟا فﯾظﻧﺗﻟﺎﺑ مﺎﯾﻘﻟا لﺑﻗ ﻲﺑرﮭﻛﻟا ر
ﺔﯾﺗاذﻟا ﺔﻣدﺧﻟا قﯾرط نﻋ مادﺧﺗﺳﻼﻟ ﺔﺻﺻﺧﻣ ﺔﻟﻵا هذھ
.ﺔﻟﻵا هذھ تﺎﻔﺻاوﻣ لﯾدﻌﺗ ﺔﻟوﺎﺣﻣ وأ لﯾدﻌﺗ رطﺧﻟا نﻣ
.مادﺧﺗﺳﻻا لﺟأ نﻣ ةﺎطﻌﻣﻟا تﺎﻣﯾﻠﻌﺗﻟا ﻊﺑﺗا
.لﻣﻌﻟﺎﺑ مﺎﯾﻘﻠﻟ ﺔﻟﻵا هذﮭﻟ ﺔﯾﻓﺎﻛ ةءﺎﺿإ كﺎﻧھ نوﻛﯾ نأ بﺟﯾ
نﻣ لﻗأ ﺔﻟﻷا هذھ توﺻ ىوﺗﺳﻣ75 رﺎﯾﻌﻣﻠﻟ ﺎًﻘﻓو لﺑﯾﺳﯾد
.ةرارﺣﻟا لدﺗﻌﻣﻟاو ﺞﺿﺎﻧﻟا رﺑﺧﻟا ﻊﯾطﻘﺗﻟ ﺔﺻﺻﺧﻣ ﺔﻟﻵا هذھ
:ﺔﯾﻟﺎﺗﻟا تﺎﻣﺎﺧﻟاو زﺑﺧﻟا عاوﻧﻷ ﺔﺻﺻﺧﻣ رﯾﻏ ﺔﻟﻵا هذھ
ﯾﺋزﺟ هدﯾﻣﺟﺗ ﺔﻟ
ً
.ﺎﮭﺑ حرﺻﻣﻟا رﯾﻏ تﺎﻣﺎﺧﻟا وأ زﺑﺧﻟا ﻊطﻗ ءﺎﻧﺛأ ﺔﻟﻵا فﻠﺗﺗ نأ نﻛﻣﯾ
.ﮫﺗﻟ
وﺎﻧﻣ ءﺎﻧﺛأ نﺎﻣﻷا تﺎطﺎﯾﺗﺣا لﻛ ذﺧﺗا .نزوﻟا لﯾﻘﺛ زﺎﮭﺟﻟا اذھ
ﻵا بﯾﻛرﺗ دﻌﺑ.ءﺎﺑرﮭﻛ لﺑﺎﻛ ﻰﻠﻋ دﻧﺗﺳﺗ ﻻ ﺎﮭﻧأ دﻛﺄﺗ ،ﺔﻟ
تﺋﺎﺑﻟا زﺑﺧﻟاو ،نﺧﺎﺳﻟا زﺑﺧﻟا
-
ازإ مﺗ يذﻟا وأ ،دﻣﺟﻣﻟا زﺑﺧﻟاﺎ
-
ﺔﺑﻠﺻﻟا ةرﺷﻘﻟا تاذ زﺑﺧﻟا نﻣ ىرﺧأ عاوﻧأو ﺔﺑﻠﺻ ةرﺷﻘﺑ لﻣﺎﻛﻟا زﺑﺧﻟا
-
رادوﺎﺟﻟا زﺑﺧ
-
ﺔﮭﯾﺑﺷﻟا تﺎﻣﺎﺧﻟاو كﯾﺗﺳﻼﺑﻟاو بﺷﺧﻟا لﺛﻣ ﺔﯾﺋاذﻏ رﯾﻏ تﺎﺟﺗﻧﻣ
-
كﻌﻛﻟا وأ زﺑﺧﻟا ﺔﺋﻓ ﻰﻟإ ﻲﻣﺗﻧﯾ ﻻ مﺎﻌط يأ
-
ﺎﯾﺗﻟا ﺎًﻣﺋاد لﺻﻓا
ﺔﯾﺳﻧرﻔﻟا ﺔﻐﻠﻟا

92 92
4 ﺔﯾﻧﻔﻟا تﺎﻔﺻاوﻣﻟا
NEW SELF 450
NEW SELF 450M
(مﻣ) عﺎﻔﺗرﻻا
1267
1267
ضرﻌﻟا(مﻣ)
(مﻣ) قﻣﻌﻟا
892
892
(مﻣ) لﺎﺧدﻹا ةﺎﻧﻗ ضرﻋ
310
300
(مﻣ) لﺎﺧدﻹا ةﺎﻧﻗ ضرﻋ
(مﻣ) لﺎﺧدﻹا ةﺎﻧﻗ عﺎﻔﺗرا
160
160
(مﻣ) مزﺣﻟا
800 ×860 ×1600
800 ×860 ×1600
(مﺟﻛ) ﻲﻓﺎﺻﻟا نزوﻟا
(مﺟﻛ) فﯾﻠﻐﺗﻟا ةوﺑﻋ + ﻲﻓﺎﺻﻟا نزوﻟا
230
240
ةوﻗ(طاو وﻠﯾﻛ) روﺗوﻣﻟا
0.49
1.1
) راوطﻷا ﻲﺛﻼﺛ وأ روطﻟا يدﺎﺣأ1 وأ ةزﺎﻓ
3 (ةزﺎﻓ
220 طﻟوﻓ- 50 ) زﺗرھA(
5
-
380 طﻟوﻓ- 50 ) زﺗرھA(
3.2
3.2
(ﺔﻋﺎﺳ/زﺑﺧﻟا) ﺔﻌﺳ
200 >500
200 >500
(لﺑﯾﺳﯾد) ﻲﺗوﺻﻟا ىوﺗﺳﻣﻟا
>75
>75
روﺗوﻣىوّﻘﻣ
يرﺎﯾﺗﺧا
JACSTOP
يرﺎﯾﺗﺧا
ﺔﯾﺣﯾﺿوﺗ ﺔﻗﺎطﺑ
هردﻗ ﻲﻓﺎﺿإ عﺎﻔﺗرا4 مﺳ
ﻲﻣوﯾ دادﻋ
يرﺎﯾﺗﺧا
ﺔﺻﺎﺧ نﯾﻛﺎﻛﺳ
يرﺎﯾﺗﺧا
4.1 ﺔﯾﻧﻔﻟا تﺎﻔﺻاوﻣﻟا
598 598
440 440
210 220
) راوطﻷا ﻲﺛﻼﺛ3 (ةزﺎﻓ
يرﺎﯾﺗﺧا
يرﺎﯾﺗﺧا
صﺎﺧ نوﻟ يرﺎﯾﺗﺧا
روﺗوﻣﻟا عوﻧ
4.2 لﯾﺻﺎﻔﺗ.نﯾﺟﻌﻠﻟ رﺷﺎﺑﻣ لﻛﺷﺑ ﺔﺳﻣﻼﻣﻟا تﺎﻣﺎﺧﻟا
:ﺔﯾﻔﻠﺧ ةدﺿﻧﻣ أدﺻﻠﻟ موﺎﻘﻣ ذﻻوﻓ430
:زﺑﺧﻟا ﻊطﻗ ﻊﻓد موﺎﻘﻣ ذﻻوﻓ أدﺻﻠﻟ430
:زﺑﺧ سﺑﻛﻣ أدﺻﻠﻟ موﺎﻘﻣ ذﻻوﻓ430
:تارﻔﺷﻟابﻠﺻﻟا
:لﺎﺑﻘﺗﺳا ةدﺿﻧﻣ أدﺻﻠﻟ موﺎﻘﻣ ذﻻوﻓ430
:سﯾﯾﻛﺗﻟا زﺎﮭﺟ أدﺻﻠﻟ موﺎﻘﻣ ذﻻوﻓ430
ﺔﯾﺳﻧرﻔﻟا ﺔﻐﻠﻟا

93
5 لﯾﻐﺷﺗﻟاو بﯾﻛرﺗﻟا
5.1 :ﺔﻟﻷا فﯾﻠﻐﺗ كﻓ
لﺑﻗ .نوﺗرﻛﻟا قروﺑ ﺔﯾﻣﺣﻣو ﺔطرﺷﺄﺑ ﺔطوﺑرﻣو ،حاوﻟأ ﻰﻠﻋ ،ﺎﻧﺷرو نﻣ ﺎﮭﺟورﺧ دﻧﻋ ،تﻻﻵا عﺎﺑُﺗ غﻼﺑإو ةوﺑﻌﻟا صﺣﻓ بﺟﯾ ،ءﻲﺷ يﺄﺑ مﺎﯾﻘﻟا
.لﻘﻧﻟا نﻋ ﺢﺗﺎﻧ فﻠﺗ يﺄﺑ ةرﺷﺎﺑﻣ لﯾﺻوﺗﻟا ﺔﻛرﺷ
.بطﻋ يﺄﺑ ﺎﻧﻐﻠﺑأو .لﻘﻧﻟا ءﺎﻧﺛأ فﻠﺗﻠﻟ ضرﻌﺗﺗ مﻟ ﺎﮭﻧأ قﻘﺣﺗ ،نوﺗرﻛﻟا نﻣ ﺔﻟﻵا جارﺧإ دﻌﺑ
ىدﻣﻟا ﻰﻠﻋ ﺔﯾﻟﺎﻌﻓو زﺎﺗﻣﻣ ءادأ ﻰﻠﻋ لوﺻﺣﻠﻟ:ﺎًﻌﺿوﻣ رﺗﺧا ،لﯾوطﻟا
.تازازﺗھﻻا نﻣ ٍلﺎﺧو يوﻗو وﺗﺳﻣ ﺢطﺳ ﻊﻣ ةرارﺣﻟا ردﺎﺻﻣ نﻋ اًدﯾﻌﺑو ةرﺷﺎﺑﻣﻟا سﻣﺷﻟا ﺔﻌﺷأ نﻋ اًدﯾﻌﺑو ،ﺔﯾوﮭﺗﻟا دﯾﺟ
ﻲﻠﺿﺎﻔﺗ رﺎﯾﺗ ﻊطﺎﻘﺑ زﮭﺟﻣ طﺧ ﻰﻠﻋ ﻎﯾرﻔﺗﻟا ﺔﺑﻠُﻋ ﻰﻠﻋ ﮫﻠﯾﺻوﺗ بﺟﯾ ،ﻲﺋﺎﺑرﮭﻛ رّﯾﻐُﻣﺑ ةزﮭﺟﻣﻟا تﻻﻶﻟ ﺔﺑﺳﻧﻟﺎﺑ300 .رﯾﺑﻣأ ﻲﻠﻣ
ءﺎﺑرﮭﻛﻟا ﺔﻛﺑﺷ قﻓاوﺗ نﻣ قﻘﺣﺗﻟا مﮭﻣﻟا نﻣ ،ءﺎﺑرﮭﻛﻟﺎﺑ ﮫﻠﯾﺻوﺗ دﻧﻋ روﺗوﻣﻟا لﯾﻐﺷﺗ فﻗو بﻧﺟﺗ لﺟأ نﻣو ءﺎﺑرﮭﻛﻟا ﺔﻛﺑﺷ ﻰﻠﻋ ﺔﻟﻵا لﯾﺻوﺗ لﺑﻗ
.(ﺔﻟﻵا هذﮭﻟ تﺎﻧﺎﯾﺑﻟا ﺔﺣوﻟ رظﻧا) ﺔﻟﻵا تﺎﻔﺻاوﻣ ﻊﻣ
تﻻﻵﺎﺑ ﺔﺻﺎﺧﻟا تﺎﻣﯾﻠﻌﺗﻟا ﻊﻣ زﺎﮭﺟﻟا اذھ قﻓاوﺗﯾ2006/42 و2006/95 و2004/108 ﺔﻣﻼﻋ لﻣﺣﯾوCE .كﻟذﺑ دﮭﺷﺗ ﻲﺗﻟا
:ﺔﻟﻵا ﻰﻠﻋ ةدوﺟوﻣﻟا نﺎﻣﻷﺎﺑ ﺔﻘﻠﻌﺗﻣﻟا ﺔﯾﺣﯾﺿوﺗﻟا روﺻﻟا ﻰﻠﻋ عﻼطﻻا ﻰﺟرﯾ
ﻊﺿو ﺔﻘطﻧﻣ لوﺣ ﺔﻟﻵا ﺔﻣدﻘﻣ ﻲﻓ ﺎھدﺟﺗ فوﺳ .حرﺟ ثودﺣ رطﺧ ﻰﻟإ رﯾﺷُﺗ ﺔﯾﺣﯾﺿوﺗ ةروﺻ ) .زﺑﺧﻟاfig. 10,
n°20 (
) .ﻲﺑرﮭﻛﻟا قودﻧﺻﻟا بﺎﺑ رﮭظ ﻰﻠﻋ ﺔﻟﻶﻟ ﻲﺑرﮭﻛﻟا ﻲطﯾطﺧﺗﻟا مﺳرﻟا دﺟﺗ فوﺳfig.10, n°22(
A. .ﺔﻟﻵا فﯾﻠﻐﺗ سﯾﻛ كﻟذﻛو ﺔﻧوﺗرﻛﻟا بﺣﺳا
B. .ﺎﮭﻌطﻗ ءﺎﻧﺛأ ةرﯾﺧﻷا هذھ ءﺎﺧﺗرا ﻰﻟإ صﺎﺧ لﻛﺷﺑ هﺎﺑﺗﻧﻻا ﻊﻣ ﺔطرﺷﻷا عزﻧا
C. ا ﺔﻛرﺣ لﻗرﻌﺗ ﻲﺗﻟا ﺔﯾﺑﺷﺧﻟا ﺢﺋارﺷﻟا عزﻧﺗ نﺄﺑ حاوﻟﻷا نﻋ زﺎﮭﺟﻟا لﺻﻓا.تﻼﺟﻌﻟ
D. لﺿﻓأ لﻛﺷﺑ ضرﻷا ﻊﻣ سﻣﻼﺗﻟا فﯾﻔﺧﺗ لﺟأ نﻣ رﻣﻷا اذﮭﺑ لﻗﻷا ﻰﻠﻋ نﺎﺻﺧﺷ موﻘﯾ نأ ﻰﻠﻋ صرﺣا .حوﻠﻟا نﻋ ﺔﻟﻵا لزﻧأ
5.2 :ﻊﺿوﻣﻟا
5.3 :ﻲﺑرﮭﻛﻟا لﯾﺻوﺗﻟا
مﺎھ.ﻲﻣازﻟإ ﻲﺿرﻷا فرطﻟا لﯾﺻوﺗ :
.ﻲﻠﺿﺎﻔﺗ رﺎﯾﺗ ﻊطﺎﻗو رﮭﺻﻧﻣﺑ ﺔﯾﺑرﮭﻛﻟا تادﯾدﻣﺗﻟا ﺔﯾﺎﻣﺣﺑ ﺢﺻﻧُﯾ
ﺔﯾﺎﻣﺣ بﺟﯾ:هﺎﻧدأ نﯾﺑُﻣ وھ ﺎﻣﻛ ﺔﻟﻵا يذﻐُﺗ ﻲﺗﻟا ﺔﯾﺑرﮭﻛﻟا تادﯾدﻣﺗﻟا
- ﺔﯾﺎﻣﺣ :ﺔﯾﻟﺎﻣﺷﻟا ﺎﻛﯾرﻣأ15 ؛رﯾﺑﻣأ
ﺔﯾﺎﻣﺣ :مﻟﺎﻌﻟا لود ﺔﯾﻘﺑ16 .رﯾﺑﻣأ
ﺔﻠﻛﺷﻣ يأ :ﺔظوﺣﻠﻣ.نﺎﻣﺿﻟا ﺎﮭﻠﻣﺷﯾ نﻟ رﺧآ لﻛﺷﺑ لﯾﺻوﺗﻟا نﻋ ﺔﻣﺟﺎﻧ
ﺔﯾﺳﻧرﻔﻟا ﺔﻐﻠﻟا

94 94
ﺔﻟﻵا لﺧادو ﺔﯾذﻐﺗﻟا لﺑﺎﻛ نﻣ برﻘﻟﺎﺑ ﺔﻟﻵا فﻠﺧ) .ﻲﺑرﮭﻛﻟا قودﻧﺻﻟا ﻰﻠﻋfig.10, n°21 (
ﺎھدﺟﺗ فوﺳ .ﺎﮭﻟ حﻼﺻإ يأ لﺑﻗ ﺔﻟﻵا نﻋ ءﺎﺑرﮭﻛﻟا لﺻﻓ ﻰﺟرُﯾ .ءﺎﺑرﮭﻛﻟﺎﺑ قﻌﺻﻟا رطﺧ ﻰﻟإ رﯾﺷُﺗ ﺔﯾﺣﯾﺿوﺗ ةروﺻ
5.4 :لﯾﻐﺷﺗﻟا
.ﺔﻟﻶﻟ ﺔﻛرﺣﺗﻣﻟا ءازﺟﻷا ﻰﻠﻋ لﯾﺧد ءﻲﺷ يأ دوﺟو مدﻋ نﻣ دﻛﺄﺗ ،لﯾﻐﺷﺗﻟا لﺑﻗ
."مادﺧﺗﺳﻻا" لﺻﻓ ﻊﺟار ،ﺔﻟﻵا مادﺧﺗﺳﻻ
5.5 :رطﺧ
ﺗﻟا لﺻﻔﻟ ﻲﻣوﻣﻌﻟا ﻊطﻘﻟا حﺎﺗﻔﻣ مدﺧﺗﺳﺗ نأ كﯾﻠﻋ بﺟﯾ ،ﺔﻟﻵا ﻰﻠﻋ وأ مدﺧﺗﺳﻣﻟا ﻰﻠﻋ رطﺧ دوﺟو ﺔﻟﺎﺣ ﻲﻓ.ﺔﻟﻵا نﻋ ﻲﺑرﮭﻛﻟا رﺎﯾ
؛صﺣﻓو ﺔﻧﺎﯾﺻ ﺔﯾﻠﻣﻋ ﺔﯾﺄﺑ مﺎﯾﻘﻟا لﺑﻗ ﻲﺑرﮭﻛﻟا سﺑﻘﻣﻟا نﻣ سﺑﺎﻘﻟا بﺣﺳا
.ﺔﯾﻠﻣﻌﻟﺎﺑ وھ موﻘﯾ نأ دﻣﺗﻌﻣﻟا عزوﻣﻟا نﻣ بﻠطا ،ةرﻔﺷﻟا رﯾﯾﻐﺗ دﻧﻋ
ءﺎﻧﺛأ وأ تارﻔﺷﻟا لادﺑﺗﺳا ءﺎﻧﺛأ حورﺟﻟا نﻣ ﺔﯾﺎﻣﺣ تازﺎﻔﻗ ءادﺗرا ﻰﻠﻋ صرﺣا.ةرﻔﺷﻟا نﻣ ﺔﺑﯾرﻗ ﺔﯾﻠﻣﻌﺑ مﺎﯾﻘﻟا
.لھؤﻣ صﺧﺷ ﺔطﺳاوﺑ مﺗﺗ نأ بﺟﯾ رﺎﯾﻏ ﺔﻌطﻗ لادﺑﺗﺳا وأ ﺔﻧﺎﯾﺻ ﺔﯾﻠﻣﻋ يأ
.فﻗوﺗﻟا ءﺎﻧﺛأ ﻰﺗﺣ ،ةرﻔﺷﻟا سﻣﻠﺗ ﻻ
ﺔﯾﺳﻧرﻔﻟا ﺔﻐﻠﻟا

95
6 نﺎﻣﻷاو مﻛﺣﺗﻟا زﺎﮭﺟ
6.1 :مﻛﺣﺗﻟا زﺎﮭﺟ
.ﺔﻟﻵا لﯾﻐﺷﺗ ﻰﻟإ يدؤﯾ يوﻠﻌﻟا ءﺎطﻐﻟا قﻠﻏ نﺈﻓ ،ﺎًﻣﺎﻣﺗ ﺔﯾﻛﯾﺗﺎﻣوﺗوأ ﺔﻟﻵا نأ ﺎﻣﺑ
6.2 :لﻣﻋ ﺔﻘطﻧﻣ
) ﺔﻟﻵا مﺎﻣأ لﻣﻌﻟا ﺔﻘطﻧﻣ دﺟوﺗfig.3 n°17(
6.3 :نﺎﻣﻷا ةزﮭﺟأ
:ـﺑ ةزﮭﺟﻣ ﺔﻟﻷا هذھ
ﻲﻛﯾﻧﺎﻛﯾﻣ نﺎﻣأ حﺎﺗﻔﻣ
يوﻠﻌﻟا ءﺎطﻐﻟا فﻠﺧ دﺟوﯾ
) يوﻠﻌﻟا ءﺎطﻐﻟا ﺢﺗﻔﻧ ﺎﻣدﻧﻋ ﺔﻟﻵا فﻗوﯾ يذﻟاوfig.1 n°1.(
ﺔﻟﻵا لﯾﻐﺷﺗ ءﺎﻧﺛأ يوﻠﻌﻟا ءﺎطﻐﻟا ﺢﺗﻓ ﻊﻧﻣﯾ
لﯾﻐﺷﺗ ءﺎﻧﺛأ ﻲﻣﺎﻣﻷا ءﺎطﻐﻟا ﺢﺗﻓ ﻊﻧﻣﯾ) ﺔﻟﻵاfig. 7 n°19(
ﻲﻛﯾﻧﺎﻛﯾﻣ نﺎﻣأ حﺎﺗﻔﻣ
زﺑﺧﻟا تﺎﺗﻓ ءﺎﻋو قوﻓ ﺔﻟﻵا لﻔﺳأ ﻲﻓ دﺟوﯾو
) ﻲﻣﺎﻣﻷا بﺎﺑﻟا ﺢﺗﻔﻧ ﺎﻣدﻧﻋ لﻣﻌﻟا نﻣ ﺔﻟﻵا ﻊﻧﻣﯾ يذﻟاوfig.1 n°5(
ﻲﻛﯾﻧﺎﻛﯾﻣ لﻔﻗ
ﻲﻛﯾﻧﺎﻛﯾﻣ لﻔﻗ
7 مادﺧﺗﺳﻻا
) ﺔﻠﻣرﻔﺑ ةدوزﻣﻟا ةرﯾﻐﺻﻟا تﻼﺟﻌﻟا لﻔﻗ بﺟﯾ ،لﺎﻣﻌﺗﺳﻻا لﺟأ نﻣfig.1 n°13.(
ﻵا لّﺻو ،موﯾﻟا ﺔﯾادﺑ ﻲﻓئراوطﻟا ﺔﻟﺎﺣ ﻲﻓ فﺎﻘﯾﻹا رز مادﺧﺗﺳﺎﺑ ءﺎﺑرﮭﻛﻟﺎﺑ ﺔﻟ
) مادﺧﺗﺳﻻا تاوطﺧfig.4,5(
) يوﻠﻌﻟا ءﺎطﻐﻟا ﺢﺗﻓا .أfig.1, n°1(
) ﺔﯾﻔﻠﺧﻟا ةدﺿﻧﻣﻟا ﻰﻠﻋ زﺑﺧﻟا ﻊﺿ .بfig.1 n°3).ﻊطﻘﻟا ﺔﯾﻠﻣﻋ لﯾﻐﺷﺗ ﻰﻟإ يدؤﯾ ءﺎطﻐﻟا قﻠﻏ .ءﺎطﻐﻟا قﻠﻏأو كرﺣﺗﻣﻟا ءزﺟﻟاو تارﻔﺷﻟا نﯾﺑ ،
ضرﻋ) زﺑﺧﻟا فﯾﻏر تﺎﺳﺎﻘﻣ × لوط × ﻰﻧدأ دﺣ :(مﺳ) (عﺎﻔﺗرا12 ×6 ×6 - ﻰﺻﻗأ دﺣ44 ×31 ×16
)fig.1 n°10 (
ﻲﻓ .ج .ﻊطﻘﻣﻟا زﺑﺧﻟا ذﺧو ﮫﺣﺗﻓا .ﮫﻠﻔﻗ نﻣ ﻲﻣﺎﻣﻷا ءﺎطﻐﻟا ررﺣﺗﯾ ،ﻊطﻘﻟا ةرود ﺔﯾﺎﮭﻧ
:ﺔظوﺣﻠﻣ مﺎظﻧﺑ (ﺎًﯾرﺎﯾﺗﺧا) ةزﮭﺟﻣ تﻻﻵا ضﻌﺑJAC Stop ) (ﺢﺋارﺷﻟا تﯾﺑﺛﺗﻟ ﻲﻛﯾﺗﺎﻣوﺗوأ مﺎظﻧ)fig.6 n°18.(
:ﺔﺣﯾﺻﻧ.لھؤﻣ صﺧﺷ ﺔطﺳاوﺑ تارﻔﺷﻟا دﺷ صﺣﻓا ،لﯾﻐﺷﺗﻟا نﻣ ﻰﻟوﻷا مﺎﯾﻷا دﻌﺑ
:ﺔﻌﺳﻟا ددﻋ :موﯾﻟا ﻲﻓ ﺔﻌطﻘﻣﻟا زﺑﺧﻟا ﻊطﻗ6.000 .(زﺑﺧﻟا عوﻧﻟ ﺎًﻘﻓو)
ﺔﯾﺳﻧرﻔﻟا ﺔﻐﻠﻟا

96 96
8 ﺔﻧﺎﯾﺻﻟا
8.1 .بردُﻣ مدﺧﺗﺳﻣ ﺔطﺳاوﺑ ﺔﯾﻣوﯾ
A. تﺎﺗﻔﻟا ءﺎﻋو ﻎﯾرﻔﺗ كﯾﻠﻋ بﺟﯾ نﺎﻛ اذإ قﻘﺣﺗ
B. ) دﺿﺎﻧﻣﻟا فﯾظﻧﺗﺑ مﻗfig.1 n°6, 3ﺗﺳﺎﺑ ( ةﺎﺷرﻓ مادﺧ
C. لﺧادﻟا نﻣ فﯾظﻧﺗﻠﻟ ﺔﻓﺎﺟ شﺎﻣﻗ ﺔﻌطﻗ مدﺧﺗﺳا
D. ﺔﺑطر شﺎﻣﻗ ﺔﻌطﻗ مدﺧﺗﺳا ،ﺔﯾﺟرﺎﺧﻟا ﺔﯾﺎﻧﻌﻠﻟ ﺔﺑﺳﻧﻟﺎﺑ
8.2 لﻛ25000 .دﻣﺗﻌﻣ لﯾﻛو ﺔطﺳاوﺑ مﺎﻋ لﻛ لﻗﻷا ﻰﻠﻋ ةدﺣاو ةرﻣ وأ /و زﺑﺧﻠﻟ ﻊﯾطﻘﺗ ةرﻣ
A. ) ءﺎﺑرﮭﻛﻟا سﺑﻘﻣ نﻣ سﺑﺎﻘﻟا بﺣﺳاfig.2 n°16 (
B. ) ﻊطﻘﻟا تارﻔﺷ ﺔﻟﺎﺣ نﻣ قﻘﺣﺗfig.1 n°4 .(
رﺎﯾﻐﻟا ﻊطﻗ جوﻟﺎﺗﻛJAC(
لﺟأ نﻣ ﺔﻧﺎﯾﺻﻟا رﺗﻓد ﻲﻓ ﮫﺗرﺎﯾز لﯾﺟﺳﺗﺑ موﻘﯾ دﻣﺗﻌﻣﻟا لﯾﻛوﻟا نأ نﻣ دﻛﺄﺗ ـﻟا نﺎﻣﺿ ﻰﻠﻋ ظﺎﻔﺣﻟا5 .تاوﻧﺳ
رﺎﯾﻌﻣ) حورﺟﻟا نﻣ ﺔﯾﺎﻣﺣ تازﺎﻔﻗ ءادﺗرا ﻰﻠﻋ ﺎًﻣﺋاد صرﺣاEN 388: 2003 رﺷؤﻣB=5 ﺔﯾﻠﻣﻋ ءﺎﻧﺛأ وأ ةرﻔﺷﻟا لادﺑﺗﺳا ءﺎﻧﺛأ نﺎﻣأ ﺔﯾذﺣأو (
) ﺔﻟﻵا سﺑﺎﻗ نأ دﻛﺄﺗﻟا دﻌﺑfig.2 n°16 رﺎﯾﺗﻟا نﻋ اًدﯾﺟ لوﺻﻔﻣ (.ﻲﺑرﮭﻛﻟا
) ﻲﻣﺎﻣﻷا بﺎﺑﻟا ﺢﺗﻓاfig1 n°5.(
؛ﺔﻟﻵا مﺎﻣأ دوﺟوﻣﻟا أدﺻﻠﻟ موﺎﻘﻣﻟا ذﻻوﻔﻟا نﻣ ﺔﻋوﻧﺻﻣﻟا ةدﺿﻧﻣﻟا بﺣﺳا
ﻲﻏرﺑﻟا كﻔﺑ مﻗ .ﺔﻟﻵاA .ﻲﻣﺎﻣﻷا رﺎطﻹا لﯾﺻوﺗ عارذ تﺑﺛُﯾ يذﻟا
ﻲﻏارﺑﻠﻟ قﻧزﻟاB تﻻآ)Misch ﻲﻏارﺑﻟا كﻔﺑ مﻗ .(B نوﻛﺗ نأ ﺔﺑﻗارﻣ ﻊﻣ تارﻔﺷﻟا لدﺑﺗﺳا .تارﻔﺷﻟا دﺷﺗ ﻲﺗﻟا ﺔﻓوﺟﻣﻟا ﺔﯾﺳادﺳﻟا
ﻲﻏارﺑﻟا دﺷﺗ نﺄﺑ تارﻔﺷﻟا دﺷ دﻋأ .ﺔﺣﺟرﺄﺗﻣﻟا عرذﻷا رﻔُظ ﻲﻓ اًدﯾﺟ ﺔﻋوﺿوﻣB ﺔﺑﺎﺛﻣﺑ ﻲھ رﺎطﻹا ﻲﻓ تﻠظ ﻲﺗﻟا تارﻔﺷﻟا نوﻛﺗو ،
.(تﯾﯾزﺗﻟا رﺎﯾﺧﺑ ةزﮭﺟﻣﻟا ﺔﻟﻵا) كﻟذ دﻌﺑ لﯾﻣاوﺻﻟا دﺷ مﺛ .دﺷﻠﻟ لﯾﻟد
.لﻛﯾﮭﻟا رﺻﺎﻧﻋ كﻟذﻛو ﻲﻣﺎﻣﻷا رﺎطﻹا بﯾﻛرﺗ دﻋأو ﻲﻣﺎﻣﻷا رﺎطﻺﻟ ﺔﺑﺳﻧﻟﺎﺑ ط ﺔطﻘﻧﻟا نﻣ ءارﺟﻹا ررﻛ
وﻛﺗﻓ ،ﻲﺑرﮭﻛﻟا رﺎﯾﺗﻟﺎﺑ ﺔﻟﻵا لﯾﺻوﺗﺑ مﻗ.ةزھﺎﺟ ﺔﻟﻵا ن
ـﻟا نﺎﻣﺿ ﻰﻠﻋ ظﺎﻔﺣﻟا لﺟأ نﻣ ﺔﻧﺎﯾﺻﻟا رﺗﻓد ﻲﻓ ﮫﺗرﺎﯾز لﯾﺟﺳﺗﺑ موﻘﯾ دﻣﺗﻌﻣﻟا لﯾﻛوﻟا نأ نﻣ دﻛﺄﺗ5 .تاوﻧﺳ
C. ﺔﻛرﺷ ىدﻟ لﺳﻠﺳﻣﻟا مﻗرﻟا) ﻊطﻘﻟا تارﻔﺷ لادﺑﺗﺳﺎﺑ مﺎﯾﻘﻟا بﺟﯾﻓ ،ﻊطﻘﻟا ةدوﺟ ضﺎﻔﺧﻧا تظﺣﻻ اذإJAC: 610001.6110011 نﻣ
D. ) ﻊطﻘﻟا تارﻔﺷ رﯾﯾﻐﺗ ءارﺟﻹ ﺎًﻘﻓو تارﻔﺷﻟا لدﺑﺗﺳﺎﻓ ،ﺎھرﯾﯾﻐﺗ نﻣ دﺑ ﻻ نﺎﻛ اذإfig.8, 9(
:ﺔظوﺣﻠﻣ .تارﺎطﻹا ﮫﯾوﺷﺗ رطﺧ دوﺟوﻟ ،مزﻼﻟا نﻋ ةدﺎﯾز تارﻔﺷﻟا دﺷﺗ ﻻ
E. .ﺔﻟﻵا لﺧاد طﻔﺷاو ةﺎﺷرﻓ مادﺧﺗﺳﺎﺑ فﯾظﻧﺗﻟﺎﺑ مﻗ
F. .كﻟذ دﻌﺑ ﺎﮭﻣﯾﺣﺷﺗﺑ مﻗ مﺛ ،ﻲﻠﺑﻟا نﺎﻣﻟور ﺔﻟﺎﺣ نﻣ قﻘﺣﺗ
G. .بﺎﺑﻟا ﺔﻧاوطﺳأ تﻼﺻﻔﻣ مﯾﺣﺷﺗﺑ مﻗ
8.3 .تارﻔﺷﻟا رﯾﯾﻐﺗ
)fig.8,9(
.ةرﻔﺷﻟا نﻣ ﺔﺑﯾرﻗ
A. ﺔﺋﺑﻌﺗﻟا حوﻟ بﺣﺳا
B. ﺢﺋارﺷﻟا تﯾﺑﺛﺗ مﺎظﻧ كﻔﺑ مﻗJAC Fix .ﮫﺑﺣﺳاو نﯾﺑﻧﺎﺟﻟا نﻣ
C. نﯾﯾﻠﺧادﻟا ﺔﻟﻵا ﻲﺑﻧﺎﺟ ﻰﻠﻋ ﺔﯾﻣﺎﻣﻷا ةدﺿﻧﻣﻟا كﻔﺑ مﻗ
D. ﺔﯾﻣﺎﻣﻷا ةدﺿﻧﻣﻟا كﯾرﺣﺗﺑ مﻗ كﺗﯾﺣﺎﻧ
E. ﺔﯾﻣﺎﻣﻷا ةدﺿﻧﻣﻟا بﺣﺳا
F. ءﺎطﻐﻟا كﻔﺑ مﻗ
G. .تارﻔﺷﻟا لﻣﺎﺣ تارﺎطإ ﻲﻣﺣﯾ يذﻟا ءﺎطﻐﻟا ﺢﺗﻓا
H. سﺎﻘﻣ فوﺟﻣ ﻲﺳادﺳ حﺎﺗﻔﻣ لﺎﺧدإ نﻣ نﻛﻣﺗﻟا لﺟأ نﻣ رﺎطﻹا ﻲﻏارﺑ ءﺎطﻏ كﯾرﺣﺗﺑ مﻗ ،ﺔﯾﻠﺧادﻟا ىرﺳﯾﻟا ﺔﯾﺣﺎﻧﻟا نﻣ8 جرﺎﺧ نﻣ مﻣ
I. لﯾﻣاوﺻ كﻓ .(ﻲﻣﺎﻣﻷا رﺎطﻹا تارﻔﺷ ﻰﻠﻋ ﺔﯾﺎﻣﺣﻟا ﮫﻧﺄﺷ نﻣ ﺎﻣ ﻊﺿ) ﻲﻔﻠﺧﻟا رﺎطﻹا تارﻔﺷ لدﺑﺗﺳا .مﺎﻣﻷا وﺣﻧ رﺎطﻹا ﺔﻟﺎﻣﺈﺑ مﻗ
ﺟأ نﻣ ﻻإ لدﺑﺗﺳﺗ ﻻ ،رﯾطﺧ رﯾﺳﻛﺗﺑ ةرطﺎﺧﻣﻟا مدﻋو رﺎطﻹا ﮫﯾوﺷﺗ مدﻋ ل1 ﻰﻟإ3 .نﯾﻣﯾﻟا ﻰﻟإ رﺎﺳﯾﻟا نﻣ بوﺎﻧﺗﻟا ﻊﻣ ةدﺣاوﻟا ةرﻣﻟا ﻲﻓ تارﻔﺷ
ﺔﯾﺳﻧرﻔﻟا ﺔﻐﻠﻟا

97
9 تﺎﻛﻠﮭﺗﺳﻣﻟا ﻊطﻗ
ALL
SPRING, Ø 9 X 28 MM
5310020
ALL
RETAINING BAR FLAP
7390031
ALL
JAC STOP FLAP
7390030
ALL
FRAME LINK WITH BEARINGS
5740162
NEW SELF 450
JAC KNIFE, 13 MM/0.5 MM
6110001
NEW SELF 450M
JAC KNIFE, 13 MM/0.5 MM + TEFLON
6110011
ALL
REAR COVER FRONT PAD
5690221
ALL
REAR COVER RH REAR PAD
5690222
ALL
REAR COVER LH REAR PAD
5690223
ALL
GAS SPRING, 10 N
5315014
ALL
BELT
7240031
ALL
SLIDE PAD, 100 MM
5690010
ALL
LOAF HOLDER PAD
5690151
ALL
LOAF HOLDER SPRING
5310019
NEW SELF 450M
PUSHER FELT PAD
6120002
.ﻊﻧﺎﺻﻟا هردﺻأ يذﻟا رﺎﯾﻐﻟا ﻊطﻗ جوﻟﺎﺗﻛ سﺎﺳأ ﻰﻠﻋ ﺔﺑوﻠطﻣﻟا ﺔﻌطﻘﻟا نﺄﺷﺑ دﻣﺗﻌﻣﻟا لﯾﻛوﻟا ﻊﻣ دﻛﺄﺗ ،رﺎﯾﻏ ﺔﻌطﻗ بﻠط ءﺎﻧﺛأ
ﻵا مﻗر ﺎًﻣﺋاد ددﺣ.تﺎﻧﺎﯾﺑﻟا ﺔﺣوﻟ ﻰﻠﻋ نﯾﺑﻣ وھ ﺎﻣﻛ ﺔﻟ
ﺔﻛرﺷ ىدﻟ تﺎﯾﺑﻠطﻟا لﻣﻌﺑ لﯾﻛوﻟا موﻘﯾوJAC.
جذوﻣﻧﻟا يدﺟﻟا فﯾﺻوﺗﻟا فﻧﺻﻟا زﻣر
9.1 تﺎﻛﻠﮭﺗﺳﻣﻟﺎﺑ ﺔﻣﺋﺎﻗ
ﺔﯾﺳﻧرﻔﻟا ﺔﻐﻠﻟا

98 98
10 لﯾﻐﺷﺗﻟا ءﺎﻧﺛأ ﺔﺿرﺎﻌﻟا ثادﺣﻷا
ﺔﻠﻛﺷﻣﻟا
قﻘﺣﺗﻟا
يوﻠﻌﻟا ءﺎطﻐﻟا قﻠﻏأ
ﺎًﻔﺷﺎﻧ ﺎﻣ دﺣ ﻰﻟإ اًزﺑﺧ ﻊﺿ
رﯾﻏ تارﻔﺷﻟا تﻧﺎﻛ اذإتارﺎطﻹاو تارﻔﺷﻟا طﺑﺿﺎﻓ ،ﺔﯾوﺎﺳﺗﻣ
تارﻔﺷﻟا ﻲﻓ زﺗﮭﯾ زﺑﺧﻟا
تارﺎطﻹاو تارﻔﺷﻟا طﺑﺿﺎﻓ ،ﺔﯾوﺎﺳﺗﻣ رﯾﻏ تارﻔﺷﻟا تﻧﺎﻛ اذإ
دﯾدﺷ ءطﺑﺑ ﻊطﻘﻧﯾ زﺑﺧﻟا
) تارﻔﺷﻟا لادﺑﺗﺳا بﺟﯾ نﺎﻛ اذإ قﻘﺣﺗfig.8,9(
تارﺎطﻹاو تارﻔﺷﻟا طﺑﺿﺎﻓ ،ﺔﯾوﺎﺳﺗﻣ رﯾﻏ تارﻔﺷﻟا تﻧﺎﻛ اذإ
اذإ قﻘﺣﺗ) تارﻔﺷﻟا لادﺑﺗﺳا بﺟﯾ نﺎﻛfig.8,9(
ﻲﻓ لظﯾ وأ دﯾدﺷ ءطﺑﺑ جرﺧﯾ زﺑﺧﻟا
تارﻔﺷﻟا
تارﻔﺷﻟا نﻣ ﮫﺟورﺧ دﻧﻋ قﺣﺳﻧﻣ زﺑﺧﻟا
) تارﻔﺷﻟا لادﺑﺗﺳا بﺟﯾ نﺎﻛ اذإ قﻘﺣﺗfig.8,9(
) لﺑﺎﻛﻟا مادﺧﺗﺳﺎﺑ ﺔﻟﻵا لﯾﺻوﺗﺑ مﻗfig.2 n°16(
رودﺗ ﻻ ﺔﻟﻵا
ﻲﻣﺎﻣﻷا ءﺎطﻐﻟا قﻠﻏأ
) تارﻔﺷﻟا لادﺑﺗﺳا بﺟﯾ نﺎﻛ اذإ قﻘﺣﺗfig.8,9(
تﺎﻋﺎﺳ ةدﻌﻟ درﺑﯾ زﺑﺧﻟا كرﺗا
ﺔﻟوﺑﻘﻣﻟا تﺎﺳﺎﻘﻣﻟﺎﺑ زﺑﺧﻟا ﻊﺿ
) تارﻔﺷﻟا لادﺑﺗﺳا بﺟﯾ نﺎﻛ اذإ قﻘﺣﺗfig.8,9(
ﻊطﻘُﻣ وأ فﻟﺎﺗ زﺑﺧﻟا نﻛﻟ ،لﻣﻌﺗ ﺔﻟﻵا
ﺔﯾوﺎﺳﺗﻣ رﯾﻏ ﺔﻘﯾرطﺑ
قزﻣﺗﯾ زﺑﺧﻟا
:ﮫﺑﺗﻧا.ﺔﻟﻵا نﻋ رﺎﯾﺗﻟا لﺻﻓ بﺟﯾ ،تﺎﺣﻼﺻإ ﺔﯾﺄﺑ مﺎﯾﻘﻟا لﺑﻗ
.ّﻲﻧﻔﻟﺎﺑ لﺎﺻﺗﻻا ﻰﺟرﯾﻓ ،كﻟذ دﻌﺑ ﺔﻠﻛﺷﻣﻟا ترﻣﺗﺳا اذإ
ﺔﯾﺳﻧرﻔﻟا ﺔﻐﻠﻟا

99
11 لﺎﻛﺷﻷا ﻲﻓ ةدوﺟوﻣﻟا تﺎﻧوﻛﻣﻟﺎﺑ ﺔﻣﺋﺎﻗ
لﻛﺷ
مﻗرﻟا
مﺳﻻا
1
يوﻠﻌﻟا ءﺎطﻐﻟا
2
زﺑﺧﻟا ﻊطﻗ ﻊﻓد
3
ﺔﯾﻔﻠﺧ ةدﺿﻧﻣ
4
تارﻔﺷﻟا
5
ﻲﻣﺎﻣأ ءﺎطﻏ
6
لﺎﺑﻘﺗﺳا ةدﺿﻧﻣ
7
تﺎﻣدﺻ ﻲﻗاو
8
زﺑﺧﻟا تﺎﺗﻓ ءﺎﻋو
9
سﯾﯾﻛﺗﻟا زﺎﮭﺟ
10
دادﻋ
11
تﯾزﻟا دادﻋ طﺑﺿ ةدﺎﻋإ
12
) تﯾزﻟا ىوﺗﺳﻣ نﺎﯾﺑ ﺔﺑﻣﻟMisch(
13
ﺔﻠﺟﻋ
14
ﻲﻔﻠﺧ جﺎﺻ
15
ءﺎﺑرﮭﻛﻟا قودﻧﺻ جﺎﺻ
16
ءﺎﺑرﮭﻛﻟا لﺑﺎﻛ
3
17
لﻣﻋ ﺔﻘطﻧﻣ
6
18
ﺢﺋارﺷﻟا تﯾﺑﺛﺗ مﺎظﻧJAC Stop
7
19
ﻲﻣﺎﻣﻷا ءﺎطﻐﻟا لﻔﻗ
20
رطﺧ" ﺔﯾﺣﯾﺿوﺗ ةروﺻ"حرﺟ ثودﺣ
21
"ءﺎﺑرﮭﻛﻟﺎﺑ قﻌﺻﻟا رطﺧ" ﺔﯾﺣﯾﺿوﺗ ةروﺻ
22
ﻲﺑرﮭﻛ ﻲطﯾطﺧﺗ مﺳر
1
2
10
ﺔﯾﺳﻧرﻔﻟا ﺔﻐﻠﻟا

100
fig.1
5
3
2
4
9
7
6
8
13
11
10
12
1
14
15
16
fig.2
 Loading...