

Page 1
User’s guide Gebrauchsanweisung
Uživatelská příručka Užívateľská príručka
Instrukcje obsługi Vartotojo vadovas
USB 3.0 SATA HDD Docking Station
with Clone Function
Page 2

EN
Read carefully the user manual before assembly - installation - commissioning.
Protect yourself and avoid damaging your equipment.
DE
Lesen Sie unbedingt die Gebrauchsanweisung vor Aufstellung – Installation –
Inbetriebnahme. Dadurch schützen Sie sich und vermeiden Schäden an Ihrem
Gerät.
CZ
Pečlivě si přečtěte uživatelskou příručku před montáží – instalací – uvedením do
provozu. Ochráníte tím sebe a vyvarujete se poškození Vašeho zařízení.
PL
Przeczytaj uważnie instrukcję przed montażem / podłączeniem / użytkowaniem,
aby ustrzec się przed obrażeniami a urządzenie przed uszkodzeniem.
SK
Každopádne si prečítajte užívateľskú príručku pred zložením - inštaláciou -
uvedením do prevádzky. Ochránite sa tým a vyvarujete sa škodám na Vašom
prístroji.
LT
Prieš montavimą-instaliavimą-eksploatavimą išsamiai perskaitykite vartotojo
vadovą. Tuo apsaugosite save ir išvengsite Jūsų įrenginio pažeidimo.
Page 3

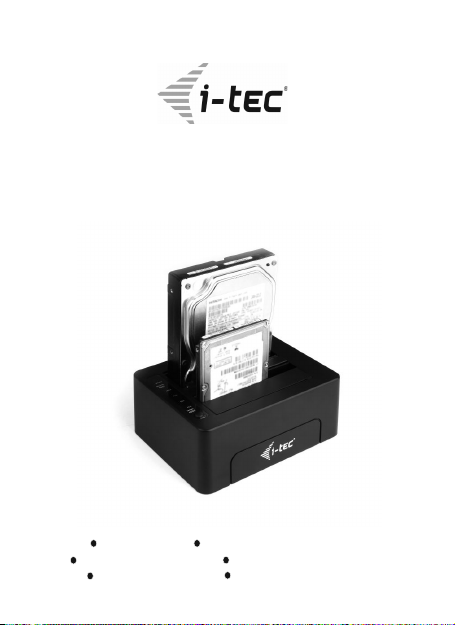
i-tec USB 3.0 SATA HDD Docking Station
with Clone Function
ENGLISH ........................................................................... 03-06
DEUTSCH .......................................................................... 07-11
FRANÇAIS..........................................................................12-16
ČESKY ............................................................................... 17-20
POLSKI .............................................................................. 21-24
SLOVENSKY ..................................................................... 25-28
LIETUVOS ......................................................................... 29-32
WEEE ...................................................................................... 33
Declaration of Conformity ..................................................... 34
Page 4
Please carefully read the entire manual before starting work
with the docking station. More information can be found on
our website www.i-tec-europe.eu.
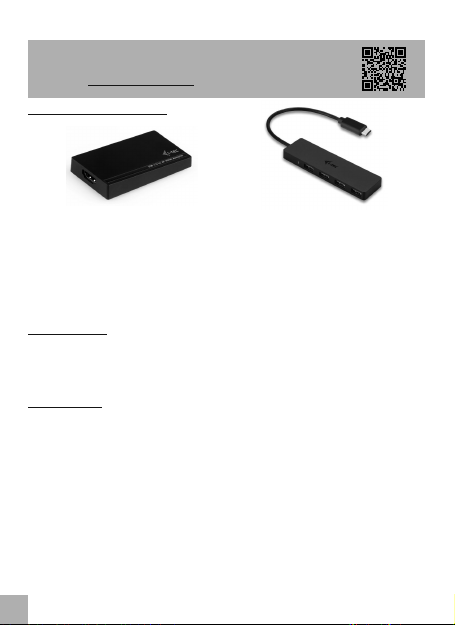
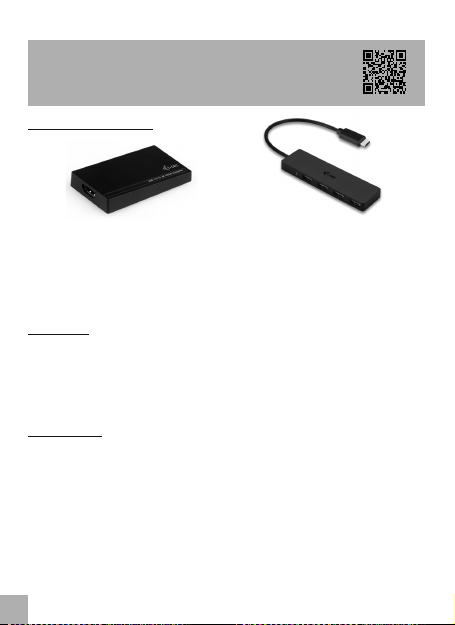
RECOMMENDED PRODUCTS
INTRODUCTION
i-tec USB 3.0 SATA HDD Docking Station is used for connecting up to two 2.5" or 3.5"
SATA I/II/III HDD without using a USB box. Thanks to the USB 3.0 connection and
SATA III data interface you can use high transfer speeds up to 5 Gbps.
SPECIFICATION
źUSB 3.0 interface, compatible with USB 2.0
źMaximum transfer speed: 5 Gbps via USB 3.0, 480 Mbps via USB 2.0; the actual
speed depends on the HDD properties
źSupported HDD: 2.5" / 3.5" HDD not exceeding the width of a standard 3.5"
HDD with data interface SATA I/II/III up to 6TB
źLED indication: for power and inserting of HDD, blue for 25% / 50% / 75% /
100% of cloning and HDD activity
źPlug & Play functions
źOS: Windows Vista, 7 32/64bit, 8 32/64bit, 8.1 32/64bit, 10 32/64bit, Mac OS
10.4 and higher, Linux 2.6.24
źOperating temperature: 5°C - 50°C
źDimensions: 153 x 111 x 62mm
źWeight: 390 g
EN
07
ENGLISH
i-tec USB 3.0 SATA HDD Docking Station
Connect a third external monitor in the
Windows system and a second external
monitor in the Ma c system, e.g.
through i-tec USB 3.0 4K Ultra HD
Display Adapter - HDMI
(P/N: U3HDMI4K).
Expand your device with 4 standard
USB-A ports via USB-C interface. For
example, i-tec USB C Slim Passive HUB 4
Port (P/N: C31HUB404).
EN
03
Page 5
SYSTEM REQUIREMENTS
Hardware requirements: PC or a notebook with Intel Pentium 2 and higher CPU,
Mac PC / notebook with Apple G3 and higher CPU with a free USB 3.0 port. For
connecting you can also use a USB 2.0 port; however, the transfer speed will be
lower.
Operating system: Windows Vista, 7 32/64bit, 8 32/64bit, 8.1 32/64bit, 10 32/64bit,
Mac OS 10.4 and higher, Linux 2.6.24
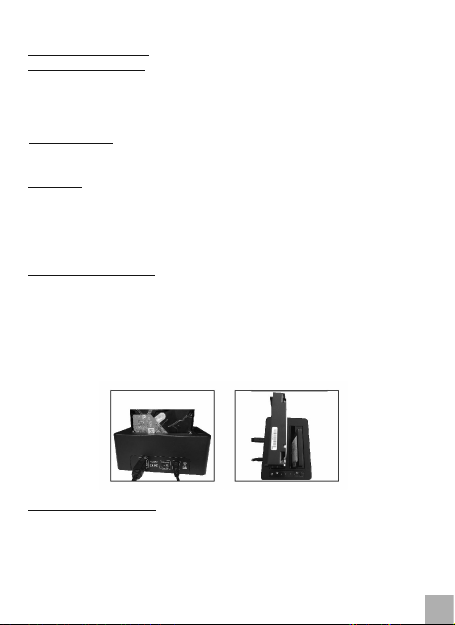
CONTENTS
źi-tec USB 3.0 SATA HDD Docking Station
źUSB 3.0 cable (80 cm)
źPower adaptor (input: AC 100-230V, 50-60Hz, max. 1.2A; output: DC 12V / 3A)
źUser manual
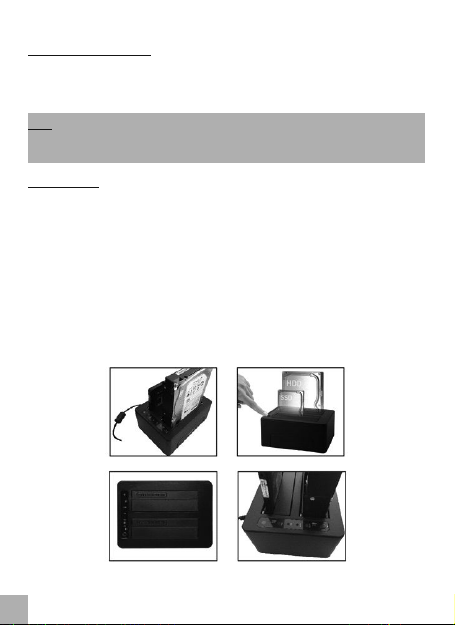
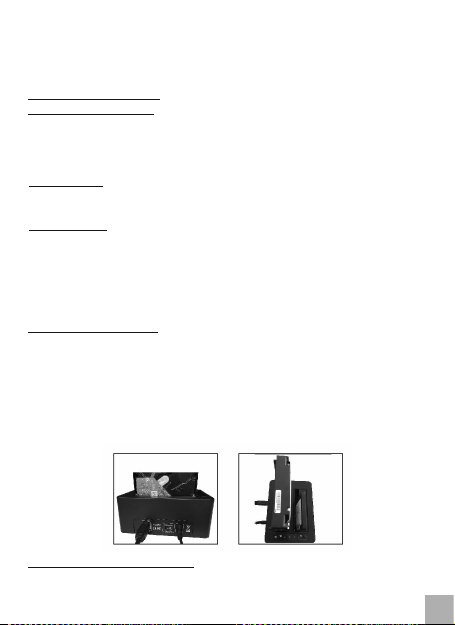
HARDWARE INSTALATION
1) Insert the 2.5" / 3.5" SATA HDD along the edges of the docking station completely
to the bottom. Before that make sure that the SATA connectors and the SATA
ports face each other.
2) Make sure that the ON/OFF button is in the OFF position and then connect the
power adaptor.
3) Using a USB cable connect the docking station to the computer.
4) Now switch the button to the ON position. The red POWER light will go on.
FORMATTING A NEW HDD
If you use a hard disk which has been already formatted you can start using it
immediately. If you insert a brand new disk to the docking station, you need to
format it first (FAT32/NTFS). This can be done after the hardware installation of the
device. Use the disk manager in your OS (in Windows use the right mouse button to
click on “My Computer“ icon, choose “Manage” and choose “Dick Management” in
the next step). Or you can use specialized software.
ENGLISH
Quick Start
EN
04
Page 6
SOFTWARE INSTALATION
The device is supported by the operating system and it is not necessary to install any
drivers. Just make sure that you have installed the most recent drivers for the USB
3.0 controller in your computer.
Note: If you insert two HDDs into the docking station at the same time, you can work
with them in a standard way as with other HDDs in the OS and you can also transfer
data between them.
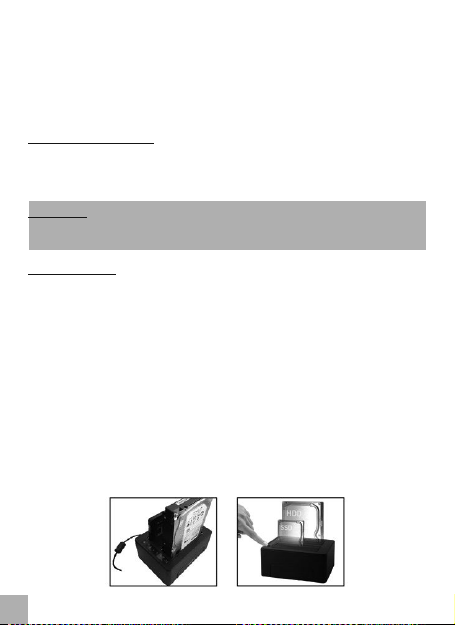
HDD CLONING
1) Before cloning, disconnect the docking station from the notebook / PC.
2) The docking station must be turned ON and the power adaptor must be
connected.
3) Insert the source HDD (Source HDD1) into the docking station – the red LED HDD1
will go ON.
4) Insert the target HDD (Target HDD2) into the docking station – it must have the
same or higher capacity as the source HDD1 – the red LED HDD2 will go ON.
5) After that you can use the docking station for simple HDD backup / cloning. Start
the backup by double-clicking on the “CLONE” button (next to HDD2).
6) This will start data transfer from HDD1 to HDD2. The process is indicated by blue
LEDs 25% / 50% / 75% / 100%. When completed, all 4 blue LEDs will go ON.
ENGLISH
EN
05
i-tec USB 3.0 SATA HDD Docking Station
Page 7

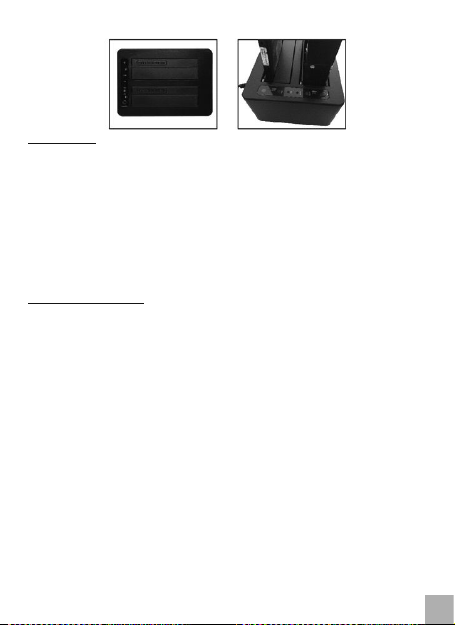
Notes:
źInsert the HDD to the docking station carefully and push it gently and
completely against the SATA connector so as to avoid damaging the connector
and so that the HDD is properly displayed in the OS.
źDo not remove the HDD during the data transfer or during the cloning.
źWe recommend reading the manual to your HDD before using it with the i-tec
docking station.
źInsert only 2.5" / 3.5" SATA HDD into the docking station, other devices or
objects can damage the SATA connectors or the tilting strips.
FAQ
Question: Can I backup / clone the HDD after connecting the docking station to a
notebook / PC?
Answer: No. After connecting the docking station to a notebook / PC the inserted
HDDs work in the OS as two external HDDs and you can transfer data between them
or to them.
Question: The backup / cloning did not start after double-clicking the “CLONE”
button.
Answer: Disconnect the docking station from the notebook / PC. HDD1 must have
lower capacity than HDD2.
Question: After connecting the docking station to the notebook / PC the inserted
HDD is not visible. Why?
Answer: Before using, the new HDD needs to be formatted in the usual way in the
OS.
Question: After connecting the docking station to the notebook / PC there is no
signal.
Answer: First format the new HDD before using. Then check the power adaptor or
the USB 3.0 cable and their function.
In case of problems with the docking station, contact our technical support:
support@itecproduct.com.
EN
08
ENGLISH
Quick Start
EN
06
Page 8
Wir bitten um sorgfältiges Durchlesen des ganzen Benutzer-
handbuchs vor dem Beginn der Arbeit mit Docking Station.
Ausführlichere Informationen finden Sie auf unserer
Webseite www.i-tec-europe.eu.
EMPFOHLENE PRODUKTE
EINLEITUNG
i-tec USB 3.0 SATA HDD Docking Station ist eine Docking Station, die für den
Anschluss von bis zu zwei 2.5" oder 3.5" SATA I/II/III HDDs ohne Verwendung eines
USB-Gehäuses geeignet ist. Dank Anschluss über USB 3.0 und Datenschnittstelle
SATA III können hohe Übertragungsgeschwindigkeiten von bis zu 5 Gbps genutzt
werden.
SPEZIFIKATION
źUSB 3.0 Schnittstelle, kompatibel mit USB 2.0
źMaximale Übertragungsgeschwindigkeit: 5 Gbps über USB 3.0, 480 Mbps über
USB 2.0; die aktuelle Geschwindigkeit hängt von den HDD-Eigenschaften ab
źUnterstützte HDDs: 2.5" / 3.5" HDD, die die Breite einer gewöhnlichen 3.5"
Festplatte mit Datenschnittstelle SATA I/II/III bis zu 6TB nicht übersteigt
źLED-Anzeige: rot für Versorgung und Einschieben der HDD, blau für 25% / 50%
/ 75% / 100% Klonen und Aktivität der HDD
źPlug & Play Funktion
źBS: Windows Vista, 7 32/64bit, 8 32/64bit, 8.1 32/64bit, 10 32/64bit, Mac OS
10.4 und höher, Linux 2.6.24
źBetriebstemperatur: 5°C - 50°C
Schließen Sie den dritten externen
Bi ld schi rm m it B etri eb ssy st em
Windows und den zweiten externen
Bildschirm mit System Mac, z. B. über i-
tec USB 3.0 4K Ultra HD Display
Adapter – HDMI (P/N: U3HDMI4K) an.
Erweitern Sie Ihr Gerät um 4 Standard
USB-A-Ports über USB-C-Schnittstelle,
z. B. i-tec USB-C Slim Passive HUB 4 Port
(P/N: C31HUB404).
DE
07
DEUTSCH
i-tec USB 3.0 SATA HDD Docking Station
Page 9
źMaße: 153 x 111 x 62mm
źGewicht: 390 g
SYSTEMANFORDERUNGEN
Hardware-Anforderungen: PC oder Notebook mit Prozessor Intel Pentium und
höher, Mac PC / Notebook mit Prozessor Apple G3 und höher mit einem freien USB
3.0 Port. Zum Anschluss kann auch USB 2.0 Port verwendet werden, aber die
Übertragungsgeschwindigkeit wird niedriger.
Betriebssystem: Windows Vista, 7 32/64bit, 8 32/64bit, 8.1 32/64bit, 10 32/64bit,
Mac OS 10.4 und höher, Linux 2.6.24
LIEFERUMFANG
źi-tec USB 3.0 SATA HDD Docking Station
źUSB 3.0 Kabel (80 cm)
źVersorgungsadapter (Eingang: AC 100-230V, 50-60Hz, max. 1.2A; Ausgang: DC
12V / 3A)
źBenutzerhandbuch
HARDWAREINSTALLATION
1) Legen Sie die 2.5" / 3.5" SATA HDD an den Kanten der Docking Station entlang bis
zum Boden. Überprüfen Sie vorher, ob der SATA-Stecker und die SATA-Ports
zueinander zeigen.
2) Vergewissern Sie sich, dass sich die ON/OFF-Taste in der Position OFF befindet
und schließen dann den Versorgungsadapter an.
3) Verbinden Sie die Docking Station mit dem Computer über einen USB-Kabel.
4) Jetzt schalten Sie die Taste in die Position ON. Die rote Kontrollleuchte POWER
leuchtet auf.
FORMATIERUNG DER NEUEN HDD
Wenn Sie eine bereits formatierte Festplatte verwenden, kann sie gleich benutzt
werden. Falls Sie in die Docking Station eine neue Festplatte einschieben, muss sie
DE
08
DEUTSCH
Quick Start
Page 10
zuerst formatiert werden (FAT32/NTFS). Es ist nach der Hardwareinstallation des
Gerätes durchzuführen. Dazu dient der Festplattenverwalter im jeweiligen BS
(unter Windows klicken Sie mit rechter Maustaste auf die Schaltfläche „Mein
Computer“, wählen Sie „Bearbeiten“ und im nächsten Fenster wählen Sie
„Festplattenverwaltung“). Gegebenenfalls ist ein Spezialprogramm zu nutzen.
SOFTWAREINSTALLATION
Das Gerät wird vom Betriebssystem unterstützt und es ist nicht nötig, Treiber zu
installieren. Überprüfen Sie bitte nur, ob Sie die neuesten Treiber für USB 3.0
Controller Ihres Computers installiert haben.
Bemerkung: Wenn in die Docking Station zwei HDDs gleichzeitig eingeschoben
werden, können Sie mit Ihnen wie mit klassischen Festplatten unter BS arbeiten oder
zwischen ihnen Daten übertragen.
KLONEN DER HDD
1) Trennen Sie die Docking Station vom Notebook / PC vor dem Klonen.
2) Die Docking Station muss eingeschaltet (ON) und der Versorgungsadapter
angeschlossen sein.
3) Schieben Sie die Ausgangs-/Ziel-HDD (Source HDD1) in die Docking Station ein –
rote LED von HDD1 leuchtet auf.
4) Schieben Sie die Ziel-HDD (Target HDD2) in die Docking Station ein – sie muss über
die selbe oder höhere Kapazität als Ausgangs-HDD1 verfügen – rote LED von
HDD2 leuchtet auf.
5) Jetzt ist es möglich, die Docking Station für einfache Datensicherung / Klonen der
HDD zu nutzen. Die Datensicherung starten Sie so, dass Sie 2x auf die Taste
„CLONE“ (neben HDD2) klicken.
6) Es beginnt die Datenübertragung von HDD1 auf HDD2. Der Verlauf wird durch
blaue LED-Kontrollleuchten 25% / 50% / 75% / 100% angezeigt. Nach dem
Beenden werden alle 4 blaue LED-Kontrollleuchten leuchten.
DE
09
DEUTSCH
i-tec USB 3.0 SATA HDD Docking Station
Page 11
.
Bemerkungen:
źSchieben Sie die HDDs in die Docking Station vorsichtig ein und drücken Sie sie
in die SATA-Stecker sorgfältig ein, um sie nicht zu beschädigen und damit die
HDDs unter BS richtig angezeigt werden.
źZiehen Sie die HDD während der Datenübertragung oder Klonen nicht aus.
źWir empfehlen, das Benutzerhandbuch zu Ihrer HDD vor der Verwendung mit
i-tec Docking Station durchzulesen.
źSchieben Sie nur 2.5" / 3.5" SATA HDDs in die Docking Station ein, andere
Geräte oder Gegenstände können die SATA-Stecker oder die Klappleisten
beschädigen.
OFT GESTELLTE FRAGEN
Frage: Kann ich die HDD nach dem Anschluss der Docking Station an ein Notebook /
einen PC sichern / klonen?
Antwort: Nein. Nach dem Anschluss der Docking Station an ein Notebook / einen PC
arbeiten die eingeschobenen HDDs unter BS als zwei externe HDDs und man kann
zwischen ihnen oder auf sie Daten übertragen.
Frage: Nach dem Doppelklick auf die Taste „CLONE“ wurde Sicherung / Klonen nicht
gestartet.
Antwort: Trennen Sie die Docking Station vom Notebook / PC. HDD1 muss über
niedrigere Kapazität als HDD2 verfügen.
Frage: Die eingeschobene HDD ist nach dem Anschluss der Docking Station an ein
Notebook / einen PC nicht sichtbar. Warum?
Antwort: Eine neue HDD ist vor ihrer ersten Verwendung unter BS zu formatieren.
Frage: Kein Signal nach dem Anschluss der Docking Station an ein Notebook / einen
PC.
Antwort: Formatieren Sie zuerst die neue HDD vor ihrer Verwendung. Dann
überprüfen Sie den Versorgungsadapter oder das USB 3.0 Kabel auf ihre
Funktionsfähigkeit.
DE
10
DEUTSCH
Quick Start
Page 12

Falls Sie Probleme mit Docking Station haben sollten, wenden Sie sich an unsere
technische Servicestelle unter: support@itecproduct.com.
DE
11
DEUTSCH
i-tec USB 3.0 SATA HDD Docking Station
Page 13

Lisez attentivement tout le mode d'emploi avant d'utiliser
la station d'accueil pour la première fois. Veuillez trouver
plus d'informations sur www.i-tec-europe.eu.
PRODUITS ASSOCIÉS
INTRODUCTION
La station d'accueil i-tec USB 3.0 SATA HDD est utilisee pour connecter jusqu'a deux
disques durs SATA I / II / III de 2,5 "ou 3,5" sans utiliser de boitier usb. Grace a la
connexion USB 3.0 et a l'interface de donnees SATA III, vous pouvez utiliser des
vitesses de transfert elevees allant jusqu'a 5 Gbps.
SPÉCIFICATION
źInterface USB 3.0, compatible avec USB 2.0
źVitesse de transfert maximale: 5 Gbps via USB 3.0, 480 Mbps via USB 2.0; La
vitesse réelle dépend des propriétés du disque dur
źDisques durs HDD pris en charge: 2,5 "/ 3,5" disques durs HDD ne dépassant
pas la largeur d'un disque dur 3,5 "standard avec interface de données SATA
I / II / III jusqu'à 6 TB
źIndication LED: rouge pour l'alimentation et l'insertion du HDD, bleu pour 25%
/ 50% / 75% / 100% de clonage et l'activité du disque dur
źFonction Plug and Play
źSystème d'exploitation: Windows Vista, 7 32 / 64bit, 8 32 / 64bit, 8,1 32 / 64bit,
10 32 / 64bit, Mac OS 10.4 et supérieur, Linux 2.6.24
źTempératures de fonctionnement : 5° - 50°C
źDimensions: 153 x 111 x 62mm
źPoids: 390g
EN
07
Branchez un troisième écran externe
(Windows) ou un deuxième écran
externe (Mac), en utilisant par exemple
i-tec USB 3.0 4K Ultra HD Display
Adaptateur - HDMI (P/N : U3HDMI4K).
Éla rgissez vos pé riphéri ques par
l'intermédiaire du nouveau connecteur
USB-C en leur ajoutant 4 ports USB-A.
Exemple : i-tec USB C Slim Concentra-
teur Ethernet HUB passif à 4 ports
(P/N : C31HUB404).
FR
12
FRANÇAIS
Quick Start
Page 14

CONFIGURATION REQUISE
Configuration matérielle requise: PC ou ordinateur portable avec processeur Intel
Pentium 2 et supérieur, Mac PC / notebook avec Apple G3 et processeur supérieur
avec port USB 3.0 libre. Pour le raccordement, vous pouvez également utiliser un
port USB 2.0; Cependant, la vitesse de transfert sera plus faible
Système d'exploitation: Windows Vista, 7 32 / 64bit, 8 32 / 64bit, 8.1 32 / 64bit, 10
32 / 64bit, Mac OS 10.4 et supérieur, Linux 2.6.24
CONTENU DE L'EMBALLAGE
źStation d'accueil i-tec USB 3.0 SATA HDD
źCâble USB 3.0 (80 cm)
źAdaptateur secteur (entrée: AC 100-230V, 50-60Hz, maxi 1,2A, sortie: DC 12V /
3A)
źManuel de l'utilisateur
INSTALLATION DU MATÉRIEL
1) Insérez le disque dur SATA 2.5 "/ 3.5" le long des bords de la station d'accueil
complètement vers le bas. Avant cela assurez-vous que les connecteurs SATA et
les ports SATA se font face.
2) Assurez-vous que le bouton ON / OFF est en position OFF, puis branchez
l'adaptateur secteur.
3) Connectez la station d'accueil à l'ordinateur à l'aide d'un câble USB
4) Mettez le bouton sur la position ON. Le voyant rouge POWER s'allume
FORMATER UN NOUVEAU DISQUE DUR
Si vous utilisez un disque dur déjà formaté, vous pouvez commencer à l'utiliser
immédiatement. Si vous insérez un nouveau disque dans la station d'accueil, vous
devez d'abord le formater (FAT32 / NTFS). Cela peut être fait après l'installation
matérielle de l'appareil. Utilisez le gestionnaire de disque dans votre système
d'exploitation (sous Windows, cliquez avec le bouton droit de la souris sur l'icône
FR
13
FRANÇAIS
i-tec USB 3.0 SATA HDD Docking Station
Page 15

« Poste de travail", choisissez "Gérer" et choisissez "Gestion des disques" à l'étape
suivante). Vous pouvez aussi utiliser un logiciel spécialisé.
INSTALLATION DU LOGICIEL
Le périphérique est pris en charge par le système d'exploitation et il n'est pas
nécessaire d'installer des pilotes. Assurez-vous d'avoir installé les pilotes les plus
récents pour le contrôleur USB 3.0 de votre ordinateur.
Remarque: Si vous insérez simultanément deux disques durs dans la station
d'accueil, vous pouvez les utiliser de manière standard comme avec les autres
disques durs de votre système d'exploitation et vous pouvez également transférer
des données entre eux.
COPIE DE DISQUE DUR
1) Avant la copie, débranchez la station d'accueil de l'ordinateur portable / PC.
2) La station d'accueil doit être sous tension et l'adaptateur secteur doit être
branché.
3) Insérez Le disque dur HDD (disque dur HDD1) dans la station d'accueil - la LED
rouge HDD1 va s'allumer.
4) Insérez le disque dur HDD cible (disque dur cible HDD2) dans la station d'accueil -
il doit avoir une capacité égale supérieure au disque dur HDD1 - la LED rouge
HDD2 va s'allumer.
5) Vous pouvez, ensuite, utiliser la station d'accueil pour une simple sauvegarde /
copie de disque dur. Démarrez la sauvegarde en double-cliquant sur le bouton
"CLONE" (à côté du disque dur HDD2).
6) Cela va commencer le transfert de données du disque dur HDD1 vers le disque dur
HDD2. L'évolution du processus est indiqué par des LED bleues 25% / 50% / 75% /
100%. Une fois terminé, les 4 LED bleues s'allument.
FR
14
FRANÇAIS
Quick Start
Page 16

Remarques:
źInsérez avec précaution le disque dur dans la station d'accueil et poussez-le
délicatement et complètement contre le connecteur SATA afin d'éviter
d'endommager le connecteur et afin que le disque dur soit correctement affiché
dans votre système d'exploitation.
źNe retirez pas le disque dur pendant le transfert de données ou pendant la
copie.
źNous vous recommandons de lire le manuel d'utilisation de votre disque dur
avant de l'utiliser avec la station d'accueil i-tec.
źInsérez uniquement un disque dur SATA 2,5 "/ 3,5" dans la station d'accueil,
d'autres périphériques ou objets risquent d'endommager les connecteurs SATA
ou les bandes inclinables.
FAQ
Question: Puis-je sauvegarder / copier le disque dur après avoir connecté la station
d'accueil à un ordinateur portable / PC?
Réponse: Non. Après avoir connecté la station d'accueil à un ordinateur portable /
PC, les disques durs insérés fonctionnent dans le système d'exploitation comme
deux disques durs externes et vous pouvez transférer des données entre eux ou vers
eux.
Question: La sauvegarde / copie n'a pas démarré après avoir double-cliqué sur le
bouton "CLONE".
Réponse: Déconnectez la station d'accueil de votre ordinateur portable / PC. Le
disque dur HDD1 doit avoir une capacité inférieure au disque dur HDD2.
Question: Après avoir connecté la station d'accueil à l'ordinateur portable / PC, le
disque dur inséré n'est pas visible. Pourquoi?
Réponse: Avant l'utilisation, le nouveau disque dur doit être formaté de la manière
habituelle dans votre système d'exploitation
EN
08
FR
15
FRANÇAIS
i-tec USB 3.0 SATA HDD Docking Station
Page 17

Question: Après avoir connecté la station d'accueil à l'ordinateur portable / PC, il
n'y a pas de signal.
Réponse: Formatez d'abord le nouveau disque dur avant de l'utiliser. Vérifiez
ensuite l'adaptateur secteur ou le câble USB 3.0 et leur fonctionnement
En cas de difficultés, veuillez contacter notre équipe d'assistance technique:
support@itecproduct.com.
FR
16
Quick Start
FRANÇAIS
Page 18

Prosíme o pečlivé přečtení celého manuálu před zahájením
práce s dokovací stanicí. Další informace naleznete na našem
webu www.i-tec-europe.eu.
DOPORUČENÉ PRODUKTY
ÚVOD
i-tec USB 3.0 SATA HDD Docking Station je dokovací zařízení sloužící pro připojení až
dvou 2.5" nebo 3.5" SATA I/II/III HDD bez použití USB rámečku. Díky připojení přes
USB 3.0 a datovému rozhraní SATA III lze využívat vysokých přenosových rychlostí až
5 Gbps.
SPECIFIKACE
źRozhraní USB 3.0, kompatibilní s USB 2.0
źMaximální přenosová rychlost: 5 Gbps přes USB 3.0, 480 Mbps přes USB 2.0;
aktuální rychlost záleží na vlastnostech HDD
źPodporované HDD: 2.5" / 3.5" HDD nepřesahující šířku běžného 3.5" HDD s
datovým rozhraním SATA I/II/III až 6TB
źLED indikace: červená pro napájení a vložení HDD, modrá pro 25% / 50% / 75%
/ 100% klonování a aktivitu HDD
źFunkce Plug & Play
źOS: Windows Vista, 7 32/64bit, 8 32/64bit, 8.1 32/64bit, 10 32/64bit, Mac OS
10.4 a vyšší, Linux 2.6.24
źProvozní teplota: 5°C - 50°C
źRozměry: 153 x 111 x 62mm
źHmotnost: 390 g
EN
07
ČESKY
Př ip oj te t řet í e xte rn í mo ni tor
v systému Windows a druhý externí
monitor v systému Mac, např. přes
i-tec USB 3.0 4K Ultra HD Display
Adapter - HDMI (P/N: U3HDMI4K).
Rozšiřte své zařízení o 4 standardní
USB-A porty přes USB-C rozhraní. Např.
i-tec USB C Slim Passive HUB 4 Port
(P/N: C31HUB404).
CZ
17
i-tec USB 3.0 SATA HDD Docking Station
Page 19

SYSTÉMOVÉ POŽADAVKY
Hardwarové požadavky: PC nebo notebook s procesorem Intel Pentium 2 a vyšší,
Mac PC / notebook s procesorem Apple G3 a vyšší s volným USB 3.0 portem. Pro
připojení lze použít také USB 2.0 port, přenosová rychlost však bude nižší.
Operační systém: Windows Vista, 7 32/64bit, 8 32/64bit, 8.1 32/64bit, 10 32/64bit,
Mac OS 10.4 a vyšší, Linux 2.6.24
OBSAH BALENÍ
źi-tec USB 3.0 SATA HDD Docking Station
źUSB 3.0 kabel (80 cm)
źNapájecí adaptér (vstup: AC 100-230V, 50-60Hz, max. 1.2A; výstup: DC 12V /
3A)
źUživatelská příručka
HARDWAROVÁ INSTALACE
1) 2.5" / 3.5" SATA HDD zasuňte podél okrajů dokovací stanice až na dno. Předtím
zkontrolujte, zda SATA konektory a SATA porty směřují k sobě.
2) Ujistěte se, že tlačítko ON/OFF je v pozici OFF a poté připojte napájecí adaptér.
3) USB kabelem propojte dokovací stanici s počítačem.
4) Nyní přepnete tlačítko do pozice ON. Rozsvítí se červená kontrolka POWER.
FORMÁTOVÁNÍ NOVÉHO HDD
Pokud použijete již zformátovaný disk, můžete jej začít ihned používat. V případě, že
do dokovací stanice vložíte úplně nový disk, je třeba jej nejprve naformátovat
(FAT32/NTFS). Toto je možné provést po hardwarové instalaci zařízení. Slouží k tomu
správce disků v samotném OS (ve Windows klikněte pravým tlačítkem myši na ikonu
„Tento počítač“, zvolte „Spravovat“ a v dalším okně vyberte „Správa disků“).
Případně lze použít specializovaný program.
ČESKY
Quick Start
CZ
18
Page 20

SOFTWAROVÁ INSTALACE
Zařízení je podporováno operačním systémem a není třeba instalovat ovladače. Jen
si prosím zkontrolujte, zda máte nainstalovány nejnovější ovladače pro USB 3.0 řadič
Vašeho počítače.
Poznámka: Pokud do dokovací stanice vložíte dva HDD zároveň, je možné s nimi
pracovat klasicky jako s dalšími HDD v OS a rovněž je možné mezi nimi přenášet data.
KLONOVÁNÍ HDD
1) Před klonováním odpojte dokovací stanici od notebooku / PC.
2) Dokovací stanice musí být zapnutá (ON) a musí být zapojený napájecí adaptér.
3) Do dokovací stanice vložte zdrojový / výchozí HDD (Source HDD1) – rozsvítí se
červená LED HDD1.
4) Do dokovací stanice vložce cílový HDD (Target HDD2) – musí mít stejnou nebo
vyšší kapacitu než zdrojový HDD1 – rozsvítí se červená LED HDD2.
5) Poté je možné použít dokovací stanici pro jednoduché zálohování / klonování
HDD. Zálohu spustíte 2x kliknutím na tlačítko „CLONE“ (vedle HDD2).
6) Zahájí se přenos dat z HDD1 na HDD2. Průběh je indikován modrými LED 25% /
50% / 75% / 100%. Po ukončení svítí všechny 4 modré LED.
Poznámky:
źHDD vkládejte do dokovací stanice opatrně a pečlivě je dotlačte do konektoru
SATA, aby nedošlo k jeho poškození a HDD se správně zobrazil v OS.
źNevytahujte HDD během přenosu dat nebo klonování.
CZ
19
ČESKY
i-tec USB 3.0 SATA HDD Docking Station
Page 21

źDoporučujeme přečíst si manuál k vašemu HDD před použitím s dokovací
stanicí i-tec.
źDo dokovací stanice vkládejte jen 2.5" / 3.5" SATA HDD, jiná zařízení nebo
předměty mohou poškodit SATA konektory nebo vyklápěcí lišty.
ČASTO KLADENÉ OTÁZKY
Otázka: Mohu zálohovat / klonovat HDD po připojení dokovací stanice k notebooku
/ PC?
Odpověď: Ne. Po připojení dokovací stanice k notebooku / PC pracují vložené HDD v
OS jako dva externí HDD a lze mezi nimi nebo na ně přenášet data.
Otázka: Po dvojím stisknutím tlačítka „CLONE“ se nespustilo zálohování / klonování.
Odpověď: Odpojte dokovací stanici od notebooku / PC. HDD1 musí mít menší
kapacitu než HDD2.
Otázka: Po připojení dokovací stanice k notebooku / PC není vložený HDD viditelný.
Proč?
Odpověď: Nový HDD je třeba před použitím zformátovat obvyklým způsobem v OS.
Otázka: Není signál po připojení dokovací stanice k notebooku / PC?
Odpověď: Nejprve nový HDD před použitím zformátujte. Poté zkontrolujte napájecí
adaptér nebo USB 3.0 kabel a jejich funkčnost.
V případě problémů s dokovací stanicí se můžete obrátit na naši technickou
podporu: support@itecproduct.com.
EN
08
CZ
20
ČESKY
Quick Start
Page 22

Proszę przeczytać uważnie całą instrukcję przed rozpoczęciem
korzystania z stacji dokującej. Więcej informacji na ten temat
można znaleźć na stronie internetowej www.i-tec.pl.
ZALECANE PRODUKTY
WPROWADZENIE
i-tec USB 3.0 SATA HDD to stacja dokująca służąca do podłączenia aż dwóch 2.5" lub
3.5" HDD SATA I/II/III bez użycia obudowy USB. Podłączenia poprzez złącze USB 3.0
oraz interfejs SATA III oferuje wysokie prędkości transferu danych (aż 5Gbps).
SPECYFIKACJA
źInterfejs USB 3.0, kompatybilność z USB 2.0
źMaksymalna szybkość transferu danych: 5Gbps poprzez USB 3.0 złącze,
480Mbps poprzez złącze USB 2.0; prędkość jest zależna od właściwości HDD
źKompatybilne HDD: 2.5" / 3.5" HDD nie większe niż szerokość zwykłego 3.5"
HDD z interfejsem SATA I/II/III aż 6TB.
źLED indykacja: czerwona dla zasilania i wkładania HDD, niebieska dla 25% /
50% / 75% / 100% klonowania i czynności HDD.
źFunkcja Plug & Play
źSO: Windows Vista, 7 32/64bit, 8 32/64bit, 8.1 32/64bit, 10 32/64bit, Mac OS
10.4 i wyższe, Linux 2.6.24
źTemperatura pracy: 5°C - 50°C
źWymiary produktu: 153 x 111 x 62mm
źWaga produktu: 390 g
EN
07
POLSKI
Podłącz trzeci moni tor zewnętrzny
w systemie Windows a drugi monitor
zewnętrzny w systemie Mac, np. przez
i-tec USB 3.0 4K Ultra HD Display
Adapter - HDMI (P/N: U3HDMI4K).
Pos zerz s woj e u rząd zeni e o 4
standardowe USB-A porty przez USB-C
interfejs. Np. i-tec USB C Slim Passive
HUB 4 Port (P/N: C31HUB404).
PL
21
i-tec USB 3.0 SATA HDD Docking Station
Page 23

WYMAGANIA SYSTEMOWE
Wymagania HW: PC lub notebook z procesorem Intel Pentium 2 i wyższym, Mac
PC/notebook z procesorem Apple G3 i wyższym, z wolnym portem USB 3.0.
Dopuszczalny jest także port USB 2.0, jednak w takim przypadku prędkość transmisji
będzie niższa.
System operacyjny: Windows Vista, 7 32/64bit, 8 32/64bit, 8.1 32/64bit, 10
32/64bit, Mac OS 10.4 i wyższe, Linux 2.6.24
ZAWARTOŚĆ OPAKOWANIA
źi-tec USB 3.0 SATA HDD stacja dokująca
źUSB 3.0 kabel (80 cm)
źZasilacz sieciowy (wejście: AC 100-230V, 50-60Hz, max. 1.2A; wyjście: DC 12V /
3A)
źQuick Start - krótki przewodnik
INSTALACJA SPRZĘTOWA
1) Wsuń HDD 2.5" / 3.5" SATA wzdłuż krawędzi stacji do samego końca. Sprawdź, czy
konektory SATA i porty SATA są skierowane do siebie.
2) Upewnij się, że przycisk ON/OFF jest w pozycji OFF a potem podłącz przewód
zasilający.
3) Poprzez USB kabel podłącz stację dokującą z komputerem.
4) Teraz ustaw przycisk w pozycji ON. Kontrolka POWER rozświeci się na czerwono.
FORMATOWANIE NOWEGO HDD
Jeżeli użyjesz sformatowany dysk, możesz zaraz z niego korzystać. Zupełnie nowy
dysk wymaga sformatowania (FAT32/NTFS). Formatowanie można przeprowadzić
po wykonaniu instalacji hardwarowej urządzenia. Służy do tego menedżer dysków w
samym SO (w Windows kliknij prawym przyciskiem myszy na ikonę „Mój komputer”,
kliknij „Zarządzaj” a w dalszym ekranie wybierz „Zarządzanie dyskami”). Można też
użyć specjalistycznego oprogramowania.
POLSKI
Quick Start
PL
22
Page 24

INSTALACJA PROGRAMOWA
Urządzenie automatycznie obsługiwane przez system, bez potrzeby instalacji
dodatkowych sterowników. Prosimy sprawdzić, czy w komputerze są zainstalowane
najaktualniejsze sterowniki dla kontrolera USB 3.0.
Uwaga: Jeżeli są do stacji dokującej podłączone dwa dyski HDD równocześnie,
możesz pracować na nich w sposób standardowy, jak z innymi dyskami w HDD w SO,
również istnieje możliwość przenoszenia danych pomiędzy nimi.
KLONOWANIE HDD
1) Przed klonowaniem odłącz stację dokującą od notebooka / PC.
2) Stacja dokująca musi być włączona (ON) oraz musi być podłączony zasilacz
sieciowy.
3) Włóż do stacji dysk HDD1 (Source HDD1) – zaświeci się czerwona dioda LED HDD1
4) Włóż do stacji HDD2 (Target HHD2) – musi mieć jednakową lub większą
pojemność niż dysk HDD1 – zaświeci się czerwona dioda LED HDD2.
5) Potem jest możliwe użycie stacji dokującej do wykonania kopii zapasowej /
klonowani a HDD. Funkcję kopii zapasowej uruchami a się podwój nym
kliknięciem na przycisk „CLONE“ (obok HHD2).
6) Rozpocznie się transfer danych z HDD1 na HDD2. Proces jest sygnalizowany
niebieskimi diodami LED 25% / 50% / 75% / 100%. Po zakończeniu świecą
wszystkie 4 niebieskie diody LED.
PL
23
POLSKI
i-tec USB 3.0 SATA HDD Docking Station
Page 25

Uwagi dotyczące użytkowania :
źHDD należy wkładać do stacji dokującej ostrożnie i starannie przyłożyć do
konektora SATA, tak aby go nie uszkodzić a HHD mógł się pojawić w SO.
źNie można wyjmować HDD podczas transferu danych albo klonowania.
źZalecamy zapoznać się z instrukcją do posiadanego HDD przed użyciem ze
stacją dokującą i-tec.
źW stacji dokującej można umieścić tylko dyski HDD SATA 2.5" / 3.5". Inne
urządzenia mogą uszkodzić konektory SATA albo uszkodzenie żaluzji.
CZĘSTO ZADAWANE PYTANIA
Pytanie: Mogę robić kopie zapasowe / klonować HDD po podłączeniu stacji
dokującej do notebooka?
Odpowiedź: Nie. Po podłączeniu stacji dokującej do notebooka / PC włożone HDD
zachowują się jako dwa dyski zewnętrzne i można na nie lub pomiędzy nimi
wgrywać dane.
Pytanie: Po podwójnym naciśnięciu przycisku „CLONE” nie uruchomiło się
kopiowanie / klonowanie.
Odpowiedź: Wyłącz stację dokującą z notebooka / PC. HHD1 musi mieć mniejszą
pojemność niż HDD2.
Pytanie: Po podłączeniu stacji dokującej do notebooka / PC nie jest włożony HDD
widoczny. Dlaczego?
Odpowiedź: Nowy HDD przed użyciem musi być sformatowany zwykłym sposobem
w SO.
Pytanie: Po podłączeniu stacji dokującej do notebooka nastąpi brak sygnału.
Odpowiedź: W pierwszej kolejności trzeba przeprowadzić format HDD. Potem
sprawdzić poprawność działania zasilacza albo kabla USB 3.0.
W razie problemów z stacją dokująca można się skontaktować z naszym
wsparciem technicznym: support@itecproduct.com.
EN
08
PL
24
POLSKI
Quick Start
Page 26

Prosíme o dôkladné prečítanie celého manuálu pred
zahájením práce s dokovacou stanicou. Podrobnejšie
informácie nájdete na našom webe www.i-tec-europe.eu.
DOPORUČENÉ PRODUKTY
ÚVOD
i-tec USB 3.0 SATA HDD Docking Station je dokovacie zariadenie slúžiace na
pripojenie až dvoch 2.5" alebo 3.5" SATA I/II/III HDD bez použitia USB rámčeku.
Vďaka pripojeniu cez USB 3.0 a dátovému rozhraniu SATA III môžete využívať vysokú
prenosovú rýchlosť až 5 Gbps.
ŠPECIFIKÁCIE
źRozhranie USB 3.0, kompatibilné s USB 2.0
źMaximálna prenosová rýchlosť: 5 Gbps cez USB 3.0, 480 Mbps cez USB 2.0;
aktuálna rýchlosť záleží na vlastnostiach HDD
źPodporované HDD: 2.5" / 3.5" HDD nepresahujúce šírku bežného 3.5" HDD s
dátovým rozhraním SATA I/II/III až 6TB
źLED indikácia: červená pre napájanie a vloženie HDD, modrá pre 25% / 50% /
75% / 100% klonovania a aktivitu HDD
źFunkcia Plug & Play
źOS: Windows Vista, 7 32/64bit, 8 32/64bit, 8.1 32/64bit, 10 32/64bit, Mac OS
10.4 a vyšší, Linux 2.6.24
źPrevádzková teplota: 5°C - 50°C
źRozmery: 153 x 111 x 62mm
źHmotnosť: 390 g
EN
07
SLOVENSKY
Pr ip ojt e t re tí e xte rný m oni tor
v systéme Windows a druhý externý
monitor v systéme Mac, napr. cez
i-tec USB 3.0 4K Ultra HD Display
Adaptér - HDMI (P/N: U3HDMI4K).
Ro zš ír te s vo je za ri ad en ie o 4
štandardné USB-A porty cez USB-C
rozhranie. Na pr. i-te c USB C Slim
Passive HUB 4 Port (P/N: C31HUB404).
SK
25
i-tec USB 3.0 SATA HDD Docking Station
Page 27

SYSTÉMOVÉ POŽIADAVKY
Hardwarové požiadavky: PC alebo notebook s procesorom Intel Pentium 2 a vyšší,
Mac PC / notebook s procesorom Apple G3 a vyšší s voľným USB 3.0 portom. Pre
pripojenie môžete použiť tiež USB 2.0 port, prenosová rýchlosť však bude nižšia.
Operačné systém: Windows Vista, 7 32/64bit, 8 32/64bit, 8.1 32/64bit, 10 32/64bit,
Mac OS 10.4 a vyšší, Linux 2.6.24
OBSAH BALENIA
źi-tec USB 3.0 SATA HDD Docking Station
źUSB 3.0 kábel (80 cm)
źNapájací adaptér (vstup: AC 100-230V, 50-60Hz, max. 1.2A; výstup: DC 12V /
3A)
źUžívateľská príručka
HARDWAROVÁ INŠTALÁCIA
1) 2.5" / 3.5" SATA HDD zasuňte pozdĺž okrajov dokovacej stanice až na dno. Predtým
skontrolujte, či SATA konektory a SATA porty smerujú k sebe.
2) Uistite sa, že tlačidlo ON/OFF je v pozícii OFF a potom pripojte napájací adaptér.
3) USB káblom prepojte dokovaciu stanicu s počítačom.
4) Teraz prepnite tlačidlo do pozície ON. Rozsvieti sa červená kontrolka POWER.
FORMÁTOVANIE NOVÉHO HDD
Pokiaľ použijete už naformátovaný disk, môžete ho začať ihneď používať. V prípade,
že do dokovacej stanice vložíte úplne nový disk, je treba ho najprv naformátovať
(FAT32/NTFS). Toto je možné vykonať po hardwarovej inštalácii zariadenia. Slúži na
to správca diskov v samotnom OS (vo Windows kliknite pravým tlačidlom myši na
ikonu „Tento počítač“, zvoľte „Spravovať“ a v ďalšom okne vyberte „Správa diskov“).
Prípadne môžete použiť špecializovaný program.
SLOVENSKY
Quick Start
SK
26
Page 28

SOFTWAROVÁ INŠTALÁCIA
Zariadenie je podporované operačným systémom a nie je treba inštalovať ovládače.
Len si prosím skontrolujte, či máte nainštalované najnovšie ovládače pre USB 3.0
radič Vášho počítača.
Poznámka: Pokiaľ do dokovacej stanice vložíte dva HDD zároveň, je možné s nimi
pracovať klasicky ako s ďalšími HDD v OS a rovnako je možné medzi nimi prenášať
dáta.
KLONOVANIE HDD
1) Pred klonovaním odpojte dokovaciu stanicu od notebooku / PC.
2) Dokovacia stanica musí byť zapnutá (ON) a musí byť zapojený napájací adaptér.
3) Do dokovacej stanice vložte zdrojový / základný HDD (Source HDD1) – rozsvieti sa
červená LED HDD1.
4) Do dokovacej stanice vložte cieľový HDD (Target HDD2) – musí ma rovnakú alebo
vyššiu kapacitu než zdrojový HDD1 – rozsvieti sa červená LED HDD2.
5) Potom je možné použiť dokovaciu stanicu pre jednoduché zálohovanie /
klonovanie HDD. Zálohu spustíte 2x kliknutím na tlačidlo „CLONE“ (vedľa HDD2).
6) Zaháji sa prenos dát z HDD1 na HDD2. Priebeh je indikovaný modrými LED 25% /
50% / 75% / 100%. Po ukončení svietia všetky 4 modré LED.
SK
27
SLOVENSKY
i-tec USB 3.0 SATA HDD Docking Station
Page 29

Poznámky:
źHDD vkladajte do dokovacej stanice opatrne a dôkladne ich dotlačte do
konektoru SATA, aby nedošlo k jeho poškodeniu a HDD sa správne zobrazil v OS.
źNevyťahujte HDD počas prenosu dát alebo klonovania.
źDoporučujeme prečítať si manuál k vášmu HDD pred použitím s dokovacou
stanicou i-tec.
źDo dokovacej stanice vkladajte len 2.5" / 3.5" SATA HDD, iné zariadenia alebo
predmety môžu poškodiť SATA konektory alebo vyklápacie lišty.
ČASTO KLADENÉ OTÁZKY
Otázka: Môžem zálohovať / klonovať HDD po pripojení dokovacej stanice k
notebooku / PC?
Odpoveď: Nie. Po pripojení dokovacej stanice k notebooku / PC pracujú vložené
HDD v OS ako dva externé HDD a môžete medzi nimi alebo na nich prenášať dáta.
Otázka: Po dvojitom stlačení tlačidla „CLONE“ sa nespustilo zálohovanie /
klonovanie.
Odpoveď: Odpojte dokovaciu stanicu od notebooku / PC. HDD1 musí mať menšiu
kapacitu než HDD2.
Otázka: Po pripojení dokovacej stanice k notebooku / PC nie je vložený HDD
viditeľný. Prečo?
Odpoveď: Nový HDD je treba pred použitím naformátovať obvyklým spôsobom v
OS.
Otázka: Nie je signál po pripojení dokovacej stanice k notebooku / PC?
Odpoveď: Najprv nový HDD pred použitím naformátujte. Potom skontrolujte
napájací adaptér alebo USB 3.0 kábel a ich funkčnosť.
V prípade problémov s dokovacou stanicou sa môžete obrátiť na našu technickú
podporu: support@itecproduct.com.
EN
08
SK
28
SLOVENSKY
Quick Start
Page 30

Prieš pradedant dirbti su įkrovos stotele, prašome, įdėmiai
perskaityti visą vadovą. Išsamesnę informaciją rasite yra
mūsų tinklalapyje: www.i-tec-europe.eu .
REKOMENDUOJAMI PRODUKTAI
ĮVADAS
i-tec USB 3.0 SATA HDD Įkrovos stotelė yra įkrovos įrenginiu tarnaujančiu dviejų 2.5"
arba 3.5" SATA I/II/III HDD prijungimui nenaudojant USB rėmelio. Prijungimo per
USB 3.0 ir duomenų sąsajos SATA III dėka galima naudoti aukštus perdavimo greičius
iki 5 Gbps.
SPECIFIKACIJA
źSąsaja USB 3.0, suderinama su USB 2.0
źDidžiausias perdavimo greitis: 5 Gbps per USB 3.0, 480 Mbps per USB 2.0;
aktualus greitis priklauso nuo HDD savybių
źPalaikomi HDD: 2.5" / 3.5" HDD neviršijantys įprasto 3.5" HDD su duomenų
sąsaja SATA I/II/III iki 6TB plotį
źLED indikatorius: raudota maitinimui ir įdėjimui HDD, mėlyna 25% / 50% / 75%
/ 100% HDD klonavimui ir veiklai
źFunkcija Plug & Play
źOS: Windows Vista, 7 32/64bitų, 8 32/64bitų, 8.1 32/64bitų, 10 32/64bitų,
Mac OS 10.4 ir aukštesnė, Linux 2.6.24
źEksploatacinė temperatūra: 5°C - 50°C
źMatmenys: 153 x 111 x 62mm
źSvoris: 390 g
EN
07
LIETUVOS
Įjunkite Windows sistemoje trečiąjį
išorinį ekraną, o Mac sistemoje antrąjį
išorinį ekraną, pvz. per i-tec USB 3.0 4K
Ultra HD Display Adapterį - HDMI
(P/N: U3HDMI4K).
Išplėskite savo įrenginį 4 standartiniais
USB-A prievadais pers USB-C sąsają.
Pvz. i-tec USB C Slim Passive HUB 4
prievadą (P/N: C31HUB404).
LT
29
i-tec USB 3.0 SATA HDD Docking Station
Page 31

SYSTEMOS REIKALAVIMAI
Hardware reikalavimai: PC arba nešiojamas kompiuteris su procesoriumi Intel
Pentium 2 ir aukštesnės versijos, Mac PC / nešiojamas kompiuteris su procesoriumi
Apple G3 ir aukštesnės versijos su laisvu USB 3.0 prievadu. Prijungimui taip pat
galima naudoti USB 2.0 prievadą, tačiau perdavimo greitis bus mažesnis.
Operacinė sistema: Windows Vista, 7 32/64bitų, 8 32/64bitų, 8.1 32/64bitų, 10
32/64bitų, Mac OS 10.4 ir aukštesnė, Linux 2.6.24
PAKUOTĖS SUDĖTIS
źi-tec USB 3.0 SATA HDD Įkrovimo stotelė
źUSB 3.0 kabelis (80 cm)
źMaitinimo adapteris (įvestis: AC 100-230V, 50-60Hz, maks. 1.2A; išvestis: DC
12V / 3A)
źVartotojo vadovas
HARDWARE INSTALIACIJA
1) 2.5" / 3.5" SATA HDD dėkite įkrovimo stotelės šonuose iki dugno. Prieš tai
patikrinkite ar SATA jungtys ir SATA prievadai susiduria.
2) Įsitikinkite, kad mygtukas ON/OFF yra padėtyje OFF, po to prijunkite maitinimo
adapterį.
3) USB kabeliu sujunkite įkrovos stotelę su kompiuteriu.
4) Dabar perjunkite mygtuką į padėtį ON. Užsidegs raudona lemputė POWER.
NAUJO HDD FORMATAVIMAS
Jeigu naudosite jau suformatuotą diską, galite jį naudoti tuoj pat. Jeigu į įkrovos
stotelę įdėsite naują diską, pirmiausia jis turi būti suformatuotas (FAT32/NTFS). Tai
galima atlikti po įrenginio hardware instaliacij os. Tam naudojamas disko
administratorius, esantis OS (Windows'uose paspauskite dešiniuoju pelės mygtuku
ties piktograma „Šis kompiuteris“, pasirinkite „Administruoti“ , o sekančiame lange
pasirinkite „Diskų administravimas“). Arba galite naudoti specializuotą programą.
LIETUVOS
Quick Start
LT
30
Page 32

SOFTWARE INSTALIACIJA
Įrenginį palaiko operacinė sistema, valdiklių instaliuoti nereikia. Prašome patikrinti
ar yra instaliuoti naujausi valdikliai skirti Jūsų kompiuterio USB 3.0 šakotuvui.
Pastaba: Jeigu į įkrovos stotelę įdėsite du HDD tuo pačiu metu su jais galima dirbti
klasikiniu būdu, kaip ir su kitais HDD OS , taip pat galima tarp jų perduoti duomenis.
HDD KLONAVIMAS
1) Prieš klonavimą išjunkite įkrovos stotelę iš nešiojamo kompiuterio/PC.
2) Įkrovos stotelė turi būti įjungta (ON), taip pat turi būti įjungtas maitinimo
adapteris.
3) Įdėkite į įkrovos stotelę pradinį HDD (Source HDD1) – užsidega raudona LED
HDD1.
4) Į įkrovos stotelę įdėkite tikslinį HDD (Target HDD2) – turi būti tokios pat arba
didesnės galios nei pradinis HDD1 – užsidega raudona LED HDD2.
5) Po to, įkrovos stotelę galima naudoti nesudėtingam HDD kopijavimui/klonavimui.
Pradėsite kopijuoti 2 kartus paspaudę mygtuką „CLONE“ (prie HDD2).
6) Pradėsite duomenų perdavimą iš HDD1 į HDD2. Procesas indikuojamas
mėlynomis LED 25% / 50% / 75% / 100%. Užbaigus dega visos 4 mėlynos LED.
LT
31
LIETUVOS
i-tec USB 3.0 SATA HDD Docking Station
Page 33

Pastabos:
źKad išvengtumėte disko pažeidimo ir HDD būtų teisingai rodomas OS HDD į
įkrovos stotelę HDD dėkite atsargiai, įstumkite į jungtį SATA.
źNeišimkite HDD duomenų perdavimo arba klonavimo metu.
źPrieš įkrovos stotelės i-tec naudojimą rekomenduojame perskaityti Jūsų HDD
vartotojo vadovą.
źĮ įkrovos stotelę dėkite tik 2.5" / 3.5" SATA HDD, kiti įrenginiai arba daiktai gali
pažeisti SATA jungtis arba atlenkiamus dangčius.
DAŽNAI UŽDUODAMI KLAUSIMAI
Klausimas: Galiu kopijuoti/klonuoti HDD dėl įkrovos stotelės prijungimo prie
nešiojamo kompiuterio/PC?
Atsakymas: Ne. Įkrovos stotelės prijungimui prie nešiojamo kompiuterio/PC dirba
įdėti HDD į OS kaip du išoriniai HDD ir galima tarp jų arba į jiems perduoti duomenis.
Kla usima s: D u ka rtus p aspau dus mygtuk ą „C LONE“ nep radėjo vei kti
kopijavimas/klonavimas.
Atsakymas: Išjunkite įkrovos stotelę iš nešiojamo kompiuterio/PC. HDD1 turi būti
mažesnės galios nei HDD2.
Klausimas: Prijungus įkrovos stotelę prie nešiojamo kompiuterio/PC įdėtas HDD yra
nematomas. Kodėl?
Atsakymas: Naują HDD prieš naudojimą reikia suformatuoti OS įprastu būdu.
Klausimas: Prijungus įkrovos stotelę prie nešiojamo kompiuterio/PC nėra signalo.
Atsakymas: Pirmiausią, prieš naudojimą, naują HDD suformatuokite. Po to,
patikrinkite maitinimo adapterį arba USB 3.0 kabelį ir ar jie veikia.
Problemų su įkrovos stotele atveju galite kreiptis į mūsų techninės pagalbos
skyrių: support@itecproduct.com.
EN
08
LT
32
LIETUVOS
Quick Start
Page 34

European Union Only
Note: Marking is in compliance with EU WEEE Directive
English
This equipment is marked with the above recycling symbol. It means that at the end of the life
of the equipment you must dispose of it separately at an appropriate collection point and not
place it in the normal domestic unsorted waste stream. This wil benefit the environment for
all. (European Union only)
Deutsch
Dieses Produkt trägt das Recycling-Symbol gemäß der EU-Richtinie 2002/96/EC. Das
bedeutet, dass das Gerät am Ende der Nutzungszeit bei einer kommunalen Sammelstelle
zum recyceln abgegeben werden muss, (kostenloss). Eine Entsorgung űber den Haus-
/Restműll ist nicht gestattet. Dies ist ein aktiver Beitrag zum Umweltschutz. (Nur innerhalb
der EU)
Čeština
Toto zařízení je označeno výše uvedeným recyklačním symbolem. To znamená, že na konci
doby života zařízení musíte zajistit, aby bylo uloženo odděleně na sběrném místě, zřízeném
pro tento účel a ne na místech určených pro ukládání běžného netříděného komunálního
odpadu. Přispěje to ke zlepšení stavu životního prostředí nás všech. (Pouze pro Evropskou
unii)
Polski
To urządzenie oznakowane jest specjalnym symbolem odzysku. Pookresie użytkowania
trzeba je zwrócic do odpowiedniego punktu zbiörki i nie wolno umiestczać go razem z
nieposortowanymi odpadami. Takie dzialanie przyniese korzyść dla środowiska. (Tylko w
Unii Europejskiej)
Lietuviu
Šis gaminys yra pažymetas specialiu atlieku tvarkymo ženklu. Baigus eksploataciją,
gaminys turi buti atiduotas i atitinkamą surinkimo punktą ir negali buti šalinamas kartu su
nerušiuojamomis atliekomis. Tokie Jusu veiksmai prisides prie aplinkos apsaugos. (Tiktai
Europos Sąjungoje)
Français
Ce dispositif est revêtu du marquage avec le symbole de recyclage indiqué ci-dessus. Ça
veut dire, qu'une fois découlée la vie utile dudit dispositif, vous vous voyez dans l'obligation
d'assurer, que le dispositif se trouve déposé en un respectif centre de collecte, dûment établi
à cette fin, et non en d'autres centres de ramassage qui soient destinés à déposer de
courants déchets municipaux non triés. De cette manière, on contribue considérablement à
une amélioration en matière d'environnement où nous vivons tous. (Seulement pour l'Union
Européenne).
WEEE
25
WEEE
33
Page 35

EU Declaration of Conformity, EU Konformitätserklärung, EU Prohlášení o shodě, EU Prehlásenie
o zhode, EU Declaracja zgodności
Manufacturer, Der Hersteller, Výrobce, Výrobca, Producent:
ComDis s.r.o., Kalvodova 2, 709 00 Ostrava - Mariánské Hory, Czech Republic
declares that this product
erklärt hiermit, dass das Produkt
tímto prohlašuje, že výrobek
týmto prehlasuje, že výrobok
deklaruje, że produkt
Product, Bezeichnung, Název, Názov, Nazwa: i-tec Advance USB 3.0 SATA HDD Docking Station with CLONE
function
Model, Modell, Model, Model, Model: U3CLONEDOCK / K3082
Determination, Bestimmung, Určení, Určenie, Opcje: Product is determined for using in PC as equipment.
Das Produkt ist für Austattung und als Zubehör von Computern bestimmt. Výrobek je určen pro přístrojové
vybavení a jako příslušenství do počítačů. Výrobok je určený pre prístrojové vybavenie a jako príslušenstvo do
počítačov. Produkt jest przeznaczony do współpracy z komputerem jako akcesorium.
Meets the essential requirements according to / Es entspricht den Anforderungen der Richtlinien / Splňuje tyto
požadavky / Spĺňa tieto požadavky / Spełnia następujace wymagania EMC directive 2014/30/EU, 2014/35/EU,
2011/65/EU:
For EMC, Für EMC, Pro EMC, Pre EMC, Dla Kompatybilności elektromagnetycznej:
EN 55022:2010/EN55013:2013 (EN61000-3-2:2014, EN61000-3-3:2013); EN 55024:2010/EN55020:2007+
A11:2011
For Safety, Für Elektrische Sicherheit , Pro Elektrickou bezpečnost, pre Elektrickú bezpečnost´, dla
Bezpieczeństwa:
EN 60065:2014
For RoHS, Für RoHS, Pro RoHS, Pre RoHS, Dla RoHS:
IEC62321:2013
and it is safety under conditions of standard application.
und ist sicher bei standardmäßiger Nuttzung.
a je bezpečný za podmínek obvyklého použití.
a je bezpečný za podmienok obvyklého použitia.
oraz jest produktem bezpiecznym przy standardowym wykorzystywaniu.
Additional information, Ergänzende Angaben, Doplňující informace, Doplňujúce informácie, Dodatkowe
informacje:
Identification Mark, Identifikationskennzeichen, Identifikační značka, Identifikačná značka, Znak identyfikacyjny:
Ostrava 20.12.2016 Ing. Lumír Kraina
Executive Name and Signature, Geschäftsführer,
Jednatel, Konatel, Nazwisko osoby upowaznionej
DOC
34
Page 36

www.i-tec-usa.com www.i-tec-world.com www.i-tec-europe.eu
www.i-tec.cz www.i-tec.pl www.i-tec.sk
 Loading...