

Page 1
AA
BB
< bottom of player >
charging indicator
H10H10
QUICK START GUIDE
This guide shows examples from Windows XP only.
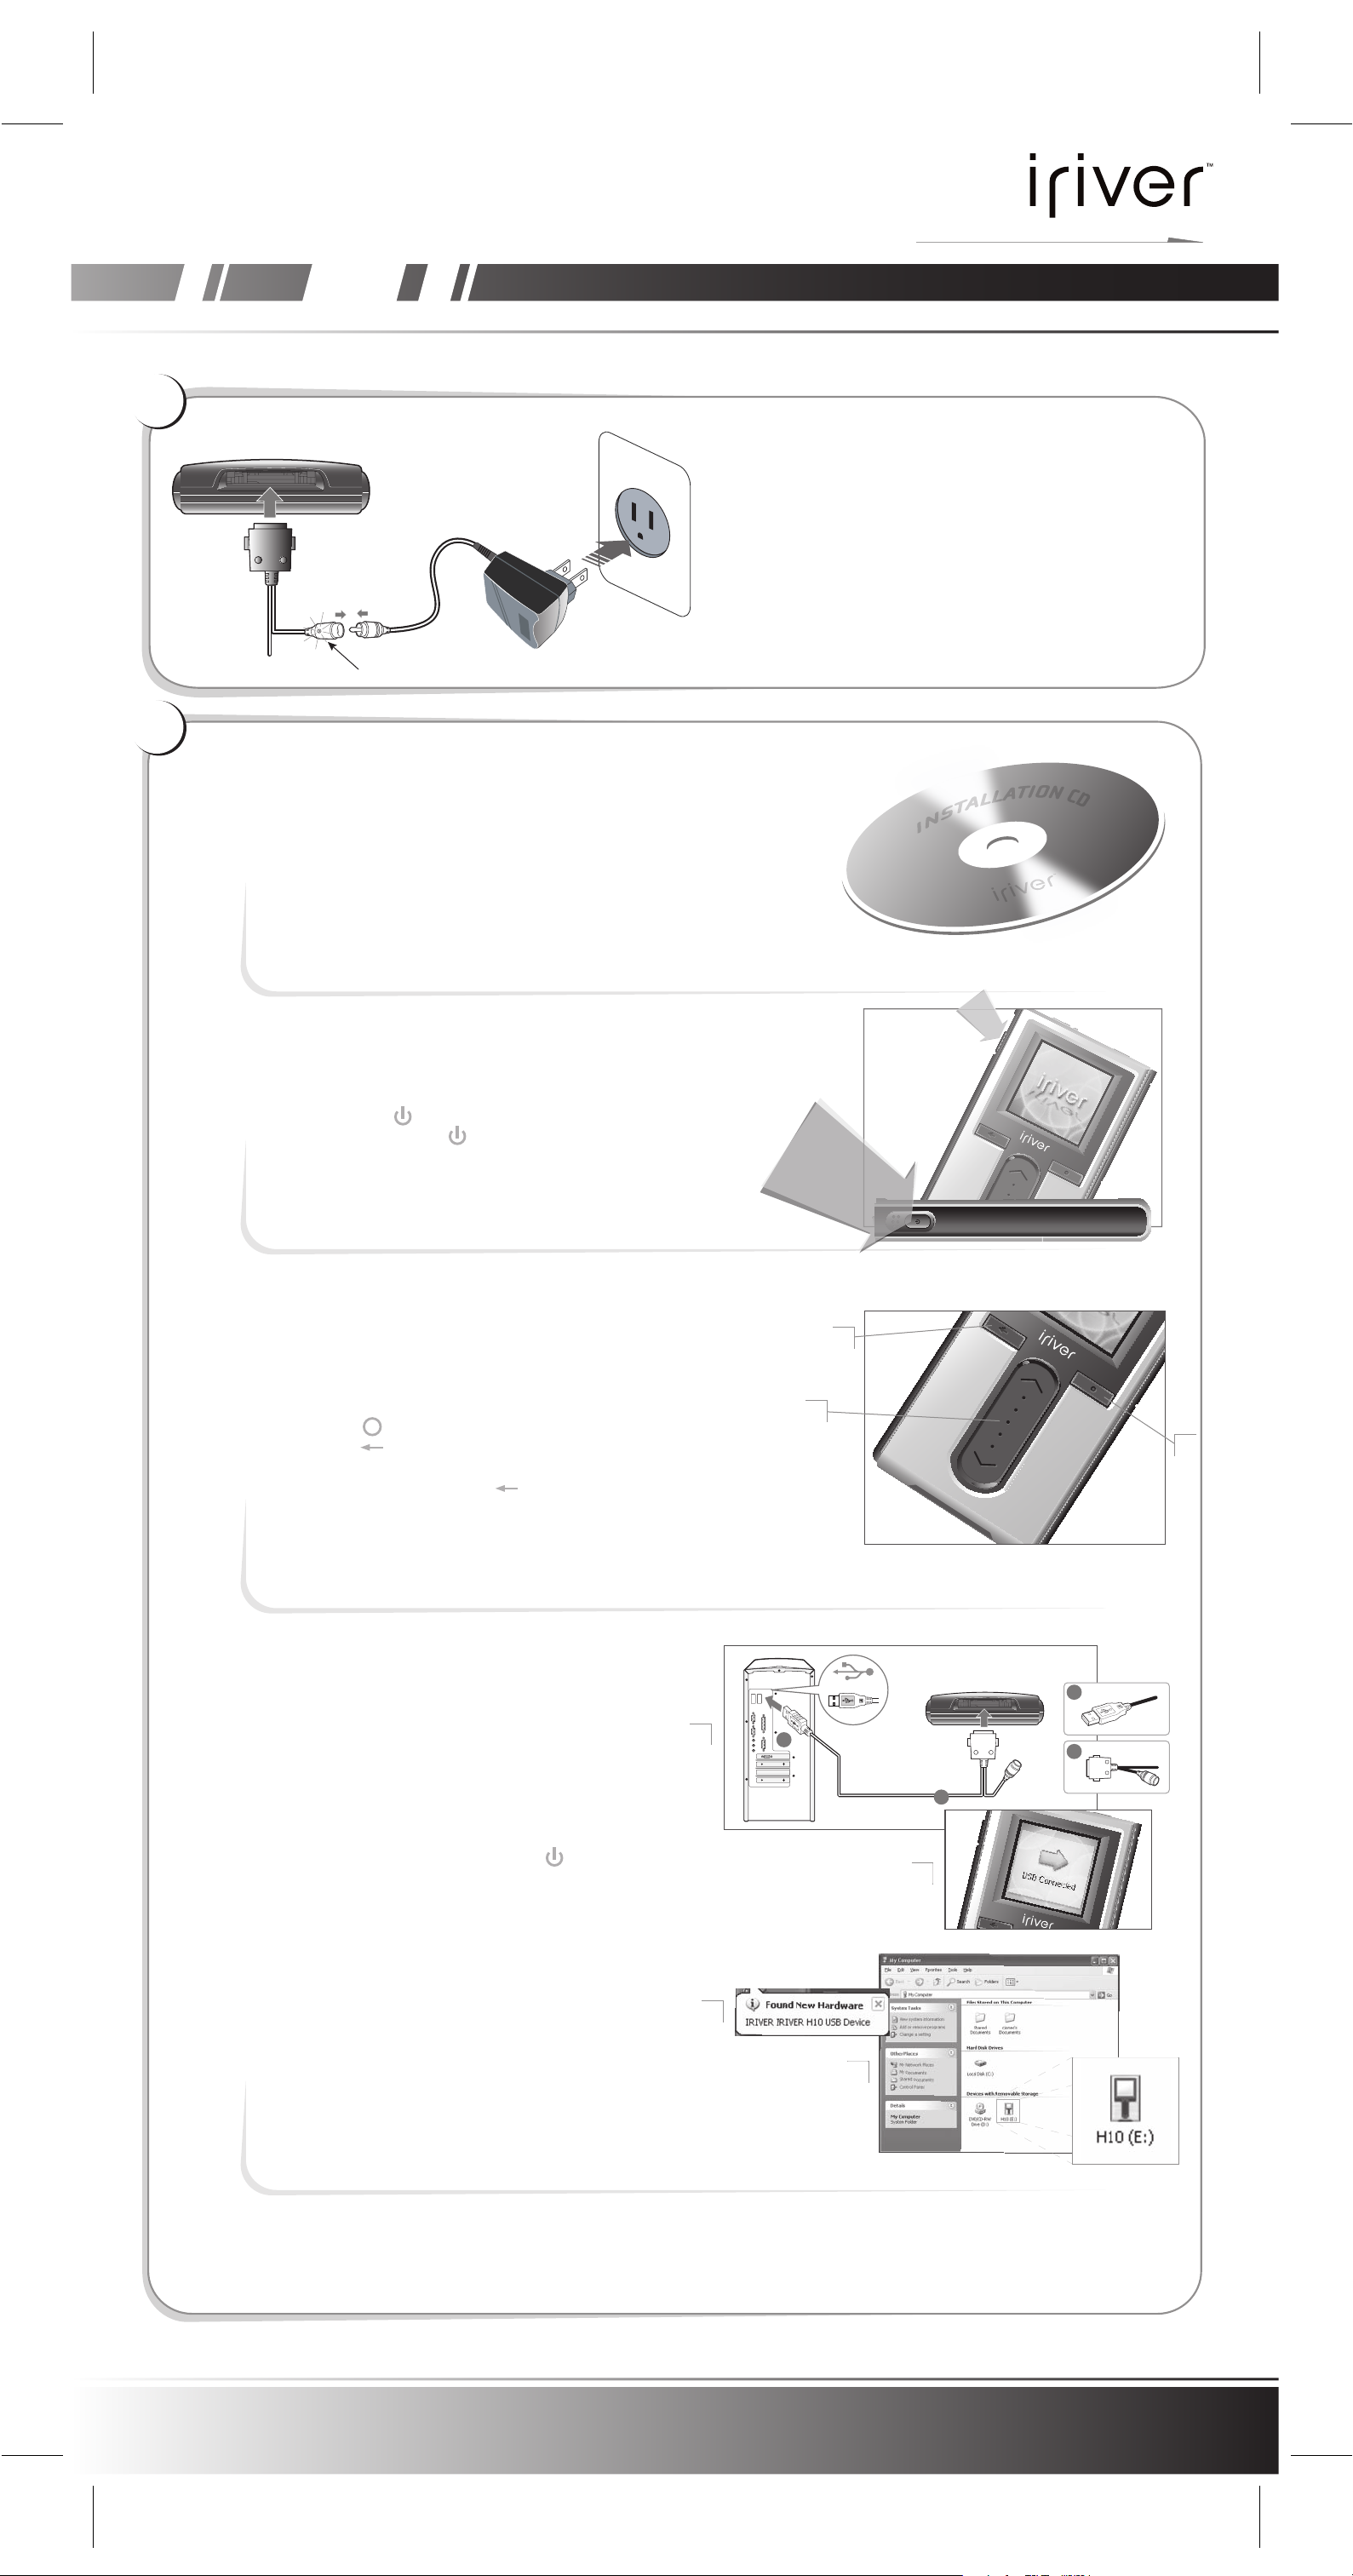
Charging The PlayerCharging The Player
a. Plug the included USB/Charging cable into the H10.
b. Plug the included AC adapter into a wall outlet then into
the jack on the USB/Charging cable. The charging indicator
light will illuminate on the cable.
c. The light will dim when charging is complete.
d. iriver strongly recommends that the player be fully charged
or connected to the AC adapter prior to performing the
functions below.
Basic OperationBasic Operation
1. Software Installation
Insert the installation CD, the software installation will
begin automatically.
Follow on-screen instructions to complete the
software installation.
2. Power On/Off
a. Press the button to power on the H10.
b. Press and hold the button to power off
the player.
3. Menu/Navigation
a. Navigation uses a combination of buttons:
a. Touch-pad for scrolling up and down menus
b. button to select items
c. button to return to the previous screen
*At any time, press and hold the button to return
to the main menu screen.
4. Connect the H10 to a PC
a. Connect the included USB cable to the port on the H10
then to an open USB port on your computer.
b. Power on the player by pressing the button.
c. The LCD screen will display “USB Connected”.
d. Windows may show “Found New Hardware” when the player
is first attached.
e. The H10 will appear as a new device under My Computer
c
a
b
< bottom of player >
A
a
A
B
B
c
d
e
The H10 is now installed and working properly. Please see the reverse side for steps to load music onto the H10.
This guide shows examples from Windows XP only.
H10 QUICK START GUIDE
Page 2
AA
GETTING MUSIC ON YOUR H10 PLAYER
This guide shows examples from Windows XP only.
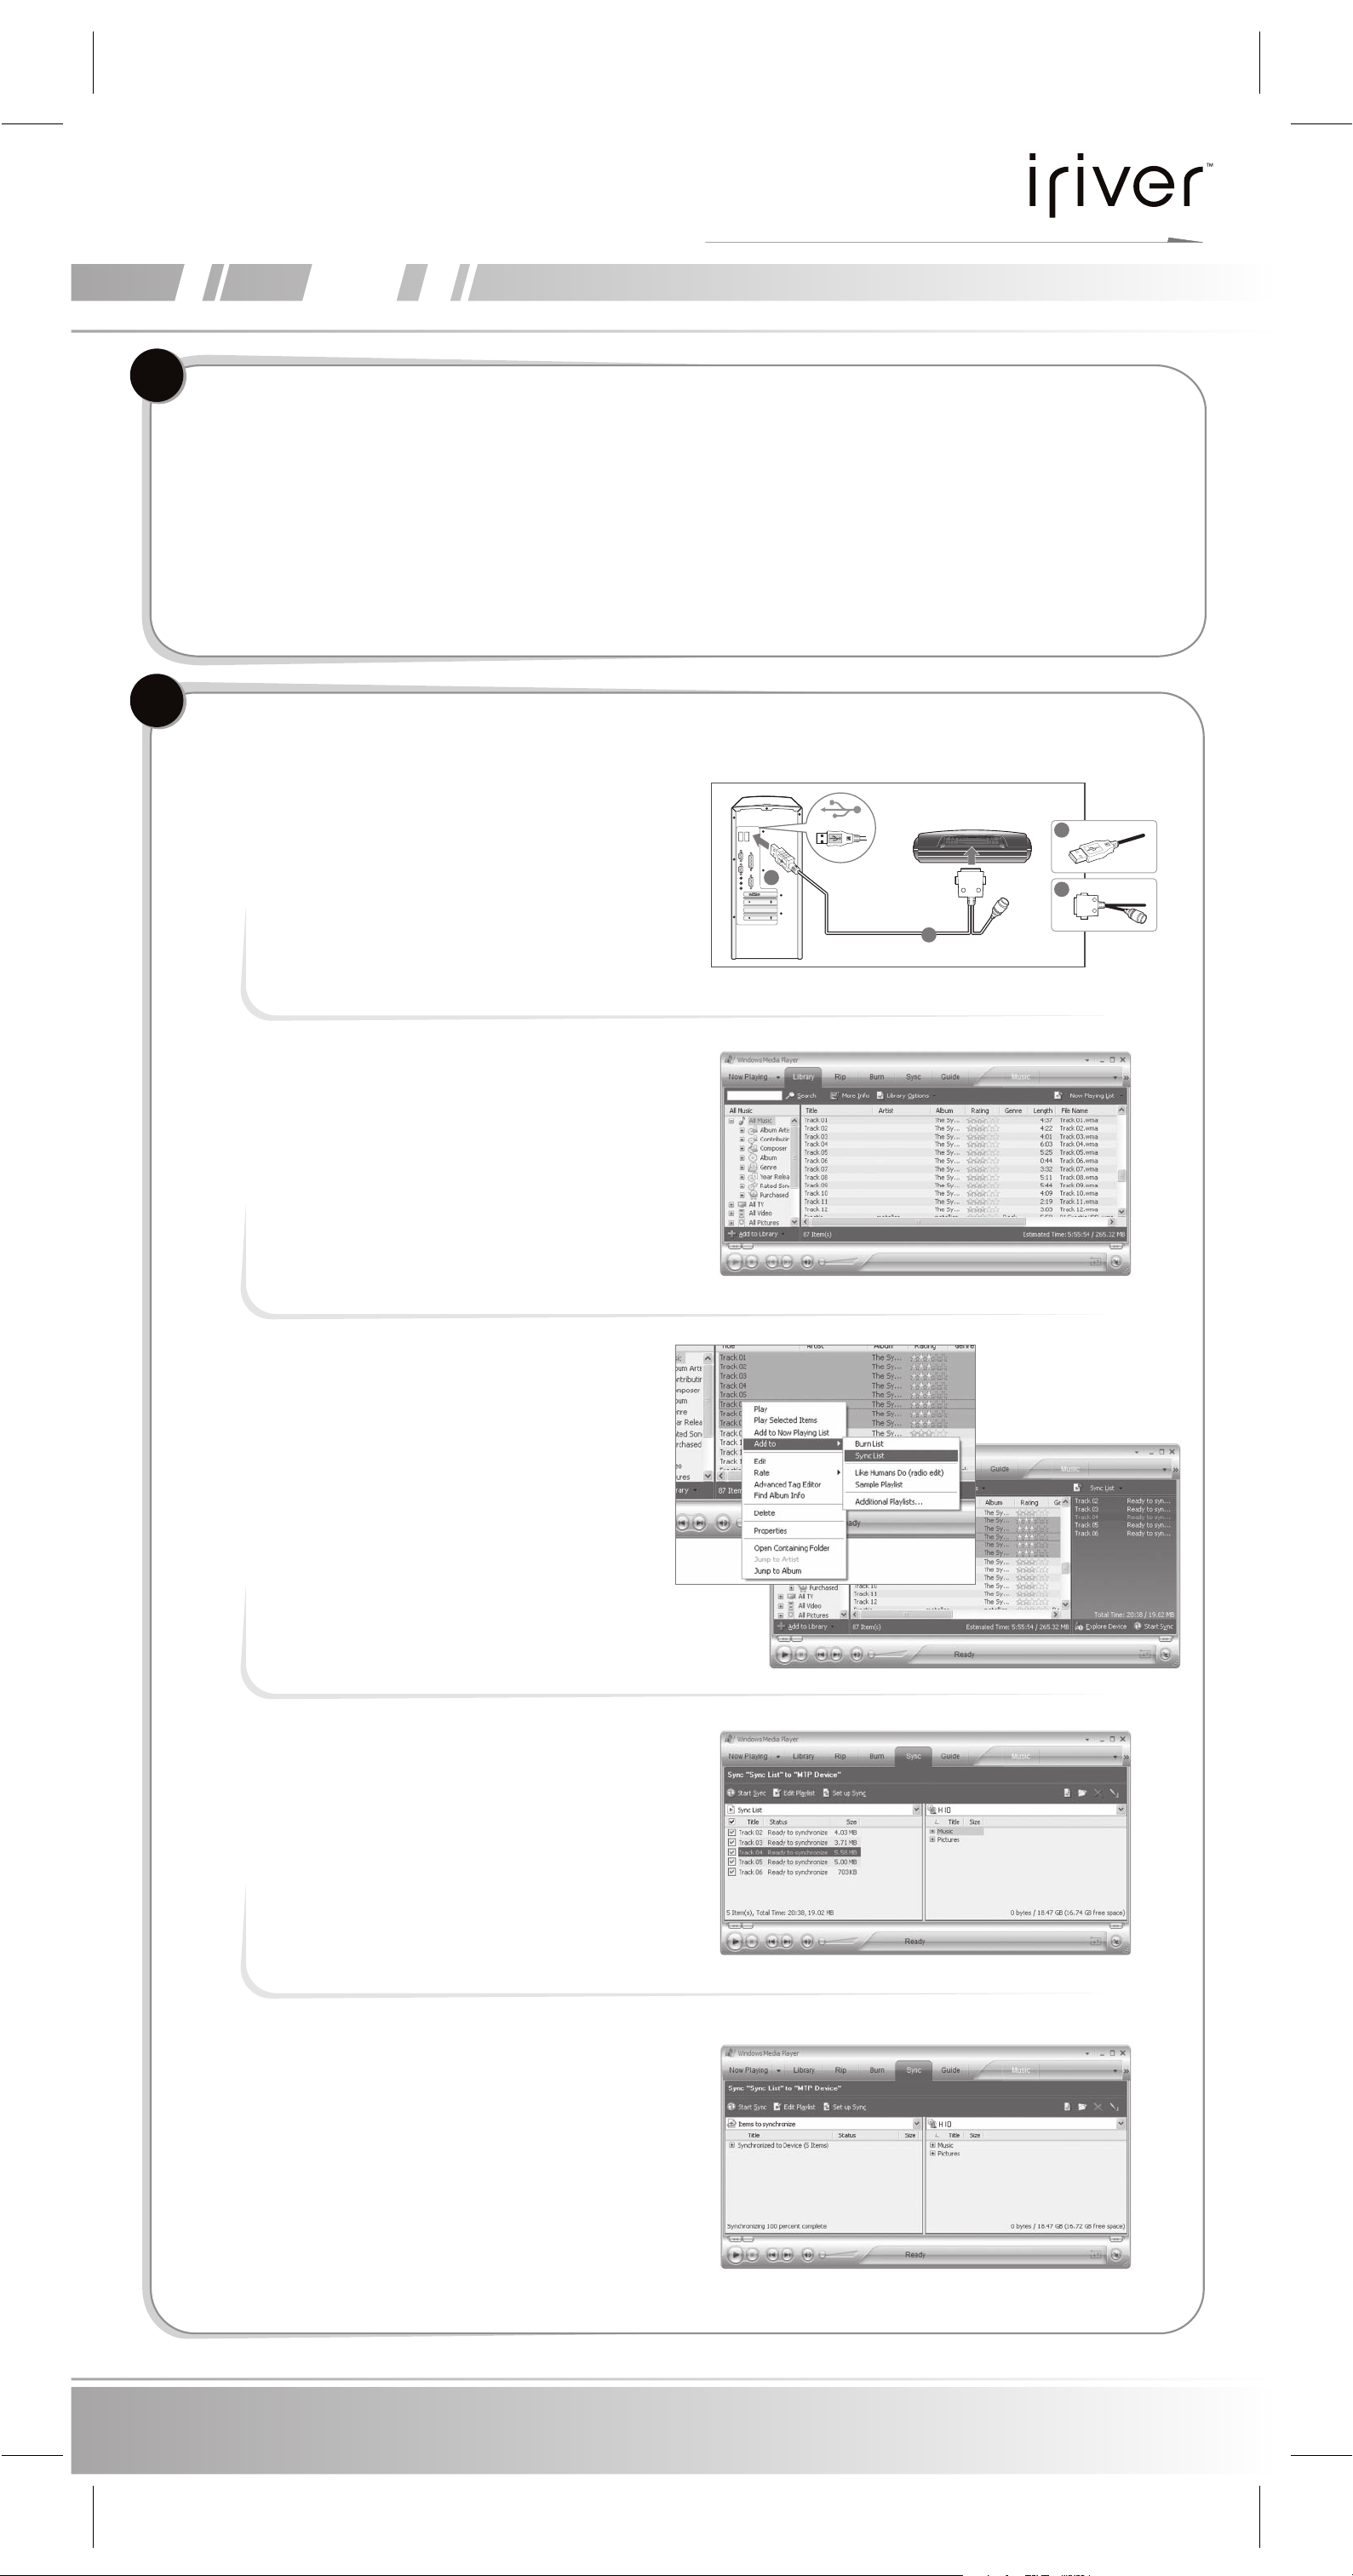
Get the latest Windows Media Player.Get the latest Windows Media Player.
In order to use music purchased from a music service, you must have Windows Media Player 10 installed. The installation CD ROM
should include the proper version of Windows Media Player.
Windows Media Player 10 can also be found online at: http://www.microsoft.com/windows/windowsmedia/download/
Once Windows Media Player has been updated, use the following steps to load music onto your player.
*** Please note, purchased music can only be copied to this player using Windows XP and the latest version of Windows Media Player ***
BB
Follow these instructions to get music on your player.Follow these instructions to get music on your player.
1. Connect the USB cable to the USB port on the player
and to the PC.
2. Open Windows Media Player
a. Click Start -> All Programs -> Accessories ->
Entertainment -> Windows Media Player
b. Click “Library” from the menu button near the top of
the screen. Most of your music should be listed in
this library. If not, check Windows Media Player help
for more information about the library.
< bottom of player >
A
A
B
B
3. Locate a song in the Library and Right-Click on it. Select
“Add to -> Sync List”. A “Sync List” will appear on the
right side of Windows Media Player listing all the songs to
be added to your player. Repeat for all the songs you
would like to add to your player.
4. Click the Sync menu button. On the right side of the Sync
screen choose the H10 from the dropdown list.
5. Click Start Sync to transfer the items on your Sync list to
the player. A progress indicator will show each file
transferring.
When complete, copied songs will appear in
the “Synchronized to Device” list on the left side of
Windows Media Player and in the specified folder on the
right side of the screen.
Disconnect the player from your computer and enjoy
your music!
This guide shows examples from Windows XP only.
GETTING MUSIC ON YOUR H10 PLAYER
 Loading...