

Page 1

Quick User Guide
Scanner
& Mouse
for Windows® & Mac®
English
Page 2

English English
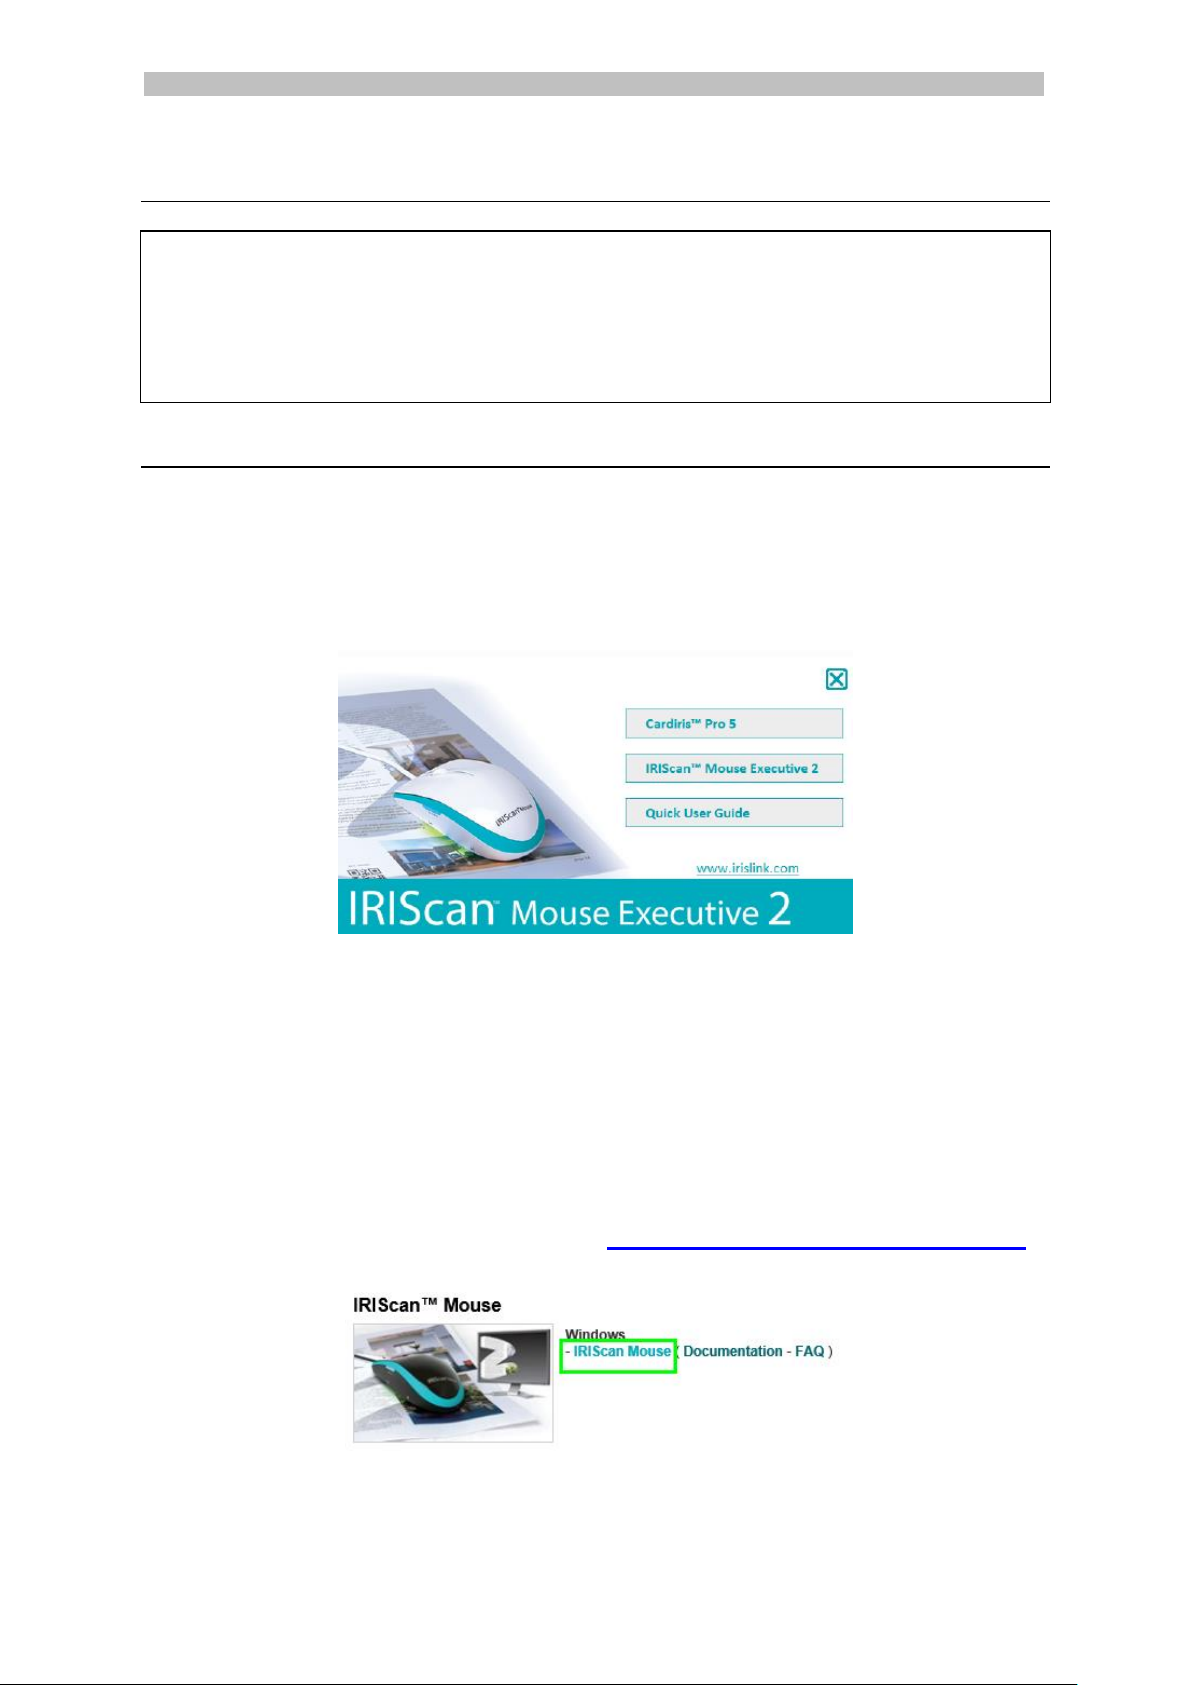
This Quick User Guide helps you get started with IRIScanTM Mouse Executive 2.
The descriptions in this documentation are based on the Windows® 7 and Mac® OS X
Mountain Lion Operating Systems. Please read this guide before operating this scanner
and its software. All information is subject to change without prior notice.
For more information about the IRIScanTM Mouse features, see the User Guide on
www.irislink.com/support.
Table of Contents
1. Introduction
2. Hardware Overview
3. Installing the IRIScanTM Mouse application
3.1 Installation on Windows
3.2 Installation on Mac OS
4. Using the IRIScanTM Mouse
Step 1: Scan documents
Step 2: Edit the scanned documents
Step 3: Save and share the scanned documents
1
Page 3
English English
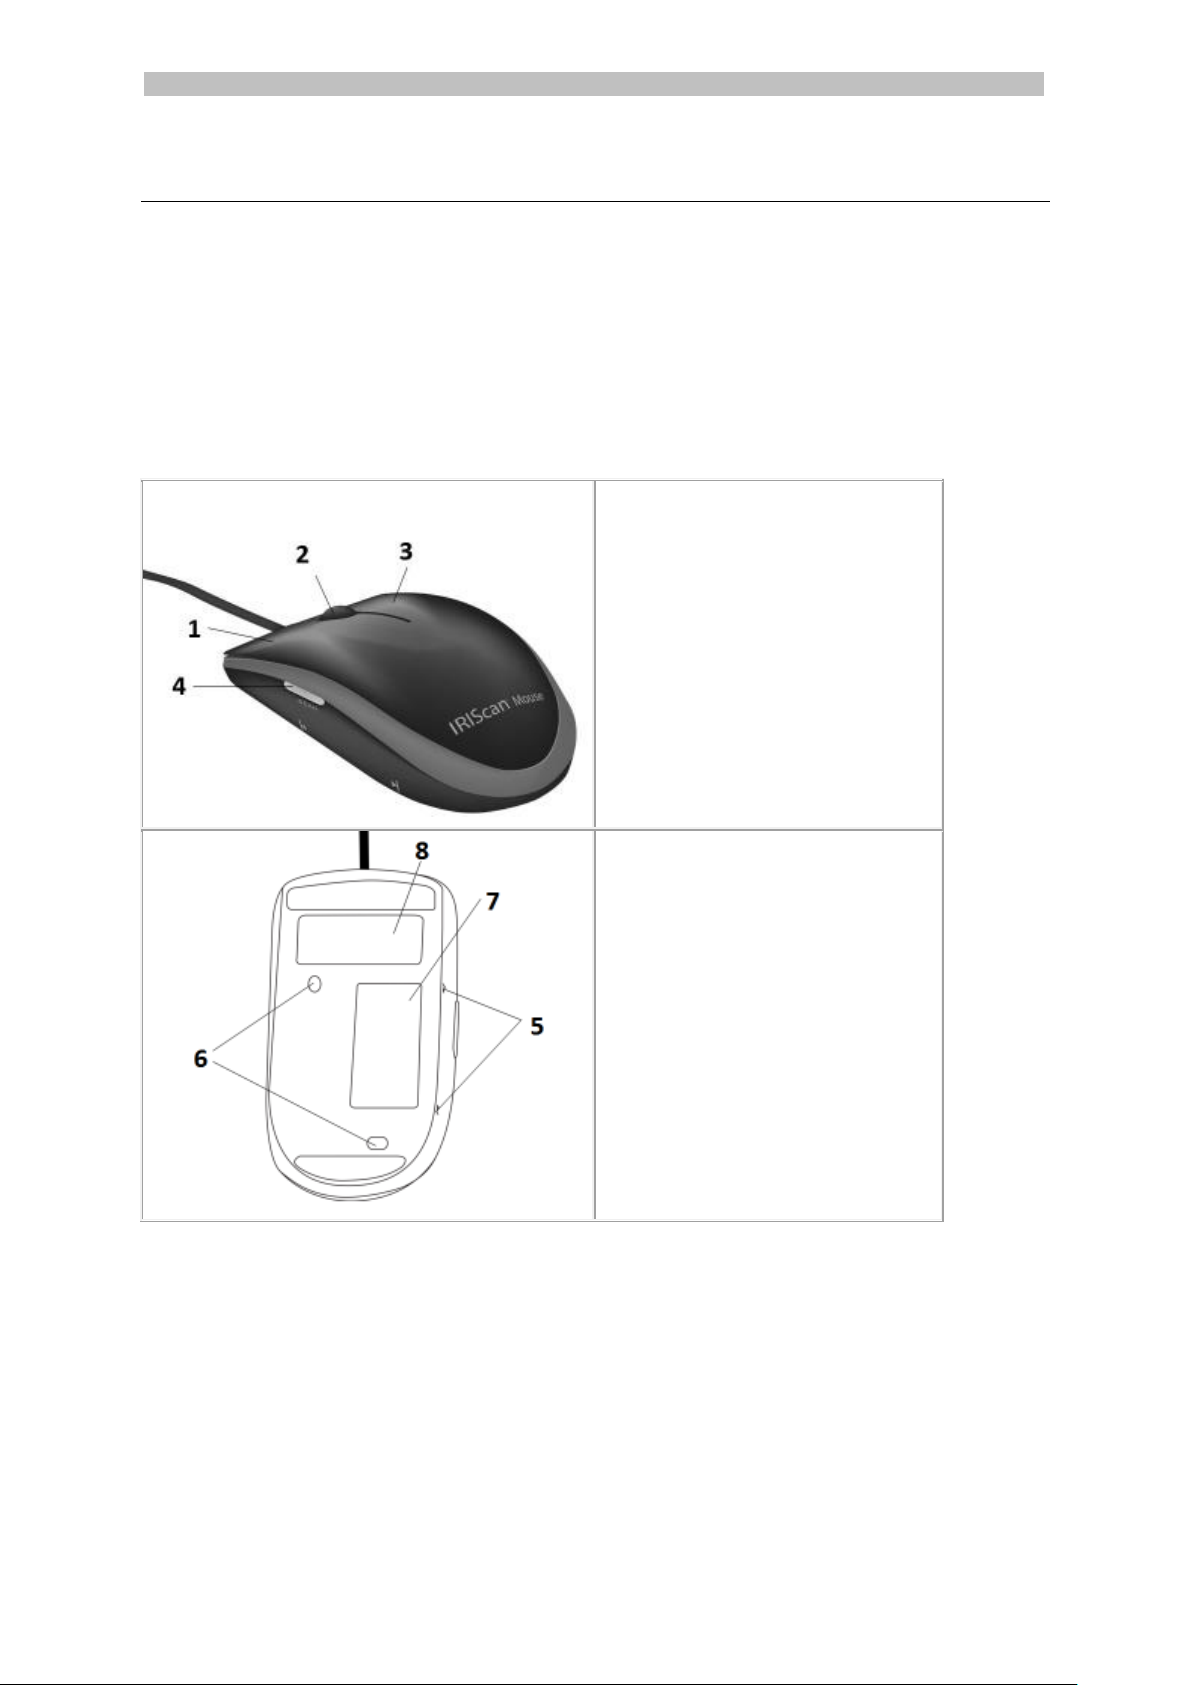
1. Left button
2. Wheel
3. Right button
4. Scan button
5. Scan surface indicators
6. Laser sensors
7. Scan surface
Remove the film before scanning
8. Mouse label
1. Introduction
The IRIScanTM Mouse is a mouse and scanner combined. With the scan function, you can
scan documents by sliding the mouse over them.
The scan results can be saved in several ways. You can drag-and-drop them to file
folders and applications. Save them directly as Doc, PDF and XML files. Share them via
Mail, Facebook©, Twitter© and Flickr©. And send them to apps such as CardirisTM,
Dropbox©, Evernote© and Google© Translate.
2. Hardware Overview
2
Page 4
English English
3. Installing the IRIScanTM Mouse application
Important Notes:
Make sure you have the required administration rights on your computer to do the
installation.
Make sure to install CardirisTM before you install the actual IRIScanTM Mouse application, as
explained below. Otherwise IRIScanTM Mouse will not be able to send scanned documents
to CardirisTM.
3.1 Installation on Windows
Installation from CD-ROM:
1. Insert the IRIScan
TM
Mouse disc in the CD-ROM drive of the computer.
The installation menu is displayed automatically.
In case the menu does not start automatically, run setup.exe from the disc.
2. Click Cardiris
TM
Pro 5. Then follow the on-screen instructions.
3. Return to the installation menu and click IRIScan
follow the on-screen instructions.
4. Click Finish to complete the installation.
5. Unplug your regular mouse. Plug in the IRIScan
2.0 or higher). The driver is installed automatically within a few seconds.
TM
Mouse Executive 2. Again
TM
Mouse in a free USB port (USB
Software Download:
The IRIScanTM Mouse application can also be downloaded from the I.R.I.S. website.
1. Open your Internet browser and go to www.irislink.com/softwaredownload.
2. Scroll down to IRIScan
3. You are then asked to download the installation package to your computer.
4. Go to the location where you downloaded the package, and double-click the
installer: ISMExec2.exe.
TM
Mouse and click the right installer.
3
Page 5

English English
5. Click Cardiris
TM
Pro 5. Then follow the on-screen instructions.
6. Return to the installation menu and click IRIScan
follow the on-screen instructions.
7. Click Finish to complete the installation.
8. Unplug your regular mouse. Plug in the IRIScan
2.0 or higher). The driver is installed automatically within a few seconds.
3.2 Installation on Mac OS
Installation from CD-ROM:
1. Insert the IRIScan
2. Click the IRIScan
The installation menu is now displayed.
TM
Mouse disc in the CD-ROM drive of the computer.
TM
Mouse CD-ROM icon that appears on the Desktop.
TM
Mouse Executive 2. Again
TM
Mouse in a free USB port (USB
3. Click Cardiris
4. Return to the installation menu and click IRIScan
TM
4. Then follow the on-screen instructions.
TM
Mouse.pkg. Again follow the
on-screen instructions.
5. Click Finish to complete the installation.
6. Unplug your regular mouse. Plug in the IRIScan
TM
Mouse in a free USB port (USB
2.0 or higher). The driver is installed automatically within a few seconds.
Software Download:
The IRIScanTM Mouse application can also be downloaded from the I.R.I.S. website.
1. Open your Internet browser and go to www.irislink.com/softwaredownload.
2. Scroll down to IRIScan
3. You are then asked to download the installation package to your computer.
4. Go to the location where you downloaded the package, and double-click the
installer: ISMExec2.pkg.
TM
Mouse and click the right installer.
5. Click Cardiris
4
TM
4. Then follow the on-screen instructions.
Page 6

English English
1. Remaining scan memory
2. Function description
3. Scan window; indicates current scan area
4. Scan image
6. Return to the installation menu and click IRIScan
TM
Mouse.pkg. Again follow the
on-screen instructions.
7. Click Finish to complete the installation.
8. Unplug your regular mouse. Plug in the IRIScan
TM
Mouse in a free USB port (USB
2.0 or higher). The driver is installed automatically within a few seconds.
4. Using the IRIScanTM Mouse
Tip: to access the documentation before scanning, open the IRIScanTM Mouse application
by clicking its icon. Then click Help > Online Help.
Step 1: Scan documents
Place the mouse on the documents you want to scan.
Press the Scan button once to start IRIScan
Move the mouse over the documents to scan the desired area.
To stop scanning, press the Scan button again. This opens the Edit screen.
To cancel the scanning, press Esc on the keyboard.
TM
Mouse.
Scan screen functions
Notes
During scanning, IRIScan
TM
Mouse automatically zooms out and adjusts the view
accordingly. To check whether the image is scanned properly, use the mouse
wheel to zoom in/out on the image. You can scan documents of up to A3 size.
If you move the IRIScan
TM
Mouse too fast, the scan window turns yellow or red.
Slow down the scanning if needed.
If the scanned image appears distorted, stop moving the IRIScan
TM
The image will be calibrated automatically.
When the scanning is done, the scanned image is automatically cut into a
rectangular shape and aligned horizontally to the background.
Mouse briefly.
5
Page 7

English English
1. Rotate the scan result
3. Adjust the colors, brightness and contrast
2. Resize the scan area using the handles
4. Adjust the background
Windows PC
Mac OS
To change the text recognition
language:
Click Options > Settings.
Click Text Recognition.
Select the required language(s)
from the list.
You can select up to 3 languages
simultaneously.
To change the text recognition
language:
Click Scanner Mouse >
Preferences.
Click Text Recognition.
Select the required language
from the list.
Step 2: Edit the scanned documents
In the Edit screen you can edit the scanned documents.
Edit screen functions
When you are done, click OK to accept the settings. To return to the Edit screen
afterwards, click Edit in the main screen.
Note: when you click Cancel the scan result will not be saved to memory.
Step 3: Save and share the scanned documents
Before you save the scanned documents, make sure to select the correct recognition
language. The default recognition language is set to English. Thanks to I.R.I.S.'
powerful text recognition technology you can recognize documents in 130 languages.
6
Page 8

English English
1. Save documents in default applications.
1. Double-click the required output format.
2. The document opens in your default application for that format.
3. Save the document from within your default application.
2. Save documents as output files.
1. Click Save.
2. Enter the file name and select a file type.
The supported file types are: png, jpeg, tiff, bmp, pdf, xml, txt and doc.
3. Then click Save.
Notes:
The image and pdf files you save can be hyper-compressed with the included
IRISCompressor
TM
.
When scanning tables, it is recommended to save them as .xml files.
7
Page 9

English English
3. Drag-and-drop to applications.
1. Choose in which format you can to save the document.
2. Open an application that supports the selected format.
E.g. Microsoft Word or Pages for Doc or Adobe Reader for PDF.
3. Drag-and-drop the required format icon to the application.
Note: you can also drag-and-drop the scan results directly to the Desktop or to file
folders.
4. Copy as image or text.
1. Click Copy.
2. Select Copy Image or Copy Text.
3. Open an application that supports images or rich text, or both. E.g. Microsoft
Word or Pages.
4. Then click Paste inside that application.
Note: you can also use the copy-paste shortcuts.
8
Page 10

English English
5. Share images via Mail, Facebook, Twitter and Flickr
Note: when using the Share functions, the scans are always sent as images.
1. Click Share.
2. Select the required application.
Note that you need a valid Facebook, Twitter or Flickr account and an internet
connection to share scans via these applications.
3. A Login window appears. Now log in to your account.
6. Send documents to apps
CardirisTM
When scanning business cards, you can recognize and store them in CardirisTM, I.R.I.S.'
powerful business card scanning solution and organizer.
Important: CardirisTM must have been installed before you installed the IRIScanTM Mouse
application. If that is not the case, uninstall IRIScanTM Mouse, insert the IRIScanTM Mouse
CD-ROM and install CardirisTM. Then install IRIScanTM Mouse.
1. Click Apps > Cardiris
2. Cardiris
TM
opens and displays the scan.
3. Now you can process the business card:
Double-click your scanned card to display it.
Select the appropriate country from the list.
Then click Recognize.
The data is extracted from the card and filled in in the corresponding
fields.
For more information, see the CardirisTM Help file.
TM
.
9
Page 11

English English
Evernote
Your scans can be sent to Evernote. If your scans contain text, both the recognized text
and the image are stored in Evernote.
1. Make sure the Evernote application is installed on your computer.
2. Log in to your Evernote account.
3. In IRIScan
TM
Mouse click Apps > Evernote.
The following message appears: Evernote - Files synchronized with
Evernote.
4. The scans have now been sent to Evernote.
Dropbox
Your scans can be sent to Dropbox. They are saved both as text files (.doc) and as
image files (.jpg) to your Dropbox folder.
1. Make sure the Dropbox application is installed on your computer.
2. Log in to your Dropbox account.
3. In IRIScan
The following message appears: Dropbox - Files synchronized Dropbox.
4. The scans are sent to the Scanner Mouse folder within your Dropbox.
TM
Mouse click Apps > Dropbox.
Google Translate
Your scans can be translated with Google Translate.
1. Make sure your computer is connected to the internet.
2. In IRIScan
3. The recognized text in the scans is sent to Google Translate.
Note: make sure you have selected the correct recognition language in IRIScanTM
Mouse (See Step 3).
TM
Mouse click Apps > Google Translate.
Should you experience issues when using the IRIScanTM Mouse, consult the Frequently
Asked Questions or Technical Support on www.irislink.com/support.
10
Page 12

© Copyright 2013 I.R.I.S. s.a./n.v.
All rights reserved for all countries. I.R.I.S.,
I.R.I.S.’ product names, I.R.I.S.’ logos and I.R.I.S.’
product logos are I.R.I.S. trademarks. All
other products and names mentioned are
trademarks or registered trademarks from
their respective owners.
I.R.I.S. - Louvain-la-Neuve (Belgium)
I.R.I.S. AG - Aachen (Germany)
I.R.I.S. Inc. - Delray Beach (United States)
I.R.I.S. HK Ltd - Hong Kong (China)
T131220-01
Visit us at www.irislink.com
 Loading...