

Page 1

User Guide
Page 2

Page 3

CardirisTM 5 – User Guide
Table of Contents
Copyrights ............................................................................................. 1
About this guide .................................................................................... 3
Chapter 1 Introducing Cardiris ................................................ 5
General information on Cardiris ........................................ 5
Chapter 2 Installing Cardiris .................................................... 9
System requirements .......................................................... 9
Software installation .......................................................... 9
Uninstalling the software ................................................. 10
Software registration ........................................................ 11
Search for updates ............................................................ 11
Product support ................................................................ 11
Chapter 3 Getting started ........................................................ 13
Running Cardiris .............................................................. 13
Changing the user interface language .............................. 13
Tutorial ............................................................................. 14
Chapter 4 View modes ............................................................. 23
Album view ...................................................................... 23
Card view ......................................................................... 25
Chapter 5 Scanning business cards ........................................ 31
Setting the scanner settings .............................................. 31
iii
Page 4

Table of Contents
Scanning cards ................................................................. 33
Scanning cards with the IRISCard scanners .................... 37
Scanning cards with the IRISCard Button manager ........ 38
Loading images from the IRIScan and IRIScard Anywhere
scanners ............................................................................ 39
Scanning cards with a flatbed scanner ............................. 41
Scanning batches of cards ................................................ 42
Scanning cards from within Microsoft Outlook .............. 43
Scanning the back side of a card ...................................... 44
Duplex scanning ............................................................... 46
Scanning a picture of a contact ........................................ 47
Adding notes to cards ....................................................... 48
Manually adding cards to the database ............................ 48
Chapter 6 Recognizing business cards ................................... 51
Selecting the card style .................................................... 51
Recognizing the cards ...................................................... 52
Recognizing batches of cards ........................................... 53
Recognizing the back side of cards automatically ........... 55
Editing the recognition results ......................................... 56
iv
Adjusting card images ...................................................... 58
Customizing database fields............................................. 60
Page 5

Cardiris
TM
5 – User Guide
Assigning categories to contacts ...................................... 62
Chapter 7 Organizing business cards ..................................... 65
Assigning a card status ..................................................... 65
Browsing through the cards ............................................. 68
Searching business cards .................................................. 69
Finding and resolving duplicates ..................................... 72
Maintaining card databases .............................................. 78
Deleting cards ................................................................... 81
Chapter 8 Exporting contacts ................................................. 83
Exporting business cards .................................................. 83
Exporting to Windows Contacts ...................................... 85
Exporting to Windows Address Book ............................. 87
Exporting to Apple devices .............................................. 89
Exporting to Google Contacts .......................................... 91
Exporting contacts to Microsoft Dynamics CRM ........... 94
Exporting contacts to Salesforce CRM .......................... 100
Printing business cards ................................................... 102
Chapter 9 Importing contacts ............................................... 105
Chapter 10 Synchronizing databases ................................... 107
Index .................................................................................... 109
v
Page 6

Table of Contents
vi
Page 7

Cardiris
TM
5 – User Guide
Copyrights
Cardiris5-dgi-110112-04
Copyrights © 1995-2012 I.R.I.S. All Rights Reserved.
I.R.I.S. owns the copyrights to the Cardiris software, the online help system
and to this publication.
The information contained in this document is the property of I.R.I.S. Its
content is subject to change without notice and does not represent a
commitment on the part of I.R.I.S. The software described in this document is
furnished under a license agreement which states the terms of use of this
product. The software may be used or copied only in accordance with the
terms of that agreement. No part of this publication may be reproduced,
transmitted, stored in a retrieval system, or translated into another language
without the prior written consent of I.R.I.S.
This user's guide utilizes fictitious names for purposes of demonstration;
references to actual persons, companies, or organizations are strictly
coincidental.
Trademarks
The Cardiris logo, Cardiris, IRISCard and IRIScan are trademarks of Image
Recognition Integrated Systems S.A. Connectionist, Linguistic and Field
Analysis Technology by I.R.I.S.
The Cardiris software is based in part on the work of the Independent JPEG
Group.
All other products mentioned in this user's guide are trademarks or registered
trademarks of their respective owners.
1
Page 8

Page 9

Cardiris
TM
5 – User Guide
About this guide
This guide covers the full range of functions available in Cardiris. The
functions that are only available in a certain version will be indicated.
3
Page 10

Page 11

Cardiris
TM
5 – User Guide
CHAPTER 1
INTRODUCING CARDIRIS
GENERAL INFORMATION ON CARDIRIS
Introduction
Cardiris is a powerful business card scanning solution and
organizer. This productivity tool allows you to scan, recognize and
archive business cards and turn them into an address database.
Cardiris can process business cards of any type or kind from 218
countries. By means of OCR (Optical Character Recognition) the
data on business cards is extracted automatically from the image,
converted into editable text and inserted in the correct database
fields through field analysis. Cardiris extensively uses a knowledge
database, acquiring the necessary intelligence to distinguish
between first and last names, cities and states, telephone and fax
numbers etc. The field analysis process is also based on the card
layout, as each country has a different style of composing business
cards.
The Cardiris Asian Edition additionally recognizes business cards
from 8 Asian countries and territories: China, Hong Kong, Macau,
Japan, North and South Korea, Singapore and Taiwan.
Business cards in English from the Asian countries listed above are
supported by the standard version of Cardiris.
5
Page 12
Chapter 1 – Introducing Cardiris
Should you encounter a business card in a language that is not
supported by Cardiris, know that you can always scan the card
image without OCRing it and insert in the database.
The Cardiris database
The business cards you scan in Cardiris make up the Cardiris
database. Their data can be sorted, searched, printed, exported to
and synchronized with other contact managers and so on.
Cardiris smoothly complements such applications as contact
managers, personal information managers (PIMs), customer
relations managers (CRMs), databases, spreadsheets or even
word processors whose mail merge function allow to print letters,
envelopes and labels.
You can also synchronize your Cardiris database with the contacts
stored on your PDA, your Windows Mobile handheld device, your
Apple iPod etc.
6
Page 13

Cardiris
TM
5 – User Guide
Cardiris Corporate also allows you to exchange data with
Microsoft Dynamics CRM and Salesforce CRM.
Supported scanners
Cardiris is available in a bundle version with the I.R.I.S. IRISCard
and IRIScan scanners.
Cardiris is Twain compliant and supports a wide range of dedicated
business card scanners, flatbed scanners and all-in-one devices or
MFP's (multifunctional peripherals).
7
Page 14

Page 15

Cardiris
TM
5 – User Guide
CHAPTER 2
INSTALLING CARDIRIS
SYSTEM REQUIREMENTS
This is the minimal system configuration required to use Cardiris:
a Pentium-class CPU
256 MB RAM
300 MB free disk space
Windows 7, Windows Vista (32 or 64 bits) or Windows XP
Internet Explorer 5.01 or higher
A free USB port to connect the IRISCard Pro or Mini
SOFTWARE INSTALLATION
How to install Cardiris
Log on to Windows as administrator or make sure you have the
necessary administration rights to install the software.
Insert the Cardiris CD-ROM in the CD-ROM drive and follow
the on-screen instructions to install the software.
9
Page 16

Chapter 2 – Installing Cardiris
Select the installation language and click OK.
Accept the terms of the license agreement.
Click Next each time you are ready to go to the next screen.
Click Finish to complete the installation.
The submenu I.R.I.S. > Cardiris on the Windows Programs
menu is created automatically by the installation program.
The installation program also creates a shortcut to the Cardiris
application on the Windows desktop.
UNINSTALLING THE SOFTWARE
There is only one correct way to uninstall Cardiris: by using the
Windows (un)install wizard. You are strongly recommended not to
uninstall Cardiris by manually erasing the program files.
To uninstall Cardiris:
Close the application.
On the Start menu, click Control Panel.
Under the Programs icon, click Uninstall a program.
Select Cardiris in the list and click the Uninstall button.
Follow the on-screen instructions.
10
Page 17

Cardiris
TM
5 – User Guide
SOFTWARE REGISTRATION
Remember to register your Cardiris license.
To register:
Use the Registration wizard in the Register menu. Follow the onscreen instructions.
SEARCH FOR UPDATES
Use the Search for Updates function in the Help menu once in a
while to search for the most recent updates. This helps to guarantee
the proper functioning of Cardiris.
PRODUCT SUPPORT
To get technical support on Cardiris, please visit our website at
http://www.irislink.com/support.
11
Page 18

Page 19

Cardiris
TM
5 – User Guide
CHAPTER 3
GETTING STARTED
RUNNING CARDIRIS
To run Cardiris:
Start Cardiris from the Windows Start menu or double-click the
shortcut on your desktop.
You will be prompted to register. Click Register now to access
the registration wizard or click Register later and then Cancel
to register at a later time.
When you are using Cardiris for the first time a sample
database will open in album view.
Refer to the section Tutorial to get started with Cardiris.
CHANGING THE USER INTERFACE LANGUAGE
The user interface of Cardiris is available in a wide range of
languages.
13
Page 20

Chapter 3 – Getting started
To change the user interface language:
On the Settings menu, point to User Interface Language.
Select the required language from the list.
You will be prompted to restart the software.
TUTORIAL
The best way to familiarize yourself with Cardiris is by using it.
This tutorial helps you get started.
Exploring the Cardiris sample database
When you launch Cardiris for the first time, the sample database
provided with the software will open. It allows you to get started
even if your scanner is not connected to your PC yet.
The sample database opens in album view.
The first cards in the database are displayed. You can see their
image and the major data fields.
14
Page 21
Cardiris
TM
5 – User Guide
The cards that are displayed have different colors. These colors
indicate the card status of each business card:
o new cards are yellow. The information they contain has
not been verified yet.
o indexed cards are green. The only information that has
been verified is the company name.
o verified cards are blue. All the information they contain
has been verified.
You can navigate through the business cards by clicking the
browse buttons on the main toolbar or the arrow buttons at the
bottom of the interface. The latter will turn the pages of the
album.
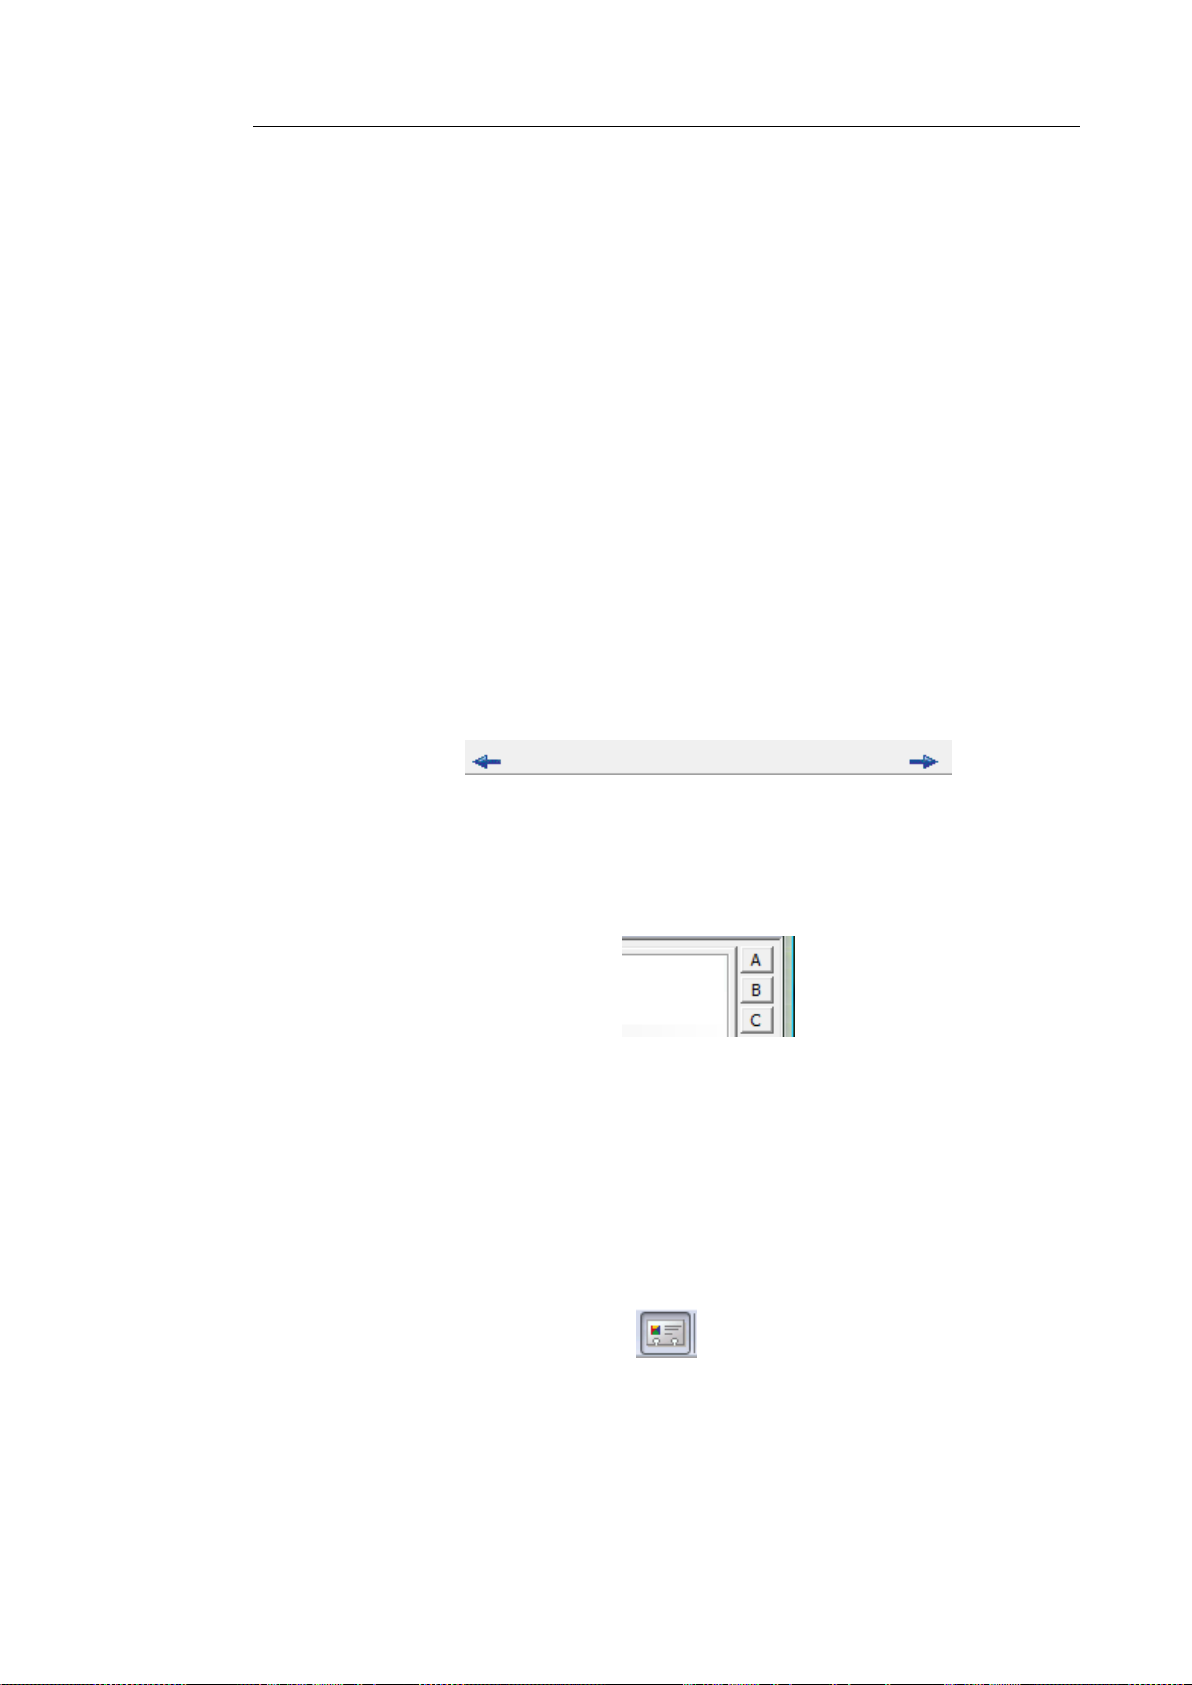
Or click the letter buttons on the right-hand side: they will take
you directly to the cards of the companies that start with a
specific letter.
For more information about album view, see the section Album view
under View modes.
Double-click one of the verified (blue) cards to switch to card
view.
15
Page 22

Chapter 3 – Getting started
In card view, the card image and all the data fields are
displayed. Card view allows you to verify and edit the database
information and add notes to your business cards via the Notes
field. In card view you can also view and/or scan the back side
of the business card and view and/or add a picture of your
contact.
Click the Browse buttons to navigate through the business cards.
16
For more information about card view, see the section Card view
under View modes.
Page 23

Cardiris
TM
5 – User Guide
Processing sample business cards
When you double-click one of the new (yellow) cards in the sample
database to view it in card view, you will notice that the data fields
are empty.
To recognize the business card:
Select the country of the business card in the Card style drop-
down list.
By selecting the business card style, you not only indicate the
language of the text to be recognized, you also indicate the general
layout of the business card. Different countries have different styles of
business cards.
Click the Recognize button to start the character recognition.
17
Page 24

Chapter 3 – Getting started
The image is converted into editable text and the recognized text is
assigned to the various fields.
Check the results so far.
If necessary you can edit the recognition results manually. You can
use cut-and-paste and drag-and-drop operations to move data about.
To drag data to another field, draw a frame around the data you want
to move, hold down the left mouse button and drag the text to another
field.
You can also use OCR on the fly: click inside the field you want to
send the data to. Hold down the Ctrl key while drawing a frame
around the data you want to move. When you release the Ctrl key the
data will be moved to the indicated field.
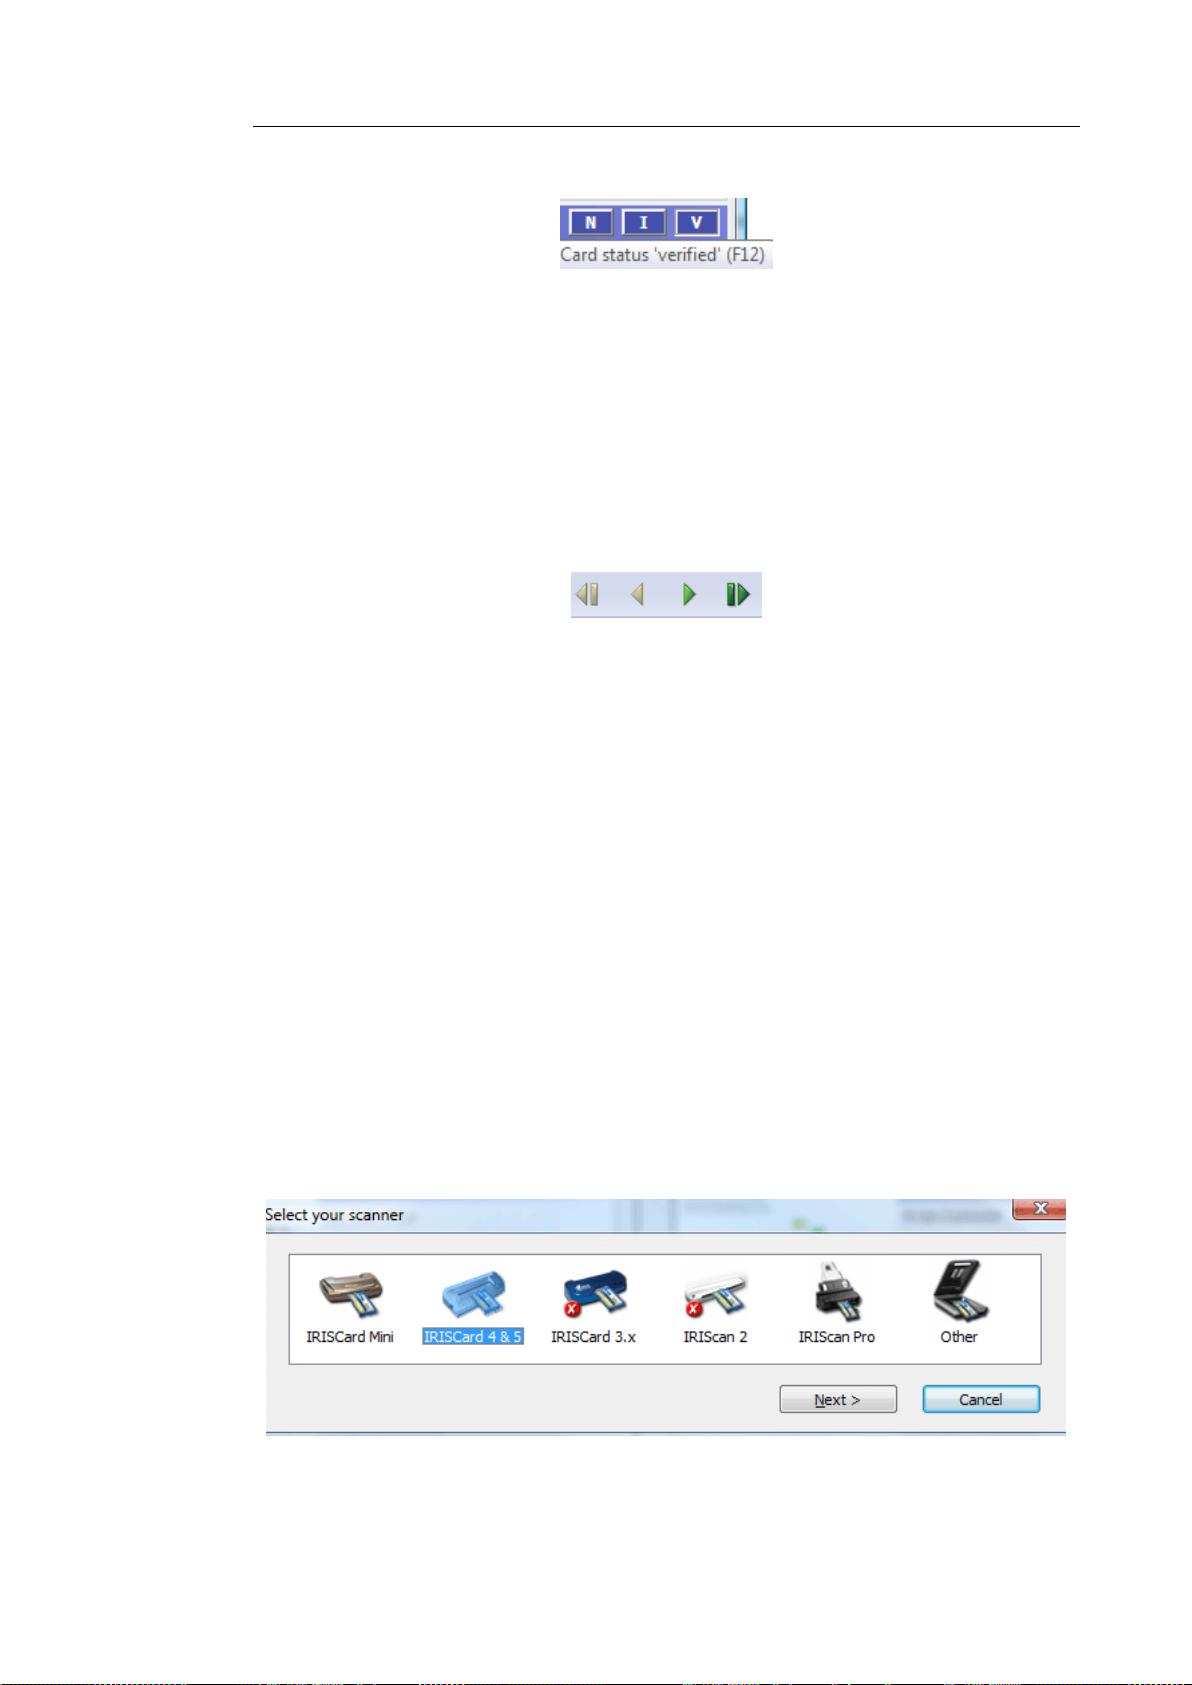
When you have verified all the recognition results, click the
status button V(erified) in the bottom left corner of the interface
(or press F12) to indicate that the card has been verified.
18
Page 25
Cardiris
TM
5 – User Guide
The card can now be stored in the database and may be consulted,
printed, exported etc.
For more information about the card status, refer to the section
Assigning a card status.
Click the browse buttons in the toolbar to display other cards in
card view.
Scanning new cards
When you want to scan new business cards, it is recommended to
start a new database.
Start a new database by clicking the New command on the File
menu. Or hit Ctrl+N.
A new and empty database will open.
Connect your scanner to your PC and install any required
scanner drivers or software.
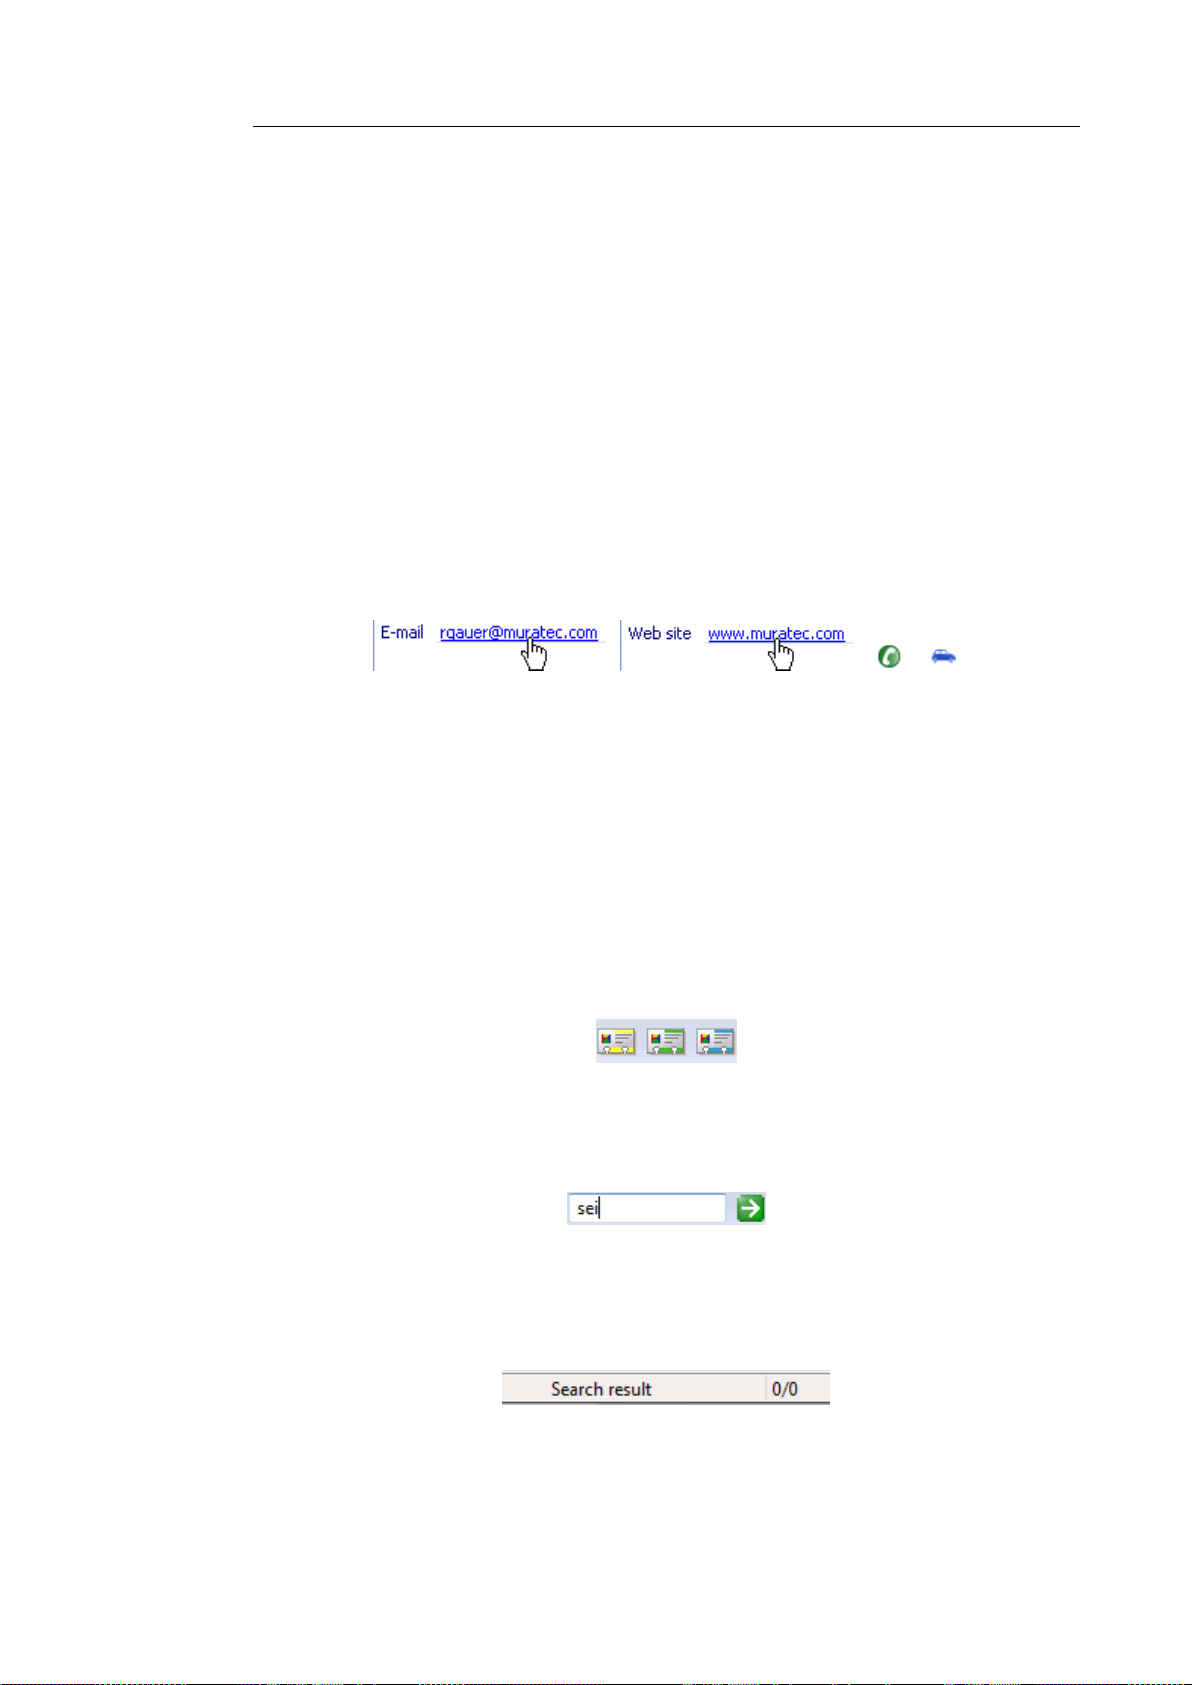
Click Scanner on the Settings menu.
A list of available scanners will be displayed.
19
Page 26

Chapter 3 – Getting started
Select your scanner in the list and click Next.
A configuration screen will appear. Depending on the scanner you
selected you can determine the scanner model and source, the paper
size, resolution and image type, etc. Note that this is not the case
when you select an IRIScan scanner. These scanners can be
configured after you click the Scan button.
Select the required scanner settings and click OK to confirm.
Depending on your scanner you may be prompted to calibrate it.
Insert the white calibration sheet that was delivered with your scanner
and click Calibrate. Once the scanner has been calibrated you will be
prompted to insert a card.
When you are using a flatbed scanner and you want to scan
multiple cards at a time, click the command Detect Cards in
Image on the Settings menu.
The scanned image will be split up in business cards.
Click the Scan button on the main toolbar to scan your business
cards.
After you have scanned the card, just repeat the recognition
process described above.
20
Page 27
Cardiris
TM
5 – User Guide
Making direct use of contacts
You can make direct use of the contacts stored inside Cardiris. You
can, for instance, contact them via e-mail, visit their website,
phone them with Skype, get driving instructions to their address
etc.
Double-click any card that has been recognized in Cardiris to
view it in card view.
Click the corresponding links and icons to carry out the actions
listed above.
Searching contacts
The contacts you add to a Cardiris database can be consulted and
searched in several ways:
In album view you can limit the view to new, indexed and
verified cards by clicking the corresponding status buttons on
the main toolbar.
Use the Search field to do free-text searches on all data fields
simultaneously.
If none of the cards meet the search criteria, the application window
remains empty and the status bar confirms that there are no cards to
display.
21
Page 28
Chapter 3 – Getting started
Or click the binoculars icon to do access advanced search
options.
These options allow you to do searches on one or more data fields.
Note that in advanced searches Cardiris looks for cards that start with
a certain character string, not for cards that contain the character string
in question.
To display all cards after a search, click the status button All
Cards.
Exporting contacts
The contacts you add to a Cardiris database can be exported to
numerous applications.
To start exporting contacts, select the cards you want to export
and click the Export button on the main toolbar.
Select the output application of your choice in the list and click
Export.
You can also import contacts from other applications and synchronize
Cardiris contacts with those of other applications. For more
information, see the sections Importing business cards and
Synchronizing databases.
22
Page 29
Cardiris
TM
5 – User Guide
CHAPTER 4
VIEW MODES
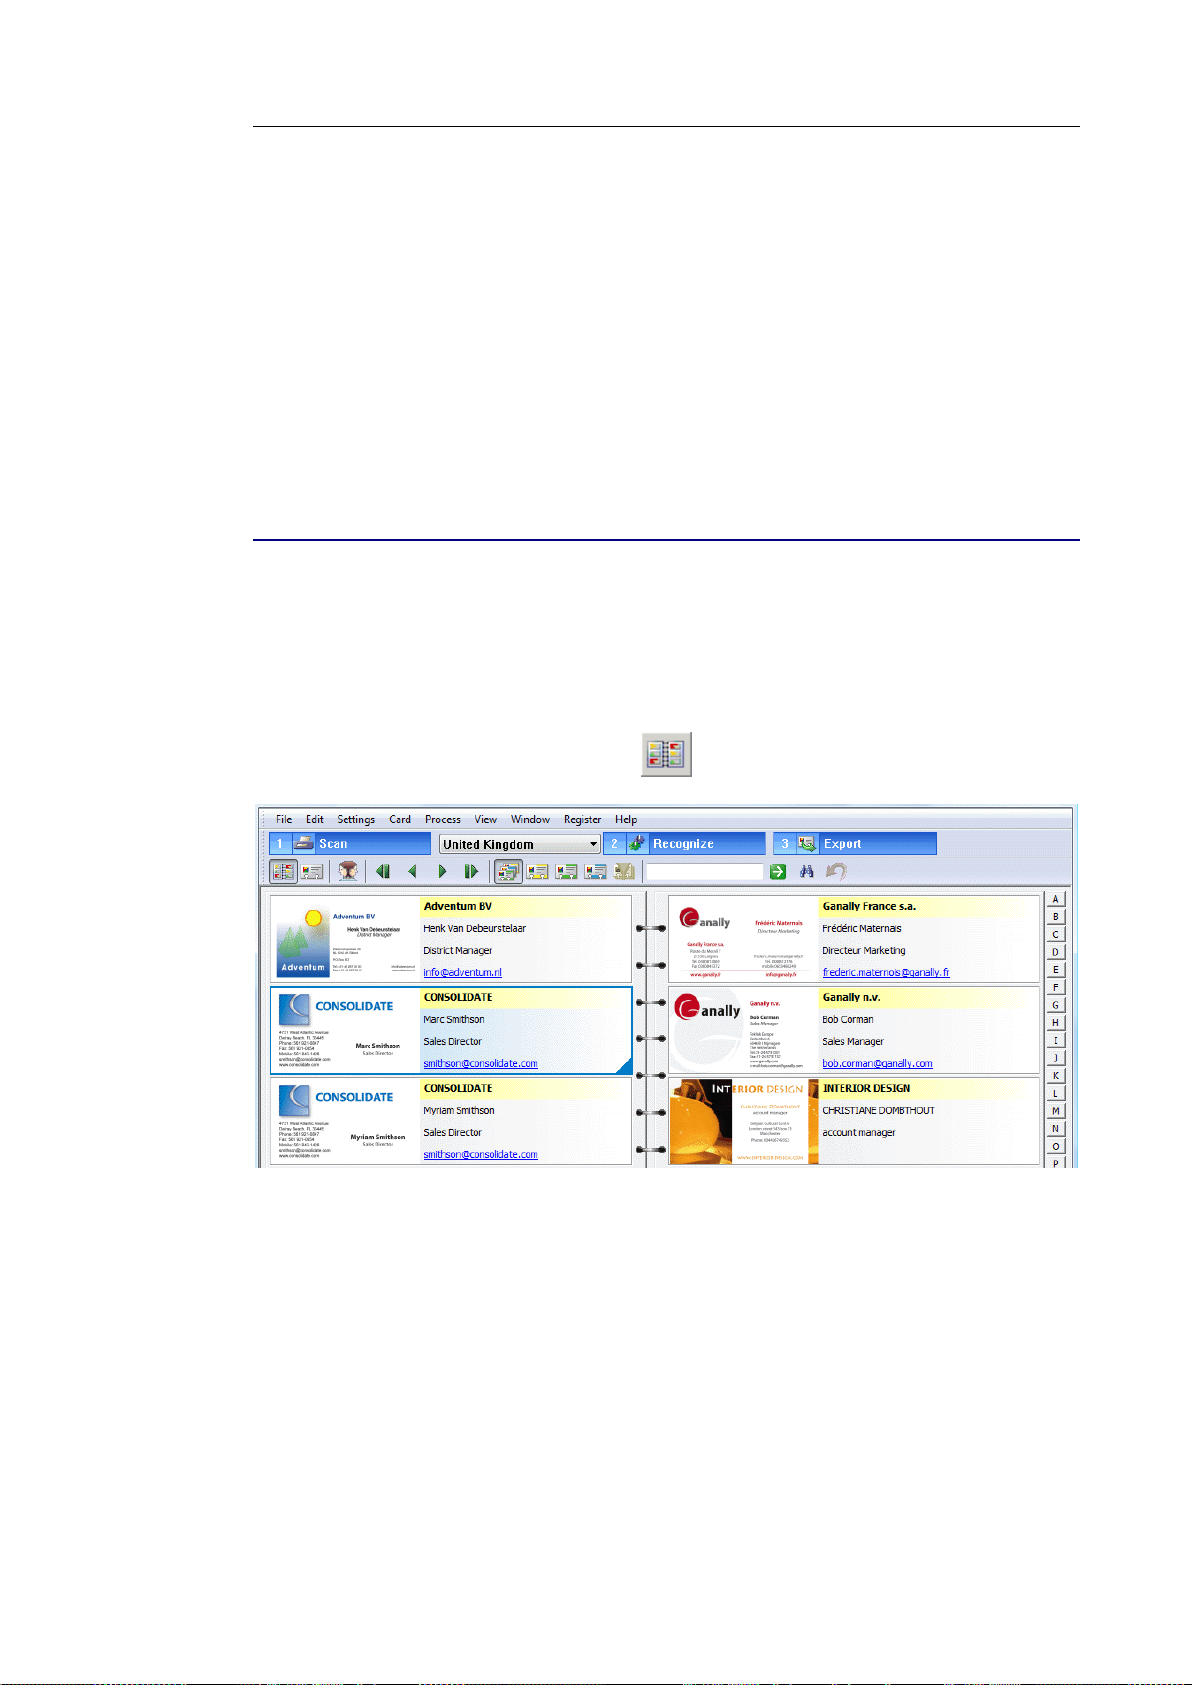
ALBUM VIEW
When you open Cardiris the database that was last opened is
displayed in album view. Album view is the default view mode. It
displays your business cards in an album-like presentation.
The major data fields - company name, first name, name, job
title and e-mail address - are listed.
A color code indicates the card status of each card: new cards
are yellow, indexed cards are green and verified cards are blue.
23
Page 30
Chapter 4 – View modes
Sort order
The contacts are sorted alphabetically first by company name, then
by name.
When no name is available, the contacts are sorted chronologically
by scanning date.
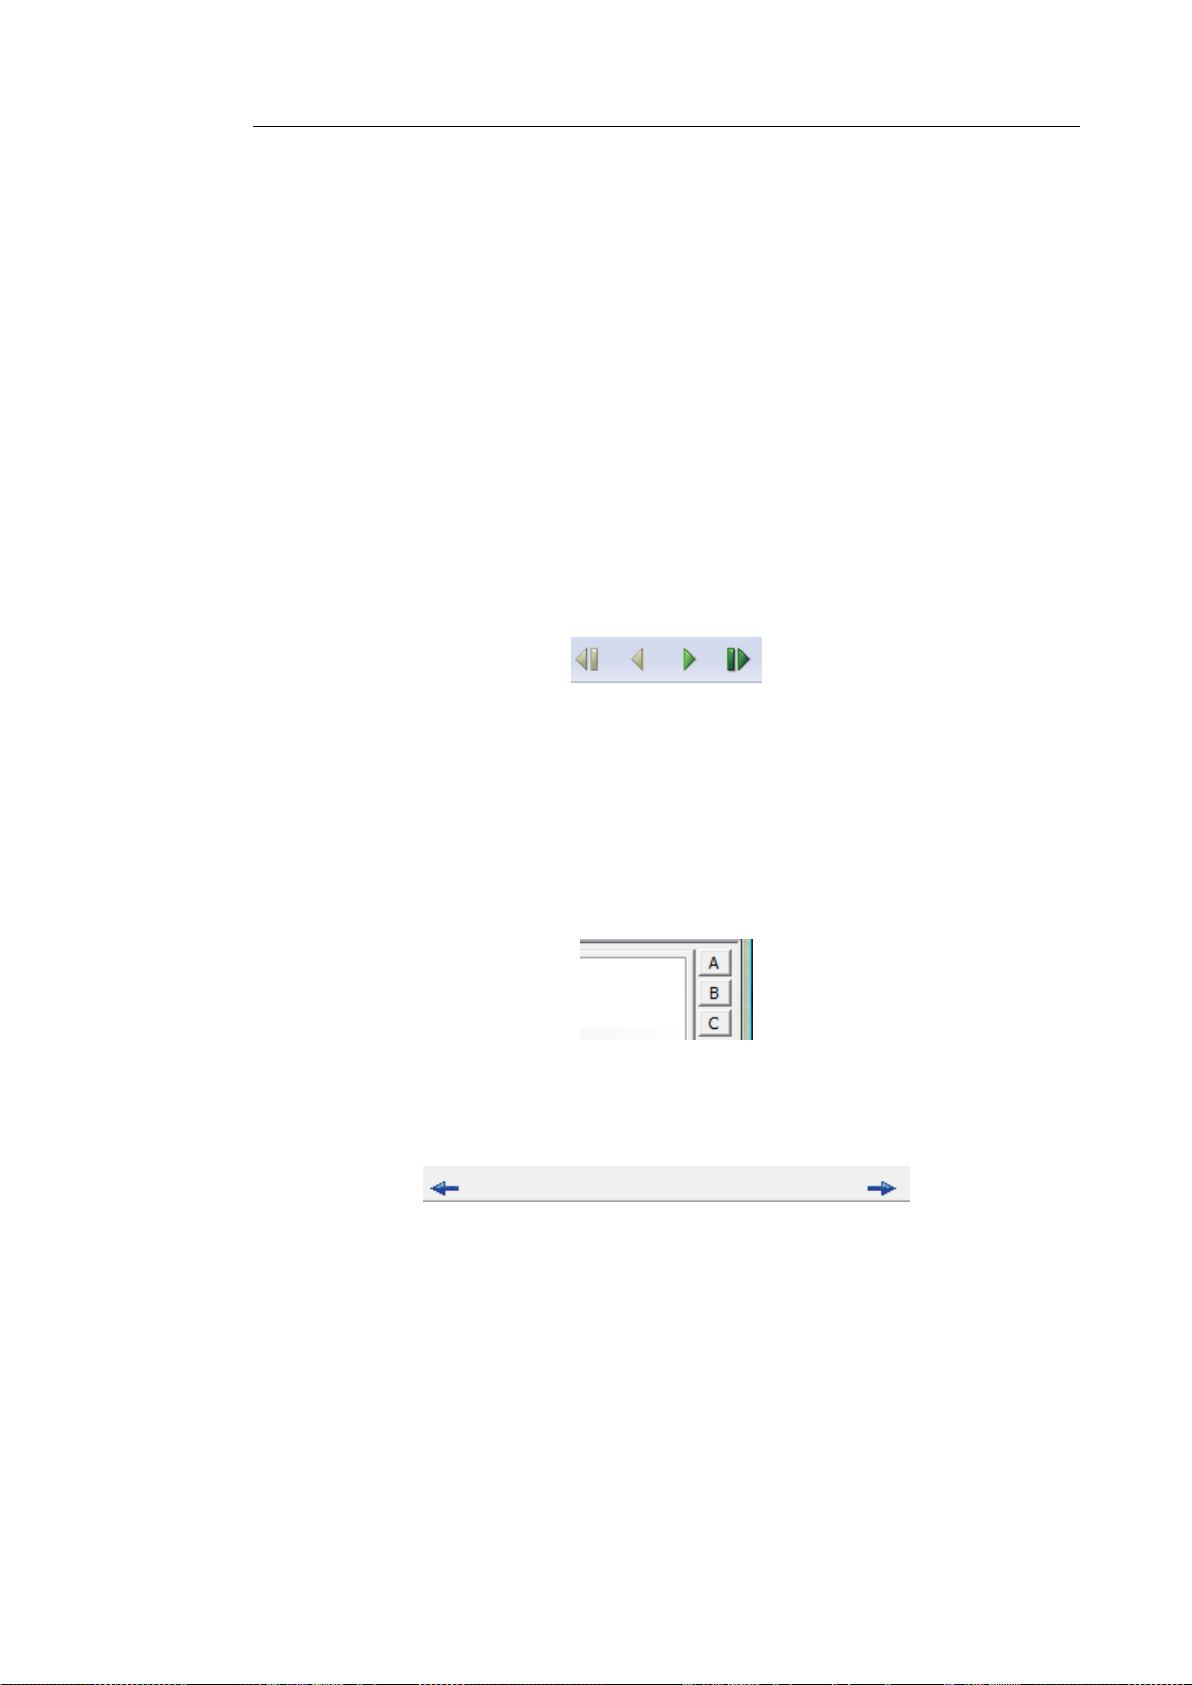
Navigation
Press the arrow keys on your keyboard to move through the
cards. Or use the browse buttons on the main toolbar.
Press Home to go to the first card, press End to go the last
card.
Click the letter buttons on the right-hand side: they will take
you directly to the cards of the companies that start with a
specific letter.
To turn the pages of the album, use the arrow buttons in the
bottom corners of the interface.
Selecting cards
Simply click a card to select it.
To select multiple cards, hold down the Ctrl key and click the
cards you want to select.
24
Page 31

Cardiris
TM
5 – User Guide
To select a continuous range of cards, click the first card and
hold down the Shift key as you select the last card of the range.
To select all cards, click Select All on the Edit menu. Or press
Ctrl+A.
Recognizing, exporting, printing and deleting cards in album view
Select one or more cards, right-click it/them to invoke the
context menu and click the command you want to execute.
CARD VIEW
Cardiris switches to card view when you double-click a business
card or click the card view button.
To switch back to album view, click the album view button.
25
Page 32

Chapter 4 – View modes
Data fields
In card view, the card image and all the data fields are displayed.
The data they contain can be edited in several ways. See the section
Editing the recognition results.
The standard data fields can be complemented by custom fields and
categories. See the sections Customizing database fields and
Assigning categories to contacts respectively.
The card status is indicated in the lower right corner. See the
section Assigning a card status for more information.
Navigation
The browse buttons allow you to navigate comfortably through the
business cards.
Card image
The card image displays the image of the business card. Right-click
it to acquire or open a new image or to delete it.
Cardiris supports color, grayscale and black-and-white images.
26
Page 33

Cardiris
TM
5 – User Guide
Back tab and Picture tab
Via the Back tab you can add the rear images of a business card to
your contact. See the section Scanning the back side of a card.
Via the Picture tab you can add a picture of your contact. See the
section Scanning a picture of a contact.
The button bar
The button bar contains several convenient commands:
The magnifying glass allows you to zoom in on the card image.
Just click inside the card image and hover over it with your
mouse.
The drag-and-drop button allows you to execute drag-and-drop
OCR and OCR on the fly. Click it and draw a frame around the
text you want to recognize. Then drag it to the required data
field. Or click inside the required data field and hold down the
Ctrl key as you draw a frame around the text. The text will be
moved to the data field.
Make sure the correct country is selected first.
Tip: you can also drag text to other applications outside Cardiris.
27
Page 34

Chapter 4 – View modes
Click the fit to window and fit to width buttons to display the
entire business card and the entire width of the business card
respectively.
Use the rotate buttons to correct the orientation of your business
cards if necessary.
Use Swap front and back images in case you scanned the back
side of a card as front side by mistake, and vice versa.
Click the Adjust image button to modify the image quality.
See the section Adjusting card images for more information.
The crop button allows you to crop the card image. Click it and
move the frames to crop the image.
Click the back side image button to acquire or open the back
side image of the card.
When the back side of a card has been added the back side thumbnail
will change form.
28
Page 35

Cardiris
TM
5 – User Guide
Click the picture button to acquire or open a picture of your
contact and add it to the database.
When a picture has been added to the contact it will be displayed in
the picture thumbnail on the button bar.
AutoActions
You can make direct use of the contacts stored inside Cardiris by
means of the AutoActions buttons. You can, for instance, contact
them via e-mail and visit their website. You can also phone them
with Skype by clicking the telephone icon, and get driving
instructions to their address via Google Maps by clicking the car
icon.
29
Page 36

Page 37

Cardiris
TM
5 – User Guide
CHAPTER 5
SCANNING BUSINESS CARDS
SETTING THE SCANNER SETTINGS
Before you can scan business cards with Cardiris, your scanner
must be connected to your PC and configured correctly.
To configure your scanner:
Click the Scanner command on the Settings menu.
A list of available business card scanners will be displayed.
Select your scanner in the list and click Next.
When you select an IRISCard scanner the configuration screen
will appear:
Select the required Paper size, Resolution and Image Type
(depending on the scanner you selected)
Note: it is recommended to use a 400 dpi resolution to scan business
cards successfully.
31
Page 38

Chapter 5 – Scanning business cards
Cardiris scan both landscape and portrait oriented business cards.
Note, however, that scanning landscape oriented cards is faster than
scanning portrait oriented cards.
If you want to scan the front and back sides of cards, select the
option Scan two-sided card. This way the duplex scanning
mode is activated. When scanning business cards you will first
be prompted to insert the front side of your card, then the back
side. (This does not apply to IRISCard Mini)
When you select an IRIScan scanner no configuration screen
will be displayed. The IRIScan settings must be set after you
click the Scan button.
When you select another type of scanner a different
configuration screen will appear.
32
Page 39

Cardiris
TM
5 – User Guide
o Select your scanner model and indicate the scanner
source.
o Select the required Format, Resolution and Image Type.
Note: it is recommended to use a 400 dpi resolution to scan business
cards successfully.
o When your scanner is equipped with a document feeder,
select the ADF (automatic document feeder) function.
o Select Duplex scanning to activate it.
Note that this option will only be available for duplex scanners.
SCANNING CARDS
With Cardiris you can either scan business cards or open already
existing image files.
33
Page 40

Chapter 5 – Scanning business cards
Cardiris is Twain compliant and supports a wide range of dedicated
business card scanners, flatbed scanners and all-in-one devices or
MFP's (multifunctional peripherals).
To open existing image files:
Click Load card images in the File menu and search for the
image files you want to open.
Cardiris is able to open images of various types: JPEG images,
Paintbrush (PCX) images, PNG (”Portable Network Graphics”)
images, (non-compressed, packbits, d2read and Group 4 compressed)
TIFF images and Windows bitmaps (BMP) are supported.
To scan business cards:
Click the Scan button on the main toolbar.
Make sure your scanner is connected and the right scanner settings are
selected. See the section Setting the scanner settings for more
information.
When you are using an IRISCard scanner for the first time you will be
prompted to calibrate it. Insert the white calibration sheet that was
delivered with your scanner and click Calibrate.
When you are using an IRISCard Pro scanner, you can also use the
two scanner buttons to scan cards. For more information, see the
section Scanning cards with the IRISCard Button Manager.
Scan settings
When scanning business cards Cardiris can apply multiple scan
settings. The scan settings are available in the Settings menu.
Note: do not confuse the scan settings with the scanner settings.
34
Page 41

Cardiris
TM
5 – User Guide
Several scan settings are applied by default:
Cardiris detect the text orientation.
This option detects the text orientation on the cards and automatically
rotates cards that have been scanned at a 90°, 180° or 270° angle in
the correct direction.
Know that you can always rotate cards manually in card view using
the rotation buttons, should this be necessary.
Cardiris crops business cards after scanning.
Any borders around the business cards are removed.
Tip: leave this option enabled at all times! Business card scanners tend to
create a black border around the card image.
Note: if you are not satisfied with the automatic cropping, know that
you can always crop business cards manually in card view. To do so,
click the crop button on the button bar and move the frames to the
appropriate size. Then click the Crop command.
The ViewGray option ensures optimal legibility for business
cards scanned in black-and-white.
35
Page 42

Chapter 5 – Scanning business cards
Besides the default settings Cardiris can also:
Detect cards in image.
Use this option when you are using a flatbed scanner. You can place
multiple business cards on your scanner's flatbed and Cardiris will
split up the image in different business cards, throwing away the
superfluous black or white borders.
When you are using a card scanner, use the default option Single
card.
Recognize cards after scanning.
When the option Recognize after Scanning has been selected,
Cardiris starts the recognition process immediately after scanning.
Make sure you select the correct country in the drop-down list before
scanning your cards.
This option is useful when you are scanning many business cards of
the same country. Note that you can only select a single card style at a
time.
Recognize back side after front side
When this option is enabled, you can also recognize the back side of
cards, after recognizing the front side.
36
This option is useful in combination with the option Recognize cards
after scanning when scanning double-sided cards. This way, you scan
and recognize the front side and are prompted to do the same for the
back side.
Page 43

Cardiris
TM
5 – User Guide
Note, however, that both sides of the card need to be in the same
language.
SCANNING CARDS WITH THE IRISCARD
SCANNERS
With the IRISCard Mini and IRISCard Pro scanners you can
scan one business card after the other.
Operation
Insert a business card in the IRISCard and click the Scan button
on the main toolbar.
When you are using an IRISCard Pro scanner, you can also use the
two scanner buttons to scan cards. For more information, see the
section Scanning cards with the IRISCard Button Manager.
When you are using the IRISCard for the first time you will be
prompted to calibrate it. Insert the white calibration sheet that
was delivered with your scanner and click Calibrate.
Should you need to recalibrate your scanner:
Click Scanner on the Settings menu.
Then click Reset calibration in the window that appears.
The next time you hit the Scan button you will be prompted to
calibrate your IRISCard again.
You are recommended to recalibrate your IRISCard scanner on a
regular basis.
See the section Setting the scanner settings and Scanning cards for
more information about the scanner and the scan settings.
37
Page 44

Chapter 5 – Scanning business cards
SCANNING CARDS WITH THE IRISCARD BUTTON
MANAGER
When you are using an IRISCard Pro scanner a small utility is
installed in combination with Cardiris: the IRISCard Button
Manager.
This utility allows you to use your IRISCard scanner without
launching the Cardiris software first.
To access the Button manager:
Double-click the Button manager icon on the task bar.
Note: when the IRISCard scanner is not connected to your pc, the
button manager icon will crossed out.
Configure the scanner buttons:
Left button
By clicking the left button on your scanner you can either send your
business card images by e-mail or save them as image files.
When you select e-mail and click the left scanner button, Cardiris will
open a new e-mail message in your default e-mail software and add
the business card image as attachment.
When you select image file and click the left scanner button, a Save
Graphics window will open. Enter the file name, choose the file type
and save it in the required location. As soon as you click Save Cardiris
will scan the business card and store it in the location you selected.
38
Page 45

Cardiris
TM
5 – User Guide
Right button
By clicking the right button you launch the Cardiris software and
automatically scan your cards.
Click the Settings button to determine the scanner settings. For more
information, see the section Setting the scanner settings.
LOADING IMAGES FROM THE IRISCAN AND IRISCARD ANYWHERE SCANNERS
(This section applies to IRIScan Anywhere 2 and IRISCard
Anywhere 4)
When you use Cardiris in combination with an IRIScan Anywhere
2 scanner or an IRISCard Anywhere 4 scanner, you can scan
your business cards anywhere you want without needing a computer
and load them into Cardiris at a later time.
Operation
If you decide to use an external storage device (SD memory card
or USB flash drive) to store your scans, insert it into the scanner.
Scan your business cards with your IRIScan Anywhere 2
scanner or IRISCard Anywhere 4 scanner.
For information on how to use these scanners correctly, refer to the
scanners' Quick User Guides or User Guides:
The paper Quick User Guide can be found in the package box.
The electronic User Guide can be accessed from the Windows Start
menu > All Programs > I.R.I.S. > IRIScan/Card Anywhere >
IRIScan/Card Anywhere-English.pdf.
39
Page 46

Chapter 5 – Scanning business cards
In case you stored your documents on an external storage device
(SD memory card or USB flash drive), insert the storage device
into your computer.
In case you used the scanner’s internal memory to store your
documents, power on the scanner and connect it to your
computer.
Open the Cardiris interface. A message will appear, prompting
you to load the images from your scanner into the current
database.
Click Yes to load the images.
To load images at a later time, click No.
Loading images at a later time
To load images at a later time, click the down-arrow right of the
Scan button.
Then select Load. The Load button will be displayed on the
main toolbar.
40
Page 47

Cardiris
TM
5 – User Guide
Click the Load button and browse for the images you want to
load.
SCANNING CARDS WITH A FLATBED SCANNER
When using a flatbed scanner you can scan multiple business cards
at a time: you can place multiple business cards on your scanner's
flatbed and Cardiris will split up the image in different business
cards, throwing away superfluous black or white borders.
Operation
Click the command Detect Cards in Image on the Settings
menu.
If you forgot to enable this function, click Extract card(s) on the
Process menu.
Put the cards on your scanner's flatbed. In order for Cardiris to
segment the cards correctly, a number of conditions must be met:
o the scan background must be clean and preferably black;
Tip: scan the cards with the scanner lid open to create a black background.
o the distance between the cards must be at least 2 cm;
o the scanned cards must be aligned with one another;
41
Page 48

Chapter 5 – Scanning business cards
o cards must either be portrait or landscape oriented. Avoid
scanning a combination of portrait and landscape oriented
cards.
Click the Scan button on the main toolbar.
The image will be split up in business cards.
SCANNING BATCHES OF CARDS
Cardiris is able to process large batches of cards and supports
scanners equipped with an automatic document feeder. When the
automatic scanning option (ADF) has been enabled in Cardiris, all
you have to do is insert cards in your scanner's document feeder and
hit the Scan button.
To activate the automatic scanning option:
Click Scanner on the Settings menu.
Select Other and click Next.
42
Page 49

Cardiris
TM
5 – User Guide
Select your scanner from the list and click the ADF option.
Any cards you enter in your scanner's document feeder will be
processed one after the other as soon as you click the Scan
button.
When you are using the IRISCard Pro or IRISCard Mini
scanners to scan batches of cards, there are no special options to
select. Simply click the Scan button once. After the first card has
been scanned, you will be prompted to insert another card. Cardiris
will process one card after the other.
Tip: the cards you scan in batch can be recognized in batch as well. Click the
command Batch OCR on the Process menu. Any new cards that have been
added to the database will be recognized.
SCANNING CARDS FROM WITHIN MICROSOFT OUTLOOK
(This section applies to IRISCard Pro and IRISCard Corporate)
When you install Cardiris on your PC and Microsoft Outlook is
already installed, a Cardiris toolbar will be added to the Outlook
interface. Via this Cardiris toolbar you can scan business cards,
recognize them and store them as Outlook contacts. This way, you
can scan your business cards even without the Cardiris interface
being displayed.
To scan cards from within Microsoft Outlook:
Open Microsoft Outlook from the Windows Programs menu.
Or click the icon on your desktop.
Cardiris supports Microsoft Outlook 2003 and 2007.
On the View menu point to Toolbars and then click Cardiris.
43
Page 50

Chapter 5 – Scanning business cards
The Cardiris toolbar will be displayed.
Select the correct country in the drop-down list and click the
Cardiris button to scan your business cards.
Make sure your scanner is connected to your PC and configured
properly.
When you are using the IRISCard you will be prompted to insert your
cards in the scanner.
Cardiris will recognize the business card, open an Outlook
contact form and fill in all recognized fields.
Click Save to save the contact.
The contact will be saved to the default contacts folder of Outlook.
Note: contacts can be saved to other Outlook contacts folders as well.
Simply open the contacts folder you want to store your contacts in and
go through the scan process. Cardiris will save the contacts to the
contacts folder that is opened.
SCANNING THE BACK SIDE OF A CARD
Sometimes business cards contain additional information on the
back side, such as private telephone numbers, logo's etc. Therefore,
Cardiris allows you to scan the back sides of cards and add the
information to the database.
To scan the back side of a card:
44
Page 51

Cardiris
TM
5 – User Guide
First scan the front side by clicking the Scan button.
Then click Scan back of Card on the Process menu.
You will be prompted to enter a card.
Or click the Back tab and click inside grayed picture.
o Click Acquire to scan the back side.
o Or click Load image to open an existing image file.
When the back side of a card has been added the standard back side
thumbnail on the button bar will change form.
If you also want to recognize the back side: while on the Back tab,
click Recognize on the main toolbar . The information will be
extracted from the back side and added to the relevant database
fields. Note that the information extracted from the back sides of
cards will not replace the info from the front side, but it will
complement it.
45
Page 52

Chapter 5 – Scanning business cards
Tips:
In case you want to recognize the back sides of cards automatically, select the
option Recognize back side after front side in the Settings menu. This way,
you only need to click the Recognize button once to recognize both sides of
the cards.
Should the necessary information not be extracted from the back side after
recognition, note that you can still use drag-and-drop OCR and OCR on
the fly on the back side of cards to add additional information to the database
fields.
When you always want to scan both the front and back side of cards, make sure you activate Duplex scanning.
DUPLEX SCANNING
(This section does not apply to IRISCard Mini)
Cardiris allows you to scan both the front and the back side of all
your business cards by means of the Duplex scanning mode.
To activate duplex scanning:
Click Scanner on the Settings menu.
Select your scanner and activate the option Duplex scanning in
the configuration screen.
Then click the Scan button on the main toolbar.
46
Page 53

Cardiris
TM
5 – User Guide
SCANNING A PICTURE OF A CONTACT
Next to the card image, you can also add a picture of your contacts
to the Cardiris database.
To scan a picture of your contacts:
If the card you want to add a picture to is already in the database,
double-click it to open it in card view.
If not, click the Scan button to scan the front side of the card.
Then click Scan Picture on the Process menu.
You will be prompted to insert a picture.
Or click the Picture tab and click inside the grayed picture.
o Click Acquire to scan the picture.
o Or click Load image to open an existing image file.
Tip: avoid loading heavy pictures. A resolution of 75 dpi is sufficient for onscreen display.
When a picture has been added to the contact it will be displayed
in the picture thumbnail on the button bar.
47
Page 54

Chapter 5 – Scanning business cards
ADDING NOTES TO CARDS
When you are scanning a stack of cards you collected during one
particular event, e.g. a trade show, it may be useful to add personal
notes to those cards, reminding you where you met your contacts.
To add automatic notes to cards:
On the Card menu, click AutoNote.
Select Insert this AutoNote and type in the text you want to
add.
The text you enter will be added to the Notes field of every card you
scan.
To disable this option click No AutoNote.
You can also add notes manually cards. To do so:
Double-click a card to open it in card view.
Click the Notes tab and enter any text you want to add.
MANUALLY ADDING CARDS TO THE DATABASE
Next to scanning business cards, Cardiris also allows you to add
cards manually to the database. This comes in handy when you
don't have your (business card) scanner near you.
48
Page 55

Cardiris
TM
5 – User Guide
To add a card to the database:
Click New on the Card menu. Or hit Ctrl+E.
A new card will be added to the database and opens in card view.
Fill in the database fields manually.
Any cards you manually add to the database have the card status
Verified, as you are supposed to enter the correct information.
To add the front image, back image or picture of the card later
on:
Click the tabs Front, Back or Picture and click inside the
grayed picture.
Then click Acquire to scan or click Load Image to open an
existing image file.
49
Page 56

Page 57

Cardiris
TM
5 – User Guide
CHAPTER 6
RECOGNIZING BUSINESS CARDS
SELECTING THE CARD STYLE
Cardiris uses field analysis to attribute data on business cards to the
correct database fields. The field analysis technology is, amongst
others, based on the card style, or layout, of business cards. Each
country has a different style of composing business. That's why it is
critical that you select the right country before recognizing your
business cards.
To do so:
Click the card style drop-down list and select the right country.
Some card styles correspond to several languages. Belgium, Canada
and Switzerland for instance all have multiple official languages.
Cardiris detects the selected language automatically.
51
Page 58

Chapter 6 – Recognizing business cards
Note that you can only select a single card style at a time.
Tip: organize your business cards per country while scanning them. That
way, you can perform Batch OCR on them afterwards.
RECOGNIZING THE CARDS
As soon as you have scanned your cards and you selected the
correct card style, you can execute the recognition on your business
cards.
To do so:
Simply click the Recognize button on the main toolbar.
The card data is extracted from the card image and attributed to the
correct data fields.
Tip: if you forgot to select the correct country, select it afterwards and
click the Recognize button again.
Double-click the recognized card to view the results in card
view.
52
Page 59

Cardiris
TM
5 – User Guide
Any data Cardiris cannot attribute to a database field is put in the
Extra field.
Unrecognized characters are represented by a tilde (the "~" symbol").
The recognition results can edited in several ways. See Editing
the recognition results.
Note: when you re-execute the recognition on cards that have
already been recognized, Cardiris will perform different operations
depending on the card status:
Cards that have the status New will be recognized again. The
data they already contain will be erased and filled out again.
Cardiris will try to complete any missing fields of Indexed
cards.
Cardiris will not execute the recognition again on Verified cards.
RECOGNIZING BATCHES OF CARDS
When scanning batches of cards it may be useful to also recognize
them in batch, instead of performing the recognition on each card
53
Page 60

Chapter 6 – Recognizing business cards
separately. This way, you can reduce the processing time
considerably.
To recognize batches of cards:
Sort all the cards you want to process by country and scan them.
Sorting cards by country is essential as you can only select one card
style at a time.
Then click Batch OCR on the Process menu.
Note that the command Batch OCR is disabled when you are viewing
a card in card view. If necessary, click the album view button to
return to album view.
Batch OCR takes the card status of cards into account while
executing the recognition:
o Cards that have the status New will be recognized. Any
data that had already been filled in will be erased and filled
in again.
o For indexed cards, the system will try and fill out all
empty data fields - all fields which already contain data are
considered validated by the user.
o Batch OCR will not be executed on verified cards.
For more information about card statuses, see the section Assigning a
card status.
You can also batch OCR a selection of cards:
Ctrl-click a selection of cards in album view and click the Batch
OCR command on the Process menu.
54
Page 61

Cardiris
TM
5 – User Guide
Or right-click the selection and click Recognize in the context
menu.
RECOGNIZING THE BACK SIDE OF CARDS
AUTOMATICALLY
Sometimes business cards contain useful information on the back
side, such as additional contact information, private telephone
numbers, logo's, etc. That's why with Cardiris you can recognize the
back side of your business cards automatically, immediately after
you recognize the front side.
Note: the information that is extracted from the back sides of cards
does not replace the info from the front side, but complements it.
Note: back side recognition only works if the back side of the card is
written in the same language as the front side.
To recognize the back side of cards:
On the Settings menu, select the option Recognize back side
after front side.
55
Page 62

Chapter 6 – Recognizing business cards
Then click Recognize on the main toolbar. Cardiris will first
recognize the front side of the card and add its data to the
database fields. Then, it recognizes the back side and adds the
additional information.
Tip: in case you scanned a front side as back side and the other way
around, just click the Swap icon beneath the card image (in Card
view). The front and back images will be swapped.
EDITING THE RECOGNITION RESULTS
Once the recognition is completed, the recognition results can be
edited in several ways should this be necessary:
You can click in any of the database fields to modify the text.
You can move data about by selecting it and dragging it to
another field.
You can also use cut-and-paste actions to move data.
Right-click in the database fields to discover handy editing
commands.
Any changes you make to the recognition results are saved
automatically. There is no need to hit a Save button. In card view,
typing is saving. The changes you make to the card that is currently
displayed can be undone, however:
click the Undo command on the Edit menu to undo the last
change you made;
56
Page 63

Cardiris
TM
5 – User Guide
or click the Restore icon to undo all changes you made to the
card and restore it to its original state.
Additional information can be added manually to the fields Notes
and Extra.
Next to these 'regular' ways of editing, Cardiris allows you to
perform Drag-and-drop OCR and OCR on the fly.
Drag-and-drop OCR
Any data that Cardiris did not extract from a business card can be
added to the database fields by means of drag-and-drop OCR:
Click the drag-and-drop button on the button bar.
Drag a frame around the text you want to add and drag that
frame to the required database field.
OCR on the fly
Any data that Cardiris did not extract from a business card can also
be added to the database fields by means of OCR on the fly.
Click inside the data field you want to add data to.
57
Page 64

Chapter 6 – Recognizing business cards
Hold down the Ctrl key and drag a frame around the text you
want to add.
Release the Ctrl key. The text will be added to the field.
In Cardiris you can not only edit the recognition results, you can
also customize the database fields. See the section Customizing
database fields for more information.
ADJUSTING CARD IMAGES
During recognition Cardiris converts cards scanned in color or
grayscale into binarized (black-and-white) images, on which it
performs the OCR. When opening or scanning extremely light or
extremely dark grayscale and color images, it may be necessary to
adjust the binarized images before executing the recognition, in
order to obtain satisfactory OCR results.
Operation
Scan the card you want to recognize.
Click the Adjust image button on the button bar.
The preview window will open displaying the binarized image
and the adjustment options.
58
Page 65

Cardiris
TM
5 – User Guide
Adjustment options:
Smoothening
o Select Smoothen to even out the image.
This option renders grayscale and color images more homogeneous by
smoothening out differences in intensity. As a result, a stronger contrast
is created between the foreground (text) and background (artwork).
Note: sometimes smoothening is the only way to separate text from a
colored background.
Brightness
o Use the slider to increase or decrease the Brightness.
59
Page 66

Chapter 6 – Recognizing business cards
The Brightness settings determine the overall brightness of the image.
Use these settings to darken or lighten the image when the text is
illegible.
Contrast
o Use the slider to increase or decrease the Contrast.
The Contrast settings determine the contrast between darker and lighter
zones of an image. Use these settings to make character shapes stand out
against a colored background.
Despeckle
o Use the slider to increase or decrease the Despeckle
options.
Despeckling removes small spots from black-and-white images.
Click Preview to preview the results.
If the results are satisfactory, click OK. If not, change the
settings again.
Then click Recognize to recognize the card.
CUSTOMIZING DATABASE FIELDS
When recognizing business cards, Cardiris extracts the data from
the cards and attributes it to a list of standard data fields. The
standard fields are complemented by a number of custom fields that
allow you to add additional information. You can, for instance, add
the location where you met your contact, the hours when to reach
him/her etc.
60
Page 67

Cardiris
TM
5 – User Guide
The default custom fields can be extended with an unlimited
number of other custom fields.
To add a custom field to a card:
Open the card in card view.
Click the + sign next to Custom Fields. Or click Custom fields
on the Edit menu.
Click Add and enter the name of the custom field.
Note: avoid using semi-colons (;) and vertical bars (|) both in the
custom field name and in the content. These characters are forbidden.
Then click OK to confirm.
The custom field will be added to the standard database fields.
61
Page 68

Chapter 6 – Recognizing business cards
The content of a custom field can be edited and searched like any
other standard field.
Note that custom fields are not displayed in album view. Only the
'major' database fields are.
To rename or delete any custom fields, click the + sign again and
click Rename or Delete.
Custom fields are also available for export. They can be exported as
cvs, xml, html and excel files and sent to Microsoft Outlook 2003
and 2007. When exporting to Microsoft Outlook, the custom fields
are exported to the Notes fields of Outlook contacts.
When exporting contacts that contain custom fields to Microsoft
Dynamics CRM, the custom fields are added to Notes field in MS
Dynamics CRM.
When exporting contacts that contain custom fields to Salesforce
CRM, the custom fields are added to the Description field in
Salesforce.
Note: custom fields are an intrinsic part of a Cardiris database.
When you merge two databases, the custom fields from both
databases will be added up. In other words, the merged database
will contain both the custom fields from the first database as well as
those of the second database. Duplicate custom fields will be
merged into a single one.
Besides custom fields, you can also assign an unlimited number of
categories to your contacts.
ASSIGNING CATEGORIES TO CONTACTS
Besides custom fields, you can also assign an unlimited number of
categories to your contacts. Assigning categories to contacts helps
62
Page 69

Cardiris
TM
5 – User Guide
you find them faster later on, by means of the advanced search
option.
For more information on advanced searching, see the section
Searching business cards.
To add categories to contacts:
Open a card in card view.
Click the + sign next to Categories. Or click Categories on the
Edit menu.
Select the categories you want to assign from the list.
This list of standard categories can be extended by an unlimited
number of categories: click Edit and then Add to add new
categories.
Note: avoid using semi-colons (;) and vertical bars (|) in category
names. These characters are forbidden.
63
Page 70

Chapter 6 – Recognizing business cards
Categories are also available for export. They can be exported as
cvs, xml, html and excel files and sent to Microsoft Outlook 2003
and 2007. When exporting to Microsoft Outlook, the categories are
created on the fly in Microsoft Outlook as far as they don't already
exist.
Note: categories are an intrinsic part of a Cardiris database. When
you merge two databases, the categories from both databases will
be added up. In other words, the merged database will contain both
the categories from the first databases as well as those of the second
database. Duplicate categories will be merged into a single one.
Note: when exporting contacts that contain categories to Microsoft
Dynamics CRM, the categories will be added to the Notes field in
CRM 3, 4 and 2011 Server and in the Notes and Activities section
in CRM Online.
Note: when exporting contacts that contain categories to Salesforce
CRM, the categories will be added to the Description field in
Salesforce.
64
Page 71

Cardiris
TM
5 – User Guide
CHAPTER 7
ORGANIZING BUSINESS CARDS
ASSIGNING A CARD STATUS
When you open the sample database, which you'll find in the
Cardiris installation folder, you will see that the cards in the
database all have a certain color code. Cards can be yellow, green
or blue.
These colors indicates the card status of a card:
Yellow cards are New cards.
The data they contain has not been verified yet.
Green cards are Indexed cards.
Indexed cards are cards of which the company name has been checked
by the user.
Blue cards are Verified cards.
Cards are Verified when all the information they contain has been
checked by the user.
65
Page 72

Chapter 7 – Organizing business cards
To assign a different card status to a card:
Double-click the card to view it in card view.
Check the recognition results and edit them if necessary.
Click the status buttons in the lower right part of the interface:
N(ew), I(ndexed), V(erified).
Or use the function keys F10, F11 and F12 on your keyboard.
Based on the card status you can choose to display a selection of
cards:
In album view click the card type buttons on the main toolbar to
display new cards, indexed cards and verified cards only,
respectively.
The status bar at the bottom of the windows indicates the card
types that are displayed.
66
Page 73

Cardiris
TM
5 – User Guide
Depending on the card types that are displayed, the Cardiris
database will be displayed in a different color.
In the image below Cardiris only displays verified cards.
When there are no cards to display:
o the application window remains empty and the status bar
confirms that there are no cards to display. (album view)
o the card image is empty, no data fields are filled out and
the card status is grayed. (card view)
To redisplay all cards, click the all cards button.
67
Page 74

Chapter 7 – Organizing business cards
Notes:
When exporting cards to other applications, make sure you only
export verified cards. This way you are sure to export only
information that has been checked.
When you resolve duplicates in Cardiris, the cards you merge
automatically get the status verified.
When you use the option Clear all fields but Notes (on the Edit
menu) on a card, the card status changes to new.
BROWSING THROUGH THE CARDS
Cardiris functions like an electronic rolodex. The cards you add to
the database can be browsed easily:
In album view click the arrows in the bottom corners of the
interface to turn the pages of the album.
Or press PageUp and PageDown on your keyboard.
The browse buttons allow you to navigate through the business
cards.
In album view press Home to go to the first card and press End
to go to the last card.
In album view you can also navigate through the cards by
clicking the letter buttons.
68
Page 75

Cardiris
TM
5 – User Guide
Example: Click the "G" button and the cursor moves to the first card
whose company name starts with the letter "G". If there are no
companies in the database that start with that letter, Cardiris moves to
the card whose company name is closest to that letter.
Sort order of cards Cardiris applies a sort order to the cards in a database:
Cards are first sorted alphabetically by company name.
The company name is the primary sort key.
Then they are sorted alphabetically by name.
The name is the secondary sort key when there are multiple contacts
of the same company in a database.
When nor their company name nor their name is available, cards
are sorted chronologically by scanning date.
SEARCHING BUSINESS CARDS
Cardiris offers two search functions to search your business cards
quickly and efficiently:
You can do free-text searches using the search field.
Or do advanced searches with the advanced search command.
69
Page 76

Chapter 7 – Organizing business cards
Free text search
To do a free text search:
Enter a term in the search field and click the search cards button
or press Enter.
Cardiris will display all cards that match the search criterion. The
filter button, the status bar and the pink background indicate that
you're displaying a "hitlist". The status bar also indicates the
number of cards that have been found.
If none of the cards meet the search criteria:
the application window remains empty and the status bar
confirms that there are no cards to display. (album view)
the card image is empty, no data fields are filled out and the
card status is grayed. (card view)
Logical operators such as OR and AND, and also quotation
marks can be used to broaden the search.
To redisplay all cards after a search, erase the search term and
press Enter or click the button All cards on the button bar.
70
Page 77

Cardiris
TM
5 – User Guide
Advanced search
To do an advanced search:
Click the binoculars icon on the main toolbar.
Cardiris displays the list of available search criteria.
The search criteria allow you to limit searches to specific data fields,
custom fields and categories. You can also search for contacts by scan
date and modification date.
Note: in advanced searches, Cardiris will look for cards that start with
the text you enter in any of the search fields, not for cards that contain
the text you enter.
Also note that you can use multiple search fields at the same time.
Tip: you can make use of logical operators (AND and OR) and
quotation marks inside the search fields.
Determine in which sort order you want the search results to be
displayed.
Enter the text you want to search in the search fields and click
OK.
Cardiris will display all cards that match the search criteria. The
filter button, the status bar and the pink background indicate that
71
Page 78

Chapter 7 – Organizing business cards
you're displaying a "hitlist". The status bar also indicates the
number of cards that have been found.
If none of the cards meet the search criteria:
the application window remains empty and the status bar
confirms that there are no cards to display. (album view)
the card image is empty, no data fields are filled out and the
card status is grayed. (card view)
To redisplay all cards after a search, erase the search term and
press Enter or click the button All cards on the button bar.
FINDING AND RESOLVING DUPLICATES
Cardiris is a comprehensive card database solution. It allows you to
import business cards from and export them to other databases,
synchronize entire databases, etc. To avoid that your database is
infected with duplicate cards or obsolete information, Cardiris
disposes of a convenient Duplicates management function.
To find and resolve duplicates:
Click the Find duplicates icon on the main toolbar.
72
Page 79

Cardiris
TM
5 – User Guide
In the Find duplicates window, select the search parameters you
want to use. Duplicate contacts can be contacts who have
matching:
o company names, first names and last names
o first names and last names
o first names
o last names
o e-mail addresses
Then click the Find Duplicates button.
Cardiris lists the duplicate contacts (and indicates between brackets
how many duplicates have been detected per card).
73
Page 80

Chapter 7 – Organizing business cards
Double-click any of the duplicates to view their information in
detail.
The card data is spread out across 4 different tabs. The tabs
marked in red require your attention. The information inside the
tabs that are not marked has been processed automatically by
Cardiris.
Tab Data and Tab Custom fields
Click the Data tab to access the data fields information. The
information below also applies to the Custom fields tab.
When Cardiris finds duplicate contacts, it compares the information
in the data fields of the different contacts and merges the contacts
into a single card.
Color codes are used to indicate the status of the information:
The merged card fields are marked in black.
The information that has been selected and moved to the merged
card is marked in blue. This is the information that Cardiris
considers to be correct.
74
Page 81

Cardiris
TM
5 – User Guide
The information that has not been used in the merged card is
grayed.
Fields that Cardiris could not merge are marked in red. Double-
click any of the red fields to move them to the merged card.
Alternative information that can also be moved to the merged
card (instead of the current information) is marked in orange.
When you or Cardiris selected the wrong information, doubleclick the orange data fields to move them to the merged card.
You can also use the AutoComplete button to have Cardiris merge
the duplicate contacts for you. Cardiris will then select the most
recent information and move it to the merged card.
Note: the information in the Notes field never creates a conflict. Any
information in any Notes field will be added to the merged card, in
combination with the data and time when the information was added.
When you are done resolving all the duplicates click Apply to save
them in the database or click OK to save them and close the
window. Resolved duplicates get the card status Verified. The
superfluous contacts will be deleted.
75
Page 82

Chapter 7 – Organizing business cards
Tab Images
Cardiris displays all three image types that can be attached to your
contacts: Front images, Back images and Pictures.
It automatically selects the most recent images and moves them to
the merged card.
Images that could not be merged by Cardiris need to be merged
manually. To move an image to the merged card, simply double-
click it. The image you did not select will be hazy.
Should you have selected the wrong image, double-click the hazy
one to move it to the merged card.
Note: the images inside the tab are necessarily kept small. To zoom
in on an image, right-click it. To close the zoom window, again use
right-click.
Tip: you can move all three images of a duplicate contact (front image, back
image and picture) simultaneously to a merged card. To do so, hold down the
Shift key while you double-click any image of the duplicate. The images of
the other duplicates will be discarded.
You can also use the AutoComplete button to have Cardiris merge
the duplicate images for you. Cardiris will then select the most
recent image and move it to the merged card.
When you are done resolving all the duplicates click Apply to save
them in the database or click OK to save them and close the
76
Page 83

Cardiris
TM
5 – User Guide
window. Resolved duplicates get the card status Verified. The
superfluous contacts will be deleted.
Tab Categories
Any categories you assigned to your contacts will be included in the
merged card. It suffices that one of the duplicates contains a
category for it to be added to the merged card.
The categories that have been moved to the merged card are marked
by a green V sign, the ones that are not by a red X.
To add categories to the merged card, double-click their red X sign.
To remove them, double-click their green V sign.
You can also use the AutoComplete button to have Cardiris merge
the duplicate categories for you.
When you are done resolving all the duplicates click Apply to save
them in the database or click OK to save them and close the
window. Resolved duplicates get the card status Verified. The
superfluous contacts will be deleted.
77
Page 84

Chapter 7 – Organizing business cards
MAINTAINING CARD DATABASES
Cardiris is a comprehensive card database solution. The databases
you create or open in Cardiris can be merged or migrated with other
Cardiris databases, duplicated etc.
Opening and saving databases
Cardiris always opens the database that was last opened. Any
changes you make to a database are saved automatically. There is
no need to hit a Save button.
To open another database, click the Open command on the File
menu.
Creating and saving new databases
To create a new database, click the New command on the File
menu. A new database must be saved once by clicking the Save as
command on the File menu. After that, any changes you make are
saved automatically.
Compacting databases
You can compact your databases to reduce their file size to a
minimum. Compacting a database is useful when you removed
many cards from it.
To compact a database, click the corresponding command in the
File menu.
Tip: use low-resolution images only when you attach a picture to your cards!
(All data, including the images, are stored inside the database file.)
78
Page 85

Cardiris
TM
5 – User Guide
Duplicating databases
You can duplicate your databases to create backups.
To duplicate a database either:
Click Save As in the File menu and save the database as a .c5d
file (database file).
Or copy the database file in Windows Explorer to another
location.
Duplicating contacts
You can also transfer specific contacts, not entire databases, to
another Cardiris database.
Two methods are available.
Open both databases and drag the contacts from one database
to the other.
Tip: the current database is mentioned in the title bar.
Select the cards to be transferred, export them and import them
later on in the other database. (Select the export and import filter
Cardiris 5)
Migrating older databases
To migrate older databases:
Open a database created in a previous version of Cardiris by
clicking the Open command on the File menu. Select the
Cardiris version in the Files of type list.
or
79
Page 86

Chapter 7 – Organizing business cards
Import the contacts from earlier versions of Cardiris (3.x and
4.x) into an empty database. To do so:
o Click Export on the main toolbar and then click the
Import tab.
o Select from which Cardiris version you want to import
contacts and click Import.
o Select the database file of your choice and click Open.
Merging databases
To merge two recent databases:
Import the contacts of another database into your current
database. To do so:
o Click Export on the main toolbar and then click the
Import tab.
o Select Cardiris 5 from the list.
o Select the database file of your choice and click Open.
Open both databases and drag all contacts from one database to
the other. To do this quickly:
o Open the database in album view and click Select All in
the Edit menu.
o Then drag them to the other database.
80
Page 87

Cardiris
TM
5 – User Guide
DELETING CARDS
Cards can be deleted from a database in several ways.
To delete cards:
Select one or more cards.
Right-click them and click Delete card(s).
Click the command Delete card(s) on the Edit menu.
Hit the Delete key on your keyboard.
81
Page 88

Page 89

Cardiris
TM
5 – User Guide
CHAPTER 8
EXPORTING CONTACTS
EXPORTING BUSINESS CARDS
The contacts in your Cardiris database can be exported to numerous
external applications. They can be exported to contact managers,
personal information managers (PIMs), customer relation
managers (CRMs), databases, spreadsheets and even word
processors whose mail merge function allows to print letters,
envelopes and labels.
You can also save your contacts in a structured file, for instance in
the vCard format, to import them into any address database, such
as Microsoft Access. vCard files can also be imported into any
vCard compliant application.
Cardiris Corporate also allows you to export contacts to Microsoft
Dynamics CRM and Salesforce CRM.
See the sections Exporting to Microsoft Dynamics CRM and
Exporting to Salesforce CRM for more information.
83
Page 90

Chapter 8 – Exporting contacts
To export contacts from Cardiris:
Select the cards you want to export. This can be done in several
ways:
o Hold down the Ctrl key and click the cards you want to
select.
o To select a continuous range of cards, click the first card
and hold down the Shift key when you select the last card.
o Execute a free text search to single out the cards you want
to export.
o Execute an advanced search (using the binoculars) to
single out the cards you want to export.
When no cards are selected, all cards will be exported to the selected
application.
Click Export on the main toolbar and select the required export
application from the list.
Note that the option Export all cards at the bottom of the Export list
overrules any selection you may have made.
Click Configure to configure the export.
Configuring the export implies setting several minor options. These
options are discussed in detail in the Cardiris ReadMe file.
Note: whether or not the Configure button is available depends on the
selected format or application.
When you are done configuring the export, click OK to confirm.
Your contacts will be stored in the selected export format or
application. Open it to check the results.
Tip: you can also access the Export options by right-clicking a card or a
selection of cards and clicking Export.
84
Page 91

Cardiris
Tip: if you want to export contacts to another Cardiris database, you do not
necessarily have to use the Export function; you can also open both
databases and drag contacts from one database to the other.
TM
5 – User Guide
Tip: select E-mail from the Export list to distribute contacts and their card
images through your e-mail software. A new e-mail message will open
containing a vCard file that in turn contains your contacts.
EXPORTING TO WINDOWS CONTACTS
When you are using Cardiris on a Windows Vista or Windows 7
based computer, you have the possibility to export your business
cards to Windows Contacts. Windows Contacts replaces Windows
XP's Address Book and allows you to keep track of people and
organizations by creating contacts. It also functions as the address
book for Windows Mail.
Note: if you are using Windows XP, you do not have Windows
Contacts. You can export to Windows Address Book (in Outlook
Express) instead. See Exporting to Windows Address Book for
more information.
To export business cards to Windows Contacts:
Select the cards you want to export.
Click Export on the main toolbar, and select Windows
Contacts from the list.
85
Page 92

Chapter 8 – Exporting contacts
Then click Export. Your contacts will be added to the Windows
Contacts folder.
The Contacts folder can be found in
C:\Users\YourAccount\Contacts. Double-click the contacts to
display their information.
86
Page 93

Cardiris
TM
5 – User Guide
Tip: you can also type "wab.exe" in the Search field to locate the Contacts
folder.
EXPORTING TO WINDOWS ADDRESS BOOK
When you are using Cardiris on a Windows XP based computer,
you can export your business cards to Windows Address Book (in
Outlook Express)
Note that this feature is only available in combination with Windows
XP, as Windows Address Book has been replaced by Windows
87
Page 94

Chapter 8 – Exporting contacts
Contacts since Windows Vista. See Exporting to Windows
Contacts should you want to export to Windows Contacts.
To export business cards to Windows Address Book:
Select the cards you want to export.
Click Export on the main toolbar, and select Microsoft Outlook
Express from the list.
Note: make sure to select Microsoft Outlook Express, not Microsoft
Outlook. The Windows Address Book cannot be used directly from
Outlook.
Then click Export. Your contacts will be added to the Windows
Address Book.
88
Page 95

Cardiris
TM
5 – User Guide
EXPORTING TO APPLE DEVICES
The contacts you create with Cardiris can be exported to your Apple
devices via iTunes. All you need to do, is first export your contacts
to Windows Contacts or Windows Address Book, then configure
iTunes to sync with one of the two aforementioned applications.
The contacts from Cardiris are added to the Contacts app on your
Apple device.
Exporting your contacts to Windows Contacts or Windows
Address Book
See the sections Exporting to Windows Contacts and Exporting
to Windows Address Book to learn how to do so.
Syncing iTunes with Windows Contacts or Windows Address
Book
From the Windows Start menu, click All Programs > iTunes.
If iTunes is not installed on your computer click here to access the
download page.
89
Page 96

Chapter 8 – Exporting contacts
Connect your Apple device to your computer.
When your device appears in the list on the left side of the
iTunes window (below Devices), select it.
At the top of the Window click Info.
Check the option Sync Contacts with, and then select Outlook
or Windows Contacts from the list.
Then click Apply to sync your contacts with the ones on your
Apple device.
90
Page 97

Cardiris
TM
5 – User Guide
The contacts from Cardiris are added to the Contacts app on
your Apple device.
EXPORTING TO GOOGLE CONTACTS
The contacts you create with Cardiris can be exported to the Google
Contacts section of your gmail account.
Note: a Google account is required to export contacts to Google
Contacts.
To export contacts to Google Contacts:
Select the cards you want to export.
Click Export on the main toolbar, and select Google Contacts
from the list.
91
Page 98

Chapter 8 – Exporting contacts
Then click Configure at the bottom of the window.
Enter the credentials of your Google account and click OK.
Then click Export to export the cards. A Cardiris group
containing your contacts will be added to the Contacts section of
your gmail account.
Note: if your contacts contain categories, a separate group will be
created as well, based on the custom field. E.g. Cardiris - Associate
in the image below.
92
Page 99

Cardiris
TM
5 – User Guide
All the database fields from Cardiris - including any Custom
fields you created - are included in each Google contact.
Tip: you can also move the contacts to the standalone application
Google Contacts. To do so, select the contacts and click Groups >
My Contacts > Apply.
93
Page 100

Chapter 8 – Exporting contacts
EXPORTING CONTACTS TO MICROSOFT DYNAMICS CRM
Cardiris Corporate allows you to export contacts to Microsoft
Dynamics CRM.
Microsoft Dynamics CRM is a Customer Relationship
Management system and allows your organization to manage
customers throughout the entire sales process efficiently.
94
 Loading...