

Page 1
Getting Started Guide
Product versions
The Cardiris 5 is a standalone software product that can be used with any twain based scanner to process the business
card information. It is also bundled in the IRIScan Anywhere product. There are two versions of the software.
Cardiris Pro 5
Cardiris Corporate for Microsoft Dynamics CRM 5
Both operate in the same fundamental way. In this guide we will cover the functions of the Pro 5 and then the
differences in the CRM 5.
Cardiris Pro 5
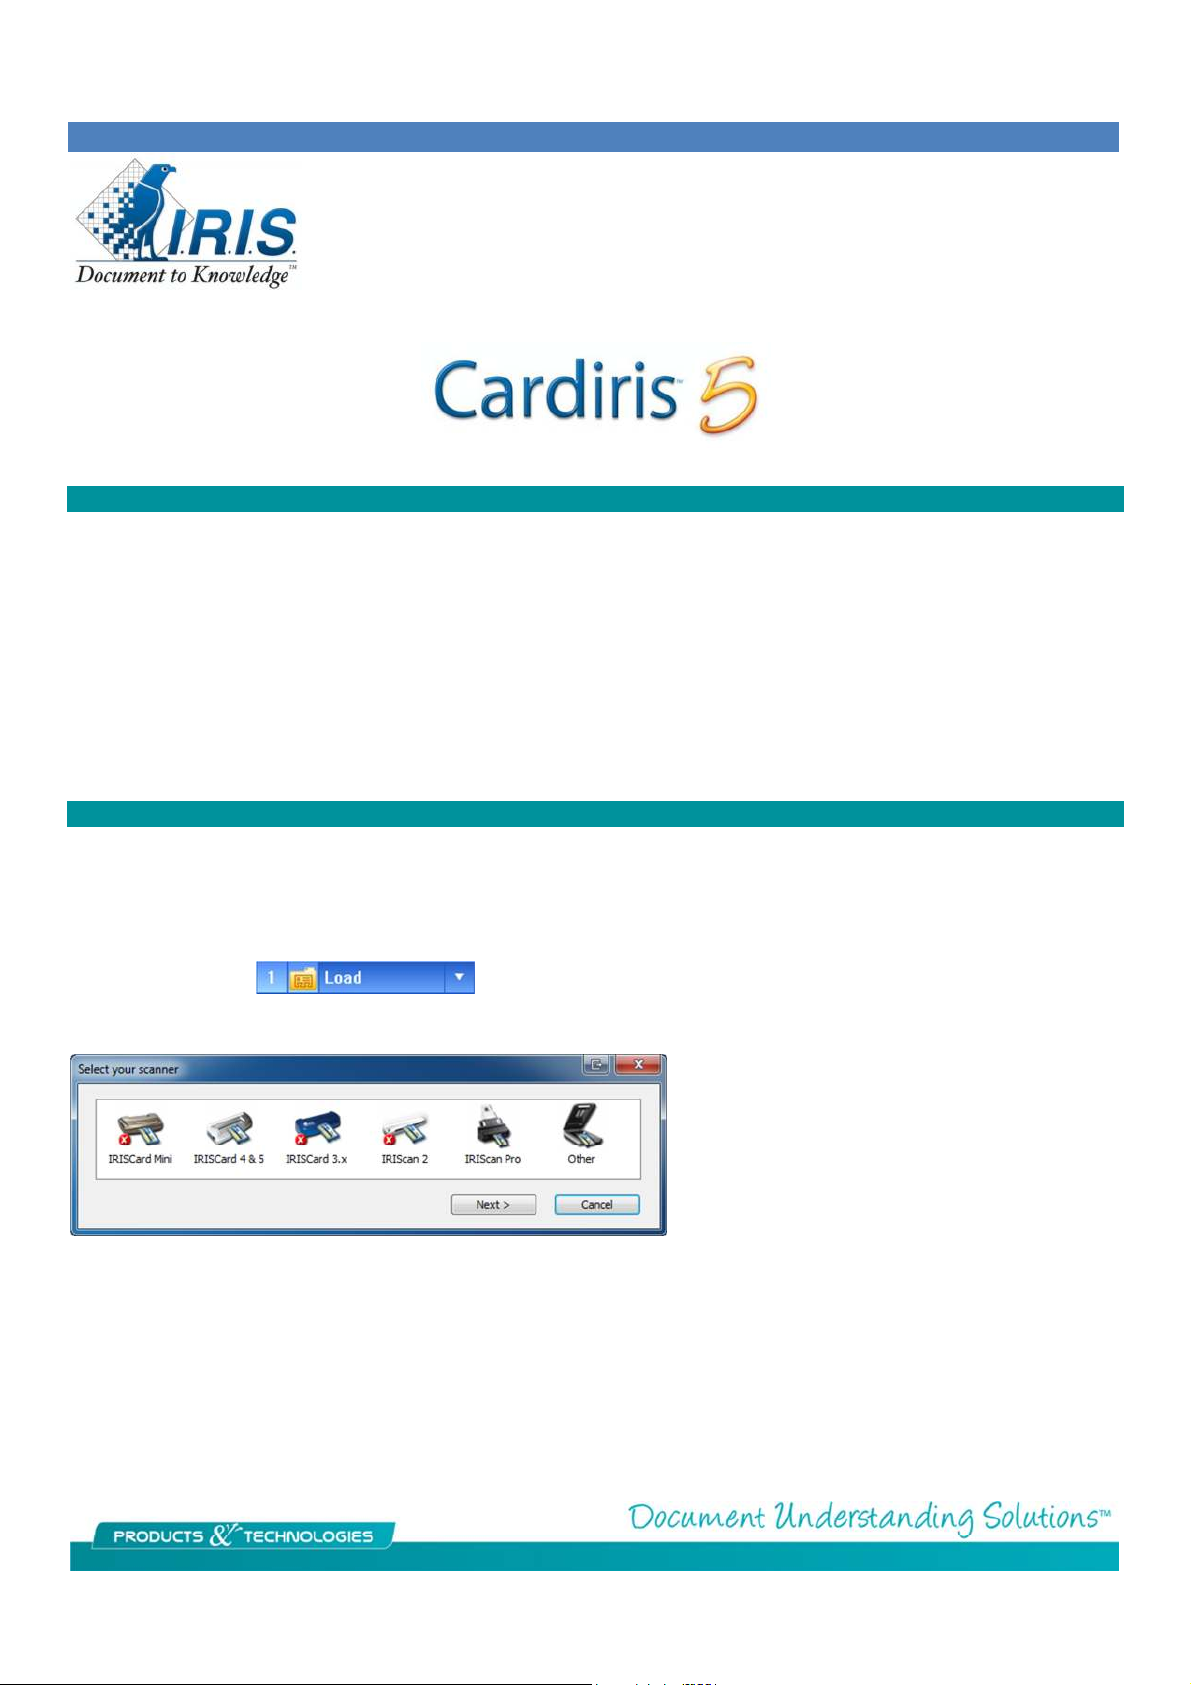
Sc anner setu p
The product can be used with any of the business card capable scanners from our previous or current products to
process individual card images. It can also process images of multiple cards in the same image and extract the individual
images for processing. You can also open prescanned images for processing by clicking the down arrow next to scan and
change it to Load.
In the Cardiris software
If you select an Iris scanner and click next you will get a window similar to the one pictured below depending on the
scanner model selected.
Go to the Settings menu > Scanner and select the scanner you are using
Page 2
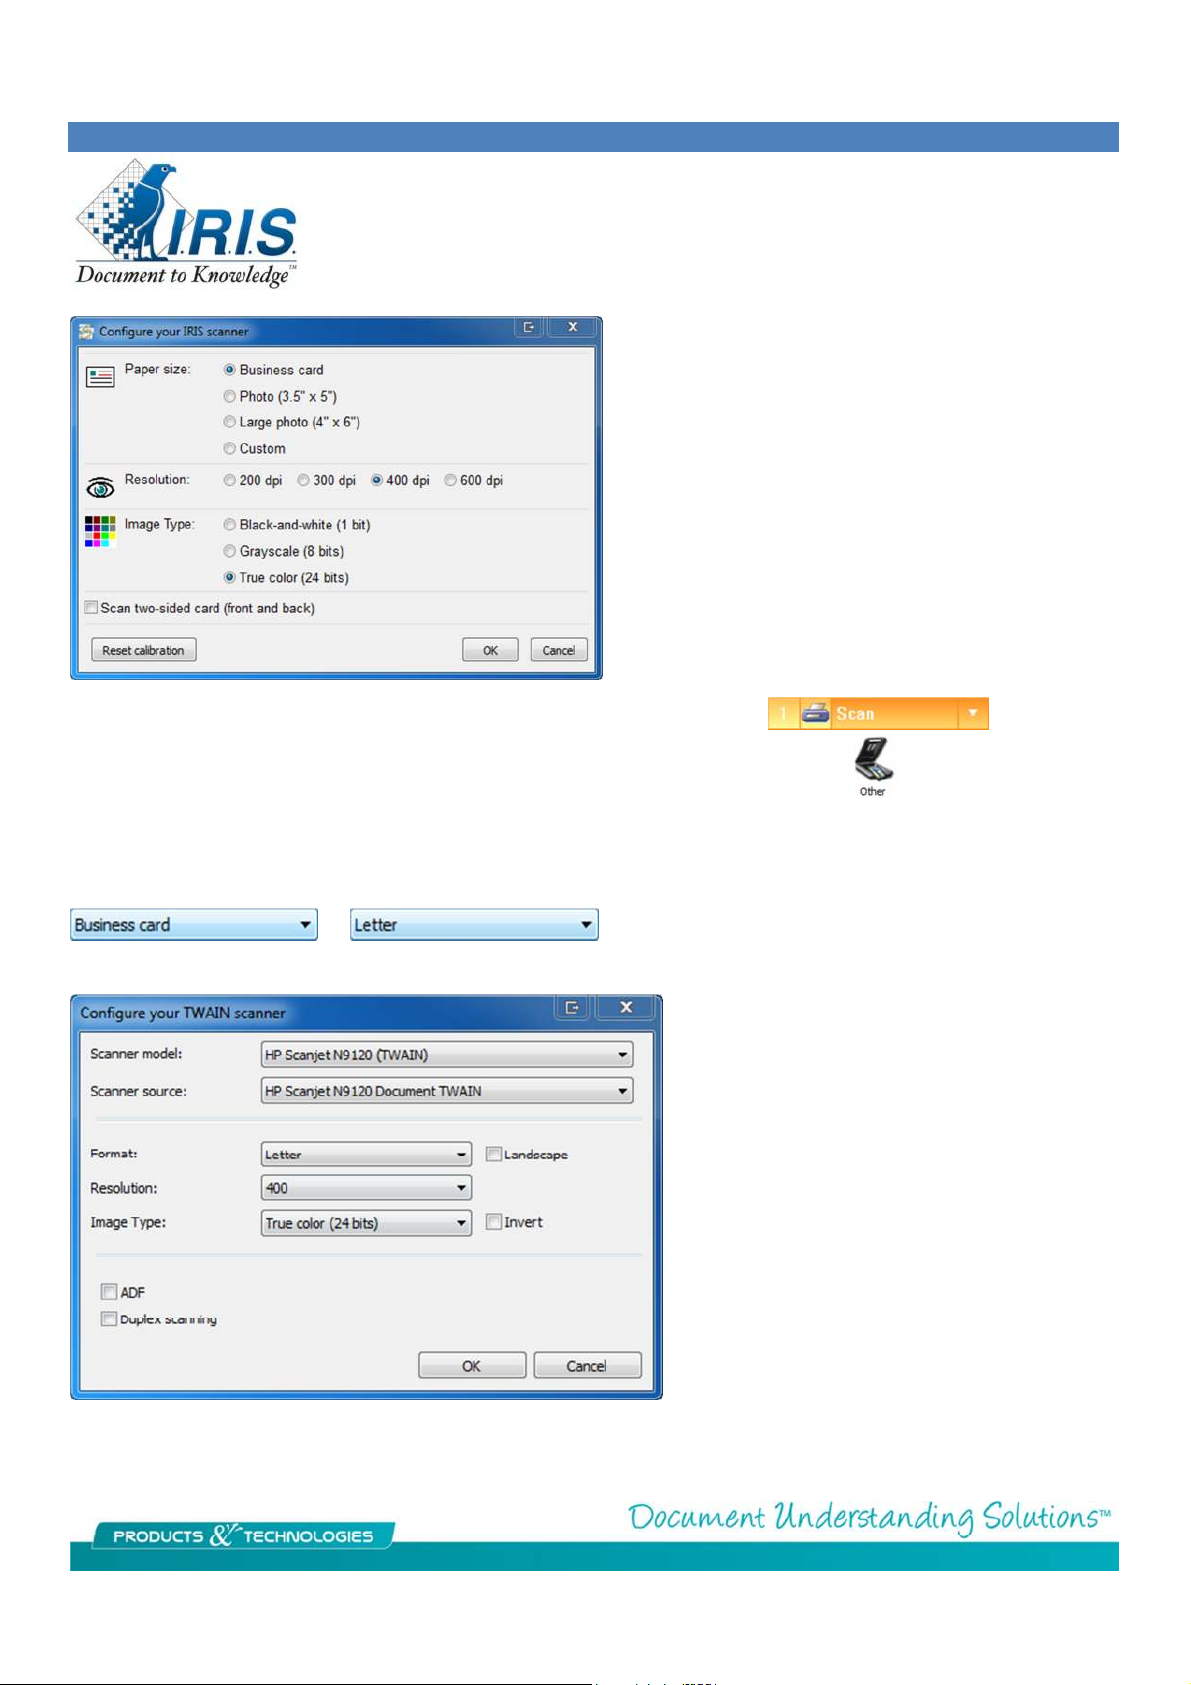
If your scanner has a business card capable
Set your scan options, click on OK and then click on the scan button in Cardiris.
If you are using a non-IRIS scanner then highlight on the “Other” choice and click on Next >
Pick the Scanner Source then the scanner model and configure as pictured making sure the format is set to the
appropriate choice. If your scanner is not listed find the closet match or use <Twain> <Other Models>.
Letter is used when scanning one image of multiple cards
as will be discussed below. Typically used for flatbed scanning.
automatic document feeder then check the
ADF box.
If it can scan the front and back in one pass
then check the Duplex scanning box.
This will place both images in the contact
field in Cardiris.
Page 3
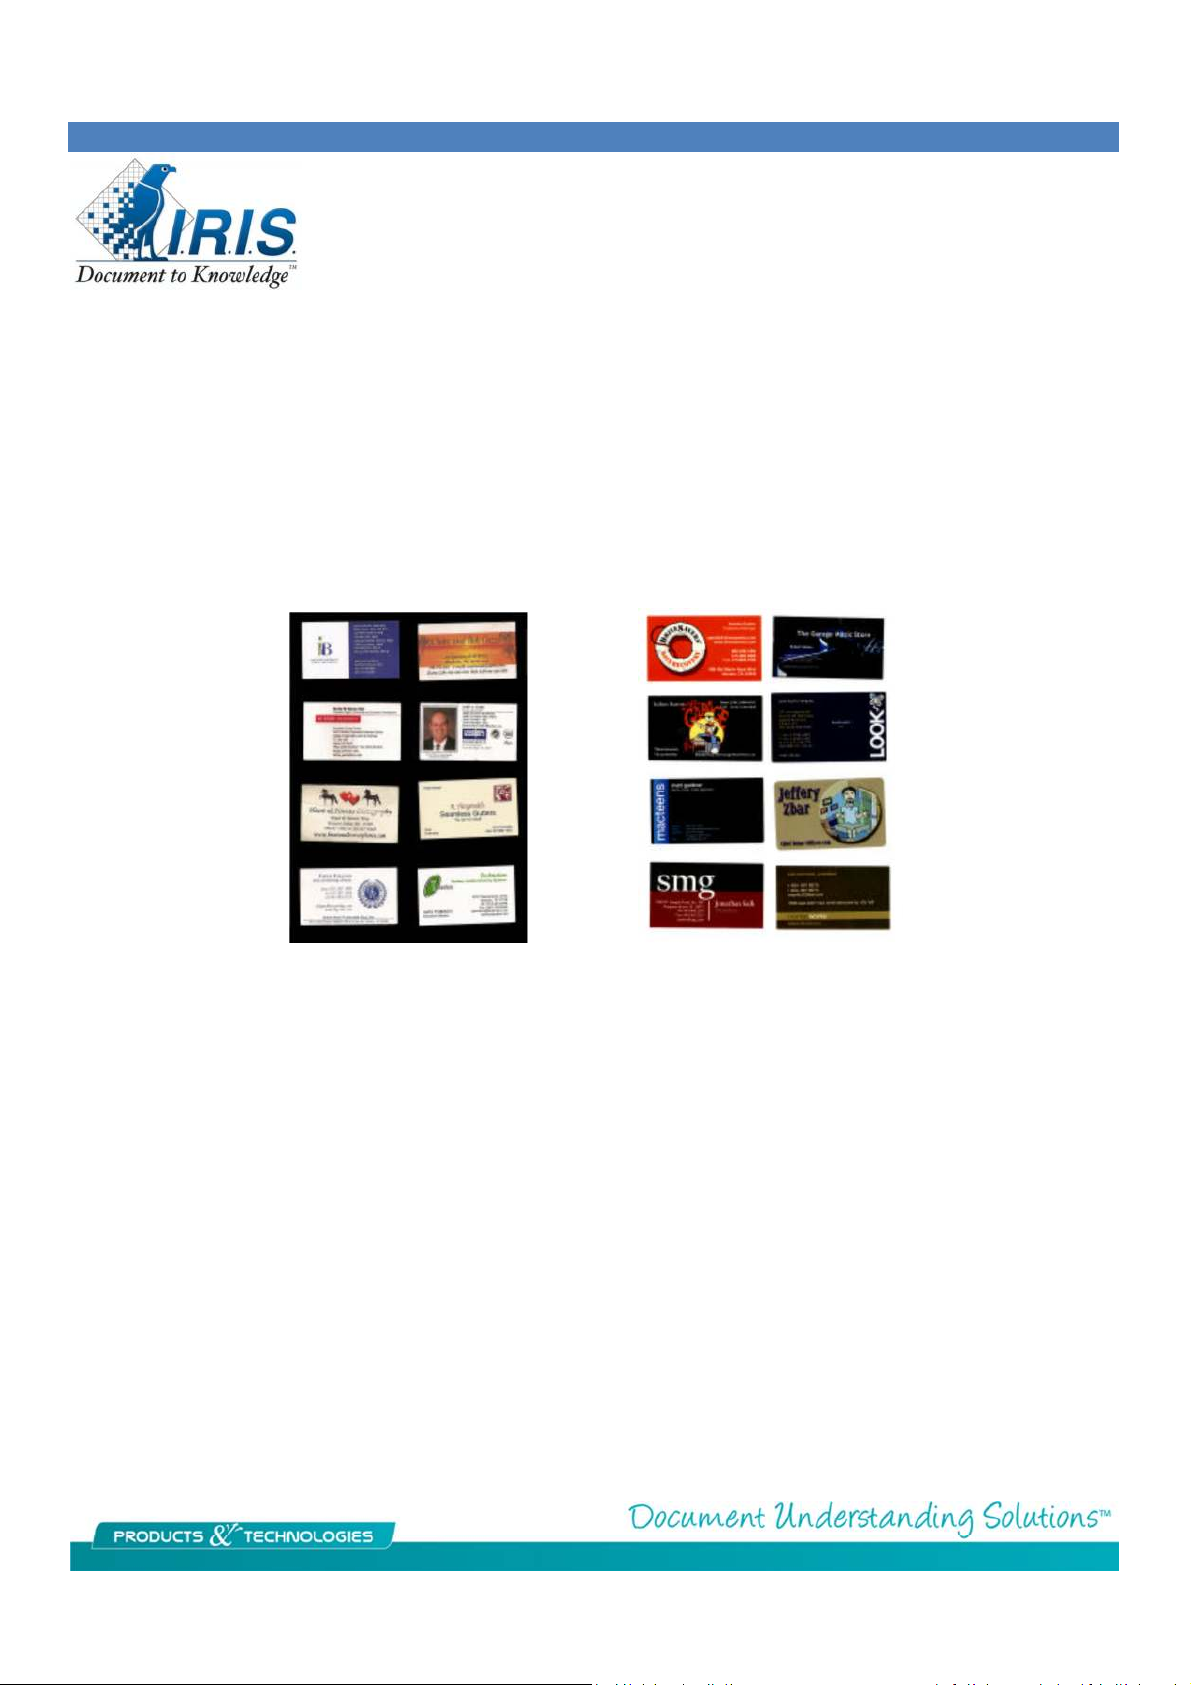
Fl at be d sc anni ng
You can place up to 10 cards on the glass of the scanner. You want there to be a gap around all edges of the card
keeping it away from the edge of the scanner bezel. You also want a dark background so the software can separate the
individual card images from the larger image. A black or dark sheet of paper placed behind the cards works best. Scan at
400 DPI in color.
You could also leave the lid to the scanner open but on some scanners you risk light leaking in on an edge of the image
creating a very subtle white line making it impossible for the software to extract the individual card images.
For very dark cards you would do the opposite and just close the lid to the scanner to create a white background. It is
useful then to separate the cards into dark and light for this kind of processing.
You can also scan outside of the software and save the scans as image files which can then be processed in the software.
Open Cardiris and go to File > Load Card images and navigate to where the images are stored and select one or more of
the images. Go to the Process menu > Extract images to separate the individual images from the larger image.
Page 4

Pr ogram Usage
The workflow is to; 1. Scan | 2. Recognize & verify | 3. Export
Prior to Exporting double click on the desired card to enter the contact view to verify the information is correct and set a
card status for easy segregation of the Cards. You can also set Categories or include custom fields.
Toolbars f u nct i ons
Page 5

In the Contact view you can select the Front | Back | Picture tabs to scan/view secondary images for the contact.
Information that is on the Card that does not have a location is put into the Extra tab on the lower left. A notes tab is
provided to allow additional information to be typed in.
Note the N I V buttons for categorizing the cards as New, Indexed or Verified.
Custom Fields
Categories, click on Edit to add or remove
Page 6

Note the
Configure
button
on the lower left of the screen. This
This is an easy way to b
ring in information from a previous
Import, Export & Synchronize.
Import
Commonly used to import data from another Cardiris database or program. This is useful to consolidate information
and/or export elsewhere.
Cardiris version.
You can also import individual vCards files or vCards files that
contain multiple contacts.
Export
The most used items are Microsoft Excel, Microsoft Outlook, Text (*.csv) and vCard (*.vcf)
is important and allows you to configure options relevant to the
output format you have choosen.
In Outlook you need to choose the contacts folder where you
want the information sent and whether to include the card
image.
For vCard you have the option to create on file with all the
contacts or multiple files with a single contact.
Note also the Export all Card check box
Page 7

If Outloo
k is selected all the contact in Outlook will be brought
Synchronize
The synchronize exchanges information between the selected program and Cardiris.
into Cardiris and all the contact in Cardiris will be sent to
Outlook.
Usually this is not what you want to do unless you are looking to
consolidate and reprocess the information elsewhere.
Organizing Cards
Once you have scanned in a batch of cards and exported the information and then scan in the new a problem arises of
how to separate the two batches. Within the Card view are three buttons for New, Indexed, and Verified. These are used
to solve this issue with all new cards automatically being assigned and color coded new.
You could also use the Advanced Search by going to the Card menu > Advanced Search and specifying a scan or
modification date. Only those cards in that range will be displayed and exported.
You could also simply archive to vCard and delete the cards to make room for the new batch.
Page 8

Highlight the
Microsoft Dynamics CRM
and click on
You will need to fill in the con
figuration details for
Cardiris Corporate for Microsoft Dynamics CRM 5
The fundamental difference in this version is the Microsoft Dynamics CRM export option.
configure.
your CRM installation.
This information can be obtained from your CRM
adminstrator.
Pictured is a sample configuration. Click next and it
will connect to your server. For Remote servers
allow time to establish communication.
Page 9

Next you will get the field mapping screen where the
contacts in Cardiris are matched to the fields
available on the server.
Click Ok and you will return to the Cardiris screen
where you can click on export.
Page 10

You will then get the find duplicates window. Click on the Find Duplicates button and it will show any possible
duplicates.
If none click on OK and the export will proceed.
 Loading...