

Page 1
Cardiris
User Guide
TM
4
Page 2

Page 3

CardirisTM 4 – User Guide
Table Of Contents
Copyrights ........................................................................................... 1
Chapter 1 Introducing Cardiris ................................................ 3
Chapter 2 Installation ................................................................ 5
System Requirements ........................................................ 5
Installing Cardiris ............................................................. 5
Register Your Cardiris License ......................................... 6
Software Updates .............................................................. 6
Product Support ................................................................ 6
Uninstalling Cardiris ......................................................... 6
Chapter 3 Supported Scanners ................................................. 8
Twain Scanners ................................................................. 8
I.R.I.S. Business Card Scanners ........................................ 9
Fujitsu Scanners .............................................................. 10
Unsupported Scanners .................................................... 10
Chapter 4 Scanning Cards ...................................................... 11
Scanning Business Cards ................................................ 11
Loading images from the IRIScan and IRIScard Anywhere
scanners .......................................................................... 13
Scanning the Reverse Side of a Card .............................. 16
Scanning a Photo of a Contact ........................................ 17
iii
Page 4

Table of Contents
Recognizing cards with drag-and-drop OCR .................. 17
Adding Comments to Cards ............................................ 18
Editing Recognized Cards ............................................... 19
Data Fields ........................................................................................ 19
Text Editing ...................................................................................... 19
Drag-and-drop Editing ...................................................................... 20
Selecting Text ................................................................................... 20
Deleting Cards .................................................................................. 20
Re-recognizing Business Cards ....................................... 21
Saving Cards in the Cardiris Database ............................ 21
Synchronizing Contacts .................................................. 23
Formatting Recognized Cards ......................................... 24
vCard files ......................................................................................... 24
Unicode files ..................................................................................... 25
HTML files ....................................................................................... 25
Exporting Recognized Cards .......................................... 27
Chapter 5 Scanning Images ..................................................... 29
Scanning and Saving Images .......................................... 29
Chapter 6 Scanning Cards using the Button Manager ........ 31
Chapter 7 Reference Information ........................................... 35
Horizontal Toolbar .......................................................... 35
Rotate ................................................................................................ 35
iv
Page 5

CardirisTM 4 – User Guide
Crop ................................................................................................ 35
Magnifying Glass .............................................................................. 36
Front - Back Tab ............................................................................... 36
Scan/Open/Load Image Button ......................................................... 37
Save All Button ................................................................................. 38
Save Selection Button ....................................................................... 39
Customize ......................................................................................... 39
Vertical Toolbar .............................................................. 40
Scan & Create - Open & Create ........................................................ 40
Load & Create ................................................................................... 42
Scanner Type - File ........................................................................... 42
Document Type - Business cards ...................................................... 43
Document Type - Image .................................................................... 43
Card Style.......................................................................................... 44
Output Format - Cards ...................................................................... 45
Output Format - Image ...................................................................... 48
Export - Cards ................................................................................... 49
Export - Image .................................................................................. 49
Address Book .................................................................................... 50
Card Toolbar ................................................................... 52
Selecting Cards ................................................................................. 52
Changing the Document Type ........................................................... 52
Changing the Card Style ................................................................... 53
v
Page 6

Table of Contents
Browsing the Cards ........................................................................... 53
Deleting Cards .................................................................................. 53
Application Window ....................................................... 54
Image ................................................................................................ 54
Status Bar .......................................................................................... 55
Data Fields ........................................................................................ 55
Photo Field ........................................................................................ 56
Cardiris Menu ................................................................. 57
About Cardiris ................................................................................... 57
Preferences ........................................................................................ 57
Quit Cardiris ...................................................................................... 59
File Menu ........................................................................ 60
New Card .......................................................................................... 60
vi
New Group ........................................................................................ 60
Scan/Open & Create New Cards ....................................................... 60
Save All Cards .................................................................................. 60
Save Selected Cards. ......................................................................... 61
Edit Menu ....................................................................... 61
Text Editing ...................................................................................... 61
Settings Menu ................................................................. 62
Document Type - Business Cards ..................................................... 62
Document Type - Images .................................................................. 62
Country ............................................................................................. 63
Page 7

CardirisTM 4 – User Guide
Output Format ................................................................................... 64
Output Format - Images .................................................................... 67
Card Orientation Detection ............................................................... 68
Auto-comment .................................................................................. 69
View menu ...................................................................... 69
Back Side - Front Side ...................................................................... 69
Rotate ................................................................................................ 70
Crop 70
Revert ................................................................................................ 70
Magnifying Glass .............................................................................. 70
Customize Toolbar ............................................................................ 70
Process menu .................................................................. 71
Calibrate Scanner .............................................................................. 71
Change Selected Cards - Business Card ............................................ 72
Change Selected Cards - Image ......................................................... 72
Change Selected Cards - Country ..................................................... 73
Change Selected Cards - Delete Image ............................................. 74
Scan/Open this Side of the Card ........................................................ 74
Export All Cards ............................................................................... 75
Export Selected Cards ....................................................................... 76
Help menu ....................................................................... 77
Cardiris Help ..................................................................................... 77
I.R.I.S. on the Internet ....................................................................... 77
vii
Page 8

Table of Contents
Register Cardiris ............................................................................... 77
Search for Updates ............................................................................ 77
IRISCard Button Manager Menu .................................... 78
About IRISCard Button Manager ...................................................... 78
Preferences ........................................................................................ 78
Quit IRISCard Button Manager ........................................................ 81
Index .................................................................................... 83
viii
Page 9

CardirisTM 4 – User Guide
Copyrights
Cardiris4-dgi-190411-03
Copyrights © 1993 - 2011 I.R.I.S. All Rights Reserved.
I.R.I.S. owns the copyrights to the Cardiris software, to the online help system
and to this publication.
The information contained in this document is the property of I.R.I.S. Its
content is subject to change without notice and does not represent a
commitment on the part of I.R.I.S. The software described in this document is
furnished under a license agreement which states the terms of use of this
product. The software may be used or copied only in accordance with the
terms of that agreement. No part of this publication may be reproduced,
transmitted, stored in a retrieval system, or translated into another language
without the prior written consent of I.R.I.S.
This manual utilizes fictitious names for purposes of demonstration;
references to actual persons, companies, or organizations are strictly
coincidental.
Trademarks
The I.R.I.S. logo, IRISCard and Cardiris are trademarks of Image Recognition
Integrated Systems S.A. OCR technology by I.R.I.S. Connectionist, Linguistic
and Field Analysis technology by I.R.I.S.
The Cardiris software is based in part on the work of the Independent JPEG
Group.
All other products mentioned in this user guide are trademarks or registered
trademarks of their respective owners.
1
Page 10

Page 11

CardirisTM 4 – User Guide
CHAPTER 1
NTRODUCING CARDIRIS
I
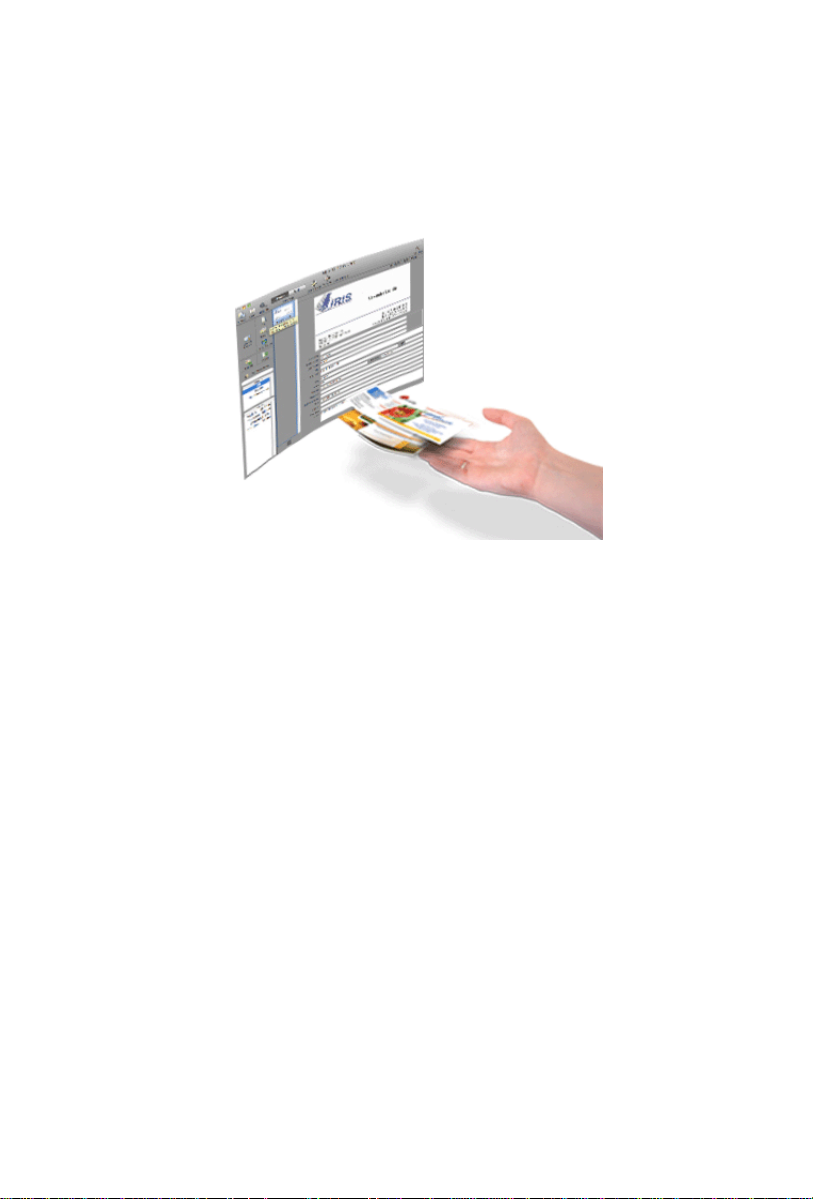
Cardiris allows you to scan business cards, recognize them and
convert them into an address database.
By means of OCR (Optical Character Recognition) the data on
business cards is extracted automatically from the image, converted
into editable text and inserted in the correct database fields through
field analysis.
Cardiris extensively uses a knowledge database, thus acquiring the
necessary intelligence to distinguish between first and last names,
cities and states, telephone and fax numbers etc.
Any data the OCR process cannot assign to a specific field is placed
in the Note field.
The Cardiris field analysis process is also based on the card layout.
Each country has a different “style” of composing business cards:
Americans compose an address differently than the French do,
Dutch ZIP codes and telephone numbers have a different syntax
than their British counterparts etc. This works for 217 countries.
3
Page 12
Chapter 1 – Introducing Cardiris
Reading Asian-language business cards from China, Japan, South
Korea and Taiwan requires the Cardiris Asian edition.
Cardiris not only analyzes but also formats the recognized text. The
resulting data can be exploited in many ways. You can save your
contacts in the Cardiris database, based on the standard Mac OS X
application Address Book. Or save your contacts in a structured file,
e.g. in the vCard format, to export them to any address database.
Alternatively, you can send the contacts directly to your contact
management software such as Microsoft Entourage, Now Contact
etc. or import them in the spreadsheet program Microsoft Excel.
Use iSync to send your personal contacts to other devices (Apple
iPod, hand-held computer, mobile phone etc.)
4
Page 13

CardirisTM 4 – User Guide
CHAPTER 2
NSTALLATION
I
SYSTEM REQUIREMENTS
This is the minimal system configuration required to use Cardiris:
A Mac with either a Power PC G3 (or above) processor or an
Intel Core processor.
The operating system Mac OS X 10.3.9 or higher. Earlier
versions of the Mac OS operating system are not supported.
160 MB of free hard disk space.
INSTALLING CARDIRIS
The Cardiris software is delivered compressed.
To install the software:
Insert the Cardiris CD-ROM.
Double-click on the Cardiris installer and follow the on-screen
instructions.
You are recommended to use the easy installation, it installs all the
necessary files on your hard disk.
5
Page 14

Chapter 2 – Installation
REGISTER YOUR CARDIRIS LICENSE
Remember to register your Cardiris license.
To register:
Use the Registration wizard in the Register menu. Follow the onscreen instructions.
SOFTWARE UPDATES
The command Search for Updates under the Help menu allows
you to keep your software up-to-date. Click the command to
download any available updates and patches from the I.R.I.S.
website.
PRODUCT SUPPORT
To get technical support on Cardiris, please visit our website at
www.irislink.com/support.
UNINSTALLING CARDIRIS
To uninstall Cardiris:
Click Finder and open the Applications folder.
Drag the Cardiris folder to the Trash.
6
Page 15

CardirisTM 4 – User Guide
Cardiris will be removed from your machine.
Note: the Cardiris preferences are not removed by dragging the
Cardiris folder to the trash can, in case you should want to re-install
the software later on. To remove the preferences, drag the folder
Cardiris Prefs to the trash. You will find this folder in Users - xxx
(your user name) - Library - Preferences.
7
Page 16

Chapter 2 – Installation
CHAPTER 3
UPPORTED SCANNERS
S
TWAIN SCANNERS
Cardiris supports all Twain compatible scanners. Note, however,
that a 1.7 or higher Twain driver is required to scan with Cardiris.
Access the website of you scanner manufacturer to download up-todate Twain drivers.
Installing a Twain Scanner under Cardiris
Insert the CD-ROM that came with your scanner to install the
Twain driver on your computer.
Make sure that you have selected the appropriate driver. To do
so:
o Verify that the scanner operates correctly in any scanning
application other than Cardiris.
o Select your scanner in the Cardiris software by clicking on
Preferences under the Cardiris menu.
Using the Twain Module
Click the Options menu of your Twain driver to specify the
scanner settings.
Determine the color mode, page size, page orientation,
brightness, contrast, and scanning resolution.
8
Page 17

CardirisTM 4 – User Guide
It is recommended to use a scanning resolution of 400 dpi.
IRISCARD AND IRISCAN SCANNERS
Cardiris is available in a bundle version with the I.R.I.S. IRISCard
and IRIScan scanners.
FUJITSU SCANNERS
Cardiris supports Fujitsu scanners thanks to the ScanSnap
Manager software.
Operation
Click the Application tab of the ScanSnap Manager software to
select Cardiris as target application.
Use the other tabs (e.g. Sanning, Paper Size) of the ScanSnap
Manager to set the scanning parameters.
Scan images. They will be sent to Cardiris automatically.
UNSUPPORTED SCANNERS
Should your scanner currently not be supported by the Cardiris
software, then scan business cards as images.
The following image formats can be imported in Cardiris: GIF,
JPEG, JPEG 2000, MacPaint, Photoshop, PICT, PNG, QuickTime,
9
Page 18

Chapter 2 – Installation
TIFF (uncompressed, packbits and Group 3 compressed), multipage
TIFF and Windows bitmap (BMP).
Contact I.R.I.S. to acquire supported scanners.
10
Page 19

CardirisTM 4 – User Guide
CHAPTER 4
CANNING CARDS
S
SCANNING BUSINESS CARDS
Click the scanner icon in the vertical toolbar to select the
appropriate scanner.
Open the Cardiris menu and click Preferences to specify the
correct scanner settings.
Select a scanning resolution of 400 dpi to recognize business cards
successfully.
Make sure to calibrate the IRISCard Pro or IRISCard Mini when
you’re using it for the first time. To do so, insert the white calibration
card supplied with your business card scanner and click Calibrate
under the Process menu.
Select Business cards as document type.
Only when the document type Business cards is selected, will the
data on the card be recognized and assigned to the appropriate data
fields.
11
Page 20
Chapter 4 – Scanning Cards
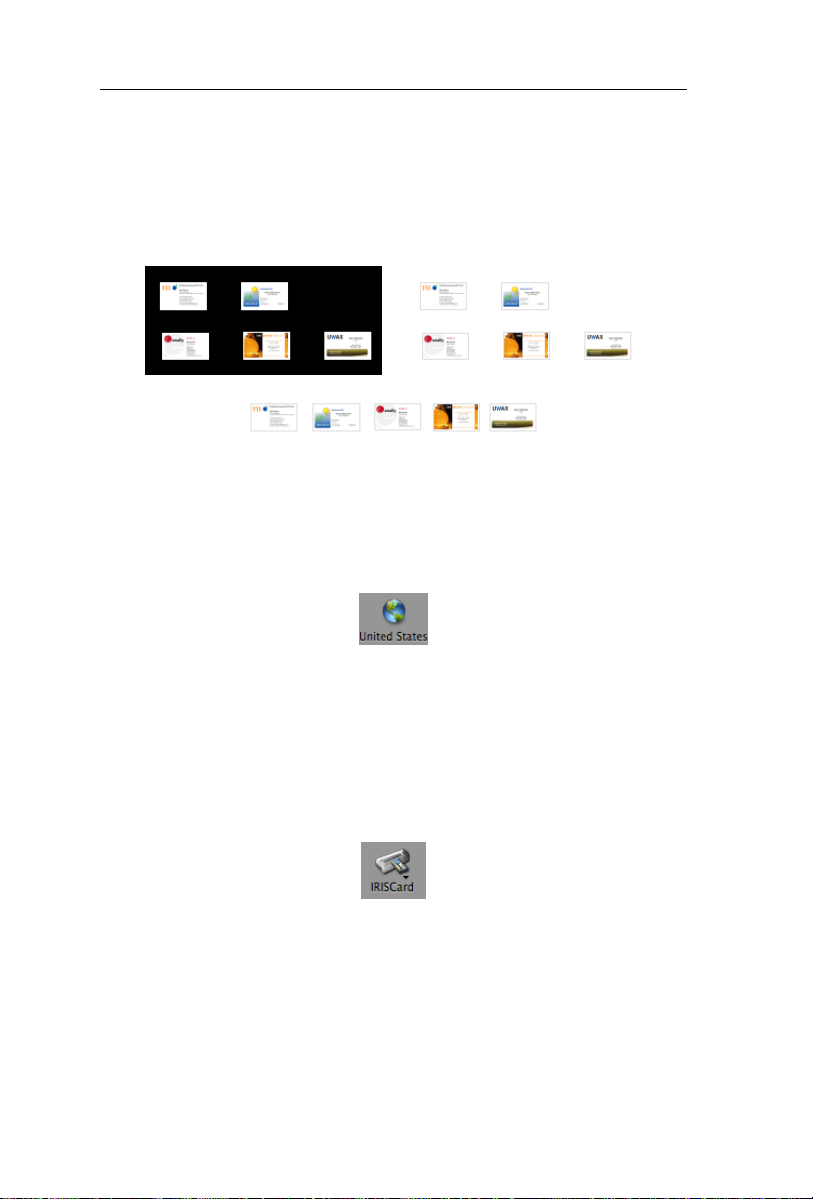
When you're scanning with a flatbed scanner, you can scan several
cards simultaneously on the flatbed and have them split up by the
software. The background must be black to extract the various
business cards. To create a black background, scan cards with the lid
open.
The complete page as you scanned it will never appear as such on the
computer screen; only the segmented business cards will.
Specify the card style of the business cards: click the globe icon
to select the country the business card belongs to.
You can activate one card style at a time.
Apply drag-and-drop OCR in case you need only part of the data on
the card.
Scan the business cards with your scanner - the card recognition
is automatic.
Note that the option Card Orientation Detection is enabled
automatically to have the business cards straightened for you.
To disable automatic card orientation:
Go to the Settings menu
12
Page 21
CardirisTM 4 – User Guide
Uncheck the option Card Orientation Detection
Should you still need to rotate an image, use the manual rotation
button.
Note that Cardiris deskews and crops all scanned business cards
automatically.
You can also crop manually by drawing a frame around the actual
card and clicking the Crop button.
You can undo a crop operation with the Undo command and with the
Revert command under the View menu.
When you crop a business card, the recognition is re-executed.
Cardiris can also scan the reverse side of a business card and add a
photo of your contacts to the database. See the sections Scan the
reverse side of a card and Scan a photo of a contact for more
information.
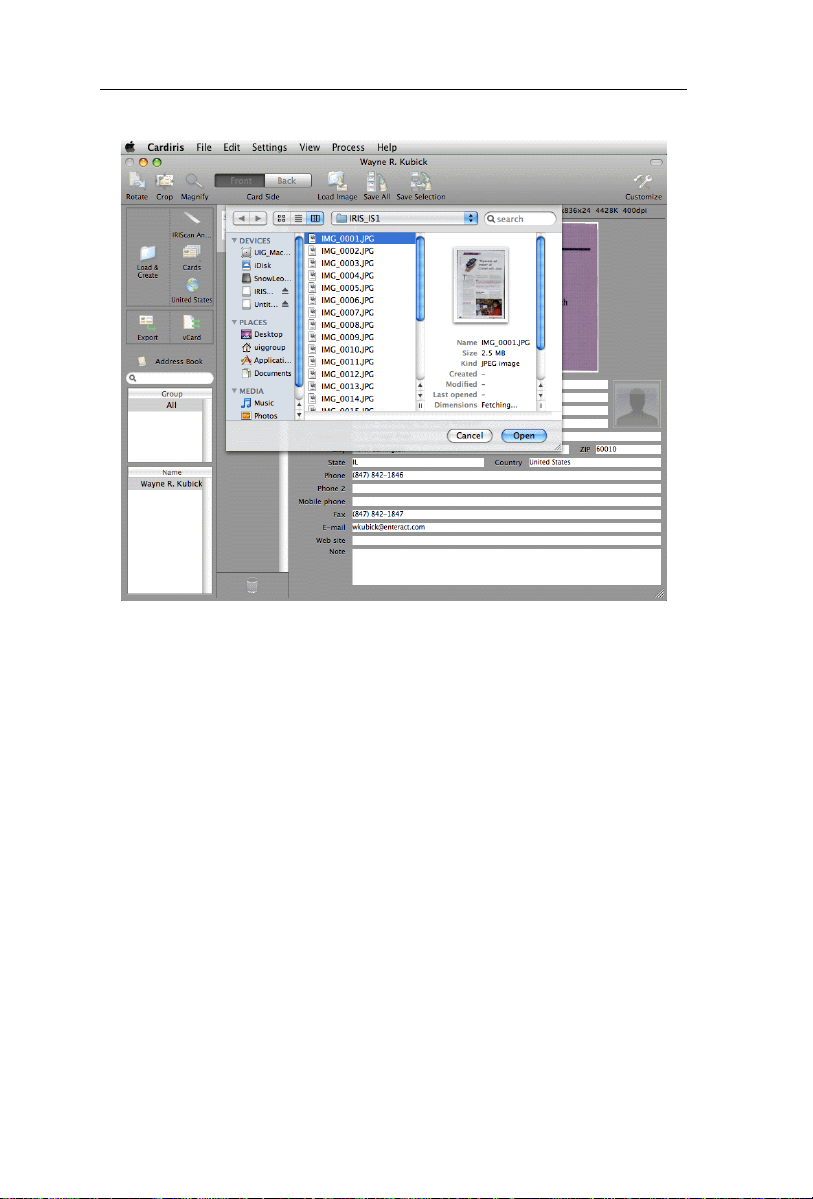
LOADING IMAGES FROM THE IRISCAN AND IRISCARD ANYWHERE SCANNERS
When you use Cardiris in combination with an IRIScan Anywhere
2 scanner or an IRISCard Anywhere 4 scanner, you can scan
your business cards anywhere you want without needing a computer
and load them into Cardiris at a later time.
13
Page 22

Chapter 4 – Scanning Cards
Operation
If you decide to use an external storage device (SD memory card
or USB flash drive) to store your scans, insert it into the scanner.
Scan your business cards with your IRIScan Anywhere 2 scanner
or IRISCard Anywhere 4 scanner.
For information on how to use these scanners correctly, refer to
the scanners' Quick User Guides or User Guides.
The paper Quick User Guide can be found in the package box.
To access the electronic User Guides:
o Click Finder > Applications > IRIScan Anywhere 2
Scanner User Guides > IRIScan Anywhere-English.pdf.
or
o Click Finder > Applications > IRISCard Anywhere 4
Scanner User Guides > IRISCard AnywhereEnglish.pdf.
In case you stored your documents on an external storage device
(SD memory card or USB flash drive), insert the storage device
into your computer.
In case you used the scanner’s internal memory to store your
documents, power on the scanner and connect it to your
computer.
Open the Cardiris interface. A window will open, prompting
you to load the images from your IRIScan/Card Anywhere
scanner.
Select the images you want to load and click Open.
14
Page 23
CardirisTM 4 – User Guide
The data on the card will be recognized and assigned to the
different data fields.
Note: the country of the business cards is set to United States by
default. To change the country, click the globe button on the main
toolbar before loading the business cards.
Loading images at a later time
Click the Load & Create button on the main toolbar.
Browse for the images you want to load.
15
Page 24
Chapter 4 – Scanning Cards
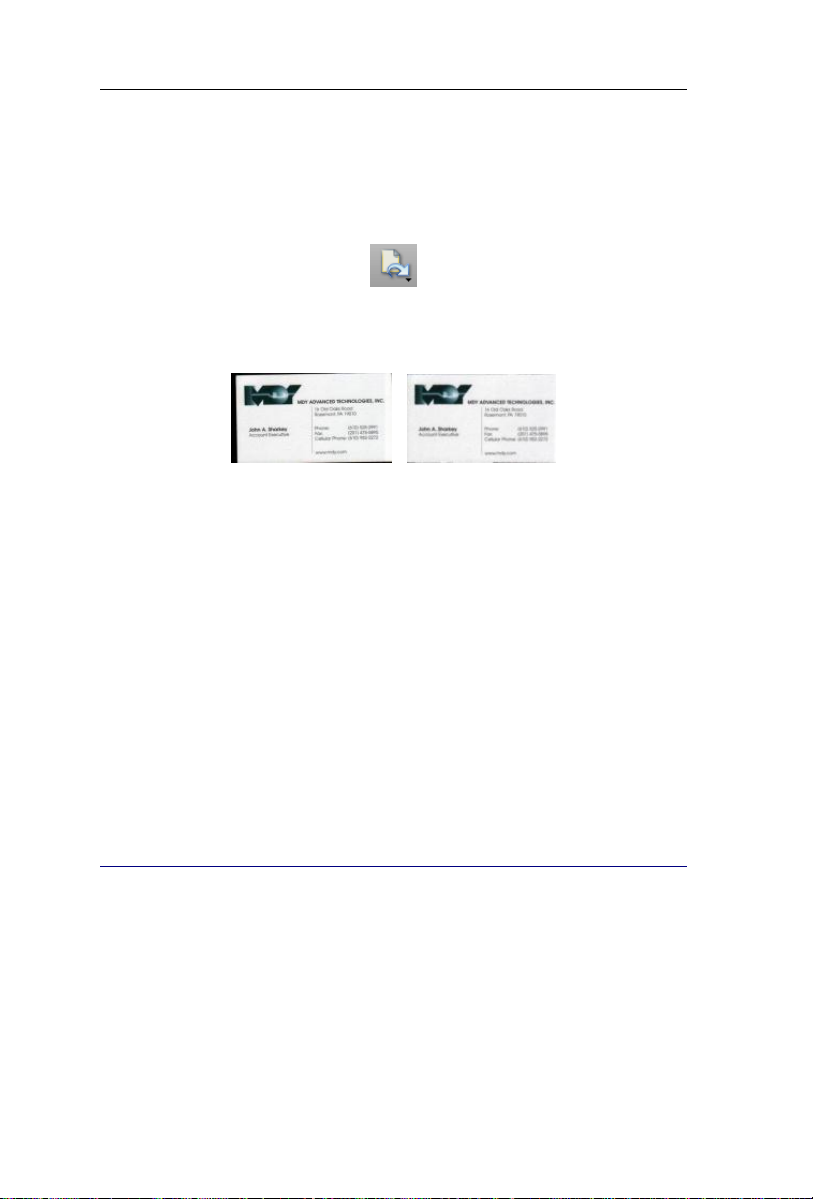
SCANNING THE REVERSE SIDE OF A CARD
Often business cards contain important additional information on
the reverse side, such as personal cell phone numbers, company
logos, etc. Therefore Cardiris offers the possibility to scan both the
front and reverse side of a card and to store the information under
the same contact.
Operation
Select the card of which you want to scan the reverse side by
clicking on it.
Select the Back tab in the toolbar menu.
The selected tab is highlighted in dark gray.
Click the Scan/Open Image button to scan the reverse side.
16
Note that the reverse side of a card is only scanned, and not
recognized. Drag-and-drop operations are available, however, to
execute drag-and-drop OCR.
Make sure to click the Scan/Open image button to scan the reverse
side of a card. Clicking the Scan/Open & Create button in the
vertical toolbar will scan the reverse side as a new business card.
Page 25

CardirisTM 4 – User Guide
SCANNING A PHOTO OF A CONTACT
Next to textual information about your contacts, Cardiris allows you
to include their photo.
Operation
Select the card you want to add a photo to in the card toolbar.
Select the Photo area by clicking on it.
Click the Scan Image button.
RECOGNIZING CARDS WITH DRAG-AND-DROP OCR
In case you need just part of the data on a business card, you can
recognize the card with drag-and-drop OCR.
Draw a frame around the information you need and drag that frame
with your mouse to the dedicated field. The recognition is executed
and the data is placed in the selected field.
17
Page 26
Chapter 4 – Scanning Cards
ADDING COMMENTS TO CARDS
The auto-comment function allows you to add comments to series
of business cards.
Operation
Go to the Settings menu.
Click the option Auto-comment.
You can either add the current date or your personal comment to
the business cards.
You can enter a maximum of 250 characters.
The comment will be added to the Note field of each card you
scan.
18
Page 27

CardirisTM 4 – User Guide
EDITING RECOGNIZED CARDS
The information recognized by Cardiris can be edited in several
ways.
Data Fields
Unrecognized characters are represented by a tilde.
Any data the OCR process cannot assign to a specific field is placed
in the Note field.
Don't hesitate to add manually entered comments to the Note field.
Text Editing
The command Undo undoes cut, copy, paste, clear and crop
operations.
The command Cut transfers the selected data to the clipboard.
The command Copy copies the selected data to the clipboard.
The command Paste inserts the data contained in the clipboard.
The command Clear erases the selected data.
The command Remove from Group removes the selected card
from the database group.
The command Select All selects all text in the current data field.
When you re-execute the OCR, Cardiris erases all data and fills them
out again.
19
Page 28

Chapter 4 – Scanning Cards
Drag-and-drop Editing
Drag-and-drop operations allow to edit the recognized data with
great comfort.
They are particularly useful when mixed data was put in the Note
field and has to be transferred to different fields.
To move data to another field, select the data with the mouse and
drag it to the target field. Release the mouse button when the cursor
is in the right position.
Drag-and-drop operations add data to a field at the selected cursor
position. The data of the target field is not erased.
Selecting Text
When the text cursor is placed in a database field, the command
Select All selects all text in that field.
Normally, this command selects all cards.
You can delete, move, rotate and export all cards simultaneously.
Deleting Cards
The command Clear erases the selected card(s).
Another way to delete cards, is selecting them in the card toolbar
and dragging them to the trash can of the toolbar.
When a single card is loaded into memory, deleting it closes the
current series of business cards.
20
Page 29

CardirisTM 4 – User Guide
RE-RECOGNIZING BUSINESS CARDS
Should you have forgotten to select the proper country, just reexecute the OCR.
Operation
Select the card(s) in the card toolbar.
Ctrl-click one card and select another country.
The recognition and field analysis get redone for all selected cards;
Cardiris erases all data and fills them out again.
SAVING CARDS IN THE CARDIRIS DATABASE
As soon as you have scanned your business cards they can be saved
in the Cardiris database.
21
Page 30

Chapter 4 – Scanning Cards
Note that business cards scanned as Image cannot be stored in the
database.
Operation
You can either save all the cards you scanned or a selection of
cards.
Click the Save All button to store all scanned cards in the
Cardiris database/Apple Address Book.
Click the Save Selection button to store a selection of cards in
the Cardiris database/Apple Address Book.
When a contact already exists in the database - that is when the first
and last name of the contact are the same - you are prompted whether
to replace the existing contact.
You can also save all scanned cards automatically in the Cardiris
database/Apple Address Book.
Operation
Open the Cardiris menu and click Preferences
Select the option Automatically save all acquired cards to the
AddressBook.
22
Page 31

CardirisTM 4 – User Guide
When you're scanning many business cards you can create a new
group of contacts in the database. Click the New Group command
under the File menu to do so.
To create a new group automatically, select the corresponding
option in the Preferences menu: Create a new Address Book
group when saving cards.
SYNCHRONIZING CONTACTS
The free Apple iSync software allows you to synchronize your
contacts across Mac computers and other devices - iPod or Palm OS
hand-held computers and (Bluetooth compatible) mobile phones.
Operation
Go to Preferences under the Cardiris menu.
Select the option Use iSync to synchronize addresses.
When you save contacts in the Cardiris database, iSync
synchronizes them across Mac computers and other devices - Apple
iPod or Palm OS hand-held computers and (Bluetooth compatible)
mobile phones.
Make sure to disable this option when you edit the recognition
results inside the contact manager. Otherwise you'll find yourself
transferring contacts that haven't been validated yet.
23
Page 32

Chapter 4 – Scanning Cards
To store contacts manually on an Apple iPod, use a PDA as external
hard disk and drag the vCard file(s) to the folder Contacts.
FORMATTING RECOGNIZED CARDS
Before recognized cards can be exported, their output format must
be specified.
Business cards can be saved in three different output formats: in
vCard files, Unicode files and HTML files.
vCard files
The output format is set to vCard files by default.
vCard files can also be swiftly imported into any vCard compliant
application e.g. Microsoft Entourage.
Select the option Send to - Add Application to define target
applications that were not preprogrammed.
Use this option to send contacts to your mail software for instance. A
new e-mail message will be opened and the vCard file will be added
as attachment.
Scanned cards can also be exported instantly by means of drag-anddrop operations. One vCard file per card is created on the Desktop.
Double-click the vCard file to add the contacts to the Apple Address
Book.
24
Page 33

CardirisTM 4 – User Guide
Unicode files
A very practical target application for unicode files is Microsoft
Excel. The different data fields of Cardiris are converted into
columns containing the correct information about your contacts.
Change the output format to Unicode to save contacts as a
structured text file.
Select the appropriate field delimiter to separate the various
database fields.
Click the option Include field names to add the name of each
data field in front of the actual data.
HTML files
Exporting scanned cards to HTML files allows to create data sheets
containing both the recognized data and the card logo. That way the
business cards are archived electronically.
25
Page 34

Change the output format to HTML.
Chapter 4 – Scanning Cards
Click the option Include field Names to add the name of each
data field in front of the actual data.
Click the option Include card images to store the card image in
the HTML file.
Note that you must always click the Export button to export the cards.
Note that you can export contacts several times and in several formats.
Just change the output format and click the Export button again.
Use the iSync option to synchronize your contacts across several
devices automatically.
26
Page 35

CardirisTM 4 – User Guide
EXPORTING RECOGNIZED CARDS
Once you have scanned your business cards, they are available for
export. They can be sent to databases, contact managers, personal
information managers (PIM), word processors, spreadsheets etc.
Operation
Before exporting the cards, you must first choose the output
format.
Export all cards by clicking the Export button.
Or export a selection of cards:
o Click a card to select it.
o Select the first card and hold the Shift key to select a
continuous range of business cards.
o Select the first card and hold the Cmd key to select extra
business cards.
o Click the command Export Selected Cards under the
Process menu.
You can also export recognized business cards instantly by dragging
their image from the card toolbar to the desktop. A vCard file is
created on the fly. If you selected several contacts, one vCard file is
created per contact.
To store the contacts on an Apple iPod, use the PDA as external hard
disk and drag the vCard files to the folder Contacts.
27
Page 36

Chapter 4 – Scanning Cards
28
Page 37

CardirisTM 4 – User Guide
CHAPTER 5
CANNING IMAGES
S
SCANNING AND SAVING IMAGES
Click Preferences under the Cardiris menu to select the
appropriate scanning mode.
Cardiris supports black-and-white, grayscale and color images.
Select Image as document type.
Ctrl-click an image in the card toolbar to change its document type.
Select your output target.
Cardiris supports the following image formats: GIF, JPEG, JPEG
2000, MacPaint, Photoshop, PICT, PNG, QuickTime, TIFF
(uncompressed, packbits and Group 3 compressed), multipage TIFF
and Windows bitmap (BMP).
29
Page 38

Chapter 5 – Scanning Images
By default the option Ask file name and location is checked. The
user is prompted to save the scans in external files.
Choose the target explication in the Export to menu.
The Export to feature offers a direct link between your scanner and
your Mac OS photo editing applications. When no target application is
chosen, the images will be sent to the standard Mac OS application
Preview.
Click the Export button to export your scans.
You can export scanned images instantly by dragging them from the
card toolbar to the desktop. The JPEG images are created on the fly.
30
Page 39

CardirisTM 4 – User Guide
CHAPTER 6
S
CANNING CARDS
USING THE BUTTON MANAGER
(This section does not apply to Cardiris delivered with your IRIScan Anywhere
With the Button Manager you can scan business cards and export
them instantly as images without having to use the Cardiris
software.
Operation
Select the Button Manager icon in the Dock or in the
Applications menu.
Note that the Button Manager and the scanner buttons on the
IRISCard Pro are disabled when the scan source of the Button
Manager and the scan source of Cardiris are set to the same scanner.
Notice the padlock on the Button Manager icon.
As soon as you exit Cardiris or set its source to File or a different
scanner type, the Button Manager is available.
Go to Preferences in the Button Manager menu to specify the
settings and to choose the scanning mode you want to use.
scanner)
31
Page 40

Chapter 6 – Scanning cards using the Button Manager
By means of the Button Manager you can either scan cards:
automatically when the scanner senses a card, or;
manually by means of the scanner buttons.
To each of the two scanner buttons, one of four actions can be
assigned:
scan the card and save the image to the IRISCard folder (inside
the Documents folder);
The image will be stored as a JPEG file.
scan the card and save the image to a file;
You are prompted to save the card image in any of the common photo
viewing applications.
32
Page 41

CardirisTM 4 – User Guide
scan the card and send it to Cardiris;
The Cardiris program opens automatically.
scan the card and send it by e-mail.
A new e-mail message, containing the card image, opens
automatically.
33
Page 42

Page 43

CardirisTM 4 – User Guide
CHAPTER 7
EFERENCE INFORMATION
R
HORIZONTAL TOOLBAR
Rotate
By default Cardiris applies automatic card orientation detection.
You can also rotate images manually.
Operation
Click the Rotate icon to rotate the selected cards 90° to the right,
90° to the left and 180°.
The recognition is re-executed automatically after the rotation.
Crop
The Crop button allows you to crop scanned cards and images
manually: just draw a frame around the card image and click the
button.
Note that the recognition is re-executed when you crop manually.
35
Page 44

Chapter 7 – Reference Information
Magnifying Glass
Click the Magnifying Glass button on the toolbar and drag the
mouse over the card image to enable the magnifying glass.
OR
Shift-click the mouse button to display the magnifying glass.
Front - Back Tab
Often business cards contain important additional information on
the reverse side, such as personal cell phone numbers, company
logos, etc. Therefore Cardiris offers the possibility to scan both the
front and reverse side of a card and to store the information under
the same contact.
Operation
Select the card of which you want to scan the reverse side by
clicking on it.
Select the Back tab in the toolbar menu.
The selected tab is highlighted in dark gray.
Click the Scan/Open Image button to scan the reverse side.
36
Page 45

CardirisTM 4 – User Guide
Note that the reverse side of a card is only scanned, and not
recognized. Drag-and-drop operations are available, however, to
execute drag-and-drop OCR.
Make sure to click the Scan/Open image button to scan the reverse
side of a card. Clicking the Scan/Open & Create button in the
vertical toolbar will scan the reverse side as a new business card.
Scan/Open/Load Image Button
Often business cards contain important additional information on
the reverse side, such as personal cell phone numbers, company
logos, etc. Therefore Cardiris offers the possibility to scan both the
front and reverse side of a card and to store the information under
the same contact.
Operation
Select the card of which you want to scan the reverse side by
clicking on it.
Select the Back tab in the toolbar menu.
The selected tab is highlighted in dark gray.
Click the Scan/Open Image button to scan the reverse side.
Note that the reverse side of a card is only scanned, and not
recognized. Drag-and-drop operations are available, however, to
execute drag-and-drop OCR.
37
Page 46

Chapter 7 – Reference Information
Make sure to click the Scan/Open image button to scan the reverse
side of a card. Clicking the Scan/Open & Create button in the
vertical toolbar will scan the reverse side as a new business card.
Note: when an IRISCard Anywhere 4 or IRIScan Anywhere 2
scanner is connected to your computer, or one of its storage devices is
inserted, the Load Image button is displayed, instead of the
Scan/Open Image buttons.
Save All Button
Once you have scanned your business cards they can be saved in
the Cardiris database.
Operation
Click the Save All button in the toolbar to store all scanned cards
in the Cardiris database.
OR
Click the Save All Cards command in the File menu.
All the cards will be stored and sent to Apple Address Book.
When a contact already exists in the Address Book, you are prompted
whether you want to replace it or not.
Note that the Save All button and Save All Cards command are
disabled when you select Image as document type.
You can also save a selection of cards.
38
Page 47

CardirisTM 4 – User Guide
Note that you can also save scanned cards automatically by selecting
the option Automatically save all acquired cards to the
AdressBook in the Preferences menu.
Save Selection Button
Once you have scanned your business cards they can be saved in
the Cardiris database.
Operation
Select the cards you want to save by clicking on them and
holding the ctrl-key.
Click the Save Selection button in the toolbar to store a selection
of scanned cards in the Cardiris database.
OR
Click the Save Selected Cards command in the File menu.
The selection of cards will be stored and sent to Apple Address Book.
When a contact already exists in the Address Book, you are prompted
whether you want to replace it or not.
Note that the Save Selection button and Save Selected Cards
command are disabled when you select Image as document type.
Customize
The Customize button allows you to determine the toolbar style.
You can add and remove buttons, change their location on the
toolbar and determine the button style.
39
Page 48

Chapter 7 – Reference Information
Operation
Click the Customize button.
Add buttons to the toolbar by selecting them in the button list
and dragging them to the toolbar.
Remove buttons from the toolbar by dragging them to the button
list.
You can also determine the look of the toolbar: choose to display
Icons & Text, Icons only or Text only.
VERTICAL TOOLBAR
Scan & Create - Open & Create
Depending on the input source, the buttons Scan & Create or Open
& Create will be displayed in the interface.
Scan & Create
The Scan & Create button will be displayed when the source is
set to a scanner.
40
Page 49

CardirisTM 4 – User Guide
Select the document type in which you want the card to be
scanned.
Click the Scan & Create button to scan cards.
Note: in case you have chosen the document type Business cards,
make sure to select the card style before scanning. The recognition is
automatic.
Open & Create
The Open & Create button will be displayed when the source is
set to File.
Select the document type in which you want the prescanned file
to open.
Note: in case you have chosen the document type Business card,
make sure to select the card style before scanning. The recognition is
automatic.
Cardiris deskews and crops all scanned business cards
automatically.
Cardiris opens black-and-white, grayscale and color images.
41
Page 50

Chapter 7 – Reference Information
Cardiris supports the following image formats GIF, JPEG, JPEG
2000, MacPaint, Photshop, PNG, Quicktime, TIFF (uncompressed,
packbits and Group 3 compressed), multipage TIFF and Windows
bitmap (BMP).
Load & Create
When an IRISCard Anywhere 4 or IRIScan Anywhere 2 scanner
is connected to your computer, or one of its storage devices is
inserted, the Load & Create button is displayed in the interface.
Click the Load & Create button to load your IRISCard/IRIScan
Anywhere images.
Scanner Type - File
Depending on the source input the Scanner icon or File icon will
be displayed in the toolbar.
Scanner
Select your scanner model - the scanner has to be connected to your
computer and ready to use.
File
When you select File as input source, the Open & Create button
allows you to open prescanned cards.
42
Page 51

CardirisTM 4 – User Guide
Document Type - Business cards
Before you start to scan cards, you must first select the document
type.
Cards can either be scanned as Business cards or as Image.
When you scan cards as Business cards, the data on the cards will
be recognized and assigned to the designated data fields.
Operation
Click the document type icon to select it.
Note: the document type is set to Business cards by default.
In order to change the document type of a scanned card: ctrl-
click the card and select the other document type.
Note: in case you're using a flatbed scanner, you can scan several
cards simultaneously on the flatbed and have them split up by the
software. The background must be black if Cardiris is to extract the
various business cards.
Document Type - Image
Before you start to scan cards, you must first select the document
type.
Cards can either be scanned as Business cards or as Image.
When you scan cards as Images, the data on the card will not be
recognized but the card image will be opened in Cardiris.
Operation
43
Page 52

Chapter 7 – Reference Information
Click the document type icon to select it.
Note: the document type is set to Business cards by default.
In order to change the document type of a scanned card: ctrl-
click the card and select the other document type.
Cardiris supports black-and-white, grayscale and color images.
Cardiris also supports the following image formats: GIF, JPEG,
JPEG 2000, MacPaint, Photoshop, PICT, PNG, QuickTime, TIFF
(uncompressed, packbits and Group 3 compressed), multipage TIFF
and Windows bitmap (BMP).
Scanned images are available for export to your Mac OS photo
editing applications.
Card Style
The style and layout of business cards differ from one country to
another. In order for Cardiris to recognize data on a card, you must
first specify the card style.
Operation
Click the globe icon to set the card style.
Based on the selection of a country, Cardiris knows which
language to recognize.
Note that the globe icon is disabled when the document type is set to
Image.
44
Page 53

CardirisTM 4 – User Guide
Note that some card styles correspond to several languages. Canada
has two official languages, Switzerland and Belgium have three.
Cardiris detects the selected language automatically.
Output Format - Cards
Before recognized cards can be exported, their output format must
be specified.
Business cards can be saved in three different output formats: in
vCard files, Unicode files and HTML files.
vCard files
The output format is set to vCard files by default.
vCard files can also be swiftly imported into any vCard compliant
application e.g. Microsoft Entourage.
Select the option Send to - Add Application to define target
applications that were not preprogrammed.
Use this option to send contacts to your mail software for instance. A
new e-mail message will be opened and the vCard file will be added
as attachment.
Scanned cards can also be exported instantly by means of drag-anddrop operations. One vCard file per card is created on the Desktop.
Double-click the vCard file to add the contacts to the Apple Address
Book.
45
Page 54

Chapter 7 – Reference Information
Unicode files
A very practical target application for unicode files is Microsoft
Excel. The different data fields of Cardiris are converted into
columns containing the correct information about your contacts.
Change the output format to Unicode to save contacts as a
structured text file.
Select the appropriate field delimiter to separate the various
database fields.
Click the option Include field names to add the name of each
data field in front of the actual data.
HTML files
Exporting scanned cards to HTML files allows to create data sheets
containing both the recognized data and the card logo. That way the
business cards are archived electronically.
46
Page 55

CardirisTM 4 – User Guide
Change the output format to HTML.
Click the option Include field names to add the name of each
data field in front of the actual data.
Click the option Include card images to store the card image in
the HTML file.
Note that you must always click the Export button to export the cards.
Note that you can export contacts several times and in several formats.
Just change the output format and click the Export button again.
Use the iSync option to synchronize your contacts across several
devices automatically.
47
Page 56

Chapter 7 – Reference Information
Output Format - Image
Before images can be exported, their output format must be
specified.
Operation
Click the output format icon to select the output format.
Note: the output format is set to Tiff by default.
By default the option Ask file name and location is checked.
The user is prompted to save the scans in external files.
The Export to feature offers a direct link between your scanner
and your Mac OS photo editing applications. When no target
application is chosen, the images will be sent to the standard
Mac OS application Preview.
Cardiris supports the following image formats: GIF, JPEG, JPEG
2000, MacPaint, Photoshop, PICT, PNG, QuickTime, TIFF
(uncompressed, packbits and Group 3 compressed), multipage TIFF
and Windows bitmap (BMP).
48
Page 57

CardirisTM 4 – User Guide
Export - Cards
Once you have scanned your business cards they are available for
export.
First choose the output format you want to use, then click Export.
All the cards will be sent to the application of your choice.
In case you only need to export a selection of cards, click the
button Export Selected Cards under the Process menu.
You can also drag their image from the card toolbar to the desktop.
A vCard file per contact will be created on the fly.
Export - Image
Once you have scanned the card images they are available for
export.
First choose the output format, then click the Export button.
All the card images will be sent to the application of your choice.
In case you only need to export a selection of cards, click the
button Export Selected Cards under the Process menu.
You can also drag their image from the card toolbar to the desktop.
A JPEG file per contact will be created on the fly.
49
Page 58

Chapter 7 – Reference Information
Address Book
Cards that are saved in the Cardiris database are also stored in the
Apple Address Book. In fact both applications are one and the
same.
Operation
Click the Save All or Save Selection button to store the scanned
cards in the database.
Or use the Save All Cards or Save Selected Cards command
under the File menu.
When a contact already exists in the Address Book, you are prompted
whether you want to replace it or not.
You can also save cards automatically in the Address Book.
Operation
Open the Cardiris menu and click Preferences.
Select the option Automatically save all acquired cards to the
AddressBook.
50
Page 59

CardirisTM 4 – User Guide
When you are scanning numerous series of cards, you can create a
new contact group for each series.
Operation
Go to the File menu and click New Group.
Ctrl-click the group to rename it.
Select the group you want to store your contacts in and click
Save All or Save Selection.
You can also create a new AddressBook group automatically.
Operation
Open the Cardiris menu and click Preferences.
Select the option Create a new AddressBook group when
saving cards.
A new group will be created, using the current date as name.
You can search contacts in the database by means of the search window.
You can delete contacts or entire groups by dragging their image to the trash
can icon of the program.
Synchronize contacts in the Address Book by means of iSync.
51
Page 60

Chapter 7 – Reference Information
CARD TOOLBAR
Selecting Cards
The current card is highlighted.
Click a card to select it.
Select the document type of the selected card. You can choose
between Business Card and Image.
Select the first card and hold the Shift key to select a continuous
range of business cards.
Select the first card and hold the Cmd key to select extra
business cards.
Use the command Select All to select all cards.
You can delete, move, rotate and export the selected cards
simultaneously.
You can re-execute the recognition of the selected cards.
Changing the Document Type
You can change the document type of the selected cards
simultaneously.
Ctrl-click the selected cards and select the other document type.
52
Page 61

CardirisTM 4 – User Guide
Changing the Card Style
You can change the card style of the selected cards simultaneously.
Ctrl-click the selected cards and select another country.
The recognition is re-executed for the selection of cards.
Browsing the Cards
Click the up-arrow and down-arrow to go the previous and next
card respectively.
Click Home and End to go the first and last card respectively.
You can export the selected cards instantly by dragging their image
from the card toolbar to the desktop. A vCard file is created on the fly
per contact.
Drag cards to another location in the card toolbar in case you need to
change the order of the cards.
Deleting Cards
To delete one or several cards, drag their image to the trash can of
Cardiris.
OR
Ctrl-click one or several cards and select delete image to delete the
card image only.
53
Page 62

Chapter 7 – Reference Information
APPLICATION WINDOW
Image
The card image of the selected card is displayed in the image
window.
By default Cardiris crops the scanned card automatically. You can
also crop manually, however, by means of the Crop button.
Use drag-and-drop operations to move information to specific data
fields.
Use the Rotate button to rotate the card image.
Use the Magnify button to magnify parts of the card.
Use the Back tab to view or scan the reverse side of the card.
To delete the card image, ctrl-click the card in the card toolbar and
select Delete Image.
54
Page 63

CardirisTM 4 – User Guide
Status Bar
Progress Info
The status bar displays the system progress.
Image Info
Displays the image size (in image pixels and in KB), the image type
(bit depth) and the image resolution of the current image.
Tooltips
Hold your mouse pointer over a button: the status bar displays its
tooltip.
Data Fields
The recognized information is sent to the appropriate data fields.
Unrecognized characters are represented by a tilde.
55
Page 64

Chapter 7 – Reference Information
Any data the OCR process cannot assign to a specific field is placed
in the Note field.
You can also add personal comments to the Note field.
The information in the data fields can be edited by means of text
editing and drag-and-drop editing. Drag-and-drop operations are
particularly useful when mixed data was put in the Note field and
has to be transferred to other fields:
To move data to another field, select the data with the mouse and
drag it to the target field.
Drag-and-drop operations add data to a field at the selected
cursor position. The data of the target field is not erased.
Note: when the text cursor is placed in a database field, the command
Select All selects all text in that field. Normally, this command selects
all cards.
Photo Field
Next to textual information about your contacts, Cardiris allows you
to include their photo.
Operation
Select the card you want to add a photo to in the card toolbar.
Select the Photo area by clicking on it.
Click the Scan Image button.
56
Page 65

CardirisTM 4 – User Guide
CARDIRIS MENU
About Cardiris
Displays the Cardiris startup screen with the copyright notices.
Click to make it disappear or click www.irislink.com to get access
to the I.R.I.S. home page.
Preferences
Scanner
Select your scanner model - the scanner has to be connected to
your computer and be ready to use.
Cardiris supports almost every business card scanner, flatbed
scanner and all-in-one MFP (Multifunctional Peripheral)
scanner. Cardiris is Twain compliant.
You'll find information on scanner setup in the ReadMe file.
Refer to this file if you experience any problems with your
scanner, and consult the hardware documentation that came with
it.
To open prescanned business cards, select the File option.
Scanning Resolution
The resolution can be set to 300, 400 and 600 dpi. It is
recommended to use a scanning resolution of 400 dpi to read
business cards successfully.
57
Page 66

Chapter 7 – Reference Information
Note that this is not the standard scanning resolution of a Twain
scanner.
Calibrate
Insert the calibration sheet and click the Calibrate button to
calibrate the scanner.
Format
You can either choose an automatic or custom scanning format, or
you can opt for the Business Card format in which the scanning
dimensions are set to 8.89 cm x 5.08 cm.
When you're using the I.R.I.S. Business card scanners IRISCard
Pro 4 or IRISCard Mini it is recommended to use the automatic
format. Cardiris applies autocropping to reduce the scanned surface
to the calling card. White space around the business card is erased
automatically to obtain the smallest possible images that are
optimally legible.
Select the custom format when you're scanning prescanned images.
Automatic deskewing will not apply here.
Color Mode
Cardiris supports black-and-white, grayscale and color images.
Scan settings of the IRISCard Pro 4 and IRISCard Mini
Select a scanning resolution of 400 dpi
.
58
Page 67

CardirisTM 4 – User Guide
Select the format Automatic. Cropping of the card image is
applied automatically.
The software prompts you to calibrate the IRISCard Pro 4 and
IRISCard Mini when you’re using it for the first time. Insert the white
calibration card supplied with your business card scanner and follow
the on-screen instructions.
Scan Settings of Other Scanner Models
The scanner settings - color mode, resolution, page format and
orientation, brightness and contrast - are set inside the Twain
module.
Other Options
The option Brushed-metal user interface is selected by default.
Uncheck it to create a white user interface.
A uniform case is applied to the recognized fields by default.
You can save all acquired cards automatically to the
AddressBook by clicking the corresponding option.
The Preferences menu offers you the possibility to create a new
Address Book group when saving cards.
Click the iSync option to synchronize addresses across your Mac
devices.
The Preferences menu offers you the possibility to delete files
that have been saved to the AddressBook from the IRISCard
folder.
Quit Cardiris
Quits the Cardiris software.
59
Page 68

Chapter 7 – Reference Information
FILE MENU
The File menu allows you to scan new business cards and open
prescanned ones.
New Card
This command adds a new untitled card to the card toolbar.
You are ready to scan or open a new series of business cards.
New Group
This command adds a new Address Book group to the contact list.
Ctrl-click the new group to rename it.
Scan/Open & Create New Cards
Depending on the input source (scanner or file) the command Scan
& Create New Cards or Open & Create Ne w Cards is displayed.
Scan & Create New Cards scans new business cards.
Open & Create New Cards opens black-and-white, grayscale
and color images of prescanned business cards.
Save All Cards
This command saves all cards to the Cardiris database.
60
Page 69

CardirisTM 4 – User Guide
Save Selected Cards.
This command saves a selection of cards to the Cardiris database.
EDIT MENU
These commands mainly concern text editing in the database
fields.
Text Editing
The command Undo undoes cut, copy, paste, clear and crop
operations.
The command Cut transfers the selected data to the clipboard.
The command Copy copies the selected data to the clipboard.
The command Paste inserts the data contained in the clipboard.
The command Clear erases the selected data.
The command Remove from Group removes the selected card
from the database group.
The command Select All selects all text in the current data field.
61
Page 70

Chapter 7 – Reference Information
SETTINGS MENU
Document Type - Business Cards
Before you start to scan cards, you must first select the document
type.
Cards can either be scanned as Business Cards or as Image.
Operation
Go to the Settings menu, click Document Type and select
Business Cards.
Only when the document type Business cards is selected, will the
data on the card be recognized and assigned to the appropriate data
fields.
Note: the document type is set to Business cards by default.
In order to change the document type of a scanned card: ctrl-
click the card and select Image as document type.
Note: in case you're using a flatbed scanner, you can scan several
simultaneously on the flatbed and have them split up by the software.
The background must be black if Cardiris is to extract the various
business cards.
Document Type - Images
Before you start to scan cards, you must first select the document
type.
Cards can either be scanned as Business Cards or as Image.
When you scan cards as Images, the data on the card will not be
recognized but the card image will be opened in Cardiris.
62
Page 71

CardirisTM 4 – User Guide
Operation
Go to the Settings menu, click Document Type and select
Image.
In order to change the document type of a scanned card: ctrl-
click the card in the card toolbar an select Business cards as
document type.
Cardiris supports black-and-white, grayscale and color images.
The following image formats are supported by Cardiris: GIF, JPEG,
JPEG 2000, MacPaint, Photoshop, PICT, PNG, QuickTime, TIFF
(uncompressed, packbits and Group 3 compressed), multipage TIFF
and Windows bitmap (BMP).
Scanned images are available for export to your Mac OS photo
editing applications.
Country
The style and layout of business cards differ from one country to
another. In order for Cardiris to recognize data on a card, you must
first specify the card style.
Operation
Click the Country command to set the card style.
63
Page 72

Chapter 7 – Reference Information
Based on the selection of a country, Cardiris knows which language
to recognize.
Note that the Country command is disabled when the document type
is set to Image.
Note that some card styles correspond to several languages. Canada
has two official languages, Switzerland and Belgium have three.
Cardiris detects the selected language automatically.
Output Format
Before recognized cards can be exported, their output format must
be specified.
Output Format – Business Cards
Business cards can be saved in three different output formats: in
vCard files, Unicode files and HTML files.
64
Page 73

CardirisTM 4 – User Guide
vCard files
The output format is set to vCard files by default.
vCard files can also be swiftly imported into any vCard compliant
application e.g. Microsoft Entourage.
Select the option Send to - Add Application to define target
applications that were not preprogrammed.
Use this option to send contacts to your mail software for instance. A
new e-mail message will be opened and the vCard file will be added
as attachment.
Scanned cards can also be exported instantly by means of drag-anddrop operations. One vCard file per card is created on the Desktop.
Double-click the vCard file to add the contacts to the Apple Address
Book.
Unicode files
A very practical target application for unicode files is Microsoft
Excel. The different data fields of Cardiris are converted into
columns containing the correct information about your contacts.
Change the output format to Unicode to save contacts as a
structured text file.
Select the appropriate field delimiter to separate the various
database fields.
Click the option Include field names to add the name of each
data field in front of the actual data.
65
Page 74

Chapter 7 – Reference Information
HTML files
Exporting scanned cards to HTML files allows to create data sheets
containing both the recognized data and the card logo. That way the
business cards are archived electronically.
Change the output format to HTML.
Click the option Include field names to add the name of each
data field in front of the actual data.
Click the option Include card images to store the card image in
the HTML file.
Note that you must always click the Export button to export the cards.
66
Page 75

CardirisTM 4 – User Guide
Note that you can export contacts several times and in several formats.
Just change the output format and click the Export button again.
Use the iSync option to synchronize your contacts across several
devices automatically.
Output Format - Images
Select the output target.
By default the option Ask file name and location is checked.
The user is prompted to save the scans in external files.
Choose the target application in the Export to menu.
The Export to feature offers a direct link between your scanner
and your Mac OS photo editing applications. When no target
application is chosen, the images will be sent to the standard
Mac OS application Preview.
67
Page 76

Chapter 7 – Reference Information
Cardiris supports the following image formats: GIF, JPEG, JPEG
2000, MacPaint, Photoshop, PICT, PNG, QuickTime, TIFF
(uncompressed, packbits and Group 3 compressed), multipage TIFF
and Windows bitmap (BMP) images.
Note that you must always click the Export button to export the
cards.
Note that you can export contacts several times and in several
formats. Just change the output format and click the Export button
again.
Card Orientation Detection
By default Cardiris detects the card orientation automatically and
rotates the image when needed.
The Card Orientation option determines whether cards which
were scanned at a 90°, 180° or 270° angle, will be rotated left, right
or turned upside down automatically before the recognition begins.
Detecting the card orientation takes some time, however. Leave this
option disabled when you are sure no image rotation is required.
To disable automatic card orientation:
Go to the Settings menu
Uncheck the option Card Orientation Detection
Should you still need to rotate an image, use the manual rotation
button.
68
Page 77

CardirisTM 4 – User Guide
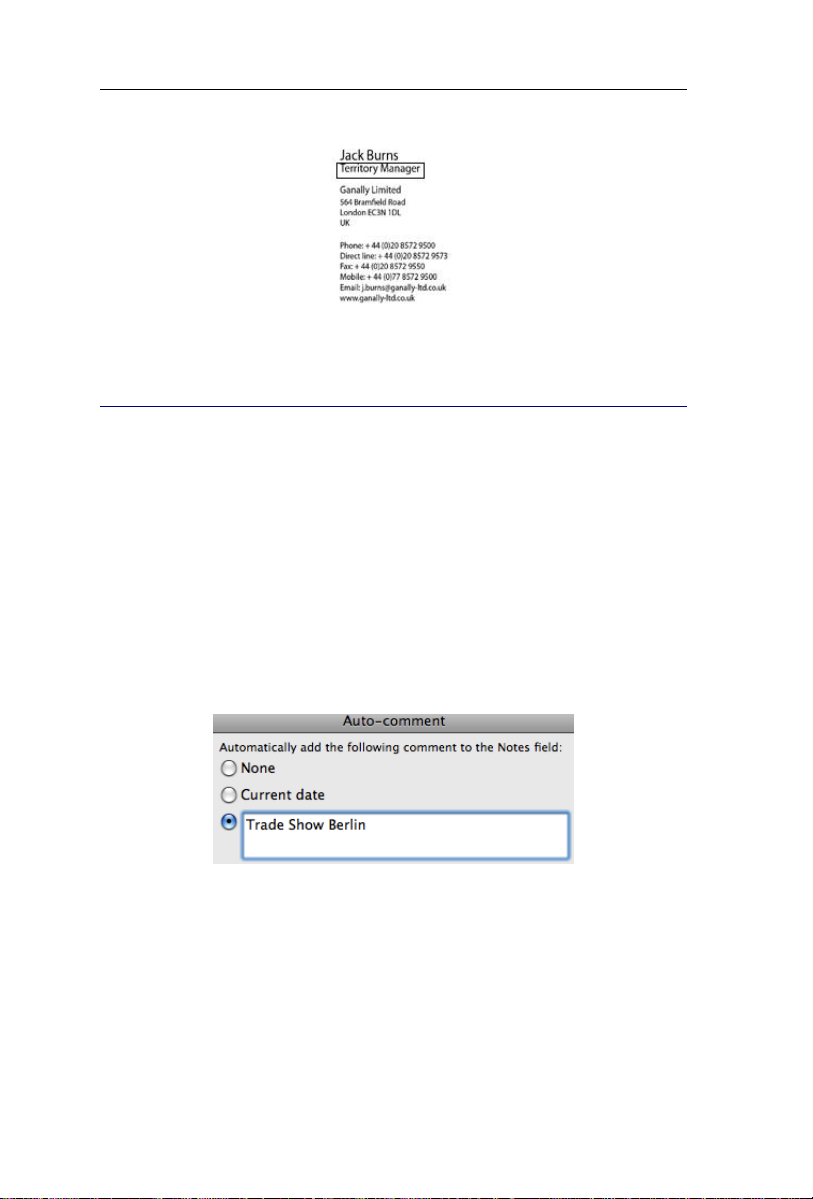
Auto-comment
The auto-comment function allows you to add comments to series
of business cards.
Operation
Go to the Settings menu.
Click the option Auto-comment.
You can either add the current date or your personal comment to
the business cards.
You can enter a maximum of 250 characters.
The comment will be added to the Note field of each card you
scan.
VIEW MENU
Back Side - Front Side
The Back Side - Front Side command flips the business cards and
enables you to scan or view the reverse side of a card.
Note that this command is disabled when the document type Image
is selected.
69
Page 78

Chapter 7 – Reference Information
Rotate
The Rotate command allows you to rotate selected cards 90° to the
right, 90° to the left and 180°.
Note that Cardiris detects the card orientation automatically by
default.
Crop
The Crop command allows you to crop scanned cards and images
manually: just draw a frame around the card image and click the
Crop command.
Note that the recognition is re-executed when you crop manually.
Revert
The Revert command allows you to undo crop operations.
Magnifying Glass
Click the Magnifying Glass command and drag the mouse over the
card image to enable the magnifying glass.
OR
Shift-click the mouse button to display the magnifying glass.
Customize Toolbar
The Customize Toolbar command allows you to determine the
toolbar style. You can add and remove buttons, change their
location on the toolbar and determine the button style.
70
Page 79

CardirisTM 4 – User Guide
Click the Customize Toolbar command.
Add buttons to the toolbar by selecting them in the button list
and dragging them to the toolbar.
Remove buttons from the toolbar by dragging them to the button
list.
You can also determine the look of the toolbar: choose to display
Icons & Text, Icons only or Text only.
PROCESS MENU
Calibrate Scanner
The software prompts you to calibrate the IRISCard Pro 4 or
IRISCard Mini when you’re using it for the first time.
Operation
Click the command Calibrate Scanner
Insert the white calibration card supplied with your business
card scanner.
Click Calibrate.
You can re-calibrate the scanner at any other time by repeating this
process.
71
Page 80

Chapter 7 – Reference Information
Change Selected Cards - Business Card
In order to recognize information on business cards and process it
correctly, the business card reading mode must be activated. To
activate it, select the document type Business cards in the vertical
toolbar.
When the document type is set to Image the card will only be
scanned and the data on it will not be processed.
To change the document type:
Go to the Process menu and click the command Change
Selected Cards.
Select Business Card as document type. The business card
reading mode is enabled and the recognition will be executed.
OR
Ctrl-click a card, or a selection of cards and select Business
Card as document type.
Change Selected Cards - Image
Set the document type to Image in case you want Cardiris to
recapture small pictures (photos, head shots etc.)
To change the document type:
Go to the Process menu and click the command Change
Selected Cards.
72
Page 81

CardirisTM 4 – User Guide
Select Image as document type. The card image will be
displayed and the database fields will be removed.
OR
Ctrl-click a card, or a selection of cards and select Image as
document type.
Change Selected Cards - Country
Should you have forgotten to select the proper country, just reexecute the OCR.
Operation
Select the option Change Selected Cards in the Process menu.
Click the Country command and select the appropriate country.
73
Page 82

Chapter 7 – Reference Information
The OCR will be re-executed.
Change Selected Cards - Delete Image
The Delete Image command deletes the image of the scanned card.
The card information assigned to the database field is not deleted,
however.
Click the Open Image or Scan Image command on the toolbar to
insert a new card image. The recognized data will not be changed.
Note that when the document type is set to Image, the Delete Image
command is disabled for safety reasons: if you were to click the
Delete command, the entire card would be removed and would have
to be re-scanned.
Scan/Open this Side of the Card
Often business cards contain important information on the reverse
side such as private cell phone numbers, company logos etc.
Therefore Cardiris offers the possibility to scan both the front and
74
Page 83

CardirisTM 4 – User Guide
reverse side of a card and store that information under the same
contact.
Operation
Select the card side you want to scan by means of the Front -
Back tabs on the toolbar.
Go to the Process menu and click Scan/Open this side of the
card.
Note: when you set the scan source to IRISCard, the command will
be displayed as Scan this side of the card.
In case you set the scan source to File, the command will be displayed
as Open this side of the card.
Or click the Scan/Open Image button. The new card side will be
scanned or opened.
Note that the new card side will only be scanned, not recognized. The
information in the data fields will not be changed.
You can also execute drag-and-drop OCR on the new card side in case
you need only part of the data.
Export All Cards
Once you have scanned your business cards, they are available for
export. They can be sent to databases, contact managers, personal
information managers (PIM), word processors, spreadsheets etc.
Operation
Before exporting the cards, you must first choose the output
format.
75
Page 84

Chapter 7 – Reference Information
Click the Export All Cards command to export all cards.
The cards will be sent to the application of your choice, which
opens automatically.
Tip: You can also click the Export button on the toolbar to export all
cards.
Tip: it is also possible to export a selection of cards.
Export Selected Cards
Once you have scanned your business cards, they are available for
export. They can be sent to databases, contact managers, personal
information managers (PIM), word processors, spreadsheets etc.
Operation
Before exporting the cards, you must first choose the output
format.
Click a card to select it. The card image will be lit up in blue.
Select the first card and hold the Shift key to select a continuous range
of business cards.
Select the first card and hold the Cmd key to select extra business
cards.
Click the Export Selected Cards command to export the
selection of cards.
The cards will be sent to the application of your choice, which
opens automatically.
76
Page 85

CardirisTM 4 – User Guide
Note: you can also export a selection of cards instantly by dragging
their images to the desktop. For each exported card a vCard or JPEG
file is created on the fly.
HELP MENU
Cardiris Help
Provides general information on business card reading (BCR) and
reference information on Cardiris.
I.R.I.S. on the Internet
Visit the I.R.I.S. website: www.irislink.com.
Register Cardiris
Register online on www.irislink.com/register.
Search for Updates
This command verifies whether updates of the Cardiris software are
available to be downloaded.
77
Page 86

Chapter 7 – Reference Information
IRISCARD BUTTON MANAGER MENU
(This section does not apply to Cardiris delivered with your IRIScan Anywhere scanner)
About IRISCard Button Manager
Displays the Button Manager startup screen with the copyright
notices. Click to make it disappear.
Preferences
Scanning Mode
You can either choose an automatic or custom scanning format, or
you can opt for the Business Card format.
When you select the automatic format, Cardiris applies
autocropping to reduce the scanned surface to the calling card.
White space around the business card is erased to obtain the smalles
possible images that are optimally legible.
When you select the Business Card format, the image is also
cropped automatically, but to the standard dimensions 8.89 cm x
5.08 cm.
In the Custom scanning mode you can specify the card’s
dimensions yourself and decide whether they are displayed in
centimeters or inches.
78
Page 87

CardirisTM 4 – User Guide
Color Depth
Select the appropriate color depth - IRISCard Button Manager
supports black-and-white, grayscale and color images.
Resolution
The resolution can be set to 300, 400 and 600 dpi. It is
recommended to use a resolution of 400 dpi.
Operation Mode
Select the operation mode you want to use.
You can either scan:
automatically when the scanner senses a card, or;
manually by means of the scanner buttons.
To each of the two scanner buttons, one of four actions can be
assigned, namely:
scan the card and save the image to the IRISCard folder;
The image will be saved as a JPEG file.
scan the card and save the image to a file;
79
Page 88

You are prompted to save the card image in any of the common photo
viewing applications.
scan the card and send it to Cardiris;
The Cardiris program opens automatically.
scan the card and send it by e-mail.
A new e-mail message, containing the card image, opens
automatically.
Chapter 7 – Reference Information
Make sure your scanner is properly calibrated before you attempt to
scan cards. The Button Manager will automatically ask you to
calibrate the scanner when necessary.
Note that the Button Manager and the scanner buttons on the
IRISCard Pro cannot be used when the scan source inside Cardiris
is already set to the same scanner. Notice the padlock icon in the
Dock. As soon as Cardiris is exited or its source is set to File or
another scanner, however, the Button Manager is available again.
Also note that the scanner buttons are only operational when the
Button Manager is activated.
80
Page 89

CardirisTM 4 – User Guide
Quit IRISCard Button Manager
Quits the IRISCard Button Manager application.
81
Page 90

Page 91

CardirisTM 4 – User Guide
INDEX
A
Address Book....................... 50
Asian edition .......................... 4
Auto-comment ..................... 69
B
Back side ................... 16, 69, 74
Browsing through cards ....... 53
Button Manager ................... 31
C
Calibration ..................... 58, 71
Card Orientation Detection .. 68
Card style ............................. 44
Cardiris database .................. 21
Color mode .......................... 58
Comments ............................ 18
Delete Image ........................ 74
Document type ......... 43, 62, 72
Drag-and-drop editing .......... 20
Drag-and-drop OCR ............. 17
E
Editing recognized cards ...... 19
Exporting cards ........ 27, 75, 76
Extracting cards .................... 12
F
Format .................................. 58
Front side .................. 16, 69, 74
Fujitsu scanners ...................... 9
H
Help ...................................... 77
HTML .................................. 24
Country .......................... 63, 73
D
Data fields ............................ 55
I
IRIScan Anywhere ............... 13
IRISCard Anywhere ............. 13
83
Page 92

Index
L
Load & Create ...................... 42
Load Image button ............... 37
Loading images from
IRIScan/Card Anywhere ...... 13
M
Magnifying glass ................. 36
O
Open & Create ..................... 40
Open Image button............... 37
Output format...... 24, 45, 48, 64
P
Photo field ............................ 56
Preferences ..................... 57, 78
Product support ...................... 6
R
Re-recognizing cards ........... 21
Resolution ............................ 57
Rotating images ................... 35
S
Save All button .................... 38
Save Selection button ........... 39
Saving cards ......................... 21
Scan & Create ....................... 40
Scan Image button ................ 37
Scanner ................................. 57
Scanner type ......................... 42
Scanning cards ...................... 11
Scanning images ................... 29
Scanning photos ................... 17
Software registration .............. 6
Software updates .................... 6
Synchronizing contacts ......... 23
System requirements .............. 5
T
Twain scanners ....................... 8
U
Unicode ................................ 24
Uninstall Cardiris ................... 6
Unsupported scanners ............. 9
V
VCard ................................... 24
84
 Loading...