

Page 1
IRISCard
mini 4
IRISCard Pro 4
IRISCard 4/Cardiris 4 Getting Started Guide
Product names
The IRISCard Pro 4 and mini 4 products are bundled with their own dedicated Business Card
Scanner. The Cardiris 4 is a software only product and is also the name of the software used on all
product versions. All of them can be used with any twain based scanner to scan the card images,
though the bundled scanners are not twain capable.
It is important to distinguish between the products when downloading updates from our website.
http://www.irislink.com/c2-350-17/Product-Updates.aspx
The IRIScan product also contains the Cardiris versions 3 or 4 software but cannot be updated in that
way.
IRISCard Pro 4
Hardware
Hardware
Sc anning
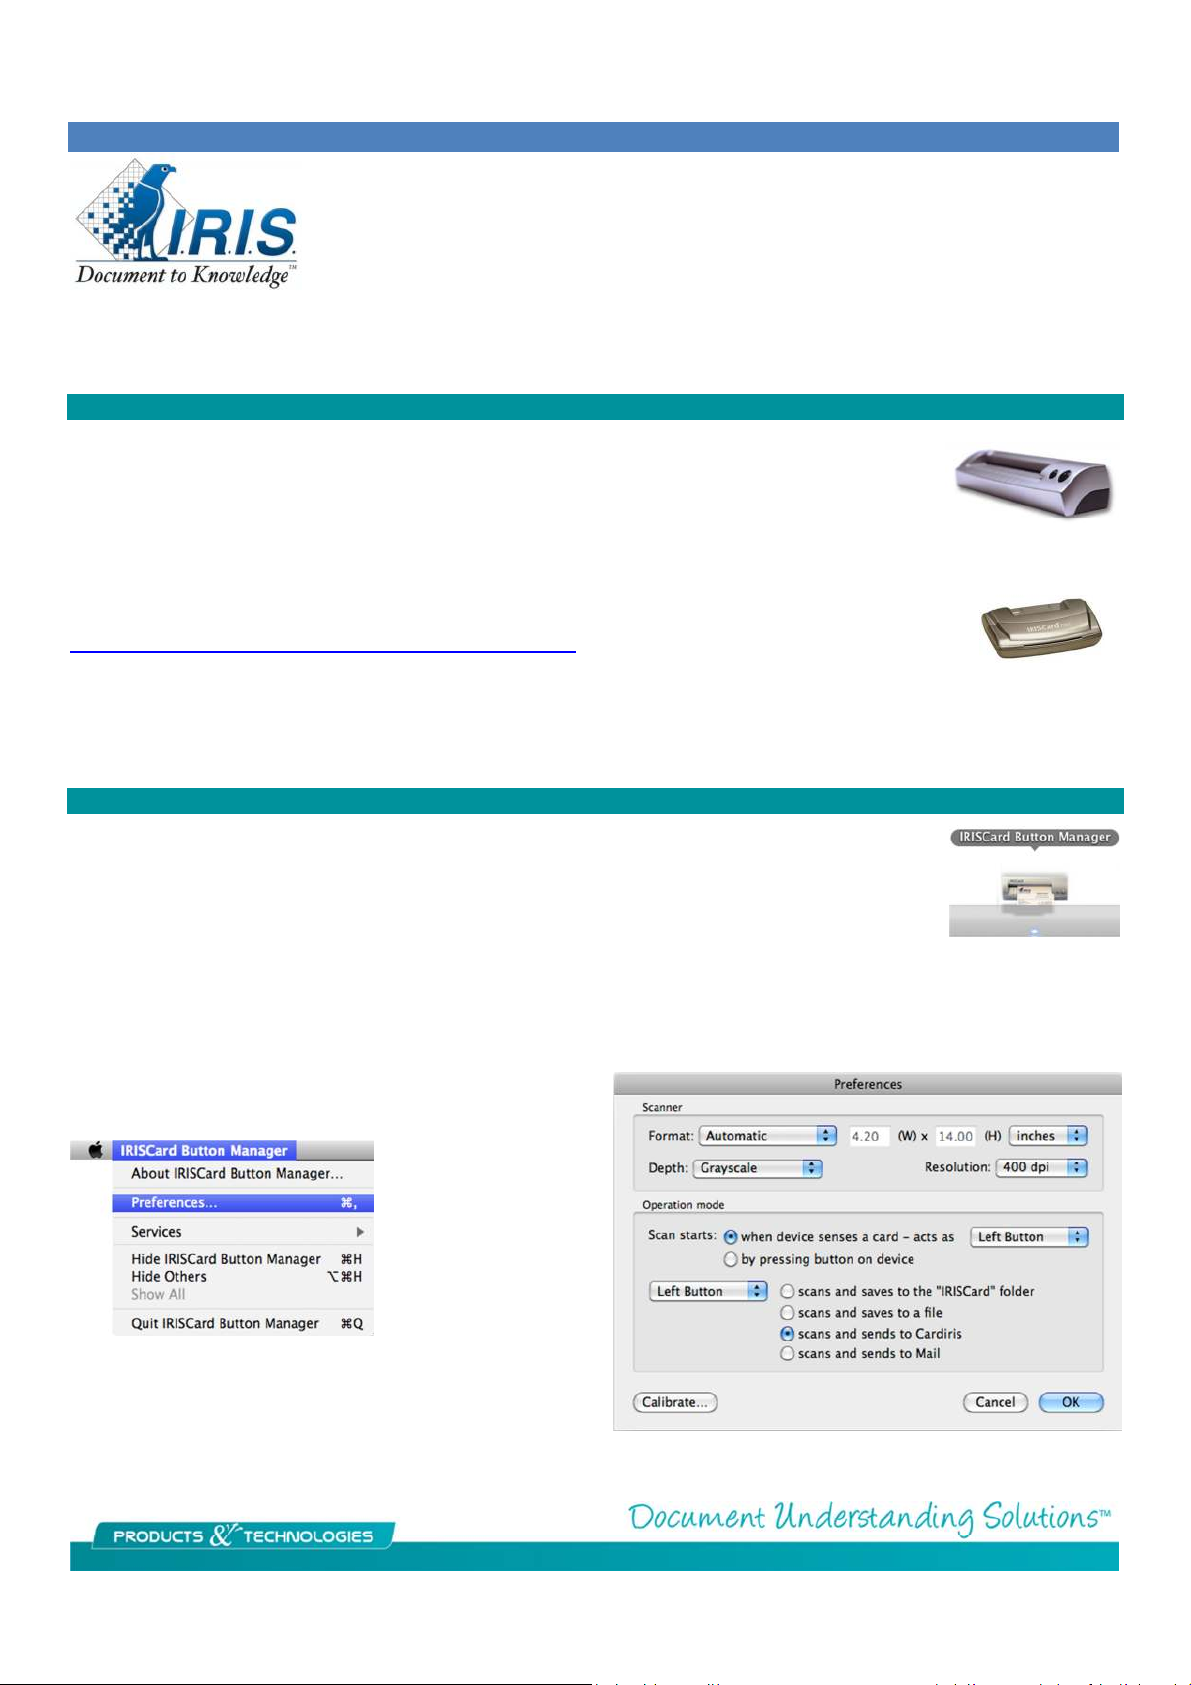
There are two ways to scan with the product, either through the Cardiris software or using the
IRISCard button manager which loads at startup. Both of the can be found in the Applications >
Cardiris 4 folder. Most users opt for the button manager to take advantage of the automatic scanning capability. If
controls the functions of the button on the scanner itself.
Click on the button manager icon of the dock and go to its preferences and mark the radio button for “when device
senses a card – acts as”, set the action for the button and
result as pictured.
Page 2
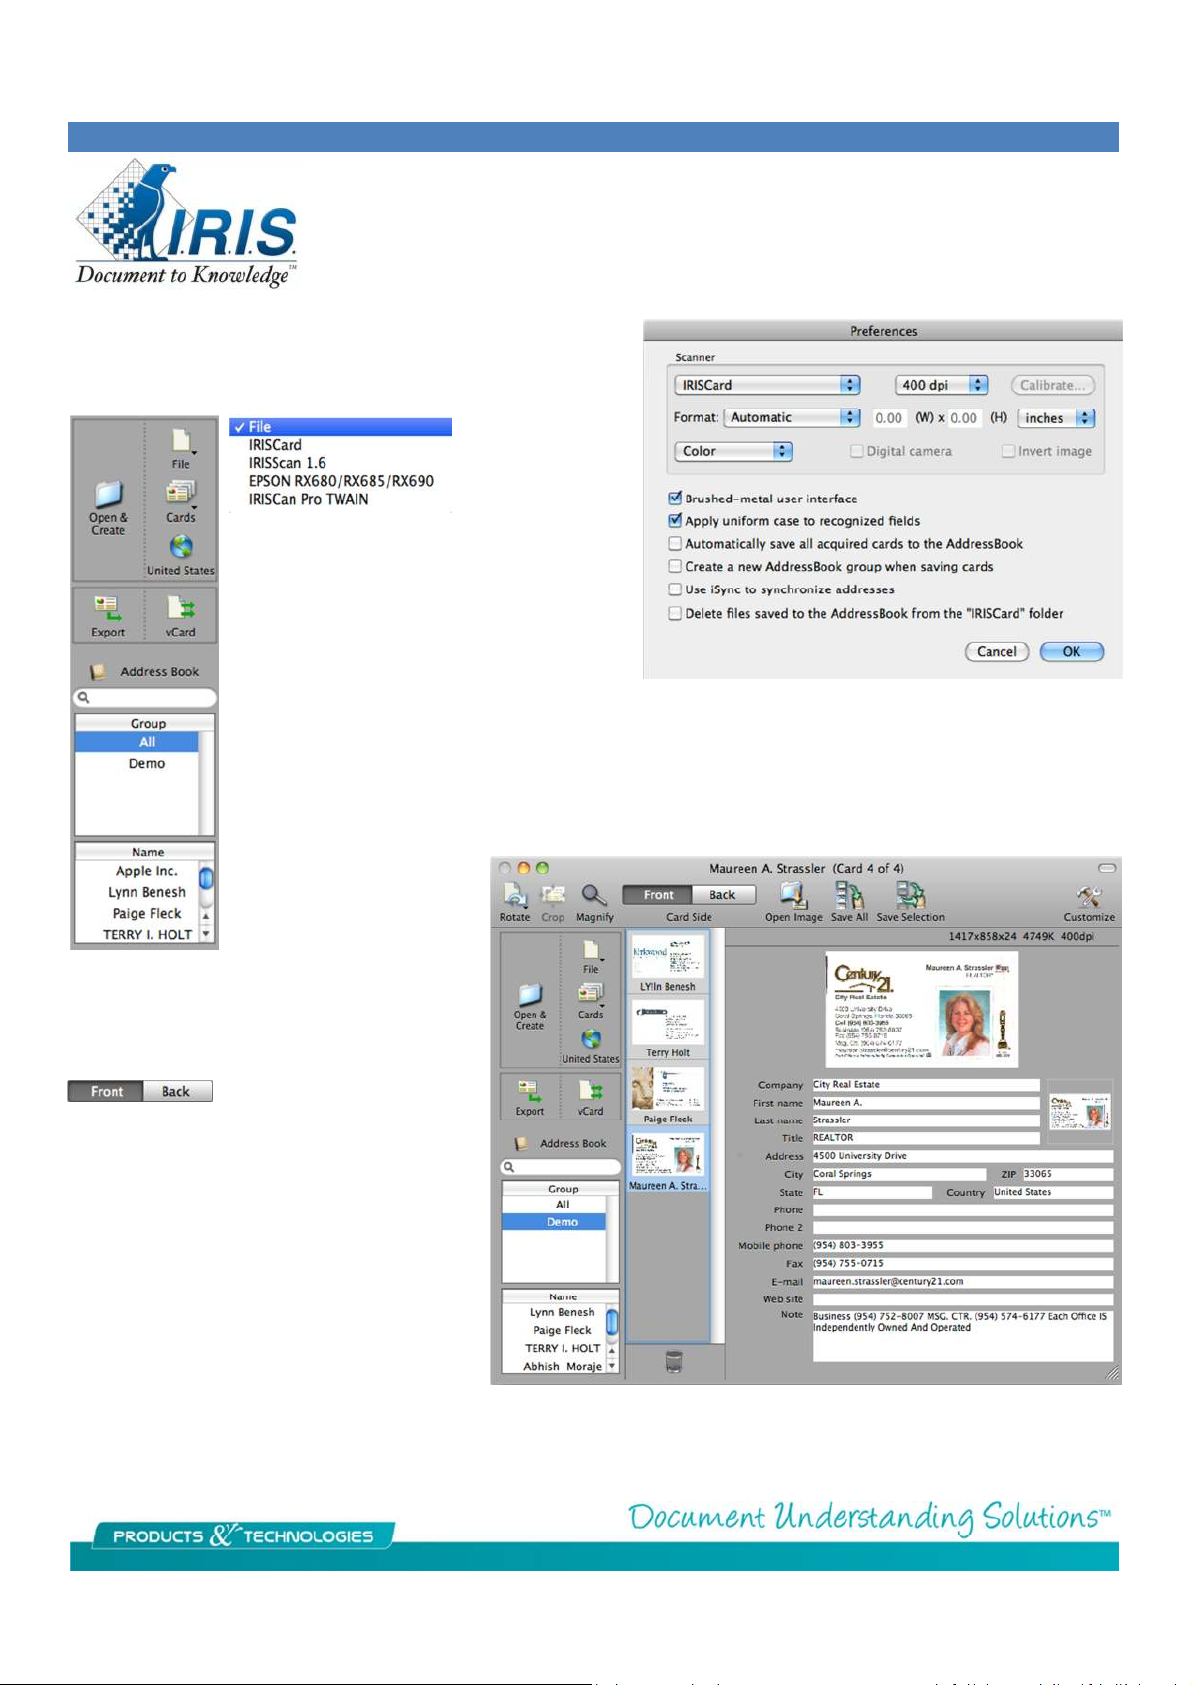
In the Cardiris software go to its preferences and select the
IRISCard in the dropdown. In most cases leave the formatting
set to Automatic and click OK out of that window.
On the left tool bar set the upper right
button to File which sets the button on the
lower left to
File to one of the listed scanners changes it
to
Scan & Create.
Open & Create
. Changing from
Close the button manager if you want to use a different scanner!
Ba ck side scanni ng
Notice that you can scan the rear side image
of the business card using the back button on
the top tool bar. When you save to address
book you will have to choose which image to
drag to the image placeholder because
Address Book can only display one image.
The two images will only viewable at the
same time within the Cardiris software.
Page 3

Saving
When you insert a business card in the scanner it will feed through and process the information and populate the
contact fields.
Review and make any needed corrections, choose a Group if so desired beforehand then click Save
All or Save Selected and the cards will be saved to the Address Book.
You can view those cards by clicking on the on the group on the lower left.
To include the card image draw a box on the image and drag to the field to the right of the Company
name.
Ex port
To export the cards to another format or application select the format (vCard pictured) and click on Export. Shown are
the available options. Unicode is the same as text.
To create a new Group go to File > New Group and give it a name to display in the Cardiris Software.
This will allow you to place the desired cards into a specified group in Address Book. You can also
perform searchs and drag the contacts from one group to the next.
Page 4

If you ar
e using a flatbed scanner
you can scan multiple cards
software.
The software will automatically extract the
IRISCard mini 4 & Cardiris 4
The software functions identically to the Pro 4 but there is no button manager so scans have to be started by clicking on
Scan & Create button on the left toolbar. Select your scanner in the Cardiris Preferences and toogle the File button
by placing up to 10 cards on the glass of the scanner. Leave a
gap around all edges of the card keeping it away from the edge
of the scanner bezel. You also want a dark background so the
software can separate the individual card images from the larger
image. A black or dark sheet of paper placed behind the cards
works best. Scan at 400 DPI in color.
cards from the larger image and the
information from the cards.
For very dark cards you would do the opposite and just close the
lid to the scanner to create a white background. It is useful then
to separate the cards into dark and light for this kind of
processing.
You can also scan outside of the software and save the scans as
image files or PDF files which can then be processed in the
 Loading...