

IOtech 640e, 650e Quick Start Manual
IOtech 640e & 650e Quick S tart
Step 1 - Install Software
Ethernet Dynami c S ignal Analyzer s f or Vibration Anal y s is & Monitoring
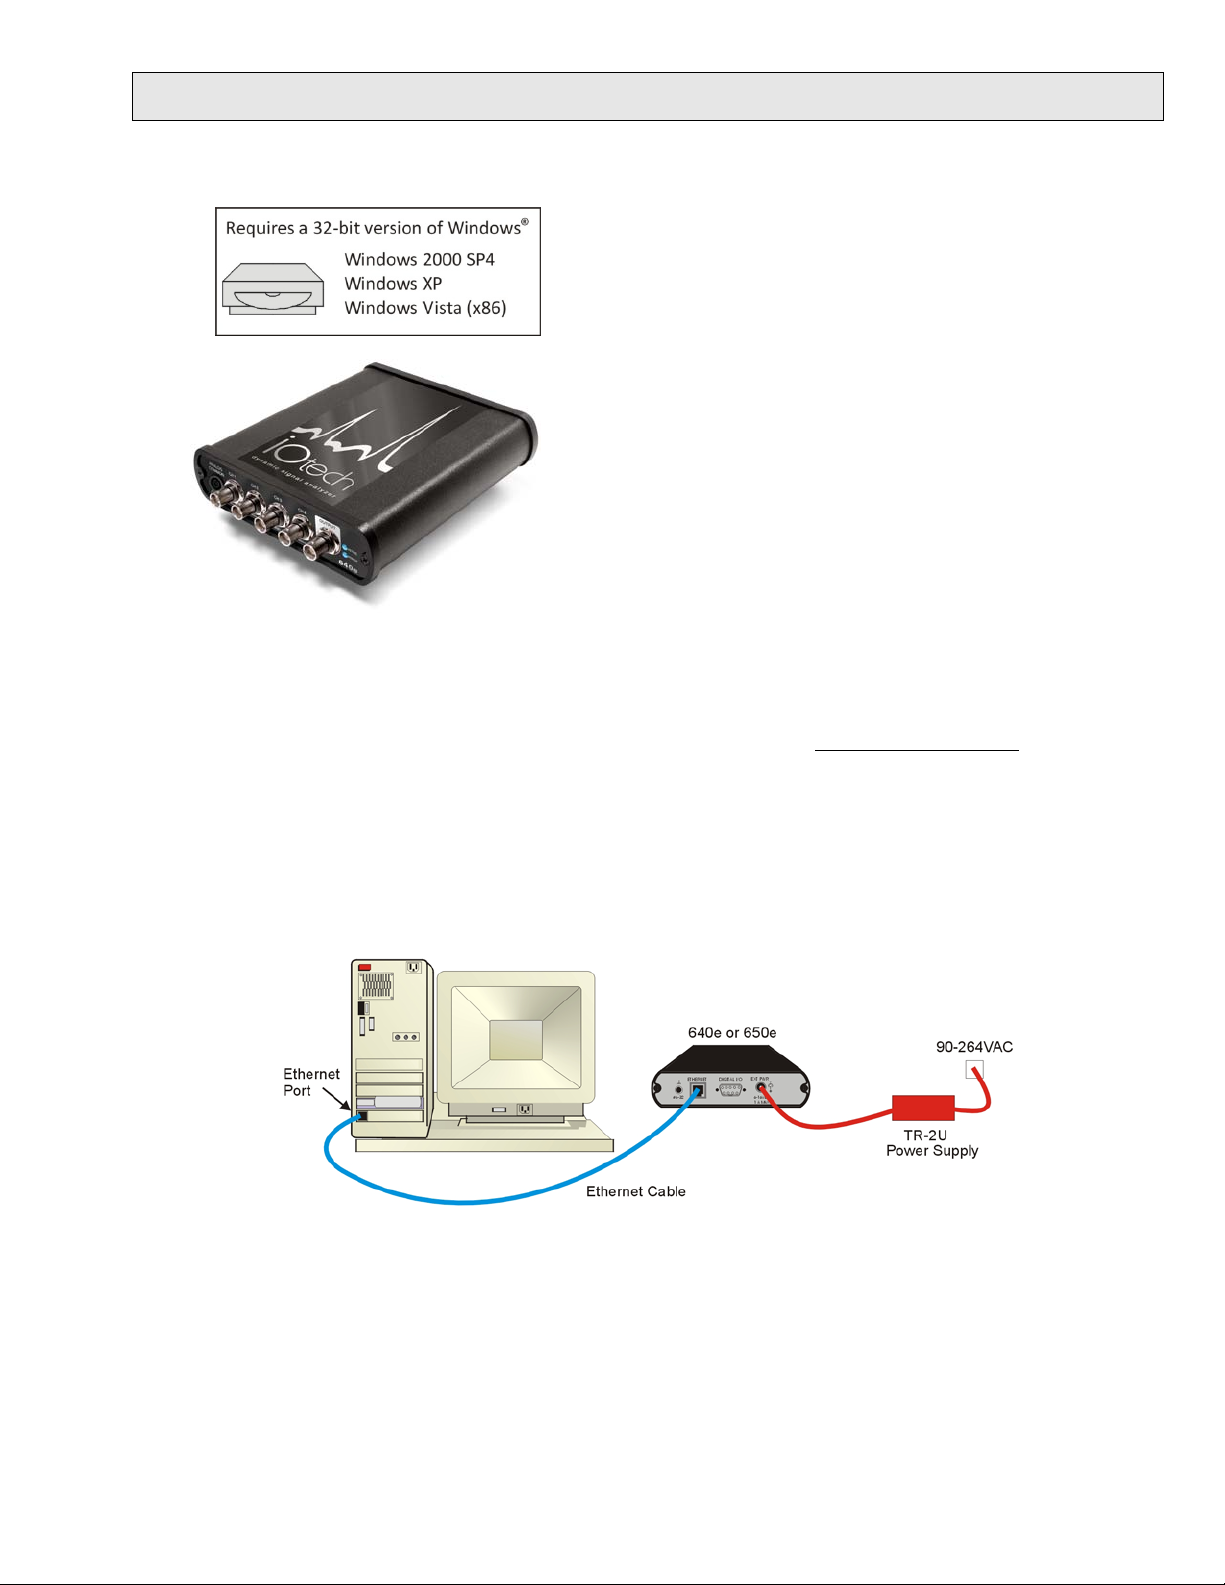
Before you get started verify that you have a 32-bit version
of Windows, the following items, and meet or exceed the
minimum requirements listed.
• 640e or 650e
• TR-2U Power Supply
• Ethernet Patch Cable
• Ethernet jack
• Dynamic Signal Analysis CD
• License Keys for purchased software;
e.g., eZ-Analyst, eZ-TOMAS, eZ-Balance, eZ-NDT
• Monitor: SVGA, 1024 x 768 screen resolution
• Windows 2000 SP4 and Windows XP users:
Intel
1 GB memory; 10 GB disk space
• Windows Vista (x86) users:
PC must be Windows Vista Premium Ready
[on PC or on a hub connected to the Ethernet]
™
Pentium 4 or equivalent
1. Close all running applications on the host PC.
2. Insert the Dynamic Signal Analysis CD into your CD -ROM d rive and wait for the CD to auto-run. An Opening
Screen will appear. As an alternative, you can download software from:
3. Click the <ENTER SETUP> button.
Note: If you are downloading software from our website, follow instructions provided there.
4. From the hardware selection screen [which follows a licensing agreement], select the 640, 650 product-line
from the drop-down list and follow the on-screen instructions.
www.iotech.com/ftp.html
Step 2 - Connect the 640e or 650e to the Ethernet
In this scenario a 640e or 650e is connected directly to an Ethernet port on a host computer. Please consult your user’s
manual (located in PDF format o n the CD) should you need information regarding the ot her network types.
1. Connect the Ethernet cable to the Ethernet jack on the 640e [or 650e].
2. Connect the other end of the Ethernet cable to the Ethernet jack on the host computer or network hub.
Step 3 - Connect the 640e or 650e to Power
1. Connect the power supply cable from the TR-2U to the External Power connector of the 640e [or 650e].
2. Connect the T R -2U plug to a standard AC outlet. The 640e [or 650e] Power LED will light up.
324539C-01
Step 4 - Configure Computer Ne t work Set t ings
to be accessed over the network.
Ph: (440) 439-4091 Fax: (440) 439-4093 productsupport@iotech.com Internet: www.iotech.com
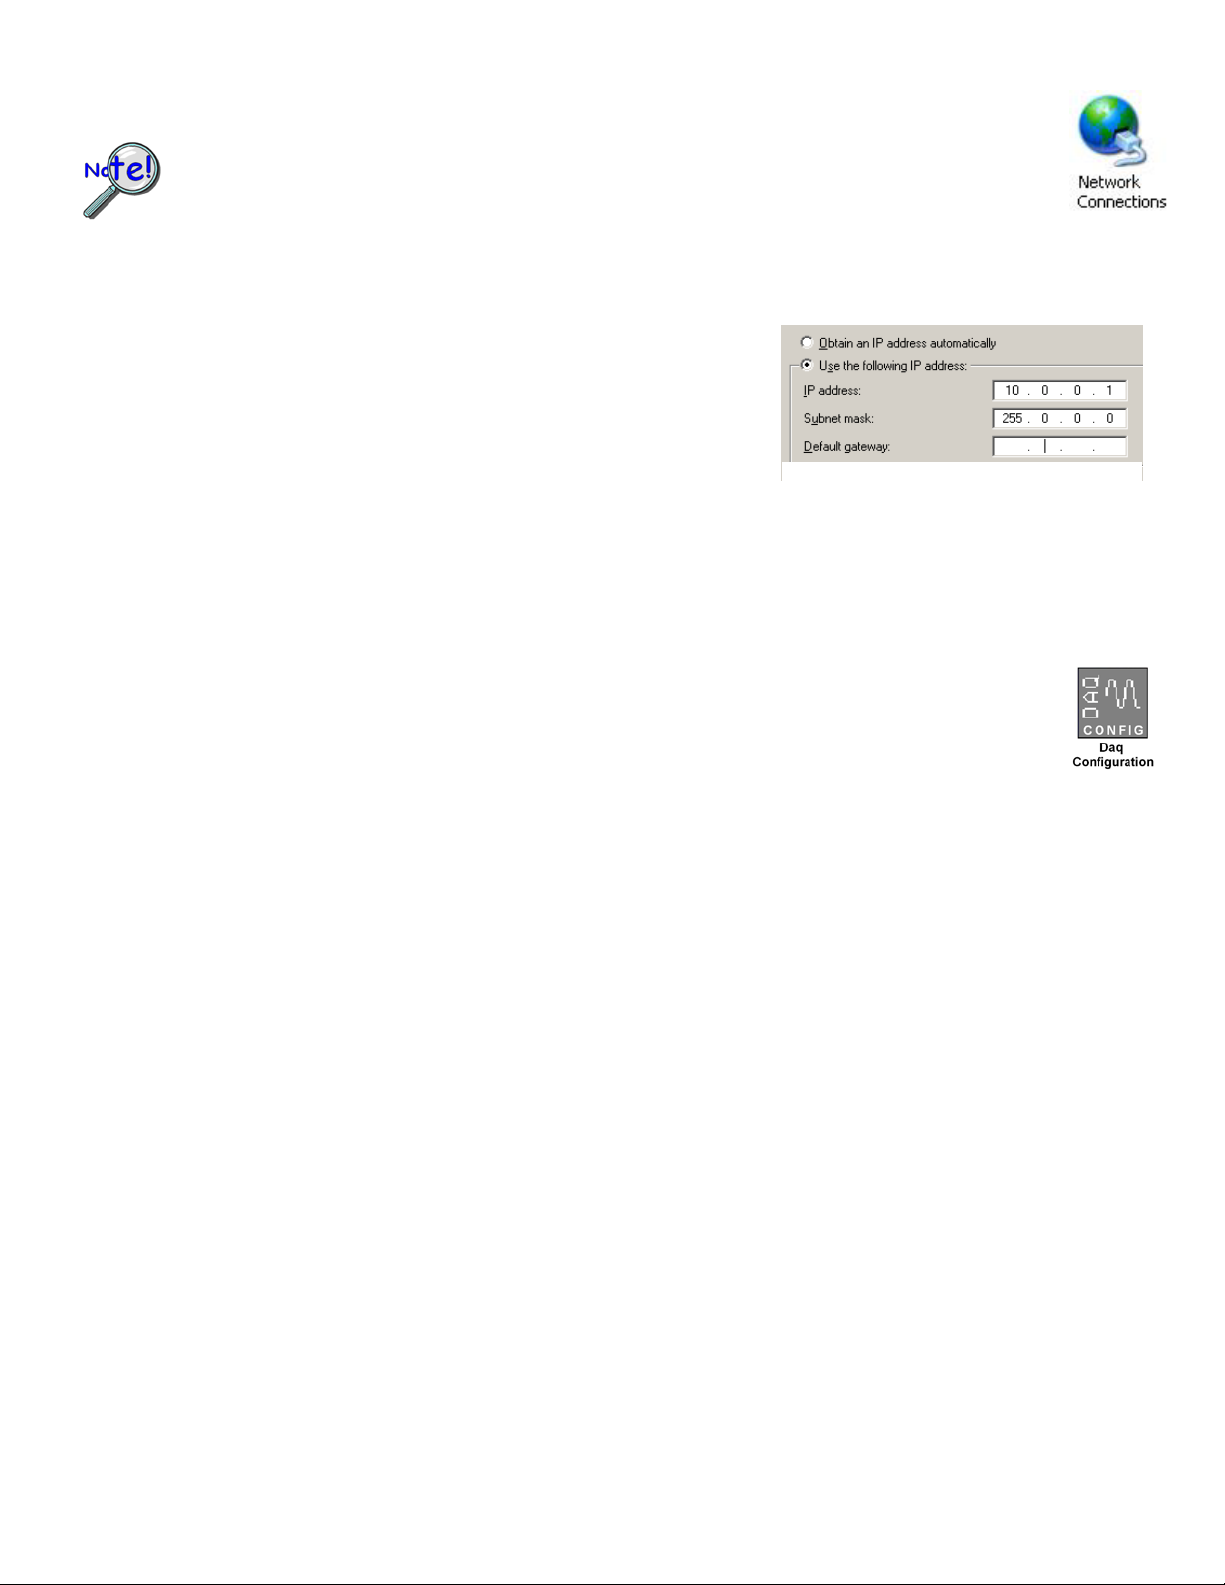
Internet Protocol (TCP/IP) Prop erties
Applies to “dedicated net works” only. See user’s manual in regard to other network types.
We recommend that you discuss this procedure with your Network Administrator before proceeding.
Note that the 640e and 650e Ethernet ports typically require 5 to 30 seconds after power-up to
configure, depending on your network configuration. When the Active LED goes dark the unit is ready
1. Open the Contr ol Panel by naviga ting from the Windo ws Des ktop: Start Menu ⇒ Settings ⇒ Control Panel.
2. Double-click the “Network Connections” icon.
3. Double-click the icon for the network that the 640e [or 650e] is connected to.
4. In the “Local Area Connection Status” box, click on the <Properties> button.
The “Local Area Connection Properties” box will appear.
5. Double-click the “Internet Protocol (TCP/IP)” component.
The “Internet Protocol (TCP/IP) Proper tie s” box will appear.
6. Selec t the “Use the following IP Address” radio button. (See figure at left).
7. Set the IP address field to 10.0.0.x , where x is some number from 1 to 254.
Make sure that each computer and each device on the dedicated network
has a unique IP address.
8. Set the Subnet mask to 255. 0.0.0. Note that the remaining fields can be left as is.
9. Click <OK> on follow-up screens to exit.
(Partial View)
Step 5 - Configure & Tes t t he S ystem with the Daq Configuration Applet
1. Open the Daq Configuration Applet.
a. Navigate from the Windows’ Desktop: Start Menu ⇒ Settings ⇒ Control Panel
b. From the Control Panel, double-click the Daq Configuration icon.
2. Add the 640e or 650e to the list of installed devices.
a. Click the <Add Device> button. The “Select Device Type” box will appear.
b. Select the 640e or 650e from the list of devices, as applicable.
c. Click the <OK> button. The “Properties” box will appear for the selected device.
d. Enter the Serial Number of the 640e [or 650e].
e. Select the “Auto IP Setting” radio button. The IP Address of the 640e [or 650e]
will be calculated automatically and displayed in the IP Address field.
3. Test the System.
a. Click the “Test Hardware” tab.
b. Click the <TCP/IP Test> button. This tests the Tr a nsmission Control Pr otocol / Internet Protocol.
c. Upon completion of the TCP/IP test, click the <Resource Test> button.
When testing, if the unit does not respond within 30 seconds perform the following steps:
1) reboot the system, 2) upon power-up, re-open the Daq Configuration applet,
3) select another configuration setting, 4) reinitiate the test.
Step 6 - Connect Data Acquisiti on S ignal Lines
Prior to making signal connections review the Specifications chapter of your user’s manual to ensure that your inte nded signal
inputs do not exceed the specified limits. The manual is i ncluded in PD F format on your CD.
*324539C-01*
324539C-01
IOtech, 25971 Cannon Road, Cleveland, OH 44146-1833
Printed in Hungary
 Loading...