

InvaMed Sovereign S888NR, Sovereign S889NR User Manual

Model S888NR
&
Model S889NR
USER MANUAL
Please ensure this manual is read and understood
before using the scooter.

www.discountscooters.co.uk 2 08000 96 12 96
CONTENTS
Introduction 3
Feature Guide 3
Safety Advice 4
Adjustments 4
Tiller angle
Seat slide
Seat swivel
Armrest width
Armrest angle
Seat height
Tiller Controls 6
Speed Controls
Battery Level Indicator
Lights Front
Lights Rear
Horn
Thumb Lever Controls
On/Off Key Switch
Freewheel Operation 7
Starting To Drive 8
Getting Started
Moving Off
Steering
Reversing
Transport and Storage 9
Dismantling
Re-assembly
Batteries & Battery Charger 10
Maintenance 11
Lubrication
Wheels and Tyres
Trouble Shooting 11
Circuit Breaker
Fuses
Check List
Warranty 12
www.discountscooters.co.uk 3 08000 96 12 96
INTRODUCTION
Congratulations on your purchase of the Invamed Sovereign Scooter. This
scooter incorporates comfort and style with the latest in technology. The
Sovereign Scooter is compact for easy use in confined spaces both indoors
and out. Direct drive sealed transaxles and electromagnetic brakes give a
safe and efficient ride.
Please ensure that you read this manual carefully, it is important for your
safety that you understand the guidelines and instructions given.
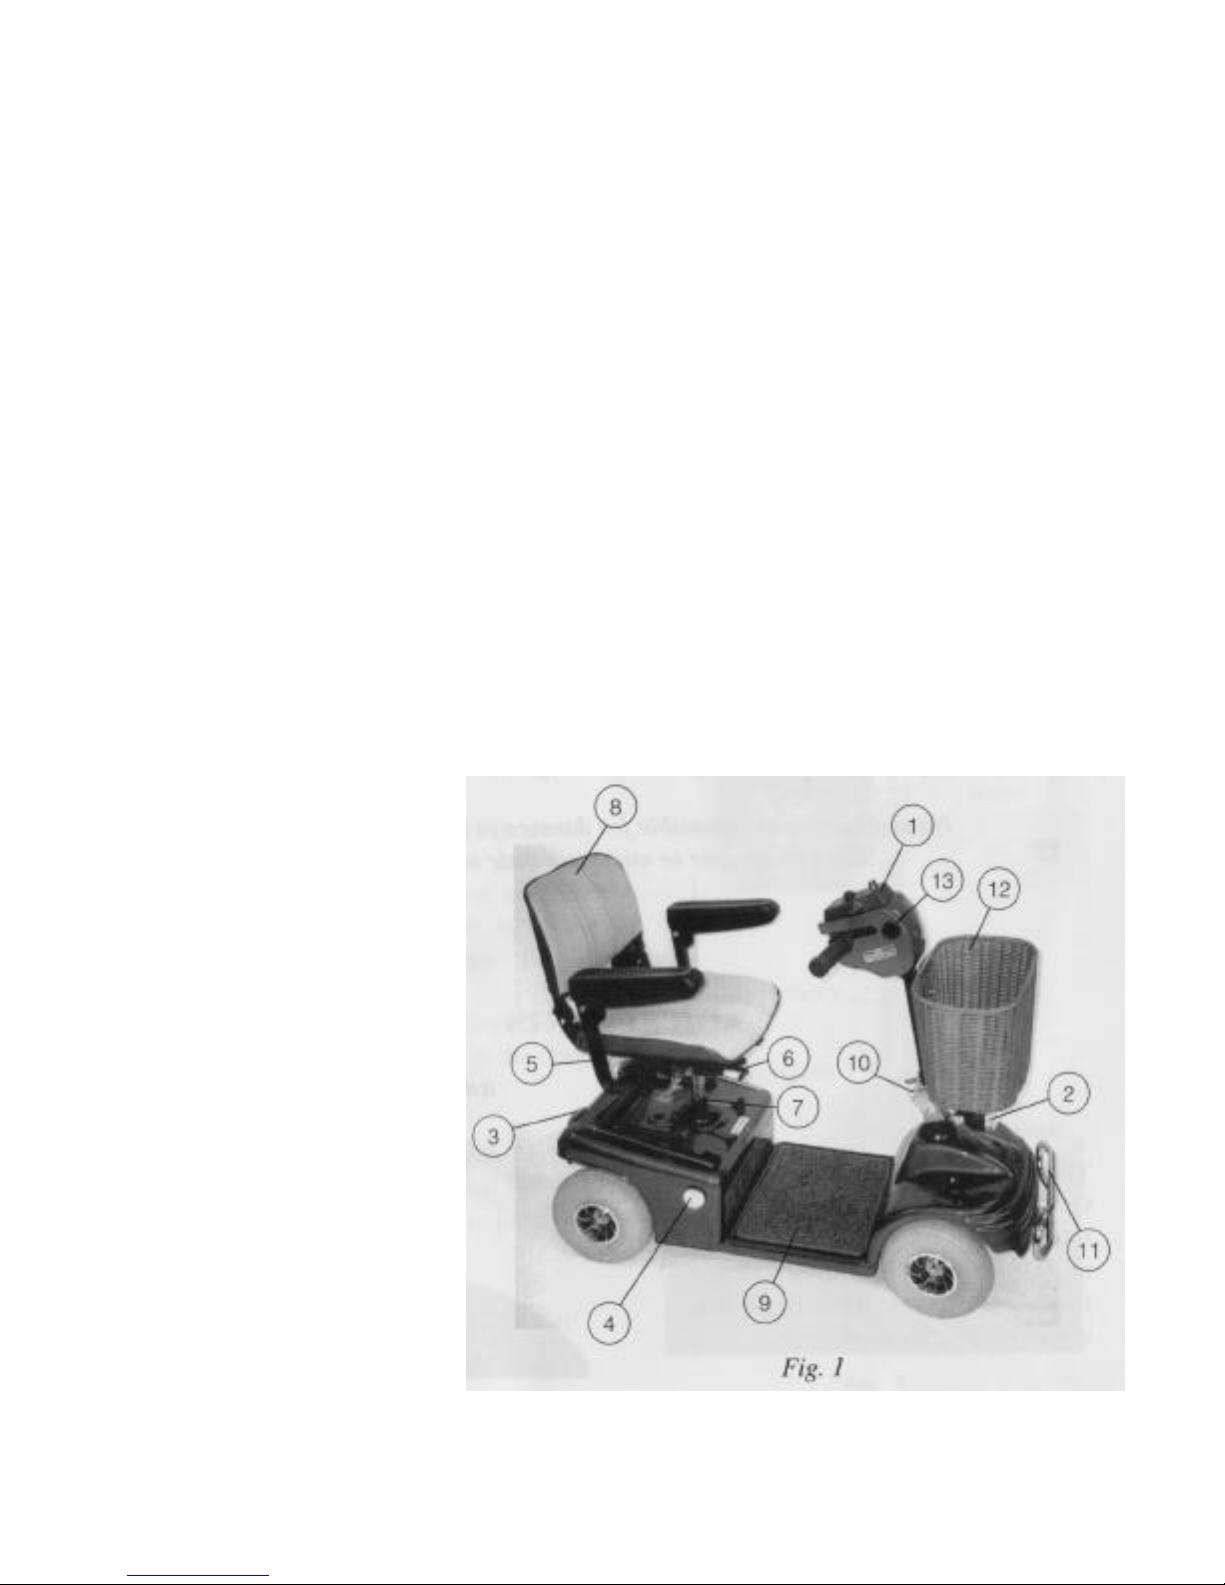
FEATURE GUIDE ( Fig. 1)
1. Speed control box.
2. Head light.
3. Rear Lights.
4. Side reflectors.
5. Adjustable width arms.
6. Sliding seat.
7. Seat height
adjustments.
8. Adjustable angle fold
down detachable seat.
9. Foot mat.
10. Tiller angle
adjustment.
11. Front bumper.
12. Moulded basket.
13. Battery charging inlet.
www.discountscooters.co.uk 4 08000 96 12 96
SAFETY ADVICE
• Do not carry passengers.
• Do not exceed inclines over 8 degrees (14%).
• Do not turn on steep inclines.
• Do not turn suddenly at full speed.
• Do not get on or off the scooter unless the brake is on and the scooter is switched off.
• Do not switch off the scooter when moving in drive.
• Do not use the scooter where you cannot safely or legally walk. Consider yourself as a
motorized pedestrian and abide by the rules and regulations of the 1988 road traffic act.
• Do not attempt to climb kerbs over 5 cms (2-3”) in height. Approach kerbs at an angle
of 90 degrees at a low speed.
• Do not reverse the scooter unless the speed setting is reduced.
• Do not drink and drive, or use a mobile phone when driving your scooter.
• Do not exceed the user weight limit of 110kg (250lb/l8st).
• Do not use the scooter if fitted with a canopy in high wind conditions
above 61 kph (38 mph).
• Always keep your feet on the scooter when moving.
• Consult your doctor if there is any doubt about your ability to use a scooter.
• Always proceed carefully when traveling over rough or uneven ground.
Invamed are not responsible for damage or injury incurred
due to improper or misuse of their scooters.
ADJUSTMENTS
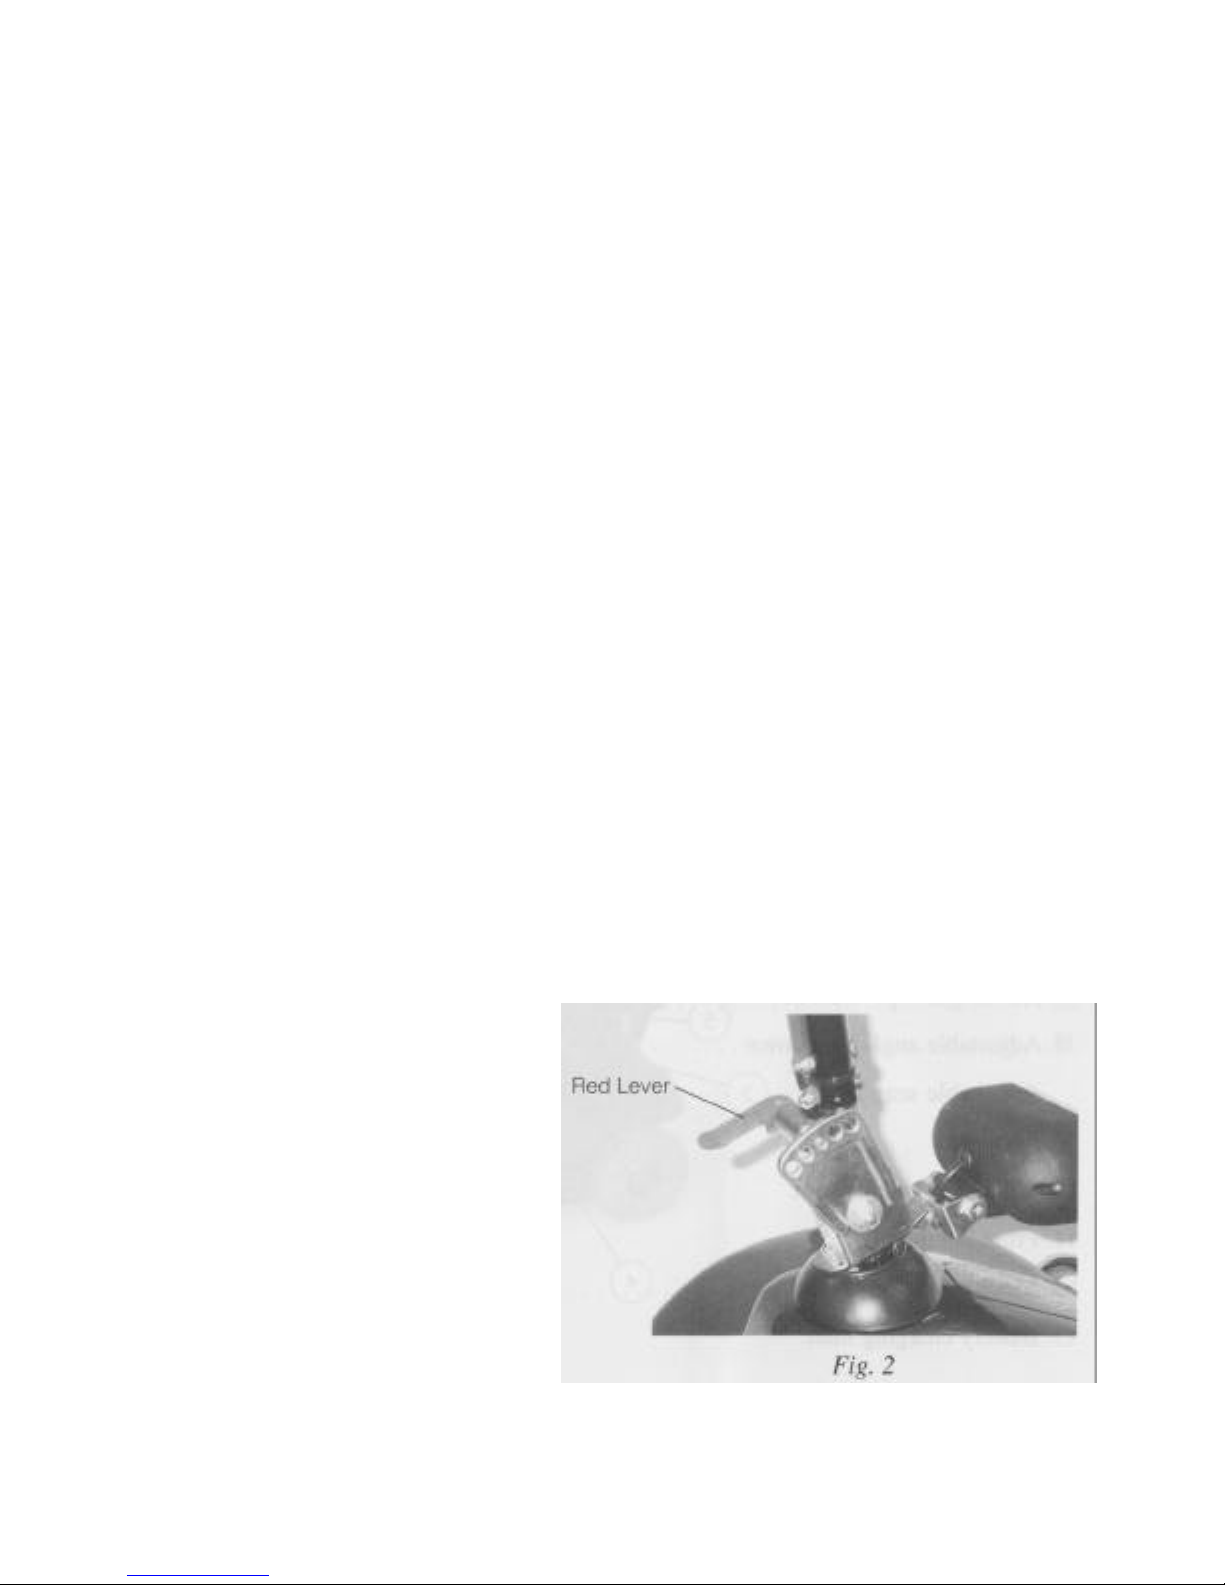
Tiller Angle Adjustment (Fig. 2)
On the left hand side at the base of
the tiller is a red lever. Push the lever
in to release the pin and select the
required tiller angle. Refit the pin into
one of the five location holes.

www.discountscooters.co.uk 5 08000 96 12 96
Seat Slide adjustment (Fig. 3)
Pulling up on the lever allows the seat position
to be adjusted forward or backward. Release
the lever and the seat will lock in that position.
Seat Swivel Adjustment (Fig. 3)
Under the right side of the seat there is a
spring loaded red lever. Pulling up on the lever
allows the seat to swivel, when released the
seat will lock into one of 4 positions.
Armrest Width adjustments (Fig. 3)
On the underside of the seat there are two hand
knobs, one either side. Releasing the hand
knob allows the arms to be adjusted to the
required width, or removed for transportation.
Do not use the scooter without the arms being
fitted.
Armrest angle adjustment (Fig. 4)
Flip up the armrests to allow access to the
adjustment screw and lock nut, unscrew the
lock nut and screw the bolt in or out to
increase or decrease the angle. Re-tighten the
lock-nut. Your scooter is despatched from the
factory with the armrests set parallel to the
floor.
Seat Height Adjustments (Fig. 5)
The seat height can be adjusted by inserting
the steel locking pin into the required hole.
 Loading...