

Page 1
www.inter-m.com
2003.11 9007501910
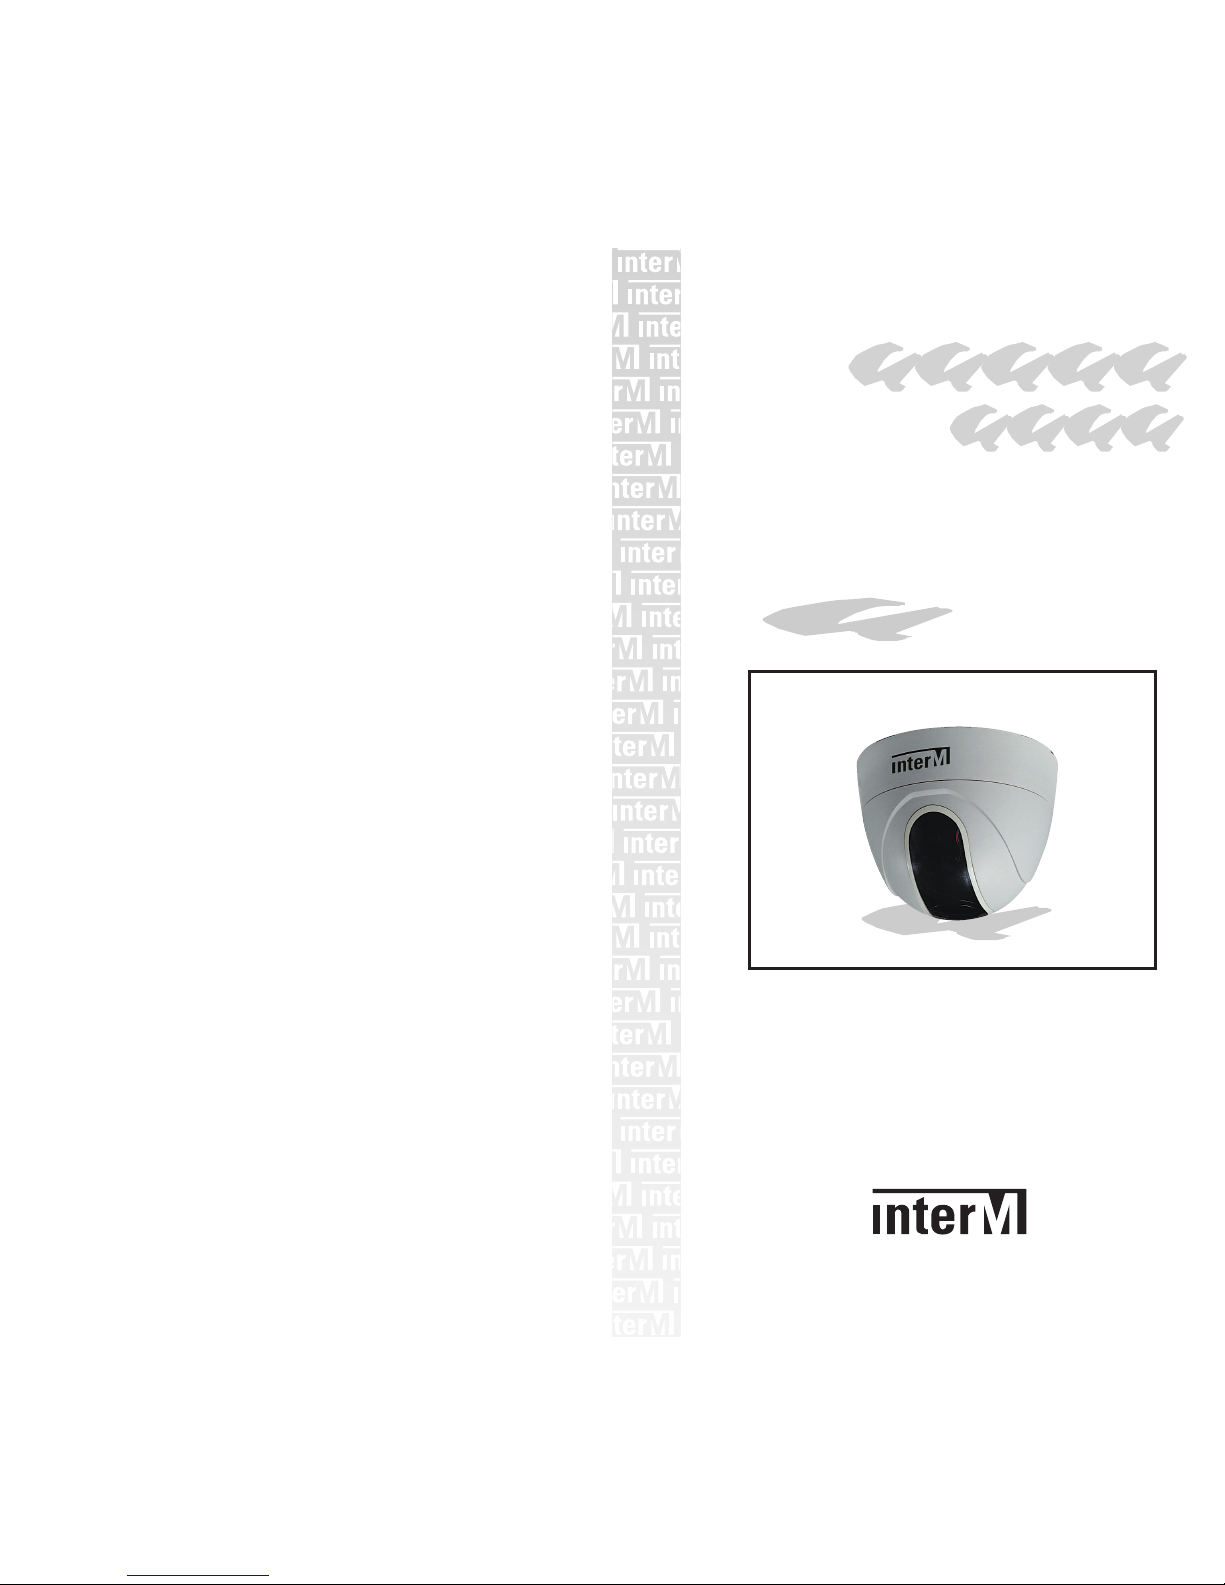
VCD-412/412VI
Color Dome Camera
Operating
Manual
Page 2
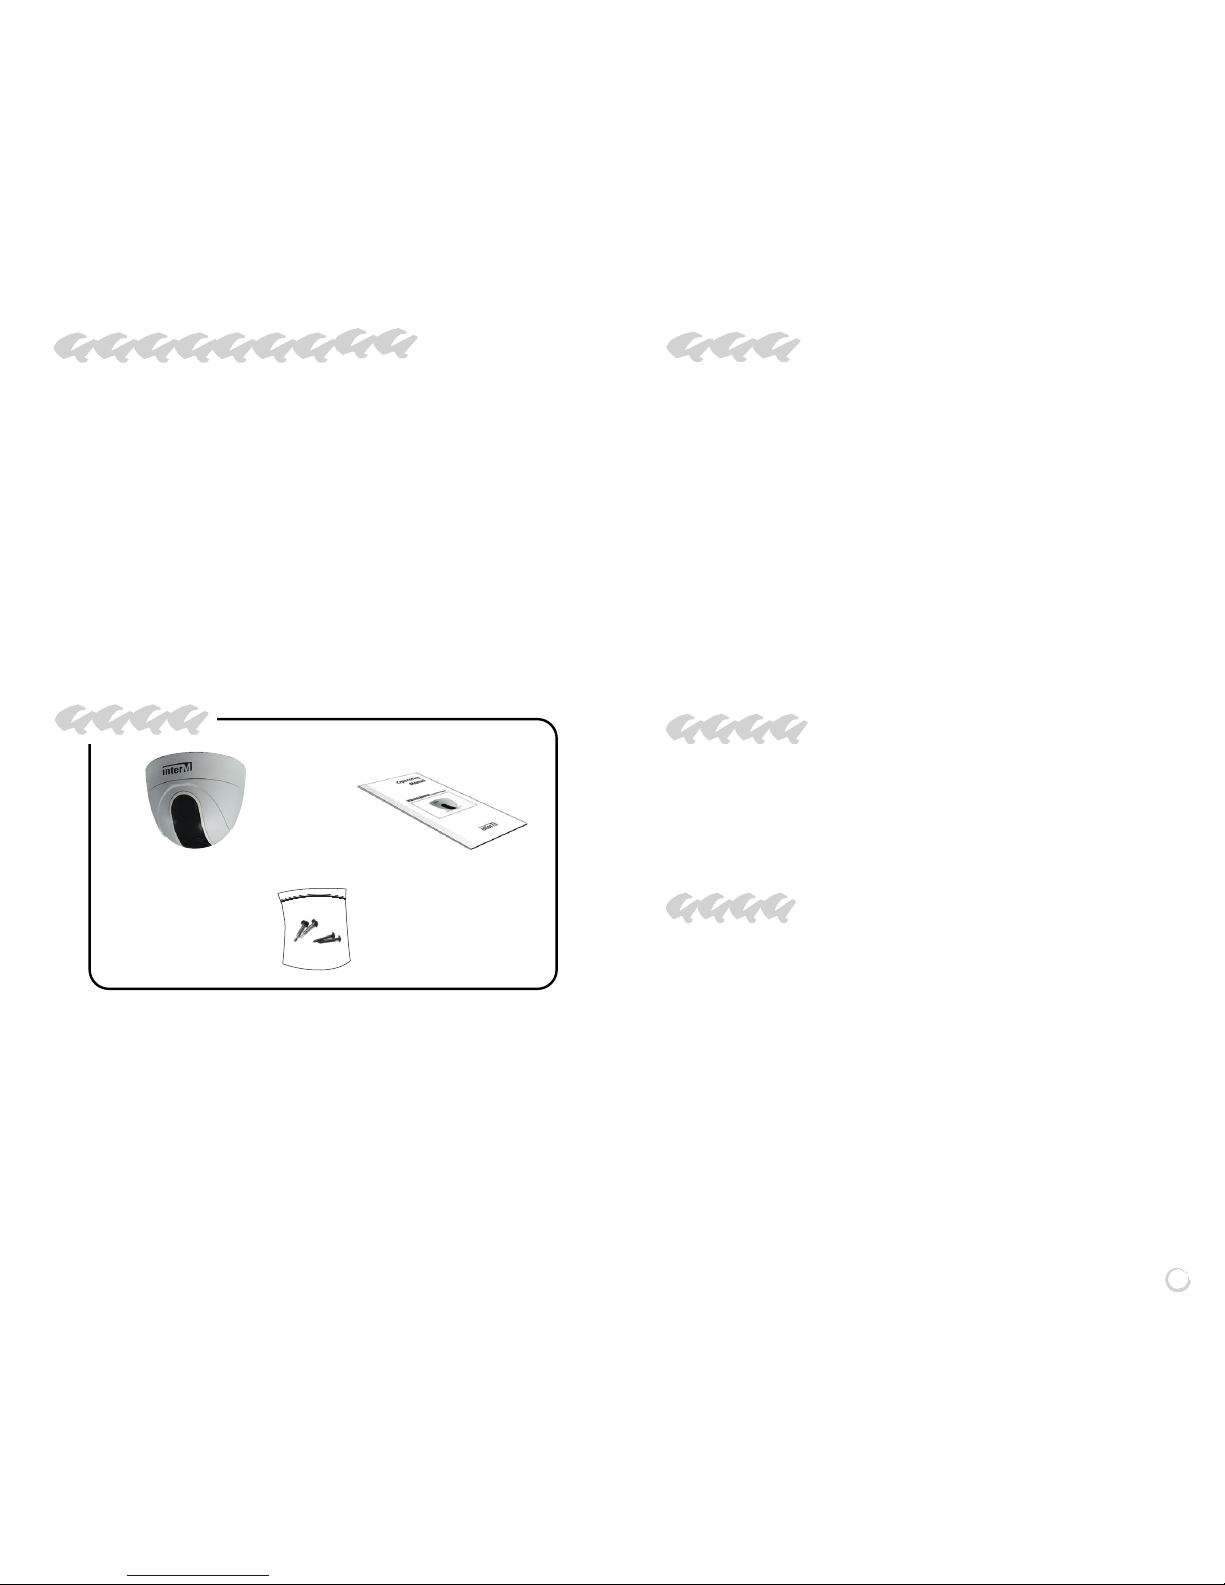
VCD-412/412VI
Screw(4EA)
O/P Manual
1
VCD-412/412VI(COLOR DOME CAMERA)
Unpacking and Installation
Although it is neither complicated to install nor difficult to operate
your set, a few minutes of your time is required to read this manual
for a properly wired installation and becoming familiar with its many
features and how to use them. Please take a great care in
unpacking your set and do not discard the carton and other packing
materials. They may be needed when moving your set and are
required if it ever becomes necessary to return your set for service.
Never place the unit near radiators, in front of heating vents, in
excessively humid or dusty location to avoid early damage and for
your years of quality use. Connect your complementary
components as illustrated in the following page.
Accessory
Contents
Definition .........................................................................................1
Features...........................................................................................1
Precautions.....................................................................................2
Components and Operation ........................................................4
Function Setting.............................................................................7
How to Install..................................................................................9
How to Connect Monitor and Peripheral Devices..................10
Specifications...............................................................................11
Trouble Shooting.........................................................................12
Definition
This camera is designed for easy installation in a luxury
apartment or hotel. Its has a high resolution of 410,000 pixels
with SONY CCD.
Features
■■
■■
Refined interior dome design
■■
■■
Adopted 1/3” 410,000 pixel Sony SUPPER HAD CCD,
providing a clear picture quality with the horizontal
resolution of over 480 TV image
■■
■■
Realized a high illumination with the minimum intensity of
illumination of 1 Lux
■■
■■
Equipped with functions of automatic white balancing
(AWB) and high speed automatic electric level control
(ELC)
■■
■■
Equipped with backlight compensation function(BLC)
■■
■■
Possible to compensate for image blinking with flickering
function in areas of frequency-interference
■■
■■
Simple to install and adjust the angles of camera
Page 3
2
VCD-412/412VI(COLOR DOME CAMERA)
3
VCD-412/412VI(COLOR DOME CAMERA)
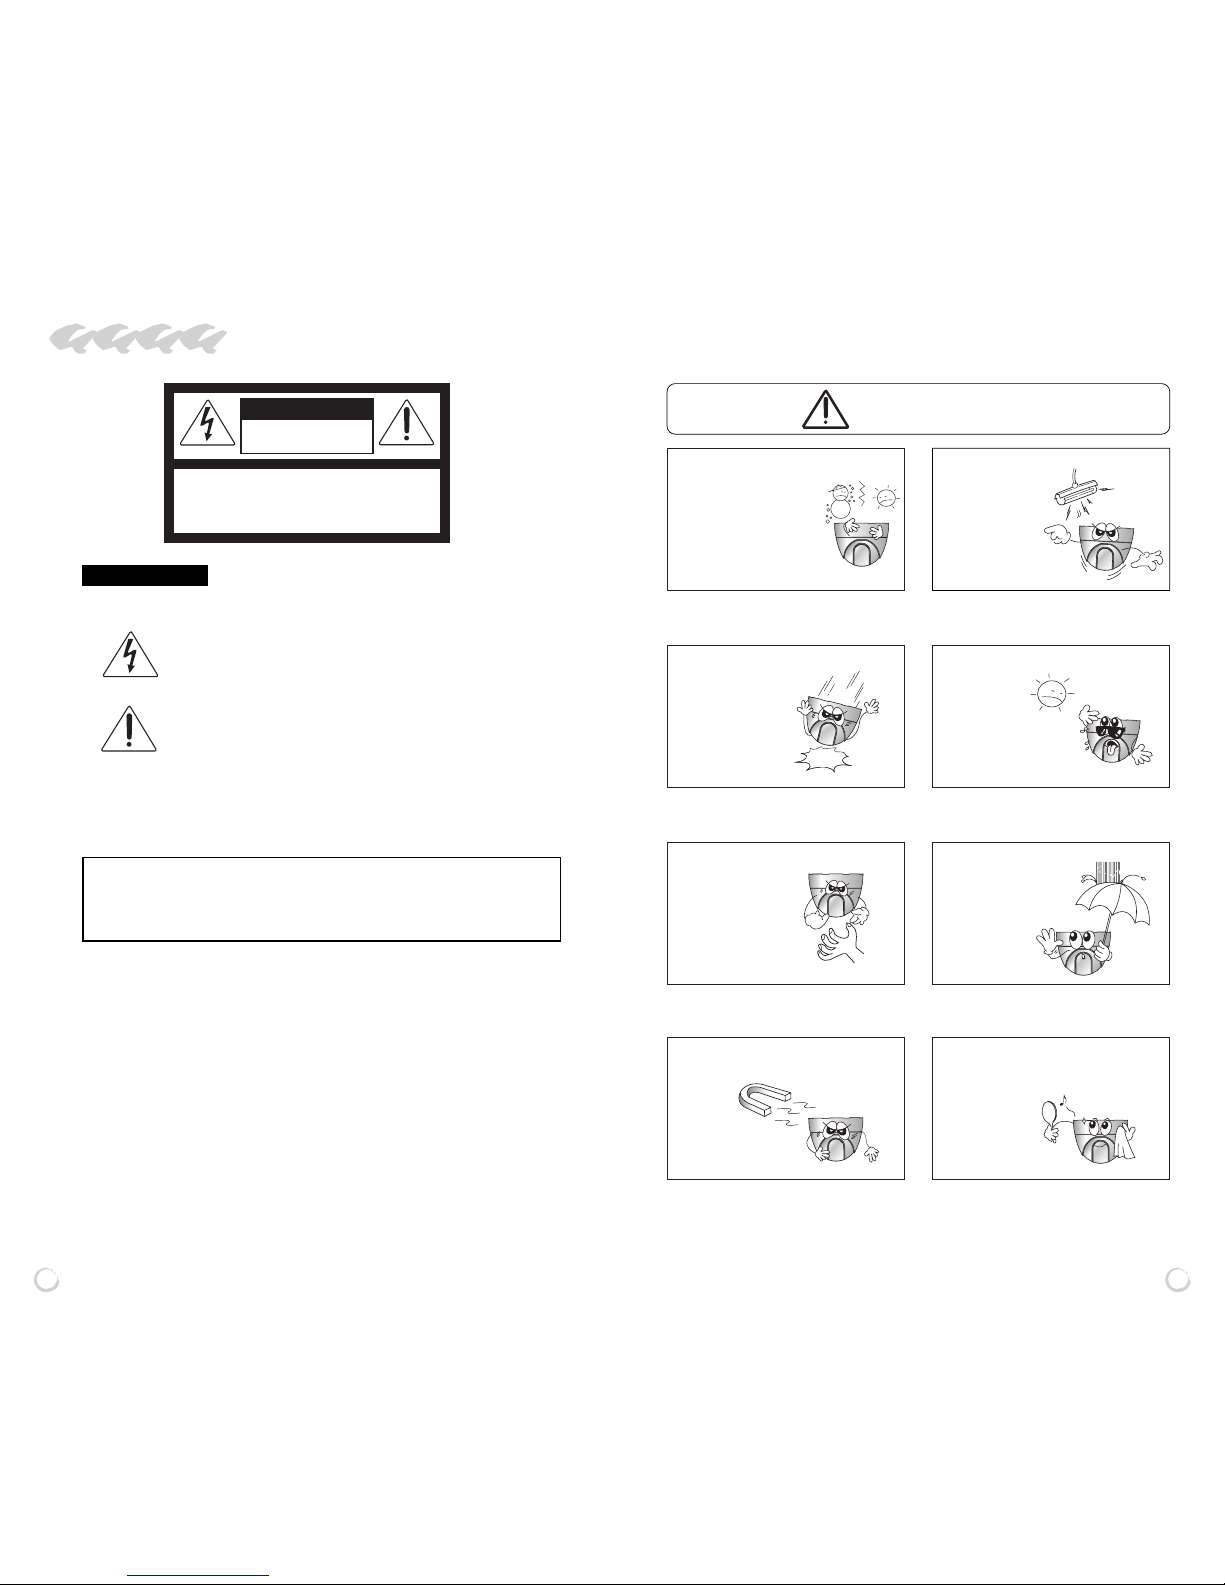
Precautions
DO NOT INSTALL THE CAMERA IN EXTREME
TEMPERATURE CONDITION
DO NOT INSTALL THE CAMERA UNDER
UNSTABLE LIGHTING CONDITION
Unstable lighting can
cause the camera to
work improperly.
Do not use the camera under
condition where temperature
is over -10°C to 50°C.
Especially be careful for
ventilation
under high
temperature.
DO NOT DROP OR SHAKE THE CAMERA DO NOT INSTALL THE CAMERA FACE UNDER
STRONG LIGHTING CONDITION
It can cause
malfunction of CCD.
It can cause malfunction.
DO NOT TOUCH THE LENS DO NOT INSTALL THE CAMERA UNDER WET OR RAIN
It can cause the image
quality to be poor.
If it gets wet, it can cause the
camera out of order.
DO NOT INSTALL THE CAMERA CLOSELY AT THE
MAGNETIC
DO USE A DRY CLOTH TO CLEAN THE CAMERA
It can cause malfunction. To sweep the camera, use a dry and soft cloth.
RISK OF ELECTRIC SHOCK
DO NOT OPEN
CAUTION
CAUTION: TO REDUCE THE RISK OF ELECTRIC SHOCK.
DO NOT REMOVE COVER (OR BACK).
NO USER-SERVICEABLE PARTS INSIDE.
REFER SERVICING TO QUALIFIED SERVICE PERSONNEL.
WARNING
To prevent fire or shock hazard, do not expose the unit to rain or moisture.
This symbol is intended to alert the user to the presence of
uninsulated “dangerous voltage” within the product’s
enclosure that may be of sufficient magnitude to constitute a
risk of electric shock to persons.
This symbol is intended to alert the user to the presence of
important operation and maintenance (servicing) instructions
in the literature accompanying the appliance.
Caution: These servicing instructions are for use by qualified service
personnel only. To reduce the risk of electric shock, do not any
perform any servicing other than that contained in the operating
instructions unless you are qualified to do so.
Attentions: Pour prévenir les chocs électriques ne pas utiliser cette fiche
polarisée avec un prolongateur, une prise de courant on une
autre sortie de courant, sauf si les lames peuvent étre
insérées à fond sans en laisser aucune partie à découvert.
Precautions
Page 4

5
VCD-412/412VI(COLOR DOME CAMERA)
4
VCD-412/412VI(COLOR DOME CAMERA)
11
11. WINDOW DISPLAY
Transparent plastic cover to protect the camera lens. Be
careful not to give any scratch to it.
22
22. DC AUTO IRIS LENS(VCD-412VI)
Built-in DC AUTO IRIS LENS. This device is designed
with built-in DC AUTO IRIS (VARIFOCAL 4~9mm). Lens
so that users can easily adjust the image level and angle.
Be careful to keep the surface of the lens from dust or
foreign materials.
33
33. BRIGHTNESS-ADJUSTING VOLUME (VCD-412VI)
You can adjust the brightness of image the iris of DC
AUTO IRIS LENS at VCD-412VI.
44
44. FIXED FOCUS LENS(VCD-412)
Built-in fixed focus lens(FIXED 4.0). Keep the surface of
the lens from dust or foreign materials.
55
55. PCB BOARD
Camera’s functions are performed here. Be careful when
handling this board.
66
66. TOP BASE
Cover to protect the camera. Possible to turn the camera
lens right or left when installed
77
77. BOTTOM BASE
The body of camera can be used to attach the camera to
a wall.
88
88. DC JACK
Usable to connect to a power source. This device is compartible with static voltage DC12V 400mA. Be sure to use
the appropriate adaptor.
7
8
9
10
VCD-412VI
VCD-412
61
2
4
3
5
Components and Operation
Page 5

7
VCD-412/412VI(COLOR DOME CAMERA)
6
VCD-412/412VI(COLOR DOME CAMERA)
99
99. BNC JACK
VIDEO output jack. Possible to connect the video image to
a monitor or other peripheral equipment through this jack.
111100
00. DIP SWITCH
To set various functions ON/OFF.
1234
ON
1234
Function Setting
Use the four switches to set each function. At the factory, the
switches are set as follows:
11
11. FLK (FLICKERLESS) ON/OFF
Set the FLK switch ON to prevent any flicker.
ON : The shutter speed is set at 1/100, it is possible to
see good image in a FLICKER area.
OFF: Set the switch OFF in other areas than FLICKER.
22
22. AGC(AUTO GAIN CONTROL) ON/OFF
If you need the automatic gain control, set the AGC switch
ON/OFF as necessary.
ON : When the input image is dark, this function will make
it bright. At this time, the image becomes bright, and
the noise also increases.
OFF: The gain function does not function when it is dark.
33
33. ELC(ELECTRIC LEVEL CONTROL) ON/OFF
Automatically adjusts the speed of the electronic shutter
according to the amount of light coming into the camera.
ON : Workable for VCD-412. Automatically adjusts the
speed of the shutter according to the amount of light
coming into the camera within the scope of 1/60 ~
100,000 seconds
Page 6

9
VCD-412/412VI(COLOR DOME CAMERA)
8
VCD-412/412VI(COLOR DOME CAMERA)
OFF: Workable for VCD-412VI. At this time, the electronic
shutter does not work, so adjust the iris of the lens
for a desired image level according to circumstances. How to adjust the iris of lens: Please refer to
No.4-3 for the brightness-adjusting volume. If you
turn the volume left, the iris will be closed, and if you
turn it right, it will be opened.
44
44. BLC (BACK LIGHT COMPENSATION) ON/OFF
You can see the object clearly with this function when it is
in a strong backlight.
ON : Possible to see the object clearly in a strong back-
light.
OFF: The backlight compensation function does not work.
When a bright spot and a dark spot come in the
monitor at the same time( EX.such as the window
side where strong sunlight comes in), the background(bright part) becomes white.
78mm
How to Install
11
11
. Open the Top Base, and fix the camera at the place to
install by using the screw.
* To separate the Top Base, turn it while pulling it slightly.
When it sounds “click”, pull the over off.
22
22
. Adjust the camera position to the target area right, left, up
or down, and put the cover on the camera.
Page 7

How to Connect Monitor and Peripheral Devices
■■
■■
Refer to the product manual because the method of
connection varies depending on the devices.
■■
■■
Before connecting, make sure that all power switches of
all the devices are turned off.
■■
■■
When connecting, set the 75 ohm switch on the middle
controller of each device to OFF or HI and the final
monitor to 75 ohm.
■■
■■
Use coaxial cable with 75 ohm impedance when connecting.
Specifications
■■
■■
ELECTRICAL
■■
■■
GENERAL
10
VCD-412/412VI(COLOR DOME CAMERA)
11
VCD-412/412VI(COLOR DOME CAMERA)
Image Sensor 1/3IT SUPER HAD CCD(410,000 pixels)
Effective Pixels NTSC 768(H) x 494(V)
PAL 752(H) x 582(V)
Horizontal Resolution 480 TV LINES
Scanning System 2:1 INTERLACE
Synchronizing System INTERNAL
Shutter Speed NTSC 1/60~1/100,000sec
PAL 1/50~1/100,000sec
Video Output 1.0Vp-p COMPOSITE OUTPUT, 75Ω
Min. Illumination 1Lux(F1.2)
S/N Ratio 50dB(AGC OFF)
Operating Temperature
-10°C ~ +50°C
Scanning Frequency NTSC H 15.734kHz
V 59.94Hz
PAL H 15.625kHz
V 50Hz
Applied Lens VCD-412 FIXED 4.0mm
VCD-412VI DC AUTO IRIS LENS 4~9mm
White Balance ELECTRONIC AUTO TRACKING
AUDIO
Input Sensitivity -40±3dB
S/N Ratio more than 58dB
AUDIO OUTPUT 0 ±3dB
Power Source DC 12V, 400mA
Weight
VCD-412:200g, VCD-412VI:230g
Dimensions 115(ø) x 90(H) mm
VCD-412/412VI
Cable
Middle Controller
Final Monitor
Video Out Jack
Page 8

12
VCD-412/412VI(COLOR DOME CAMERA)
Trouble Shooting
IF YOU HAVE TROUBLE OPERATING IN YOUR CAMERA,
REFER TO THE FOLLOWING.
Problem Solution
THE IMAGE ON THE SCREEN IS DARK ★ Check the line of power source.
THE IMAGE ON THE SCREEN IS DARK ★ Check the cable of video signal
THE IMAGE ON THE SCREEN IS DIM ★ Check if the lens is stained.
THE IMAGE ON THE SCREEN IS DIM ★ Adjust the focus of the lens again.
★ Check the condition of Monitor.
THE CAMERA IS NOT WORK PROPERLY. AND ★ Check that you have connected the
THE SURFACE OF THE CAMERA CASE IS HOT ★ camera to a proper power source
★ (DC 12V 400mA).
THE CHROMA OF IMAGE IS EXTRAORDINARY ★ Check WHITE BALANCE of the camera.
 Loading...