

Interlogix MVC-7200-36-BL, MVC-7200-60-W, MVC-7100-29-BL, MVC-7200-29-W, MVC-7200-29-BL Installation Manual
...
Mini-Dome Camera Installation Manual
Content
Introduction 1
Location and Preparation 1
Installation 1
Troubleshooting 4
FCC Compliance 4
Contact information 4
Mounting bracket template 5
Introduction
The MobileView™ Mini-Dome Camera Installation
Manual includes instructions for installation inside a
transit vehicle. Read through these instructions before
installation.
To use this document, you must have the following
minimum qualifications:
A basic knowledge of CCTV systems and
components; and
A basic knowledge of electrical wiring and low-
voltage electrical hookups.
MobileView™ Part Numbers:
MVC-7100-29-BL Mini-dome, 600TVL, 2.9mm lens, black, No IR
MVC-7100-29-BLI Mini-dome, 600 TVL, 2.9mm lens, black, with IR
MVC-7100-29-W Mini-dome, 600TVL, 2.9mm lens, white, No IR
MVC-7100-29-WI Mini-dome, 600TVL, 2.9mm lens, white, with IR
MVC-7100-36-BL Mini-dome, 600 TVL, 3.6mm lens, black, No IR
MVC-7100-36-BLI Mini-dome, 600 TVL, 3.6mm lens, black, with IR
MVC-7100-36-W Mini-dome, 600TVL, 3.6mm lens, white, No IR
MVC-7100-36-WI Mini-dome, 600TVL, 3.6mm lens, white, with IR
MVC-7100-60-BL Mini-dome, 600TVL, 6.0mm lens, black, No IR
MVC-7100-60-BLI Mini-dome, 600 TVL, 6.0mm lens, black, with IR
MVC-7100-60-W Mini-dome, 600TVL, 6.0mm lens, white, No IR
MVC-7100-60-WI Mini-dome, 600TVL, 6.0mm lens, white, with IR
MVC-7200-29-BL Mini-dome, 520 TVL, 2.9mm lens, black, with WDR
MVC-7200-29-W Mini-dome, 520 TVL, 2.9mm lens, white, with WDR
MVC-7200-36-BL Mini-dome, 520 TVL, 3.6mm lens, black, with WDR
MVC-7200-36-W Mini-dome, 520 TVL, 3.6mm lens, white, with WDR
MVC-7200-60-BL Mini-dome, 520 TVL, 6.0mm lens, black, with WDR
MVC-7200-60-W Mini-dome, 520 TVL, 6.0mm lens, white, with WDR
Installation
Mounting the Camera
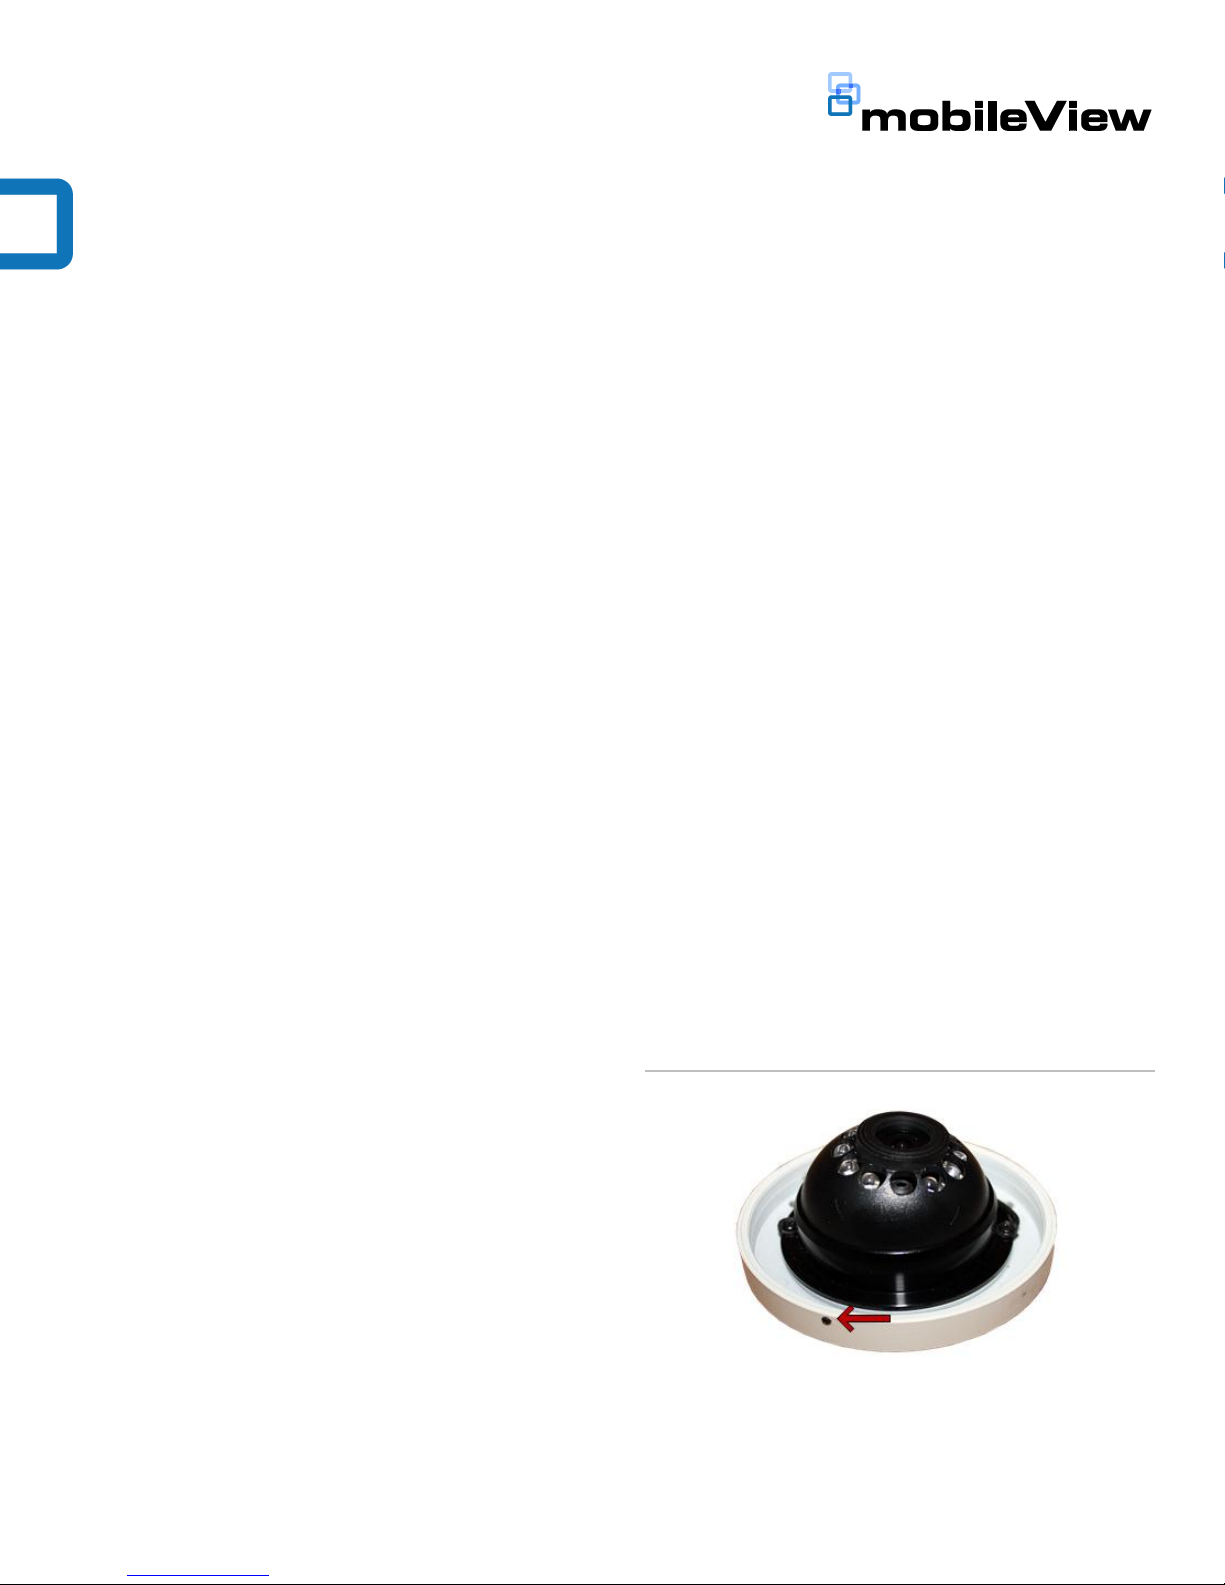
1. Using the provided hex wrench, loosen the set
Location and Preparation
The mini-dome camera is designed for interior use only.
Choose a protected location inside the vehicle that will
screw on the side of the camera just enough to
unscrew the lens cover. See Figure 1.
Figure 1 Loosen set screw
deliver the desired image.
Before beginning, confirm you have the following parts
required for installation:
MobileView™ Mini-Dome Camera
Three (3) machine screws with red nylon washers
Three (3) flat-head sheet-metal screws with black
nylon washers (optional)
Hex wrench
Mini-Dome Camera Installation Manual 1

2. Using the camera mounting base as a guide, mark
the center of the mounting base and the position of
the three mounting screws on the mounting surface
as shown in Figure 2.
Figure 2 Mark the mounting holes and center
6. If using rivnuts, install stainless steel rivnuts as
shown in Figure 5.
Figure 5 Install stainless steel rivnuts
3. Cut the center hole for the video/power cable
connectors (typically 9/16” or more) as shown in
Figure 3.
Figure 3 Cut the cable hole
4. Drill the three mounting holes as shown in Figure 4
using a bit sized according to the mounting
hardware you will use.
Figure 4 Drill the mounting holes
7. If using the flat head sheet metal screws or other
hardware, install hardware to secure camera base to
surface.
NOTE: Application of blue Loctite is recommended on
the camera base mounting screws to prevent
loosening.
Figure 6 Install the camera base
8. Remove the protective covering from the camera,
and remove the dome from the camera plate by
unscrewing counter-clockwise.
9. Feed the camera cable harness through the center
hole, and pull gently until the camera is against the
base.
5. Use a deburring tool to eliminate sharp edges from
the center hole to prevent video cable damage.
2 Mini-Dome Camera Installation Manual
The cable will be accessed from inside the vehicle
through an appropriate access panel for later
connection to the DVR. When the camera pigtail
BNC is connected to the video cable, wrap the BNC
connector with electrical tape.
10. Use the three machine screws with red nylon
washers to attach the camera to the base. Hand
tighten the screws until snug.
 Loading...