

P/N 1040736 • REV E • OCT12
Smart Card Reader AL1191, AL-1193
Wire color
Name
Description
Red
Positive 9 to 14 VDC supply .
Black
O V
DC supply ground.
Green
D-/D0/Data
RS485 Data -, Wiegand Data 0 Absolute
maximum, 12 V at 10 mA
White
D+/D1/Clock
RS485 Data +, Wiegand Data 1 Absolute
maximum, 12 V at 10 mA
AL-1191
Cover
Blue LED
Red LED
Comms
AL-1193
Blue LED
Red LED
Comms
Installation Instructions
Introduction
This is the Smart Card Reader Installation Instructions for
models AL-1191 and AL-1193. The smart card reader is a
multifunction, all-purpose proximity card reader suitable for all
locations (including outdoors) that require a short-range
reader. You can connect the reader directly to the Alliance
system RS485 databus.
You can configure the reader through the control panel menu
when it is connected to the system databus, through the DGP
menu when it is connected to the local databus, or you can use
a configuration card. Refer to the Smart Card Reader
Programming Manual for more information.
The AL-1191 model is shipped with a white removable cover
(there are five other colors available).
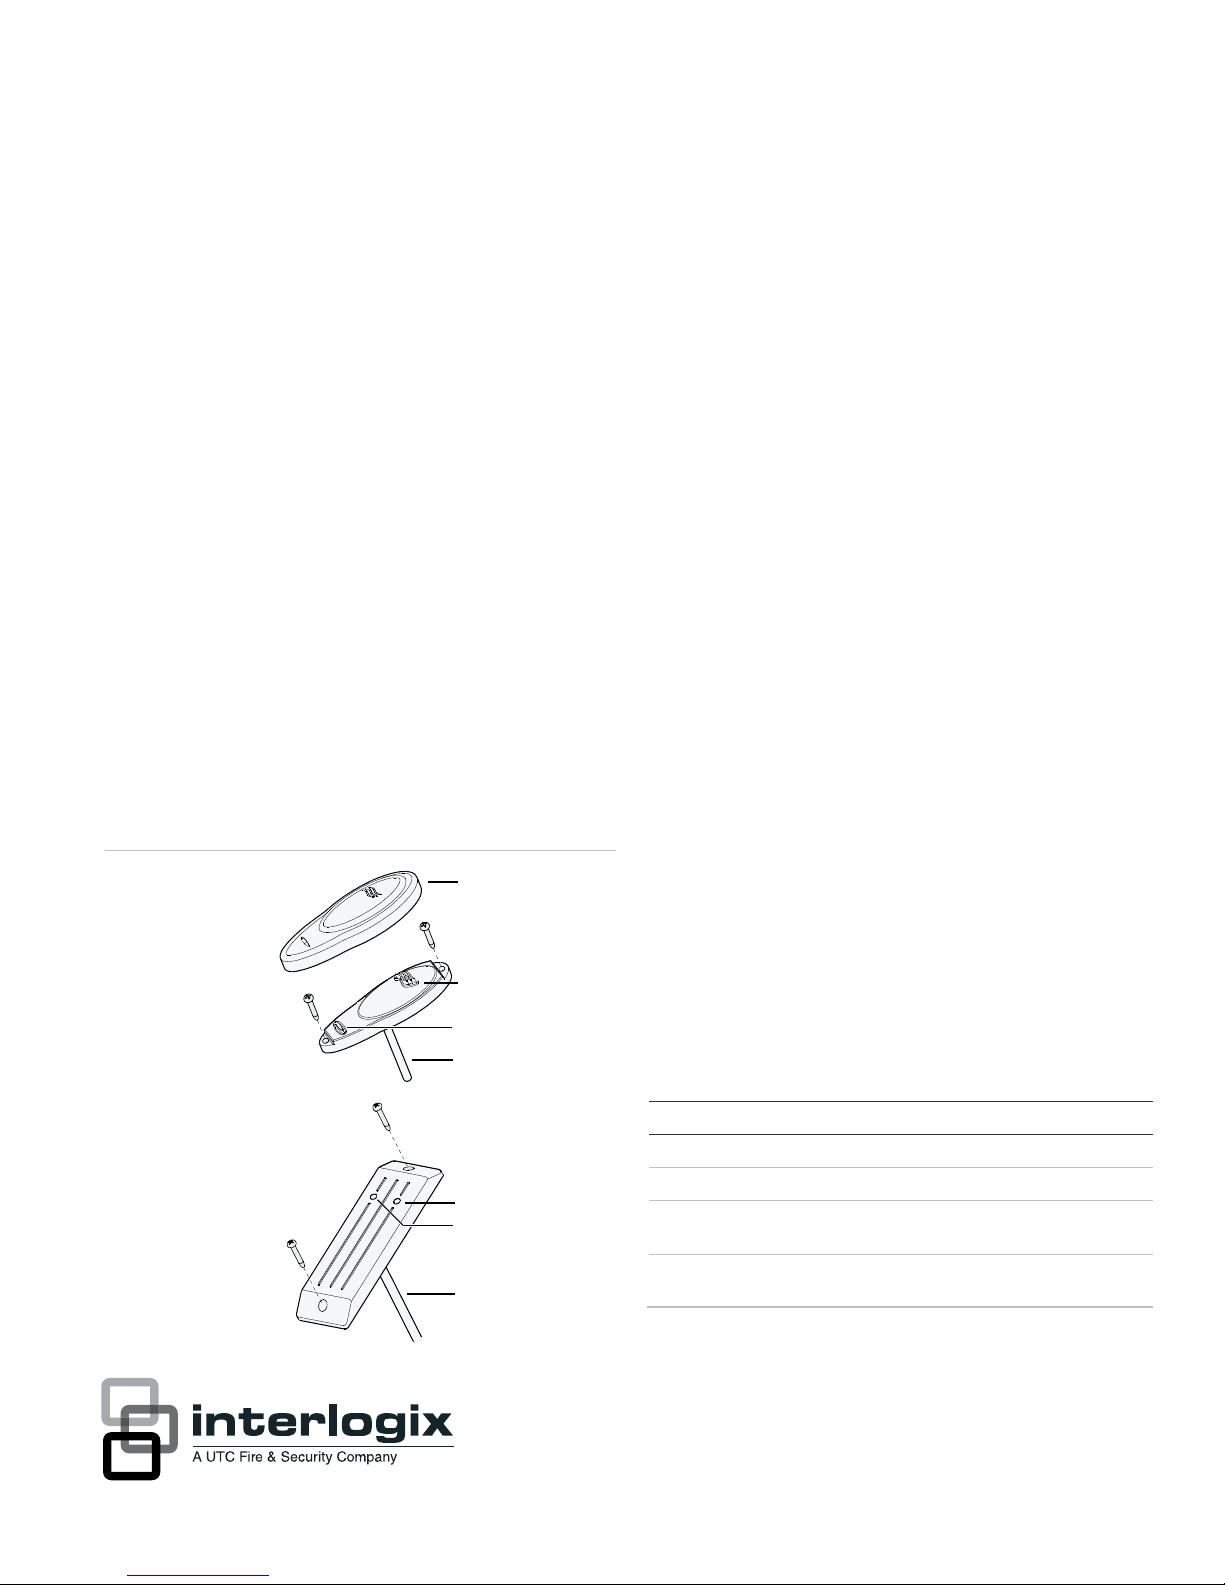
Reader components
Figure 1 below shows the reader components.
Figure 1: Reader components
Blue LED. Door open, disarmed.
Red LED. Door open, armed
Comms. LED control, buzzer control, power.
Installation
You should program the reader and change the default
address (16) before you install the reader. Refer to the Smart
Card Reader Programming Manual for programming details.
You can mount the reader on any flat surface with two #6 (3 to
3.5 mm diameter) panhead screws (Figure 1). We do not
recommend using countersunk screws.
You will experience a slightly reduced range if you mount the
reader on a metal surface. If you mount the AL-1191 reader
outdoors, ensure that the blue LED is at the top.
To mount the reader, do the following:
1. Gently pry the AL-1191 cover sides away from the main
reader body to remove cover and expose the mounting
screws. Do not use excessive force or the reader can be
irreparably damaged.
2. Mount the reader using the mounting screws.
3. Gently press the cover over the main body of the AL-1191
reader until it locks into place.
Wiring
Table 1 below describes the reader wiring components.
Table 1: Wiring components
Brown
LED 1
Off line LED control configured to two-wire
control will control the red LED only.
Wire grounded: red LED on
Wire open: red LED off
Wire at +5 to +12 V: red LED off
Off line LED Control configured to one-wire
control will control both the red and blue LEDs
Wire grounded: blue LED on
Wire open circuit: both LEDs off .
Wire at +5 V to +12 V: red LED on.
Absolute maximum, 14 V
Yellow
LED 2
Conf igurable to control the blue LED when
off line.
Wire grounded: blue LED on.
Wire open: blue LED off .
Wire at +5V to +12V: blue LED off .
Request-to-exit input when online to Alliance.
This input may be connected to a push button
connected to ground with RTE only selected on
the option card or in Menu 10. Refer to the
Smart Card Reader Programming Manual.
Blue
Buzzer
Off line buzzer control.
Wire open or +5V to +12V: buzzer off .
Wire grounded: buzzer sounding.
Absolute maximum, 14 V.
Violet
Open
collector
Conf igurable as: door relay, tamper output,
credit controlled pulse, timed, or latched output.
Absolute maximum, 14 V at 25 mA
This is a low current output and must not be
used to directly energize high current door
openers.
470 ohm
resistor
Used to terminate RS485 bus when the reader
is the last device on the bus.
Install across D+ (white) and D- (green).
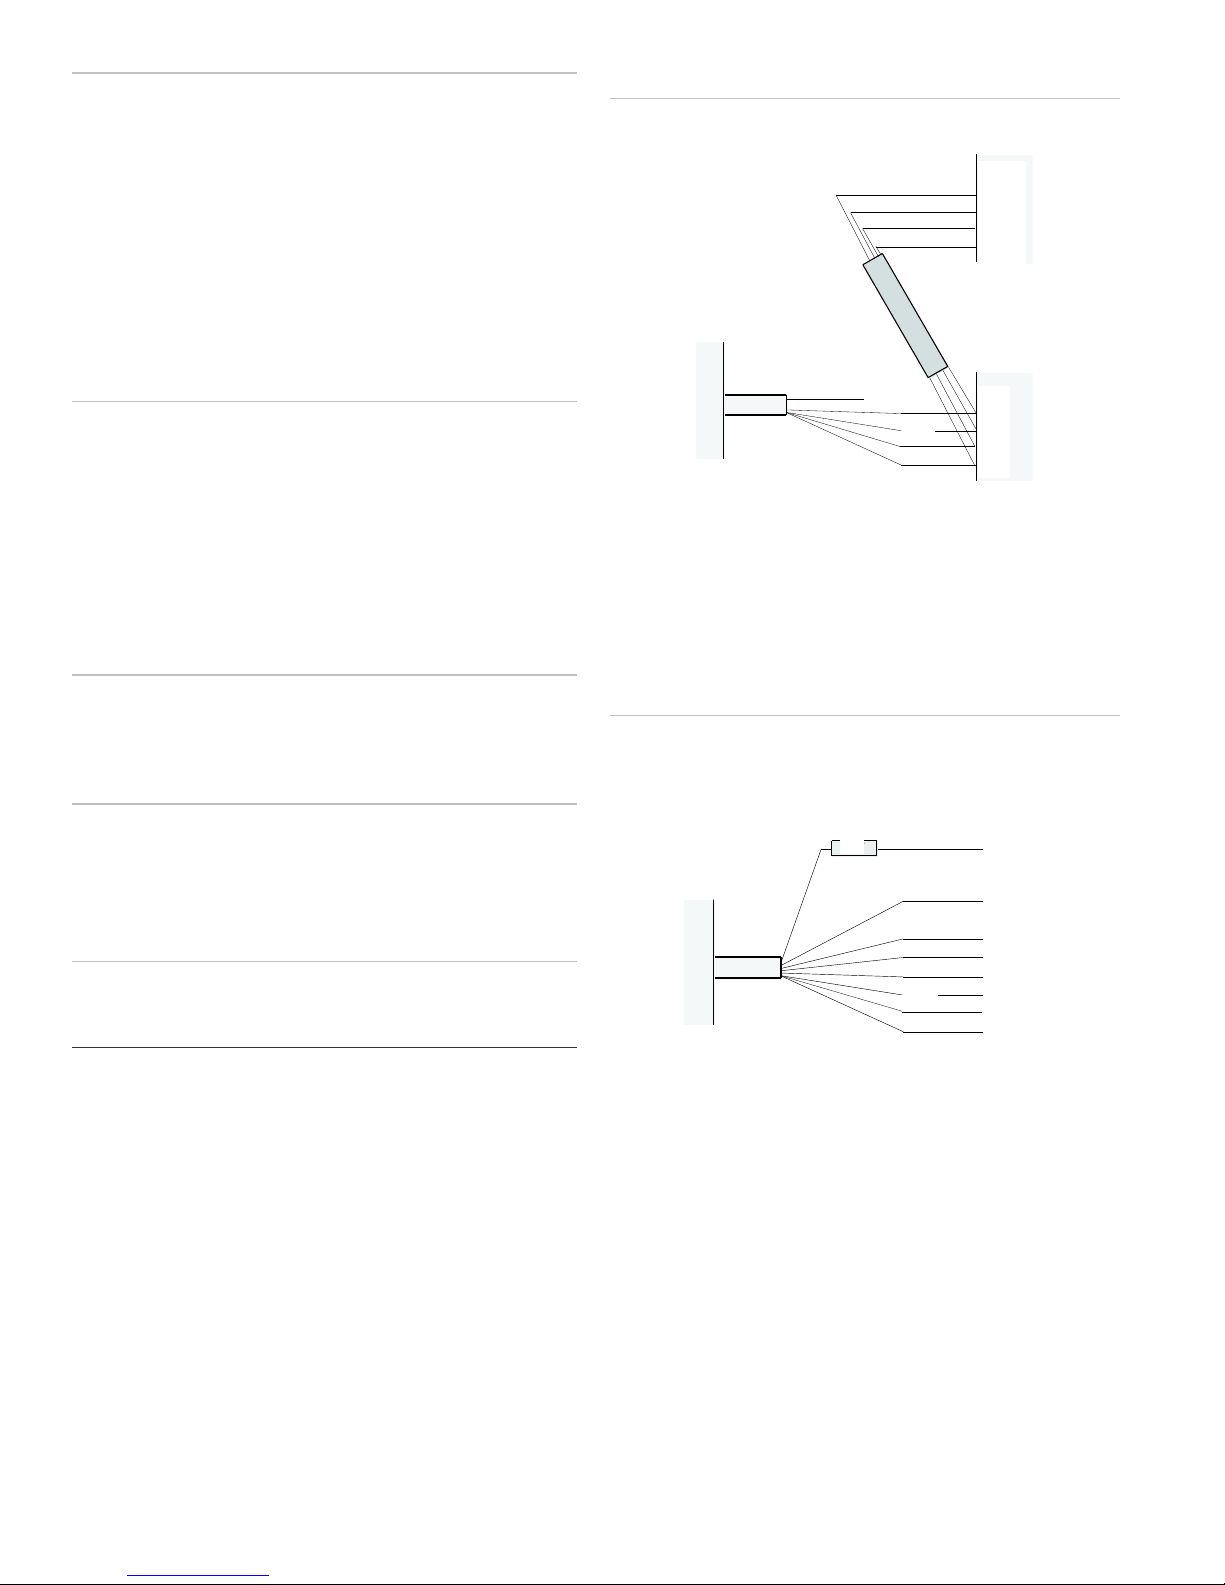
Figure 2: System Bus connections
AL-1191/AL-1193
Control
Panel
System bus
White
Black
Red
J10
D+
+12V
0V
+12V
White
Black
Red
Violet (open collector)
DGP
AL-1191/AL-1193
Violet
Red
Black
Green
Yellow
4K7
J8 to J12
1
C
2
C
3
C
J13 to J16
+12V
+5V
0V
D0
D1
L2
L1
BZ
Wiegand block connections
Figure 3 below shows how to connect the reader to the
Wiegand connection block on a 4-Door/Elevator Controller
DGP.
System bus connections
Figure 2 below shows how to connect the reader to a RAS on
the Alliance system bus.
2 Smart Card Reader AL1191, AL-1193 Installation Instructions
Figure 3: Wiegand block connections
Local bus connections
Figure 4 on page 3 shows how to connect the reader to a 4Door/Elevator Controller DGP local bus with a request-to-exit
input.
 Loading...