

Intel Omni-Path Switch 100 Series, Omni-Path Edge Switch Series, Omni-Path Director Class Switch Series Installation Manual
Page 1

Intel® Omni-Path Fabric Switches
Hardware
Installation Guide
Rev. 10.0
June 2019
Doc. No.: H76456, Rev.: 10.0
Page 2

You may not use or facilitate the use of this document in connection with any infringement or other legal analysis concerning Intel products described
herein. You agree to grant Intel a non-exclusive, royalty-free license to any patent claim thereafter drafted which includes subject matter disclosed
herein.
No license (express or implied, by estoppel or otherwise) to any intellectual property rights is granted by this document.
All information provided here is subject to change without notice. Contact your Intel representative to obtain the latest Intel product specifications and
roadmaps.
The products described may contain design defects or errors known as errata which may cause the product to deviate from published specifications.
Current characterized errata are available on request.
Intel technologies’ features and benefits depend on system configuration and may require enabled hardware, software or service activation.
Performance varies depending on system configuration. No computer system can be absolutely secure. Check with your system manufacturer or
retailer or learn more at intel.com.
Intel, the Intel logo, Intel Xeon Phi, and Xeon are trademarks of Intel Corporation in the U.S. and/or other countries.
*Other names and brands may be claimed as the property of others.
Copyright © 2015–2019, Intel Corporation. All rights reserved.
®
Omni-Path Fabric Switches Hardware
Intel
Installation Guide June 2019
2 Doc. No.: H76456, Rev.: 10.0
Page 3

Revision History—Intel® Omni-Path Fabric
Revision History
For the latest documentation, go to: http://www.intel.com/omnipath/SwitchPublications.
Date Revision Description
June 2019 10.0 • Updated the FM Switch LED description.
April 2019 9.0 Added Appendix B Director Switch Cable Management on page 90.
February 2019 8.0 • Added an Edge switch cable port connection limitation statement to
April 2018 7.0 • Added Figure 57, "48-Port Leaf Module Port Numbering"
April 2017 6.0 • Updated Air Baffle information in "Installing the Airflow Baffles"
December 2016 5.0 Document updated for Revision 5.0
August 2016 4.0 Document updated for Revision 4.0
May 2016 3.0 Document updated for Revision 3.0
February 2016 2.0 Document updated for Revision 2.0
November 2015 1.0 Document updated for Revision 1.0
• Edge switch product naming. Updated remaining instances of
"unmanaged" to "externally-managed" wherever applicable.
the section Cable Distances on page 28.
• The section Updating the Management Module IP Addresses in a
Director Class Redundant Management Configuration on page 75
was updated to use the boot command moduleip.
• Added Q7 BIOS Update on page 86
• Added module installation information for the Omni-Path Fabric
Edge Hot Swap in "Installing the Edge Switch Hot-Swap Power and
Fan Modules".
June 2019 Installation Guide
Doc. No.: H76456, Rev.: 10.0 3
Intel® Omni-Path Fabric Switches Hardware
Page 4

®
Omni-Path Fabric—Contents
Intel
Contents
Revision History..................................................................................................................3
Preface............................................................................................................................... 9
Intended Audience....................................................................................................... 9
Intel® Omni-Path Documentation Library.........................................................................9
How to Search the Intel® Omni-Path Documentation Set........................................ 11
Cluster Configurator for Intel® Omni-Path Fabric.............................................................12
Documentation Conventions........................................................................................ 12
Laser Safety Information.............................................................................................13
Electrostatic Discharge Sensitivity (ESDS) Precautions.................................................... 13
License Agreements....................................................................................................13
Technical Support.......................................................................................................13
1.0 Introduction................................................................................................................14
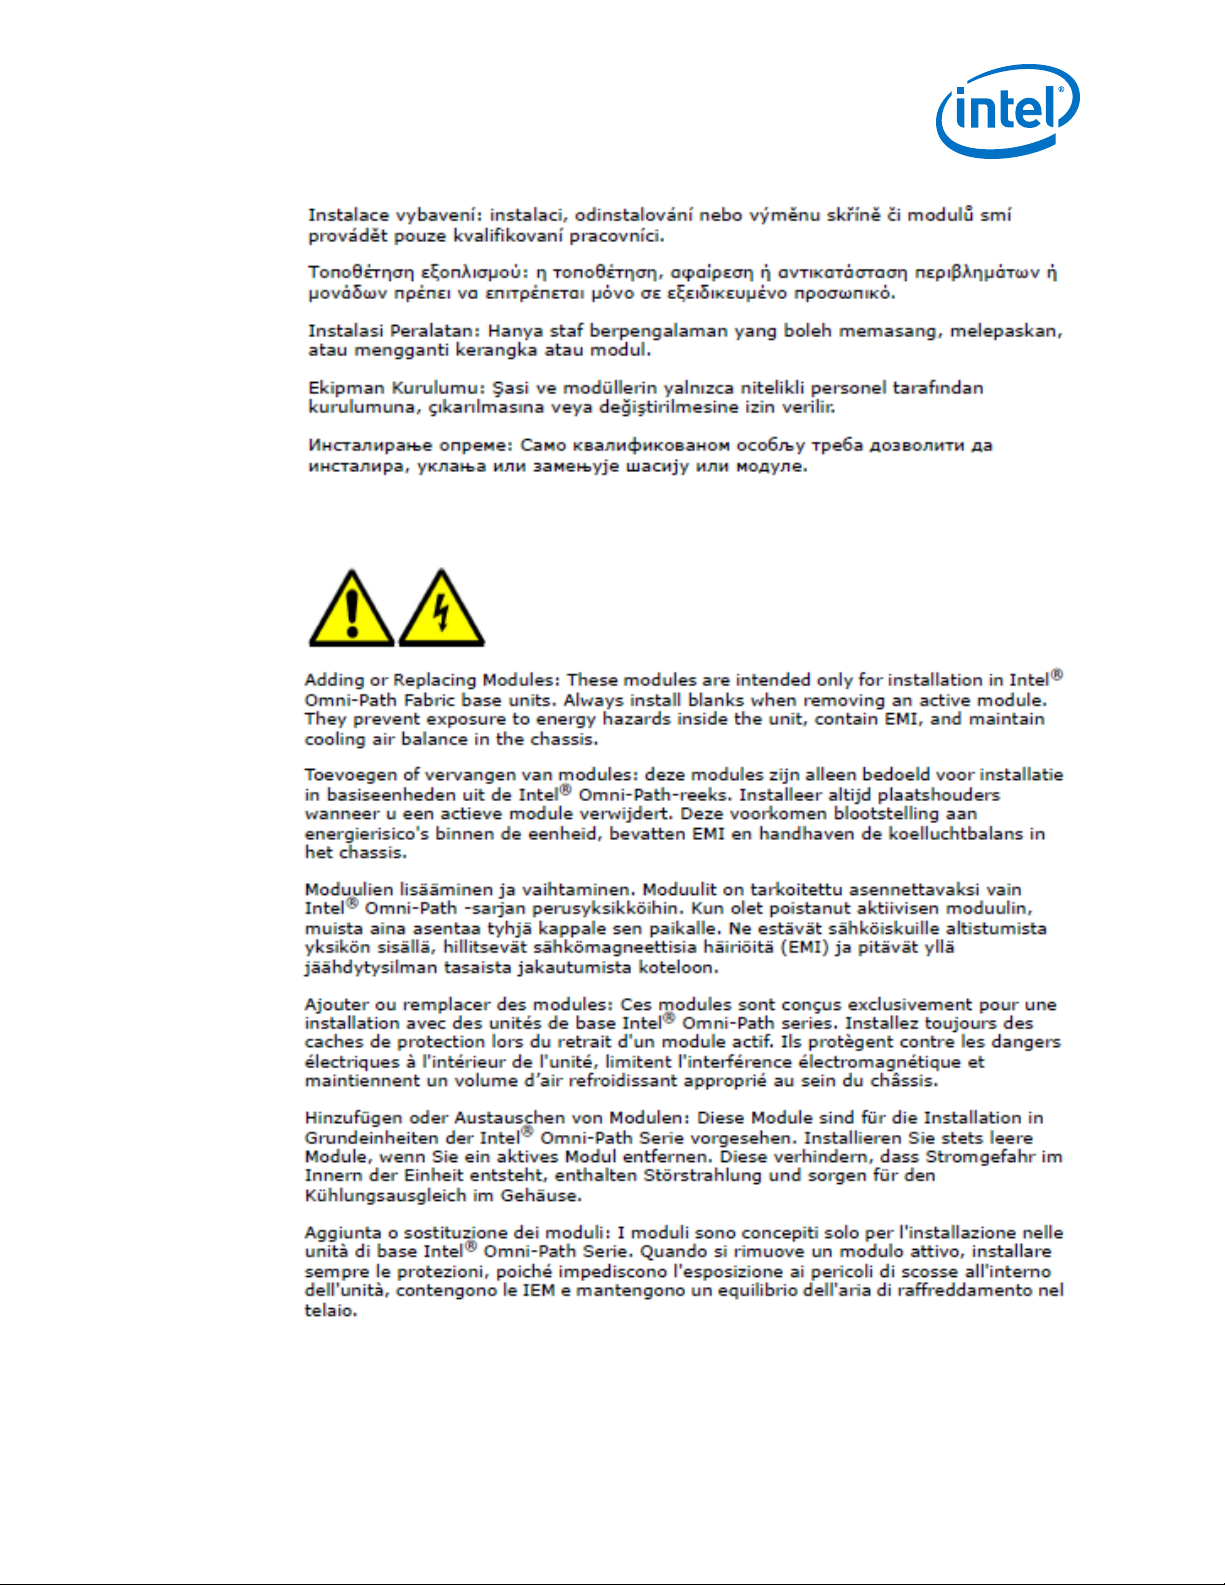
1.1 Safety Information................................................................................................14
1.1.1 Statement 1.............................................................................................15
1.1.2 Statement 2.............................................................................................17
1.1.3 Statement 3.............................................................................................19
1.1.4 Statement 4.............................................................................................20
1.1.5 Statement 5.............................................................................................22
1.1.6 Statement 6.............................................................................................24
1.1.7 Statement 7.............................................................................................25
2.0 Installation................................................................................................................. 28
2.1 Planning the Installation........................................................................................ 28
2.1.1 Cable Requirements.................................................................................. 28
2.1.2 Uninterruptible Power Supply Equipment......................................................31
2.2 Installation Tasks Checklist.....................................................................................31
2.2.1 Tools and Equipment Required.................................................................... 32
2.2.2 Check the Installation Site......................................................................... 32
2.2.3 Mark the Rack.......................................................................................... 32
2.3 Intel® Omni-Path Fabric Edge Switch Installation...................................................... 33
2.3.1 Mounting Hardware Kit Contents................................................................. 33
2.3.2 Rack Mounting..........................................................................................33
2.3.3 Installing the Airflow Baffles....................................................................... 37
2.3.4 Installing the Switch Fascia........................................................................ 40
2.3.5 Reversing the Fan Airflow...........................................................................41
2.3.6 Installing the Q7 Management Module......................................................... 43
2.4 Intel® Omni-Path Director Class Switch 100 Series Installation................................... 45
2.4.1 Mounting Hardware Kit Contents................................................................. 45
2.4.2 Unpacking the Switch................................................................................ 45
2.4.3 Installation Tasks...................................................................................... 51
2.4.4 Installing the Optional Cable Management Guide........................................... 59
2.4.5 Installing Director Class Modules.................................................................61
2.4.6 Installing the Edge Switch Hot-Swap Power and Fan Modules.......................... 65
2.5 Connect Equipment to the Ports and Power On the System.........................................68
2.5.1 Director Class Switch Port and Slot Numbering..............................................69
2.5.2 Leaf Module Port Numbering.......................................................................70
Intel® Omni-Path Fabric Switches Hardware
Installation Guide June 2019
4 Doc. No.: H76456, Rev.: 10.0
Page 5

Contents—Intel® Omni-Path Fabric
2.5.3 Edge Switch Cabling Recommendations........................................................71
2.6 Setting Up the USB Console................................................................................... 73
2.7 Bringing Up the System For the First Time................................................................73
2.7.1 Start-up Procedures.................................................................................. 73
2.7.2 Changing the Switch IP Address and Default Gateway through the CLI............. 73
2.7.3 Updating the Management Module IP Addresses in a Director Class
Redundant Management Configuration........................................................75
2.8 Component LEDs.................................................................................................. 75
2.8.1 Edge Switch LEDs..................................................................................... 76
2.8.2 Director Class LEDs................................................................................... 79
Appendix A Q7 BIOS Update............................................................................................. 86
A.1 Before Getting Started.......................................................................................... 86
A.1.1 Prior to Upgrading.....................................................................................86
A.2 Displaying the Current Version................................................................................86
A.3 SFTP Server Configuration..................................................................................... 87
A.4 Updating the Edge Switches................................................................................... 87
A.4.1 Performing the Upgrade.............................................................................87
A.5 Updating Director Class Switches............................................................................ 88
A.5.1 Performing the Upgrade.............................................................................88
Appendix B Director Switch Cable Management................................................................ 90
June 2019 Installation Guide
Doc. No.: H76456, Rev.: 10.0 5
Intel® Omni-Path Fabric Switches Hardware
Page 6

®
Omni-Path Fabric—Figures
Intel
Figures
1 Edge Switch Port Connection Limitations.....................................................................29
2 QSFP Cable Connector Orientation............................................................................. 29
3 Copper Cable Bend Radius ....................................................................................... 30
4 Fiber Optic Bend Radius ...........................................................................................31
5 Intel® Omni-Path Edge Switch Rail.............................................................................33
6 Rail Installation Pin.................................................................................................. 34
7 Installed the Rack Rails............................................................................................ 34
8 Intel® Omni-Path Fabric Edge Switch Mounted in a Four Post Standard Rack....................35
9 Switch Rail Adjustments........................................................................................... 36
10 Rail Adjustment Notches...........................................................................................36
11 Edge Baffle (Top View)............................................................................................. 38
12 Secure the Top Baffle to the Switch............................................................................39
13 Remove Rail Post.....................................................................................................39
14 Insert Clamp on Baffles............................................................................................ 39
15 Clamp over Rail Post................................................................................................ 40
16 Reattach the Rail Post.............................................................................................. 40
17 Switch Fascia.......................................................................................................... 41
18 Rail Posts for Fascia Installation................................................................................. 41
19 Switch Cover Thumbscrews (Top View).......................................................................42
20 Fan Assembly Rotation............................................................................................. 42
21 Wire Assembly Strain Relief and Airflow Direction Indicators..........................................43
22 Q7 Management Module........................................................................................... 43
23 Switch Cover Thumbscrews (Top View).......................................................................44
24 Installing the Q7 Module...........................................................................................44
25 Q7 Module Mounting Screw.......................................................................................45
26 Unpacking the Switch (1)......................................................................................... 46
27 Unpacking the Switch (2)......................................................................................... 47
28 Unpacking the Switch (3)......................................................................................... 48
29 Unpacking the Switch (4)......................................................................................... 48
30 Unpacking the Switch (5)......................................................................................... 49
31 Unpacking the Switch (6)......................................................................................... 50
32 Unpacking the Switch (7)......................................................................................... 51
33 Measure the Rack.................................................................................................... 52
34 Preset the Adjustable Rails........................................................................................52
35 Install Fixture Brackets.............................................................................................53
36 Secure Shelf to Rack................................................................................................53
37 Secure the Baffles to Top of Shelf Rails....................................................................... 54
38 Secure the Top of the Baffles to the Rack Rails.............................................................55
39 Completed Shelf Assemblies......................................................................................56
40 Slide the Chassis into the Rack..................................................................................57
41 Fasten the Chassis to the Rack.................................................................................. 58
42 Completed Switch Installations..................................................................................59
43 Installing Cable Management.................................................................................... 60
44 Module Installation 1................................................................................................62
45 Module Installation 2................................................................................................63
46 Module Installation 3................................................................................................63
47 Module Installation 4................................................................................................64
48 Module Installation 5................................................................................................64
49 Edge Power Supply Install 1......................................................................................66
50 Edge Power Supply Install 2......................................................................................67
51 Edge Fan Supply Install 1......................................................................................... 67
52 Edge Fan Supply Install 2......................................................................................... 68
53 Edge Switch Serial and Ethernet Ports........................................................................ 68
54 Director Switch Serial and Ethernet Ports ...................................................................68
Intel® Omni-Path Fabric Switches Hardware
Installation Guide June 2019
6 Doc. No.: H76456, Rev.: 10.0
Page 7

Figures—Intel® Omni-Path Fabric
55 Director Class Leaf Slot Numbering............................................................................ 69
56 Leaf Module Port Numbering..................................................................................... 70
57 48-Port Leaf Module Port Numbering ......................................................................... 70
58 Chassis Viewer GUI Leaf Port Stats Scree....................................................................71
59 48-Port Edge Switch Cabling Recommendations...........................................................72
60 Edge Switch LEDs.................................................................................................... 76
61 Ports, Fabric Manager (FM), Managed (M), and FM Switch LEDs..................................... 77
62 Activating the FM Enable Switch LED.......................................................................... 78
63 Power Supply LEDs.................................................................................................. 79
64 Airflow Direction LED............................................................................................... 79
65 Management Module LEDs........................................................................................ 80
66 Leaf Module LEDs.................................................................................................... 81
67 Spine Module LEDs.................................................................................................. 82
68 SEEB Module LEDs...................................................................................................83
69 Director Class Fan LEDs............................................................................................84
70 Director Class Power Supply LEDs..............................................................................85
71 Leaf Cabling............................................................................................................90
72 Using Velcro Ties and the Cable Management Hanger................................................... 90
73 Tying Off All Cables..................................................................................................91
June 2019 Installation Guide
Doc. No.: H76456, Rev.: 10.0 7
Intel® Omni-Path Fabric Switches Hardware
Page 8

®
Omni-Path Fabric—Tables
Intel
Tables
1 Cable Bend Radius Guidelines....................................................................................30
Intel® Omni-Path Fabric Switches Hardware
Installation Guide June 2019
8 Doc. No.: H76456, Rev.: 10.0
Page 9

Preface—Intel® Omni-Path Fabric
Preface
This manual is part of the documentation set for the Intel® Omni-Path Fabric (Intel
OP Fabric), which is an end-to-end solution consisting of Intel® Omni-Path Host Fabric
Interfaces (HFIs), Intel® Omni-Path switches, and fabric management and
development tools.
The Intel® OP Fabric delivers the next generation, High-Performance Computing (HPC)
network solution that is designed to cost-effectively meet the growth, density, and
reliability requirements of large-scale HPC clusters.
Both the Intel® OP Fabric and standard InfiniBand* (IB) are able to send Internet
Protocol (IP) traffic over the fabric, or IPoFabric. In this document, however, it may
also be referred to as IP over IB or IPoIB. From a software point of view, IPoFabric
behaves the same way as IPoIB, and in fact uses an ib_ipoib driver to send IP traffic
over the ib0/ib1 ports.
Intended Audience
The intended audience for the Intel® Omni-Path (Intel® OP) document set is network
administrators and other qualified personnel.
Intel® Omni-Path Documentation Library
Intel® Omni-Path publications are available at the following URLs:
• Intel® Omni-Path Switches Installation, User, and Reference Guides
http://www.intel.com/omnipath/SwitchPublications
• Intel® Omni-Path Software Installation, User, and Reference Guides (includes HFI
documents)
http://www.intel.com/omnipath/FabricSoftwarePublications
• Drivers and Software (including Release Notes)
http://www.intel.com/omnipath/Downloads
®
Use the tasks listed in this table to find the corresponding Intel® Omni-Path
document.
Task
Key:
Shading indicates the URL to use for accessing the particular document.
• Intel® Omni-Path Switches Installation, User, and Reference Guides: http://www.intel.com/omnipath/SwitchPublications
• Intel® Omni-Path Software Installation, User, and Reference Guides (includes HFI documents):
http://www.intel.com/omnipath/FabricSoftwarePublications (no shading)
• Drivers, Software, and Firmware (including Release Notes): http://www.intel.com/omnipath/Downloads
June 2019 Installation Guide
Doc. No.: H76456, Rev.: 10.0 9
Document Title Description
continued...
Intel® Omni-Path Fabric Switches Hardware
Page 10

Task Document Title Description
A roadmap to Intel's comprehensive library of publications
Using the Intel® OPA
documentation set
Intel® Omni-Path Fabric Quick Start
Guide
describing all aspects of the product family. This document
outlines the most basic steps for getting your Intel® OmniPath Architecture (Intel® OPA) cluster installed and
operational.
Provides a high level overview of the steps required to stage
a customer-based installation of the Intel® Omni-Path Fabric.
Setting up an Intel
OPA cluster
®
Intel® Omni-Path Fabric Setup Guide
Procedures and key reference documents, such as Intel
Omni-Path user guides and installation guides, are provided
to clarify the process. Additional commands and best known
methods are defined to facilitate the installation process and
troubleshooting.
Describes the hardware installation and initial configuration
tasks for the Intel® Omni-Path Switches 100 Series. This
includes: Intel® Omni-Path Edge Switches 100 Series, 24 and
48-port configurable Edge switches, and Intel® Omni-Path
Director Class Switches 100 Series.
Contains instructions for installing the HFI in an Intel® OPA
cluster.
Installing hardware
Intel® Omni-Path Fabric Switches
Hardware Installation Guide
Intel® Omni-Path Host Fabric Interface
Installation Guide
Installing host
software
Installing HFI
firmware
Installing switch
firmware (externally-
Intel® Omni-Path Fabric Software
Installation Guide
Describes using a Text-based User Interface (TUI) to guide
you through the installation process. You have the option of
using command line interface (CLI) commands to perform the
installation or install using the Linux* distribution software.
managed switches)
Managing a switch
using GUI
Installing switch
firmware (managed
switches)
Describes the graphical user interface (GUI) of the Intel
Omni-Path Fabric GUI. This document provides task-oriented
procedures for configuring and managing the Intel® OmniPath Switch family.
Help: GUI embedded help files
Managing a switch
using the CLI
Installing switch
firmware (managed
Intel® Omni-Path Fabric Switches
Command Line Interface Reference
Guide
Describes the command line interface (CLI) task information
for the Intel® Omni-Path Switch family.
Help: -help for each CLI
switches)
Provides instructions for using the set of fabric management
tools designed to simplify and optimize common fabric
management tasks. The management tools consist of Text-
Managing a fabric
using FastFabric
Intel® Omni-Path Fabric Suite
FastFabric User Guide
based User Interface (TUI) menus and command line
interface (CLI) commands.
Help: -help and man pages for each CLI. Also, all host CLI
commands can be accessed as console help in the Fabric
Manager GUI.
The Fabric Manager uses a well defined management protocol
Intel® Omni-Path Fabric Suite Fabric
Manager User Guide
to communicate with management agents in every Intel
Omni-Path Host Fabric Interface (HFI) and switch. Through
these interfaces the Fabric Manager is able to discover,
configure, and monitor the fabric.
Managing a fabric
using Fabric Manager
Intel® Omni-Path Fabric Suite Fabric
Manager GUI User Guide
Provides an intuitive, scalable dashboard and set of analysis
tools for graphically monitoring fabric status and
configuration. This document is a user-friendly alternative to
traditional command-line tools for day-to-day monitoring of
fabric health.
Help: Fabric Manager GUI embedded help files
Intel® Omni-Path Fabric—Preface
®
®
®
continued...
Intel® Omni-Path Fabric Switches Hardware
Installation Guide June 2019
10 Doc. No.: H76456, Rev.: 10.0
Page 11

®
Preface—Intel
Configuring and
administering Intel
HFI and IPoIB driver
Running MPI
applications on
Intel® OPA
Writing and running
middleware that
uses Intel® OPA
Optimizing system
performance
Designing an IP or
LNet router on Intel
OPA
Building Containers
for Intel® OPA
fabrics
Writing management
applications that
interface with Intel
OPA
Using NVMe* over
Fabrics on Intel
OPA
Learning about new
release features,
open issues, and
resolved issues for a
particular release
Omni-Path Fabric
Task Document Title Description
®
®
Intel® Omni-Path Fabric Host Software
User Guide
Intel® Performance Scaled Messaging
2 (PSM2) Programmer's Guide
Intel® Omni-Path Fabric Performance
Tuning User Guide
Intel® Omni-Path IP and LNet Router
Design Guide
®
(Old title: Intel® Omni-Path IP and
Storage Router Design Guide)
Building Containers for Intel® OmniPath Fabrics using Docker* and
Singularity* Application Note
Intel® Omni-Path Management API
®
Programmer’s Guide
Configuring Non-Volatile Memory
Express* (NVMe*) over Fabrics on
Intel® Omni-Path Architecture
Application Note
Intel® Omni-Path Fabric Software Release Notes
Intel® Omni-Path Fabric Manager GUI Release Notes
Intel® Omni-Path Fabric Switches Release Notes (includes managed and externally-managed switches)
Intel® Omni-Path Fabric Unified Extensible Firmware Interface (UEFI) Release Notes
Intel® Omni-Path Fabric Thermal Management Microchip (TMM) Release Notes
Intel® Omni-Path Fabric Firmware Tools Release Notes
Describes how to set up and administer the Host Fabric
Interface (HFI) after the software has been installed. The
audience for this document includes cluster administrators
and Message-Passing Interface (MPI) application
programmers.
Provides a reference for programmers working with the Intel
PSM2 Application Programming Interface (API). The
Performance Scaled Messaging 2 API (PSM2 API) is a lowlevel user-level communications interface.
Describes BIOS settings and parameters that have been
shown to ensure best performance, or make performance
more consistent, on Intel® Omni-Path Architecture. If you are
interested in benchmarking the performance of your system,
these tips may help you obtain better performance.
Describes how to install, configure, and administer an IPoIB
router solution (Linux* IP or LNet) for inter-operating
between Intel® Omni-Path and a legacy InfiniBand* fabric.
Provides basic information for building and running Docker*
and Singularity* containers on Linux*-based computer
platforms that incorporate Intel® Omni-Path networking
technology.
Contains a reference for programmers working with the
Intel® Omni-Path Architecture Management (Intel OPAMGT)
Application Programming Interface (API). The Intel OPAMGT
API is a C-API permitting in-band and out-of-band queries of
the FM's Subnet Administrator and Performance
Administrator.
Describes how to implement a simple Intel® Omni-Path
Architecture-based point-to-point configuration with one
target and one host server.
®
How to Search the Intel® Omni-Path Documentation Set
Many PDF readers, such as Adobe* Reader and Foxit* Reader, allow you to search
across multiple PDFs in a folder.
Follow these steps:
1. Download and unzip all the Intel® Omni-Path PDFs into a single folder.
2. Open your PDF reader and use CTRL-SHIFT-F to open the Advanced Search
window.
3. Select All PDF documents in...
June 2019 Installation Guide
Doc. No.: H76456, Rev.: 10.0 11
Intel® Omni-Path Fabric Switches Hardware
Page 12

4. Select Browse for Location in the dropdown menu and navigate to the folder
containing the PDFs.
5. Enter the string you are looking for and click Search.
Use advanced features to further refine your search criteria. Refer to your PDF reader
Help for details.
Cluster Configurator for Intel® Omni-Path Fabric
The Cluster Configurator for Intel® Omni-Path Fabric is available at: http://
www.intel.com/content/www/us/en/high-performance-computing-fabrics/omni-pathconfigurator.html.
This tool generates sample cluster configurations based on key cluster attributes,
including a side-by-side comparison of up to four cluster configurations. The tool also
generates parts lists and cluster diagrams.
Documentation Conventions
The following conventions are standard for Intel® Omni-Path documentation:
• Note: provides additional information.
• Caution: indicates the presence of a hazard that has the potential of causing
damage to data or equipment.
• Warning: indicates the presence of a hazard that has the potential of causing
personal injury.
• Text in blue font indicates a hyperlink (jump) to a figure, table, or section in this
guide. Links to websites are also shown in blue. For example:
See License Agreements on page 13 for more information.
For more information, visit www.intel.com.
• Text in bold font indicates user interface elements such as menu items, buttons,
check boxes, key names, key strokes, or column headings. For example:
Click the Start button, point to Programs, point to Accessories, and then click
Command Prompt.
Press CTRL+P and then press the UP ARROW key.
•
Text in Courier font indicates a file name, directory path, or command line text.
For example:
Enter the following command: sh ./install.bin
• Text in italics indicates terms, emphasis, variables, or document titles. For
example:
Refer to Intel® Omni-Path Fabric Software Installation Guide for details.
In this document, the term chassis refers to a managed switch.
®
Omni-Path Fabric—Preface
Intel
Procedures and information may be marked with one of the following qualifications:
• (Linux) – Tasks are only applicable when Linux* is being used.
• (Host) – Tasks are only applicable when Intel® Omni-Path Fabric Host Software or
Intel® Omni-Path Fabric Suite is being used on the hosts.
Intel® Omni-Path Fabric Switches Hardware
Installation Guide June 2019
12 Doc. No.: H76456, Rev.: 10.0
Page 13
®
Preface—Intel
Omni-Path Fabric
• (Switch) – Tasks are applicable only when Intel® Omni-Path Switches or Chassis
are being used.
• Tasks that are generally applicable to all environments are not marked.
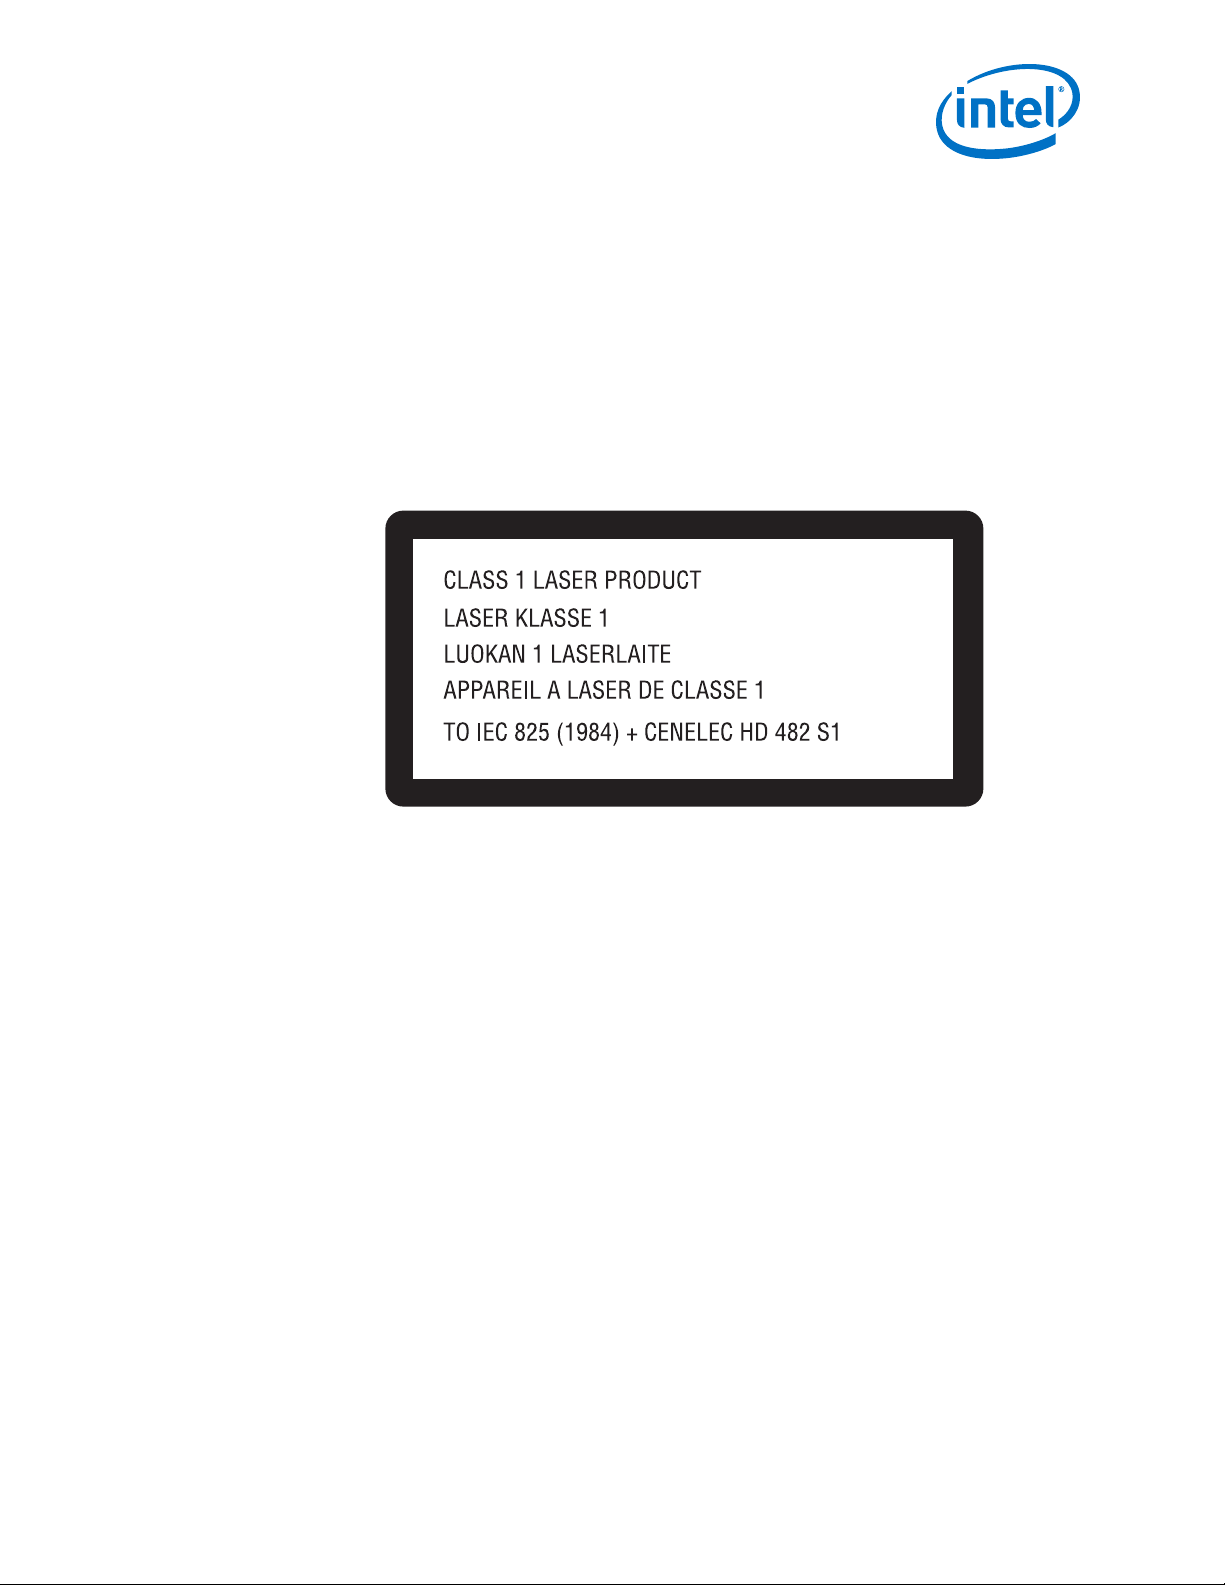
Laser Safety Information
This product may use Class 1 laser optical transceivers to communicate over the fiber
optic conductors. The U.S. Department of Health and Human Services (DHHS) does
not consider Class 1 lasers to be hazardous. The International Electrotechnical
Commission (IEC) 825 Laser Safety Standard requires labeling in English, German,
Finnish, and French stating that the product uses Class 1 lasers. Because it is
impractical to label the transceivers, the following label is provided in this manual.
Electrostatic Discharge Sensitivity (ESDS) Precautions
The assemblies used in the switch chassis are ESD sensitive. Observe ESD handling
procedures when handling any assembly used in the switch chassis.
License Agreements
This software is provided under one or more license agreements. Please refer to the
license agreement(s) provided with the software for specific detail. Do not install or
use the software until you have carefully read and agree to the terms and conditions
of the license agreement(s). By loading or using the software, you agree to the terms
of the license agreement(s). If you do not wish to so agree, do not install or use the
software.
Technical Support
Technical support for Intel® Omni-Path products is available 24 hours a day, 365 days
a year. Please contact Intel Customer Support or visit http://www.intel.com/omnipath/
support for additional detail.
June 2019 Installation Guide
Doc. No.: H76456, Rev.: 10.0 13
Intel® Omni-Path Fabric Switches Hardware
Page 14

1.0 Introduction
This manual describes the hardware installation and initial configuration tasks for the
Intel® Omni-Path Switch 100 Series. This includes:
• Intel® Omni-Path Edge Switch 100 Series, 24 and 48-port configurable edge
switches
• Intel® Omni-Path Director Class Switch 100 Series
This manual is organized as follows:
This Introduction describes the product safety information.
Installation describes the hardware installation and initial configuration tasks.
Appendix Q7 BIOS Update provides instructions for updating the Q7 BIOS on Edge and
Director Class Switches.
Intel® Omni-Path Fabric—Introduction
1.1
Safety Information
Intel® Omni-Path Fabric Switches Hardware
Installation Guide June 2019
14 Doc. No.: H76456, Rev.: 10.0
Page 15

Introduction—Intel® Omni-Path Fabric
Statement 11.1.1
June 2019 Installation Guide
Doc. No.: H76456, Rev.: 10.0 15
Intel® Omni-Path Fabric Switches Hardware
Page 16

Intel® Omni-Path Fabric—Introduction
Intel® Omni-Path Fabric Switches Hardware
Installation Guide June 2019
16 Doc. No.: H76456, Rev.: 10.0
Page 17

Introduction—Intel® Omni-Path Fabric
Statement 21.1.2
June 2019 Installation Guide
Doc. No.: H76456, Rev.: 10.0 17
Intel® Omni-Path Fabric Switches Hardware
Page 18
Intel® Omni-Path Fabric—Introduction
Intel® Omni-Path Fabric Switches Hardware
Installation Guide June 2019
18 Doc. No.: H76456, Rev.: 10.0
Page 19

Introduction—Intel® Omni-Path Fabric
Statement 31.1.3
June 2019 Installation Guide
Doc. No.: H76456, Rev.: 10.0 19
Intel® Omni-Path Fabric Switches Hardware
Page 20

Intel® Omni-Path Fabric—Introduction
1.1.4
Intel® Omni-Path Fabric Switches Hardware
Installation Guide June 2019
20 Doc. No.: H76456, Rev.: 10.0
Statement 4
Page 21

Introduction—Intel® Omni-Path Fabric
June 2019 Installation Guide
Doc. No.: H76456, Rev.: 10.0 21
Intel® Omni-Path Fabric Switches Hardware
Page 22
Intel® Omni-Path Fabric—Introduction
1.1.5
Statement 5
Intel® Omni-Path Fabric Switches Hardware
Installation Guide June 2019
22 Doc. No.: H76456, Rev.: 10.0
Page 23
Introduction—Intel® Omni-Path Fabric
June 2019 Installation Guide
Doc. No.: H76456, Rev.: 10.0 23
Intel® Omni-Path Fabric Switches Hardware
Page 24

Intel® Omni-Path Fabric—Introduction
Statement 61.1.6
Intel® Omni-Path Fabric Switches Hardware
Installation Guide June 2019
24 Doc. No.: H76456, Rev.: 10.0
Page 25
Introduction—Intel® Omni-Path Fabric
Statement 71.1.7
June 2019 Installation Guide
Doc. No.: H76456, Rev.: 10.0 25
Intel® Omni-Path Fabric Switches Hardware
Page 26

Intel® Omni-Path Fabric—Introduction
Intel® Omni-Path Fabric Switches Hardware
Installation Guide June 2019
26 Doc. No.: H76456, Rev.: 10.0
Page 27

Introduction—Intel® Omni-Path Fabric
June 2019 Installation Guide
Doc. No.: H76456, Rev.: 10.0 27
Intel® Omni-Path Fabric Switches Hardware
Page 28

2.0 Installation
This section describes how to install and configure for first-time use:
• The Intel® Omni-Path Fabric Series switches in a network environment.
Intel® Omni-Path Fabric—Installation
2.1
Planning the Installation
The Intel® Omni-Path switches are designed for installation in standard 19-inch
equipment racks.
Racks should conform to conventional standards. Use the American National
Standards Institute (ANSI)/Electronic Industries Association (EIA) standard ANSI/
EIA-310-D-92 and International Electrotechnical Commission (IEC) 297
Racks should meet the following mechanical recommendations:
• Four-post, 19" rack to facilitate easy maintenance
• Universal mounting rail hole pattern identified in IEC Standard 297
• Mounting holes flush with the rails to accommodate the chassis
NOTE
Operation is subject to the following conditions:
NOTE
Use a rack grounding kit and a ground conductor that is carried back to earth or to
another suitable building ground. Ground the equipment rack to earth ground.
NOTE
Provide enough room to work on the equipment. Clear the work site of any
unnecessary materials. Make sure the equipment will have enough clearance for front
and rear access.
2.1.1
2.1.1.1
Intel® Omni-Path Fabric Switches Hardware
Installation Guide June 2019
28 Doc. No.: H76456, Rev.: 10.0
Cable Requirements
Cable Distances
When planning the location of the switches, consider the distance limitations for
signaling, EMI, and connector compatibility. It is recommended that the user does not
exceed specified transmission rate and distance limits.
NOTE
When connecting the outer ports of two (2) 48-port Edge switches (highlighted green
in Figure 1 below), make certain to use active optical cables (AOC) for distances
greater than 2 meters.
Page 29

Installation—Intel® Omni-Path Fabric
Figure 1. Edge Switch Port Connection Limitations
2.1.1.2
Cable Guidelines
NOTE
Building and electrical codes vary depending on the location. Comply with all code
specifications when planning the site and installing cable.
When running cable to the equipment, consider the following:
• Do not run cables where they can be stepped on or rolled over.
• Be sure cables are intact with no cuts, bends, or nicks.
• If the user is making a cable, ensure that the cable is properly crimped.
• Provide proper strain relief for cables.
• Support cables using a cable manager mounted above connectors to avoid
unnecessary weight on the cable bundles.
• Bundle cable using Velcro straps to avoid injuring cables.
• Keep all ports and connectors free of dust.
• Untwisted Pair (UTP) cables can build up Electrostatic Discharge (ESD) charges
when being placed into a new installation. Before installing category 5 UTP cables,
discharge ESD from the cable by plugging it into a port on a system that is not
powered on.
• When required for safety and fire rating requirements, plenum-rated cable can be
used. Check the local building codes to determine when it is appropriate to use
plenum-rated cable, or refer to IEC standard 850.
• In order to create enough space, QSFP cables connectors may need to be rotated
when plugging into alternate rows of switch components.
Figure 2. QSFP Cable Connector Orientation
June 2019 Installation Guide
Doc. No.: H76456, Rev.: 10.0 29
Intel® Omni-Path Fabric Switches Hardware
Page 30

Intel® Omni-Path Fabric—Installation
2.1.1.3
Cable Handling and Bend Radius
• Intel® Omni-Path Copper Cable 100 Series:
— Recommended minimum bend radius is >69mm
• Intel® Omni-Path Active Optical Cable 100 Series:
— Recommended minimum bend radius is >105 mm within 100 mm of either
cable end module, and >60 mm on the rest of the cable
Table 1. Cable Bend Radius Guidelines
Intel® Omni-Path Copper Cable 100 Series
American Wire Gauge (AWG) Size Cable Bend Radius
26 >69 mm
30 >66 mm
Intel® Omni-Path Active Optical Cable 100 Series
Gauge Bend Radius
Optical >105 mm within 100 mm of either cable end module
Figure 3. Copper Cable Bend Radius
>60 mm on the rest of the cable
Intel® Omni-Path Fabric Switches Hardware
Installation Guide June 2019
30 Doc. No.: H76456, Rev.: 10.0
Page 31

Installation—Intel® Omni-Path Fabric
Figure 4. Fiber Optic Bend Radius
2.1.2
2.2
Uninterruptible Power Supply Equipment
Consider the following when selecting uninterruptible power supply (UPS) equipment:
• The minimum amperage requirements for a UPS:
— Calculate VA (volt-amps): Locate the voltage and amperage requirements for
each piece of equipment (usually located on a sticker on the back or bottom of
the equipment). Multiply the numbers together to get VA.
— Add the VA from each piece of equipment together to find the total VA
requirement. Then add 30% to determine the minimum amperage
requirements for the UPS.
• Transition time (the time necessary for the UPS to transfer from utility power to
full-load battery power).
• The longest potential time period the UPS might be required to supply backup
power.
• Whether the UPS unit provides online protection.
Installation Tasks Checklist
To perform the actual switch installation, the site implementation engineer must
perform the following tasks, which are detailed in this section.
CAUTION
Be sure to review the safety information before starting the installation and during the
installation process (refer to Safety Information on page 14).
June 2019 Installation Guide
Doc. No.: H76456, Rev.: 10.0 31
Intel® Omni-Path Fabric Switches Hardware
Page 32

Intel® Omni-Path Fabric—Installation
1. Check the installation site to verify the installation of cabinet power feeds, rails,
and grounding.
2. Unpack the equipment and inspect for any shipping damage. Any shipping damage
should be reported to the shipping company.
3. Verify that the equipment shipped matches the packing list.
4. Mark the rack and install the mounting rails.
5. Physically install the switch in the rack.
2.2.1
2.2.2
Tools and Equipment Required
• An ESD wrist strap
• A #0 and #2 Phillips screwdriver
• An M6 HEX nut wrench
• M6 screws
• Torque wrench
• Open sockets or open wrenches
• Lifting device (e.g., pallet jack) for the Intel® Omni-Path Director Class Switch 100
Series
Check the Installation Site
The switches are designed to be installed in an existing server cabinet (not a telco
cabinet), where it can be mounted in a standard equipment rack.
Be sure of the following:
• The cabinet has a full earth ground to provide reliable grounding.
• There is enough room to work on the equipment.
• The equipment will have enough clearance for front and rear access.
• The cables can be accessed easily.
• Water or moisture cannot enter the switch.
• The ambient temperature stays between 50–113 °F (5–40 °C).
• Cabinet doors do not interfere with front-to-back air flow.
The cabinet should have its own switchable power distribution. If the switch has two
power supplies, it is suggested that a cabinet with dual power distribution units is
used.
It is recommended that cabinet anti-tip devices are used. This is especially true if
installing or removing a switch in the upper half of the cabinet when the lower half is
empty.
2.2.3
Intel® Omni-Path Fabric Switches Hardware
Installation Guide June 2019
32 Doc. No.: H76456, Rev.: 10.0
Mark the Rack
Allow enough vertical space in the rack for each specific switch installation.
1. Determine the location in the rack of the bottom of the switch.
Page 33

Installation—Intel® Omni-Path Fabric
2. Mark the upper (if applicable) and lower mounting positions on the vertical rails on
the front of the rack.
3. Mark the upper (if applicable) and lower mounting positions on the vertical rails on
the back of the rack.
2.3
2.3.1
2.3.2
Figure 5. Intel® Omni-Path Edge Switch Rail
Intel® Omni-Path Fabric Edge Switch Installation
This section describes the rack mounting instructions for the 24- and 48-port Intel
Omni-Path Fabric Edge Switches in a four-post standard-depth rack. The installation of
either switch is very similar; the majority of steps apply to both switches. Where
applicable, any specifics for either switch are called out.
In a standard-depth rack, the distance between the front and back mounting posts is
~28" (700 mm). Mounting rails for the switch are adjustable to accommodate racks
with 26"–32" between mounting posts.
Mounting Hardware Kit Contents
The Mounting Kit contains:
• ESD wrist strap
• One pair of mounting rails adjustable for 26"–32" installation range
• M6 hex head screws
• Front 1U perforated cover
Rack Mounting
®
1. Insert the rail installation pin in to the rack hole as shown in the following figure.
This holds the rail in place so the user can install the fan side screws.
June 2019 Installation Guide
Doc. No.: H76456, Rev.: 10.0 33
Intel® Omni-Path Fabric Switches Hardware
Page 34

Figure 6. Rail Installation Pin
a. Fasten the rail using two (2) M6 screws.
b. Torque screws to 30 in-lb.
c. Repeat this step for the second rail.
2. Fasten the port-side rails using four (4) M6 screws.
a. Torque screws to 30 in-lb.
Note the orientation of mounting rails in the following figure. The rails are
shown from the front side of the rack.
®
Omni-Path Fabric—Installation
Intel
Figure 7. Installed the Rack Rails
Intel® Omni-Path Fabric Switches Hardware
Installation Guide June 2019
34 Doc. No.: H76456, Rev.: 10.0
Page 35

®
Installation—Intel
Omni-Path Fabric
Figure 8. Intel® Omni-Path Fabric Edge Switch Mounted in a Four Post Standard Rack
3. The rails are designed for different mounting positions, from flush mount to
recessed (in 1 inch increments) as shown in the following figure.
June 2019 Installation Guide
Doc. No.: H76456, Rev.: 10.0 35
Intel® Omni-Path Fabric Switches Hardware
Page 36

Figure 9. Switch Rail Adjustments
®
Omni-Path Fabric—Installation
Intel
4. To change the depth of the switch, insert your fingers into the rail adjustment
notches and pull away from the switch as shown in the following figure.
This disengages the rail latches from the switch hat section.
Figure 10. Rail Adjustment Notches
5. Slide the switch to the desired depth in the rack.
The switch is adjustable in increments of 1 inch. When the switch is at the proper
depth, push the rail adjustment notches back to their original position to secure in
place.
Intel® Omni-Path Fabric Switches Hardware
Installation Guide June 2019
36 Doc. No.: H76456, Rev.: 10.0
Page 37

Installation—Intel® Omni-Path Fabric
2.3.3
Installing the Airflow Baffles
For rack cabinet installations of high-powered servers and associated fabric
equipment, it is critical for proper cooling of the equipment that air recirculation from
the air outlet side of the equipment to the inlet side of the equipment be minimized.
Following are some general requirements:
• All equipment in a given cabinet must be configured to the same flow pattern
• All unused 'U' increments must have some type of closeout installed
• Cabinet side spaces must be closed off
• Any front-to-back cable pass-through paths must be configured with flexible fillers
allowing for the cable to pass through-but not air. This is also true for patch
panels.
• Top-of-rack and bottom-of-rack transitions must be closed out
The Intel® Omni-Path Edge switch is generally shorter than the associated servers
installed in the same cabinet. Therefore, the following additional considerations should
be considered:
• The mounting rails supplied with the edge switch are adequate for closing off the
left-and-right side spaces on the cabinet from the 'U' increment the edge switch
occupies. If full-depth servers are installed directly above and below the edge
switch this will generally suffice to close off the space, minimizing recirculation.
However, if the space above and/or below the Edge switch is empty-or occupied by
racks that are not full depth-then the Air Baffle Kit that is available for the edge
product needs to be installed. This kit closes out the space between the fan grill
end of the switch and the front of the cabinet. The condition requiring the air
baffle may also exist in top-of-rack or bottom-of-rack installations, depending on
the cabinet geometry in these regions.
• The Edge Air Baffle Kit mounts to the mounting rails supplied with the switch and
is adjustable for various cabinet depths.
June 2019 Installation Guide
Doc. No.: H76456, Rev.: 10.0 37
Intel® Omni-Path Fabric Switches Hardware
Page 38

Figure 11. Edge Baffle (Top View)
®
Omni-Path Fabric—Installation
Intel
NOTE
Installation of the baffle(s) take place after the edge switch has been rack mounted.
1. Unlock the rail system by pulling the handles out.
2. Guide the baffle onto the rails, then slide the baffle into the rack until it stops
against the edge switch.
a. Baffle Extension(s): Each baffle (i.e., top and bottom) has an extension
(shown in yellow below). If not pre-configured, insert 4 screws (2 on each
side) to secure the extension to the main baffle. The location of the screws
depends upon the depth that the edge has been mounted.
Intel® Omni-Path Fabric Switches Hardware
Installation Guide June 2019
38 Doc. No.: H76456, Rev.: 10.0
Page 39

®
Installation—Intel
Omni-Path Fabric
Figure 12. Secure the Top Baffle to the Switch
3. After baffle is fully inserted, push the handles back until the rail locks in place.
To vertically secure the baffles, insert the baffle clamp (one on each side) as shown:
1. Unscrew the end of the rail post.
Figure 13. Remove Rail Post
2. Slide the clamp into place on the top and bottom baffles.
Figure 14. Insert Clamp on Baffles
3. Push the clamp into place over the rail post.
June 2019 Installation Guide
Doc. No.: H76456, Rev.: 10.0 39
Intel® Omni-Path Fabric Switches Hardware
Page 40

Figure 15. Clamp over Rail Post
4. Reattach the rail post, which locks the clamp into place.
Figure 16. Reattach the Rail Post
Intel® Omni-Path Fabric—Installation
2.3.4
Installing the Switch Fascia
The Edge switch fascia guards against ESD as well as accidental contact with the fans
and power supplies.
Intel® Omni-Path Fabric Switches Hardware
Installation Guide June 2019
40 Doc. No.: H76456, Rev.: 10.0
Page 41

Installation—Intel® Omni-Path Fabric
Figure 17. Switch Fascia
The fascia is installed by snapping it in place onto the switch rail posts.
Figure 18. Rail Posts for Fascia Installation
2.3.5
Reversing the Fan Airflow
This section details the procedure to reverse the airflow on the switch fan assembly
from the default port-side exhaust position.
Tools Required
• ESD wrist strap
• #0 Phillips screwdriver
Procedure
NOTE
Before removing the cover from the switch, first disconnect the power cord(s).
June 2019 Installation Guide
Doc. No.: H76456, Rev.: 10.0 41
Intel® Omni-Path Fabric Switches Hardware
Page 42

1. Loosen the 4 thumbscrews from the switch cover. There are 3 screws on the top,
and 5 screws on the back. Lift the cover on a 45-degree angle, then pull to
remove.
Figure 19. Switch Cover Thumbscrews (Top View)
®
Omni-Path Fabric—Installation
Intel
2. Holding the fan assembly on the sides lift straight up and rotate the fan assembly
180 degrees as shown in the following figure.
Figure 20. Fan Assembly Rotation
3. Lower the fan assembly straight down. The airflow direction indicators should now
face towards the rear of the chassis as shown in the following figure.
NOTE
Make certain to provide strain relief for the wire assembly.
Intel® Omni-Path Fabric Switches Hardware
Installation Guide June 2019
42 Doc. No.: H76456, Rev.: 10.0
Page 43

Installation—Intel® Omni-Path Fabric
Figure 21. Wire Assembly Strain Relief and Airflow Direction Indicators
4. Reattach the switch cover.
2.3.6
Installing the Q7 Management Module
This section details the procedure to install the Q7 Management Module into an
existing externally-managed edge switch.
Figure 22. Q7 Management Module
Tools Required
• ESD wrist strap
• #0 Phillips screwdriver
• Regular screwdriver
Procedure
NOTE
Before removing the cover from the switch, first disconnect the power cord(s).
June 2019 Installation Guide
Doc. No.: H76456, Rev.: 10.0 43
Intel® Omni-Path Fabric Switches Hardware
Page 44

1. Loosen the 4 thumbscrews from the switch cover. There are 3 screws on the top,
and 5 screws on the back. Lift the cover on a 45-degree angle, then pull to
remove.
Figure 23. Switch Cover Thumbscrews (Top View)
2. Holding the module at approximately a 45-degree angle, slide the connector into
module slot. Make certain to line up the notch on the module and the connector
(see following figure).
®
Omni-Path Fabric—Installation
Intel
Figure 24. Installing the Q7 Module
3. Once the module is seated properly in the connector, secure screw to the chassis
using a regular screwdriver.
Intel® Omni-Path Fabric Switches Hardware
Installation Guide June 2019
44 Doc. No.: H76456, Rev.: 10.0
Page 45

Installation—Intel® Omni-Path Fabric
Figure 25. Q7 Module Mounting Screw
4. Reattach the switch cover.
NOTE
For information on upgrading Q7 board controller firmware (BCFW) and BIOS, refer to
Q7 BIOS Update on page 86.
2.4
2.4.1
2.4.2
Intel® Omni-Path Director Class Switch 100 Series Installation
Mounting Hardware Kit Contents
The Mounting Kit contains:
• Support Shelf (1)
• Baffles (2)
• #10 Mounting screws
• #10 Mounting nuts
• M6 Mounting Screws
Unpacking the Switch
NOTE
Set aside packaging materials in the event that the switch requires return shipment.
The following images and descriptions give a high-level overview for unpacking a
Director Switch (24-slot model in this example).
June 2019 Installation Guide
Doc. No.: H76456, Rev.: 10.0 45
Intel® Omni-Path Fabric Switches Hardware
Page 46

Figure 26. Unpacking the Switch (1)
Intel® Omni-Path Fabric—Installation
1. Remove the banding.
Intel® Omni-Path Fabric Switches Hardware
Installation Guide June 2019
46 Doc. No.: H76456, Rev.: 10.0
Page 47

®
Installation—Intel
Omni-Path Fabric
Figure 27. Unpacking the Switch (2)
2. Remove the lid.
June 2019 Installation Guide
Doc. No.: H76456, Rev.: 10.0 47
Intel® Omni-Path Fabric Switches Hardware
Page 48

Figure 28. Unpacking the Switch (3)
®
Omni-Path Fabric—Installation
Intel
3. Remove the accessory kit box and white packing form. The accessory kit contains
required hardware, power cables, documentation, etc.
Figure 29. Unpacking the Switch (4)
Intel® Omni-Path Fabric Switches Hardware
Installation Guide June 2019
48 Doc. No.: H76456, Rev.: 10.0
Page 49

Installation—Intel® Omni-Path Fabric
Figure 30. Unpacking the Switch (5)
4. Lift the box up out of the base.
June 2019 Installation Guide
Doc. No.: H76456, Rev.: 10.0 49
Intel® Omni-Path Fabric Switches Hardware
Page 50

Figure 31. Unpacking the Switch (6)
®
Omni-Path Fabric—Installation
Intel
5. Remove the baffle boxes.
Intel® Omni-Path Fabric Switches Hardware
Installation Guide June 2019
50 Doc. No.: H76456, Rev.: 10.0
Page 51

Installation—Intel® Omni-Path Fabric
Figure 32. Unpacking the Switch (7)
2.4.3
2.4.3.1
6. Remove the plastic bag, then remove the support shelf from the top of the switch.
Installation Tasks
The following section details rack mounting instructions for the 6-slot and 24-slot
Intel® Omni-Path Director Class Switch 100 Series. The installations are very similar;
the majority of steps apply to both switches. Where applicable, any specifics for either
the 6-slot or 24-slot Director are called out.
Installing the Support Shelf
1. Measure the inside distance between the front and middle rails on the cabinet (27"
in the following example).
June 2019 Installation Guide
Doc. No.: H76456, Rev.: 10.0 51
Intel® Omni-Path Fabric Switches Hardware
Page 52

Figure 33. Measure the Rack
2. Before installing into the cabinet, preset the adjustable rails on the baffle base,
leaving the screws loose to the dimension measured on the cabinet (27" in this
example). In order to be able to fit the baffle base into the cabinet, set the rails to
slightly less than the measured size (i.e., < 27"). See the following figure.
®
Omni-Path Fabric—Installation
Intel
Figure 34. Preset the Adjustable Rails
3. Install the fixture brackets to the cabinet at the desired height (see the following
figure). The brackets support and help locate the installation of the baffle base.
Remove and discard/recycle the brackets after baffle base has been installed.
Intel® Omni-Path Fabric Switches Hardware
Installation Guide June 2019
52 Doc. No.: H76456, Rev.: 10.0
Page 53

®
Installation—Intel
Omni-Path Fabric
Figure 35. Install Fixture Brackets
4. Secure the shelf to the rack using M6 mounting screws, 3 per shelf rail (1 in the
front and 2 in the back) as displayed in the following figure. Torque screws to 30
in-lb.
Figure 36. Secure Shelf to Rack
5. Attach the baffles to the top of each shelf rail using 10 mounting nuts, 5 per shelf
rail as displayed in the following figure. Torque nuts to 30 in-lb.
NOTE
Make certain to tighten the adjustable rail screws (from Step 2) at this time.
June 2019 Installation Guide
Doc. No.: H76456, Rev.: 10.0 53
Intel® Omni-Path Fabric Switches Hardware
Page 54

Figure 37. Secure the Baffles to Top of Shelf Rails
®
Omni-Path Fabric—Installation
Intel
6. Secure the top of the baffles to the rack rail as displayed in the following figure:
• 6-Slot Chassis: use 2 mounting nuts, 1 per rail.
• 24-Slot Chassis: use the lower of the 2 openings, 1 mounting nut per rail.
Intel® Omni-Path Fabric Switches Hardware
Installation Guide June 2019
54 Doc. No.: H76456, Rev.: 10.0
Page 55

®
Installation—Intel
Omni-Path Fabric
Figure 38. Secure the Top of the Baffles to the Rack Rails
7. The completed Shelf assemblies for both the 6- and 24-slot switches are displayed
in the following figure.
June 2019 Installation Guide
Doc. No.: H76456, Rev.: 10.0 55
Intel® Omni-Path Fabric Switches Hardware
Page 56

Figure 39. Completed Shelf Assemblies
Intel® Omni-Path Fabric—Installation
2.4.3.2
Installing the Director Switch Chassis
WARNING
To avoid injury, do not lift a fully-loaded Director Class switch manually. Use a
mechanized lift only.
1. Align the chassis with the rack.
2. Using a pallet jack, raise the unit until the bottom of the chassis is at (or slightly
higher than) the surface of the support shelf installed in Steps 1 through 6. Lock
the pallet jack wheels.
3. Use a group of people to push the chassis from the front to slide it off the pallet
and on the support shelf. The chassis should be inserted into the rack until the
rear of the chassis base is against the rear support bracket.
NOTE
If you are installing the cable management guides (see Installing the Optional
Cable Management Guide on page 59), install the cage nuts into the rack rails
before fully sliding the chassis into the rack.
Intel® Omni-Path Fabric Switches Hardware
Installation Guide June 2019
56 Doc. No.: H76456, Rev.: 10.0
Page 57

®
Installation—Intel
Omni-Path Fabric
Figure 40. Slide the Chassis into the Rack
4. Fasten the chassis to the rack with M6 screws:
• 6-Slot Director: six (6).
• 24-Slot Director: twelve (12).
June 2019 Installation Guide
Doc. No.: H76456, Rev.: 10.0 57
Intel® Omni-Path Fabric Switches Hardware
Page 58

Figure 41. Fasten the Chassis to the Rack
Intel® Omni-Path Fabric—Installation
5. The completed switch installations for both the 6- and 24-slot switches are
displayed in the following figure.
Intel® Omni-Path Fabric Switches Hardware
Installation Guide June 2019
58 Doc. No.: H76456, Rev.: 10.0
Page 59

Installation—Intel® Omni-Path Fabric
Figure 42. Completed Switch Installations
2.4.4
Installing the Optional Cable Management Guide
The optional Cable Management Guides are attached to the rack rails with M6 cage
nuts and screws as shown in the following figure.
June 2019 Installation Guide
Doc. No.: H76456, Rev.: 10.0 59
Intel® Omni-Path Fabric Switches Hardware
Page 60

Figure 43. Installing Cable Management
®
Omni-Path Fabric—Installation
Intel
Intel® Omni-Path Fabric Switches Hardware
Installation Guide June 2019
60 Doc. No.: H76456, Rev.: 10.0
Page 61

Installation—Intel® Omni-Path Fabric
2.4.5
Installing Director Class Modules
2.4.5.1
Spine, Leaf and Management Modules
NOTE
In order to maintain thermal integrity, all open Spine and Leafs slots must be
populated with filler panels.
June 2019 Installation Guide
Doc. No.: H76456, Rev.: 10.0 61
Intel® Omni-Path Fabric Switches Hardware
Page 62

®
Omni-Path Fabric—Installation
Intel
NOTE
When installing the Leaf Module, there is no "correct" orientation (i.e., no top or
bottom).
These modules all have release arms that function in a similar way during installation.
The Management Module (MM) is used here as the example.
1. Grasp and pull the release arms out and away from the module body as shown in
the following figure.
Figure 44. Module Installation 1
Intel® Omni-Path Fabric Switches Hardware
Installation Guide June 2019
62 Doc. No.: H76456, Rev.: 10.0
Page 63

®
Installation—Intel
Omni-Path Fabric
Figure 45. Module Installation 2
2. Slide the module straight into an applicable open slot until it engages with the
backplane connector.
CAUTION
Never push on the release arms when sliding the modules into the applicable
slots. Always apply pressure to the middle of the module as shown below.
Figure 46. Module Installation 3
3. Push the release arms in until they lock in place.
NOTE
The 48-port leaf module release arms will lock in place correctly; however the
module will protrude slightly from the leaf slot. This is normal.
4. Management Module only: Lower the MRL latch into the holes of the release
arms. Doing this allows the MM to communicate with the SEEB module on the
other side of chassis as shown in the following figure.
June 2019 Installation Guide
Doc. No.: H76456, Rev.: 10.0 63
Intel® Omni-Path Fabric Switches Hardware
Page 64

Figure 47. Module Installation 4
5. Chassis management slot leaf only: If the leaf module is in one of the chassis
management slots (i.e., L101 or L102) the mechanical release latch (MRL) must
be moved in order to install the leaf. To move the MRL, loosen the thumbscrew
attached to the Serial, Ethernet, Chassis EEPROM Board (SEEB) module, then pull
down to release the MRL as shown in the following figure. This allows enough
clearance for leaf module to be installed.
Figure 48. Module Installation 5
®
Omni-Path Fabric—Installation
Intel
Intel® Omni-Path Fabric Switches Hardware
Installation Guide June 2019
64 Doc. No.: H76456, Rev.: 10.0
Page 65

Installation—Intel® Omni-Path Fabric
2.4.5.2
2.4.5.3
Fans
1. Slide the fan module straight into an applicable open slot until it engages with the
backplane connector.
Power Supplies
1. Loosen the thumbscrew until it disengages from the power supply unit.
2. Pull the handle down.
3. Slide the module straight into an applicable open slot until it engages with the
backplane connector.
4. Push the handle back up and reconnect the thumbscrew.
2.4.6
June 2019 Installation Guide
Doc. No.: H76456, Rev.: 10.0 65
Installing the Edge Switch Hot-Swap Power and Fan Modules
Intel® Omni-Path Fabric Switches Hardware
Page 66

Intel® Omni-Path Fabric—Installation
NOTE
The following instructions are for the Intel® Omni-Path Edge Switch with hot swap
power and fan modules (Part Numbers 100SWE48UFH and 100SWE48QFH).
2.4.6.1
Power Supply
1. Grasp the module by the handle and slide into an open slot until the unit engages
with the connector.
Figure 49. Edge Power Supply Install 1
2. When fully inserted, the module sits flush with the chassis and the thumb tab is
locked as shown.
Intel® Omni-Path Fabric Switches Hardware
Installation Guide June 2019
66 Doc. No.: H76456, Rev.: 10.0
Page 67

Installation—Intel® Omni-Path Fabric
Figure 50. Edge Power Supply Install 2
2.4.6.2
Fans
1. Grasp the module by the handle and slide into an open slot until the unit engages
with the connector.
Figure 51. Edge Fan Supply Install 1
2. When fully inserted, the module sits flush with the chassis and the thumb tab is
locked as shown.
June 2019 Installation Guide
Doc. No.: H76456, Rev.: 10.0 67
Intel® Omni-Path Fabric Switches Hardware
Page 68

Figure 52. Edge Fan Supply Install 2
Intel® Omni-Path Fabric—Installation
2.5
Connect Equipment to the Ports and Power On the System
NOTE
Before connecting equipment, it is important to understand the locations of the serial
and Ethernet ports on the Intel® Omni-Path Fabric series switches. For the edge
switch, these are located on the switch port side.
Figure 53. Edge Switch Serial and Ethernet Ports
Figure 54. Director Switch Serial and Ethernet Ports
Intel® Omni-Path Fabric Switches Hardware
Installation Guide June 2019
68 Doc. No.: H76456, Rev.: 10.0
Page 69

Installation—Intel® Omni-Path Fabric
1. Connect a Category 5 or 6 (Cat 5/6) Ethernet cable to the RJ-45 connector(s) on
the switch. Connect the other end of the Cat 5/6 to an OOB LAN workstation,
another switch or a hub.
2. Connect the switch to host(s)/switch(es) using QSFP cables.
CAUTION
It is important to provide strain relief for the cable connector.
2.5.1
Director Class Switch Port and Slot Numbering
The graphic below details the leaf slot numbering schema for each Director switches.
Note:
Leaf slots 101 and 102 are referred to "Management" slots, meaning a leaf module
must be present whenever a management module is installed in the corresponding
slot on the front of the chassis.
Figure 55. Director Class Leaf Slot Numbering
June 2019 Installation Guide
Doc. No.: H76456, Rev.: 10.0 69
Intel® Omni-Path Fabric Switches Hardware
Page 70

Intel® Omni-Path Fabric—Installation
2.5.2
Leaf Module Port Numbering
The physical module contains two 16-port leafs-A and B-stacked on top of each other.
The physical port numbering is shown below.
Figure 56. Leaf Module Port Numbering
Figure 57. 48-Port Leaf Module Port Numbering
NOTE
When cabling the 48-port leaf module, make certain to firmly seat the cable into the
port, otherwise only one of two ports may connect.
2.5.2.1
Chassis Viewer GUI Leaf Port Stats Screen
The Port Name column schema is a follows:
• Lxxx = Chassis leaf module slot (i.e. L101 - L124 for the 24-slot Director)
• A/B = Leaf A or B
• Pxx = Physical port number (e.g., 01 - 16)
Intel® Omni-Path Fabric Switches Hardware
Installation Guide June 2019
70 Doc. No.: H76456, Rev.: 10.0
Page 71

Installation—Intel® Omni-Path Fabric
Figure 58. Chassis Viewer GUI Leaf Port Stats Scree
2.5.3
Edge Switch Cabling Recommendations
To minimize complexity, the following figure details cabling recommendations for the
48-port edge switch:
June 2019 Installation Guide
Doc. No.: H76456, Rev.: 10.0 71
Intel® Omni-Path Fabric Switches Hardware
Page 72

Figure 59. 48-Port Edge Switch Cabling Recommendations
Intel® Omni-Path Fabric—Installation
2.5.3.1
Connecting Power
NOTE
For each power supply installed, a power cord must be installed in corresponding
power inlet.
1. Provide strain relief for the power cable(s).
2. If necessary, replace the closeout over the switch fan side.
3. Connect the power cables to a power distribution unit (PDU) or a proper AC power
outlet.
4. When the switch is plugged into an AC power outlet:
a. The system powers up.
b. The fans start.
c. The system performs a power-on self test.
Intel® Omni-Path Fabric Switches Hardware
Installation Guide June 2019
72 Doc. No.: H76456, Rev.: 10.0
Page 73

Installation—Intel® Omni-Path Fabric
NOTE
For the Director switches, make certain the DC ON/OFF switch is illuminated.
If it is not, press the button to supply power. The switch is located in the lower
left corner on the chassis spine side.
5. The switch, power supply(s), and fan LEDs light up.
2.6
2.7
2.7.1
Setting Up the USB Console
1.
Download the driver file CDM v2.12.00 WHQL Certified.exe from http://
www.ftdichip.com/Drivers/VCP.htm.
2.
Open the FTDI Drivers Folder and Right click on the CDMv2.12 driver file and
select Run As Administrator to install the necessary driver to access the USB
serial console of the switch.
3. Open Putty, under Category, select Serial and enter the following parameters:
• Serial Line to connect to: <Enter COM>
• Speed: 115200
• Data Bits: 8
• Stop Bits: 1
• Parity: None
• Flow Control: None
Bringing Up the System For the First Time
Start-up Procedures
1. Power up the switch.
2. From its flash image on the management module, the switch begins its boot
process.
3.
Verify the IP address with the CLI command showChassisIpAddr command. The
system returns information similar to the following:
Chassis IP Address: 192.168.100.9 Net mask: 255.255.252.0
2.7.2
Changing the Switch IP Address and Default Gateway through the CLI
The CLI can be accessed two ways:
• Using the switch serial port:
— Edge switch (with optional management module): connects through the
USB serial port
— Director series: connects through the USB port on the SEEB modules
• Through Ethernet, using Telnet or SSH
June 2019 Installation Guide
Doc. No.: H76456, Rev.: 10.0 73
Intel® Omni-Path Fabric Switches Hardware
Page 74

Intel® Omni-Path Fabric—Installation
NOTE
If using a serial port on a Director switch, make certain to connect to the SEEB serial
port associated with the Management Module (MM) on the opposite side of the
chassis.
2.7.2.1
2.7.2.2
Using the Serial Connection
1. When a serial port connection is established, the user will see a prompt. To change
the chassis IP address type:
setChassisIpAddr -h <ipaddress> -m <netMask>
where -h <ipaddress> is the new IP address in dotted decimal format (that is,
xxx.xxx.xxx.xxx), and -m <netMask> is the new subnet mask in dotted
decimal format.
2. To change the switch default gateway IP address type:
setDefaultRoute -h <ipaddress>
where -h <ipaddress> is the new default gateway IP address in dotted decimal
format.
3. The changes are effective immediately.
Using Ethernet
1. Access the switch with one of the following commands using the default IP
address:
Telnet: telnet 192.168.100.9
SSH: ssh 192.168.100.9
2. The system prompts for a user name. In order to change the IP address and
default gateway, the user must be logged in as the administrator. At the prompt
type admin and press ENTER.
3.
The system prompts for a password. At the prompt type adminpass and press
ENTER. The system responds with:
Welcome to the <SWITCH> CLI. Type 'list' for the list of
commands.
4. To change the switch IP address type:
setChassisIpAddr -h <ipaddress> -m <netMask>
where -h <ipaddress> is the new IP address in dotted decimal format (that is,
xxx.xxx.xxx.xxx), and -m <netMask> is the new subnet mask in dotted
decimal format.
5. To change the switch default gateway IP address type:
setDefaultRoute -h <ipaddress>
Intel® Omni-Path Fabric Switches Hardware
Installation Guide June 2019
74 Doc. No.: H76456, Rev.: 10.0
Page 75

Installation—Intel® Omni-Path Fabric
where -h <ipaddress> is the new default gateway IP address in dotted decimal
format.
6. The changes are effective immediately.
2.7.3
Updating the Management Module IP Addresses in a Director Class Redundant Management Configuration
Each management module (MM) must have a unique IP address that is different than
the chassis IP address of the switch. A redundantly-managed switch will have multiple,
unique IP addresses. The default IP addresses are:
• Chassis: 192.168.100.9
• Management Module(s): 192.168.100.10
It is necessary for each management module to have a unique IP address for the
following reasons:
• Unique IP addresses are used when sending syslog messages from a management
module to a syslog server.
• Gives the user the ability to ping each management module separately.
• If the IP addresses are not unique, collisions occur, causing IP operations to fail.
NOTE
All management modules are individually tested and configured with the default IP
address of 192.168.100.10. In order to avoid an address conflict, be certain to change
the default IP address of each MM after inserting it into the chassis.
NOTE
Make sure when updating the MM IP, only 1 module is inserted into the chassis at a
time. Repeat this procedure for the second MM.
To update the IP address on a management module, do the following:
1. Insert a MM into the chassis.
2. Connect the MM via the USB port to a serial console software (e.g., Putty or
Teraterm).
3. Reset/apply power to the MM.
4.
When the system displays image1 or image2, press the SPACEBAR to interrupt
the auto load sequence before the counter expires (within 5 seconds).
5. Enter moduleip <IP ADDRESS> in dotted decimal format and press ENTER.
6. To update the module netmask address enter netmask <ADDRESS> in
hexadecimal format and press ENTER.
7. To update the module gateway address enter gateway <ADDRESS> in dotted
decimal format and press ENTER.
8. At the boot prompt, reboot the MM.
2.8
June 2019 Installation Guide
Doc. No.: H76456, Rev.: 10.0 75
Component LEDs
Intel® Omni-Path Fabric Switches Hardware
Page 76

Intel® Omni-Path Fabric—Installation
2.8.1
Figure 60. Edge Switch LEDs
2.8.1.1
2.8.1.2
Edge Switch LEDs
RJ45 LEDs
The RJ45 connectors have two LEDs, Link and Speed. The Speed LED is Green when
a 100 Mbps link is connected. The Link LED is Amber when an Ethernet link has been
established, and blinking when the link is active.
Chassis Status LEDs
Status (STAT)
The status LED indicates one of the following conditions:
• Steady Green: the module is operating normally.
• Blinking Green: LED test state.
• Off: module is in the removable state.
Attention (ATTN)
The Attention LED indicates one of the following conditions:
• Off: the system functioning normally.
• Steady Amber: the system requires some attention, which could indicate one of
the following conditions:
— The switch temperature is at a warning level on the module.
— The switch silicon temperature is at a warning level (approximately 90 degrees
C).
— DC voltages on the board are slightly out of tolerance (12V Bulk, 5V, 3.3V and
1.8V are all monitored).
— The module can no longer function properly. The system will take the
appropriate actions to ensure that no damage is done to its components.
• Blinking Amber (once every four seconds): LED test state.
Intel® Omni-Path Fabric Switches Hardware
Installation Guide June 2019
76 Doc. No.: H76456, Rev.: 10.0
Page 77

Installation—Intel® Omni-Path Fabric
2.8.1.3
Ports, Fabric Manager (FM), Managed (M), and FM Switch LEDs
Figure 61. Ports, Fabric Manager (FM), Managed (M), and FM Switch LEDs
Ports
Each switch cable port has a Green link status LED that provide the following
indications:
• On: the logical link is up (port is in the Active state).
• Off: the physical link is down (port is in the Down state).
• Blink: traffic passing through the port
Fabric Manager (FM)
The FM LED indicates that the switch is recognized by the active Fabric Manager.
Managed (M)
The Managed (M) LED indicates that a Q7 management module is installed switch.
FM Switch
On an externally-managed switch, the FM Switch LED is used to restrict whether the
end-node attached to a switch port is trusted to run a Fabric Manager, or to issue
Fabric Manager-related packets and operations.
The user activates the LED using a small, straight instrument (e.g., a standard-size
paper clip).
June 2019 Installation Guide
Doc. No.: H76456, Rev.: 10.0 77
Intel® Omni-Path Fabric Switches Hardware
Page 78

Figure 62. Activating the FM Enable Switch LED
®
Omni-Path Fabric—Installation
Intel
The FM Enable Switch is used as follows:
NOTE
Actions take place approximately 1 second after releasing the button.
• Pressing the button for 4 seconds does a "Restore Factory Defaults" and reboots
the ASIC.
• Pressing the button for 2 seconds (and then releasing) puts the "FM control button
persistent state" in configuration mode.
— The FM enabled LED will blink "n" times, where "n" is the current state value
plus 1.
— Pressing (and releasing) the button once for less than 2 seconds advances the
FM control persistent state by 1 (round-robin), and then it returns to step 1
(i.e., blinking the FM enabled LED).
— Pressing the button for 2 seconds leaves the configuration state, and saves the
FM control button state persistently, restoring the FM enabled LED to the
proper value.
Intel® Omni-Path Fabric Switches Hardware
Installation Guide June 2019
78 Doc. No.: H76456, Rev.: 10.0
Page 79

Installation—Intel® Omni-Path Fabric
2.8.1.4
Figure 63. Power Supply LEDs
Power Supply LEDs
PSU1/PSU2:
• Green indicates that DC power is normal.
• Off indicates a DC power failure or no DC power is present.
2.8.1.5
Figure 64. Airflow Direction LED
2.8.2
Airflow Direction LED
• Green indicates the fans are blowing from front to back.
• Off indicates the fans are blowing from back to front.
Director Class LEDs
June 2019 Installation Guide
Doc. No.: H76456, Rev.: 10.0 79
Intel® Omni-Path Fabric Switches Hardware
Page 80

Intel® Omni-Path Fabric—Installation
2.8.2.1
Management Module LEDs
Figure 65. Management Module LEDs
Module Status (M_Stat)
The status LED indicates one of the following conditions:
• Steady Green: the module is operating normally.
• Blinking Green: LED test state.
• Off: module is in the removable state.
Module Attention (M_Attn)
The Attention LED indicates one of the following conditions:
• Off: the system is functioning normally.
• Steady Amber: the system requires some attention, which could indicate one of
the following conditions:
— The management module is at a warning level
— The microprocessor temperature is at a warning level
— DC voltages on the board are slightly out of tolerance
— The management module has taken a hot swap fault
• Blinking Amber (once every four seconds): LED test state, which could indicate
one of the following conditions:
— Bulk power is stable.
— The module DC-to-DC converter is enabled.
— The module is not removable.
Chassis Status and Attention (C_Stat, C_Attn)
The chassis status LED is Green when the system is functioning normally. The chassis
status LED is Off when the system is not functioning normally.
Fault Tolerant (FT)
The Chassis Fault Tolerant (FT) LED indicates the following condition:
• Green: Redundant Cooling, DC Power, and management all present (n+1)
• Off: Redundant Cooling, DC Power, and management are not all present
Intel® Omni-Path Fabric Switches Hardware
Installation Guide June 2019
80 Doc. No.: H76456, Rev.: 10.0
Page 81

Installation—Intel® Omni-Path Fabric
Service (SVC)
The Chassis Service (SVC) LED indicates the following condition:
• Green: Chassis beacon is active
• Off: Not selected
Master
• Green: the module is acting as the master Management Module
• Off: Management Module is not the Master
MRL Active
• Green: the mechanical release latch (MRL) thumbscrew is secured to the
management module, enabling communications with a mated management leaf
module
• Off: the mechanical release latch (MRL) thumbscrew is not engaged, disabling
communications with a mated management leaf module
2.8.2.2
Leaf Module LEDs
Figure 66. Leaf Module LEDs
Port LEDs
• Green: The external HFI link is in the Active Port State
• Off: Link is not active
Module Status
The status LED indicates one of the following conditions:
• Steady Green: the module is operating normally.
• Blinking Green: LED test state.
• Off: module is in the removable state.
Module Attention
The Attention LED indicates one of the following conditions:
June 2019 Installation Guide
Doc. No.: H76456, Rev.: 10.0 81
Intel® Omni-Path Fabric Switches Hardware
Page 82

Intel® Omni-Path Fabric—Installation
• Off: the system functioning normally.
• Steady Amber: the system requires some attention, which could indicate one of
the following conditions:
— The switch temperature is at a warning level
— The switch silicon temperature is at a warning level
— DC voltages on the board are slightly out of tolerance
2.8.2.3
Spine Module LEDs
Figure 67. Spine Module LEDs
Module Status (Stat)
The status LED indicates one of the following conditions:
• Steady Green: the module is operating normally.
• Blinking Green: LED test state.
• Off: module is in the removable state.
Module Attention (Attn)
The Attention LED indicates one of the following conditions:
• Off: the system functioning normally.
• Steady Amber: the system requires some attention, which could indicate one of
the following conditions:
— The switch temperature is at a warning level
— The switch silicon temperature is at a warning level
— DC voltages on the board are slightly out of tolerance
• Blinking Amber (once every four seconds): LED test state.
Intel® Omni-Path Fabric Switches Hardware
Installation Guide June 2019
82 Doc. No.: H76456, Rev.: 10.0
Page 83

Installation—Intel® Omni-Path Fabric
2.8.2.4
SEEB Module LEDs
Figure 68. SEEB Module LEDs
RJ45 LEDs
The RJ45 connectors have two LEDs, Link and Speed.The Speed LED is Green when
a 100Mbps link is connected. The Link LED is Amber when an Ethernet link has been
established, and blinking when the link is active.
MRL Active
• Green: the mechanical release latch (MRL) thumbscrew is secured to the serial,
Ethernet, chassis EEPROM board (SEEB), enabling communications with a mated
management module
• Off: the mechanical release latch (MRL) thumbscrew is not engaged, disabling
communications with a mated management module
June 2019 Installation Guide
Doc. No.: H76456, Rev.: 10.0 83
Intel® Omni-Path Fabric Switches Hardware
Page 84

Intel® Omni-Path Fabric—Installation
2.8.2.5
Fans and Power Supplies LEDs
Fan LEDs
Figure 69. Director Class Fan LEDs
Fan LEDs indicate the following status(es):
• Green indicates that the fan is functioning properly.
• Amber indicates that the following warning condition exists:
— A single fan failure when the rotation speed is less than 4000 RPM or greater
than 10,950 RPM.
• Green and Amber on indicates a possible problem, including:
— The fan tray is not responding to commands for configuration and
temperature-related operations.
— A fan is not responding to commands for temperature and speed related
operations.
— The fan speed has fallen below the minimum allowed RPM for a fan.
Intel® Omni-Path Fabric Switches Hardware
Installation Guide June 2019
84 Doc. No.: H76456, Rev.: 10.0
Page 85

Installation—Intel® Omni-Path Fabric
Power Supply LEDs
Figure 70. Director Class Power Supply LEDs
Power LEDs indicate the following status(es):
• AC: Green indicates that AC power is present.
• DC: Green indicates that DC power is present.
• FLT: Red indicates that DC power is off/interrupted (e.g., power cord not seated
properly).
June 2019 Installation Guide
Doc. No.: H76456, Rev.: 10.0 85
Intel® Omni-Path Fabric Switches Hardware
Page 86

Appendix A Q7 BIOS Update
Intel® Omni-Path Fabric—Q7 BIOS Update
A.1
A.1.1
A.2
Before Getting Started
• Ensure that the Q7 unit being updated is a QA3E. This unit can be found in either
a managed Edge switch or a Director Class switch management module.
• The Q7 update has two parts; board controller firmware (BCFW) and BIOS.
• Two separate files are used to perform the update
• The update files are bcfw: CGBCP429.q7.spkg for the firmware update and
bios: QA3ER962.q7.spkg for the BIOS update
• The BCFW and BIOS update requires switch firmware version 10.7 (or newer)
Prior to Upgrading
Make sure that the subnet manager (SM) is not running on the switch:
•
Execute the CLI command smcontrol to ensure that the embedded subnet
manager (ESM) is not running on the switch. For example:
Edge-> smControl
Subnet manager is not started.
•
Execute the CLI command who to ensure that no other CLI sessions are running
during the update.
Displaying the Current Version
At the prompt, execute the commands bcfwversion and biosversion to view the
current version(s). For example:
Edge-> bcfwversion
Module Information ------- Board Controller Firmware Version: CGBCP419
Edge-> biosversion
Module Information ------- System BIOS Version: QA3E915
• If you have a QA31 card(s) (i.e., the BIOS version starts with QA31 instead of
QA3E), replace this with a new Q7 card which contains the latest BIOS and BCFW.
Intel® Omni-Path Fabric Switches Hardware
Installation Guide June 2019
86 Doc. No.: H76456, Rev.: 10.0
Page 87

Q7 BIOS Update—Intel® Omni-Path Fabric
• If you have a QA3E card(s) that does not have BIOS version QA3ER962 and
BCFW version CGBCP429, you will need to perform the update. Run the CLI
command logShow. If BCWF and BIOS updates are required, the system returns
messages similar to the following:
W|2018/01/24 14:57:18.480U: Thread "tSlot" (0x3b8a030)
Osa: Module QA3E BC Version CGBCP420 is not CGBCP429; please run bcfwUpdate
to fix.
W|2018/01/24 14:57:18.480U: Thread "tSlot" (0x3b8a030)
Osa: Module QA3E BIOS Version QA3ER915 is not QA3ER962; please run biosUpdate
to fix.
A.3
A.4
A.4.1
SFTP Server Configuration
This update requires a server with SFTP. The update files must be present on this
server.
Updating the Edge Switches
Performing the Upgrade
1.
At the prompt enter sftp> put <version>.q7.spkg /firmware/bios.pkg
update and press Enter. If successful, the system displays information similar to
the following.
Uploading QA3ER962.q7.spkg to /firmware/bios.pkg
QA3ER962.q7.spkg
100% 8193KB 8.0MB/s 00:01
You can check the progress of the update with the CLI command
showLastBiosRetCode -all. The system returns information similar to the
following:
Edge-> showLastBiosRetCode -all
Module System BIOS Last Exit Code: 3: In Progress
Edge-> showLastBiosRetCode -all
Module System BIOS Last Exit Code: 0: Success
NOTE
DO NOT REBOOT AT THIS TIME. Wait until both the BCFW (via bcfwupdate) and
the BIOS (via biosupdate; see Step 2) have been updated, then reboot.
Proceed to Step 2.
2.
At the prompt enter sftp> put <version>.bcfw.pkg/firmware/bcfw.pkg
update and press Enter. If successful, the system displays information similar to
the following.
sftp> put CGBCP429.q7.spkg/firmware/bcfw.pkg update
Uploading CGBCP429.q7.spkg to /firmware/bcfw.pkg
CGBCP429.q7.spkg
100% xxxKB X.xMB/s 00:00
June 2019 Installation Guide
Doc. No.: H76456, Rev.: 10.0 87
Intel® Omni-Path Fabric Switches Hardware
Page 88

Intel® Omni-Path Fabric—Q7 BIOS Update
You can check the progress of the update with the CLI command
showLastBcFwRetCode -all. The system returns information similar to the
following:
Edge-> showLastBcFwRetCode -all
Module Board Controller Firmware Last Exit Code: 3: In Progress
Edge-> showLastBcFwRetCode -all
Module Board Controller Firmware Last Exit Code: 0: Success
Proceed to Step 3.
3. Reboot the switch.
4. Verify the version of the BCFW and BIOS by running the CLI commands
bcfwversion and biosversion. The system should return information similar
to the following:
Board Controller Firmware Version: CGBCP429
System BIOS Version: QA3ER962
A.5
A.5.1
Updating Director Class Switches
Update the BCFW and BIOS on Director Class switches (DCS) using the instructions in
Performing the Upgrade on page 88.
NOTE
The instructions upgrade both the Master and Slave MM.
Performing the Upgrade
1. At the master MM prompt, enter the following command to update the master and
slave: sftp> put QA3ER962.q7.spkg A:/firmware/bios.pkg
The system returns information similar to the following:
Uploading QA3ER962.q7.spkg to /firmware/A:/firmware/bios.pkg
QA3ER962.q7.spkg
100% 8193KB 12.4MB/s 00:00
You can check the progress of the update with the CLI command
showLastBiosRetCode -all. The system returns information similar to the
following:
MasterM201-> showLastBiosRetCode -all
M201 System BIOS Last Exit Code: 3: In Progress
M202 System BIOS Last Exit Code: 0: Success
MasterM201-> showLastBiosRetCode -all
M201 System BIOS Last Exit Code: 0: Success
M202 System BIOS Last Exit Code: 0: Success
NOTE
DO NOT REBOOT AT THIS TIME. Wait until both the BCFW (via bcfwupdate) and
the BIOS (via biosupdate; see Step 2) have been updated, then reboot.
Proceed to Step 2.
Intel® Omni-Path Fabric Switches Hardware
Installation Guide June 2019
88 Doc. No.: H76456, Rev.: 10.0
Page 89

Q7 BIOS Update—Intel® Omni-Path Fabric
2. At the master MM prompt, enter the following command to update the master and
slave: sftp> put CGBCP429.q7.spkg A:/firmware/bcfw.pkg
The system returns information similar to the following:
Uploading CGBCP429.q7.spkg to /firmware/A:/firmware/bcfw.pkg
CGBCP429.q7.spkg
100% 193KB 11.3MB/s 00:00
You can check the progress of the update with the CLI command
showLastBcFwRetCode -all. The system returns information similar to the
following:
MasterM201-> showLastBcFwRetCode -all
M201 Board Controller Firmware Last Exit Code: 3: In Progress
M202 Board Controller Firmware Last Exit Code: 3: In Progress
MasterM201-> showLastBcFwRetCode -all
M201 Board Controller Firmware Last Exit Code: 0: Success
M202 Board Controller Firmware Last Exit Code: 0: Success
Proceed to Step 3.
3.
Reboot the switch with the command reboot -all.
4. Verify the version of the BCFW and BIOS by running the CLI commands
bcfwversion and biosversion. The system should return information similar to
the following:
Board Controller Firmware Version: CGBCP429
System BIOS Version: QA3ER962
June 2019 Installation Guide
Doc. No.: H76456, Rev.: 10.0 89
Intel® Omni-Path Fabric Switches Hardware
Page 90

®
Omni-Path Fabric—Director Switch Cable Management
Intel
Appendix B Director Switch Cable Management
This example explains cabling a Director switch in a raised floor cable management
scenario.
1. Cable the Leaf modules from the top rows of the chassis down toward the floor.
2. Cable each Leaf from the bottom row up to the top row, and from the inside port
(nearest the fan units) to the outside port.
Figure 71. Leaf Cabling
3. Use Velcro ties to wrap the cables for each leaf module.
4. Hang the tied cables over the cable management bracket.
Figure 72. Using Velcro Ties and the Cable Management Hanger
5. Tie off all of the cables (red band in Figure 73 below) before feeding the cables
under the floor.
Intel® Omni-Path Fabric Switches Hardware
Installation Guide June 2019
90 Doc. No.: H76456, Rev.: 10.0
Page 91

Director Switch Cable Management—Intel
Figure 73. Tying Off All Cables
®
Omni-Path Fabric
June 2019 Installation Guide
Doc. No.: H76456, Rev.: 10.0 91
Intel® Omni-Path Fabric Switches Hardware
 Loading...