

Instrumentarium Dental Cliniview User Manual

ENGLISH
CliniView 10.0
User Manual
5139505-100 rev. 16


Copyright Code: 5139505-100 rev 16 Date: 19 August 2011
Document code: D500317 rev 16
Copyright © 08 2011 by PaloDEx Group Oy.
All rights reserved.
Windows® is a trademark of Microsoft Corporation in the United
®
States of America and other countries. Pentium
is a registered
trademark of Intel Corporation.
Documentation, trademark and the software are copyrighted
with all rights reserved. Under the copyright laws the
documentation may not be copied, photocopied, reproduced,
translated, or reduced to any electronic medium or machine
readable form in whole or part, without the prior written
permission of Instrumentarium Dental.
The original language of this manual is English.
Instrumentarium Dental reserves the right to make changes in
specification and features shown herein, or discontinue the
product described at any time without notice or obligation.
Contact your Instrumentarium Dental representative for the most
current information.
Manufactured by Instrumentarium Dental
Nahkelantie 160 (P.O. Box 20)
FI-04300 Tuusula
FINLAND
Tel. +358 10 270 2000
Fax. +358 9 851 4048
For service, contact your local distributor.


Table of Contents
1 Introduction..................................................................................................................1
1.1 General ................................................................................................................. 1
1.2 Manufacturer’s liability........................................................................................... 2
1.3 Manual .................................................................................................................. 2
1.4 General instructions .............................................................................................. 2
2 Patient management....................................................................................................3
2.1 Start the software ..................................................................................................3
2.2 Login ..................................................................................................................... 3
2.3 Patient management .............................................................................................3
2.4 Patient search ....................................................................................................... 4
2.5 Add a new patient ................................................................................................. 5
2.6 Edit patient information ......................................................................................... 6
2.7 Delete patient ........................................................................................................6
2.8 “No patient selected” mode ...................................................................................7
3 Image capturing........................................................................................................... 9
3.1 Image capturing with OP300................................................................................. 9
3.2 Image capturing with OP100 D/OP200 D ...........................................................10
3.2.1 Taking panoramic exposures ...................................................................10
3.2.2 Taking cephalometric images .................................................................. 11
3.2.3 Image orientation ..................................................................................... 11
3.3 Image capturing with OP30................................................................................. 11
3.4 Image capturing with intraoral sensors ............................................................... 12
3.4.1 General .................................................................................................... 12
3.4.2 Quick intraoral capturing .......................................................................... 13
3.4.3 Template capturing .................................................................................. 15
3.5 Image capturing with Express ............................................................................. 19
3.5.1 General .................................................................................................... 19
3.5.2 Quick intraoral capturing .......................................................................... 19
3.5.3 Template capturing .................................................................................. 20
3.6 Taking intraoral photographs .............................................................................. 22
3.7 Exceptions........................................................................................................... 23
3.7.1 Image recovery ........................................................................................ 23
3.7.2 Continue an interrupted series .................................................................23
3.7.3 Retake of image during series capturing.................................................. 24
4 Using SmartNav......................................................................................................... 25
4.1 Using SmartNav in image capturing.................................................................... 25
5 Volumetric Tomography ...........................................................................................27
5.1 Intended use ....................................................................................................... 27
5.2 Overview of the VT workflow in the software ...................................................... 27
5.3 Capturing.............................................................................................................28
5.3.1 VT panoramic...........................................................................................28
5.3.2 VT projection series ................................................................................. 29
5.3.3 Viewing the projection series ................................................................... 30
5.3.4 Projection navigator ................................................................................. 31
5139505-100 rev 16 Instrumentarium Dental i

5.3.5 Manual Fiducial Search............................................................................ 32
5.4 Reconstruction .................................................................................................... 34
5.4.1 Association............................................................................................... 34
5.4.2 Creating a reconstruction task ................................................................. 36
5.4.3 Viewing reconstruction .............................................................................39
5.4.4 Cube view ................................................................................................ 42
5.4.5 Slice navigator.......................................................................................... 43
5.4.6 Slice location indicator accuracy ..............................................................44
5.4.7 Angle adjustment ..................................................................................... 44
5.4.8 Editing slice images ................................................................................. 46
5.4.9 Accuracy of the slice images.................................................................... 47
5.5 Implant planning.................................................................................................. 48
5.5.1 Creating a new implant ............................................................................ 50
5.6 Fiducial search calibration................................................................................... 50
6 Saving images............................................................................................................51
6.1 Saving image manually ....................................................................................... 51
6.2 Save all ............................................................................................................... 51
6.3 Autosave option .................................................................................................. 52
7 Image folder ...............................................................................................................53
7.1 Open image......................................................................................................... 53
7.2 3D image display................................................................................................. 54
7.3 Move the image to another patient...................................................................... 54
7.4 Delete image .......................................................................................................55
7.5 Status window .....................................................................................................55
7.6 Restore from archive........................................................................................... 56
7.7 Export.................................................................................................................. 57
8 Image processing ...................................................................................................... 59
8.1 Diagnostic tools................................................................................................... 59
8.1.1 Zoom........................................................................................................ 60
8.1.2 Zoom by fitting to the view ....................................................................... 60
8.1.3 Navigator..................................................................................................61
8.1.4 Pan...........................................................................................................
61
8.1.5 Adjust contrast and brightness................................................................. 61
8.1.6 Invert ........................................................................................................ 62
8.1.7 Noise reduction ........................................................................................ 62
8.1.8 Edge enhancement ..................................................................................62
8.1.9 Sharpening............................................................................................... 63
8.1.10 Isodensity colorization tool ....................................................................... 63
8.1.11 Pseudo color ............................................................................................ 64
8.1.12 Orientation................................................................................................ 65
8.1.12.1 Rotate ........................................................................................65
8.1.12.2 Flip .............................................................................................65
8.1.13 Image control ........................................................................................... 65
8.1.14 Undo......................................................................................................... 67
8.1.15 Restore original image ............................................................................. 67
8.1.16 Crop image............................................................................................... 67
8.1.17 Default...................................................................................................... 67
8.2 Overlay graphics tools.........................................................................................
68
ii Instrumentarium Dental 5139505-100 rev 16

8.2.1 Select tools............................................................................................... 68
8.2.2 Drawing tools ........................................................................................... 69
8.2.2.1 Draw line.................................................................................... 69
8.2.2.2 Draw arrow ................................................................................ 69
8.2.2.3 Draw rectangle........................................................................... 69
8.2.2.4 Draw circle................................................................................. 69
8.2.2.5 Draw free-hand.......................................................................... 69
8.2.2.6 Insert text................................................................................... 70
8.2.2.7 Implant tool ................................................................................ 70
8.2.3 Measurement tools................................................................................... 71
8.2.3.1 Inaccuracy in length measurements..........................................71
8.2.3.2 Three point angle....................................................................... 72
8.2.3.3 Free angle .................................................................................73
8.2.3.4 2D Measurement tool ................................................................ 74
8.2.3.5 3D Measurement tool ................................................................ 75
8.2.3.6 Calibration tool........................................................................... 77
8.2.4 Region of interest (ROI) tools................................................................... 78
9 Creating series...........................................................................................................79
9.1 Fill the template................................................................................................... 79
9.2 Change the order ................................................................................................ 80
9.3 Edit the image ..................................................................................................... 81
9.4 Delete image .......................................................................................................81
10 Templates ................................................................................................................... 83
10.1 Creating new template ........................................................................................ 84
10.1.1 Changing the slot type ............................................................................. 84
10.1.2 Rotate the slot ..........................................................................................85
10.1.3 Undefined slot type .................................................................................. 85
10.1.4 Delete slot ................................................................................................ 85
10.1.5 Slot title .................................................................................................... 85
10.1.6 Saving the created template ....................................................................85
10.2 Delete template ...................................................................................................86
10.3 Edit template ....................................................................................................... 86
10.4 Import and export templates ...............................................................................86
10.5 Copy template .....................................................................................................
87
10.6 Set as default ...................................................................................................... 87
11 Printing .......................................................................................................................89
11.1 Image size in printing .......................................................................................... 89
11.2 Image list............................................................................................................. 90
11.2.1 Image information .................................................................................... 90
11.3 Tools ................................................................................................................... 91
11.4 Zoom ................................................................................................................... 91
11.5 Arranging the images in the print preview........................................................... 91
11.6 Resizing the images in the print preview............................................................. 91
11.6.1 Fit to page ................................................................................................ 92
11.6.2 Restoring the image size.......................................................................... 92
11.7 Copy to clipboard ................................................................................................ 92
11.8 Page setup ..........................................................................................................92
11.9 Header and footer on the print ............................................................................93
5139505-100 rev 16 Instrumentarium Dental iii

11.9.1 Print logo ..................................................................................................93
11.9.2 Font type .................................................................................................. 94
11.10Start printing ....................................................................................................... 94
11.11Background color................................................................................................95
11.12Volumetric Tomography Images......................................................................... 96
11.12.1Reconstruction images............................................................................ 96
11.13 Exit print editor..................................................................................................97
12 Scanning..................................................................................................................... 99
13 Import and export .................................................................................................... 101
13.1 Import ................................................................................................................101
13.2 Export................................................................................................................ 102
13.3 DICOM import/export ........................................................................................ 104
13.3.1 DICOM import ........................................................................................ 104
13.3.1.1 3D DICOM image import .........................................................104
13.3.2 DICOM export ........................................................................................ 104
13.3.2.1 3D DICOM image export .........................................................105
13.4 Create DICOMDIR ............................................................................................ 106
13.5 Importing DICOMDIR ........................................................................................108
13.6 FMS Import/Export ............................................................................................109
13.6.1 FMS Import ............................................................................................ 109
13.6.2 FMS Export ............................................................................................ 109
13.7 Volumetric Tomography (VT) import & export................................................... 111
13.7.1 VT import................................................................................................111
13.7.2 VT export................................................................................................ 112
13.7.3 Export of an individual VT image ........................................................... 113
13.8 Export patient to Viewer ....................................................................................114
13.9 Quick Import...................................................................................................... 114
13.10Quick Export ..................................................................................................... 115
13.11Instant Export....................................................................................................115
14 General settings....................................................................................................... 117
14.1 Settings ............................................................................................................. 117
14.1.1 General .................................................................................................. 117
14.1.2 Background ............................................................................................118
14.1.3 Image Dialog ..........................................................................................119
14.1.4 Image capturing ..................................................................................... 119
14.1.5 Quick Import........................................................................................... 120
14.1.6 Quick Export........................................................................................... 121
14.1.7 VT........................................................................................................... 122
14.2 Default image settings....................................................................................... 123
14.3 Installed devices................................................................................................ 133
14.4 Intra ...................................................................................................................134
14.4.1 Default exposure values......................................................................... 134
14.4.2 Sigma settings........................................................................................ 134
14.4.2.1 Battery refreshment .................................................................135
14.4.3 Sigma M settings.................................................................................... 137
14.4.4 Snapshot settings................................................................................... 139
14.4.5 Express settings..................................................................................... 140
14.4.5.1 Default exposure values ..........................................................140
iv Instrumentarium Dental 5139505-100 rev 16

14.4.5.2 Express Setup ......................................................................... 140
14.5 OP30 settings.................................................................................................... 140
14.6 CB3D settings ................................................................................................... 141
14.6.1 3D-link setting ........................................................................................ 141
14.7 Settings for the intraoral camera .......................................................................142
14.8 Contrast and brightness of the monitor ............................................................. 143
15 Other features ..........................................................................................................145
15.1 Copy to and paste from Clipboard .................................................................... 145
15.2 Create copy....................................................................................................... 145
15.2.1 Create copy of an individual VT image ..................................................145
15.3 Toolbars ............................................................................................................ 146
15.4 Window control.................................................................................................. 146
15.5 Full screen view ................................................................................................ 147
15.6 Light box............................................................................................................ 147
15.7 Selecting the language...................................................................................... 147
15.8 Creating Backup................................................................................................147
15.9 Touch screen mode .......................................................................................... 148
15.10Optional Resolution image capturing and processing with test tool Digital Kit
68795 according to EN61223-3-4 and DIN6868-151........................................ 148
15.11Monitor test....................................................................................................... 149
16 DICOM functions in the software DICOM .............................................................. 153
16.1 DICOM mode .................................................................................................... 153
16.2 Worklist, SCU................................................................................................... 154
16.2.1 Searching studies................................................................................... 154
16.2.1.1 Indirect search .........................................................................154
16.2.1.2 Direct search............................................................................ 155
16.2.2 Selecting a study.................................................................................... 155
16.3 Storage, SCU ....................................................................................................156
16.3.1 Monitoring of the queue ......................................................................... 156
16.4 Storage Commitment ........................................................................................ 158
16.5 DICOM printing ................................................................................................. 159
16.5.1 Physical Width measure......................................................................... 160
16.5.2 Background color ................................................................................... 161
16.6 Study manager..................................................................................................
161
16.6.1 Study Editor............................................................................................ 164
16.6.2 Moving image from one study to another............................................... 164
16.7 Query / Retrieve ................................................................................................165
16.7.1 Perform a query ..................................................................................... 165
16.7.2 Retrieving data .......................................................................................167
16.7.3 View retrieving schedule ........................................................................167
16.8 Storage SCP ..................................................................................................... 168
16.9 DICOM Info ....................................................................................................... 169
16.10DICOM configuration dialog.............................................................................. 169
17 Graphical symbols and shortcuts.......................................................................... 171
17.1 Graphical symbols............................................................................................. 171
17.2 Shortcuts ........................................................................................................... 174
18 Software license ......................................................................................................175
5139505-100 rev 16 Instrumentarium Dental v

vi Instrumentarium Dental 5139505-100 rev 16

1 Introduction
1.1 General
CliniView software (hereafter called “the software”) is a
complete solution for digital image acquisition, processing,
viewing and storing. The software supports
Instrumentarium Dental Sigma, Sigma M and Snapshot
intraoral sensors, Express, Orthopantomograph® OP30/
OP300/ OP100 D/ OP200 D and Orthoceph® OC100 D/
OC200 D digital units and intraoral video cameras. Images
can also be imported from other digital sources. The
software stores images and patient information in a SQL
database and provides tools for image archiving.
This manual covers the usage of the software Standard
and DICOM versions. The Installation Manual describes
how to install the software and usage of the Manager
software. See the equipment manuals before installing or
using the equipment. See the Windows manuals for further
information about the Windows environment.
With the software you can perform the following
operations:
Create a new patient and store patient information in a
database.
Capture and store digital X-ray images with exposure
values from the device.
Capture and store intraoral photographs.
Export and import digital images.
Process images to enhance their diagnostic value with
dental specific tools.
Analyse the image with application specific
measurement tools.
Build an environment with multiple workstations using
a database shared over a network.
Printing images and image information.
Supported Windows® operation systems are specified in
the software installation manual.
The software lets you import and export image files.
Supported file formats are D32, JPG, JPG2000, TIF, BMP
and PNG. D32 is Instrumentarium’s proprietary own file
format. Images can be saved in the database in PNG
(16 bit) or JPG formats (12 bit).
5139505-100 rev 16 Instrumentarium Dental 1

1 Introduction
the software can be used in a network environment. If the
software is installed in several computers, the patient and
image database can be shared and used from different
workstations.
1.2 Manufacturer’s liability
As a manufacturer, we can only assume liability for safe
and reliable operation of this software when the PC
software is installed and used according to the software
Installation and User Manuals.
Safe and reliable usage of the product requires that the
user is conscious of the instructions and restrictions given
in the manual.
1.3 Manual
All the software functions can be selected from the menu
bar. In addition, there are graphical symbols on the toolbar
for some of the most used functions. This manual primarily
describes the procedure by using graphical symbols, but it
also describes the procedure through menubar. The user
can select either of them. The use through menu bar is
instructed as in this example: File ⇒ Save.
Graphical symbols used stand beside the text.
NOTE! Clicking means pressing the primary mouse button
once. Double-clicking means pressing the primary mouse
button twice in rapid succession.
1.4 General instructions
To obtain full advantage of the software, you have to be
familiar with the functionality of the operating system.
For diagnostic tasks it is important to use high quality
monitor and graphics card to achieve bright, sharp and
high contrast image. The monitor should be operated in
subdued light and strong direct light should not reach the
screen. In professional use the display system quality
should be regularly controlled. See additional information
from the chapters 8, Image processing, 14.8, Contrast and
brightness of the monitor and 15.11, Monitor test. The
monitor image quality tends to degrade significantly in
couple of years by losing brightness and sharpness without
noticeable sudden change.
Do not open, process or overwrite the software internally
stored image or other files.
2 Instrumentarium Dental 5139505-100 rev 16
2 Patient management
2.1 Start the software
To start the software, double-click the CliniView icon on
the desktop or open the program from Start menu
Programs ⇒ CliniView.
NOTE! The software checks the computer resources when
it starts. If there is less than 300 MB of space on the hard
disk, the software notifies you.
2.2 Login
If the login option is activated, enter the user name and
password.
Click OK. The software starts after successful login. Login
is defined in the Manager software.
See the Installation Manual for details.
2.3 Patient management
In the software, patient information is stored in the
database and image always belongs to the patient. Image
capturing is not possible without patient selection.
5139505-100 rev 16 Instrumentarium Dental 3
2 Patient management
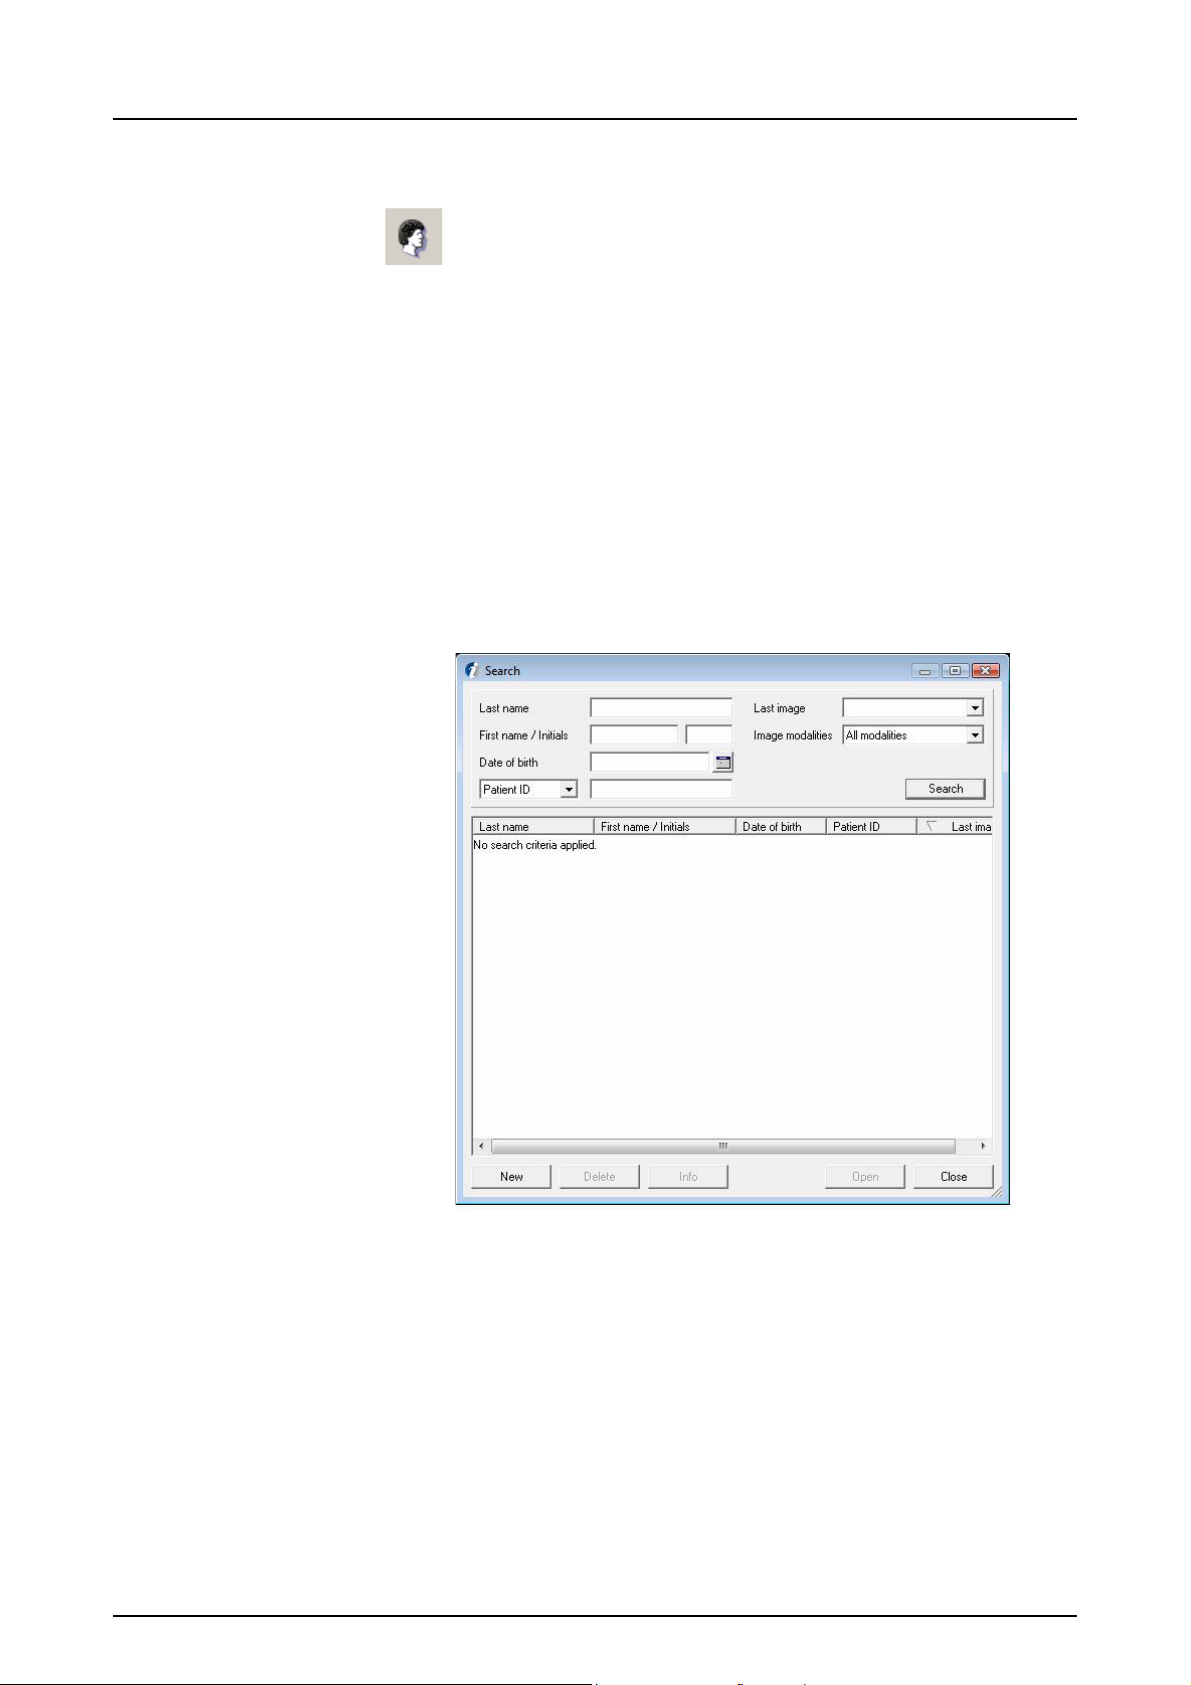
2.4 Patient search
The Patient search dialog opens automatically when you
start the program. The dialog can be opened by clicking
Open patient in the toolbar. Select the fields to fill in the
search criteria. Use * mark to expand the search area.
For example by writing C*, you can search all the patients
whose name starts with the letter C. In the patient ID field,
select from drop-down menu: Patient ID, social security ID
number or PatID (Bridge) as search criteria. Click Search.
All patients that meet your criteria appears on the list.
Select the patient and click Open to enter the patient´s
image folder.
Another way to open the Patient search dialog is to select
Patient ⇒ Open.
4 Instrumentarium Dental 5139505-100 rev 16
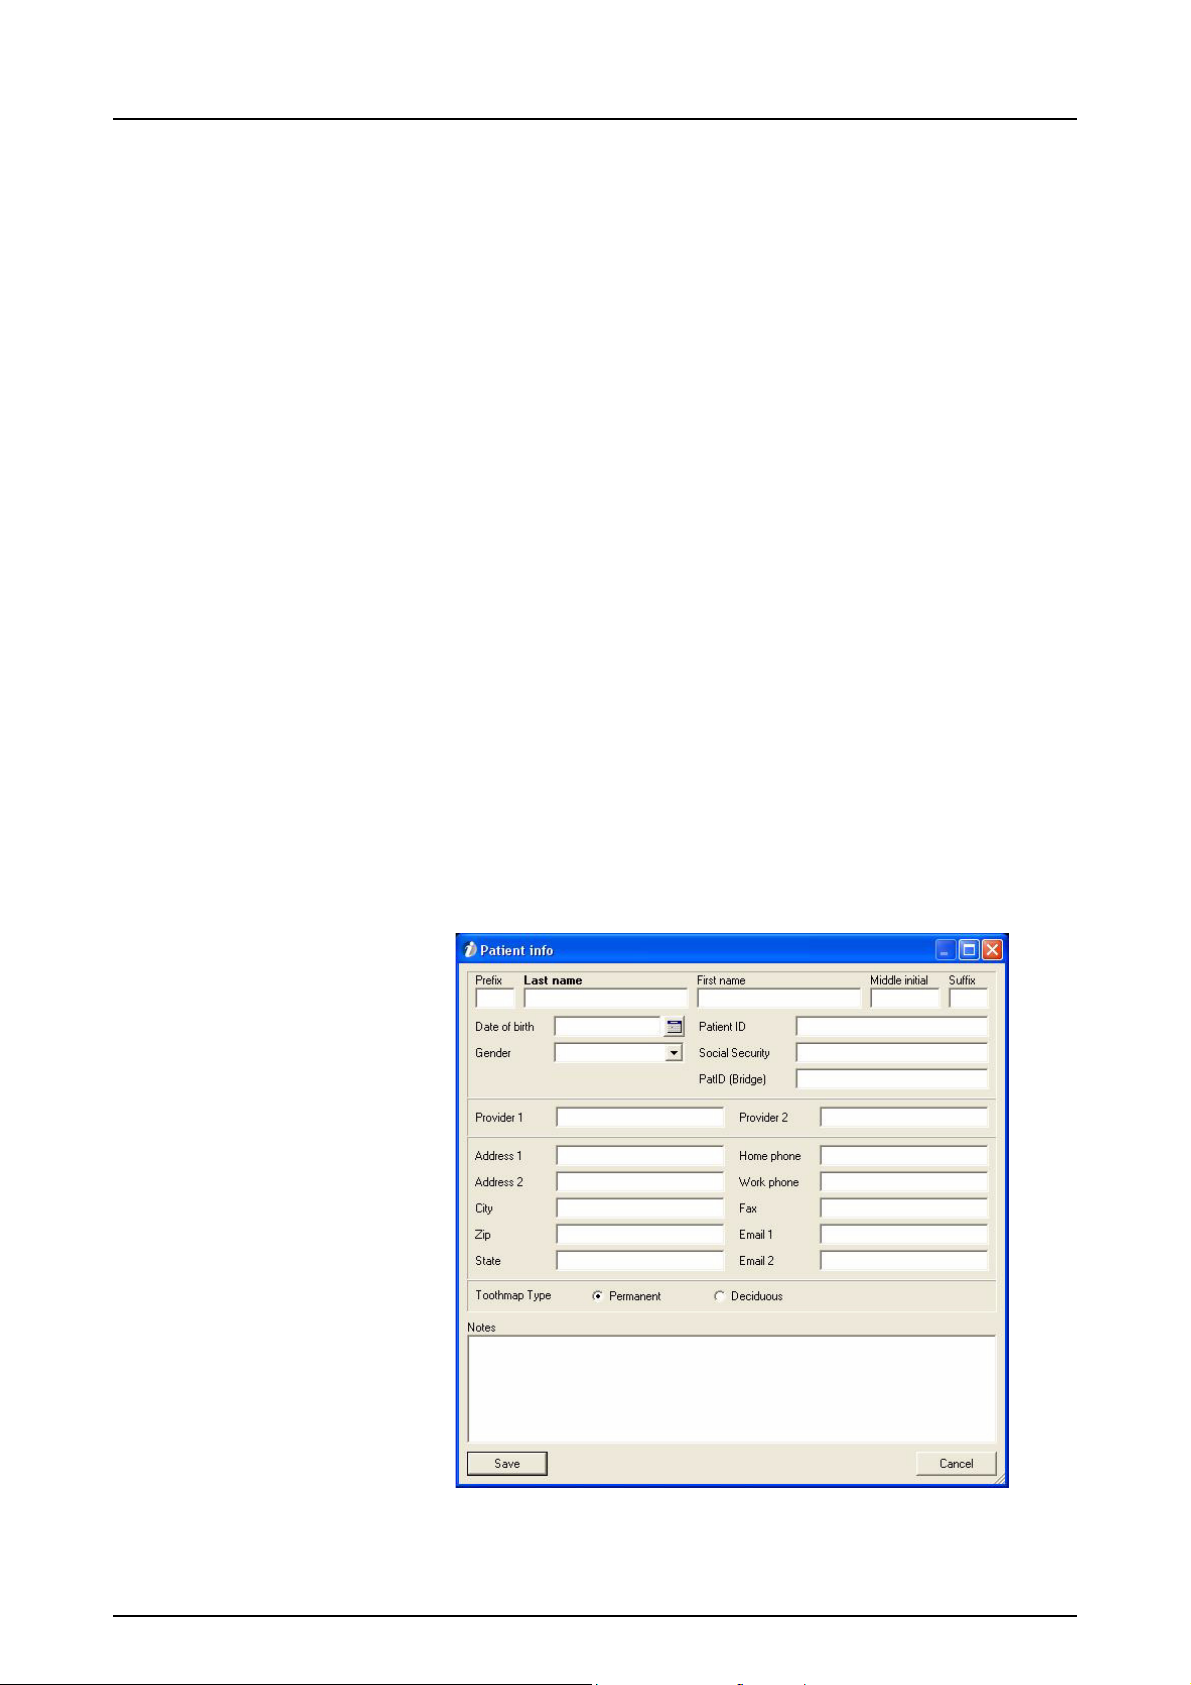
2.5 Add a new patient
To add a new patient to the database, click New on the
Patient search dialog. Fill in the information in the free
fields. Mandatory fields are marked with bold font.
Patient name is divided into 5 separate fields. Only the
Last Name field is mandatory. Prefix field can be used to
identify the tittle of the person, e.g. Mr. or Ms. Suffix means
the generational information or such, e.g. Jr. or Sr.
The Patient ID field is a mandatory field. In case the user
does not fill in the patient ID, the software creates a unique
Patient ID. PatID (Bridge) is shown in case the software
has a connection to practise management software.
Date of birth can be filled in manually. Date format
depends on settings in Windows. If you want to use the
calendar to define a date of birth, click the Calendar
button. To select year, click the primary mouse button on
top of the year in the calendar. The year becomes gray and
you can use the arrow buttons to select the year. Use the
left and right arrow buttons to define the month and click
the appropriate day. To close the calendar, click the
primary mouse button anywhere outside the calendar.
2 Patient management
Another way to open the dialog is to select Patient ⇒ New.
Click Save to finish adding the information. Click Cancel to
abort the action; the patient information is not saved.
5139505-100 rev 16 Instrumentarium Dental 5
2 Patient management
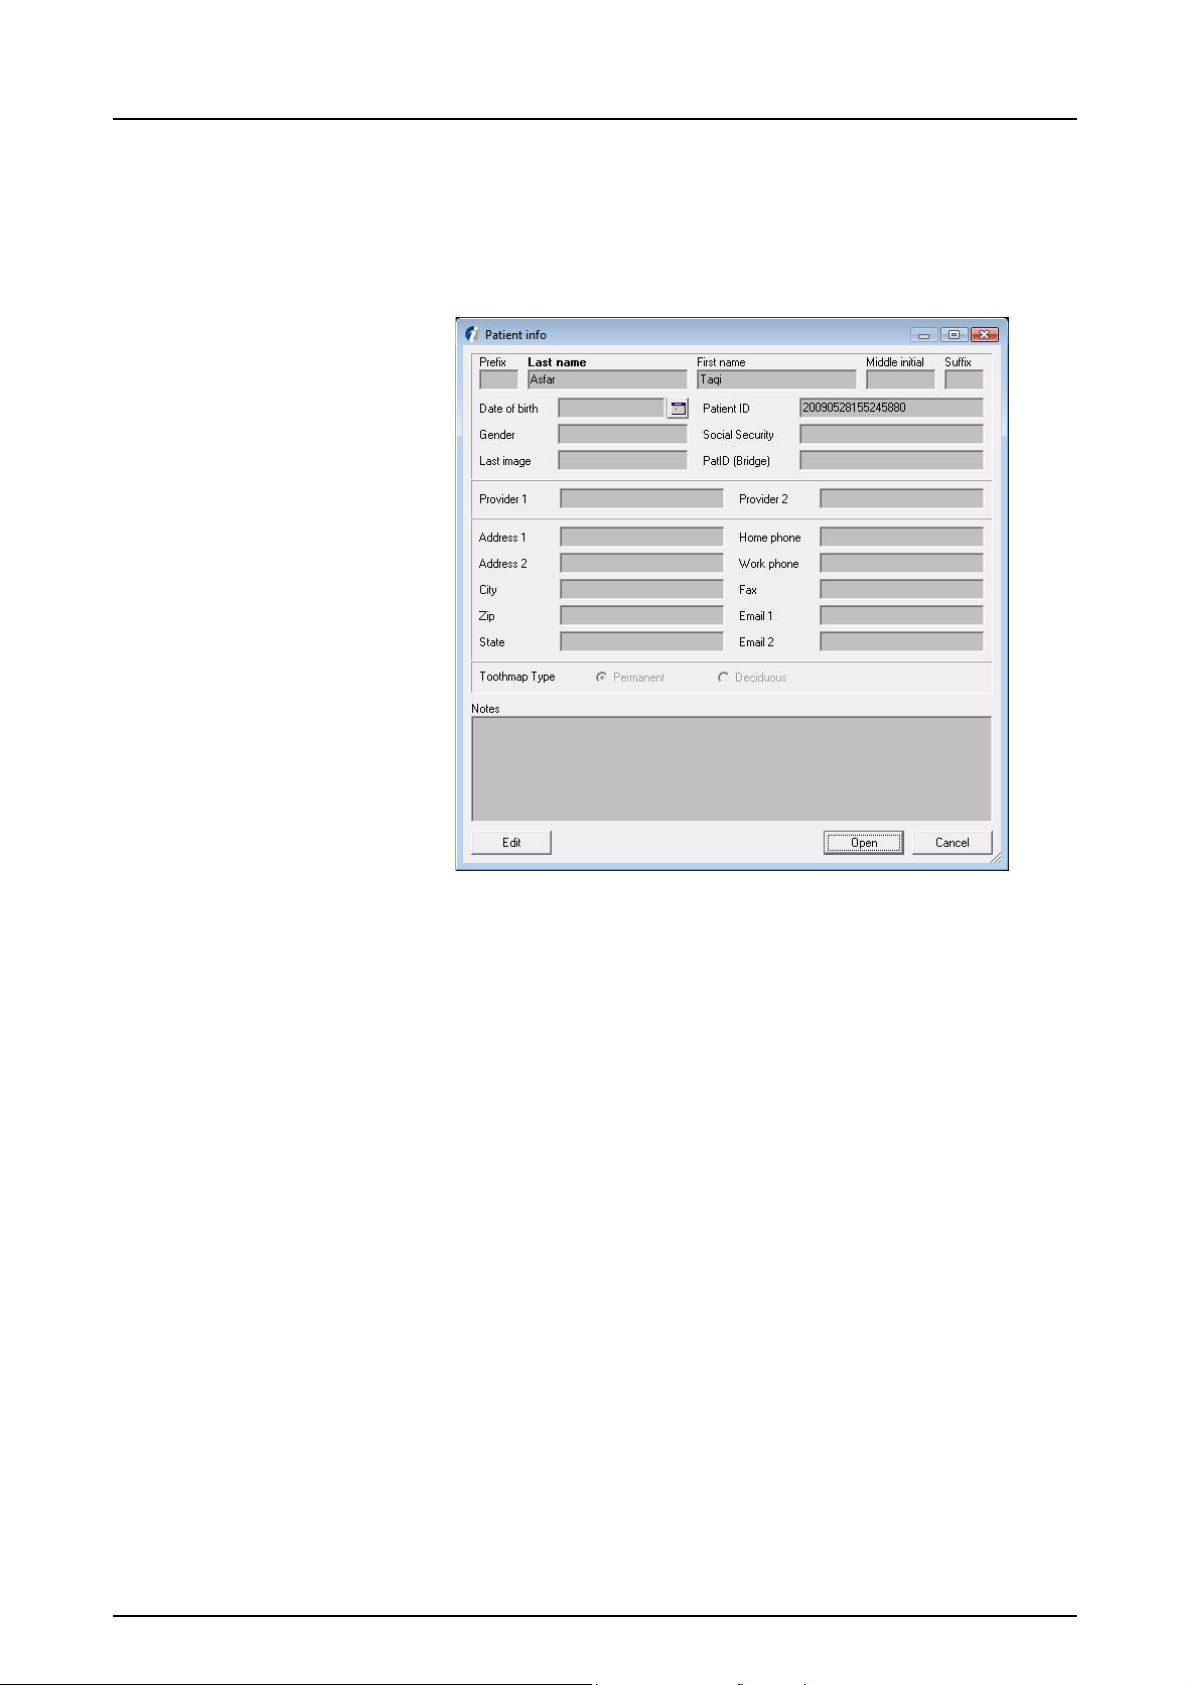
2.6 Edit patient information
To edit the patient information, select the patient and click
Info in the search dialog. The Patient information dialog
opens.
Click Edit in the Patient info dialog. The Input fields turn
white and can be edited. To save the edited information
click Save. To exit the Patient info dialog without saving,
click Cancel. Another way to enter the Patient info dialog is
to select Patient ⇒ Info and click Edit or Patient ⇒ Edit.
2.7 Delete patient
In the Patient search dialog, patient information can be
removed by selecting the patient and clicking Delete.
Patient information and all patient images disappear from
the software but remain in the database.
NOTE! Patient information and images are not deleted
from the database. Delete those finally or restore them to
patient list by using the software Manager program. See
the software Installation Manual for details.
6 Instrumentarium Dental 5139505-100 rev 16

2.8 “No patient selected” mode
The software can be opened without any patient selected.
To enter “No patient selected mode” click Close in the
patient search dialog before selecting any patient.
If you want to close the patient, when having a patient
selected, click Select patient or select Patient ⇒ Close.
The name of the patient is shown in the software caption
bar if a patient is selected. Image capturing is not possible,
if patient is not selected.
2 Patient management
5139505-100 rev 16 Instrumentarium Dental 7

2 Patient management
8 Instrumentarium Dental 5139505-100 rev 16
3 Image capturing
CAUTION! Do not run other programs while taking X-ray
images. The imaging system uses all the resources of the
workstation.
WARNING! Turning off the X-ray unit or the workstation
during the exposure or image processing may cause the
image to be lost.
WARNING! Do not release the exposure button before the
exposure is ended and alarm stopped.
3.1 Image capturing with OP300
1. Prepare the system according to the OP300 User
Manual.
2. Launch the software.
3. Open a new or existing patient or select a patient from
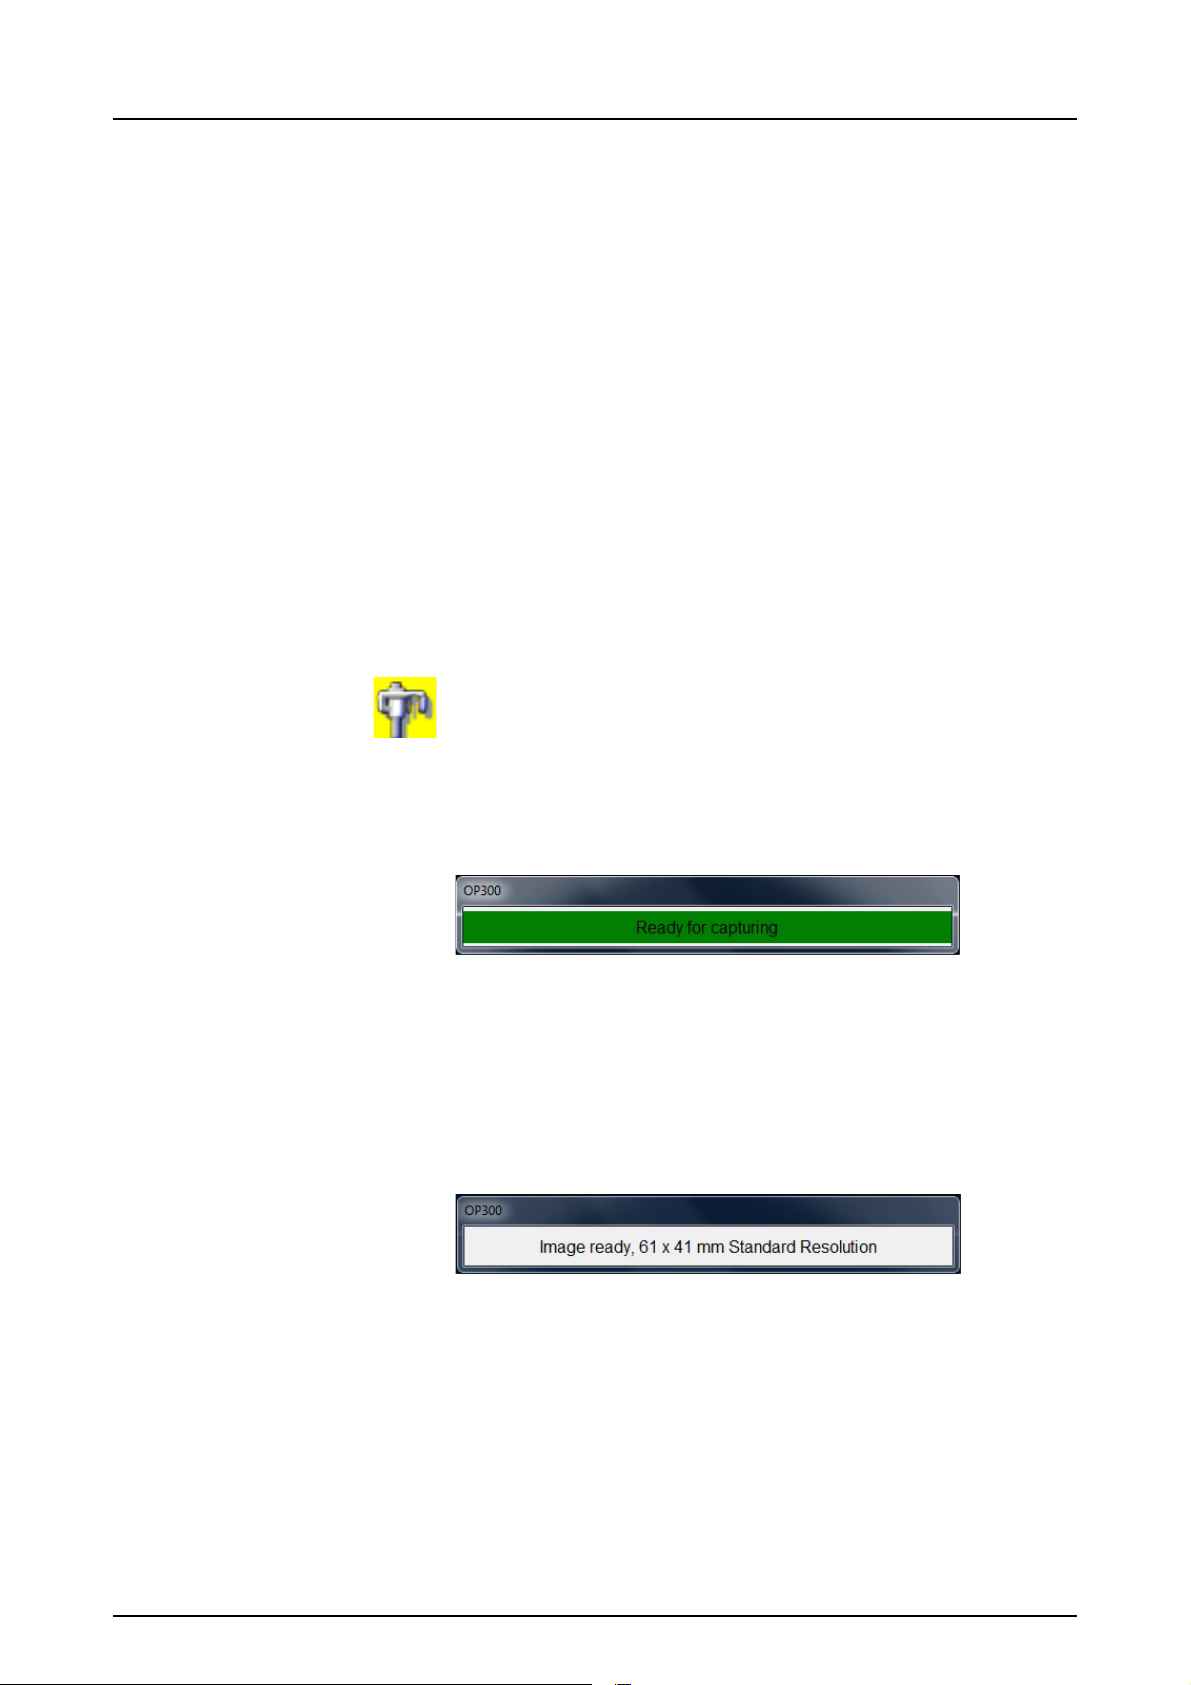
the worklist and click OP300 capture.
The software checks that the system is ready for an
exposure and displays the “Ready for capturing”
dialog.
4. Select an imaging program, exposure values at the
unit and position the patient according to unit user’s
manual.
5. Make an exposure.
6. Wait until the image is processed and the image is
received by the software.
NOTE! Image processing and downloading the 3D image
data to the software may take a few minutes.
5139505-100 rev 16 Instrumentarium Dental 9

3 Image capturing
Panoramic and scout images are displayed automatically
after capturing by the software. The software is not able to
display 3D image, but the image is saved automatically
after the image data is received. See chapter 7.2, 3D
image display for more information about 3D image
viewing.
The system is ready for the next exposure when the state
is again “Ready for exposure”.
7. Terminate image capturing when all necessary images
are taken and processed by clicking Abort capture.
NOTE! The x-ray unit can be configured to terminate the
capturing automatically after a 3D image.
3.2 Image capturing with OP100 D/OP200 D
3.2.1 Taking panoramic exposures
1. Prepare the system according to the OP100 D/
OP200 D User Manual.
2. Click Capture images with OP.
Another way to start the image capturing is to select
File ⇒ Capture ⇒ OPD/OCD.
NOTE! The exposure button is not visible if the software
has been installed as a ViewStation. The Exposure button
is disabled (gray) if there is no patient selected or if system
is not ready for capturing. Check that the optic cable is
properly connected and the OPD unit is ON. If this does not
help, call your local distributor.
3. Wait until the status bar at the bottom of the screen
indicates ‘System is ready for capturing’.
4. Select an imaging program, exposure values and
position the patient according to unit user’s manual.
5. Make an exposure. The software displays
automatically the captured image and terminates the
capturing session.
You can abort capturing without an exposure by clicking
Abort capture.
WARNING! Turning off the X-ray unit or the workstation
during the exposure may cause the image to be lost.
10 Instrumentarium Dental 5139505-100 rev 16

3 Image capturing
3.2.2 Taking cephalometric exposures
See the instructions in chapter 3.2.1, Taking panoramic
exposures.
3.2.3 Image orientation
When a PA image is taken, the patient’s face is pointed
towards the camera/sensor. The image appears on the
screen the patient’s left side on the left side of the screen.
When an AP image is taken, the patient’s face is away
from the camera/sensor. The image appears on the screen
the patient’s left side on the right side of the screen.
Letter L on the right lower corner of the panoramic image
means patient left side.
3.3 Image capturing with OP30
1. Prepare the system according to the OP30 User
Manual.
2. Launch the software.
3. Open a new or existing patient.
4. Start image capturing by clicking Capture images
with OP30.
5. Wait until the status bar at the bottom of the screen
indicates ‘System is ready for capturing’.
6. Select an imaging program, exposure values at the
unit and position the patient according to OP30 user’s
manual.
7. Make an exposure.
8. After the exposure has been taken a progress bar
appears. This indicates that the image is being
transferred to the software.
9. The software displays the captured image and
terminates the capturing session.
NOTE! You can abort capturing without an exposure by
clicking Abort capture.
5139505-100 rev 16 Instrumentarium Dental 11
3 Image capturing
3.4 Image capturing with intraoral sensors
3.4.1 General
The software supports intraoral imaging with
Instrumentarium Dental Sigma, Sigma M and Snapshot
Intraoral Sensors.
NOTE! Sigma is not supported in 64-bit operating systems.
It is possible to take single intraoral images or capture
images to a predefined template.
In ‘Quick intraoral capturing mode’ the image is displayed
on the screen with the default orientation. The image can
be rotated afterwards to the correct orientation.
In ‘Template capturing mode’ the orientation is selected
before the exposure and the image is automatically in the
needed orientation when displayed on the screen.
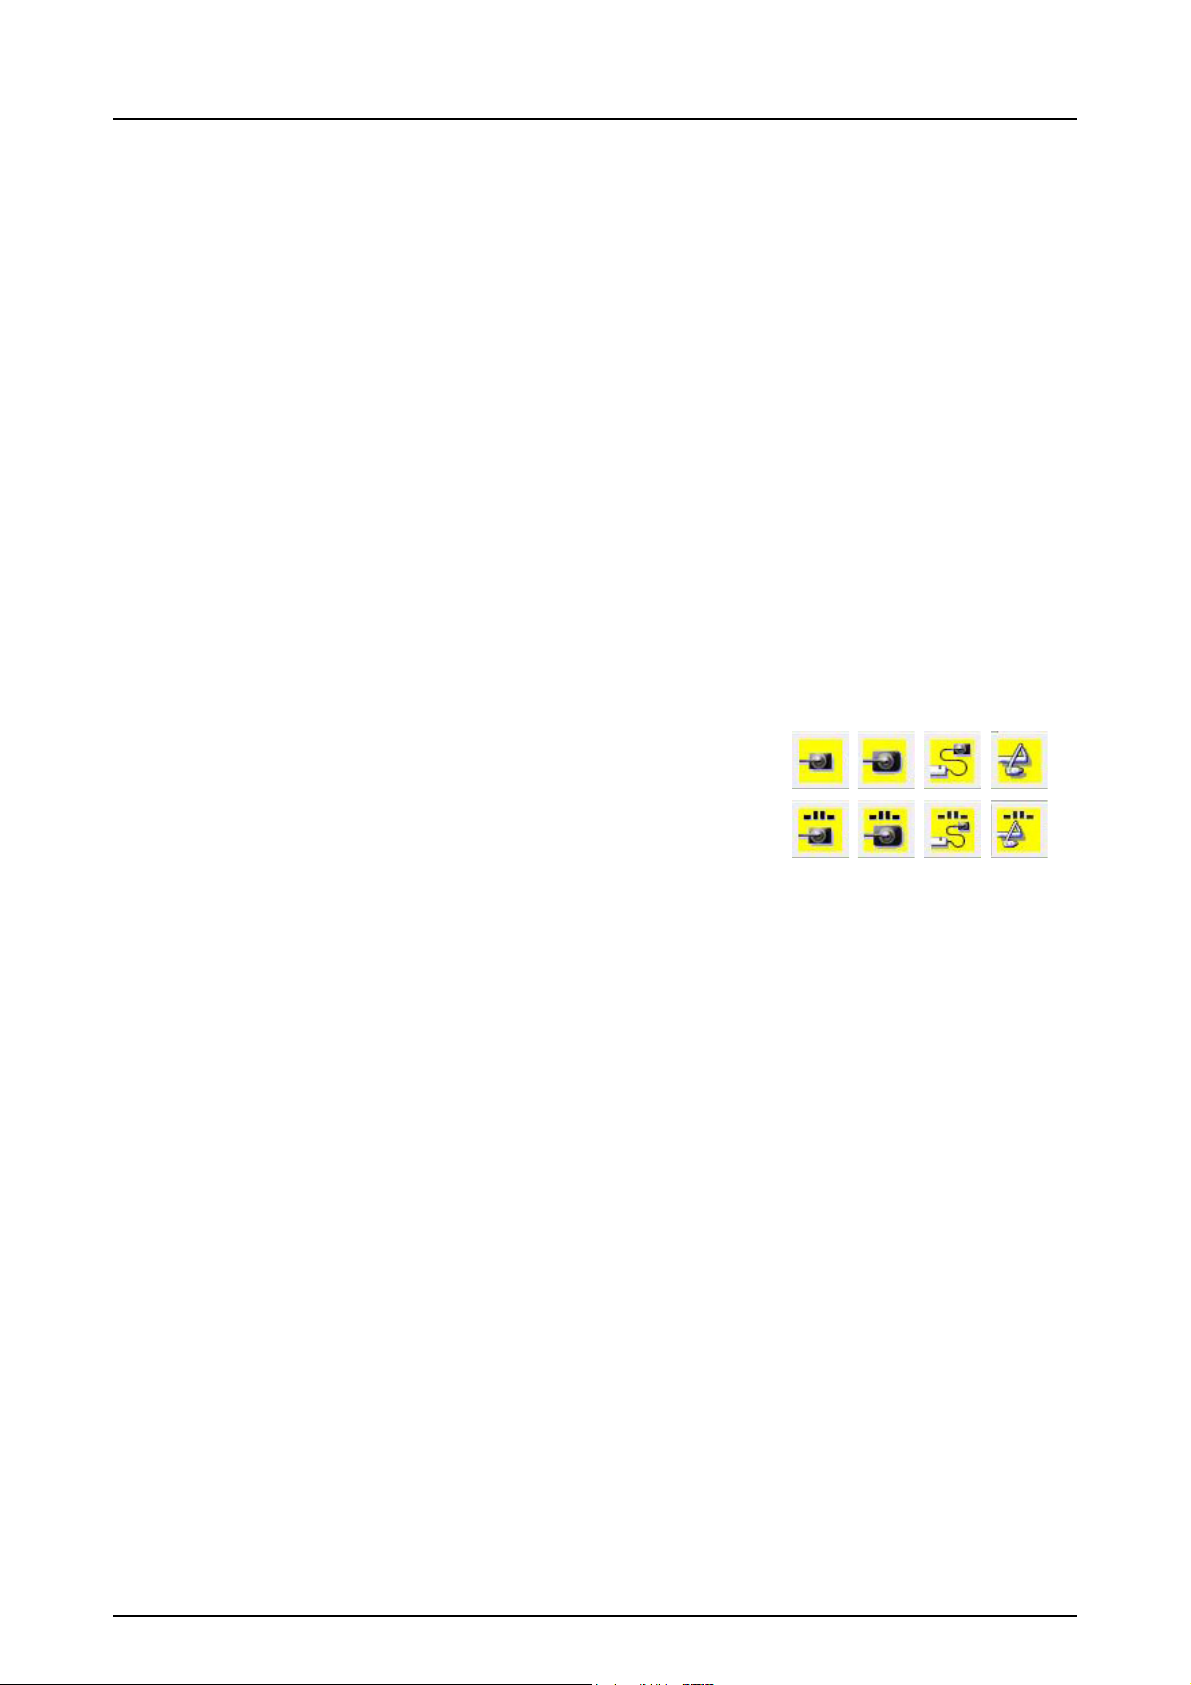
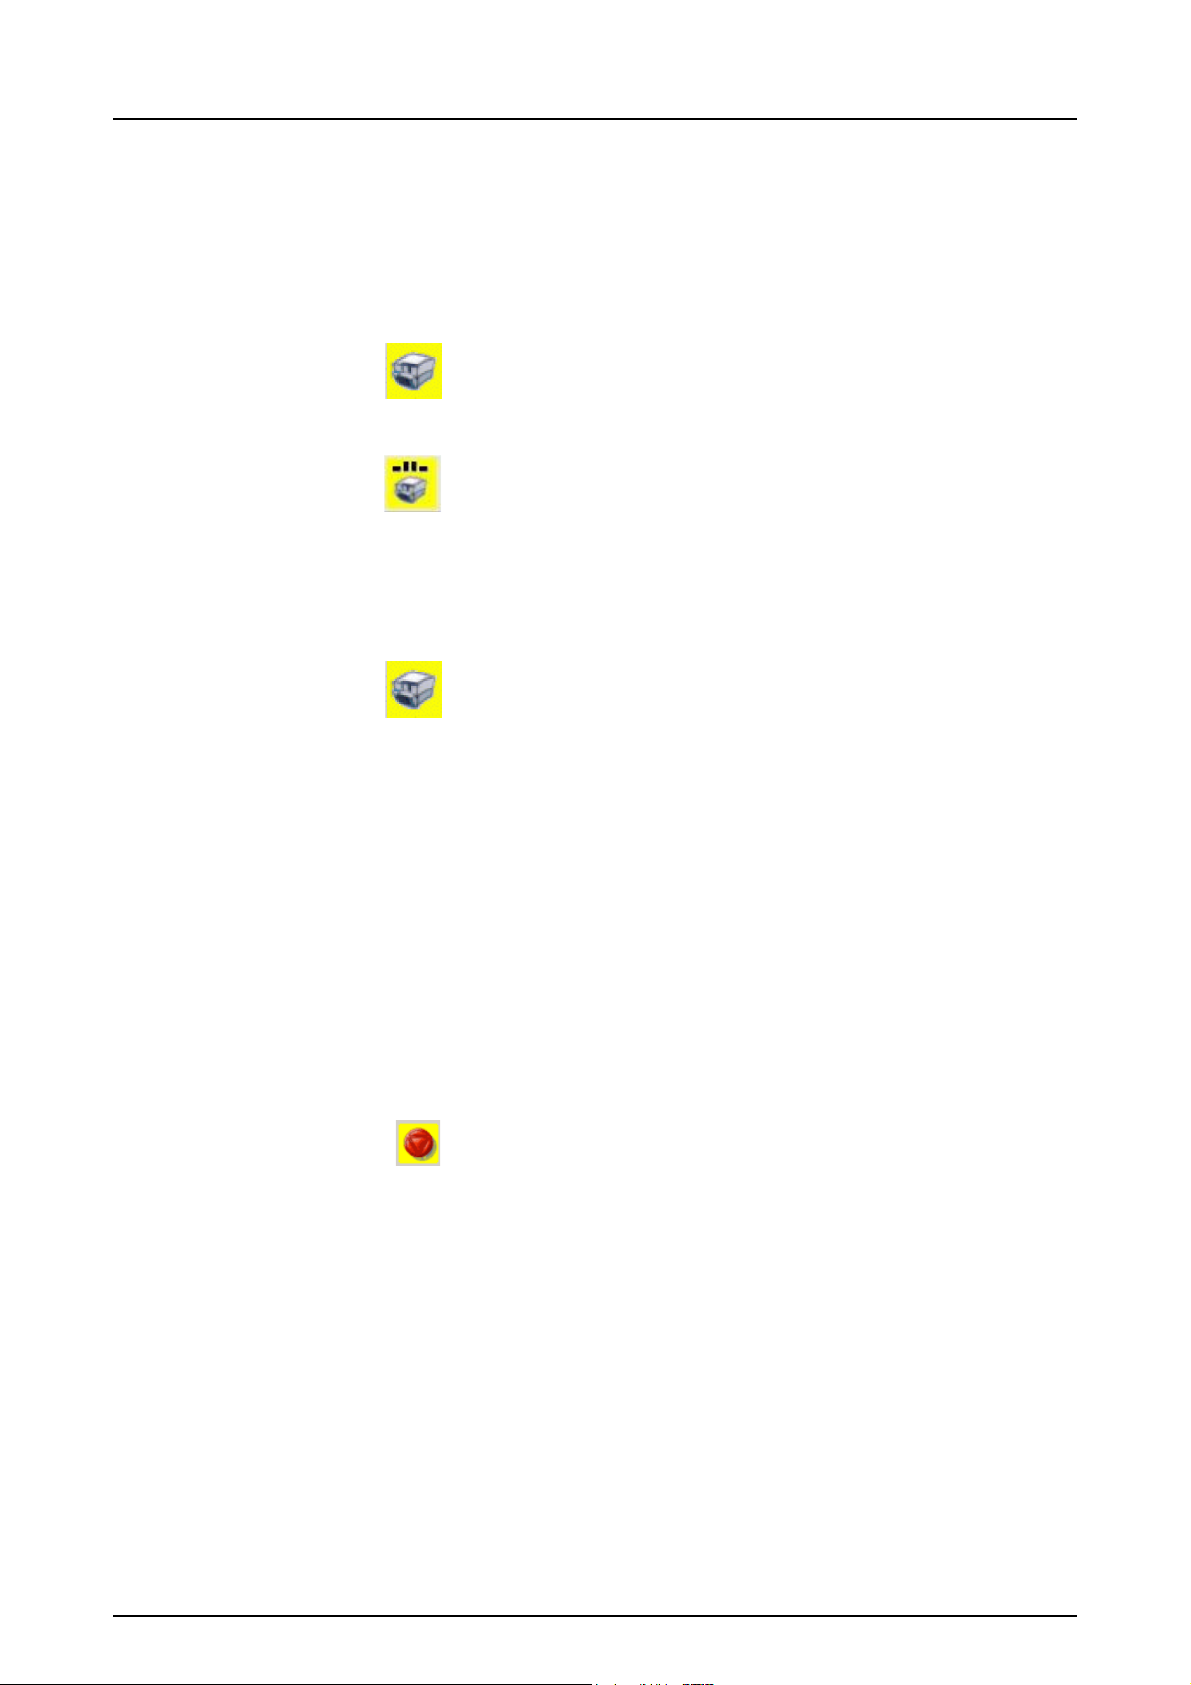
For Quick intraoral capturing:
For Template image capturing:
NOTE! The capture buttons are not visible if the device is
not selected during the software installation or added to
Installed devices.
NOTE! The capture buttons are disabled (gray) if no
patient is selected or no sensors are connected
(Snapshot).
WARNING! Do not run other programs while taking X-ray
images. The imaging system uses all the resources of the
workstation.
WARNING! Turning off the X-ray unit or the workstation
during exposure may cause the image to be lost.
12 Instrumentarium Dental 5139505-100 rev 16
3 Image capturing
3.4.2 Quick intraoral capturing
1. Prepare the sensor according to the sensor user
manual.
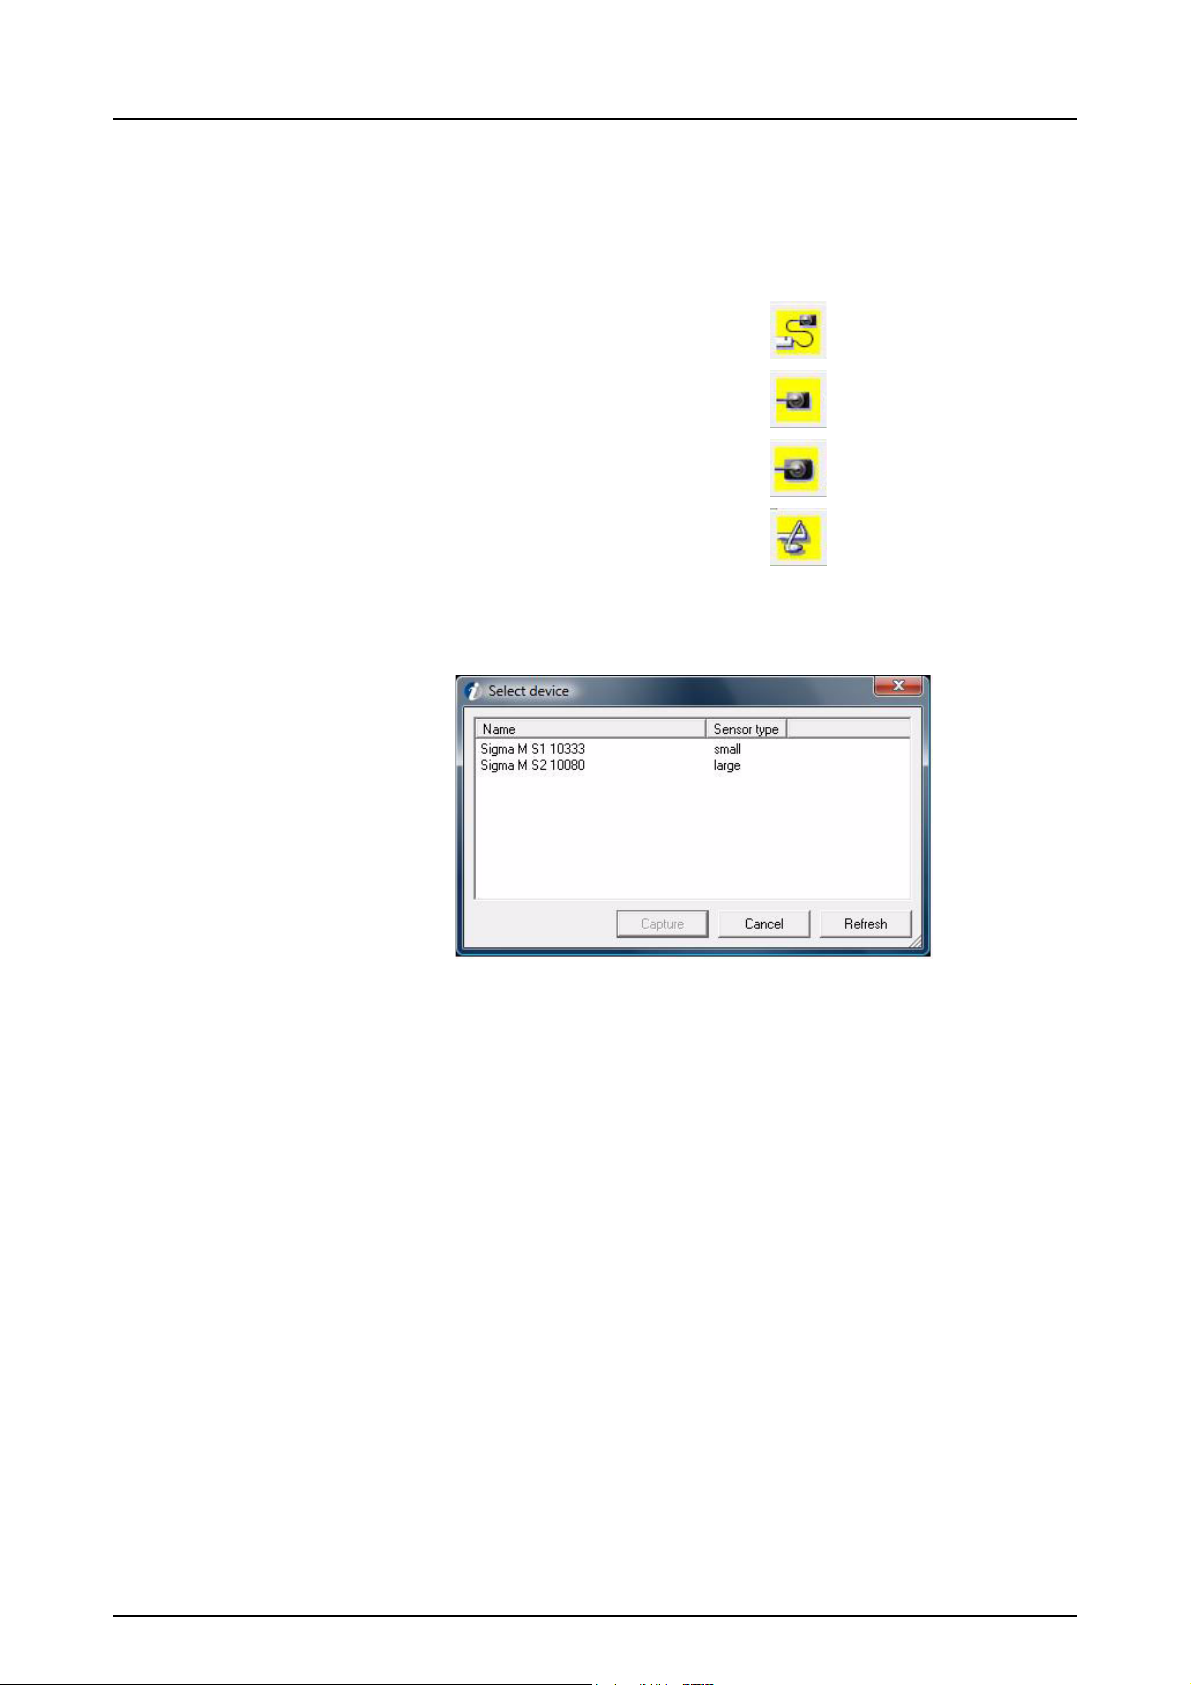
2. Click the image capture button.
Snapshot:
Sigma M small sensor:
Sigma M large sensor:
Sigma:
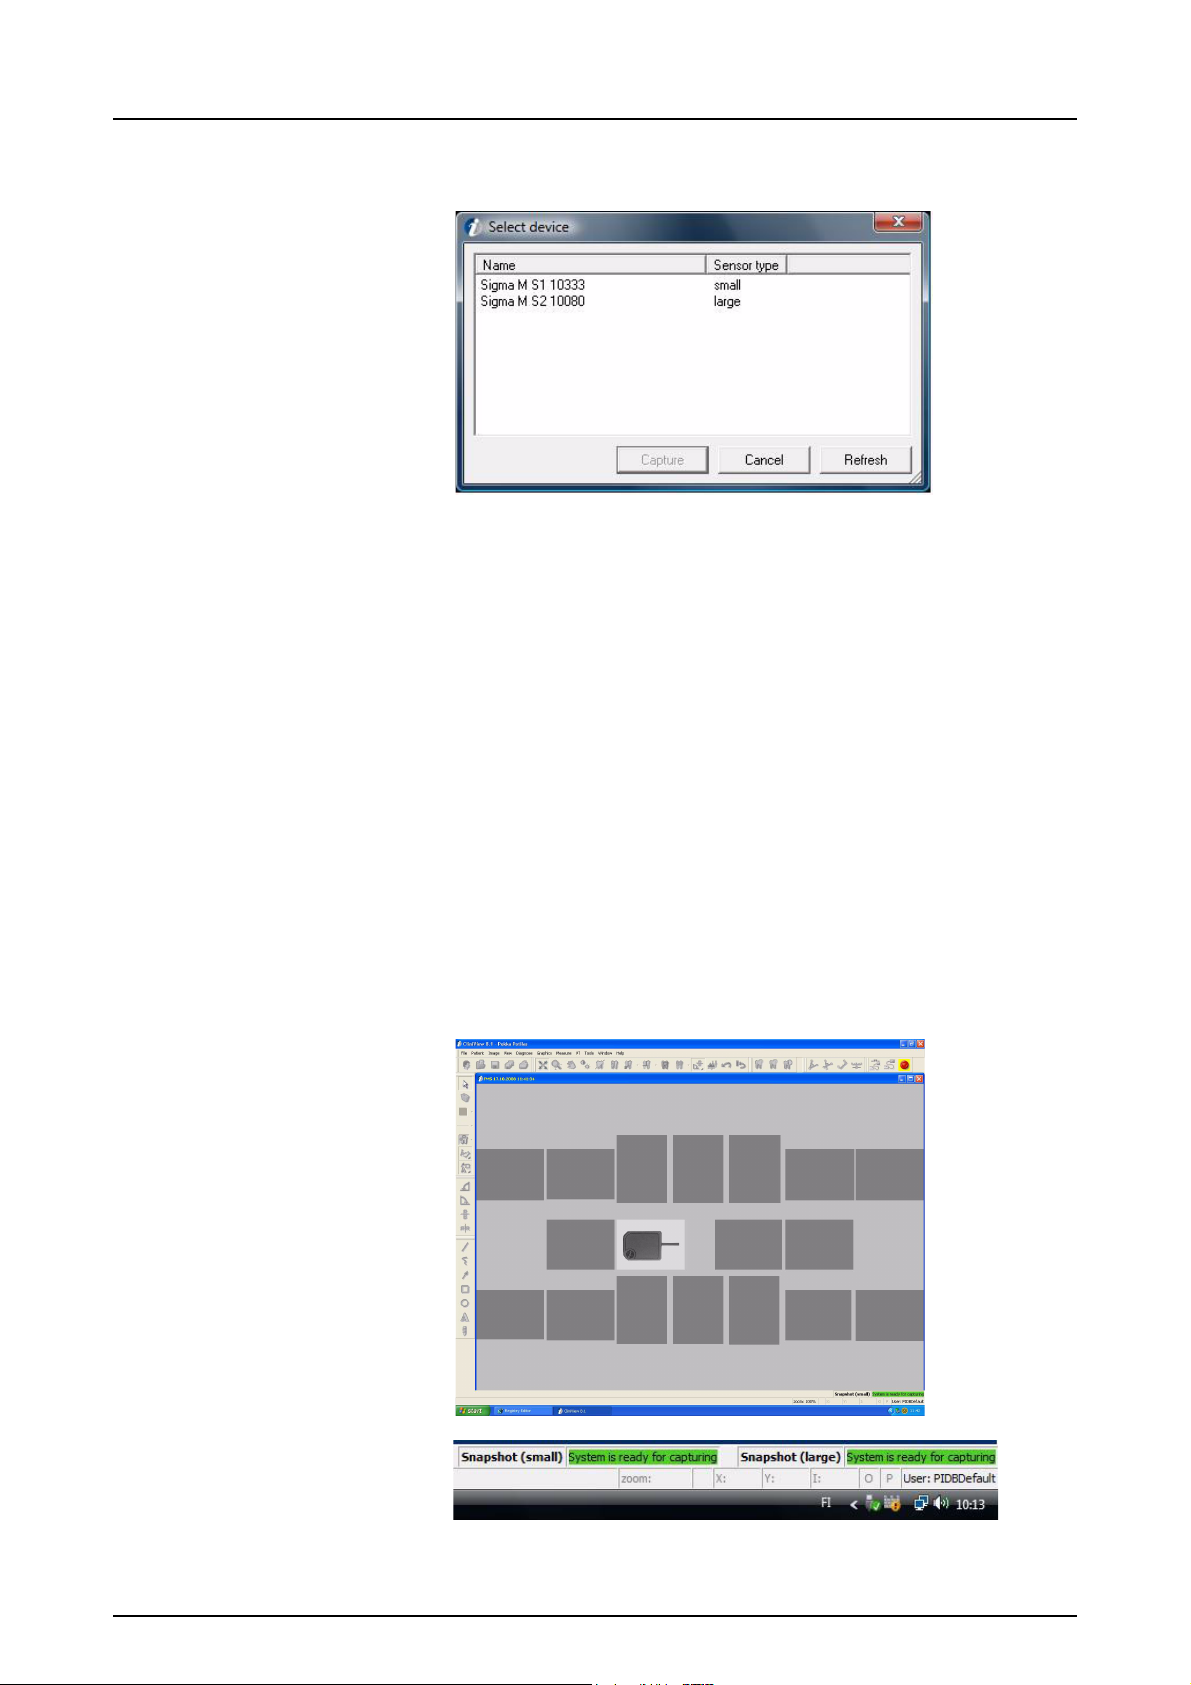
3. With Sigma M sensor only:
Select the sensor.
NOTE! This dialog is not shown if pre-selected Sigma M
sensors are used. See more information in Chapter 14.4.3,
Sigma M settings.
If the software cannot find Sigma M sensor:
Check that the sensor power switch is ON
If the sensor is locked by other workstation, the
software can not find it (check that you have selected
the correct sensor, wait a minute and try again)
Check the WLAN configuration
Ensure that gain files are installed
4. Wait until the software connects to the sensor(s) and
the status bar shows that the system is ready for
capturing.
5. Position the patient and prepare the X-ray unit for
exposure according to the device user manual.
5139505-100 rev 16 Instrumentarium Dental 13

3 Image capturing
NOTE! Be sure the used sensor is the same than the
sensor activated in the software. When capturing is started
from the software, the sensor name and the size are
shown in the status bar.
NOTE! Make sure that the device status indicator
illuminates green before making the exposure.
WARNING! Do not release the exposure button before the
exposure is ended and alarm stopped.
6. Make an exposure with the X-ray unit.
NOTE! The exposure must be made within
the time-out (1...10 min.), otherwise the
image capturing time expires (see the
settings section).
When an image capturing time-out occurs, the software
gives warning of the interrupted examination by a tone and
message. Adjust the PC playback volume so that the
warning beeps can be heard.
7. Wait until the image is downloaded to the software and
the image is displayed on the screen.
8. Rotate image with the Rotate left or Rotate right
buttons to the same position as the sensor was during
exposure.
9. Continue capturing more images after
status bar has indicated that the
system is ready for the next image.
NOTE! It is possible to use small and large size sensors or
sensors of different generation during the same capture
session. The capturing with Sigma, Sigma M large, Sigma
M small and Snapshot sensors need to be activated
separately. The image is downloaded only from the sensor
receiving X-rays. The activated sensors and the status is
indicated on the status bar on the bottom of the main
window.
10. Click Abort to stop image capturing and
deactivate the sensor after you have taken all
required images.
14 Instrumentarium Dental 5139505-100 rev 16
3 Image capturing
CAUTION! With Sigma and Sigma M: Avoid keeping the
sensor device as ready for an exposure, as this consumes
battery power. The image cannot be taken if the battery
level is too low. Battery charging status is shown in the
lower right corner. If the external power is switched on for
Sigma, the battery is not used.
3.4.3 Template capturing
1. Prepare the sensor according to the sensor user
manual.
2. Click the image capture button.
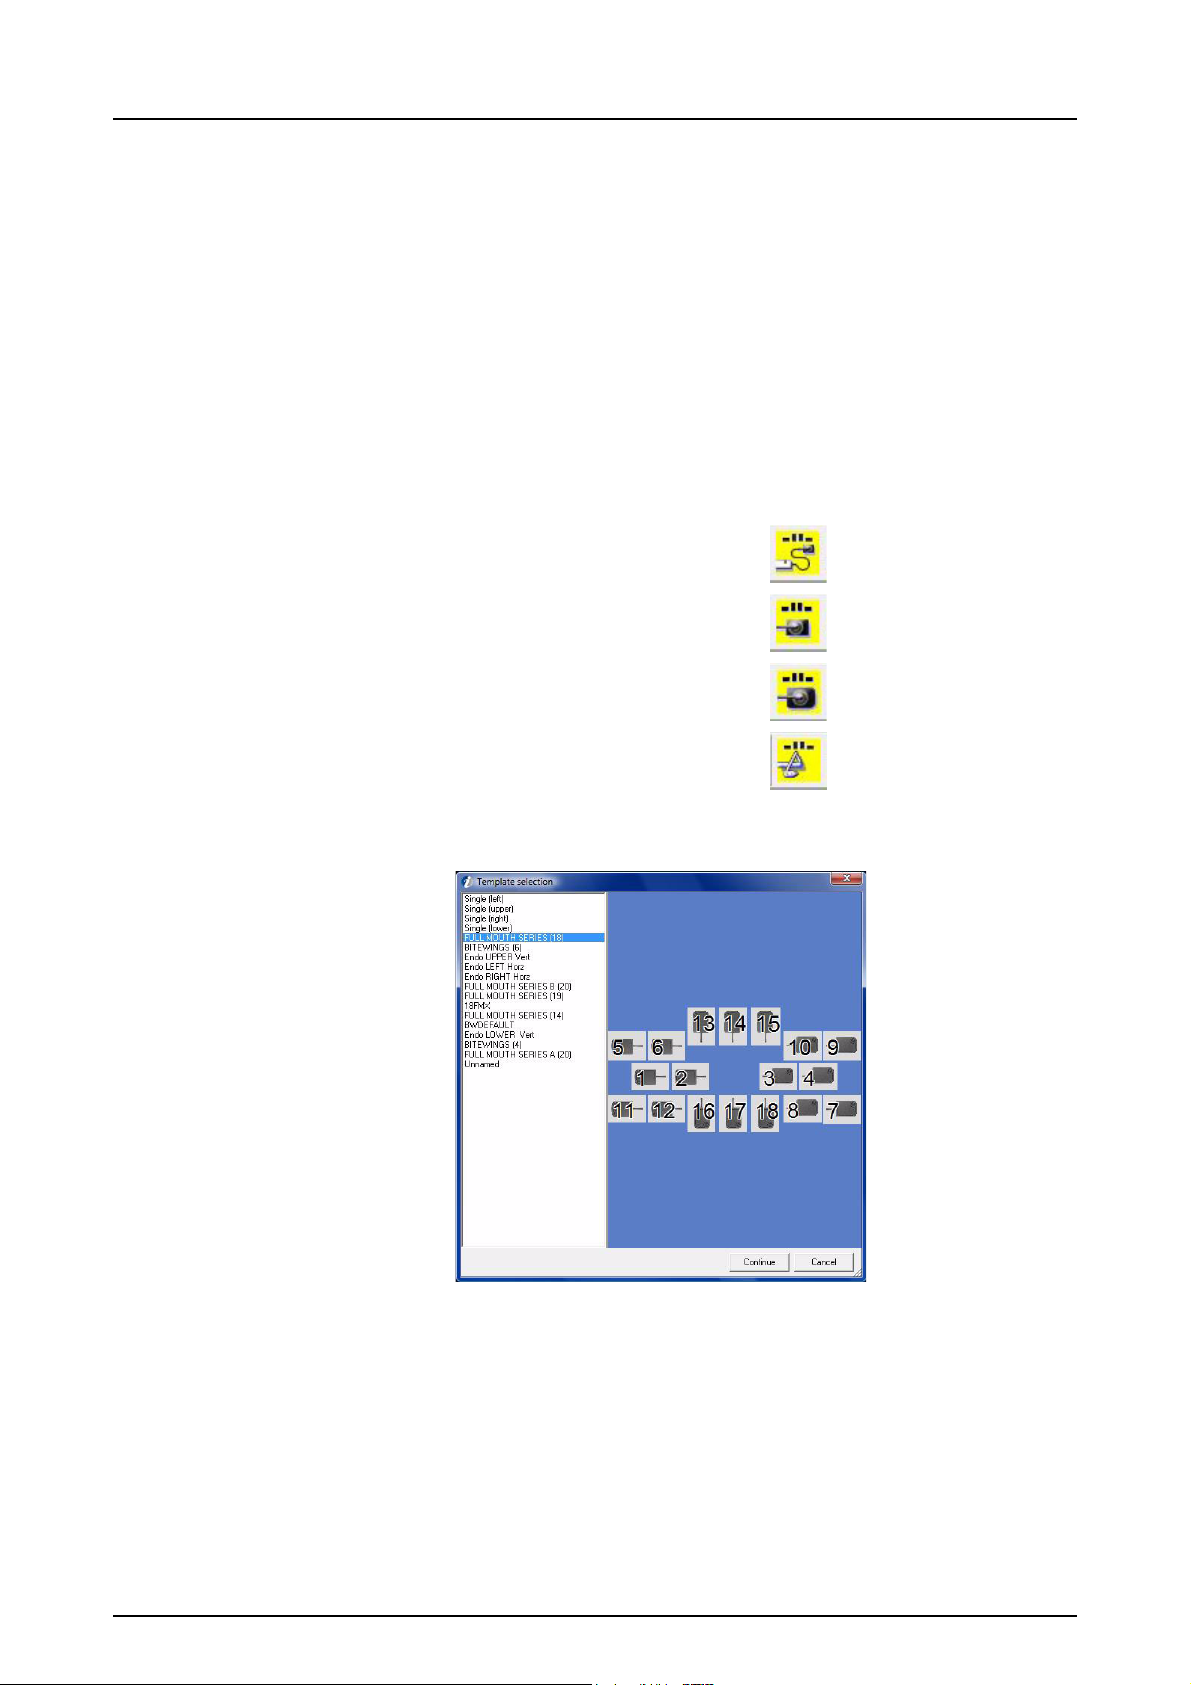
Snapshot:
Sigma M small sensor:
Sigma M large sensor:
Sigma:
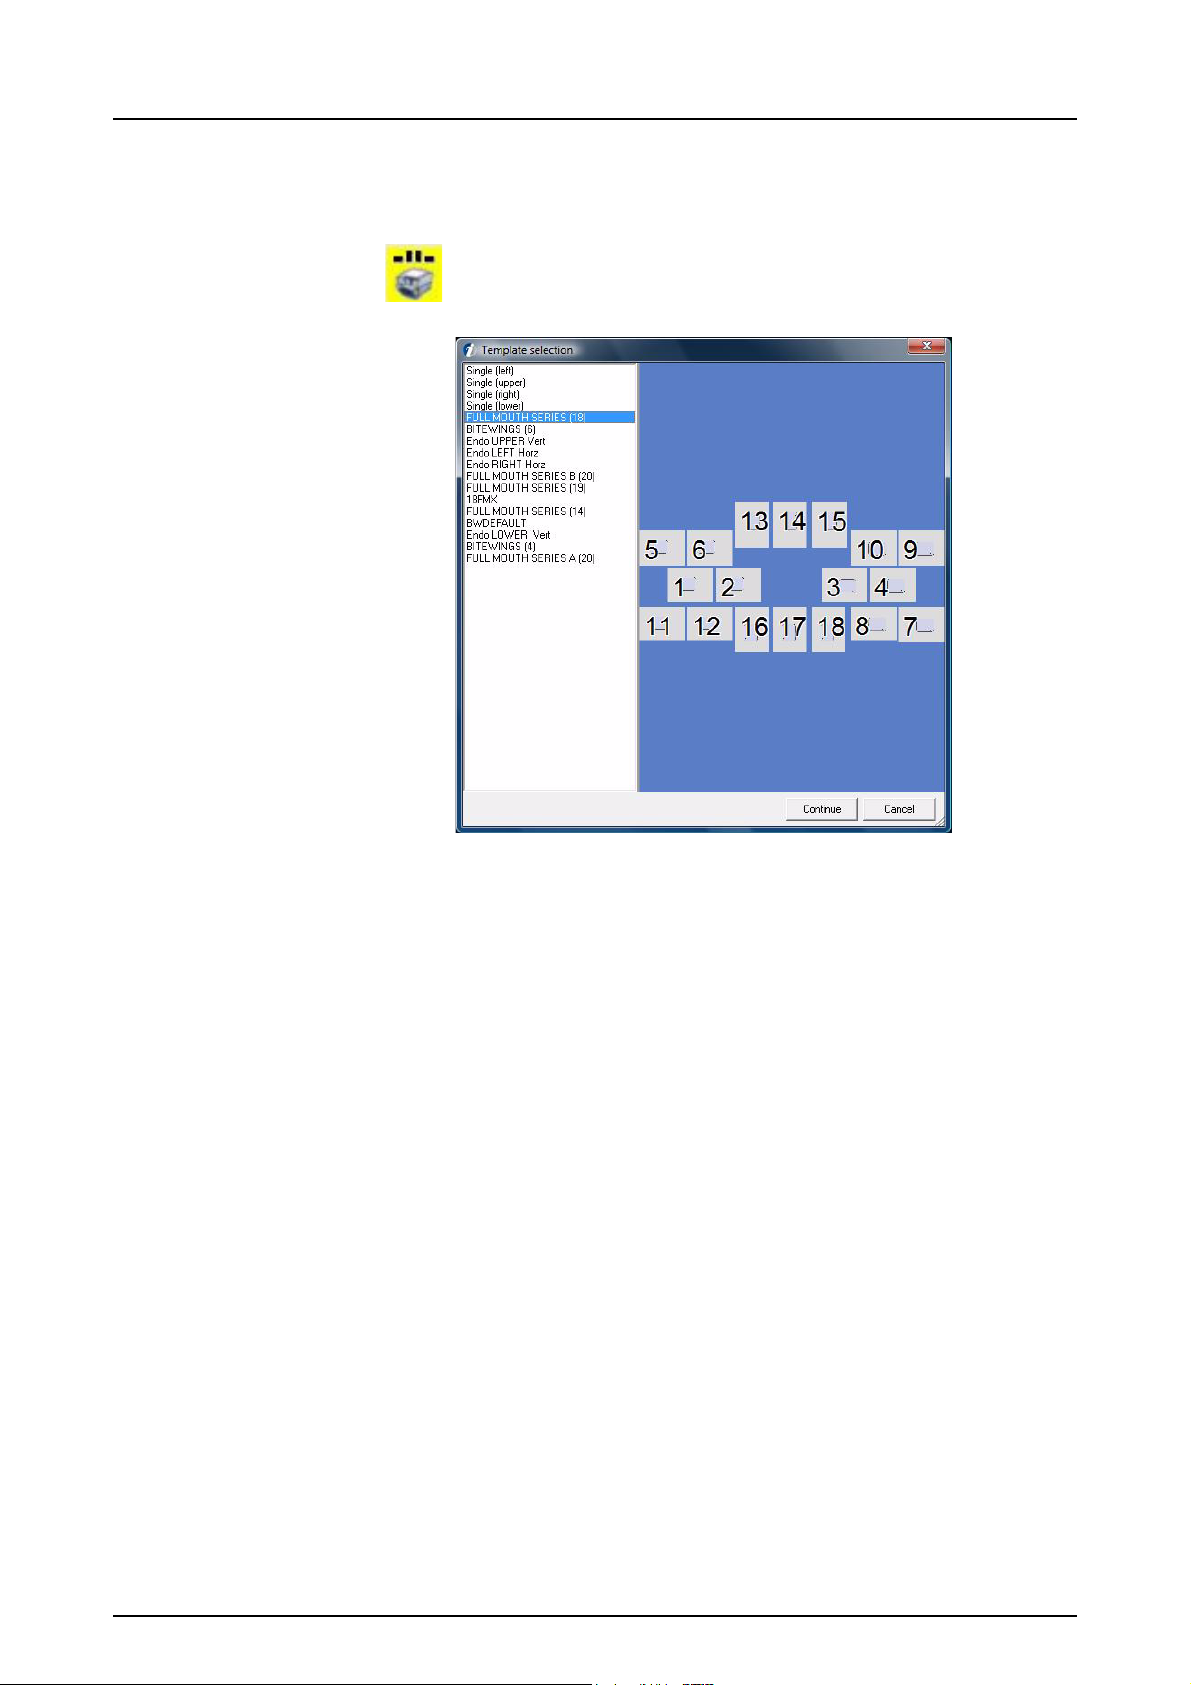
3. Select the preferred series from the template options.
NOTE! This dialog is not shown if “Always use default
template for FMS capturing” is enabled and default
template is defined.
See chapter 9, Creating series and 10, Templates for
editing, creating custom templates or defining default
template.
5139505-100 rev 16 Instrumentarium Dental 15
3 Image capturing
4. With Sigma M sensor only:
Select the sensor.
NOTE! This dialog is not shown if pre-selected Sigma M
sensors are used. See more information in Chapter 14.4.3,
Sigma M settings.
If the software cannot find Sigma M sensor:
Check that the sensor power switch is ON
If the sensor is locked by other workstation, the
software can not find it (check that you have selected
the correct sensor, wait a minute and try again)
Check the WLAN configuration
Ensure that gain files are installed
5. Wait until
- the template capturing window is opened,
- the software connects to the sensor(s) and
- the status bar shows ‘System is ready for capturing’.
16 Instrumentarium Dental 5139505-100 rev 16

3 Image capturing
6. Position the patient as shown in the template and
prepare the X-ray unit for exposure according to the
device user manual.
NOTE! Be sure the used sensor is the same than the
sensor activated in the software. When capturing is started
from the software, the sensor name and the size are
shown in the status bar.
NOTE! Make sure that the device status indicator
illuminates green before making the exposure.
WARNING! Do not release the exposure button before the
exposure is ended and alarm stopped.
7. Make an exposure with the X-ray unit.
NOTE! The exposure must be made within
the time-out (1...10 min.), otherwise the
image capturing time expires (see the
settings section).
When an image capturing time-out occurs, the software
gives warning of the interrupted examination by a tone and
message. Adjust the PC playback volume so that the
warning beeps can be heard.
8. Wait until the image is downloaded to the software and
the image is displayed on the screen.
9. Continue capturing more images after
status bar has indicated that the
system is ready for the next image.
Perform series capturing in the order
suggested by the template until all
images are taken.
Alternatively, change the active slot by clicking on an
empty slot with the primary mouse button. The active
slot of the template is always indicated with an image
of the sensor.
NOTE! It is possible to use small and large size sensors or
sensors of different generation during the same capture
session. The capturing with Sigma, Sigma M large, Sigma
M small and Snapshot sensors need to be activated
separately. The image is downloaded only from the sensor
receiving X-rays. The activated sensors and the status is
indicated on the status bar on the bottom of the main
window.
5139505-100 rev 16 Instrumentarium Dental 17

3 Image capturing
10. The capturing is automatically terminated after all
images in the series are taken.
NOTE! To turn automatic termination of image capturing
off, disable the setting “End FMS capturing automatically
when template is full“. See chapter 14.1, Settings.
NOTE! You can abort the capturing before all images are
taken by clicking Abort capture. See chapter 3.7,
Exceptions, section ‘Continue an interrupted series’.
NOTE! To see the Slot titles of the captured FMS images,
select the following option from menu View -> Show slot
titles. The slot titles appear on the top left corner of the slot.
If slot titles are not needed to be shown, then deselect from
menu View -> Show slot titles.
18 Instrumentarium Dental 5139505-100 rev 16
3.5 Image capturing with Express
3.5.1 General
It is possible to take a single intraoral images or capture
images to a predefined template.
In 'Quick intraoral capturing mode' the Image is displayed
on the screen with the default orientation. The image can
be rotated afterwards to the correct orientation.
In 'Template capturing mode' the orientation is selected
before the exposure and the image is automatically in the
needed orientation when displayed on the screen.
3.5.2 Quick intraoral capturing
1. Prepare the system according to the Express User
Manual.
3 Image capturing
2. Click the image capture button.
3. Wait until the status bar indicates that the system is
ready for capturing.
4. Position the patient and prepare the X-ray unit for
exposure according to the device user manual.
5. Make an exposure with the X-ray unit.
6. Wait until the image is downloaded to the software and
the image is displayed on the screen.
7. Rotate image with Rotate left or Rotate right to the
correct orientation.
8. Continue capturing more images after status bar has
indicated that the system is ready for the next image.
9. Click Abort Capture to stop image capturing after you
have taken all required images.
5139505-100 rev 16 Instrumentarium Dental 19
3 Image capturing
3.5.3 Template capturing
1. Prepare the system according to the Express User
Manual.
2. Click Template capture.
3. Select the preferred series from the template options.
NOTE! This dialog is not shown if “Always use default
template for FMS capturing” is enabled and default
template is defined.
See chapter 9, Creating series and 10, Templates for
editing, creating custom templates or defining default
template.
4. Wait until the template capturing window is opened
and status bar indicates ‘system is ready for
capturing’.
20 Instrumentarium Dental 5139505-100 rev 16
 Loading...