

Page 1
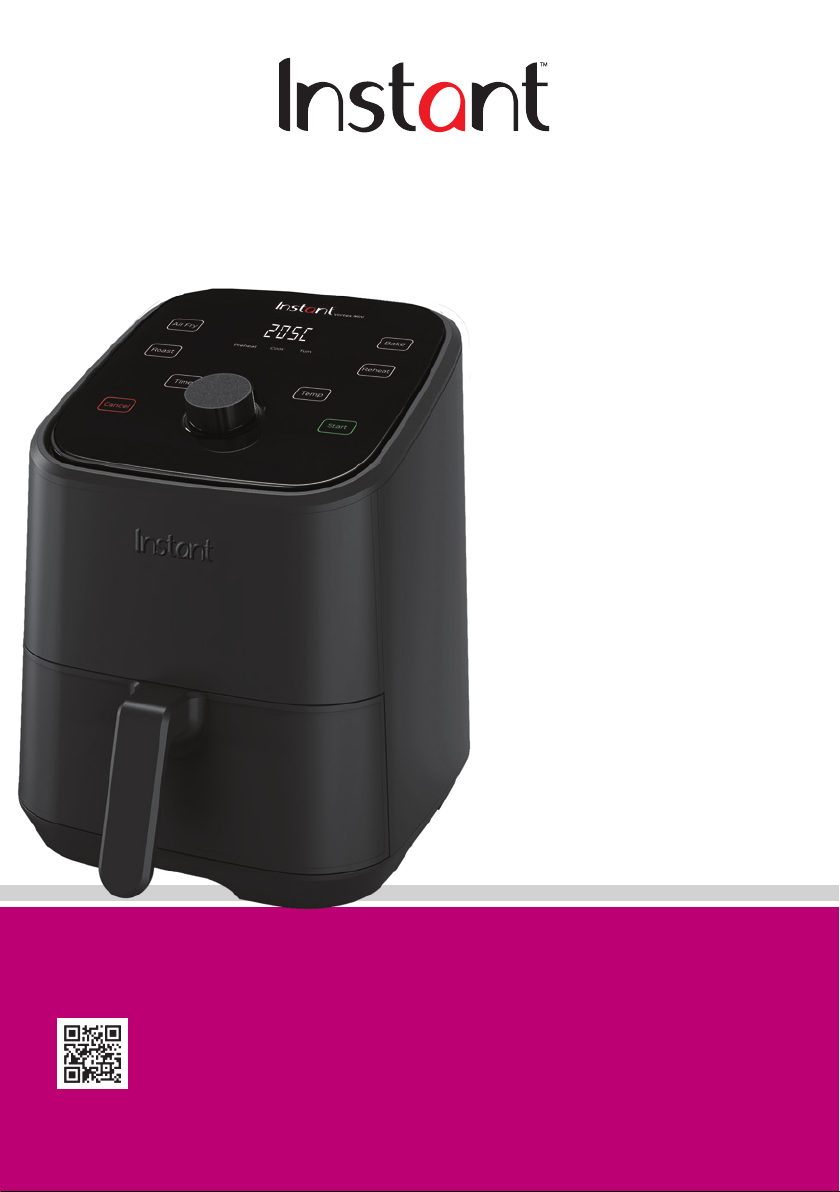
VORTEXTM MINI
2 Litre Air Fryer
Getting Started Guide
2 Important Safeguards
6 Product, Parts & Accessories
7 Getting Started
9 Control Panel
12 Cooking
13 Care, Cleaning & Storage
14 Warranty
16 Contact Information
Full Manual, How-to Videos and Recipes available online at instantpot.com.au
Register your product today at instantpot.com.au/support/register
Page 2

IMPORTANT SAFEGUARDS
At Instant Brands™ your safety always comes rst. The Instant™ Vortex™ family was
designed with your safety in mind, and we mean business. Visit instantpot.com.au to
learn about this appliance’s safety mechanisms.
When using electrical appliances, basic safety precautions should always be followed:
1. READ ALL INSTRUCTIONS, SAFEGUARDS, AND WAR NINGS
BEFORE OPERATING THE APPLIANCE. FAILURE TO FOLLOW THESE
SAFEGUARDS AND INSTRUCTIONS MAY RESULT IN INJURY AND/OR
PROPERTY DAMAGE.
2. The appliance’s outer surfaces may become hot during use. DO NOT
touch hot surfaces. Only use the air fryer basket handle to lift and
carry the air fryer basket. Wear proper hand protection when handling
hot components. Extreme caution must be used when moving the
appliance. Let the appliance cool to room temperature before handling
or moving.
3.
CAUTION
NOT immerse power lead, plug, or the appliance in water or other
liquid.
4. DO NOT rinse the appliance under tap.
5. The cooking chamber contains electrical components. To avoid electrical
shock, DO NOT put liquid of any kind into the cooking chamber.
6. This appliance is NOT to be used by children or by persons with reduced
physical, sensory, or mental capabilities. Close supervision is necessary
when this appliance is used near children and these individuals. Children
should not use or play with this appliance.
7. Turn off and unplug when not in use, as well as before adding or removing
parts or accessories, and before cleaning. To turn off, press Cancel. To
unplug, grasp the plug and pull from the socket. NEVER pull from the power
lead.
8. Avoid making contact with moving parts.
9. Inspect the appliance and power lead regularly. DO NOT operate
any appliance with a damaged lead or plug or after the appliance
malfunctions, or is dropped or damaged in any manner. For assistance,
contact the Customer Care Team at [email protected] or
1800 251 643 or 02 9317 1000.
To protect against the risk of electrical shock, DO
WARNING
2
Read thi s manual carefu lly and complet ely, and retain for fu ture referenc e.
Failure to a dhere to safety i nstruction s may result in ser ious injury.
Page 3

IMPORTANT SAFEGUARDS
10. DO NOT use any accessories or attachments not authorised by
Instant Brands
™
Inc. The use of attachments not recommended by
the manufacturer, may cause a risk of injury, re or electric shock.
11. For household countertop use only. Do not use outdoors. Not for
commercial use. Not for use in staff kitchen areas in shops, ofces and
other working environments, farm houses, nor by clients in hotels, motels
and other residential type environments such as bed and breakfasts.
12. DO NOT place the appliance on any kind of stovetop, or in a heated
oven; heat from an external source will damage the appliance.
13. DO NOT let power lead contact hot surfaces or open ame, including a
stovetop.
14. DO NOT use appliance for anything other than intended use.
15. Proper maintenance is recommended after each use. Refer to Care,
Cleaning & Storage. Let the appliance cool to room temperature
before cleaning or storage.
16.
CAUTION
Spilled food can cause serious burns. A short
power-supply lead is provided to reduce the hazards resulting from
grabbing, entanglement and tripping. Keep appliance and lead away
from children. NEVER drape lead over edge of table or counter, NEVER
use power socket below counter, and NEVER use with an extension
lead.
17. DO NOT attempt to repair, replace, alter, or modify components of the
appliance. This may cause electric shock, re and/or injury, and will
void the warranty.
18. DO NOT tamper with any of the safety mechanisms.
19. DO NOT use the appliance in electrical systems other than
220-240V~ 50-60Hz for Australia and New Zealand. DO NOT use with
power converters or adapters.
20. DO NOT overll the appliance or accessories. Overlling may cause
food to contact the heating element, which may result in re and/or
personal injury.
21. DO NOT cover the cooling vents while the appliance is in operation.
Doing so will prevent even cooking and may cause damage to the
appliance.
WARNING
Read thi s manual carefu lly and complet ely, and retain for fu ture referenc e.
Failure to a dhere to safety i nstruction s may result in ser ious injury.
3
Page 4

IMPORTANT SAFEGUARDS
22. NEVER pour oil into the cooking chamber. This could result in re
and/or personal injury.
23. While cooking, the internal temperature of the appliance reaches
several hundred degrees. To avoid personal injury, NEVER place
unprotected hands inside the appliance until it has cooled to room
temperature.
24. When cooking, DO NOT place the appliance against a wall or against
other appliances. Leave at least 13 cm of free space on the back, sides,
and above the appliance. DO NOT operate the appliance on or near
combustible materials such as tablecloths and curtains. DO NOT place
anything on top of the appliance.
25. When in operation, hot air is released through the cooling vents. Keep
your hands and face at a safe distance from the cooling vents and take
extreme caution when removing the accessories from the appliance.
26. Should the unit emit black smoke, press Cancel and unplug the
appliance immediately. Wait for smoking to stop before removing the
air fryer basket, then clean the appliance thoroughly.
27. DO NOT leave the appliance unattended while in use.
28. NEVER connect this appliance to an external timer switch or separate
remote-control system.
29. Use extreme caution when removing hot accessories from the cooking
chamber or disposing of hot grease.
30. Oversized foods and/or metal utensils must not be inserted into the
cooking chamber as they may cause risk of re and/or personal injury.
31. DO NOT store any materials, other than the included accessories,
in the cooking chamber when not in use.
32. DO NOT place any combustible materials in the cooking chamber,
such as paper, cardboard, plastic, Styrofoam or wood.
33. DO NOT use appliance accessories in any other appliance including
microwave ovens, toaster ovens, convection or conventional ovens,
ceramic, electric, induction or gas hobs, or outdoor grills.
34.
CAUTION
contaning hot oil or other hot liquids.
Use extreme caution when moving an appliance
SAVE THESE INSTRUCTIONS.
WARNING
4
Read thi s manual carefu lly and complet ely, and retain for fu ture referenc e.
Failure to a dhere to safety i nstruction s may result in ser ious injury.
Page 5
IMPORTANT SAFEGUARDS
WARN ING
To avoid injury, read and understand instruction manual before using this appliance.
WARN ING
Electr ical shock ha zard. Use grou nded socket only.
• DO NOT rem ove ground.
• DO NOT use a n adapter.
• DO NOT use a n extension lead.
Failure to f ollow these ins tructions m ay result in elect ric shock and /or serious inj ury.
WARN ING
THE FAILU RE TO FOLLOW ANY OF THE IMPO RTANT SA FEGUARDS AND/ OR THE INSTRU CTIONS FOR SAF E USE IS A MISUSE O F
YOUR APPL IANCE THAT CAN VO ID YOUR WARRA NTY AND CRE ATE THE RI SK OF SERIOUS I NJURY.
Special Cord Set Instructions
As per CE safety requirements, a short power supply cord is provided to reduce the hazards
resulting from grabbing, entanglement and tripping.
This appliance has a 3-prong grounding plug. To reduce the risk of electric shock, plug the
power cord into a grounded (earthed) electrical outlet that is easily accessible.
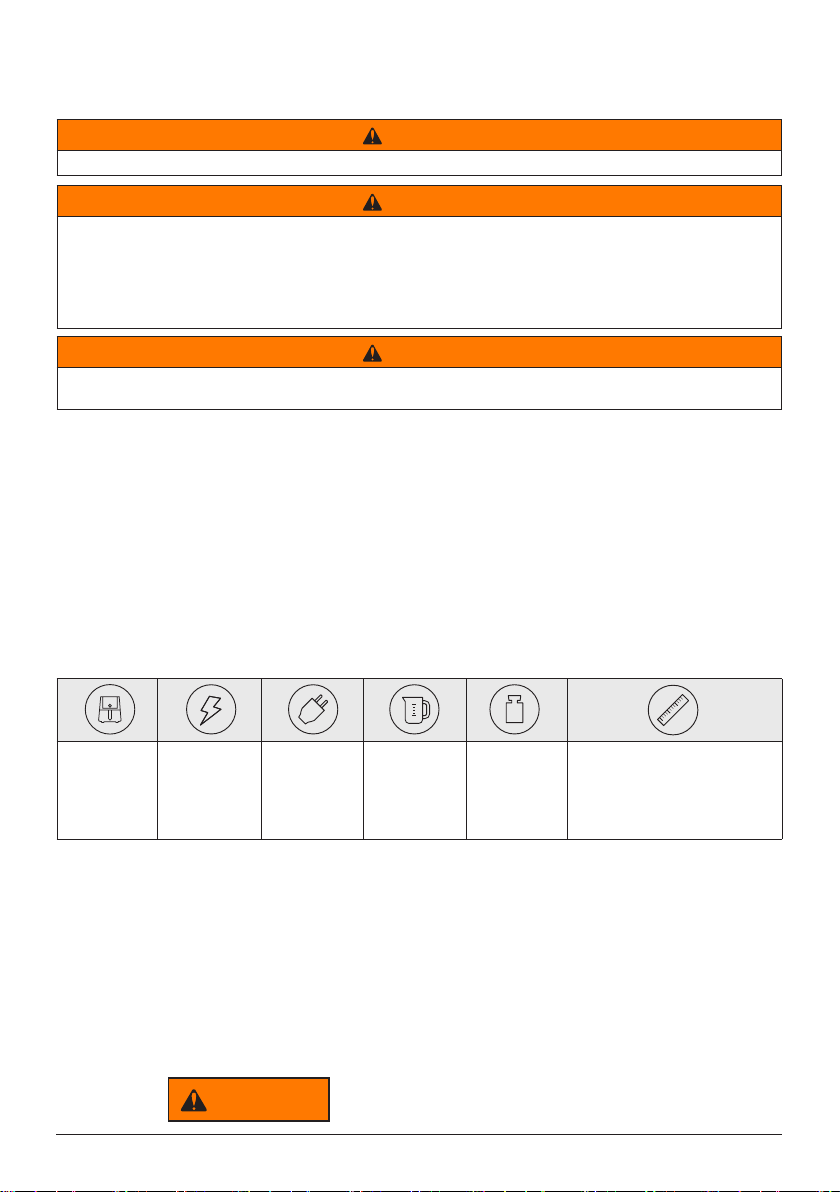
Product Specifications
Models:
Vortex Mini RE
Vortex Mini BL
Vortex Mini WH
1200-1400W
220–240V~
50–60Hz
2 Litres 3.3 kg cm: 28.6L x 22.9W x 29.8H
Find Your Model Name and Serial Number
Find both of these on the rating label on the bottom of the airfryer.
WARNING
Read thi s manual carefu lly and complet ely, and retain for fu ture referenc e.
Failure to a dhere to safety i nstruction s may result in ser ious injury.
5
Page 6
Product, Parts & Accessories
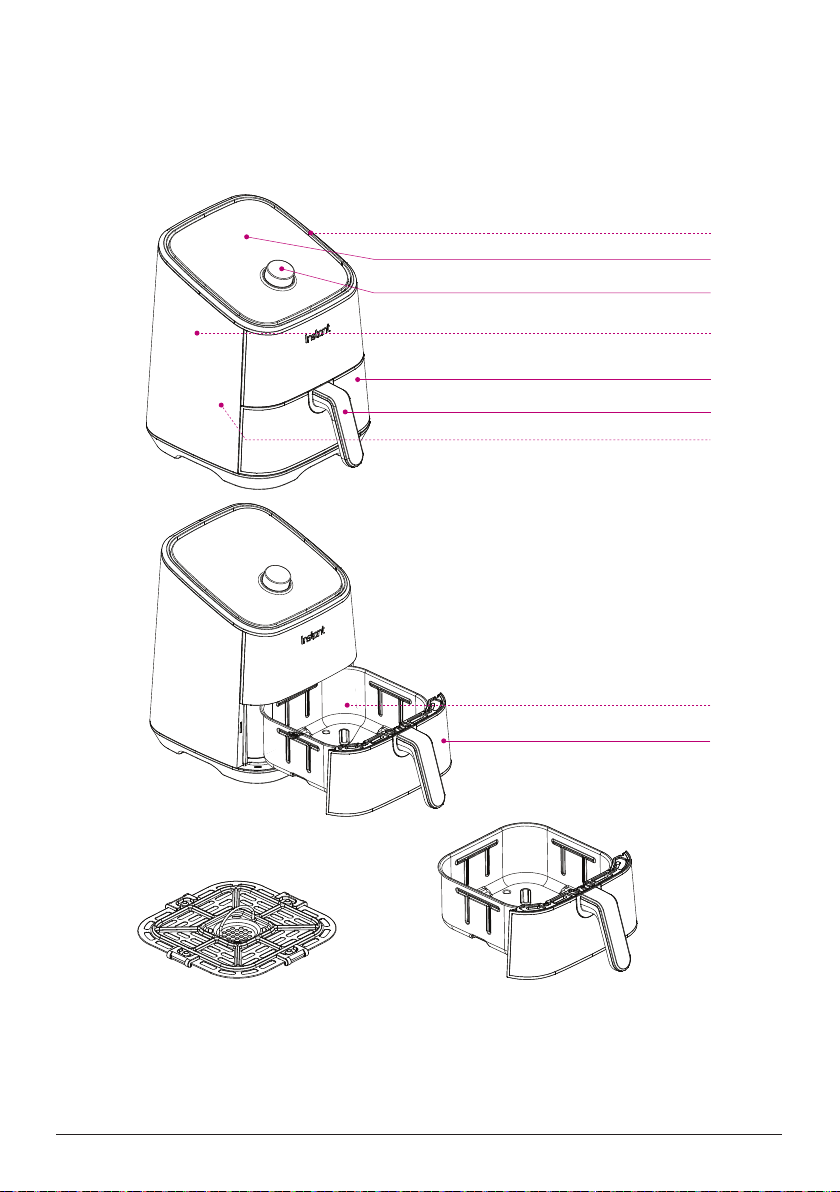
Before using your cute new air fryer, make sure that everything is present and accounted for.
Air Fryer
Air Intake Vent
Control Panel
Dial
Air Vents (Rear)
Air Fryer Basket
Air Fryer Basket Handle
Power Cord (Rear)
Cooking Chamber (Interior)
Air Fryer with Removable Basket
Cooking Tray Air Fryer Basket
Illustrations in this document are for reference only and may differ from the actual product.
6
Always refer to the actual product.
Page 7

Getting Started
Initial Setup
"Notice the small things. The rewards are inversely proportional."
– Liz Vassey
1. Pull that Instant™ Vortex™ Mini Air Fryer out of the box!
2. Remove the air fryer basket and check the cooking
cha m b er fo r loos e p acki n g mate r i al be f o re rs t use.
Don't remove the silicone supports from the removable cooking tray.
3. You may be tempted to put the air fryer on your stovetop — but don’t do it! Place it
on a stable, level surface, away from combustible material and external heat sources.
Do not place your air fryer on top of another appliance.
Make sure to leave at least 13 cm of space above and around all sides of the appliance.
4. Follow the Care, Cleaning & Storage instructions to wash your new air fryer before
using it.
Don’t remove the safety warning stickers or the rating label from the air fryer.
Read the Important
Safeguards before using
the appliance. Failure
to read and follow those
instructions for safe use
may result in damage
to the appliance,
property damage or
personal injury.
WARNING
Do not place the
appliance on a stovetop,
on another appliance,
or in a heated oven.
Heat from an external
source will damage
the appliance.
To avoid the risk of re,
property damage, and/
or personal injury, do not
place anything on top of
the appliance, and do not
block the air vents.
7
Page 8
Getting Started
Initial Test Run
Do you have to do the test run? No — but getting to know the ins and outs of your
Instant™ Vortex™ Mini Air Fryer prepares you for success in the kitchen! Take a few
minutes to get to know how this little baby works.
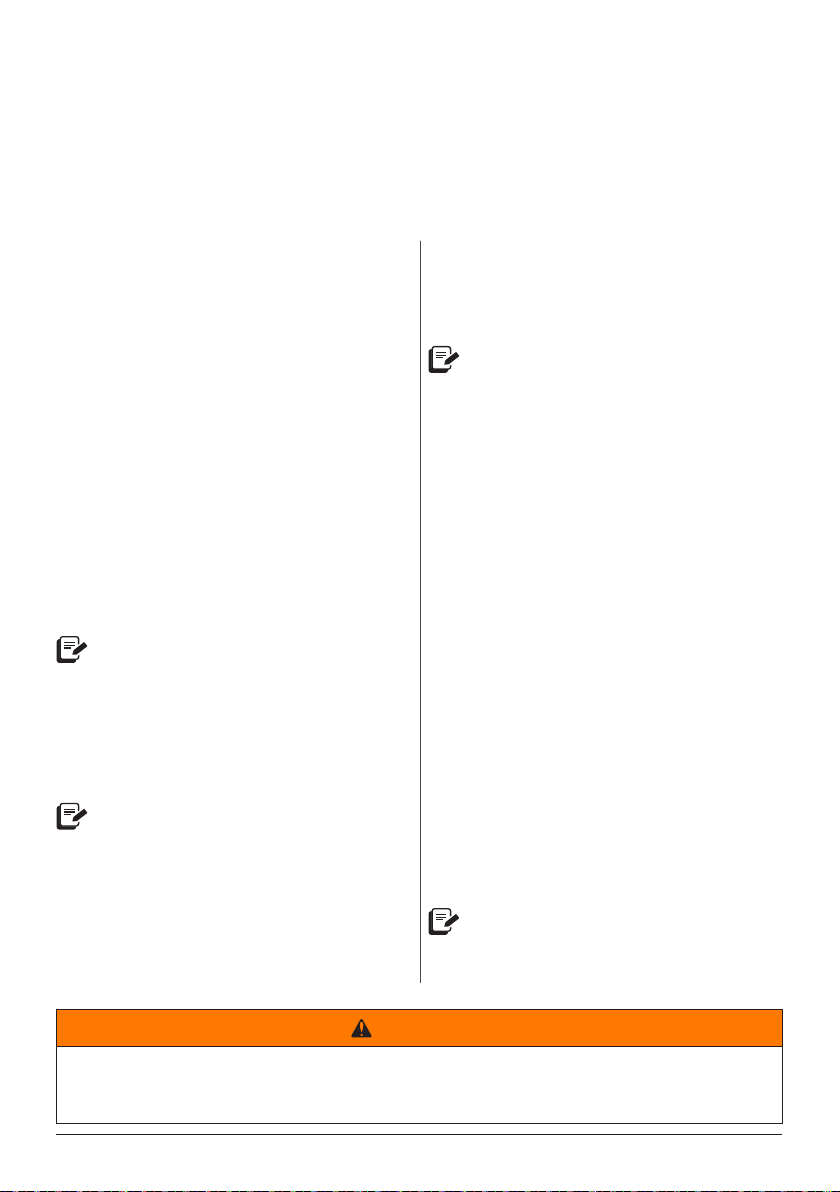
Stage 1: Setting up the air fryer
for cooking
1. Connect the power cord to a 220-240V
power source.
The air fryer is in standby mode and
the display shows OFF.
2. Remove the air fryer basket from the
cooking chamber.
3. Place the cooking tray on the bottom
of the air fryer basket (if it is not
already installed).
4. Insert the air fryer basket back into
the cooking chamber.
5. Touch Air Fry.
6. Touch Time, then turn the dial to adjust
the cook time to 20 minutes (00:20).
Each Smart Program automatically
saves the adjustments you make to
the time and temperature when you
touch Start.
7. Touch Start to begin!
The display shows On and the cooking
status shows Preheat.
The rst few times you use your air fryer,
you may notice a strong plastic smell.
This is normal, non-toxic, and goes
away quickly.
Stage 2: "Cooking" (...but not really,
this is just a test!)
1. When the air fryer is hot enough,
the display shows Add Food.
For this initial test, do not add food
to the air fryer basket.
Carefully remove and re-insert the
air fryer basket. The displayalternates
between the cooking time and
temperature, and the cooking status
shows Cook.
2. Part way through cooking, the display
shows turn Food.
Wait 10 seconds for the program to
resume automatically, or, remove and
re-insert the air fryer basket to pause
and resume the program manually.
3. When 1 minute remains, the display
counts down the remaining cooking
time in seconds.
When the Smart Program completes,
the display shows End and the fan
blows for a little while to help cool
the air fryer.
4. Press the dial or remove and re-insert
the air fryer basket to return to standby
mode and start cooking for real!
If you forget this last step, the air fryer
will beep to remind you about it after
5, 30, and 60 minutes.
CAUTION
The air fryer and air fryer basket will be hot during and after cooking. To avoid the risk of
burn injury, DO NOT touch hot surfaces. Allow the air fryer to cool to room temperature,
then clean the appliance according to Care, Cleaning & Storage instructions.
8
Page 9
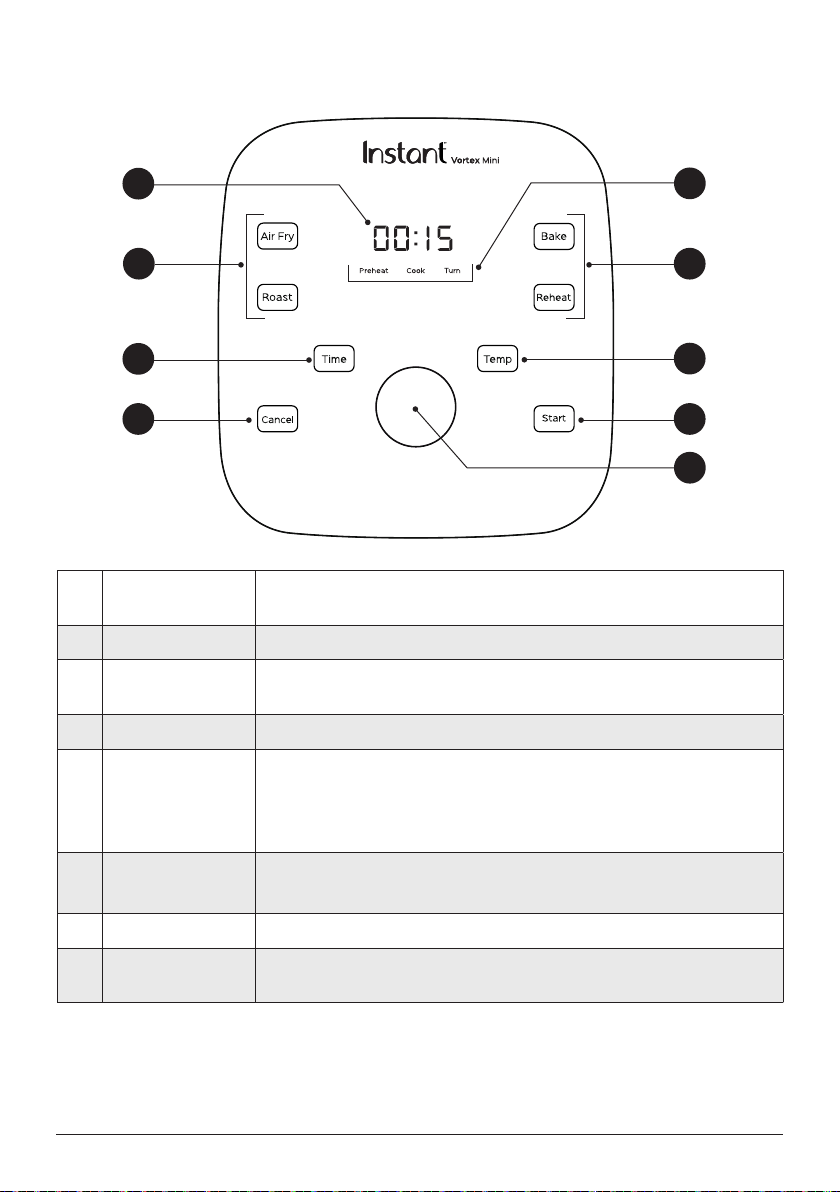
Control Panel
1
5
2
4
5
3
8 7
6
Time/Temperature
1
Display
2 Time Touch Time and turn the dial if you want to adjust the cooking time.
3 Temp
4 Cooking Status Preheat, Cook and Turn.
Shows the cooking time, the set temperature, reminder messages and
error messages.
Touch Temp and turn the dial if you want to adjust the cooking
temperature.
• Air Fry
5 Smart Programs
6 Dial
7 Start Touch Start to begin a selected smart program.
8 Cancel
• Roast
• Bake
• Reheat
Rotate to adjust cooking times and temperatures.
Press to wake the display.
Touch Cancel to stop a smart program at any time and go back to
standby.
Find full instructions for use online at instantpot.com.au
Illustrations in this document are for reference only and may differ from the actual product.
Always refer to the actual product.
9
Page 10
Settings
To do this... Do this!
Touch the display, press the dial, or remove
Wake the air fryer
Turn sounds on and off
Change temperature scale (ºC or ºF)
Save a custom cooking time
Save a custom cooking temperature
and re-insert the air fryer basket to wake the air
fryer. The display shows OFF to let you know
that it's in standby mode and ready for action.
In standby mode, touch and hold both the
Time and Temp for 3 seconds. The display
shows S On when the sound is on, and SOFF
when the sound is off.
Error alerts cannot be silenced.
In standby mode, touch and hold the Temp
key for 5 seconds to toggle between °C
and °F.
Select a smart program, then touch Time and
use the dial to adjust the time as you like. Press
the dial or touch Start to save the change.
Select a smart program, then touch Temp
and use the dial to adjust the temperature as
you like. Press the dial or touch Start to save
the change.
Reset an individual smart program
Reset all smart programs
10
In standby mode, touch and hold the smart
program key you want to reset (for example:
Air Fry) for 3 seconds. The cooking time
and temperature for that Smart Program
are restored to the factory default settings.
In standby mode, press and hold the dial
for 3 seconds. The cooking times and
temperatures for all Smart Programs are
restored to the factory default settings.
Page 11
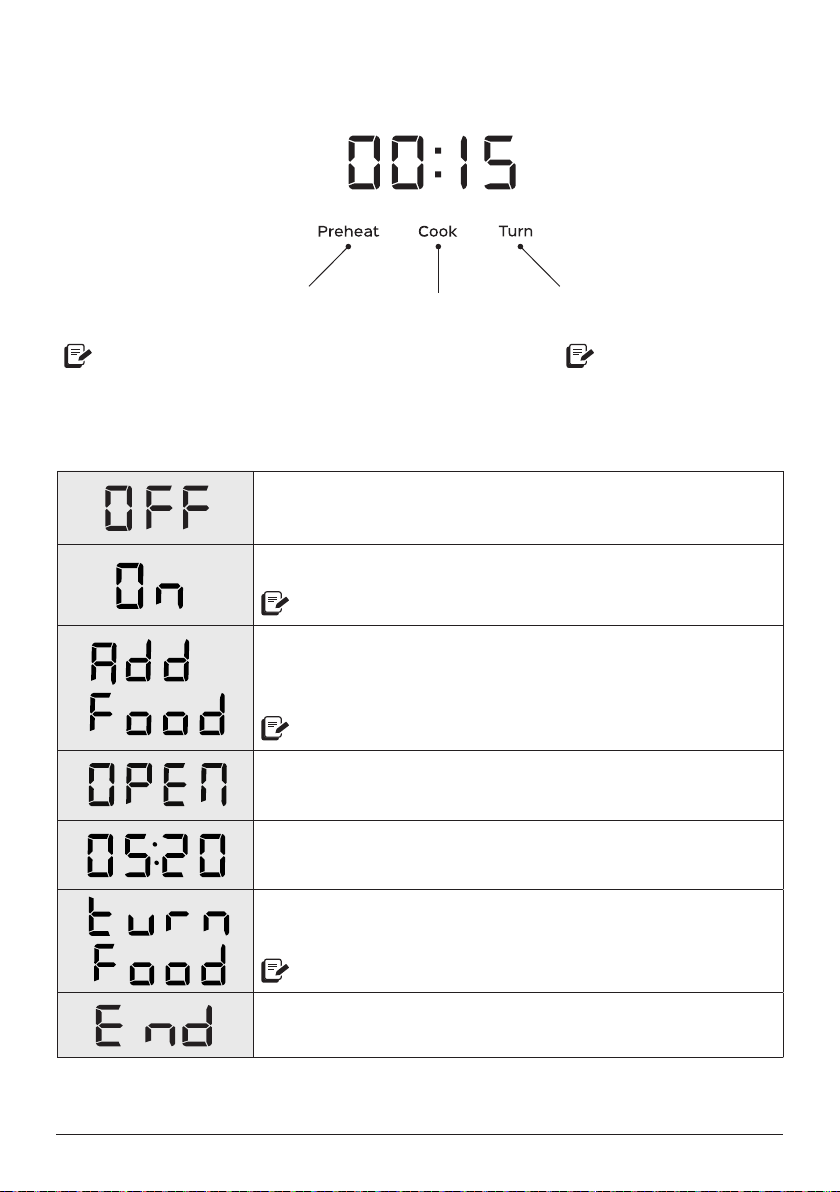
Cooking Status
The air fryer is heating up
to the perfect temperature
to cook your meal.
Not applicable to Reheat. Not applicable
Cooking is
in progress.
Food is ready to be
ipped or tossed, as
required by your recipe.
to Bake or Reheat.
Status Messages
The air fryer is in standby mode.
A smart program is in the Preheat stage.
Not applicable to Reheat.
This message appears to let you know that the air fryer
has reached the perfect cooking temperature and food can
be added to the air fryer basket (if it hasn’t been already).
Not applicable to Reheat.
May indicate that the air fryer basket has been removed
or is not fully inserted.
The display alternates between showing the cooking time,
the temperature, and on-screen messages.
Food is ready to be turned or tossed, as recommended
by your recipe.
Not applicable to Bake or Reheat.
The Smart Program has nished.
11
Page 12

Cooking
Cooking in the Instant™ Vortex™ Mini Air Fryer is quick and easy — food goes in, crispy
deliciousness comes out!
Find full instructions for use and cooking time tables online at instantpot.com.au or
download the free Instant Pot app for fun, easy to follow recipes.
Air Fry, Roast, Bake and Reheat
These programs give your meals all the rich, crispy avor of deep frying with little to
no oil, so you can say, “See ya!” to the greasy mess and extra calories! The presets are
a starting point that you can experiment with to get the results you like best.
Smart
Program
Air Fry
Roast
Bake
Reheat
Default Time Time Range Default Temperature Temperature Range
12 minutes
(00:12)
18 minutes
(00:18)
30 minutes
(00:30)
10 minutes
(00:10)
1 minute to 1 hour
(00:01 to 01:00)
1 minute to 1 hour
(00:01 to 01:00)
1 minute to 1 hour
(00:01 to 01:00)
1 minute to 1 hour
(00:01 to 01:00)
205°C 82 to 205°C
193°C 82 to 205°C
166°C 82 to 205°C
138°C 49 to 182°C
CAUTION
To avoid the risk of re, property damage and personal injury, DO NOT spray
cooking oil into the cooking chamber
CAUTION
The air fryer and air frying accessories will be hot
during and after cooking. Do not touch hot surfaces
with unprotected hands. Always use proper hand
protection and exercise extreme caution when adding
or removing food from the hot cooking chamber. Allow
all items to cool to room temperature, then clean them
according to Care, Cleaning & Storage instructions.
To avoid a burn injury,
always use proper hand
protection and exercise
extreme caution when
adding or removing food
from the hot cooking
chamber.
12
Page 13

Care, Cleaning & Storage
Clean your air fryer and accessories after each use.
Always unplug the air fryer and let it cool to room temperature before cleaning.
Never use harsh chemical detergents, scouring pads, or powders on any of the parts
or components.
Let all surfaces dry thoroughly before use, and before storage.
Part or Accessory Cleaning Method and Notes
• Clean the air fryer basket with a sponge or cloth and warm water and dish soap,
Air Fryer
Basket
Cooking Tray
Cooking
Chamber
Exterior • Clean with a soft, damp cloth or sponge and wipe dry.
Any other servicing must be performed by an authorised representative.
then rinse well. Ensure that all grease and food debris are removed.
• DO NOT immerse the basket in water or any other liquid.
• DO NOT machine wash the basket.
• Clean the cooking tray with a cloth or sponge and warm water and dish soap.
• The cooking tray has non-stick coating. To avoid damage to the non-stick coating,
DO NOT use metal cleaning utensils.
• Clean the cooking chamber with a sponge or soft cloth and warm water and dish soap.
• To remove baked-on grease and food residue from cooking chamber, spray with a
mixture of baking soda and vinegar and wipe clean with damp cloth.
• For stubborn stains, allow the mixture to sit on the affected area for several minutes
before scrubbing clean.
• Check the heating coil for oil spatter and food debris. Clean the heating coil with a damp
cloth as needed. Ensure the heating coil is completely dry before next use.
For Troubleshooting tips, visit instantpot.com.au or contact Customer Support
at [email protected].
WARNING
To avoid risk of electrical
shock and personal injury:
- Do not immerse the
appliance in water.
- Do not rinse the
appliance under a tap.
Without proper cleaning,
food and grease splatter
may build up around the
heating element, causing
the risk of smoke, re, and
personal injury.
If you see or smell smoke,
touch Cancel, unplug the
appliance, and allow it to
cool. Remove food splatter
or grease with a soft cloth
and dish detergent.
- Do not wet prongs of
the power cord.
13
Page 14

Warranty
Limited Warranty
This L imited Warr anty is iss ued by Corell e Brands (Aus tralia) Pt y Ltd (Corelle Brands Australia) and is eff ective fo r one year from t he
date of o riginal con sumer purcha se. Proof of or iginal purch ase date and re turn of your a ppliance is re quired to obt ain serv ice under
this Limite d. Return of yo ur appliance t o us will be done i n accordanc e with our ins tructi ons only. Prov ided that this appli ance is
oper ated and main tained in acc ordance wi th writt en operati ng instru ctions at tached t o or furnish ed with the ap pliance or pu blished
oper ating inst ructio ns on www.in stantpo t.com.au, C orelle Bran ds Austra lia will, in it s sole and excl usive discretio n, either: (i) r epair
defec ts in mate rials or work manship; or (ii) replac e the applian ce. In the even t that your app liance is repl aced, the Li mited Warra nty
on the re placement a ppliance wi ll expire 12 month s from the date of orig inal consume r purchase.
We remin d you the appliance you p urchased i s for person al use only (not co mmercial us e).
Any modi cation/alteration or at tempted modication/alteration to yo ur appliance will void this Limited War rant y, unless such
modication/alterat ion or attempt ed modicat ion/al teration was ex pressly authorized by a Corelle Brands Au stralia Represent ative
in writing.
This Limited War rant y only covers Core lle Brands Australia’s applia nces /products an d is not exte nded to any ot her appliances,
produ cts, equ ipment, com ponents, or devi ces that you us e or may use in con junctio n with the Cor elle Brands A ustrali a’s appliance s.
To claim und er this Limi ted Warrant y:
1. Cont act Corell e Brands Aus tralia at :
9C Comm ercial Road, Kings grove, NSW, 2208
Email: [email protected]
2. Provi de a descrip tion of the app liance you be lieve has malfunc tioned due t o defecti ve parts o r workmans hip.
3. If it is n ecessar y for the appl iance to be sen t to Corelle Br ands Aust ralia for rep air or replacement , Corelle Bra nds
Aus tralia will s end you a pre- paid shippi ng label and yo u must send t he appliance a nd your dated s ales recei pt to Corelle
Bra nds Australia alo ng with the ap pliance. If you do not ha ve your dated s ales receip t, please ad vise Corel le Brands
Aus tralia in ad vance, and Co relle Brand s Australi a will atte mpt to verif y your purcha se.
4. If Core lle Brands A ustralia d etermine s that the appliance h as malfunc tioned du e to defect ive part s or workmanship, and
is cov ered under th is Limited Warrant y, Corelle Br ands Aust ralia will re pair and retu rn the applia nce, or send yo u a
repl acement app liance, at Cor elle Brands Aust ralia’s cos t.
5. Any rep aired or repl aced appliance will b e covered by th is Limited Wa rranty fo r the remaind er of the original war ranty
per iod or ninet y (90) days follo wing your rec eipt of the rep lacement or repaire d appliance, w hichever is g reater.
6. If Corell e Brands Austr alia conrms the appliance has not malfunc tioned due to defe cti ve par ts or workmanship, and/or
is in working order, or if proof of purchase is not ver ied, Corelle Br ands Australia reserve s the right to return the
appl iance to you at your pre -paid cost . If this cos t is not met, Co relle Brand s Austral ia reserves the right to di spose of the
appl iance aft er 45 days’ noti ce to you.
Limitation and Exclusions
To the maxi mum extent p ermitted by law, th e maximum lia bility of Corelle B rands Australi a, if any, for any all egedly defe ctive app liance
or par t shall in no circums tances exceed the p urchase price of a com parable rep lacement ap pliance or part of the same a ge.
This Limited Warranty does not cover:
1. Damage resul ting from accident, modica tion /alter ation (unless express ly auth orize d by a Corelle Br ands Austra lia
Repr esentative in wr iting), misuse, abu se, neglec t, unreaso nable use, us e contrar y to the writ ten opera ting inst ruction s
at tached to or f urnishe d with the app liance or publ ished oper ating ins tructio ns on www.insta ntpot.co m.au, norma l wear
and te ar, commercial u se, imprope r assembly b y you or anyone, di sassemb ly by you or anyon e, repair by you o r anyone,
failu re to provide reasonable and ne cess ary maintenance, force majeure event incl uding bu t not limited to re, ood, acts
of G od;
2. Repair s where your ap pliance is us ed for other th an normal, pe rsonal use o r when it is use d in a manner tha t is contrar y
to the writ ten opera ting inst ruction s attach ed to or furni shed with t he appliance o r published opera ting inst ruction s on
www.instantp ot.com.au ; or
3. Use of unaut horized par ts and accessories, or repair s t o part s and sys tems resulting from unautho rized re pairs or
modications/alterations made to your applianc e.
The cos t of repair or r eplacemen t under these exclud ed circums tances sha ll be borne by you. Our goods co me with guar antees
that c annot be exclu ded under th e Australian Cons umer Law. You are en titled to a re placement o r refund for a ma jor failure a nd
compe nsation fo r any other reas onably fore seeable lo ss or damage. You ar e also entit led to have the g oods repai red or replac ed if
the go ods fail to be of a cceptabl e quality an d the failur e does not amou nt to a major fai lure.
9c Comme rcial Road, K ingsgrove, N SW, 2208. 1800 251 643 o r (02) 9317 100 0.
Distr ibuted by Corelle B rands (Aus tralia) Pt y Ltd.
Email: [email protected]
14
Page 15

THIS PAGE HAS BEEN INTENTIONALLY LEFT BLANK.
15
Page 16

©2021 Corelle Brands (Australia) Pty Ltd.
Distributed by Corelle Brands (Australia) Pty Ltd.
9c Commercial Road, Kingsgrove, NSW, 2208, Australia
Register your product today at:
instantpot.com.au/support/register
Contact Customer Care:
Ph 1800 251 643 or 02 9317 1000
instantpot.com.au
© 2021 Corelle Brands (Australia) Pty Ltd.
885-0310-61
 Loading...