

Page 1
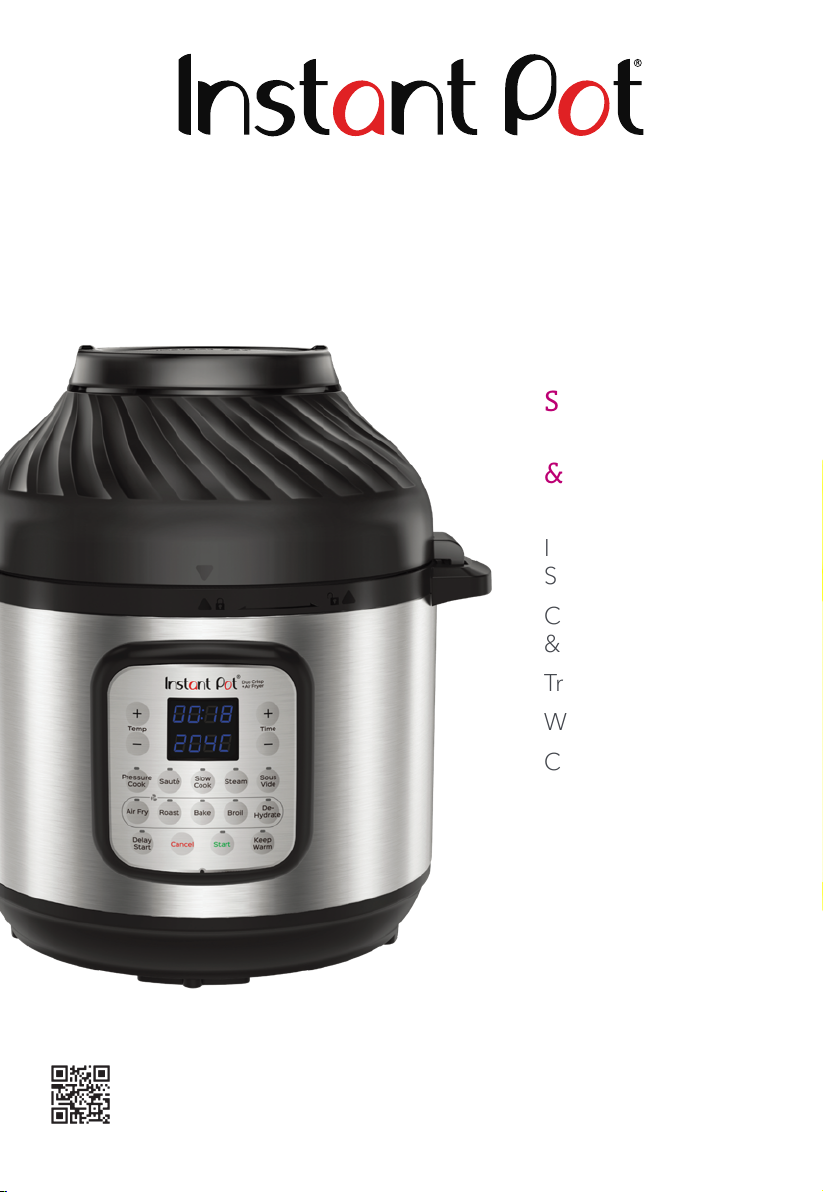
DUO CRISP™ + AIR FRYER
Multi-Use Pressure Cooker & Air Fryer
Safety,
Maintenance
& Warranty
Important
Safeguards
Care, Cleaning
& Storage
Troubleshooting
Warranty
Contact Information
Full Manual, How-to Videos and Recipes available online at instantpot.com.au
Register your product today at instantpot.com.au/support/register
Page 2

IMPORTANT SAFEGUARDS
When using electrical appliances, basic safety precautions should
always be followed:
1. READ ALL INSTRUCTIONS, SAFEGUARDS AND WARNINGS,
AS WELL AS INSTRUCTIONS FOR SAFE USE BEFORE
OPERATING THE APPLIANCE. FAILURE TO FOLLOW THESE
SAFEGUARDS AND INSTRUCTIONS MAY RESULT IN INJURY
AND/OR PROPERTY DAMAGE.
®
2. Always use an Instant Pot
appropriate size when using the air fryer lid. The Duo Crisp™
is only compatible with the stainless-steel inner pot. DO NOT
use the cooker with the non-stick, ceramic coated inner pot.
Failure to follow these instructions may lead to sudden
release of contents and may cause burns or other injuries
and/or damage.
3. Use the Duo Crisp pressure cooker lid or the Duo Crisp air
fryer lid with the Duo Crisp cooker base. Using any other lids
may cause injury and/or damage.
stainless steel inner pot of the
4. Do not let children near the appliance when in use. Children
should not play with the appliance.
5. Do not put the appliance into a heated oven or on any
heated surface.
6. Do not place the appliance on or in close proximity to a hot
gas or electric burner, or a heated oven. Heat from an external
source will damage the appliance. Failure to follow these
instructions may result in injury or property damage.
WARNING
Read this manual carefully and completely, and
retain for future reference. Failure to adhere to
safety instructions may result in serious injury.
2
Page 3

IMPORTANT SAFEGUARDS
7. Do not tamper with any of the safety mechanisms as this
may result in injury or property damage.
8. Do not move the appliance while it is under pressure.
9. Do not use the appliance for a purpose other than that
for which it is intended.
10. This appliance cooks under pressure. Scalds may result from
inappropriate use of the pressure cooker. Make sure that the
cooker is properly closed before applying heat. Refer to the
Getting Started Guide.
11. Never force open the pressure cooker. Do not
open before making sure that its internal pressure has
completely dropped. Refer to the Getting Started Guide.
12. Use the appropriate heat source(s) according to the
Getting Started Guide.
13. Never use the pressure cooker without adding water,
as this would seriously damage it.
14. Do not ll the inner pot beyond —2/3 of its capacity as
indicated on the inner pot. When cooking foodstuffs
which expand during cooking, such as rice or dehydrated
vegetables, do not ll the cooker to more than —1/2 of its
capacity as indicated on the inner pot.
15. After cooking meat with a skin (such as ox tongue), which
may swell under the effect of pressure, do not prick the
meat while the skin is swollen as you may be scalded.
WARNING
Read this manual carefully and completely, and
retain for future reference. Failure to adhere to
safety instructions may result in serious injury.
3
Page 4

IMPORTANT SAFEGUARDS
16. The heating element surface inside the Instant Pot® cooker
base is subject to residual heat after use; do not touch it.
17. Before each use, check that the valves, the steam release pipe,
and the anti-block shield are not obstructed. Refer to the
Getting Started Guide.
18. Never use the pressure cooker in its pressurised mode for
deep or shallow frying of food.
19. Do not tamper with any of the safety systems beyond the
maintenance instructions specied in the instructions for use.
20. Do not operate any appliance with a damaged lead or plug, or
after the appliance malfunctions or has been damaged in any
way. If the power supply lead is damaged, users should contact
Customer Care for further assistance.
21. For domestic use only. Not intended for commercial or
outdoor use.
22. This appliance should not be used by children, by individuals
whose physical, sensory or mental abilities prevent safe use of
the appliance, or by individuals with limited knowledge of how
to use a pressure cooker. Close supervision is needed when
using this appliance near these individuals.
23. When cooking doughy food, use caution when removing
the lid to avoid food ejection.
24. Do not use this appliance in electrical systems other than
220-240V~ 50-60Hz for Australia and New Zealand. Do not use
with power converters or adapters.
WARNING
4
Read this manual carefully and completely, and
retain for future reference. Failure to adhere to
safety instructions may result in serious injury.
Page 5

IMPORTANT SAFEGUARDS
25. Do not use this appliance for shallow or deep frying or
pressure frying with oil.
26. Be aware that certain foods such as stewed apples, cranberries,
pearl barley, oatmeal or other cereals, split peas, noodles,
macaroni, rhubarb or spaghetti can foam, froth and clog
the steam release. These foods should not be cooked under
pressure cooking settings unless as directed in authorised
Instant Pot® recipes.
27. Spilled food can cause serious burns. A short power-supply
lead is provided to reduce the hazards resulting from
grabbing, entanglement and tripping.
• Keep the appliance and lead away from children.
• Never drape the power lead over edges of tables or counters.
• Never use below-counter power sockets, and never use
with an extension lead.
28. Unplug from the outlet when not in use, as well as before
adding or removing parts or accessories, and before cleaning.
To unplug, grasp the plug and pull from the outlet. To avoid
damage to the power lead, never pull from the power lead.
29. Always allow the appliance to cool before cleaning. Allow
all surfaces to dry thoroughly before use or storage.
WARNING
Read this manual carefully and completely, and
retain for future reference. Failure to adhere to
safety instructions may result in serious injury.
5
Page 6

IMPORTANT SAFEGUARDS
30. The appliance is not intended to be operated by means
of an external timer or a separate remote-control system.
31. Always make sure the sealing ring is completely set in the
groove on the inside of the sealing ring rack.
32. Avoid spillage on the connector.
33.
34. Intended for countertop use only. Keep the appliance on
35.
36. Avoid contact with moving parts. Failure to do so may result
37. When using the air fryer lid, do not overll the air fry basket.
CAUTION
electrical components. To avoid electrical shock, do not
immerse the power lead, plug, or the cooker base or air fryer
lid in water or other liquid. Do not rinse the cooker base or
the air fryer lid under a tap.
a stable, heat resistant platform. Do not place on or near
a hot stovetop.
CAUTION
is in operation, and do not place the appliance on anything
that may block the vents on the bottom of the appliance. Leave
at least 13 cm of space around the air fryer lid while it is in use.
Failure to follow these instructions will prevent even cooking
and may cause damage to the appliance.
in injury.
Overlling may cause food to contact the heating element,
which may result in re and/or personal injury.
The cooker base and air fryer lid contain
Do not cover the air vents while the air fryer lid
WARNING
6
Read this manual carefully and completely, and
retain for future reference. Failure to adhere to
safety instructions may result in serious injury.
Page 7

IMPORTANT SAFEGUARDS
38.
39. While cooking, the internal temperature of the appliance
40.
CAUTION
after cooking. To avoid personal injury:
• Always use proper hand protection when removing
accessories, and when handling the inner pot.
• Always place hot accessories on a heat resistant surface
or cooking plate.
• Only place the air fryer lid on the protective pad provided;
do not place on countertop.
• Use extreme caution when disposing of hot grease.
Failure to follow these instructions may result in serious
injury or property damage.
reaches several hundred degrees. To avoid personal injury,
never place unprotected hands inside the appliance until
it has cooled to room temperature.
CAUTION
released through the air vents. Keep your hands and face at a
safe distance from the air vents and take extreme caution when
removing hot accessories from the appliance. Failure to follow
these instructions may result in injury or property damage.
Do not touch accessories during or immediately
When the air fryer lid is in operation, hot air is
41. Should the unit emit black smoke when using the air fryer
lid, press Cancel and unplug the appliance immediately.
Wait for smoking to stop before removing the lid, then clean
thoroughly. For further information refer to “Troubleshooting”.
WARNING
Read this manual carefully and completely, and
retain for future reference. Failure to adhere to
safety instructions may result in serious injury.
7
Page 8

IMPORTANT SAFEGUARDS
42. Oversized foods and/or metal utensils must not be inserted
into the inner pot or air fry basket as they may cause risk
of re and/or personal injury.
43. Do not store any materials in the cooker base or inner pot
when not in use.
44. Do not place any combustible materials in the cooker base
or inner pot, such as paper, cardboard, plastic, Styrofoam
or wood.
45. Do not use the included accessories in a microwave, toaster
oven, convection or conventional oven, or on a ceramic cooktop,
electric coil, gas stovetop, or outdoor grill.
SAVE THESE INSTRUCTIONS.
WARNING
To avoid injury, read and understand instruction manual before
using this appliance. Failure to do so may result in injury.
WARNING
Electric shock hazard. Use an earthed outlet only. DO NOT remove
earthing. DO NOT use an adapter. DO NOT use an extension lead. Failure
to follow instructions can cause electric shock and/or serious injury.
WARNING
FAILURE TO FOLLOW ANY OF THE IMPORTANT SAFEGUARDS
AND IMPORTANT INSTRUCTIONS FOR SAFE USE IS A MISUSE
OF YOUR APPLIANCE THAT CAN VOID YOUR WARRANTY
AND CREATE THE RISK OF SERIOUS INJURY.
WARNING
8
Read this manual carefully and completely, and
retain for future reference. Failure to adhere to
safety instructions may result in serious injury.
Page 9

IMPORTANT SAFEGUARDS
Special Lead Set Instructions
As per safety requirements, a short power supply lead is provided
to reduce the hazards resulting from grabbing, entanglement
and tripping.
To reduce the risk of electric shock, plug the power lead into an
earthed and easily accessible electric socket.
Product Specifications
Model: DUO CRISP AF 8
1500W
220–240 V~ 50-60 Hz
8 Litres
10.06 kg
With Air Fryer Lid: 37.5L x 34.5W x 38.8H cm
With Pressure Cooker Lid: 37.5L x 34.5W x 36H cm
Pressure cooking Smart Programs operate at High (9.4 - 12.3 psi)
or Low (5.1 - 8.0 psi) pressure. Higher pressure results in
higher temperature.
WARNING
Read this manual carefully and completely, and
retain for future reference. Failure to adhere to
safety instructions may result in serious injury.
9
Page 10

Care, Cleaning & Storage
Unplug your Instant Pot® Duo Crisp and allow it to cool before
cleaning. Allow all surfaces to dry thoroughly before use. Failure to
follow these instructions may cause your appliance to malfunction
and could void your warranty.
Part Instruction
Accessories
• Protective Pad
and Storage
Cover
• Air Fryer
Basket Base
• Broil/
Dehydrating
Tray
• Multi-purpose
Rack
• Wash after each use.
• Never use harsh chemical
detergents, powders
or scouring pads on
accessories.
• Optionally, spray the cooking
tray and/or air fryer basket
with non-stick cooking spray
before adding food for an
easier clean-up.
• For dishwasher, place on
top rack.
Cleaning
Method
Dishwasher
Safe & Hand
Washable.
10
Page 11

Care, Cleaning & Storage
Part Instruction
Pressure Cooker
Lid & Parts
• Condensation
Collector
• Steam Release
Valve
• Anti-Block
Shield
• Sealing Ring
• Float Valve
• Float Valve
Silicone Cap
• Wash after each use with hot
water and washing up liquid
and allow to air dry, or place
on top rack of dishwasher.
• Remove all parts from lid
before dishwashing.
• With steam release valve
and anti-block shield
removed, clean interior
of steam release pipe to
prevent clogging.
• To drain water from the lid
after dishwashing, take the
lid handle and hold the lid
vertically over a sink, then
turn it 360°— like turning a
steering wheel.
• After cleaning, store the
lid upside down on the
cooker base.
• Store sealing ring in a wellventilated area to decrease
residual odour from highly
avoured meals. To eliminate
odours, add 1 cup (250 mL)
of water and 1 cup (250 mL)
of white vinegar to inner
pot and run Pressure Cook
for 5–10 minutes, then
QR pressure.
• Empty and rinse condensation
collector after each use.
Cleaning
Method
Dishwasher
Safe & Hand
Washable.
11
Page 12

Care, Cleaning & Storage
Part Instruction
Inner Pot
Air Fryer Lid
Power Lead
• Heavy hard water staining
may require a vinegar
dampened sponge and
some scrubbing to remove.
If there is tough or burned
food residue at the bottom,
soak in hot water for a few
hours for easy cleaning.
• Wash after each use.
• Ensure all exterior surfaces
are dry before placing in
cooker base.
• Allow the Air Fryer Lid to cool
to room temperature, then
clean the heating element
and surrounding area with a
soft, damp cloth or sponge.
Ensure it is free of food
debris and/or grease splatter.
• Do not remove the
element cover.
• Do not rinse or immerse
air fryer lid in water.
• Use a barely-damp cloth
to wipe any particles off
power lead.
• Do not rinse or immerse
power lead in water.
Cleaning
Method
Dishwasher
Safe & Hand
Washable.
Wipe the
exterior
clean with
a soft,
damp cloth
or sponge.
Damp Cloth
Only.
12
Page 13

Care, Cleaning & Storage
Part Instruction
• Wipe the inside of the
outer pot as well as the
condensation rim with a
barely-damp cloth, and
allow to air dry.
Cooker Base
To protect against the risk of shock, do not immerse the appliance
in water or any liquid. Do not rinse the appliance under a tap.
To protect against the risk of shock, ensure heating element
• Clean cooker base and
control panel with a soft,
barely-damp cloth or
sponge.
• Do not rinse or immerse
cooker base in water.
WARNING
remains dry at all times.
Cleaning
Method
Damp Cloth
Only.
To protect against the risk of shock, do not submerge power lead
at any time. Do not wet pins of power lead.
Without proper cleaning, food and grease splatter may
build up around the heating element, leading to the
risk of smoke, re and personal injury.
To prevent re and personal injury, if you smell smoke, press
Cancel and unplug the appliance. Once cool, remove food
splatter or grease with a soft cloth and mild washing up liquid.
13
Page 14

Troubleshooting
Register your product today at instantpot.com.au/support/register
Problem Possible Reason Solution
Air Fryer Lid
is in place but
appliance will
not turn on
Black smoke is
coming from the
Air Fryer Lid
White smoke is
coming from the
Air Fryer Lid
Difculty
closing pressure
cooking lid
The connection between the
Air Fryer Lid and pressure
cooker base is loose or broken.
Bad power connection or
no power.
Microswitch is ceased by
grease or is damaged.
Using an oil with a low
smoke point.
Food residue on the bottom
of the inner pot or around the
element on the Air Fryer Lid.
Cooking foods with a high
fat content, such as bacon,
sausages and hamburgers.
Food is moist. Water is
evaporating, producing
thick steam.
Seasoning on food has blown
into element.
Sealing ring not properly tted.
Float valve in the popped-up
position.
Contents in cooker are still hot.
Ensure the Air Fryer Lid is seated correctly
on the pressure cooker base.
Inspect the power lead on the pressure
cooker base to ensure a good connection.
Ensure the power lead is plugged rmly into
the cooker base.
Contact Customer Care.
Could be an equipment malfunction.
Contact Customer Care.
Cancel the Smart Program, unplug the cooker
and allow it to cool to room temperature. DO
NOT interact with hot appliance. Choose a
neutral oil with a high smoke point, such as
Rapeseed, Avocado, Soybean, Safower or
Rice Bran.
Cancel the Smart Program, unplug the cooker
and allow it to cool to room temperature.
Remove all accessories from the inner pot
and clean the inner pot, Air Fryer Lid and all
accessories thoroughly.
Could be an equipment malfunction.
Contact Customer Care.
Avoid air frying foods with a high fat content.
Check the inner pot for excess oil and/or fat and
carefully remove as needed before air frying.
White smoke is steam as the water in the food
is evaporating and escaping from the Air Fryer.
Pat dry moist food ingredients before air frying.
Be careful when seasoning food. Spray
vegetables and meats before adding seasoning
so it adheres to the ingredients.
Re-position sealing ring, ensuring it is snug
behind sealing ring rack.
Gently press the oat valve down with a long
utensil.
Press quick release button down until it clicks
into “Vent” position, then lower lid onto cooker
base slowly, allowing heat to dissipate.
Any other servicing should be performed by an authorised service representative.
14
Page 15

Troubleshooting
Problem Possible Reason Solution
Release pressure according to recipe; only
open lid after oat valve has dropped down.
Difculty
opening the
pressure
cooking lid
Inner pot is
stuck to pressure
cooking lid
when cooker
is opened
Steam leaks
from side
of pressure
cooking lid
Float valve
does not rise
Pressure inside the cooker.
Float valve stuck in the poppedup position due to food debris
or residue.
Cooling of inner pot may create
suction, causing inner pot to
adhere to the lid.
No sealing ring in lid. Fit sealing ring.
Sealing ring damaged or not
properly tted.
Food debris attached to sealing
ring.
Lid not closed properly. Open, then close lid.
Sealing ring rack is warped or
off-centre.
Inner pot rim may be
misshapen.
Food debris on oat valve or
oat valve silicone cap.
Too little liquid in the inner pot.
Float valve silicone cap
damaged or missing.
Float valve obstructed by lidlocking mechanism.
WARNING
pressure; to avoid scalding injury, do not attempt
to force lid open.
Ensure steam is completely released by quick-
releasing pressure, then press oat valve gently
with a long utensil. Open lid carefully and
thoroughly clean oat valve, surrounding area
and lid before next use.
To release the vacuum, press quick release
button down until it clicks into “Vent” position.
Replace sealing ring.
Remove sealing ring and clean thoroughly.
Remove sealing ring from lid, check sealing
ring rack for bends or warps.
Contact Customer Care.
Check for deformation, contact Customer
Care.
Remove oat valve from lid and clean
thoroughly; perform “Initial Test Run” to check
operation and record ndings.
Contact Customer Care.
Check for scorching on bottom of inner pot.
Add 375 ml of a thin cooking liquid to inner pot.
Fit or replace oat valve.
Tap oat valve with a long utensil. If the oat
valve does not drop, turn the cooker off.
Contact Customer Care.
Contents may be under
Any other servicing should be performed by an authorised service representative.
15
Page 16

Troubleshooting
Problem Possible Reason Solution
Steam gushes
from steam
release valve
when quick
release button
is in “Seal”
position
Display remains
blank after
connecting the
power lead
Small amount
of steam
leaking/hissing
from steam
release valve
during cook
cycle
Steam gushes
from steam
release valve
when quick
release button
is in “Seal”
position
Occasional
clicking or light
cracking sound
Pressure sensor control failure. Contact Customer Care.
Steam release valve not
seated properly.
Bad power connection
or no power.
Cooker electrical fuse
has blown.
No heat in the inner pot.
Inner pot base may
be damaged.
Quick release button not
in “Seal” position.
Cooker is regulating excess
pressure.
Not enough liquid in the inner
pot.
Pressure sensor control failure. Contact Customer Care.
Steam release valve not seated
properly.
The sound of power switching
and expanding pressure board
when changing temperatures.
Bottom of the inner pot is wet.
Flick quick release button to ensure it is in the
“Seal” position.
Inspect power lead for damage. If damage is
noticed, contact Customer Care. Check outlet to
ensure it is powered.
Contact Customer Care.
Perform “Initial Test Run” to check operation,
and record ndings.
Contact Customer Care.
Perform “Initial Test Run” to check operation,
and record ndings.
Contact Customer Care.
Flick quick release button to ensure it is in the
“Seal” position.
This is normal. No action required.
Add 375 ml of a thin cooking liquid to inner pot.
Flick quick release button to ensure it is in the
“Seal” position.
This is normal; no action needed.
Wipe exterior surfaces of inner pot. Ensure
heating element is dry before inserting inner pot
into cooker base.
Any other servicing should be performed by an authorised service representative.
16
Page 17

Troubleshooting
Error code
appears on
display and
cooker beeps
continuously
Error Code
C1
C2
C6L
C6H
C7 Pressure function on non-pressure for a long time.
C9 Using Air Fry function. Sensor in Air Fryer lid open circuit.
PrSE Pressure switch disconnected for non-pressure function.
Food burn
Lid Using lid mistakenly or lid is not in the correct position.
Pot
Contact Customer Care.
Food burning at high temperature on pot bottom for
pressure functions.
Not putting inner pot into base cooker/sensor short circuit
in pressure cooker bottom.
Meaning of error code
Any other servicing should be performed by an authorised service representative.
17
Page 18

Warranty
Limited Warranty
This L imited Warr anty is iss ued by Corell e Brands (Aus tralia) Pt y Ltd (Corelle Brands Australia) and is ef fectiv e for one year fr om the
date of o riginal con sumer purcha se. Proof of or iginal purch ase date and re turn of your a ppliance is re quired to obt ain serv ice under
this Limite d. Return of yo ur appliance t o us will be done i n accordanc e with our ins tructi ons only. Prov ided that this appli ance is
oper ated and main tained in acc ordance wi th writt en operati ng instru ctions at tached t o or furnish ed with the ap pliance or pu blished
oper ating inst ructio ns on www.in stantpo t.com.au, C orelle Bran ds Austra lia will, in it s sole and excl usive discretio n, either: (i) r epair
defec ts in mate rials or work manship; or (ii) replac e the applian ce. In the even t that your app liance is repl aced, the Li mited Warra nty
on the re placement a ppliance wi ll expire 12 month s from the date of orig inal consume r purchase.
We remin d you the appliance you p urchased i s for person al use only (not co mmercial us e).
Any modi cation/alteration or at tempted modication/alteration to yo ur appliance will void this Limited War rant y, unless such
modication/alterat ion or attempt ed modicat ion/al teration was ex pressly authorized by a Corelle Brands Au stralia Represent ative
in writing.
This L imited Warr anty only c overs Corel le Brands Aus tralia’s ap pliances /product s and is not extende d to any other app liances,
produ cts, equ ipment, com ponents, or devi ces that you us e or may use in con junctio n with the Cor elle Brands A ustrali a’s appliance s.
To claim und er this Limi ted Warrant y:
1. Cont act Corell e Brands Aus tralia at :
9C Comm ercial Road, K ingsgrove , NSW, 2208
Email: [email protected]
2. Provi de a descrip tion of the app liance you be lieve has malfunc tioned due t o defecti ve parts o r workmans hip.
3. If it is n ecessar y for the appl iance to be sen t to Corelle Br ands Aust ralia for rep air or replacement , Corelle Bra nds
Aus tralia will s end you a pre- paid shippi ng label and yo u must send the appli ance and your d ated sales re ceipt to Core lle
Brands Aus tralia alo ng with the ap pliance. If yo u do not have your d ated sales r eceipt, pl ease advis e Corelle Bra nds
Aus tralia in ad vance, and Cor elle Brands Aust ralia will at tempt to ver ify your pu rchase.
4. If Core lle Brands A ustralia d etermine s that the appliance h as malfunc tioned du e to defect ive part s or workmanship, and
is covered und er this Limi ted Warrant y, Corelle Br ands Aust ralia will rep air and return the ap pliance, or s end you a
repl acement app liance, at Cor elle Brands A ustrali a’s cost.
5. Any rep aired or repl aced appliance will b e covered by th is Limited Wa rranty fo r the remaind er of the original war ranty
per iod or ninet y (90) days follo wing your rec eipt of the replacement or rep aired appli ance, whiche ver is greater.
6. If Corell e Brands Austr alia conrms the appliance has not malfunc tioned due to defe cti ve par ts or workmanship, and/or
is in working order, or if pro of of purchase is not ver ied, Corelle Br ands Australia rese rves the right to return the
appl iance to you at yo ur pre-pai d cost. If th is cost is not m et, Corelle Brand s Australia reserves t he right to di spose of the
appl iance aft er 45 days’ noti ce to you.
Limitation and Exclusions
To the maxi mum extent p ermitt ed by law, the max imum liabili ty of Corel le Brands Austra lia, if any, for any a llegedly d efectiv e
appli ance or par t shall in no circ umstanc es exceed the p urchase pr ice of a compar able replac ement appli ance or par t of the same
age.
This Limited Warranty does not cover:
1. Damage resul ting from accident, mod ica tion /alter ation (unless express ly auth orize d by a Corelle Br ands Austra lia
Repr esentati ve in writi ng), misuse, ab use, neglec t, unreas onable use, use cont rary to th e written o peratin g instruc tions
at tached to or f urnished w ith the app liance or publ ished oper ating inst ructio ns on www.in stantp ot.com.au, n ormal wear
and te ar, com mercial use, i mproper as sembly by you o r anyone, disa ssembly by y ou or anyone, repair by yo u or anyone,
failure to provid e reason able and ne cess ary maintena nce, forc e majeure event including but not limite d to re, oo d, act s
of G od;
2. Repair s where your ap pliance is us ed for other th an normal, pe rsonal use o r when it is use d in a manner tha t is contrar y
to the w ritten o perating i nstruc tions at tached to or f urnished w ith the app liance or publ ished oper ating inst ructio ns on
www.instantpot.com.au ; or
3. Use of una uthorize d parts an d accessor ies, or repa irs to part s and systems res ulting fro m unauthor ized repair s or
modications/alterations made to your app liance.
The cos t of repair or r eplacemen t under these exclud ed circums tances sha ll be borne by you. Our goods co me with guar antees
that c annot be exclu ded under th e Australian Cons umer Law. You are en titled to a re placement o r refund for a ma jor failure a nd
compe nsation fo r any other reas onably fore seeable lo ss or damage. You ar e also entit led to have the g oods repai red or replac ed if
the go ods fail to be of a cceptabl e quality an d the failur e does not amou nt to a major fai lure.
9c Comme rcial Road, K ingsgrove, N SW, 2208. 1800 251 643 o r (02) 9317 1000.
18
Distr ibuted by Corelle B rands (Aus tralia) Pt y Ltd.
Email: [email protected]
Page 19

THIS PAGE HAS BEEN INTENTIONALLY LEFT BLANK.
Page 20

805-1710-41
©2020 Corelle Brands (Australia) Pty Ltd.
Distributed by Corelle Brands (Australia) Pty Ltd.
9c Commercial Road, Kingsgrove, NSW, 2208, Australia
Register your product today at:
instantpot.com.au/support/register
Contact Customer Care:
Ph 1800 251 643 or 02 9317 1000
instantpot.com.au
© 2020 Corelle Brands (Australia) Pty Ltd.
 Loading...