

Inspire NS1001 User Manual

Version 1.4
INSPIRE
HOME
AUTOMATION
USER MANUAL (ALL VARIANTS)

Contents
Unpacking ............................................................................................................................................. 1
Setup ..................................................................................................................................................... 2
Internet Gateway .............................................................................................................................. 2
Pairing and Connecting ..................................................................................................................... 2
Registering your Room Thermostat .................................................................................................. 3
Your Thermostat ................................................................................................................................... 5
Basic Functions ................................................................................................................................. 6
Adjusting the Temperature ........................................................................................................... 6
Switching your heating on and off ................................................................................................ 6
Boost Mode (Plus & Landlord Versions) ........................................................................................ 7
Program advance (Plus & Landlord Plus) ...................................................................................... 7
Menu ................................................................................................................................................ 7
Setting the clock............................................................................................................................ 8
Set Program Mode ........................................................................................................................ 8
Setting Programs ........................................................................................................................... 9
Timer on ........................................................................................................................................ 9
Timer Off ....................................................................................................................................... 9
Your Gateway ..................................................................................................................................... 10
Status Lights .................................................................................................................................... 10
Troubleshooting ................................................................................................................................ 11
Specification ....................................................................................................................................... 13

Inspire Home Automation | www.inspirehomeautomation.co.uk | Unpacking
1
Unpacking
Inside the box you will find the following
1 x Assembled Room Thermostat consisting of
1 x Room Thermostat
1 x Wall Mount
1 x Wiring Cover
1 x Internet Gateway
1 x Network Cable
1 x Power Supply
2 x AA Batteries
2 x Screws
2 x Wall Plugs
Inspire Home Automation | www.inspirehomeautomation.co.uk | Setup
2
Setup
Internet Gateway
Plug in the supplied power cable and connect to your router via the network cable.
Pairing and Connecting
This is the process by which the Room Thermostat and the Gateway are programmed to recognise
each other. Your new Room Thermostat should already be paired to your gateway at the factory, so
they should automatically recognise each other and connect.
Power up the gateway and wait until the Power Light is green. Then power up the Room Thermostat.
Within a few seconds, the connection should be established, confirmed by the Radio symbol on the
Room Thermostat and the RF Light on the Gateway switching to green.
If the gateway was switched on after the Room Thermostat, then it may take up to 10 minutes to
establish the connection. If you do not wish to wait this long, reset the Room Thermostat by pressing
and holding all four buttons for 5 seconds. Upon reset, the connection should be made within a few
seconds.
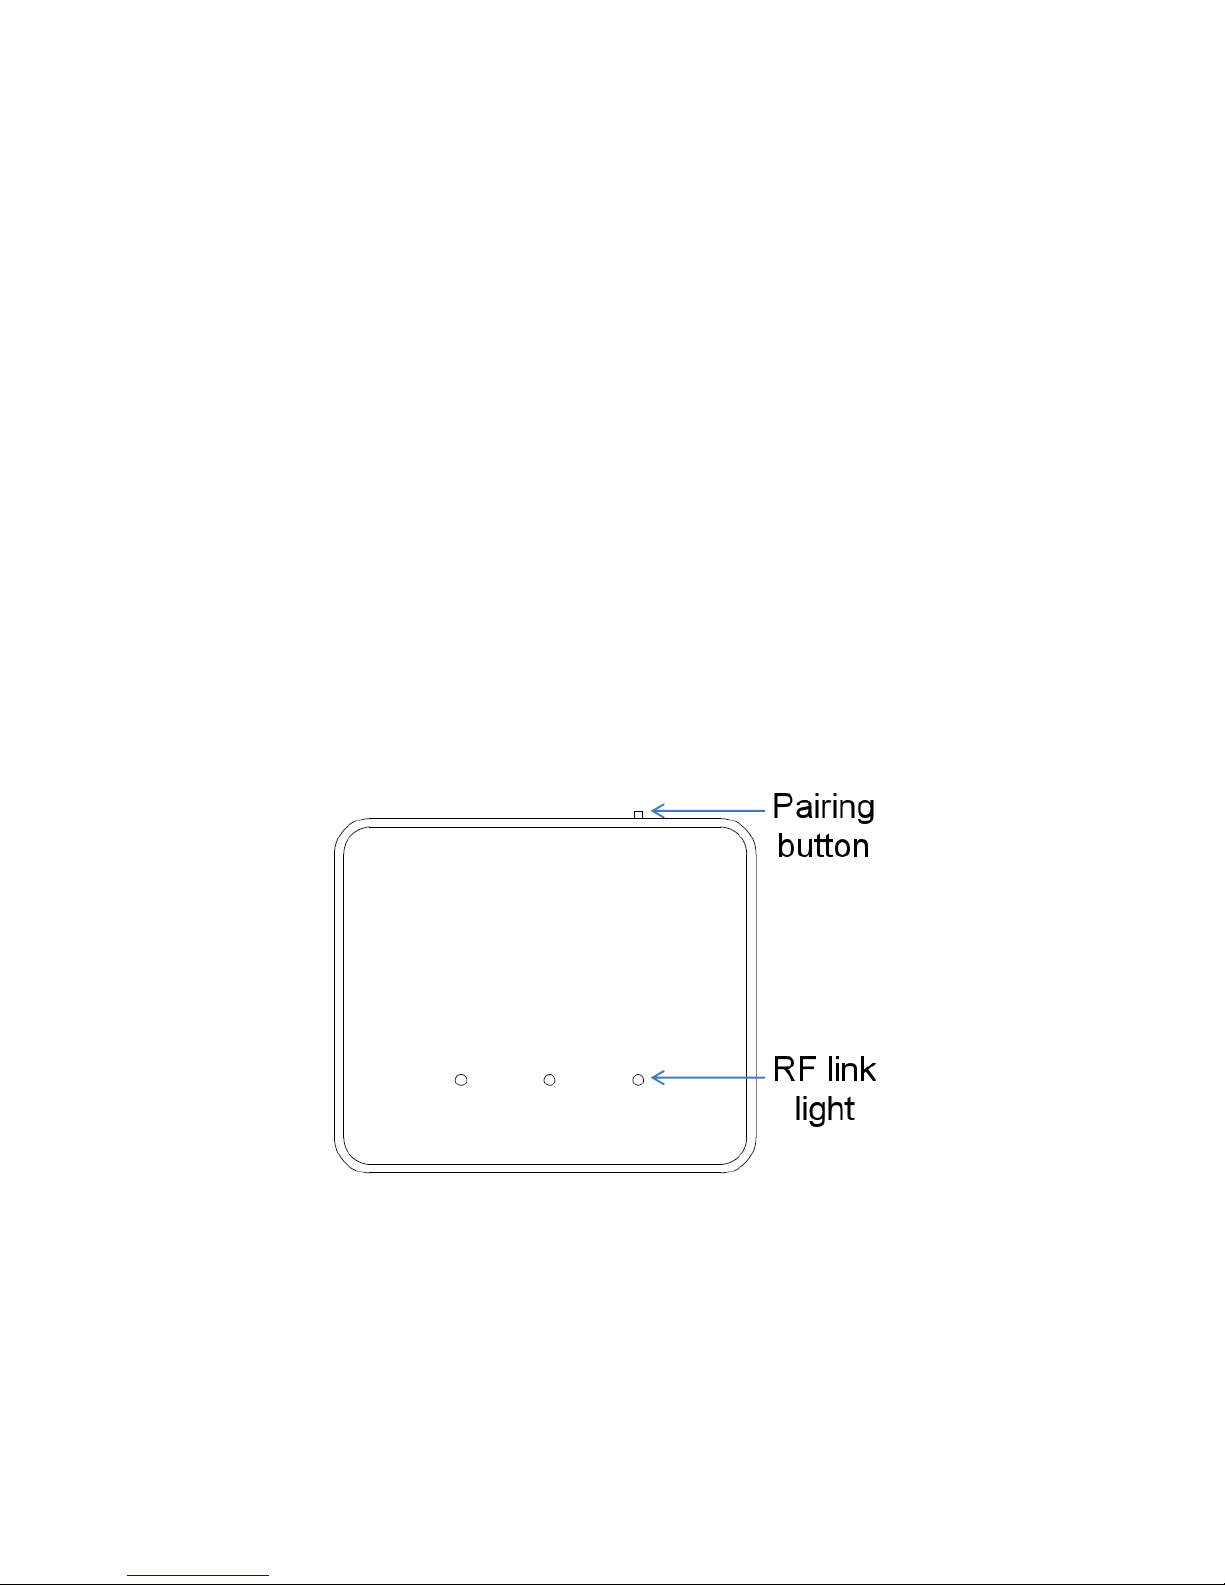
If you have received a replacement unit, an additional unit to create a Multizone setup, or they will
not connect, they will need to be paired. Switch on both units, wait for the Internet Gateway Power
light to go green, then press the Pairing Button on the back of the Gateway. The RF Link light will
begin to flash Amber.
Figure 1: Gateway Box
Next press and hold 'M' and 'S' simultaneously on the Room thermostat for 5 seconds. This will make
a connection icon, located in the bottom left hand corner, flash. This icon will stay on permanently
once a connection has been established.
Inspire Home Automation | www.inspirehomeautomation.co.uk | Setup
3
Registering your Room Thermostat
To control your room thermostat over the Internet you will first need to register on our website.
Go to https://www.inspirehomeautomation.co.uk/client/, select register and complete the
registration process.
Once you have validated your e-mail you will need to add your Room Thermostat to this account.
The Internet Gateway should have a flashing Amber middle light and both outer lights should be
green.
If the computer that you are registering from is connected to the same router as the Internet
Gateway, your new Thermostat should be automatically detected, just click ‘Auto’ and the new unit
should be registered to your account.
If the computer is not on the same network, or the auto registration does not work, it can be
manually registered by doing the following.
Press the '+' and '-' buttons on the Room Thermostat for 5 seconds. The display will show '-------',
shortly followed by your registration code.
Enter this registration code on the website, click 'Add' then within a few seconds, you will be at the
Settings page.
Note that if you have purchased a zoned system, the above procedure only needs to be done from
one Thermostat, once registered, all devices connected to your Internet Gateway should show in
your account.
If you purchased the NS1001 PLUS model or Landlord Model, you should have been emailed an
activation code to unlock the extra functionality. Click the 'Advanced' tab, then scroll down to ‘Unit
Codes’ Copy and paste your activation code here to unlock the extra features.
If you have purchased a zoned Plus/Landlord system, you should have received a code for each
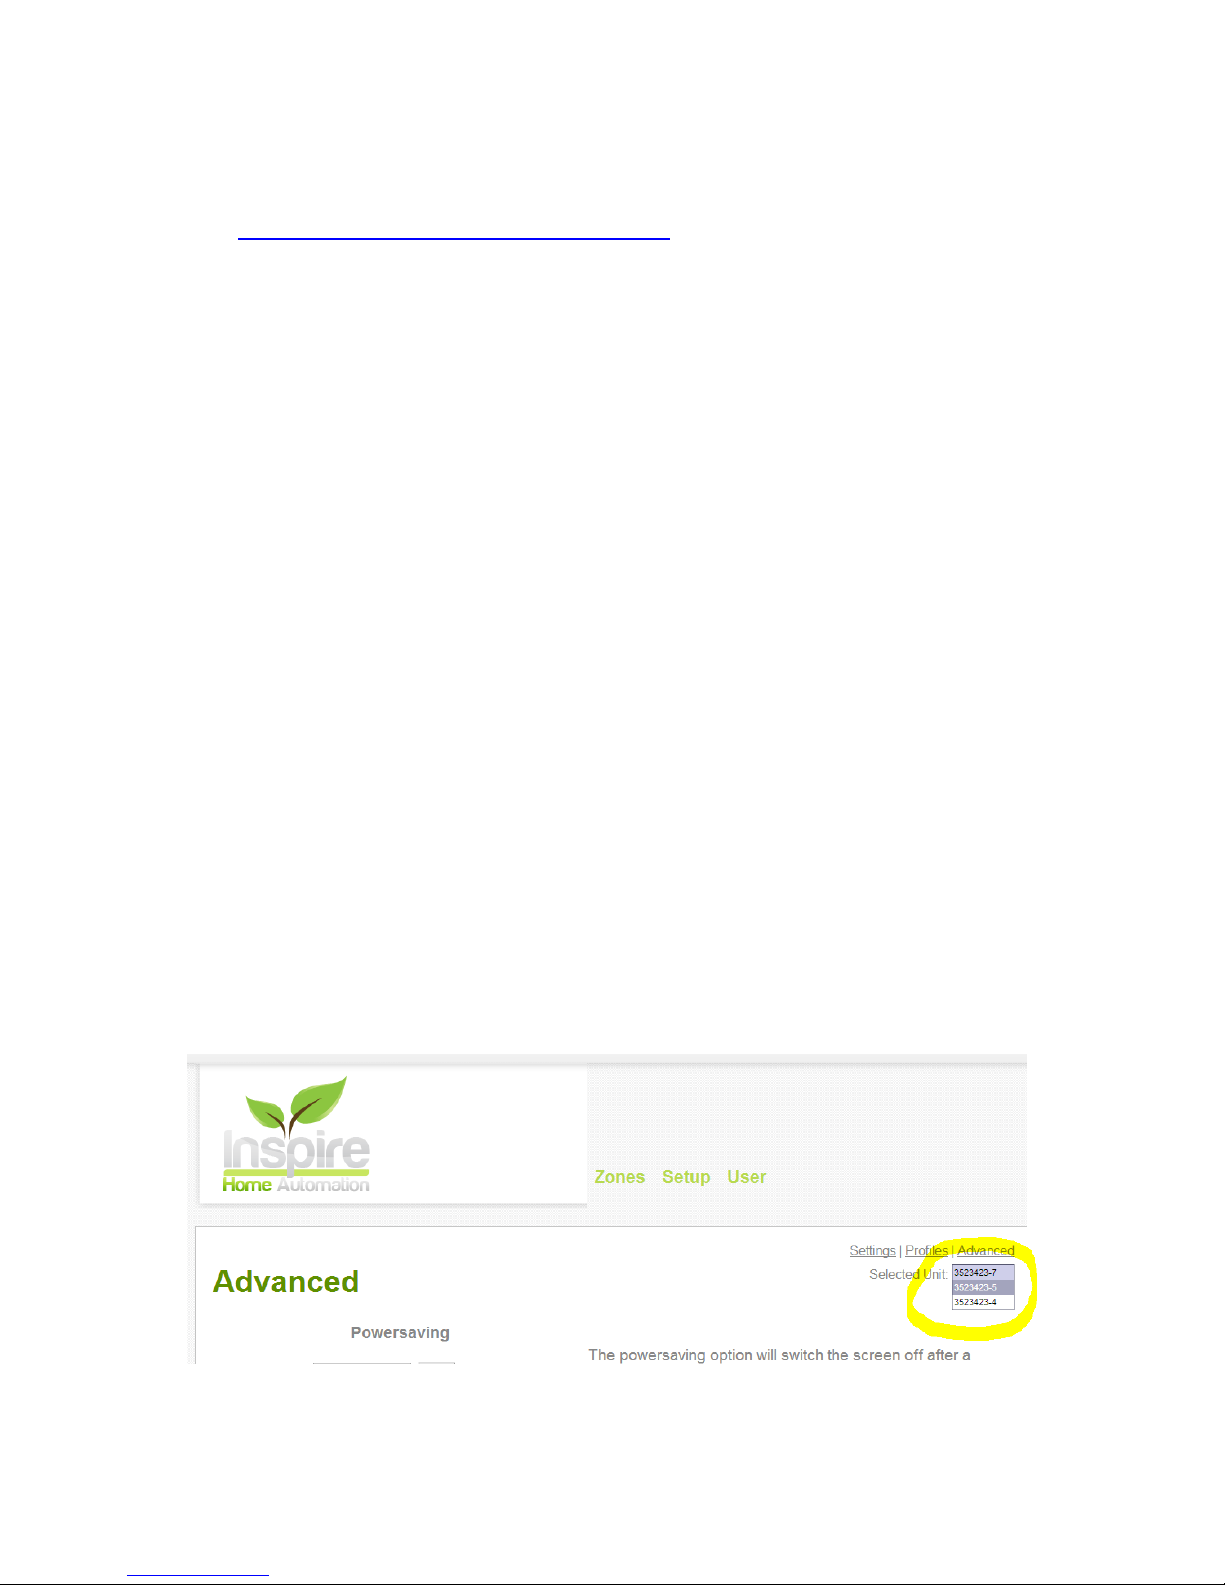
Thermostat. You will need to enter one code for each Thermostat. To switch Thermostats, click the
number in the top right of webpage, then select a different unit from the drop down list.
 Loading...