

Page 1
Quick Setup Guide | NS-C6500-A
In-ceiling speakers
Congratulations on your purchase of a high-quality Insignia product.
Your NS-C6500-A represents the state of the art in ceiling speaker
design and is designed for reliable and trouble-free performance.
PACKAGE CONTENTS
• Insignia speakers (2)
• Paint plugs (2)
• Grills (2)
• Template (1)
• Quick Setup Guide
Tools you will need:
• Pencil
• Keyhole or drywall saw
• Phillips screwdriver
• Sturdy wire or coat hanger
• Wire strippers
• Gloves
• Safety goggles
• Drill
• ¼- to ½-inch drill bit (for drilling test hole)
Before using your new product, please read
these instructions to prevent any damage.
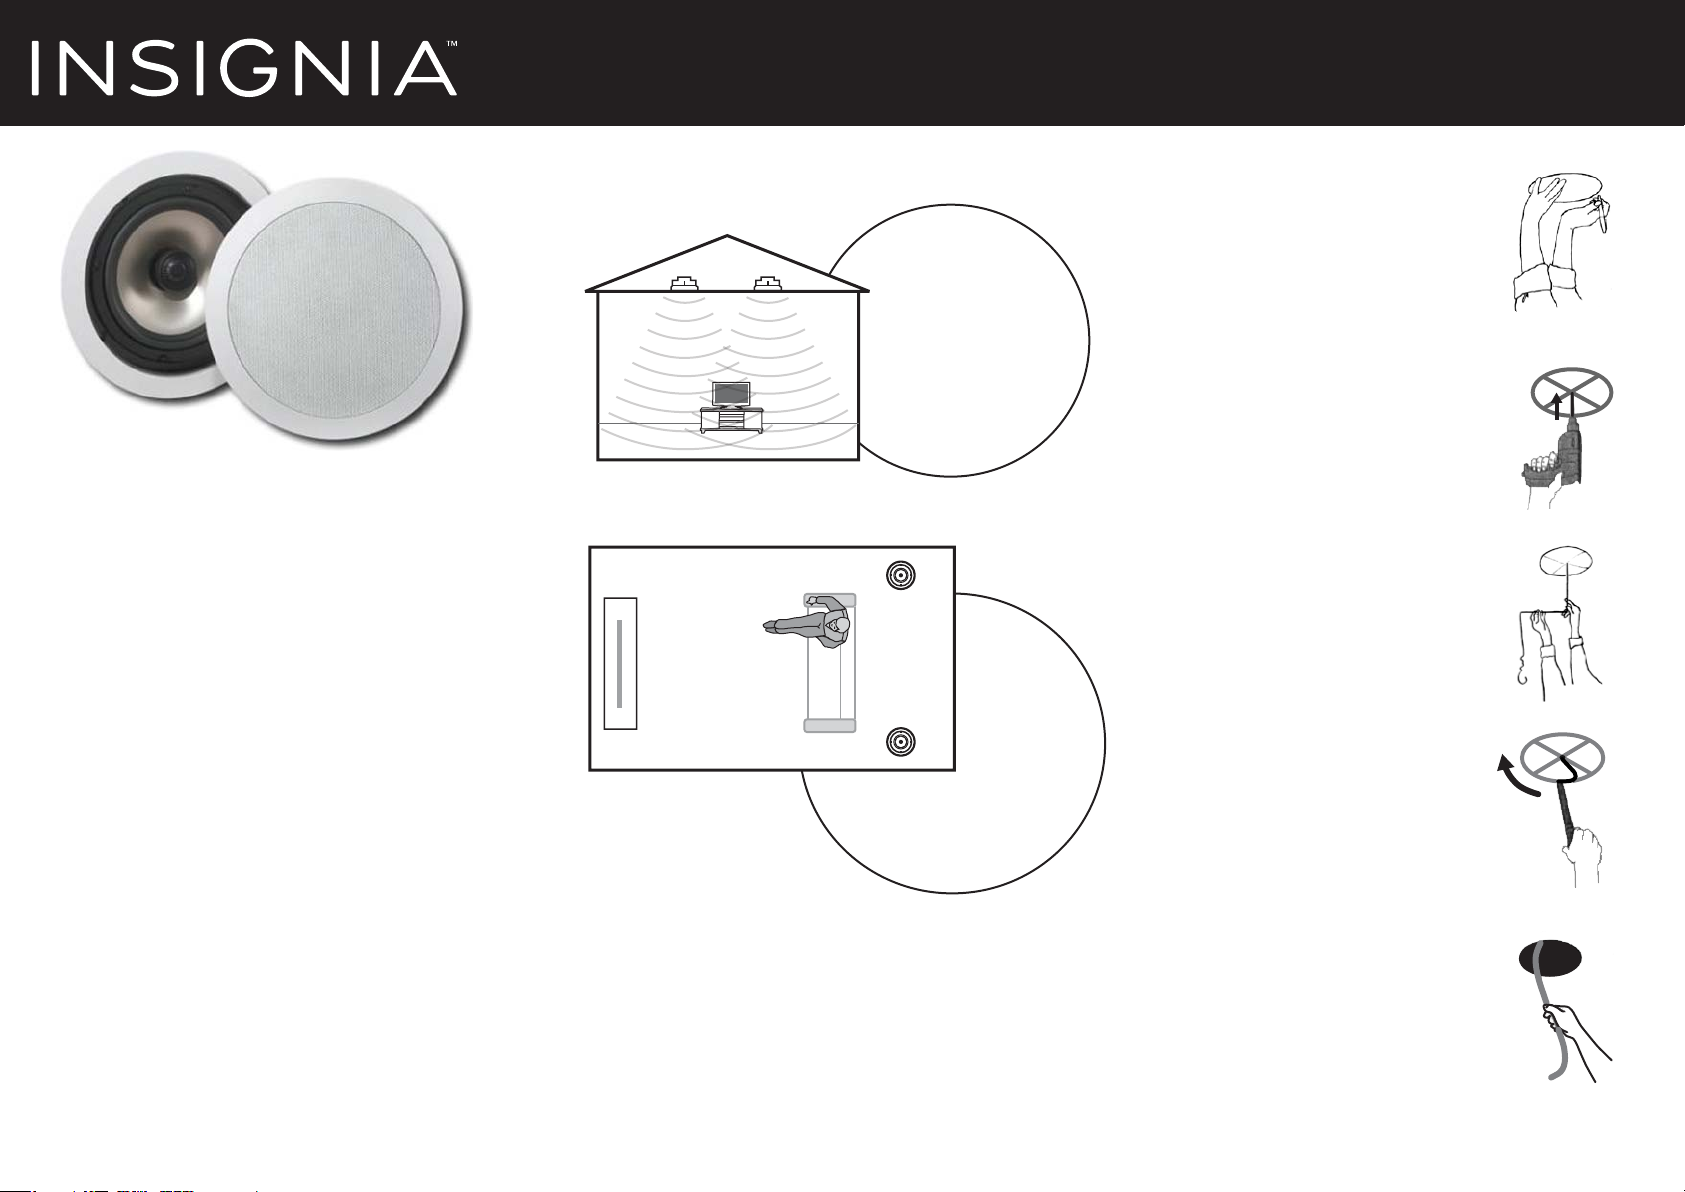
MOUNTING SPEAKERS IN THE CEILING
For stereo sound
Mount the speakers 6-10
feet apart. Each speaker
should be the same
distance from the listening
area. For detailed mounting
instructions, see “Ceiling
mount instructions.”
For home theater surround sound
Mount the
speakers 6-10
feet apart and
3-6 feet behind
the listening
area. For
detailed mounting instructions,
see “Ceiling mount instructions.”
CEILING MOUNT INSTRUCTIONS
1 Determine where you want to mount the speakers. The speakers must
be mounted in areas where there are no obstructions like studs (joists).
Tap the ceiling to nd a “hollow” space, or use a stud nder to locate
the studs.
Note: Make sure that your speaker wires are long enough to run from the
speakers to your audio equipment. If you plan to run the speaker wires
through the walls or ceiling, the wires must be UL or CL rated to ensure your
safety and to meet building code compliance.
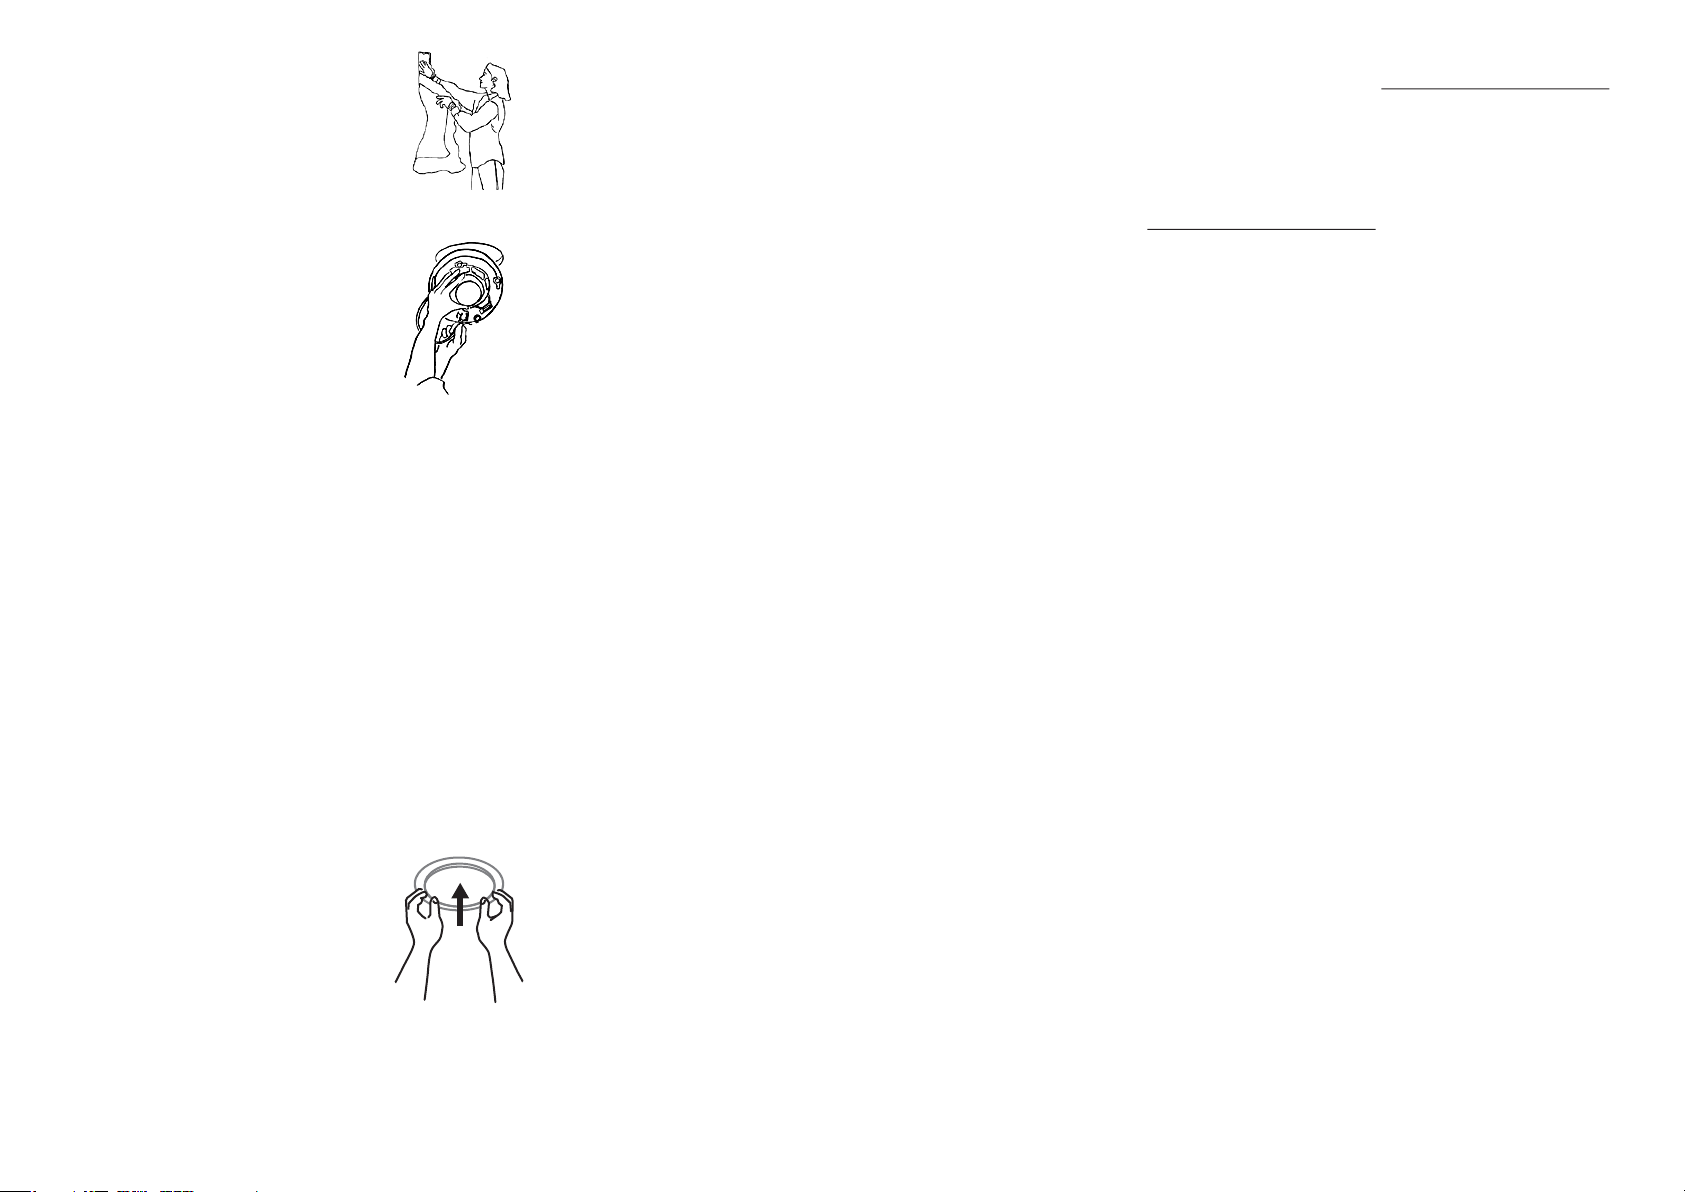
2 Position the cardboard mounting
template on the ceiling where you want
to mount a speaker, then trace around
the template.
3 Drill a small hole in the center of the
template outline you drew on the
ceiling.
4 Bend a piece of coat hanger wire, then
insert the wire into the hole. Slowly
rotate the wire to check for any
obstructions. If you nd an obstruction,
patch the hole and nd a new location
for the speaker.
5 Using a keyhole or drywall saw,
carefully cut the ceiling section you
outlined, then remove the section.
6 Run the wires from the speaker outputs
on your audio equipment to your
speakers. Allow a few extra feet of wire
so you will have enough wire to easily
connect the speaker before mounting it
to the ceiling.
Note: Use high-quality wire such as 16
gauge speaker wire.
Page 2
7 (Optional) To improve speaker perfor-
mance, insert unbacked berglass
insulation behind and around the
speaker.
Warning: To avoid personal injury, wear
gloves when inserting the insulation.
8 Pull the wires through the hole in the
ceiling. Using wire strippers, strip o the
end of the outer wire jacket, then strip
about ½ inch of the insulation from the
ends of the wires.
9 Connect the positive wire on your audio
equipment to the red terminal on the
speaker, then connect the negative wire
on your audio equipment to the black
terminal on the speaker.
Warning: Make sure that your audio
equipment is turned o before you
connect the speaker wires.
10 Remove the speaker grill by pushing one of the mounting clip screws
towards the front of the speaker, then insert the speaker into the hole
in the ceiling.
11 Tighten the screws evenly until the speaker is at against the ceiling.
Caution: If you use a drill to tighten the screws, make sure that you set
the drill to its lowest torque speed. Do not overtighten screws.
PAINTING THE SPEAKERS AND GRILLS
The speakers have a weather resistant, ABS nish that you can paint.
To paint the speakers and grills:
1 Remove the grills from the speakers.
2 Make sure that the interior of the speaker is covered so no paint will
get inside.
3 Insert one of the supplied paint plugs into the speaker to protect the
speaker.
4 Carefully paint the exposed part of the speaker. Remove the plug
when you have nished painting.
5 Spray the grill with thin paint (5 parts thinning agent to 1 part paint).
Make sure that you do not plug the holes on the grill with paint. Too
much paint may adversely aect the speaker sound.
SPECIFICATIONS
• Woofer 6 ½" aluminum cone
• Tweeter ¾" pivoting aluminum dome
• Frequency response 50 Hz to 20 kHz
• Eciency 87 dB 1W 1m 1 kHz
• Power 5 watts minimum to 100 watts maximum
• Impedance 8 ohms nominal
• Overall dimensions 8.9" diameter × 3.9" depth /
227 mm diameter × 99.5 mm depth
• Cutout dimension 7.6" (193 mm )
• Weight 6.9 lbs (5.5 kg) per pair
ONEYEAR LIMITED WARRANTY
For complete warranty, visit www.insigniaproducts.com.
CONTACT INSIGNIA:
For customer service, call 1-877-467-4289 (U.S. and Canada)
or 01-800-926-3000 (Mexico)
www.insigniaproducts.com
INSIGNIA is a trademark of Best Buy and its aliated companies.
Registered in some countries.
Distributed by Best Buy Purchasing, LLC
7601 Penn Ave South, Richeld, MN 55423 U.S.A.
©2014 Best Buy. All rights reserved.
Made in China
12 Reinstall the speaker grill.
V2 ENGLISH 14-1138
 Loading...