

Page 1

User Guide | Guide de l’ utilisateur | Guí a del Usuario
30" Wide Flat Digital TV | TV numérique à écran panoramiqu e plat de 30 po
Televisor digital de pantalla panorámica plana de 30 pulgadas
NS-30HTV
Page 2

Page 3

Welcome
Congratulations on your purchase of this
high-quality Insignia product. Your NS-30HTV
30" Wide Flat Digital TV represents the state of
the art in TVs and is designed for reliable and
trouble-free performance. For future reference,
record the serial number, date of purchase, and
dealer name in the spaces provided.
Model Number: NS-30HTV
Serial Number:_____________________
Date of purchase:___________________
Dealer: ___________________________
Contents
Features. . . . . . . . . . . . . . . . . . . . . . . . . . . . . . . . .1
Important safeguards. . . . . . . . . . . . . . . . . . . . . . .1
Preparing to set up your TV. . . . . . . . . . . . . . . . . .3
Setting up your TV . . . . . . . . . . . . . . . . . . . . . . . . .4
Getting to know your TV . . . . . . . . . . . . . . . . . . . .7
Using your TV . . . . . . . . . . . . . . . . . . . . . . . . . . . .9
Troubleshooting . . . . . . . . . . . . . . . . . . . . . . . . . .24
Specifications. . . . . . . . . . . . . . . . . . . . . . . . . . . .25
Limited warranty. . . . . . . . . . . . . . . . . . . . . . . . . .25
Legal notices . . . . . . . . . . . . . . . . . . . . . . . . . . . .26
Français. . . . . . . . . . . . . . . . . . . . . . . . 27
Español . . . . . . . . . . . . . . . . . . . . . . . . 56
Features
• A high-quality picture with a horizontal
resolution of more than 500 lines–Which
exceeds Super VHS (400 lines) or Laser Disc
(430 lines) in resolution.
• Compatible with a wide range of audio
outputs through a digital audio jack
(coaxial) –When a component with a built-in
Dolby Digital decoder is connected, Dolby
Digital sou n d ca n pr od u ce th e ef fect of bein g
in a movie theater or a concert hall.
• Integrated digital tuner—You can view
digital broadcasts without using a digital TV
set-top box.
• Closed Caption decoder with full text
mode—Displays text captions or full screen
text on the screen for hearing impaired
viewers.
• Picture adjustments using the remote
control—The on-screen display provides
precise remote control adjustment of
brightness, contrast, color, tint, and
sharpness.
• Programmable TV sleep timer—Available
from the remote control, you can program
your TV to turn off automatically after as
many as 120 minutes.
• V-Chip—The V-Chip function can read the
rating of a TV program or movie content if the
program is encoded with this information.
V-Chip lets you set a restriction level.
• Stereo/SAP reception—Y our TV is designed
to receive stereo and second audio program
(SAP) broadcasts, where available.
• BBE—BBE gives you vivid sound with
incredible presence.
• S-Video/component video jacks—Your TV
is equipped with 3 types of video input jacks.
You can connect a VCR, DVD player , satellite
receiver, or other audio/video component to
your TV. The component video in jacks and
S-Video in jack let you watch the DVD player
or other video devices with a high quality
picture.
• On-screen 3 language display
select English, Spanish, or French for
on-screen programming.
* Manufactured under li cense from Dolby Laboratories. “Dolby” and
the double-D symbol are trademarks of Dolby Laboratories.
—You can
W ARNING:
To prevent fire or shock hazard, do not expose
this appliance to rain or moisture.
CAUTION:
ELECTRIC
COVER
PARTS INSIDE. REFER SERVICING
QUALIFIED SERVICE PERSONNEL.
The lightning flash with arrowhead symbol, within an
equilateral triangle is intended to alert the user to the
presence of uninsulated dangerous voltage within the
product’s enclosure that may be of sufficient magnitude
to constitute a risk of electric shock.
The exclamation point within an equilateral triangle is
intended to alert the user to the presence of important
operating and maintenance (servicing) instructions in the
literature accompanying the appliance.
TO REDUCE THE RISK OF
SHOCK, DO NOT REMOVE
(OR BACK). NO USER-SERVICEABLE
TO
Important safeguards
• Read instructions– Read all the safety and
operating instructions before operating your
TV.
• Retain Instructions–Retain the safety and
operating instructions for future reference.
• Follow Warnings–Follow all warnings on
your TV and in the operating instructions.
• Follow Instructions–Follow all operating
and use instructions.
• Cleaning–Unplug TV from the wall outlet
before cleaning. Do not use liquid cleaners or
aerosol cleaners. Use a damp cloth for
cleaning.
EXCEPTION: A product that is meant for
uninterrupted service and, that for some
specific reason, such as the possibility of the
loss of an authorization code for a CATV
converter, is not intended to be unplugged by
the user for cleaning or any other purpose,
may exclude the reference to unplugging
your TV in the cleaning description otherwise
required in this instruction.
• Attachments–Do not use attachments not
recommended by your TV manufacturer as
they may cause hazards.
• Water and Moisture–Do not use your TV
near water, for example, near a bath tub,
wash bowl, kitchen sink, or laundry tub, in a
wet basement, or near a swimming pool.
www.insignia-products.com
1
Page 4
• Accessories–Do not place your TV on an
unstable cart, stand, tripod, bracket, or table.
Your TV may fall, causing serious injury to
someone, and serious damage to your TV.
Use only with a cart, stand, tripod, bracket, or
table recommended by the manufacturer, or
sold with your TV.
If you mount your TV, follow
the manufacturer's
instructions and use a
mounting accessor y
recommended by the
manufacturer. Move a TV and
cart combination with care.
Quick stops, excessive force, and uneven
surfaces may cause your TV and cart
combination to overturn.
• Ventilation–Slots and openings in the
cabinet and the back or bottom are provided
for ventilation and to ensure reliable
operation of your TV and to protect it from
overheating. Do not block openings. Do not
place your TV on a bed, sofa, rug, or other
similar surface. Your TV should never be
placed near or over a radiator or heat
register. Do not place your TV in a built-in
installation such as a bookcase or rack
unless proper ventilation is provided or the
manufacturer’s instructions have been
adhered to.
• Power Sources–Use only the type of power
source indicated on the marking label. If you
are not sure of the type of power supply to
your home, consult your TV dealer or local
power company . F or TVs intended to operate
from battery power, or other sources, refer to
the operating instructions.
• Grounding or P olarization–Your TV is
equipped with a polarized alternating-current
line plug (a plug having one blade wider than
the other). This plug will fit into the power
outlet only one way . This is a safety feature. If
you are unable to insert the plug fully into the
outlet, try reversing the plug. If the plug
should still fail to fit, contact your electrician
to replace your obsolete outlet. Do not defeat
the safety purpose of the polarized plug.
• Power -cord protection–Route power-supply
cords so that they are not likely to be walked
on or pinched by items placed upon or
against them, paying particular attention to
cords at plugs, convenience receptacles, and
the point where they exit from your TV.
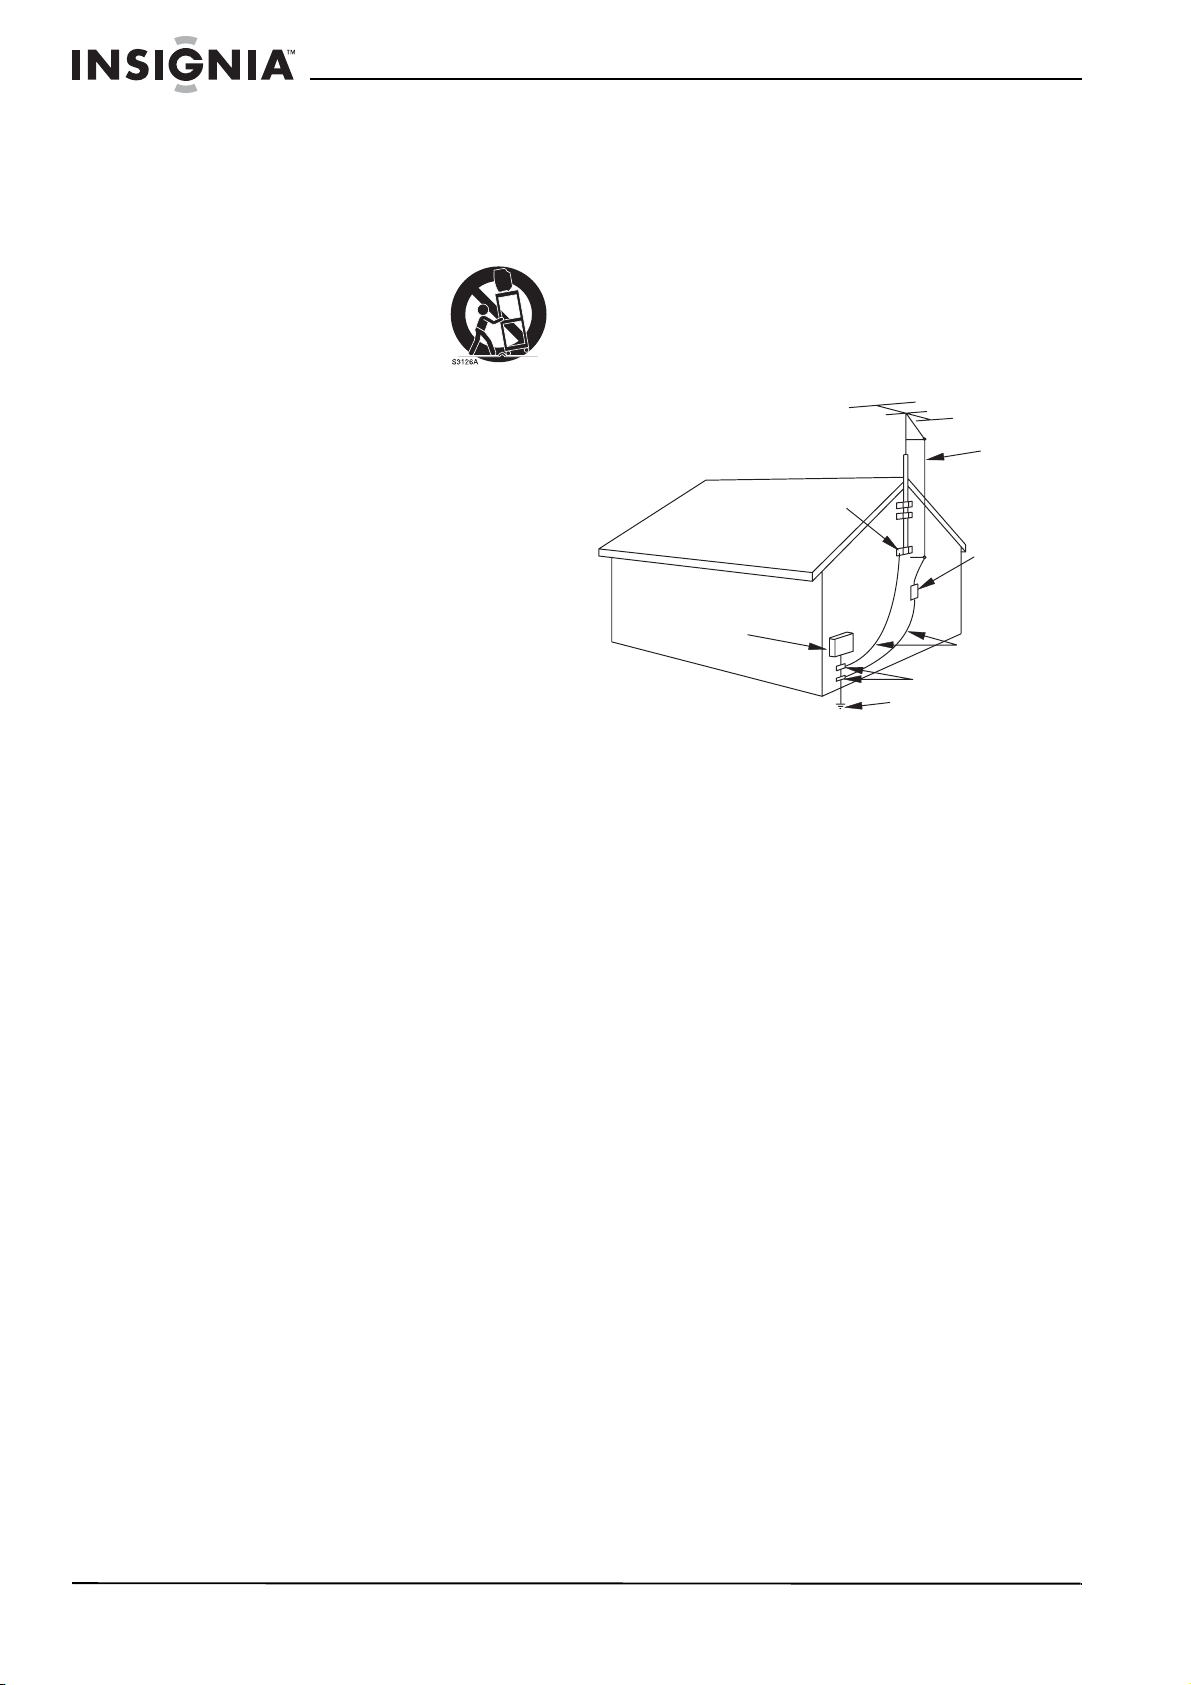
• Outdoor Antenna grounding–If an outside
antenna or cable system is connected to your
TV, be sure the antenna or cable system is
grounded so as to provide some protection
against voltage surges and built-up static
charges. Article 810 of the National Electrical
Code, ANSI/NFPA No. 70, provides
information with respect to proper grounding
of the mast and supporting structure,
grounding of the lead-in wire to an antenna
discharge unit, size of grounding conductors,
location of antenna-discharge unit,
connection to grounding electrodes, and
requirements for the grounding electrode.
EXAMPLE OF ANTENNA GROUNDING AS PER
NEC - NATIONAL ELECTRICAL CODE POWER SERVICE GROUNDING
S2898A
FIGURE A
NATIONAL ELECTRICAL CODE
ELECTRIC
SERVICE
EQUIPMENT
GROUND
CLAMP
GROUNDING CONDUCTORS
(NEC SECTION 810-21)
GROUND CLAMPS
ELECTRODE SYSTEM
(NEC ART 250, PART H)
• Lightning–For added protection for your TV
receiver during a lightning storm, or when it is
left unattended and unused for long periods
of time, unplug it from the wall outlet and
disconnect the antenna or cable system. This
will prevent damage to your TV due to
lightning and power-line surges.
• Power Lines–An outside antenna system
should not be located in the vicinity of
overhead power lines or other electric light of
power circuits, or where it can fall into such
power lines or circuits. When installing an
outside antenna system, do not touch power
lines or circuits because contact with them
might be fatal.
• Overloading–Do not overload wall outlets
and extension cords as this can result in a
risk of fire or electric shock.
• Object and Liquid Entry–Never push
objects of any kind into your TV through
openings because they may touch dangerous
voltage points or short out parts that could
result in a fire or electric shock. Never spill
liquid of any kind on your TV.
• Servicing–Do not attempt to service your TV
yourself because opening or removing covers
may expose you to dangerous voltage or
other hazards. Refer all servicing to qualified
service personnel.
• Damage Requiring Service–Unplug your
TV from the wall outlet and refer servicing to
qualified serv i ce pers onn el unde r the
following conditions:
• When the power supply cord or plug is
damaged or frayed.
• If liquid has been spilled, or objects have
fallen into your TV.
• If your TV has been exposed to rain or
water.
ANTENNA
LEAD IN
WIRE
ANTENNA
DISCHARGE UNIT
(NEC SECTION 810-20)
2
www.insignia-products.com
Page 5

• If your TV does not operate normally by
following the operating instructions, adjust
only those controls that are covered by
the operating instructions, because
improper adjustment of other controls
may result in damage and will often
require extensive work by a qualified
technician to restore your TV to its normal
operation.
• If your TV has been dropped or damaged
in any way.
• When your TV exhibits a distinct change
in performance, this indicates a need for
service.
• Replacement Parts–When replacement
parts are required, be sure the service
technician uses replacement parts specified
by the manufacturer that have the same
characteristic s as the original part.
Unauthorized substitutions may result in fire,
electric shock, injury to persons or other
hazards.
• Safety Check–Upon completion of any
service or repairs to your TV, ask the service
technician to perform routine safety checks to
determine that your TV is in correct operating
condition.
• Heat–Place your TV away from heat sources
such as radiators, heat registers, stoves, or
other products (including amplifiers) that
produce heat.
Preparing to set up your TV
Unpacking and setup
Your TV carton should contain:
• 30" Wide Flat Digital TV
•User Guide
• Remote control unit
If you need to replace these accessories, call
our help line mentioned in the Warranty section
of this guide.
Depending on your antenna system, you may
need different types of combiners (mixers) or
separators (splitters). C onta ct your local
electronics store for these items.
Carefully remove all the components from the
carton and verify that you have all the necessary
components before you dispose of the carton.
• Remove all packing materials from the
individual components.
• Do not remove any labels or stickers on the
back panel of your TV.
• Place your TV in the location you want. Your
TV is designed to be used on a level, stable,
flat surface, such as a table, desk, shelf, or
stand convenient to a power outlet, out of
direct sunlight, and away from sources of
excess heat, dust, moisture, or vibration.
• Unwind the AC power cord on the back of
your TV and extend the cord to its full length.
Note to CATV system installer:
This reminder is provided to call the CATV system installer's
attention to Article 820-40 of the NEC that provides
guidelines for proper grounding and, in particular, specifies
that the cable ground sho uld be connected to the grounding
system of the building as close to the point of cabl e entry as
practical.
A NOTE ABOUT RECYCLING: Batteries should never be
thrown away or incinerated but disposed of in accordance
with your local regulations concerning chemical wastes.
CAUTION:
NOT USE THIS POLARIZED PLUG WITH AN EXTENSION
CORD, RECEPTACLE OR OTHER OUTLET UNLESS THE
BLADES CAN BE FULLY INSERTED TO PREVENT BLADE
EXPOSURE
FCC WARNING: Changes or modifications not expressly
approved by the party responsible for compliance with the
FCC Rules could void the user's authority to operate this
equipment.
CAUTION: TO PREVENT ELECTRIC SHOCK DO
.
Power source
Use the polarized AC line cord provided for
operation on AC power. Insert the AC cord plug
into a standard 120 V 60 Hz polarized AC outlet.
If you cause a static discharge when touching
your TV and your TV fails to function, unplug
your TV from the AC outlet and plug it back in.
Your TV should return to normal operation.
Warning
• The system uses a polarized AC plug with
one wide blade and one narrow blade. The
plug will only fit into matchin g polarized
power outlets. This is a safety feature to
reduce the possibility of electric shock. If
the plug will not fit in your power outlets,
you probably have outdated,
non-polarized o utlets which should be
changed by a qualified, licensed
electrician. Do not file the wide blade on
the plug or use an adapter to ma ke the
plug fit into your outlet. This defeats the
safety feature and could expose you to
electric shock.
• Never connect the AC cord plug to other
than the specified voltage (120 V 60 Hz).
Use the attached power cord only.
www.insignia-products.com
3
Page 6

Setting up your TV
Connections
If you are using an indoor or outdoor antenna,
follow the instructions that correspond to your
antenna system. If you are using a cable TV
service (CABLE), see “Cable TV connections”
on page 4.
Antenna connections
Combination VHF/UHF antenna (separate
VHF and UHF 300 ohm twin-lead wires)
Connect th e 7 5 oh m cable from the co m bi n ation
VHF/UHF antenna to the RF IN jack.
If your combination VHF/UHF antenna has a 300
ohm twin-lead wire, you may need a 300-75 ohm
matching transformer.
RF IN jack
75 ohm coaxial
cable
300-75 ohm matching
transformer
Combination VHF/UHF antenna (single 75
ohm cable or 300 ohm twin-lead wire)
Connect the UHF 300 ohm twin-lead wire to the
combiner (not supplied). Connect the VHF
300 ohm twin-lead wire to the 300-75 ohm
matching transformer. Attach the transformer to
the combiner, then attach the combiner to the
RF IN jack.
RF IN jack
300-75 ohm matching
transformer
Combiner
UHF 300 ohm
Separate VHF/UHF antennas (75 ohm VHF
cable and 300 ohm UHF twin-lead wires)
Connect the VHF 75 ohm cable and UHF 300
ohm twin-lead wire to the combiner. Attach the
combiner to the RF IN jack.
RF IN jack
RF IN jack
VHF 300 ohm
VHF 75 ohm
Cable TV connections
Your TV has an extended tuning range and can
tune most cable channels without using a Cable
TV converter box. Some Cable TV companies
offer “premium pay channels” in which the signal
is scrambled. Descrambling these signals for
normal viewing requires the use of a
descrambler device which is generally provided
by the Cable TV company.
For subscribers to basic cable TV service.
For basi c cable service not requ iring a con v erter/
descrambler box, connect the 75 ohm coaxial
cable directly to the RF IN jack on the back of
your TV.
RF IN jack
75 ohm coaxial
cable
For subscribers to scrambled cable TV
service.
If you subscribe to a Cable TV service which
requires the use of a converter/descrambler box,
connect the incoming 75 ohm Coaxial Cable to
the converter/descrambler box. Using another
75 ohm Coaxial Cable, connect the output jack
of the converter/descrambler box to the RF IN
Jack on your TV. Set your TV to the output
channel of the converter/descrambler box
(usually channel 3 or 4) and use the converter/
descrambler box to select channels.
Incoming 75 ohm cable TV
cable
75 ohm cable to
Converter/descrambler
TV
For subscribers to unscrambled basic cable
TV service with scrambled premium
channels.
If you subscribe to a cable TV service in which
basic channels are unscrambled and premium
channels require the use of a converter/
descrambler box, you may wish to use a signal
Splitter and an A/B switch box (available from
the cable TV company or an electronics supply
store). With the switch in the “B” position, you
can directly tune any non-scrambled channels
on your TV. With the switch in the “A” position,
you can tune your TV to the output of the
converter/descrambler box (usually channel 3 or
4) and use the converter/descrambler box to
tune scrambled channels.
Incoming 75
ohm cable
TV cable
Converter/descrambler
Splitter
A/B
switch
A
B
75 ohm cable to
TV
RF IN jack
RF IN jack
Combiner
UHF 300 ohm
4
www.insignia-products.com
Page 7
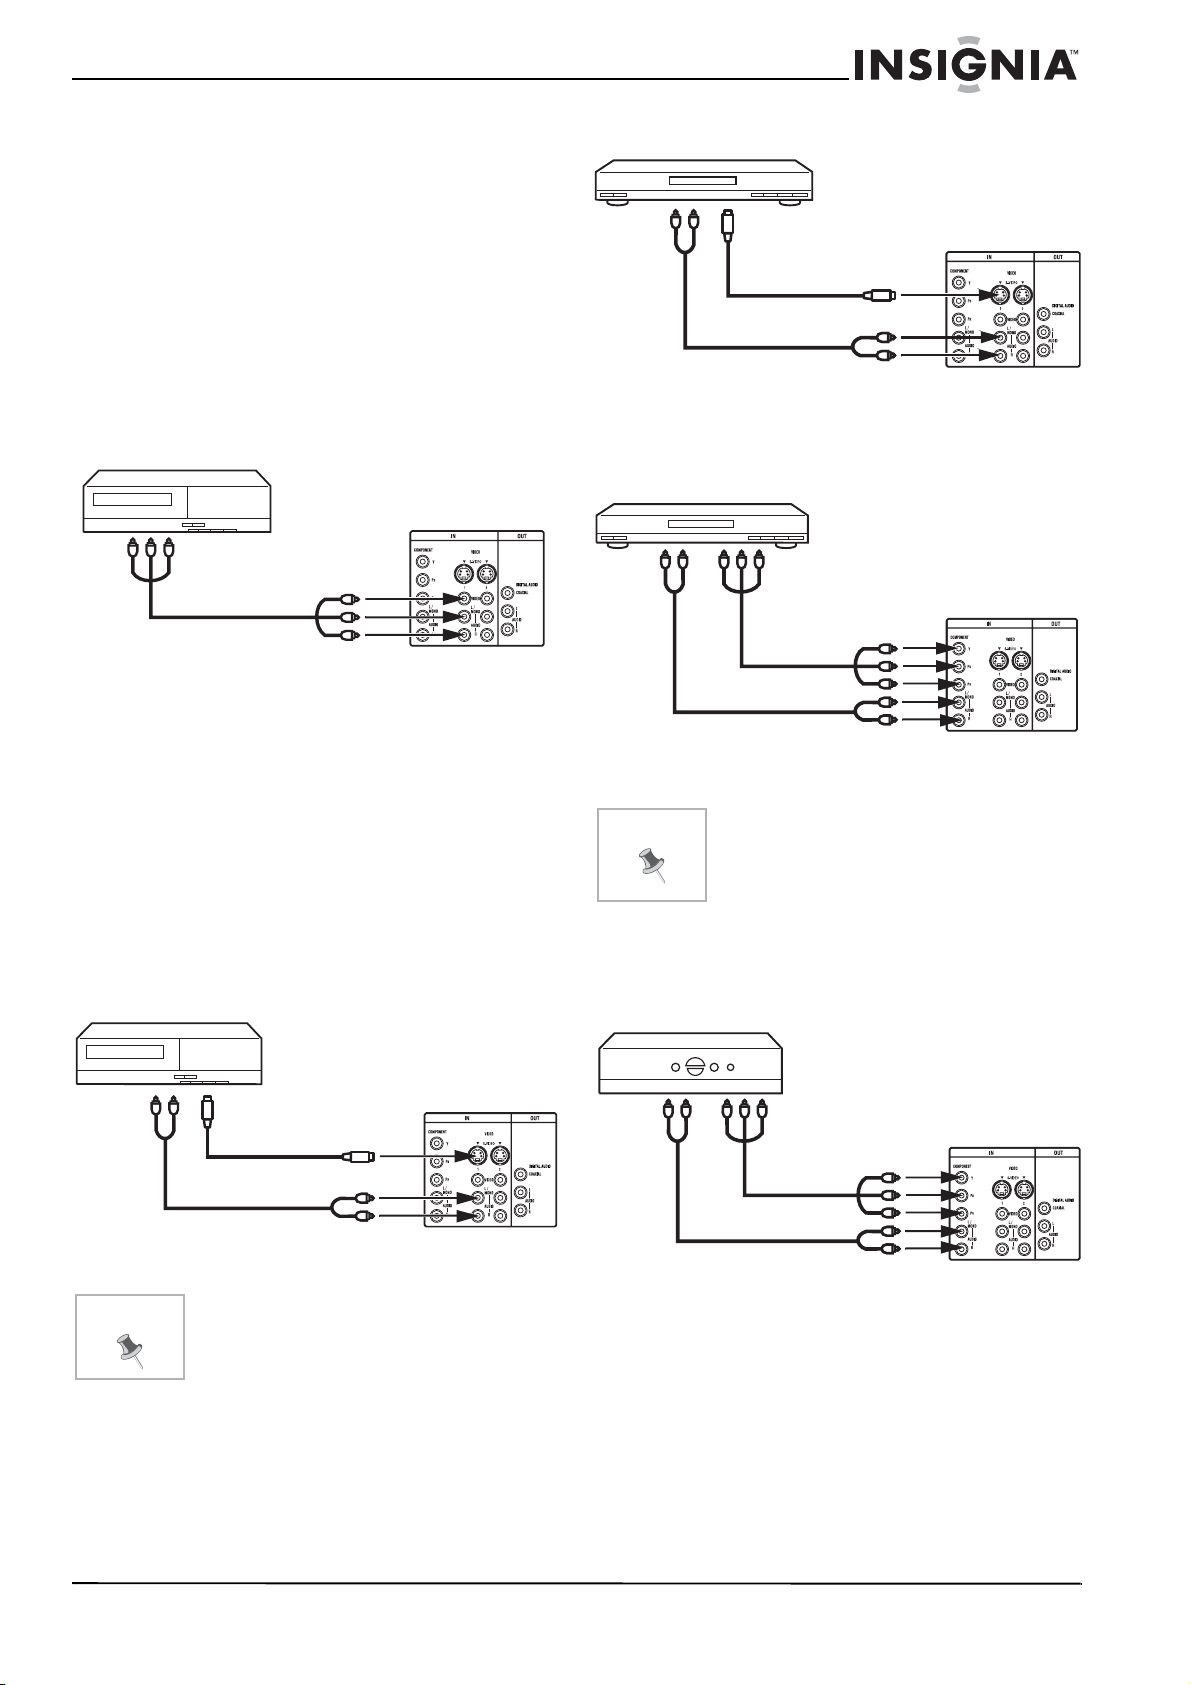
Connections to other equipment
The exact arrangement you use to connect
various video and audio components to your TV
is dependent on the model and features of each
component. Check the owner's manual provided
with each component for the location of video
and audio inputs and outputs.
The connection diagrams are offered as
suggestions. You may need to modify them to
accommodate your particular selection of
components. The diagrams are intended to
show component video and audio connections
only.
Connecting your TV to a VCR
To Audio/Video OUT
jacks
Audio/video cable (not
supplied)
To AUDIO/VIDEO 1 (or 2) IN
jacks
Connecting your TV to a VCR with an S-Video
cable
Use this method to connect your TV to video
devices with an S-Video output jack. This type of
connection provides better picture quality than
the audio/video cable connection.
Use a commercially available S-Video cable for
this connection.
If you connect a VCR with an S-Video cable to
the S-VIDEO IN jack on the back of your TV, you
must also connect the audio cords to the AUDIO
IN jacks on the back of your TV. The S-Video
cable only carries the video signal. The audio
signal is separate.
TV back
Connecting your TV to a DVD player or
satellite receiver with an S-Video cable
To Audio
OUT jacks
To S-Video OUT
jack
S-Video cable (not
supplied)
Audio cable (not
supplied)
To S-VIDEO I N 1
(or 2)
To AUDIO IN 1 (or 2)
jacks
Connecting your TV to a DVD player with
component video
To Audio
OUT
jacks
Note
YPBP
Video cable (not
supplied)
Audio cable (not
supplied)
To Component OUT
jacks
R
To Component IN jacks
To AUDIO IN jacks
The Component video inputs of your TV are for
use with devices which output 480i/1080i
interlaced signals and 480p/720p progressive
signals.
Connecting your TV t o a DTV receiver/set-to p
box
If you connect a DTV receiver/set-top box,
connect your TV to it by using a component
video cord.
TV back
TV back
T o Audi o OUT
jacks
Note
To S-Video OUT
jack
S-Video cable (not
supplied)
Audio cable (not
supplied)
To S-VIDEO I N
jack
To AUDIO IN 1 (or 2)
jacks
If you connect to the S-VIDEO and VIDEO jacks at
the same time, the S-Video co nnection has
priority.
www.insignia-products.com
TV back
To Audio
OUT
jacks
YPBP
Video cable (not
supplied)
Audio cable (not
supplied)
To Component OUT
jacks
R
To Component IN
jacks
To AUDIO IN jacks
Connecting an external audio system
This connection lets you use an audio amplifier
and external speakers, and adjust the audio
level using your TV’s remote control.
TV back
5
Page 8
To control the audio, turn on your TV and the
s
stereo amplifier, and turn off your TV’s built-in
speakers (see “Turning off the built-in speakers”
on page 22).
Manufactured under license from Dolby
Laboratories. “Dolby” and the double-D sy mbol
are trademarks of Dolby Laboratories.
Amplifier
TV back
Note
To Audio (L) input
jack
To Audio (L) output
jack
To Audio (R) output
jack
Audio cable (not
supplied)
To hear sound when using an external audio
To Audio (R) input
jack
amplifier, the volume of both your TV and the
amplifier must be set above 0 (zero).
For example, if the volume of you r TV is set to 0,
you will not be able to hear any sound, even if the
volume of the amplifier is at its highest level.
Using an AV amplifier with built-in digital
surround sound
If you are using an amplifier with built-in digital
surround sound as follows, you can enjoy
various audio systems including Dolby Digital
Surround audio that sounds just like the movie.
TV back
Note
This unit does not have DTS audio out. There will
be no sound output if connected to an AV
amplifier with a built-in DTS decoder.
Connecting your TV to a camcorder
T o play back from a camco rder , connect the camco rder
to your TV as shown.
Camcorder
To Audio/Video
OUT jacks
Audio/Video cable (not
supplied)
Front of TV
Connecting your TV to a Game
You can also use your TV as a display device for
many video games. However, due to the wide
variety of signals generated by these devices
and subsequent hook-up variations required,
they have not all been included in the suggested
connection diagrams. You need to consult each
component's owner's manual for additional
information.
Front of TV
TV GAME
Coaxial digital cable (not
upplied)
To Coaxial Digital Audio
IN jack
AV amplifier with built-in
digital surround decoder
Caution
To Coaxial Digital Audio OUT jack
TV
When you make the above connection, do not set
To Audio/Video OUT
jack
Audio/Video cable (not
supplied)
DOLBY DIGITAL to DOLBY DIGITAL“ON” on the
AV Amplifier. If you do, the speakers will emit a
loud noise, possibly causing damage to your
hearing or to the speakers.
6
www.insignia-products.com
Page 9

Remote control batteries
The remote control requires two AA batteries
(not included). We recommend that you replace
the batteries on a yearly basis, or when the
operation of the remote control becomes
intermittent or unsatisfactory. Replace the
original batteries with new AA batteries. Do not
mix old and new batteries or different types.
To replace the batteries:
1 Press the lock tab of the battery holder and
open the battery compartment.
Getting to know your TV
Controls and connections
Front panel
2 Place two AA batteries in the battery holder,
matching the polarity indicated in the battery
compartment.
3 Close the battery cover.
Caution
• Use only the size and type of batteries
specified.
• Make sure that you follow the correct
polarity as indicated in the battery
compartment. Reversed batteries may
damage the device.
• Do not mix differ ent types of batte ries
together (for example, Alkaline an d
Carbon-Zinc) or old batteries with fresh
ones.
• If the remote is not to be used for a long
period of time, remove the batteries to
prevent damage or injury from possible
battery leakag e.
• Do not try to recharge batteries not
intended to be recharged. They can
overheat and rupture.
Item
1 POWER button Press to turn your TV on or off.
2 Infrared sensor
3 Power indicator Lights when TV is tur ned on.
4CHANNEL
5 VOLUME
6S-Video input
7 AUDIO L/R and
Control/
connection
window
or
buttons
or
buttons
jack
VIDEO 3 input
jacks
Function
Receives the remote control signal
from the remote control unit.
Press to change the channels up or
down or to move up or do w n
through menu selections.
Press to adjust the volume up or
down, or to change settings or
move to the next menu screen.
Connect an S-Video cable from an
external source, such as a DVD
player.
Connect the audio out put cables
(left and right, respectively) from
an external source, such as a VCR,
to the AUDIO jacks. Connect a
video cable from an external
source, such as a VCR.
www.insignia-products.com
7
Page 10

Back panel Remote control
1
2
9
8
3
4
5
6
8
9
10
11
12
13
14
15
Item
1 RF antenna in
2 COMPONENT IN
3 AUDIO(L/R)
4 AUDIO(L/R)
5 Audio right inp ut
6 Coaxial digital
7 S-VIDEO 1 input
8 S-VIDEO 2 input
9 AC power cord Insert the AC plug into a standard
Control/
connection
jack
jacks
VIDEO 1 input
jacks
VIDEO 2 input
jacks
jack
audio output
jack
jack
jack
Function
Connect the antenna cab le to this
jack.
Connect the component audio and
video cables from an exte rnal
source, such as a DVD player, to
these jacks.
Connect audio (left and right) and a
composite video cabl e from an
external source, such as a VCR, to
these jacks.
Connect audio (left and right) and a
composite video cabl e from an
external source, such as a VCR, to
these jacks.
Connect the righ t audio output
cable from an external source,
such as a VCR, to this jack.
Connect the digital audio coaxial
cable from this jack to an external
amplifier, such as a Dolby Digital
decoder.
Connect an S-Video cable from an
external source, such as a DVD
player, to these jacks.
Connect an S-Video cable from an
external source, such as a DVD
player, to these jacks.
120V 60Hz polarized AC outlet.
7
16
Item Button Function
1 POWER button Press to turn your TV on or off.
2 SLEEP button Sets the sleep timer to
3 Channel number
buttons
4 RESET button While in Adjustment mode, press
5 ENTER button Press to ente r or to select
6 VOL (Volume) +
or - buttons
automatically turn off your TV at a
preset time. For more information,
see “To set the sleep timer:” on
page 10.
Press to enter a channel numbe r
directly. For more information, see
“To operate your TV:” on page 9 .
to reset the menu screen, picture,
and sound adjustments to t heir
factory preset pos itions.
information for menu screen
operations.
Press to adjust the volume up or
down, or to change settings or
move to the next menu screen. For
more information, see “To operate
your TV:” on page 9.
7 MENU button Press to access the on-screen
8
8
www.insignia-products.com
FAV or
buttons
menu.
Press to select your favorite
channels. For more information,
see “Setting your favorite
channels” on page 11.
Page 11
Item Button Function
9 MUTE button Toggles the sound off and on. For
more information, see “To operate
your TV:” on page 9.
10 DISPLAY button In analog mode—Press to display
the channel number on the scre en.
In digital mode—Press to display
channel information on t he screen.
For more information, see “To
display current information on the
screen:” on page 9.
4 To change the channel up or down, press the
CH or . Your TV stops at the next
channel programmed into memory. For more
information, see “Memorizing channels” on
page 10.
- OR Press the channel number buttons
the channel.
to select
11 PICTURE SIZE
button
12 INPUT SELECT
button
13 QUICK VIEW
button
14 CLOSED
CAPTION button
15 CHANNEL
or buttons
16 EXIT button Press to exit from the on-scre e n
Press to display the PICTURE SIZE
menu.
Press to select either TV or external
input. For more information, see
“Selecting the video input source”
on page 9.
Press to return to the previously
viewed channel. For more
information, see “To operate your
TV:” on page 9.
Press to display the CLOSED
CAPTION menu.
Press to change the channels up or
down or to move up or do wn
through menu selections. For more
information, see “To operate your
TV:” on page 9.
menu.
Using your TV
Basic operation
To operate your TV:
1 Press POWER on your TV or the remote
control to turn on your TV.
2 Set your TV/CABLE menu option to the
appropriate position (for more information,
see “To select TV or Cable mode:” on
page 10).
3 A dju st the v o lume le v e l by pressi ng VOL + or
VOL – .
ANT
ABCD
12
To select analog channels:
• 1-9 – Press 0 twice, then 1-9 as needed.
For example, to select
2
.
channel 2, press 0 0
• 10-99 – Press 0, then the remaining 2
digits. For example, to select channel 12,
press 0 1 2.
• 100-125 – Press the 3 digits in order. For
example, to select channel 120, press
120.
To select digital channels:
• Press the first 3 digits, then press the –
button, followed by the remaining 3 digits.
For example, to select channel 015-001,
press 0 1 5 – 0 0 1.
Note
• If a channel with no broadcast is selected,
the sound is automatically muted.
• If a station being viewed stops
broadcasting, your TV automatically shuts
itself off after 15 minutes.
5 Press QUICK VIEW to view the last channel
selected, then press QUICK VIEW again to
return to the initial channel.
Selecting the video input source
Press INPUT SELECT to view a signal from
another device connected to your TV, such as a
VCR or DVD player. You can select ANT,
VIDEO1, VIDEO2, VIDEO3 (on the front panel),
or COMPONENT depending on which inp ut
jacks you used to connect your devices.
The volume level is indicated on the screen
by green bars. As the volume level increases,
the number of bars increases. If the volume
decreases, the number of green bars also
decreases.
Press MUTE to switch off the sound. Press
MUTE again, or VOL + or VOL – to turn on
the sound.
www.insignia-products.com
SOURCE SELECTION
0. ANT
1. VIDEO1
2. VIDEO2
3. VIDEO3
4. COMPONENT
/0-4 : SELECT
Pressing INPUT SELECT on the remote control
displays the current signal source (press INPUT
SELECT again or 0-4 to change).
To display current information on the screen:
1 Press DISPLAY on the remote control.
9
Page 12
When your TV receives a digital signal, the
digital information appears.
51-3
Moon Star
CITYHD
Remaining Time 0:20 TV-Y7
No program information is available.
SUN Jan 01 12:00 PM
English
HD CC
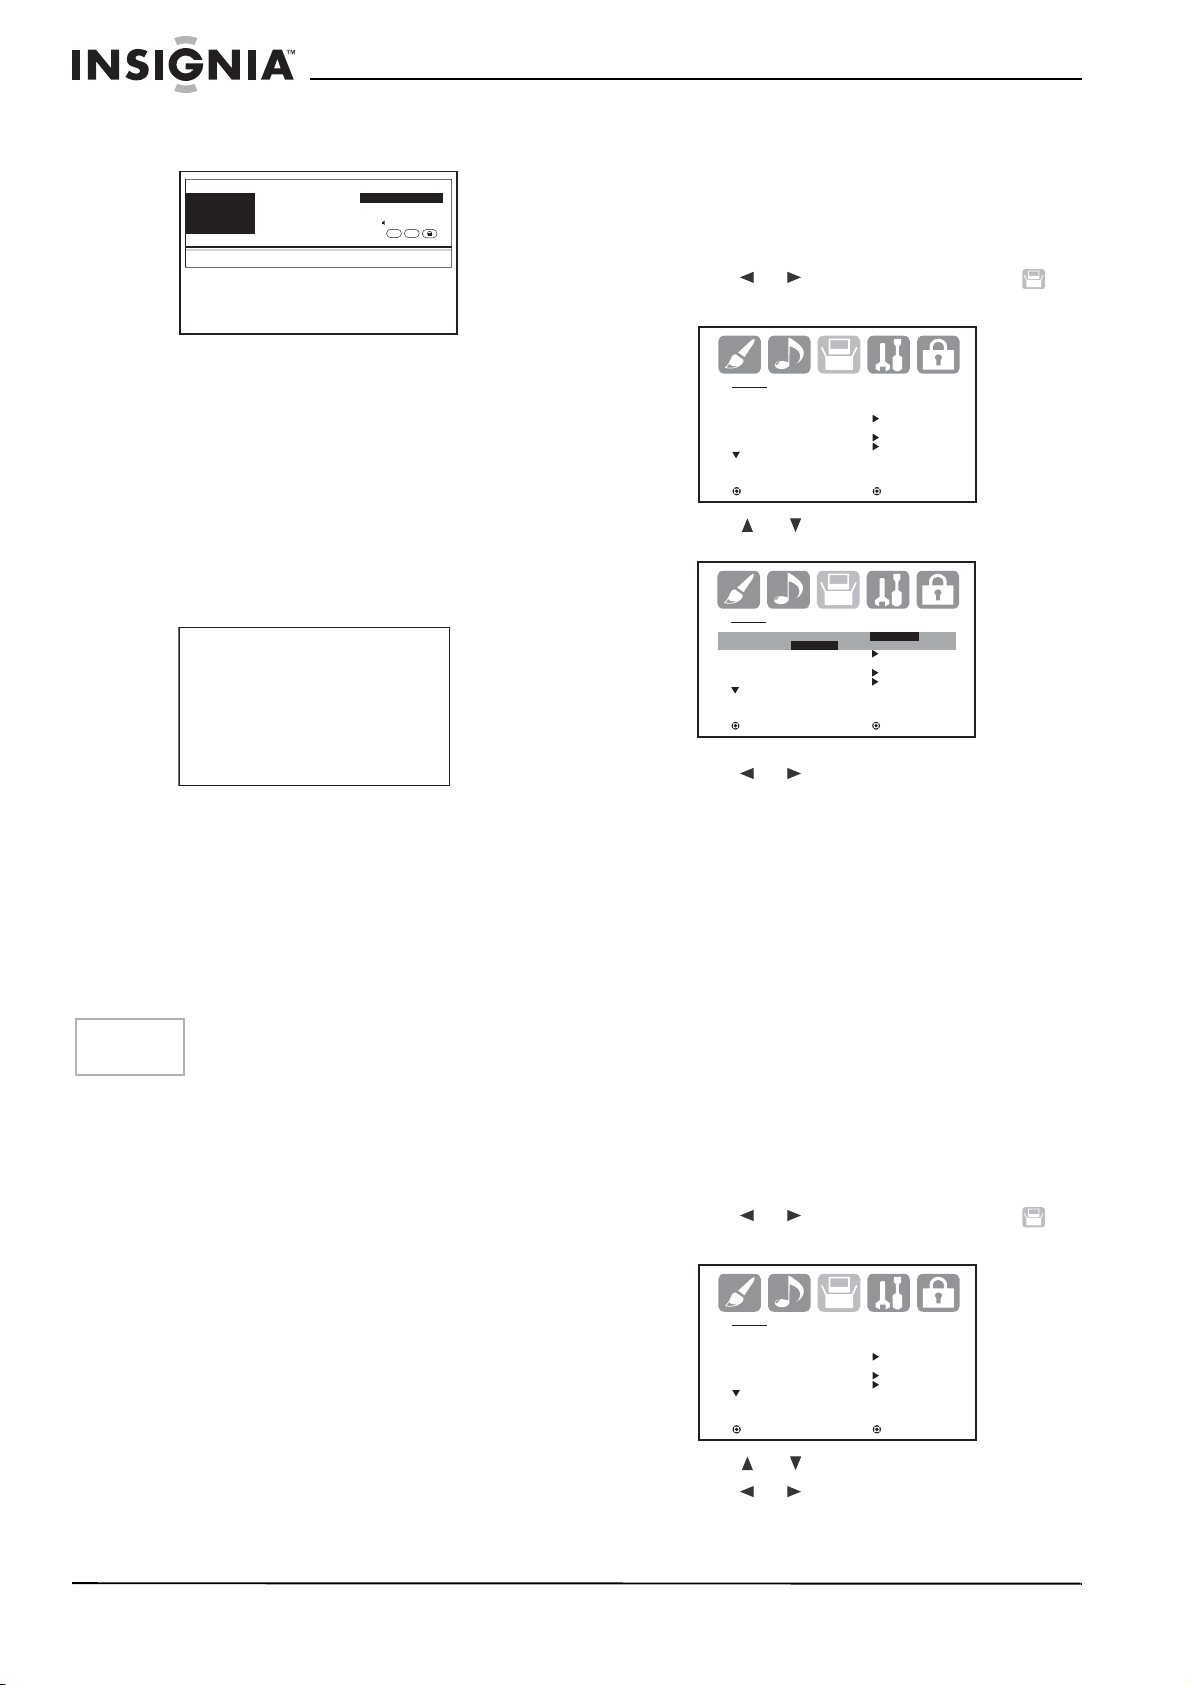
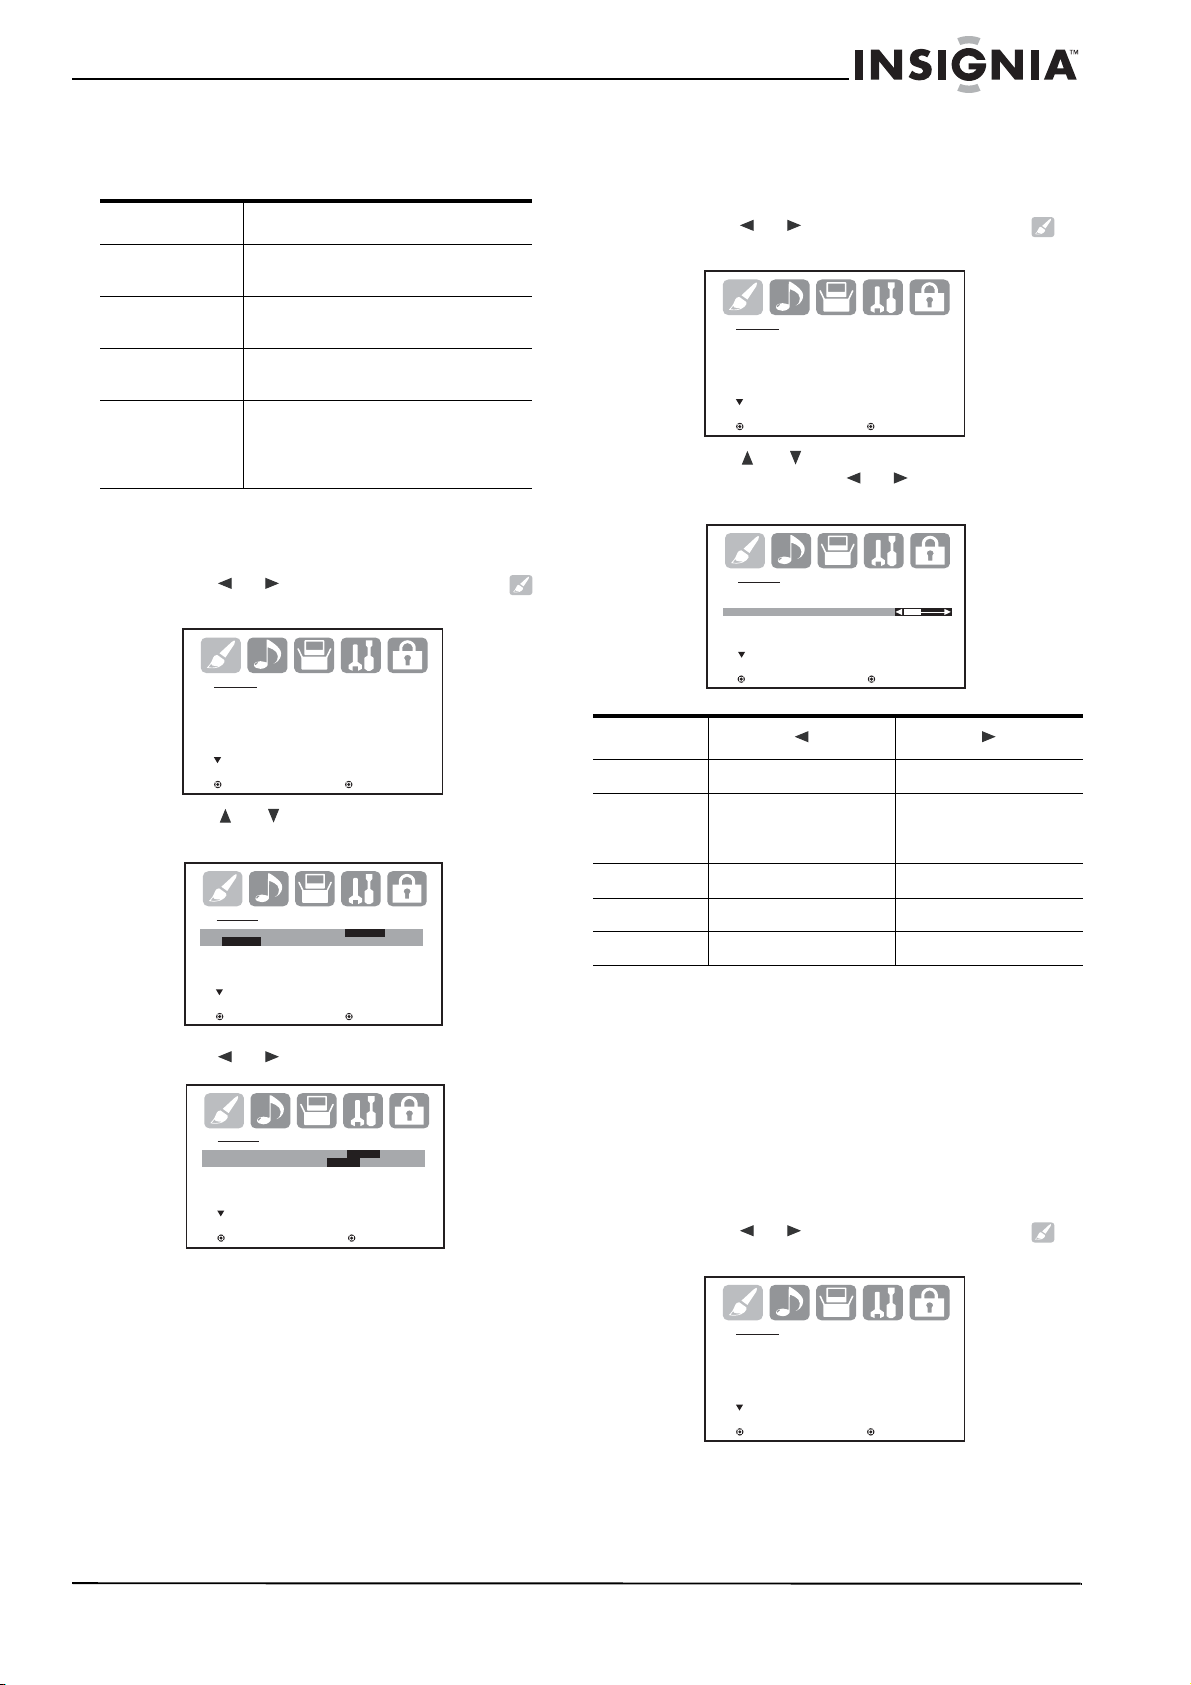
Selecting the language
You can select English, Spanish, or French for
the menu language displayed on the screen.
To select your language:
1 Press MENU on the remote control. The
menu screen opens.
2 Press or to select the setup icon .
The SETUP menu screen opens.
• Broadcast program name
• Station name
• Remaining time
• Audio language
• Program name
• V-CHIP RATING
• HD or SD mark
• Closed Caption mark
•V-Chip mark
2 Press DISPLAY again, the anal og
information appears.
STEREO
SAP
TV-PG L V
ON TIMER 8:30AM
OFF TIMER 11:30PM
SLEEP TIMER 2h00m
ANT
FULL CABLE
CLOCK 12:00AM SUN
ABCD
7
•Clock
• Channel number or VIDEO mode
selected
• Channel label (if preset)
• Stereo or SAP (second audio program)
audio status
• Content rating
• On timer, Off timer, Sleep time (if preset)
•Picture size
Note
When your TV receives an anal og signal,
DISPLAY shows only analog information.
3 Press DISPLAY again to clear the display.
To set the sleep timer:
1 To set your TV to turn off after a preset
amount of time, press SLEEP on the remote
control. The clock adds 10 minutes to the
interval each time you press the SLEEP
button.
After the sleep time is programmed, the
display appears briefly every ten minutes to
remind you that the sleep timer is operating.
2 To confirm the sleep timer setting, press
SLEEP and the remaining time is displayed
for a few seconds.
3 To cancel the sleep timer, press SLEEP
repeatedly until the display turns to 0h00m.
Initial settings
This section describes the initial settings you
must make when you turn on your TV for the first
time.
SETUP
LANGUAGE ENGLISH
CLOCK SET
TV/CABLE CABLE
AUTO CH MEMORY
ADD/DELETE
:SELECT :ADJUST
3 Press or to select LANGUAGE.
SETUP
LANGUAGE ENGLISH
ENGLISH / FRANÇAIS / ESPAÑOL
CLOCK SET
TV/CABLE CABLE
AUTO C H ME MORY
ADD/DELETE
:SELECT :ADJUST
4 Press or to select the language you
want.
5 Press EXIT on the remote to return to normal
viewing.
Memorizing channels
Your TV is equipped with a channel memory
feature which allows channels to skip up or down
to the next channel set into memory, skipping
over unwanted channels. Before selecting
channels, they must be programmed into your
TV’s memory. Your TV can receive up to 250
VHF/UHF channels and 500 cable TV channels.
To use your TV with an antenna, set the TV/
CABLE menu option to the TV mode. When
shipped from the factory, this menu option is in
the CABLE mode.
To select TV or Cable mode:
1 Press MENU on the remote control. The
menu screen opens.
2 Press or to select the setup icon .
The SETUP menu screen opens.
SETUP
LANGUAGE ENGLISH
CLOCK SET
TV/CABLE CABLE
AUTO CH MEMORY
ADD/DELETE
:SELECT :ADJUST
3 Press or to select TV/CABLE. 4 Press or to select TV or CABLE.
• TV – VHF/UHF channels
• CABLE – Cable TV channels
10
www.insignia-products.com
Page 13

5 Press EXIT on the remote to return to normal
viewing.
To memorize the channels:
1 Press MENU on the remote control. The
menu screen opens.
2 Press or to select the setup icon .
The SETUP menu screen opens.
SETUP
LANGUAGE ENGLISH
CLOCK SET
TV/CABLE CABLE
AUTO CH MEMORY
ADD/DELETE
:SELECT :ADJUST
3 Press or to select AUTO CH MEMORY.
To add or delete channels:
1 Press MENU on the remote control. The
menu screen opens.
2 Press or to select the setup icon .
The SETUP menu screen opens.
SETUP
LANGUAGE ENGLISH
CLOCK SET
TV/CABLE CABLE
AUTO CH MEMORY
ADD/DELETE
:SELECT :ADJUST
3 Press or to select ADD/DELETE, then
press . the ADD/DELETE menu opens.
4 Press or to select the channel to add or
delete, then press or to select ADD or
DELETE, as appropriate.
SETUP
LANGUAGE ENGLISH
CLOCK SET
TV/CABLE CABLE
AUTO CH MEMORY
ADD/DELETE
:SELECT :ADJUST
4 Press or and your TV begins to
memorize the available channels in your
area. This may take several minutes. Your TV
returns to normal viewing when the process
is complete.
AUTO CH MEMORY
EXIT : CANCEL
PROGRAMMING NOW
PLEASE WAIT
Note
New channels may become available at any time,
so we recommend that you go throug h the
channel memorization procedure periodically to
update your channel listing.
To add a digital channel:
1 Press the number buttons (0-9) to select the
channel you want to add to the channel list.
2 Press MENU on the remote control. The
menu screen opens.
3 Press or to select the setup icon ,
then press or to select ADD/DELETE.
4 Press . The ADD/DELETE menu opens.
5 Press or to select ADDING CHANNEL,
then press . The selected channel is added
to the list.
6 Press EXIT on the remote control to return to
normal viewing .
7 Repeat the abov e steps for each channel you
want to add.
Note
To remove all channels from memory, select
CLEAR ALL from the menu, then press or
to complete the action.
5 Repeat step 4 for the other channels you
want to add or delete, then press ENTER.
6 Press EXIT on the remote to return to normal
viewing.
Setting your favorite channels
You choose as many as 12 channels as your
favorite channels.
To set your favorite channels:
1 Select a channel you want to include in your
favorite channel list.
2 Press
MENU on the remote control. The
menu screen opens.
3 Press or to select the Option icon .
The OPTION menu screen opens.
OPTION
ON/OFF TIMER OFF
FAVORITE CH
CH LABEL
VIDEO LABEL
:SELECT :ADJUST
4 Press or to select FAVORITE CH, then
press or . The FAVORITE CH menu
opens.
FAVORITE CH:CH 23-100
SET/ CLEAR TV CABLE
123-456
123-456
OPTION MENU
:SELECT :ADJUST
CLEAR:ENTER END :EXIT
15-001
15-001
13
23-100
13
23-100
0
0
0
0
6-001
6-001
0
0
0
0
0
0
0
0
0
0
5 Press or to select SET, then press
ENTER.
6 Press EXIT on the remote to return to normal
viewing.
www.insignia-products.com
11
Page 14

7 Repeat steps 1 through 5 to set as many as
11 additional favorite channels.
3 Press or to select NEW PASSWORD.
The NEW PASSWORD screen opens.
Note
To watch your favorite channel, press FAV or
on the remote control to select the
channel. FAV or does not work until
you have programmed your favorite
channels into m emory.
To delete a channel from your favorite
channels list:
1 Select a channel to delete from your favorite
channels list.
2 Press MENU on the remote control. The
menu screen opens.
3 Press or to select the Option icon .
The OPTION menu screen opens.
OPTION
ON/OFF TIMER OFF
FAVORITE CH
CH LABEL
VIDEO LABEL
:SELECT :ADJUST
4 Press or to select FAVORITE CH, then
press or and the FAVORITE CH menu
opens.
5 Press or to select CLEAR, then press
ENTER.
6 Press EXIT on the remote to return to normal
viewing.
General settings and controls
Making the V-Chip settings
You can set the viewing limitations on your TV to
restrict children from viewing or hearing violent
scenes or pictures that you may choose to
exclude. The restriction applies to TV ratings
and movie ratings, if this data is transmitted. You
may set this restriction separately. To use the
V-Chip function, you must first register a
password.
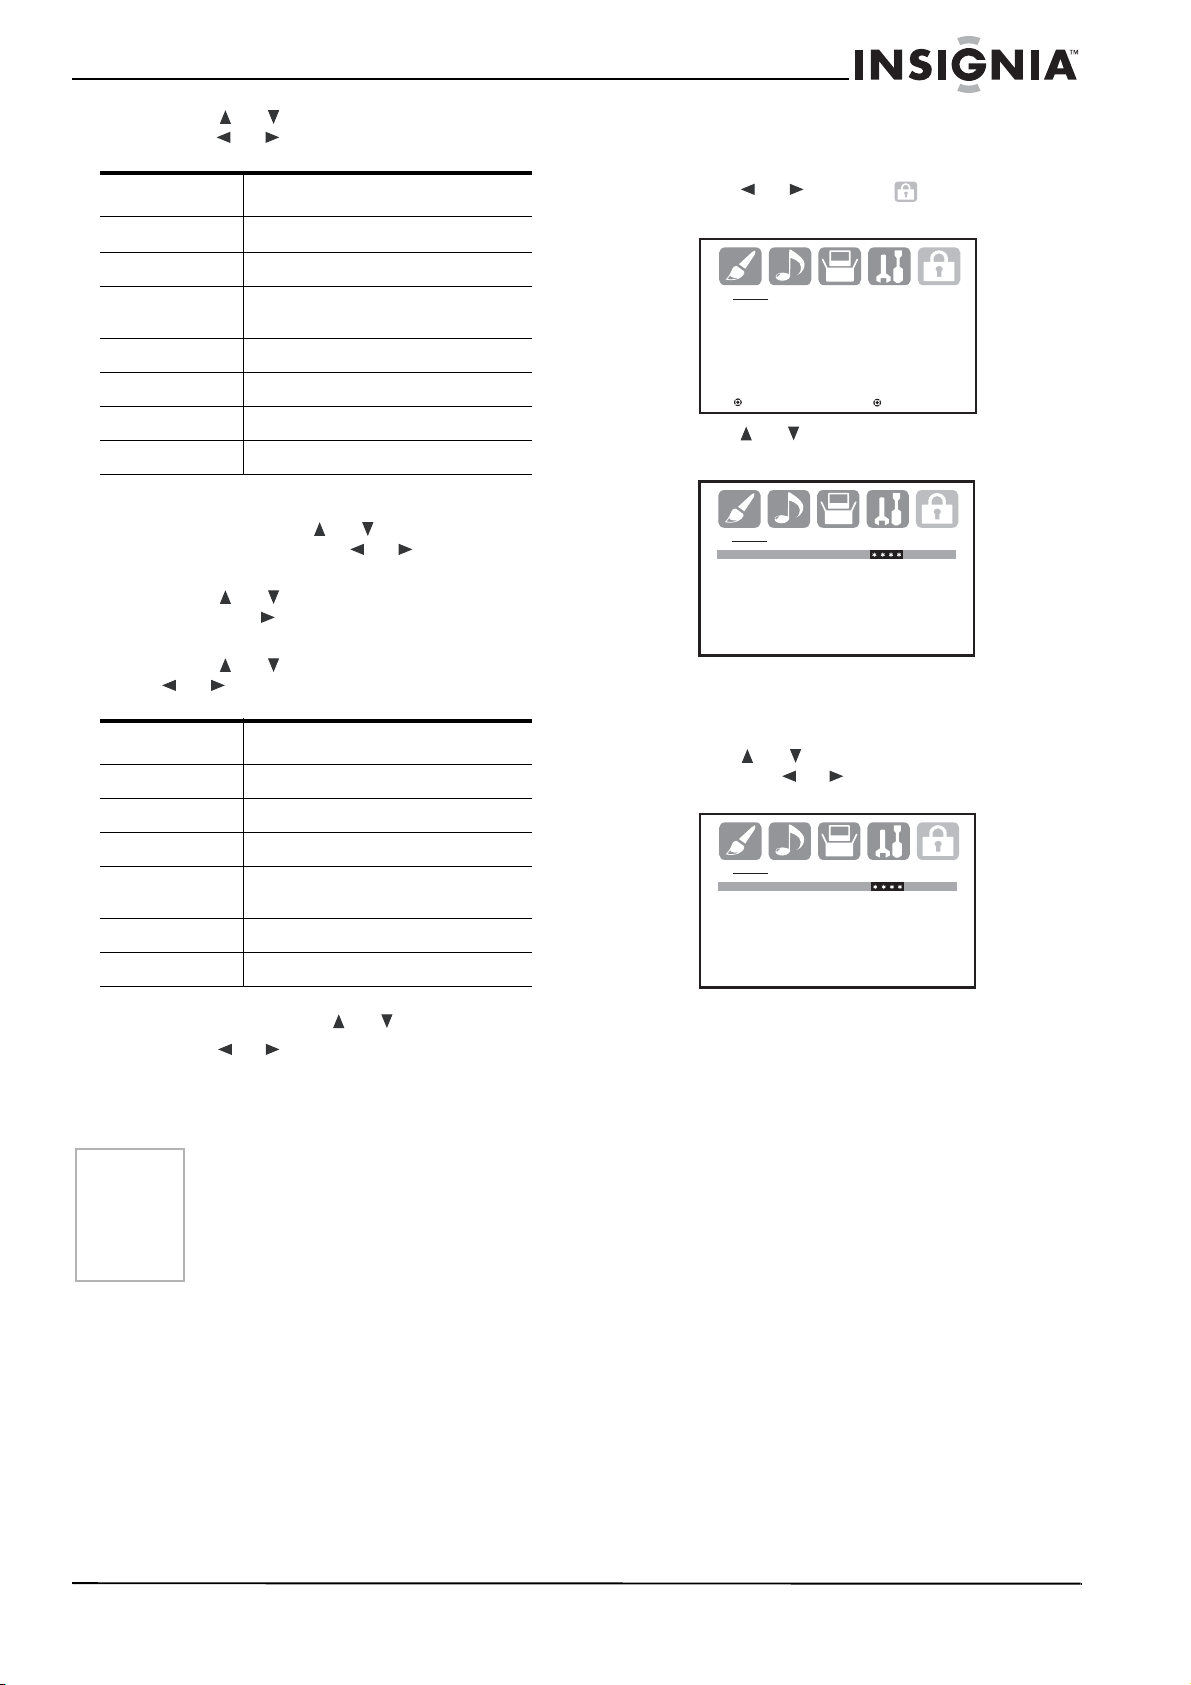
To register a password:
1 Press MENU on the remote control or your
TV. The menu screen opens.
2 Press or to select (LOCKS). The
LOCKS menu opens.
LOCKS
V-CHIP SET
FRONT PANEL LOCK
NEW PASSWORD
:SELECT :ADJUST
LOCKS
NEW PASSWORD
[0-9] : SELECT ENTER : SET
EXIT : END
4 Enter a 4-d igit password with the number
keys on the remote control, then press
ENTER. The CONFIRM PASSW ORD screen
opens.
LOCKS
CONFIRM PASSWORD
[0-9] : SELECT ENTER : SET
EXIT : END
5 Enter the same password, then press
ENTER. The password is registered and the
V-Chip menu opens.
Notes
To avoid forgetting the password, write it down
and keep it in a safe place.
If you forget the password:
1. Set the volu me t o minimum.
2. Press and hold the volume down button (on
the TV) and the channel button 0 (on the remote
control) for more than two seconds.
To set the V-Chip:
1 Press MENU on the remote control or your
TV. The menu screen opens.
2 Press or to select (LOCKS). The
LOCKS menu opens.
LOCKS
V-CHIP SET
FRONT PANEL LOCK
NEW PASSWORD
:SELECT :ADJUST
3 Press or to enter the password entering
mode. The LOCKS password screen opens.
4 Enter your 4-digit password with the numb er
keys on the remote control and press
ENTER. The LOCKS setup menu opens.
5 Press or to select V-CHIP SET, then
press . The SET menu opens.
12
www.insignia-products.com
Page 15
6 Press or to select TV RATING, then
press or to display the rating you want.
Rating Explanation
OFF
TV-Y Appropriate for all children
TV-Y7 Appropriate for children seven and
TV-G General audience
TV RATING is not set.
older
To change the password:
1 Press MENU on the remote control or your
TV. The menu screen opens.
2 Press or to select (LOCKS). The
LOCKS menu opens.
LOCKS
V-CHIP SET
FRONT PANEL LOCK
NEW PASSWORD
TV-PG Parental guidance suggested
TV-14 Unsuitable for chil dr e n und er 14
TV-MA Mature audience only
When you select TV-Y7, TV-PG, TV-14, or
TV-MA, press -/DISPLAY for a description of
the rating. Press or to select the rating
you want, then press or to select ON or
OFF.
7 Press or to select MOVIE RATING,
then press . The RATING SET menu
opens.
8 Press or to select a rating, then press
or to select ON or OFF.
Rating Explanation
G General audiences
PG Parental guidance suggested
PG-13 Unsuitable for c hil dr e n und er 13
R Restricted: Children under 17 require
NC-17 No one under 17 admitted
X Mature audiences only
parent or adult guardian
9 Press MENU twice to return to the LOCKS
screen, then press or to select V-CHIP.
10 Press or to select ON. Your settings are
saved in memory.
11 Press EXIT on the remote to return to normal
viewing.
Notes
The V-Chip function is activated only on
programs and input sources that have the rating
signal.
The V-CHIP SET (DTV) option will be available for
selection whenever a new rating system for U.S .
digital broadcasting can be received.
To use your TV after your TV is protected:
• When you receive a program that is blocked
by the V-Chip, press MUTE and enter the
password, then press ENTER to view the
program.
When the password is entered correctly, the
protection is temporarily overridden. If your
TV is turned off, or the channel is changed,
the V- Chip restriction is reactivated.
:SELECT :ADJUST
3 Press or to enter the password entering
mode. The LOCKS password screen opens.
LOCKS
PASSWORD
[0-9] : SELECT ENTER : SET
EXIT : END
4 Enter your 4-digit password with the numb er
keys on the remote control and press
ENTER. The LOCKS setup menu opens.
5 Press or to select NEW PASSWORD,
then press or .
LOCKS
NEW PASSWORD
[0-9] : SELECT ENTER : SET
EXIT : END
6 Enter a new 4-digit password with the
number keys on the remote control, then
press ENTER. The CONFIRM PASSWORD
screen opens.
7 Enter the same password, then press
ENTER. The password is changed.
8 Press EXIT on the remote to return to normal
viewing.
Setting the front panel lock
You can lock the front panel buttons to prevent
your settings from being changed accidentally.
When the front panel lock is ON, all control
buttons on the TV front panel (except POWER)
will not operate.
To lock or unlock the front panel:
1 Press MENU on the remote control or your
TV. The menu screen opens.
www.insignia-products.com
13
Page 16

2 Press or to select (LOCKS). The
LOCKS menu opens.
LOCKS
V-CHIP SET
FRONT PANEL LOCK
NEW PASSWORD
:SELECT :ADJUST
3 Press or to enter the password entering
mode. The LOCKS password screen opens.
LOCKS
PASSWORD
[0-9] : SELECT ENTER : SET
EXIT : END
4 Enter your 4-digit password with the number
keys on the remote control and press
ENTER. The LOCKS setup menu opens.
5 Press or to select FRONT PANEL
LOCK, then press or to select ON or
OFF.
When the front panel lock is on, the message
“NOT AVAILABLE” appears on the screen
when a button on the front panel is pushed.
6 Press EXIT on the remote to return to normal
viewing.
Labeling channels
Channel labels appear over the channel number
display each time you turn on your TV, select a
channel, or press DISPLAY.
You can choose any four characters to identify a
channel.
4 Press or to select CH LABEL, then
press or and the CH LABEL menu
opens.
CH LABEL : CH 23
SET/ CLEAR
LABEL ––––
OPTION MENU
:SELECT :ADJUST
ENTER : SET EXIT : END
5 Press or to select SET/CLEAR, then
press or to change the setting to SET.
6 Press ENTER to select LABEL, then press
or repeatedly until the character you
want is shown.
7 Press ENTER to select the character. 8 Repeat the process until all the characters
you want have been selected.
9 Press ENTER again when you have finished
inputting the label.
10 Press EXIT on the remote to return to normal
viewing.
11 Repeat steps 1 through 9 to label other
channels.
Notes
To return from the CH LABEL menu to the
OPTION menu, se lect OPTION MENU, then press
or .
To erase channel labels:
1 Select the channel from which you want to
remove the label.
2 Press MENU on the remote control. The
menu screen opens.
3 Press or to select the Option icon .
The OPTION menu screen opens.
To create channel labels:
1 Select the channel you want to label. 2 Press MENU on the remote control. The
menu screen opens.
3 Press or to select the Option icon .
The OPTION menu screen opens.
OPTION
ON/OFF TIMER OFF
FAVORITE CH
CH LABEL
VIDEO LABEL
:SELECT :ADJUST
14
4 Press or to select CH LABEL, then
press or and the CH LABEL menu
opens.
5 Press or to select SET/CLEAR, then
press or to change the setting to
CLEAR
6 Press ENTER to confirm the change.
www.insignia-products.com
OPTION
ON/OFF TIMER OFF
FAVORITE CH
CH LABEL
VIDEO LABEL
:SELECT :ADJUST
CH LABEL : CH 23
SET/ CLEAR
LABEL ––––
OPTION MENU
:SELECT :ADJUST
ENTER : SET EXIT : END
Page 17

7 Press EXIT on the remote to return to normal
viewing.
8 Repeat steps 1 through 6 to remove the
labels other channels.
Labeling the video input source
The video label feature allows you to label each
input source for your TV.
To label the video input source:
1 Press MENU on the remote control. The
menu screen opens.
2 Press or to select the Option icon .
The OPTION menu screen opens.
OPTION
ON/OFF TIMER OFF
FAVORITE CH
CH LABEL
VIDEO LABEL
:SELECT :ADJUST
3 Press or to select VIDEO LABEL, then
press or and the VIDEO LABEL menu
opens.
To set the clock:
1 Press MENU on the remote control. The
menu screen opens.
2 Press or to select the setup icon .
The SETUP menu screen opens.
SETUP
LANGUAGE ENGLISH
CLOCK SET
TV/CABLE CABLE
AUTO CH MEMORY
ADD/DELETE
:SELECT :ADJUST
3 Press or to select CLOCK SET, then
press . the CLOCK SET menu opens.
SETUP
LANGUAGE ENGLISH
CLOCK SET
TV/CABLE CABLE
AUTO CH MEMORY
ADD/DELETE
:SELECT :ADJUST
4 Press or to set the MONTH, then press
.
VIDEO LABLE
1. VIDEO1 - /VCR/DVD/DTV
2. VIDEO2 - SAT/CBL
3. VIDEO3 -
4. COMPONENT -
OPTION MENU
:SELECT :ADJUST
4 Press or to select the video source you
want to label.
VIDEO LABEL
1. VIDEO1 -
2. VIDEO2 -
3. VIDEO3 -
4. COMPONENT - / VCR/ DVD/ DTV
OPTION MENU
:SELECT :ADJUST
SAT/CBL
5 Press or to select the label you want.
VIDEO LABLE
1. VIDEO1 -
2. VIDEO2 -
3. VIDEO3 -
4. COMPONENT - /VCR/ DVD/DTV
OPTION MENU
SAT/CBL
CLOCK SET
MONTH 1
DAY 1 (SUN)
YEAR 2006
TIME 12:00AM
:SELECT :ADJUST
EXIT:END
5 Set the DAY, YEAR, and TIMER as you set
the MONTH in step 3.
Note
• After setting the clock, the dat e and time
start working automatically.
• After a power outage or disconnection, the
clock settings are lost and need to be
reset.
6 Press EXIT on the remote to return to normal
viewing.
Setting the ON and OFF TIMERS
This feature allows you to have your TV
automatically turn on and off at a predetermined
time. If you program the ON/OFF TIMER to
DAILY, your TV turns on and off everyday at the
same time to the same channel.
:SELECT :ADJUST
6 Press EXIT on the remote to return to normal
viewing.
Setting the clock
You must set the clock correctly for the ON/OFF
TIMER to activate at the correct time. For more
information, see “Setting the ON and OFF
TIMERS” on page 15.
www.insignia-products.com
15
Page 18
To set the ON TIM E R :
1 Press MENU on the remote control. The
menu screen opens.
2 Press or to select the Option icon .
The OPTION menu screen opens.
To set the OFF TIMER:
1 Press MENU on the remote control. The
menu screen opens.
2 Press or to select the Option icon .
The OPTION menu screen opens.
OPTION
ON/ OFF TIMER ON/ OFF/SET
FAVORITE CH
CH LABEL
VIDEO LABEL
:SELECT :ADJUST
3 Press or to select ON/OFF TIMER. 4 Press or to select SET, then press
ENTER. The ON/OFF TIMER menu opens.
ON/ OFF TIMER
ON TIMER
12:00AM CH 1
OFF TIMER
12:00AM
OPTION MENU
: SELECT : ADJUST
EXIT : END
CLEAR
CLEAR
5 Press or to select ON TIMER, then
press to enter the setting for the timer.
6 Press or to set the hour you want, then
press .
Note whether you are setting the hour to AM
or PM.
7 Set the minutes and start-up channel like you
set the hour in step 6.
8 Press or to select DAILY, then press
ENTER.
9 Press EXIT on the remote to return to normal
viewing.
Notes
• Your TV automatically turns off
approximately 1 hour later after the ON
TIMER turns on if no OFF TI MER h as b een
set. To continue watching your TV, press
any button to cancel the one hour
automatic shut off.
• If the station being viewed stops
broadcasting, your TV automatically shuts
itself off after 15 minutes.
• To cancel ON TIMER, select CLEAR in step
8. Press EXIT to return to normal screen.
• If the power is disconnected or fails, the
timer setti ngs are lost.
• T o return from the ON/OFF TIMER menu to
the OPTION menu, select OPTION MENU
then press or .
OPTION
ON/ OFF TIMER ON/ OFF/SET
FAVORITE CH
CH LABEL
VIDEO LABEL
:SELECT :ADJUST
3 Press or to select ON/OFF TIMER. 4 Press or to select SET, then press
ENTER. The ON/OFF TIMER menu opens.
ON/ OFF TIMER
ON TIMER
12:00AM CH 1
OFF TIMER
12:00AM
OPTION MENU
: SELECT : ADJUST
EXIT : END
CLEAR
CLEAR
5 Press or to select OFF TIMER, then
press to enter the setting for the timer.
6 Press or to set the hour you want, then
press .
Note whether you are setting the hour to AM
or PM.
7 Set the minutes and start-up channel like you
set the hour in step 6.
8 Press or to select DAILY, then press
ENTER.
Note
To cancel the OFF TIMER, press to select
CLEAR after this step, then press ENTER.
9 Press EXIT on the remote to return to normal
viewing.
Notes
• To confirm the ON/OFF TIMER settings,
press DISPLAY to show the program on
the screen.
• If the station being viewed stops
broadcasting, your TV automatically shuts
itself off after 15 minutes.
• After a power failure or disconnect ion of
the power, the timer settings are lost.
• To return from ON/OFF TIMER menu to
OPTION menu, select OPTION MENU then
press or .
16
www.insignia-products.com
Page 19
To set the ON/OFF TIMER on or off:
1 Press MENU on the remote control. The
menu screen opens.
2 Press or to select the Option icon .
The OPTION menu screen opens.
The top and bottom edges of the picture may be
hidden. To view the hidden areas, you can scroll
the picture (see “Setting the picture scroll” on
page 18).
OPTION
ON/ OFF TIMER ON/ OFF/SET
FAVORITE CH
CH LABEL
VIDEO LABEL
:SELECT :ADJUST
3 Press or to select ON/OFF TIMER. 4 Press or to select ON or OFF to turn the
timer on or off, respectively.
5 Press EXIT on the remote to return to normal
viewing.
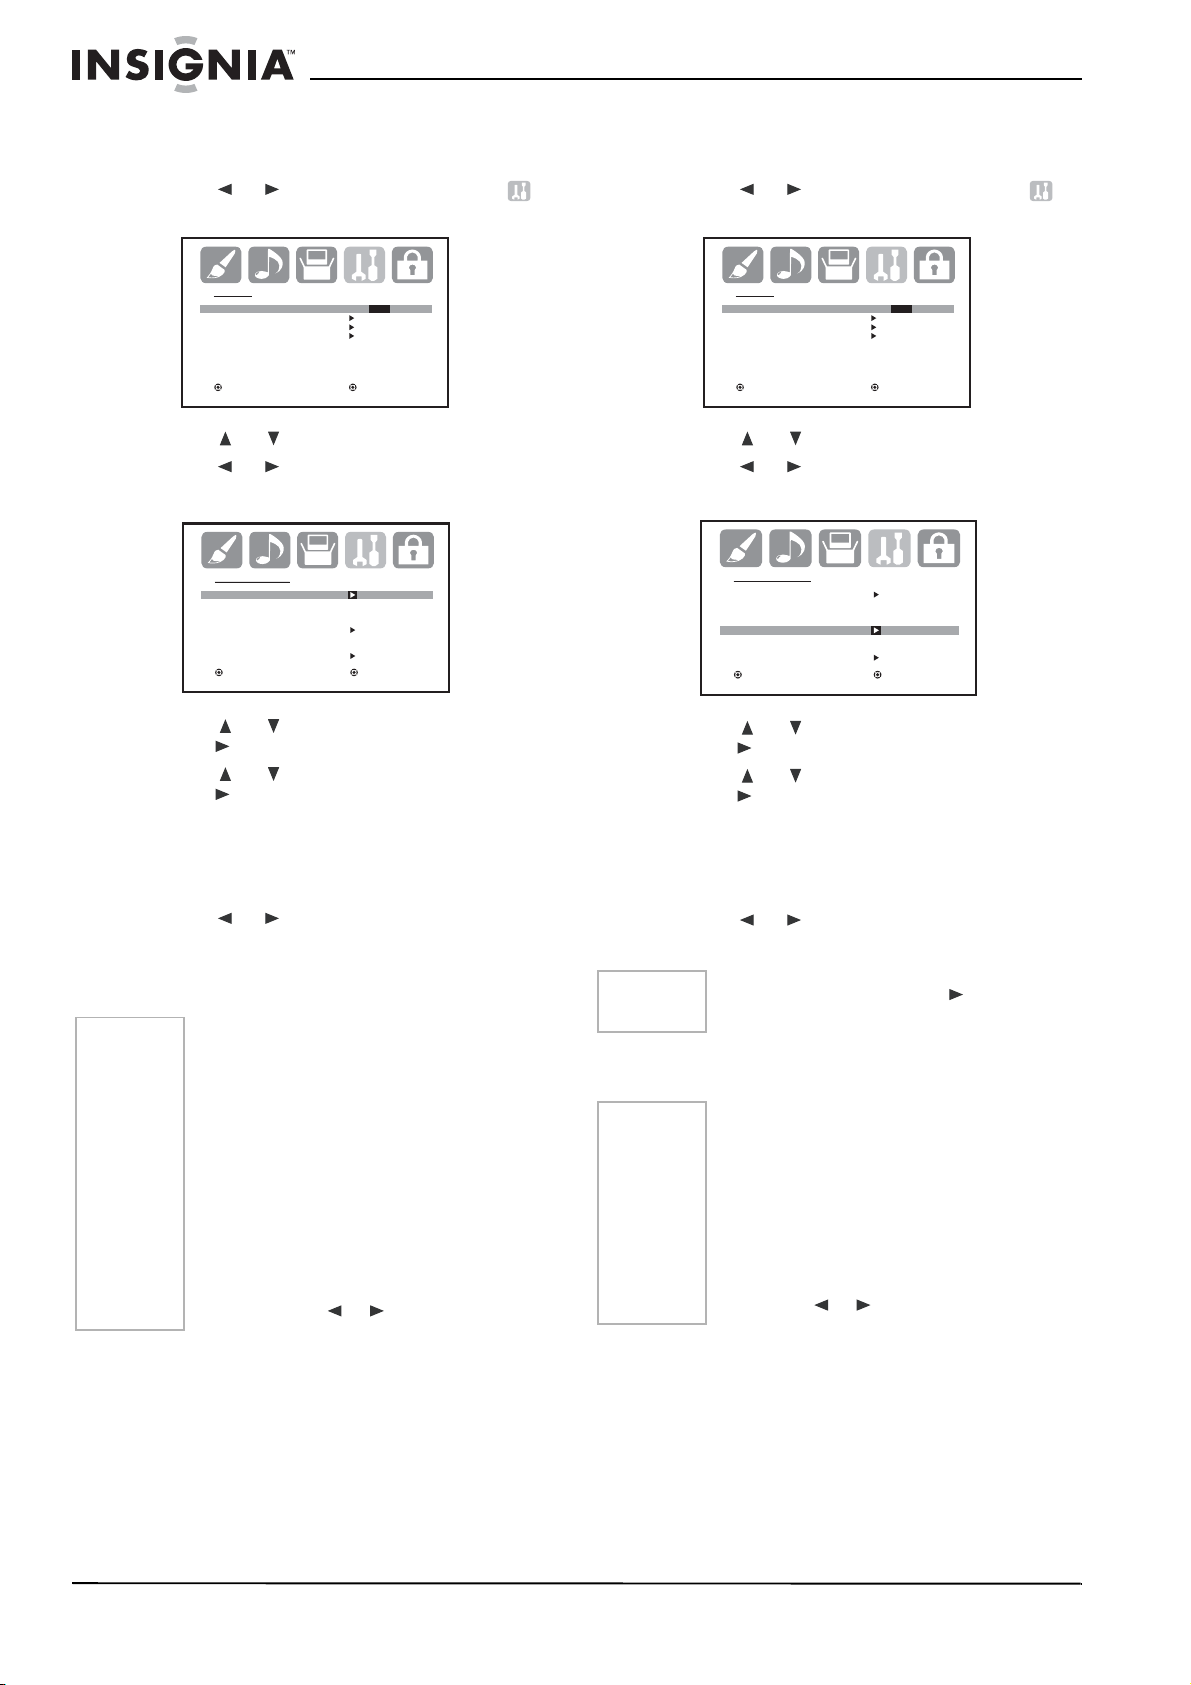
Setting the picture size
You can view 480i and 480p format programs in
a variety of picture sizes, including NATURAL,
CINEMA WIDE1, CINEMA WIDE2, CINEMA
WIDE3, and FULL.
Note
The PICTURE SIZE feature is not available for
some program formats (such as 1080i or 720p).
Such formats display in FULL.
NATURAL picture size – Typically, this image is
in the standard 4:3 aspect, with gray side bars.
A B C D E F G - - - - - - - - - - - - - - - -
CINEMA WIDE3 picture size (for letter box
programs with subtitles) – To fill the width of the
screen, the picture is extended horizontally.
However, it is only slightly extended at the top
and the bottom.
The top and bottom edges of the picture may be
hidden. To view the hidden areas (such as
subtitles or captions), you can scroll the picture
(see “Setting the picture scroll” on page 18).
A B C D E F G - - - - - - - - - - - - - - - -
A B C D E F G - - - - - - - - - - - - - - - - - - - - - - - - - -
FULL picture size (for 16:9 source programs) –
This setting displays the picture at the maximum
size.
CINEMA WIDE1 picture size (for 4:3 aspect
programs) – To fill the screen, the right and left
edges are extended. However the center of the
picture remains near its normal ratio.
The top and bottom edges of the picture may be
hidden.
CINEMA WIDE2 picture size (for letter box
programs) – The entire picture is uniformly
enlarged. It is stretched the same amount both
wider and taller (and retains its original
proportion).
To set the picture size:
1 Press MENU on the remote control. The
menu screen opens.
2 Press or to select the setup icon .
The SETUP menu screen opens.
SETUP
CLOSED CAPTION OFF
CC ADVANCED
PICTURE SIZE
PICTURE SCROLL
CINEMA MODE FILM
: SELECT : ADJUST
3 Press or to select PICTURE SIZE, then
press . the PICTURE SIZE menu opens.
PICTURE SIZE
0. NATURAL
1. CINEMA WIDE1
2. CINEMA WIDE2
3. CINEMA WIDE3
4. FULL
/0-4 : SELECT
4 Press or , or from 1 to 4 on the number
buttons, to select the picture size you want,
then press ENTER.
5 Press EXIT on the remote to return to normal
viewing.
www.insignia-products.com
17
Page 20

Setting the picture scroll
You can scroll the picture in CINEMA WIDE2
and CINEMA WIDE3 modes.
7 To lower the picture, press .
To set the picture scroll:
1 Press MENU on the remote control in
CINEMA WIDE2 or CINEMA WIDE3 mode.
The menu screen opens.
2 Press or to select the setup icon .
The SETUP menu screen opens.
SETUP
LANGUAGE ENGLISH
CLOCK SET
TV/CABLE CABLE
AUTO CH MEMORY
ADD/DELETE
:SELECT :ADJUST
3 Press or to select PICTURE SCROLL.
SETUP
CLOSED CAPTION OFF
CC ADVANCED
PICTURE SIZE
PICTURE SCROLL
CINEMA MODE FILM
: SELECT : ADJUST
4 Press or to open the SCROLL
ADJUSTMENT screen.
SCROLL ADJUSTMENT -10
TO ADJUST
8 Press EXIT on the remote to return to normal
viewing.
Note
The scroll amounts for a 480i/480p signal source
are:
CINEMA WIDE1 : Not adjustable
CINEMA WIDE2 : -10 to +20
CINEMA WIDE3 : -10 to +10
Selecting the cinema mode
When you view a DVD from the DVD player
connected with the component input, you may
get a smoother motion by setting the CINEMA
MODE to FILM.
To select the cinema mode:
1 Press MENU on the remote control. The
menu screen opens.
2 Press or to select the setup icon .
The SETUP menu screen opens.
SCROLL ADJUSTMENT 0
TO ADJUST
5 To adjust the vertical position of the picture,
press or .
SCROLL ADJUSTMENT 0
TO ADJUST
6 To raise the picture, press .
SCROLL ADJUSTMENT +10
TO ADJUST
SETUP
CLOSED CAPTION OFF
CC ADVANCED
PICTURE SIZE
PICTURE SCROLL
CINEMA MODE FILM
: SELECT : ADJUST
3 Press or to select CINEMA MODE,
then press or to select FILM.
SETUP
CLOSED CAPTION OFF
CC ADVANCED
PICTURE SIZE
PICTURE SCROLL
CINEMA MODE FILM / VIDEO
: SELECT : ADJUST
4 To return the cinema mode to VIDEO, press
or to select VIDEO.
5 Press EXIT on the remote to return to normal
viewing.
18
www.insignia-products.com
Page 21
Setting the picture preference
You can select four picture modes—SPORTS,
STANDARD, MOVIE, and MEMORY.
Mode Description
Sports Bright and dynamic picture (set at the
Standard Standard picture quality (set at the
Movie Movie-like picture setting (set at the
Memory Your personal preferences, set by you
factory)
factory)
factory.
using the pict ure co nt rol adjus tme nts.
For more information, see “Adj usting
the picture” on pa ge 19.
To set the picture preference:
1 Press MENU on the remote control. The
menu screen opens.
2 Press or to select the picture icon .
The PICTURE menu screen opens.
PICTURE
PICTURE PREFERENCE SPORTS
BRIGHTNESS 25
CONTRAST 50
COLOR 25
TINT 0
SHARPNESS 25
: SELECT : ADJUST
3 Press or to select PICTURE
PREFERENCE.
Adjusting the picture
To adjust the picture:
1 Press MENU on the remote control. The
menu screen opens.
2 Press or to select the picture icon .
The PICTURE menu screen opens.
PICTURE
PICTURE PREFERENCE SPORTS
BRIGHTNESS 25
CONTRAST 50
COLOR 25
TINT 0
SHARPNESS 25
: SELECT : ADJUST
3 Press or to select the item you want to
adjust, then press or to make the
adjustment.
PICTURE
PICTURE PREFERENCE SPORTS
BRIGHTNESS 25
CONTRAST 50
COLOR 25
TINT 0
SHARPNESS 25
: SELECT : ADJUST
Element
Brightness decrease brightness increase brightness
Contrast (set
to maximum
at the factory)
Color paler color r icher color
decrease contrast increase contrast
PICTURE
PICTURE PREFERENCE SPORTS
SPORTS/STANDARD/MOVIE/MEMORY
BRIGHTNESS 25
CONTRAST 50
COLOR 25
TINT 0
SHARPNESS 25
: SELECT : ADJUST
4 Press or to select the setting you want.
PICTURE
PICTURE PREFERENCE MOVIE
SPORTS/ STANDARD/ MOVIE/ MEMORY
BRIGHTNESS 25
CONTRAST 50
COLOR 25
TINT 0
SHARPNESS 25
: SELECT : ADJUST
5 Press EXIT on the remote to return to normal
viewing.
Tint more red more green
Sharpness softer picture sharper picture
4 When the picture is adjus ted corre ctl y, press
EXIT on the remote to return to normal
viewing.
Setting the color temperature
You can change the picture quality by selecting
from three preset color temperatures—COOL,
MEDIUM, and WARM:
To set the color temperature:
1 Press MENU on the remote control. The
menu screen opens.
2 Press or to select the picture icon .
The PICTURE menu screen opens.
PICTURE
PICTURE PREFERENCE SPORTS
BRIGHTNESS 25
CONTRAST 50
COLOR 25
TINT 0
SHARPNESS 25
: SELECT : ADJUST
www.insignia-products.com
19
Page 22
3 Press or to select COLOR
TEMPERATURE, then press or to set
the mode you want.
PICTURE
COLOR COOL
TEMPERATURE COOL/MEDIUM/WARM
DISPLAY FORMAT 1080i
SVM HIGH
RESET
: SELECT : ADJUST
Mode Description
Cool Bluish picture
Medium Neutral pictu r e
Warm Reddish picture
4 Press EXIT on the remote to return to normal
viewing.
Setting the display format
This setting converts a 480p input signal to 540p
or 1080i.
Notes
• The display format feature is available only
for 480p input. 1080i is always displayed
when a signal other than 480 p is input.
• If you notice flickering in a 480p image, try
setting the display format to 540p.
To set the display format:
1 Press MENU on the remote control. The
menu screen opens.
2 Press or to select the picture icon .
The PICTURE menu screen opens.
PICTURE
PICTURE PREFERENCE SPORTS
BRIGHTNESS 25
CONTRAST 50
COLOR 25
TINT 0
SHARPNESS 25
: SELECT : ADJUST
3 Press or to select DISPLAY FORMAT.
To select the SVM:
1 Press MENU on the remote control. The
menu screen opens.
2 Press or to select the picture icon .
The PICTURE menu screen opens.
PICTURE
PICTURE PREFERENCE SPORTS
BRIGHTNESS 25
CONTRAST 50
COLOR 25
TINT 0
SHARPNESS 25
: SELECT : ADJUST
3 Press or to select SVM.
PICTURE
COLOR COOL
TEMPERATURE
DISPLAY FORMAT 1080i
SVM HIGH /LOW/OFF
RESET
: SELECT : ADJUST
4 Press or to choose the setting you want,
HIGH, LOW, or OFF.
5 Press EXIT on the remote to return to normal
viewing.
Resetting the picture adjustments
The RESET function returns your picture quality
adjustments to the following factory settings:
• PICTURE PREFERENCE ... .sports
• BRIGHTNESS......................center (25)
• CONTRAST .........................max (50)
• COLOR ................................center (25)
• TINT.....................................center (0)
• SHARPNESS.......................center (25)
• COLOR TEMPERATURE.....COOL
• DISPLAY FORMAT ..............1080i
• SVM .....................................HIGH
To reset the picture adjustments:
1 Press MENU on the remote control. The
menu screen opens.
2 Press or to select the picture icon .
The PICTURE menu screen opens.
PICTURE
COLOR COOL
TEMPERATURE
DISPLAY FORMAT 540p /1080i
SVM HIGH
RESET
: SELECT : ADJUST
4 Press or to select 540p or 1080i. 5 Press EXIT on the remote to return to normal
viewing.
Selecting the Scan Ve locity Modulation (SVM)
The SVM feature enhances picture contrast and
sharpness. This feature has three modes: HIGH,
LOW, and OFF.
20
www.insignia-products.com
PICTURE
PICTURE PREFERENCE SPORTS
BRIGHTNESS 25
CONTRAST 50
COLOR 25
TINT 0
SHARPNESS 25
: SELECT : ADJUST
3 Press or to select RESET, then press
. The settings are reset.
PICTURE
COLOR COOL
TEMPERATURE
DISPLAY FORMAT 1080i
SVM HIGH
RESET
: SELECT : ADJUST
Page 23
Setting Closed Captioning
This television has the capability to decode and
display Closed Captioned television programs.
Closed Captioning displays text on the screen
for hearing impaired viewers or it translates and
displays text in another language.
Two Closed Caption modes are available:
• Captions: This Closed Caption mode
displays text on the screen in English or
another language. Generally, Closed
Captions in English are transmitted on C1
and Closed Captions in other languages are
transmitted on C2.
• Text: The Text Closed Caption mode usually
fills half of the screen with a programming
schedule or other information.
When an analog signal is received, you can
choose from C1, C2, T1, T2, and OFF.
SETUP
CLOSED CAPTION OFF
CC ADVANCED
PICTURE SIZE
PICTURE SCROLL
CINEMA MODE FILM
: SELECT : ADJUST
C1/C2/T1/T2/OFF
- OR When a digital signal is received, you can
choose from CS1, CS2, CS3, CS4, CS5,
CS6, C1, C2, C3, C4, T1, T2, T3, T4, or OFF.
Notes
• If the program or video you selected is not
closed-c ap t i oned, no caption s display
on-screen, but the television remains in
the Caption Mode.
• If text is not available in your viewing area,
a black rectangle may appear on-screen. If
this happens, set the Closed Caption
feature to OFF.
• When selectin g Closed Captions, the
captioning is delayed approximately 10
seconds.
• Misspellings or unusual characters may
occasionally appear during Closed
Captioning. This is normal, especially with
live programs, bec a use during live
programs captions are also entered li ve.
These transmissions do not allow time for
editing.
• When Captions are being displayed,
on-screen displays, such as volume and
mute may be seen but may interfere with
Closed Captions.
• Some Cable TV systems and co py
protection systems may interfere with the
Closed Captioned signal.
• If using an indoor antenna or if TV
reception is very poor, the Closed Caption
Decoder may not appear or may appear
with strange characters or missp elled
words. In this case, adjust the antenna for
better reception or use an outdoor
antenna.
To set Closed Captioning:
1 Press MENU on the remote control. The
menu screen opens.
2 Press or to select the setup icon .
The SETUP menu screen opens.
SETUP
CLOSED CAPTION OFF
CS1/CS2/CS3/CS4/CS5/CS6
C1/C2/C3/C4/T1/T2/T3/T4/OFF
CC ADVANCED
PICTURE SIZE
PICTURE SCROLL
CINEMA MODE FILM
: SELECT : ADJUST
5 Press EXIT on the remote to return to normal
viewing.
Customizing Closed Captions
Closed Captions are factory preset however you
can adjust digital Closed Captions individually as
follows:
To customize digital Closed Captions:
1 Press MENU on the remote control. The
menu screen opens.
2 Press or to select the setup icon .
The SETUP menu screen opens.
SETUP
CLOSED CAPTION OFF
CC ADVANCED
PICTURE SIZE
PICTURE SCROLL
CINEMA MODE FILM
: SELECT : ADJUST
3 Press or to select CC ADVANCED,
then press . The CC ADVANCED menu
opens.
SETUP
CLOSED CAPTION OFF
CC ADVANCED
PICTURE SIZE
PICTURE SCROLL
CINEMA MODE FILM
: SELECT : ADJUST
3 Press or to select CLOSED CAPTION. 4 Press or to select the Closed Caption
mode you want.
www.insignia-products.com
CC ADVANCED
TEXT SIZE
TEXT TYPE
TEXT COLOR
TEXT EDGE
BACKGROUND COLOR
: SELECT : ADJUST
21
Page 24
4 Press or to select the CC ADVANCED
option you want to customize, then press
or .
3 Press or to select MTS, then press or
to select the option you want (STR, SAP,
or MONO).
TEXT SIZE
AUTO
SMALL
STANDARD
LARGE
: SELECT : ADJUST
5 Press or to select the setting you want.
Option Parameters
Text size Auto, small, standard, large
Text type Auto, default, mono w/serif, prop w/
serif, mono w/o ser if , prop w/o serif,
casual, cursive, small caps
Text color Auto, black, white, red, green, blue,
yellow, magenta, and cyan
Text edge Auto, none, raised, depressed,
uniform, left drop shadow, right drop
shadow
Background color Auto, black, white, red, green, blue,
yellow, magenta, and cyan
6 Press EXIT on the remote to return to normal
viewing.
Selecting stereo, second audio program (SAP), and adjusting the sound
The multi-channel TV sound (MTS) feature
provides high-fidelity stereo sound. MTS also
can transmit a second audio program (SAP),
containing a second language or other audio
information.
When your TV receives a stereo or SAP
broadcast, the word STEREO or SAP appears
on-screen every time you turn your TV on,
change the channel, or press DISPLAY.
To select stereo or SAP:
1 Press MENU on the remote control. The
menu screen opens.
2 Press or to select the audio icon .
The AUDIO menu screen opens.
AUDI O
MTS STR / SAP / MONO
BASS 2 5
TREBLE 25
BALANCE 0
SPEAKERS ON
: SELECT : ADJUST
Notes
• Normally, you can leave your TV in stereo
mode because your TV auto matically
outputs the type of sound being broadcast
(stereo or mono).
• If the stereo sound is noisy, select MONO
to reduce the noise.
To adjust the sound:
1 Press MENU on the remote control. The
menu screen opens.
2 Press or to select the audio icon .
The AUDIO menu screen opens.
AUDIO
MTS STEREO
BASS 25
TREBLE 25
BALANC E 0
SPEAKERS ON
: SELECT : ADJUST
3 Press or to select the sound element
you want to adjust.
4 Press or to increase or decrease the
level of the selected element.
5 Press EXIT on the remote to return to normal
viewing.
Turning off the built-in speakers
To turn off the built-in speakers:
1 Press MENU on the remote control. The
menu screen opens.
2 Press or to select the audio icon .
The AUDIO menu screen opens.
AUDIO
MTS STEREO
BASS 25
TREBLE 25
BALANCE 0
SPEAKERS ON/OFF
: SELECT : ADJUST
3 Press or to select SPEAKERS, then
press or to select OFF. (To turn the
built-in speakers on, select ON.)
4 Press EXIT on the remote to return to normal
viewing.
Selecting the BBE
By correcting the phase delay and distortion
naturally generated by speaker systems, the
BBE sound feature ensures that the sound that
reaches your ears is as natural as the original
sound. Human voices are clearer and music is
natural and well-defined.
Licensed by BBE Sound, Inc. under one or more of the
following US patents: 5510752, 5736897. BBE, and BBE
symbol are registered trademarks of BBE Sound, Inc.
22
www.insignia-products.com
Page 25

To select the BBE:
1 Press MENU on the remote control. The
menu screen opens.
2 Press or to select the audio icon .
The AUDIO menu screen opens.
AUDI O
BBE ON/OFF
AUDIO LANGUAGE
DIGITAL OUTPUT PCM
RESET
3 Press or to select AUDIO LANGU AGE,
then press or . The AUDIO LANGUAGE
menu opens.
AUDIO LANGUAGE
0. ENGLISH 1
1. ENGLISH 2
2. FRENCH
3. SPANISH
4. NO INFO
5. NO INFO
6. NO INFO
7. NO INFO
/ 0-7 : SELECT
: SELECT : ADJUST
3 Press or to select BBE, then press or
to select ON. (To turn the BBE off, select
OFF.)
4 Press EXIT on the remote to return to normal
viewing.
Selecting digital sound output
You can choose the format of the digital audio
output signal.
To select digital sound output:
1 Press MENU on the remote control. The
menu screen opens.
2 Press or to select the audio icon .
The AUDIO menu screen opens.
AUDIO
BBE ON
AUDIO LANGUAGE
DIGITAL OUTPUT PCM
RESET
: SELECT : ADJUST
DOLBY DIGITAL
/
PCM
3 Press or to select DIGITAL OUTPUT,
then press or to select PCM or DOLBY
DIGITAL.
4 Press EXIT on the remote to return to normal
viewing.
Selecting the audio language
When two or more audio languages are included
in a digital signal, you can select one of the
audio language.
To select the audio language:
1 Press MENU on the remote control. The
menu screen opens.
2 Press or to select the audio icon .
The AUDIO menu screen opens.
AUDIO
BBE ON
AUDIO LANGUAGE
DIGITAL OUTPUT PCM
RESET
4 Press or to select the language you
want.
5 Press EXIT on the remote to return to normal
viewing.
Resetting the audio adjustments
The RESET function returns the audio
adjustments to the following factory settings:
• BASS ........ ...... ....... .center (25)
• TREBLE..................center (25)
• BALANCE . ...... ....... .center (0)
To reset the audio adjustments:
1 Press MENU on the remote control. The
menu screen opens.
2 Press or to select the audio icon .
The AUDIO menu screen opens.
AUDIO
BBE ON
AUDIO LANGUAGE
DIGITAL OUTPUT PCM
RESET
: SELECT : ADJUST
3
Press or to select RESET, then press
. The audio adjustment reset to the factory
settings.
Checking the digital signal strength
This lets you view the digital signal meter for
digital channels.
To check the digital signal strength:
1 Press MENU on the remote control. The
menu screen opens.
2 Press or to select the setup icon .
The SETUP menu screen opens.
SETUP
SIGNAL METER
: SELECT : ADJUST
: SELECT : ADJUST
www.insignia-products.com
23
Page 26
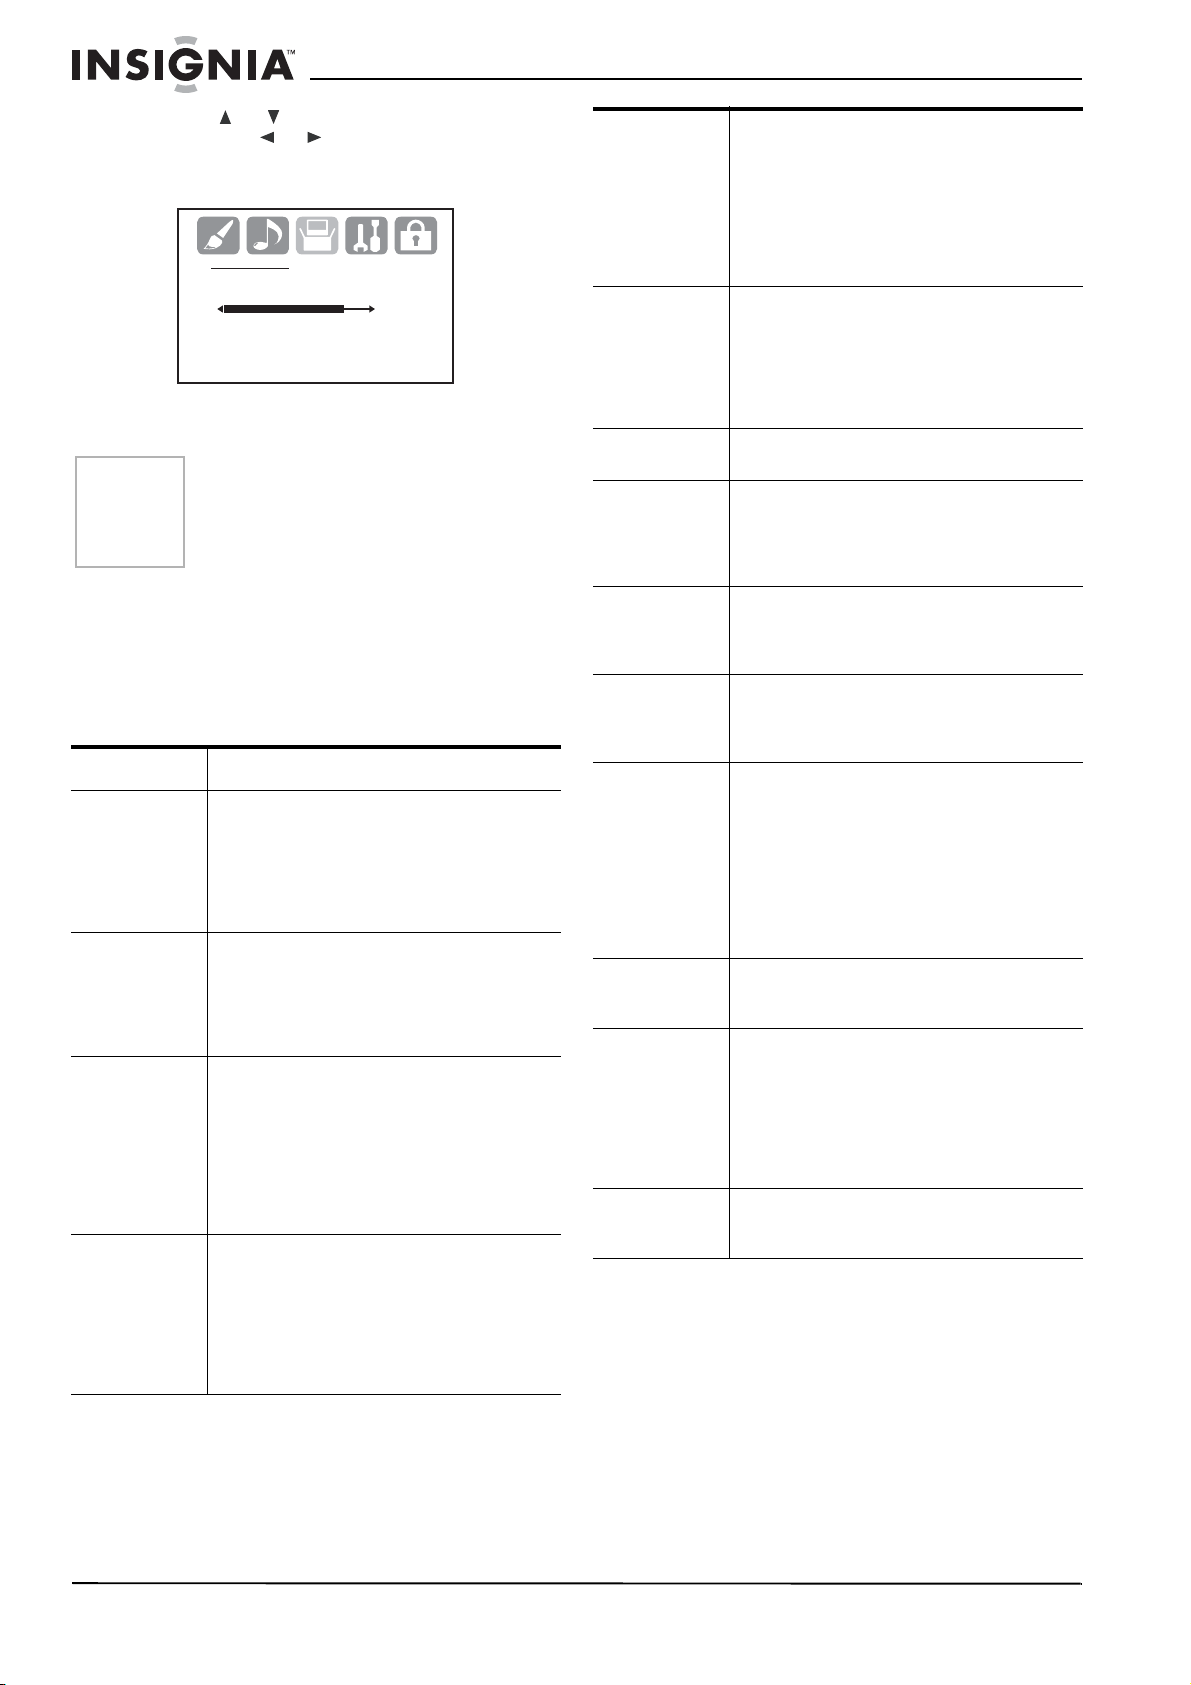
3 Press or to select SIGNAL METER,
then press or . The SIGNAL METER
opens, showing you the digital signal
strength.
SIGNAL METER
CHANNEL (DIGITAL) 123-045
80
4 Press EXIT on the remote to return to normal
viewing.
Notes
• The signal meter fea ture is not available
for analog channels.
• After 240 seconds, the SIGNAL METER
screen returns to normal TV operation
automatically.
Troubleshooting
Use the following check list for troubleshooting
when you have problems with your TV. Consult
your local dealer or service outlet if problems
persist. Make sure that all connections are
correctly made when using with other units.
Problem Solution
TV does not
operate
Poor or no
sound
Poor or no
picture
Poor reception
on some
channels
• Make sure that the power cord is
plugged in.
• Try another AC outlet.
• Power is off, check fuse or circuit
breaker.
• Unplug your TV for an hour, then plug it
back in.
• Station or cable experien cing problems,
tune to another station.
• Check the sound adjustments (Volume
and Mute).
• Check for possible sources of
interference.
• Station or cable experien cing problems,
tune to another station.
• Make sure that channels are set into
memory.
• Check antenna or cable connec ti ons,
and try adjustin g the antenna.
• Check for sources of possible
interference.
• Check picture control adjustments.
• Station or cable experien cing problems,
tune to another station.
• Make sure that channels are set into
memory.
• Station is weak, adjust the antenna to
receive a better reception.
• Check for possible sources of
interference.
Poor or no color • Station or cable experiencing problems,
Picture wobbles
or drifts
Digital broadca st
screen problem
No cable TV
reception
Horizontal or
diagonal bars on
the screen
No reception
above channel
13
No remote
control
operation
TV turns off • No broadcast on the station tuned.
Closed Caption
is not activated
The display is
not shown in
your language
tune to another station.
• Make sure that channels are set into
memory.
• Check the picture control adj ustments.
• Check the antenna or cable connections,
adjust the antenna.
• Check for possible sources of
interference.
• Station or cable experien cing problems,
tune to another station.
• Make sure that channels are set into
memory.
• The cable company is scrambling the
signal.
• Adjust the antenna.
• Check the digital signal strength.
• Check all cable connecti ons.
• Set TV/CABLE menu option to the
CABLE mode.
• Station or cable system problems, try
another station.
• Check the antenna connections and
adjust or re-direct the antenna.
• Check for possible sources of
interference.
• Make sure that the TV/CABLE menu
option is in the a ppropriate mode.
• If you are using an antenna, check the
UHF antenna connections.
• Batteries are weak, dead, or insert ed
incorrectly.
• The remote is out of range, move closer
to TV (within 15 feet) .
• Make sure that remote is aimed at the
sensor.
• Confirm that there are no obstructions
between the remote and you r TV.
• Make sure that the power cord is
plugged in.
• The Sleep Timer is set.
• The power has been interrupted.
• The TV station is experiencing problems
or the program tuned is not closed
captioned. Try another channel.
• Check the cable connection or the VHF/
UHF antenna. Reposition or rotate the
antenna.
• Set the Closed Caption decoder in the
menu.
• Select the correct language in the menu
options.
24
www.insignia-products.com
Page 27

Specifications
Limited warranty
General specifications
Power supply: AC 120 V 60 Hz
Power consumption: Operation: 195 W
Stand by: 1 W
Weight: 117.7 lbs (53.5 kg)
Dimensions: 31-5/16 × 21-5/8 ×
Inputs:
VIDEO: 1 V (p-p)/75 ohms
AUDIO: –8 dBm/50 k ohms
S-VIDEO: Y: 1 V (p-p), 75 ohms
COMPONENT: Y: 1 V (p-p), 75 ohms
Output:
VIDEO: 1 V (p-p)/75 ohms
AUDIO: 150 mV (rms)
DIGITAL
AUDIO: 0.5V (p-p), 75 ohms
Antenna input: VHF/UHF/CABLE In
Picture tube: 30 inches (760 mm
Tuner type: Quartz PLL Frequency
Receiving channels:
VHF 2-13
UHF 14-69
CABLE 14-36 (A)-(W)
Speaker: 1.8 × 3.9 inches (45.7 x
Sound output power: 5.0 W + 5.0 W
Design and specifications are subject to change without notice.
22-3/18 inches
(796 × 549.2 × 563 mm)
C: 0.286 V (p-p), 75 ohms
P
: 0.7 V (p-p), 75 ohms
R
P
: 0.7 V (p-p), 75 ohms
B
75 ohms coaxial
diagonal)
Synthesized
37-59 (AA)-(WW)
60-85
(AAA)-(ZZZ)
86-94 (86)-(94)
95-99 (A-5)-(A-1)
100-125 (100)-(125)
01 (5A)
99 mm), 8 ohms x 2
Insignia Products warrants to you, the original
purchaser of this Product, that this product shall
be free of defects in material or workmanship for
a period of three hundred sixty five (365) days
from the date of purchase as follows:
1 LABOR: During the Warranty Period if this
Product is determined to be defective,
Insignia will repair or replace the Product, at
its option at no charge, or pay the labor
charges to any Insignia authorized service
facility. After the Warranty Period, you must
pay for all labor charges.
2PARTS: In addition, Insignia will supply, at no
charge, new or rebuilt replacement parts in
exchange for defective parts for the Warranty
Period. After the Warranty Period, you must
pay all parts costs.
To obtain warranty service, you must take the
Product with your original receipt or other proof
of purchase, either in its original packaging or
packaging affording an equal degree of
protection, to your nearest retail store location of
the store or online web site from which you
purchased the Product.
This warranty does not cover cosmetic damage
or damage due to acts of God, lightning strikes,
accident, misuse, abuse, negligence,
commercial use, or modification of, or to any part
of the Product, including the antenna. This
warranty does not cover damage due to
improper operation or maintenance, connection
to improper voltage supply, or attempted repair
by anyone other than a facility authorized by
Insignia to service the Product. This warranty
does not cover Products sold AS IS or WITH
ALL FAULTS, or consumables (such as fuses or
batteries). This warranty is valid only in the
United States and Canada.
This warranty is invalid if the factory applied
serial number has been altered or removed from
the Product.
REPAIR REPLACEMENT AS PROVIDED
UNDER THIS WARRANTY IS THE EXCLUSIVE
REMEDY OF THE CONSUMER. INSIGNIA
SHALL NOT BE LIABLE FOR ANY
INCIDENTAL OR CONSEQUENTIAL
DAMAGES FOR BREACH OF ANY EXPRESS
OR IMPLIED WARRANTY ON THIS PRODUCT.
EXCEPT TO THE EXTENT PROHIBITED BY
APPLICABLE L A W , ANY IMPL IED W ARRAN TY,
REPRESENTATION OR CONDITION OF
MERCHANTABILITY OR FITNESS FOR A
PARTICULAR PURPOSE ON THIS PRODUCT
IS LIMITED IN DURATION TO THE DURATION
OF THIS WARRANTY.
Some states or provinces do not allow the
exclusion or limitation of incidental or
consequential damages, or allow limitations on
how long an implied warranty lasts, so the above
limitations or exclusions may not apply to you.
This warranty gives you specific legal rights, and
you may have other rights which vary from state
to state, or province to province.
For customer service please call
1-877-467-4289
www.insignia-products.com
Insignia Products, Richfield, Minnesota, U.S.A.
www.insignia-products.com
25
Page 28

Legal notices
FCC compliance statement
This equipment generates, uses, and can
radiate radio frequency energy and, if not
installed and used in accordance with the
instructions, may cause harmful interference to
radio communications. However, there is no
guarantee that interference will not occur in a
particular installation. Changes or modifications
to this equipment may cause harmful
interference unless the modifications are
expressly approved in the owner’s manual. The
user could lose the authority to operate this
equipment if an unauthorized change or
modification is made. If this equipment does
cause harmful interference to radio or television
reception, which can be determined by turning
the equipment off and on, the user is
encouraged to try to correct the interference by
one or more of the following measures:
• Reorient or relocate the receiving antenna.
• Increase the separation between the
equipment and receiver.
• Connect the equipment into an outlet on a
circuit different from that to which the receiver
is connected.
• Consult the dealer or an experienced radio/
TV technician for help.
This device complies with Part 15 of the FCC
Rules. Operation is subject to the following two
conditions:
• This device may not cause harmful
interference, and
• This device must accept any interference
received, including interference that may
cause undesired operation.
Copyright
© 2006 Insignia. Insignia and the Insignia logo are
trademarks of Best Buy Enterprise Services, Inc. Other
brands and product names are trademarks or
registered trademarks of their respective holders.
Specifications and features are subject to change
without notice or obligation.
26
www.insignia-products.com
Page 29

Bienvenue
Félicitati ons d’ av oir ac heté ce produit Insign ia de
haute qualité. Ce téléviseur numérique à écran
panoramique plat de 30 po NS-30HTV est la
dernière avancée technologique dans la
conception de téléviseurs et a été conçu pour
des performances et une fiabilité totale. Pour
toute référence ultérieure, noter le numéro de
série, la date d’achat et le nom du revendeur
dans les espaces prévus à cet effet.
Numéro de modèle : NS-30HTV
Numéro de série : ___________________
Date d’achat :______________________
Revendeur :________________________
Table des matières
Fonctionnalités. . . . . . . . . . . . . . . . . . . . . . . . . . .27
MESURES DE SÉCURITÉ IMPORTANTES . . . .27
Préparation à la configuration du téléviseur :. . . .29
Installation de l’appareil . . . . . . . . . . . . . . . . . . . .30
Présentation du téléviseur . . . . . . . . . . . . . . . . . .34
Fonctionnement du téléviseur . . . . . . . . . . . . . . .35
Problèmes et solutions. . . . . . . . . . . . . . . . . . . . .53
Spécifications. . . . . . . . . . . . . . . . . . . . . . . . . . . .54
Garantie limitée . . . . . . . . . . . . . . . . . . . . . . . . . .55
Avis juridiques . . . . . . . . . . . . . . . . . . . . . . . . . . .55
Fonctionnalités
• Une image de haute qualité avec une
résolution horizontale de plus de 500
lignes – qui dépasse le Super VHS (400
lignes) ou le disque laser (430 lignes) en
résolution.
• Compatible avec une large gamme de
sorties audio par l'intermédiaire d'une
prise audio numérique (coaxiale) –
Lorsqu'un composant avec un décodeur
Dolby Digital intégré est connecté, le son
Dolby Digital peut donner l'impression que
l'on se trouve dans une salle de cinéma ou
de concer t.
• Syntoniseur numérique intégré — Il est
possible de visualiser des émissions
numériques sans utiliser un décodeur de TV
numérique.
• Décodeur de sous-titres avec mode plein
texte — Affiche des sous-titres ou du texte
sur la totalité de l'écran pour que les
téléspectateurs malentendants.
• Réglages de l'image à l'aide de la
télécommande — L'affichage à l'écran
permet un réglage précis au moyen de la
télécommande de la luminosité, du contraste,
de la couleur, de la teinte et de la netteté.
• Arrêt différé programmable du téléviseur
— À partir de la télécommande, il est
possible de programmer le téléviseur pour
qu'il s'éteigne automatiquement après une
durée pouvant aller jusqu'à 120 minutes.
• Puce antiviolence — La puce antiviolence
peut lire la classification d'une émission TV
ou d'un film si l'émission en question est
encodée avec cette information. La puce
antiviolence permet de définir un niveau de
restrictions.
• Réception stéréo/SAP — Le téléviseur est
conçu pour recevoir des émissions diffusées
en stéréo et avec une deuxième trame
sonore (SAP), si disponibles.
• BBE — BBE produit un son net avec une
présence extraordinaire.
• Prises S-Vidéo/vidéo à composantes — Le
téléviseur est équipé de 3 types de prises
d'entrée vidéo. Il est possible de connecter
un magnétoscope, un lecteur de DVD, un
récepteur satellite ou un autre composant
audio/vidéo au téléviseur. Les prises d'entrée
vidéo à composantes et la prise d'entrée
S-Vidéo permettent de regarder le lecteur de
DVD ou d'autres périphériques vidéo avec
une image de haute qualité.
• Affichage à l'écran en 3 langues
programmation à l'écran peut s'effectuer en
anglais, en espagnol ou en français.
* Fabriqué sous licen ce de Dolby Laboratories. « Dolby » et le
symbole à double D so nt des marques de commerce de Dolby
Laboratories.
— La
AVERTISSEMENT :
Afin de réduire les risques d’incendie et de choc
électrique, ne pas exposer cet appareil À la pluie
ou l’humiditÉ.
ATTENTION
RISQUE DE CHOC ÉLECTRIQUE
NE PAS OUVRIR
ATTENTION
RISQUES DE CHOC ÉLECTRIQUE, NE RETIREZ
PAS LE COUVERCLE (OU LE PANNEAU ARRIÈRE)
AUCUNE PIÈCE NE PEUT ÊTRE RÉPARÉE PAR
L'UTILISATEUR. CONFIEZ L'APPAREIL À UN
TECHNICIEN QUALIFIÉ.
Le symbole représentant un éclair dans un
triangle équilatéral a pour but d'avertir l'utilisateur
du danger présenté par des pièces
non isolées à l'intérieur de l'appareil et dont la
tension est suffisante pour provoquer des
décharges électriques dangereuses.
:
AFIN DE RÉDUIRE LES
Le point d'exclamation dans un triangle équilatéral
a pour but d'avertir l'utilisateur que des instructions
importantes relatives à l'utilisation et à l'entretien se
trouvent dans le manuel accompagnant l'appareil.
MESURES DE SÉCURITÉ IMPORTANTES
• Lire les instructions — Lire toutes les
instructions de sécurité et de fonctionnement
avant d’utiliser le téléviseur.
• Conserver les instructions — Conserver
les instructions de sécurité et de
fonctionnement pour toute référence
ultérieure.
• Respecter les avertissements – Respecter
tous les avertissements figurant sur le
téléviseur ainsi que dans les instructions
d’utilisation.
• Suivre les instructions – Toutes les
instructions d’utilisation doivent être
appliquées.
www.insignia-products.com
27
Page 30

• Nettoyage – Débrancher l'appareil de la
prise murale avant tout nettoyage. Ne pas
utiliser de nettoyants liquides ou en aérosol.
Utiliser un chiffon humide pour le nettoyage.
EXCEPTION : Un produit qui est destiné à un
service ininterrompu et qui, pour une raison
spécifique (comme par exemple le risque de
perdre un code d'autorisation pour un
convertisseur de TV câblée) ne doit pas être
débranché par l'utilisateur pour le nettoyage
ou pour toute autre raison, pourra ne pas
comporter la référence au débranchement du
téléviseur dans la description du nettoyage
qui est sinon requise dans ces instructions.
• Périphériques – Ne pas utiliser de
périphériques qui ne sont pas recommandés
par le fabricant du téléviseur et qui pourraient
être dangereux.
• Eau et humidité – Ne pas utiliser ce
téléviseur à proximité de l’eau, par exemple,
à côté d’une baignoire, d'un lavabo, d'un
évier, d’un bac à laver , dans une cave humide
ou à côté d’une piscine.
• Accessoires – Ne pas placer le téléviseur
sur une table roulante, un pied, un trépied, un
support ou une table. Le téléviseur risque de
tomber et, dans sa chute, de provoquer des
blessures graves et de subir des dommages
importants. N’utiliser qu’avec la table
roulante, le pied, le trépied, le support ou la
table recommandés par le fabricant ou
vendus avec le téléviseur.
Pour monter le téléviseur,
observer les instructions du
fabricant et utiliser un
accessoire de montage
recommandé par le fabricant.
Déplacer cet appareil sur un
meuble à roulettes avec
précaution. Un arrêt brusque, l’utilisation
d’une force excessive et des surfaces
irrégulières risquent de déstabiliser
l’ensemble et de le renverser.
• Ventilation – Les fentes et ouvertures au dos
et au bas du boîtier sont prévues pour la
ventilation, pour assurer un fonctionnement
fiable de l’appareil et le protéger contre toute
surchauffe. Ne pas obstruer les ouvertures.
Ne pas placer l’appareil sur un lit, un sofa,
une moquette ou toute autre surface
semblable. Le téléviseur ne doit jamais être
positionné à proximité ou sur un radiateur, ou
une bouche de chauffage. Ne pas installer le
téléviseur l'appareil dans un meuble encastré
comme une bibliothèque ou sur une étagère,
sauf si une ventilation adéquate a été prévue
ou si les instructions du fabricant ont été
respectées.
• Sources d’alimentation – Utiliser
uniquement le type d’alimentation électrique
indiqué sur la plaque signalétique. En cas
d’incertitude sur la tension d'alimentation
électrique de la maison, consulter le
revendeur ou la compagnie d'électricité. Pour
les téléviseurs fonctionnant sur piles ou
d'autres sources d'alimentation électrique,
consulter les instructions d'utilisation.
• Mise à la terre ou polarisation – Cet
appareil est équipé d'une prise de courant
CA polarisée (à deux plots, un plus large que
l'autre). Cette fiche ne s'insère dans une
prise murale que d'une seule façon. Il s'agit
d'une caractéristique de sécurité. S’il est
impossible d’introduire à fond la fiche dans la
prise murale, essayer de retourner la prise. Si
la fiche ne s'adapte toujours pas à la prise
murale, contacter un électricien afin qu’il
remplace la prise inadéquate. Ne pas
chercher à modifier le dispositif de sécurité
de la prise polarisée.
• Protection du cordon d’alimentation –
Acheminer le cordon d'alimentation de telle
manière qu'on ne puisse marcher dessus ou
qu'il ne soit pas pincé par des objets placés
dessus ou tout contre ; prêter
particulièrement attention au point de
raccordement du cordon à la prise murale, à
la plaque multiprises et au connecteur du
téléviseur dans lequel il est branché.
• Mise à la terre d’une antenne extérieure –
Si le téléviseur est connecté à une antenne
extérieure ou à un réseau câblé, s'assurer
que l'antenne ou la connexion au réseau
câblé est mis à la terre afin de bénéficier
d'une certaine protection contre les sautes
de courant et les charges électrostatiques
L'article 810 du Code national de l’électricité
(CNE), ANSI/NFPA Nº 70, fournit des
informations relatives à la mise à la terre
correcte du mât et du support, la mise à la
terre du fil conducteur de l’antenne à l’unité
de décharge de l’antenne, la taille des
conducteurs de mise à la terre,
l’emplacement de l’unité de décharge de
l’antenne, la connexion aux conducteurs de
terre ainsi que les normes en matière de
prise de terre.
EXAMPLE OF ANTENNA GROUNDING AS PER
NEC - NATIONAL ELECTRICAL CODE POWER SERVICE GROUNDING
S2898A
FIGURE A
NATIONAL ELECTRICAL CODE
ELECTRIC
SERVICE
EQUIPMENT
• Foudre
– Pour protéger le téléviseur pendant
GROUND
CLAMP
GROUNDING CONDUCTORS
(NEC SECTION 810-21)
GROUND CLAMPS
ELECTRODE SYSTEM
(NEC ART 250, PART H)
un orage ou s’il se trouve inutilisé et sans
surveillance pendant de longues périodes, le
débrancher de la prise murale et débrancher
l'antenne ou la connexion au réseau câblé.
Ceci évitera d’endommager le téléviseur en
cas de foudre et de variations de tension du
secteur.
ANTENNA
LEAD IN
WIRE
ANTENNA
DISCHARGE UNIT
(NEC SECTION 810-20)
28
www.insignia-products.com
Page 31

• Lignes électriques – L'antenne externe ne
doit pas être située près de lignes électriques
aériennes ou d'autres circuits d'alimentation
et électriques, ni à un emplacement où elle
pourrait tomber sur de tels circuits ou lignes
électriques. Lors de l'installation d'une
antenne externe, ne pas toucher les lignes
ou circuits électriques car tout contact peut
être mortel.
• Surcharge – Les prises murales et les
rallonges ne doivent pas être surchargées,
ce qui pourrait provoquer des risques
d'incendie ou de choc électrique.
• Pénétration de liquides et d'objets divers
– Ne jamais enfoncer un objet quelconque
dans les ouvertures du téléviseur, car il
pourrait entrer en contact avec des tensions
dangereuses ou provoquer un court-circuit à
l'origine d'un incendie ou d'un choc
électrique. Ne jamais répandre un liquide sur
le téléviseur.
• Réparation – L’utilisateur ne doit pas essayer
de réparer cet appareil lui-même ; en effet
son ouverture ou le démontage des
couvercles peut l’exposer à des tensions
dangereuses et à d'autres dangers. Toutes
les réparations doivent être réalisées par du
personnel qualifié.
• Dommages requérant des réparations –
Débrancher l'appareil de la prise murale et
utiliser les services d’un technicien qualifié
dans les conditions suivantes :
• Lorsque le cordon d’alimentation est
effiloché ou la prise endommagée.
• Si un liquide a été répandu ou des objets
sont tombés dans l’appareil.
• Si l’appareil a été exposé à la pluie ou à
l’eau.
• Si le téléviseur ne fonctionne pas
normalement en suivant les instructions
d’utilisation, ne régler que les commandes
décrites dans celles-ci ; en effet, le
réglage incorrect d’autres commandes
pourrait provoquer des anomalies,
entraînant souvent d'importantes
réparations par un technicien qualifié pour
rétablir le fonctionnement normal du
téléviseur.
• Si le téléviseur est tombé ou sil est
endommagé de quelque façon que ce
soit.
• Lorsque le téléviseur présente
d’importantes modifications de ses
performances, il devra subir une
maintenance.
• Pièces de remplacement – Si des pièces
doivent être remplacées, s’assurer que le
technicien a utilisé des pièces spécifiées par
le fa bricant ayant les mêmes car actérist ique s
que celles d’origine. Toute substitution par
des pièces non autorisées risque de
provoquer un incendie, un choc électrique,
des blessures aux personnes ou d'autres
dangers.
• Contrôle de sécurité – Les réparations ou la
maintenance ayant été effectuées, demander
au technicien de réaliser les contrôles de
sécurité de routine afin de déterminer que le
téléviseur est en bon état de fonctionnement
• Chaleur – Installer le téléviseur à l’écart de
sources de chaleur, telles que radiateurs,
bouches de chaleur, fours ou autres
appareils (y compris les amplificateurs) qui
produisent de la chaleur.
Avis à l'installateur de TV câblée :
Le présent avis a pour objet de rappeler à l'installateur de
systèmes de télévision par câble que l'article 820-40 du Code
national de l'électri c ité contient des recommandations
relatives à la mise à la masse de l'appareil et, en particulier,
stipule que la terre du câbl e doit être connectée au système
de mise à la terre de l'immeuble, aussi prêt que possible du
point d'entrée du câble.
REMARQUE CONCERNAN T LE RECYCLAGE : Les piles ne
doivent jamais être mises au rebut ni incinérées, mais
éliminées de façon con fo rme aux réglementations locales
concernant les déchets chimiques.
PRUDENCE :
ÉLECTROCU TI ON, NE PAS UTILISER CETTE PR ISE
POLARISÉE AVEC UNE RALLONGE, FICHE OU TOUT E
AUTRE PRISE À MOINS QUE LES PLOTS PUISSENT
ÊTRE INSÉRÉS COMP LÈT E MENT SANS ÊTRE VISIBLES
AVERTISSEMENT de la FCC : Tous changements ou
modifications qui ne seraient pas expressément approuvés
par les responsables des règles FCC pourraient rendre nul le
droit de l’utilisateur d’utiliser cet équipement.
ATTENTION : AFIN D’ÉVITER UNE
.
Préparation à la configuration du téléviseur :
Désemballage et configuration
Le carton du téléviseur doit contenir :
• TV numérique à écran panoramique plat de
30 po
• Guide de l’utilisateur
• Télécommande
Si ces accessoires doivent être remplacés,
appeler notre numéro d’assistance à la clientèle
mentionné dans ce guide à la section relative à
la garantie.
Selon le système d'antenne, différents types de
gestionnaires de signaux (mélangeurs) ou
séparateurs (répartiteurs) peuvent être
nécessaires. Contacter un magasin local
d'articles électroniques pour obtenir ces
éléments.
Enlever soigneu sem en t tous le s com p os an t s du
carton. Avant de jeter l’emballage, vérifier que
tous les composants nécessaires sont au
complet.
• Enlever les matériaux d’emballage des
composants individuels.
• Ne pas retirer d’étiquettes ou d’autocollants
du panneau arrière du téléviseur.
www.insignia-products.com
29
Page 32

• Placer le téléviseur à l’ emplacement
souhaité. Ce téléviseur a été conçu pour être
utilisé sur une surface à niveau, stable, plane,
telle qu’une table, un bureau, une étagère ou
un support, située près d’une prise
d’alimentation, à l’écart de la lumière directe
du soleil et des sources de chaleur
excessive, de la poussière, de l’humidité ou
des vibrations.
• Dérouler le cordon d’alimentation CA à
l’arrière du téléviseur et le déployer sur toute
sa longueur.
Source d’ali ment ation
Utiliser le cordon CA polarisé fourni pour le
fonctionnement sur CA. Insérer la prise du
cordon d’alimentation CA dans une prise secteur
CA polarisée standard de 120 V 60 Hz.
Si une décharge d’électricité statique se produit
quand le téléviseur est touché, et que celui-ci
cesse de fonctionner, débrancher le téléviseur
de la prise secteur CA, puis le rebrancher. Il
devrait alors fonctionner normalement.
Avertissement
• Le système est doté d’un e fiche CA
polarisée avec un plot large et un plot
étroit. Cette fiche ne pourra
fonctionner qu’avec des prises
polarisées adaptées. Cette mesure de
sécurité permet de réduire la
possibilité de choc électrique. Si la
fiche ne rentre pas dans la prise
d’alimentation, i l s’agit certainement
d’une prise ancienne non-polarisée,
qui doit être remplacée par un
électricien agréé, qualifié. Ne pas
limer le plot large sur la fiche ou
utiliser un adaptateur pour que la
fiche puisse être branchée dans la
prise. Ce faisant, le dispositif de
sécurité serait endommagé et
l’utilisateur exposé à des chocs
électriques.
• Ne jamais conne cter la prise du
cordon CA à une tension autre que
celle spécifiée (120 V 60 Hz).
N’utiliser que le cord o n
d’alimentation four ni .
Si l’antenne combinée VHF/UHF a une ligne
bifilaire de 300 ohms, l’utilisation d’un
transformateur compatible de 300 à 75ohms
peut être nécessaire.
Câble coaxial 75
ohms
Prise RF IN
Transformateur compatible de
300 à 75 ohms
Prise RF IN
Antenne combinée VHF/UHF (câble unique
de 75 ohms ou ligne bifilaire de 300 ohms)
Connecter la ligne bifilaire UHF de 300 ohms au
mélangeur (non fourni). Connecter la ligne
bifilaire VHF de 300 ohms à un transformateur
compatible de 300 à 75 ohms. Relier le
transformateur au mélangeur, puis relier le
mélangeur à la prise RF IN.
Prise RF IN
Mélangeur
UHF 300 ohms
Transformateur compatible de
300 à 75 ohms
VHF 300 ohms
Antennes séparées VHF/UHF (câble VHF de
75 ohms et ligne bifilaire UHF de 300 ohms)
Connecter le câble VHF de 75 ohms et la ligne
bifilaire UHF de 300 ohms au mélangeur. Relier
le mélangeur à la prise RF IN.
Prise RF IN
Installation de l’appareil
Connexions
Pour utiliser une antenne intérieure ou
extérieure, suivre les instructions correspondant
au système d'antenne. Pour utiliser un service
de télévision par câble (CABLE), voir page 30.
Prises d'antenne
Antenne combinée VHF/UHF (VHF et UHF
séparés avec lignes bifilaires de 300 ohms)
Connecter le câble de 75 ohms de l’antenne
combinée VHF/UHF à la prise RF IN.
30
VHF 75 ohms
Mélangeur
UHF 300 ohms
Connexions à la télévision câblée
Ce téléviseur est doté d’une gamme de
syntonisation étendue, qui lui permet de
syntoniser la majorit é des can aux câblés sans
utiliser un décodeur de TV câblée. Certains
câblo-opérateurs proposent des « canaux par
abonnement » pour lesquels le signal est
brouillé. Le décodage de ces signaux pour une
visualisation normale nécessite l’utilisation d’un
décodeur qui est en général fourni par le
câblo-opérateur.
www.insignia-products.com
Page 33

Pour les abonnés au service de TV câblée de
base.
Pour le service de base ne nécessitant pas de
décodeur/décrypteur, connecter le câble coaxial
de 75 ohms directement à la prise RF IN à
l’arrière du téléviseur.
Prise RF IN
Câble coaxial 75
ohms
Pour les abonnés au service de TV câblée
cryptée.
En cas d'abonnement à un service de TV câblée
qui nécessite l’utilisation d’un décodeur/
décrypteur, connecter le câble coaxial de 75
ohms à l’entrée au décodeur/décrypteur. Avec
un autre câble coaxial de 75 ohms, connecter la
prise de sortie du décodeur/décrypteur à la prise
RF IN du téléviseur. Régler le téléviseur sur le
canal de sortie du décodeur/décrypteur (3 ou 4
habituellement) et utiliser le décodeur/
décrypteur pour sélectionner les canaux.
Câble de 75 ohms d'entrée de TV
câblée
Décodeur/décrypteur
Câble de 75 ohms
au téléviseur
Pour les abonnés au service câblé de base
en clair avec canaux par souscription.
En cas d’abonnement à un service de TV câblée
dans lequel les canaux de base sont en clair et
les canaux par souscription nécessitent un
décodeur/décrypteur, il peut être judicieux
d’utiliser un répartiteur et un commutateur A/B
(disponible auprès du câblo-opérateur ou d’un
magasin d’accessoires électroniques). Avec le
commutateur en position « B », il est possible
d’accéder directement aux canaux non cryptés
de la télévision. Avec le commutateur en position
« A », il est possible de syntoniser le téléviseur
sur la sortie du décodeur/décrypteur (canal 3 ou
4 habituellement) et d'utiliser le décodeur/
décrypteur pour syntoniser les canaux cryptés.
Câble de 75
ohms d'entrée de
TV câblée
Décodeur/décrypteur
Commutateur A/B
Répartiteur
A
B
Câble de 75
ohms au
téléviseur
Prise RF IN
Prise RF IN
Les schémas de connexion sont offerts à titre de
suggestions. Il pourra être nécessaire de les
modifier pour répondre aux besoins d'une
sélection particulière de composants. Les
schémas sont destinés à illustrer uniquement les
connexions audio et vidéo à composantes.
Connexion du téléviseur à un magnétoscope
Arrière du
téléviseur
Prises Audio/Video OUT
(Sorties audio/vidéo)
Câble audio/vidéo (non
fourni)
Prises AUDIO/VIDEO IN (Entrées audio/vidéo
1 (ou 2)
Connexion du téléviseur à un ma gnétos cope
avec un câble S-Vidéo
Utiliser cette méthode pour connecter le
téléviseur à des périphériques vidéo avec une
prise de sortie S-Vidéo. Ce type de connexion
fournit une qualité d’image supérieure à celle
obtenue avec des câbles audio/vidéo.
Utiliser un câble S-Vidéo disponible dans le
commerce pour cette connexion.
Pour connecter un magnétoscope avec un câble
S-Vidéo à la prise S-VIDEO IN (entrée S-Vidéo)
au dos du téléviseur, il faut aussi connecter les
câbles audio aux prises AUDIO IN (entrée
Audio) au dos du téléviseur. Le câble S-Vidéo
transporte uniquement le signal vidéo. Le signal
audio est séparé.
Prise S-VIDEO IN
Prises Audio
OUT (Sorties
audio)
Prise S-Video OUT
(Sortie S-Vidéo)
Câble S-Vidéo (non
fourni)
Câble audio (non
fourni)
(Entrée S-Vidéo)
Prises AUDIO IN (Entrée audio) 1
(ou 2)
Remarque Si les prises S-VIDEO (S-Vidéo) et VIDEO (Vidéo)
sont connectées en même temps, la connexion
S-Vidéo est prioritaire.
Arrière du
téléviseur
Connexions à d'autres équipements
La disposition exacte à utiliser pour connecter
divers composants vidéo et audio au téléviseur
dépend du modèle et des fonctions de chaque
composan t. Consult er le manuel du propriétaire
fourni avec chaque composant pour localiser les
entrées et sorties vidéo et audio.
www.insignia-products.com
31
Page 34

Connexion du téléviseur à un lecteur de DVD
ou un récepteur satellite avec un câble
S-Vidéo.
Prises S-VI DEO IN
Prises
Audio OUT
(Sorties
audio)
Prise S-Video OUT
(Sortie S-Vidéo)
Câble S-Vidéo (non
fourni)
Câble audio (non
fourni)
(Entrée S-Vidéo) 1
(ou 2)
Prises AUDIO IN (Entrée audio) 1
(ou 2)
Arrière du
téléviseur
Connexion du téléviseur à un lecteur de DVD
avec vidéo à composantes
Prises Component OUT (Sorties vidéo à
Prises
Audio OUT
(Sorties
audio)
Câble vidéo (non fourni)
Câble audio (non
fourni)
YPBP
composantes)
R
Prises Component IN (Entrées vidéo
à composantes)
Prises AUDIO IN (Entrées
audio)
Arrière du
téléviseur
Remarque Les entrées vidéo à composantes du téléviseur
sont destinées à être utilisées avec des
périphériques qui émett e nt des signaux
entrelacés 480i/10 80i et des signaux progressifs
480p/720p.
Connexion du téléviseur à un récepteur/
décodeur DTV
Pour connecter un récepteur/décodeur DTV, le
relier au téléviseur à l'aide d'un câble vidéo à
composantes.
Pour régler le volume sonore, allumer le
téléviseur et l'amplificateur stéré o et désactiver
les haut-parleurs intégrés du téléviseur (voir
“Désactivation des haut-parleurs intégrés” voir
page 52).
Amplificateur
Arrière du téléviseur
Prise de sortie audio
(D)
Prise d'entrée audio
(G)
Prise de sortie audio
(G)
Câble audio (non
fourni)
Prise d'entrée audio
(D)
Remarque Pour entendre un son lorsqu'un amplificateur
audio externe est utilisé, le volume du téléviseur
et le volume de l'amplificateur doivent tous deux
être réglés au-dessus de 0 (zéro).
Par exemple, si le volume du téléviseur est réglé à
0, aucun son ne se fait ent endre, même si le
volume de l'amplificateur est réglé au maximum.
Utilisation d'un amplificateur AV avec son
ambiophonique numérique intégré
En utilisant comme suit un amplificateur avec
son ambiophonique numérique intégré, il est
possible de profiter de divers systèmes audio, y
compris du son ambiophonique Dolby Digital qui
permet de se croire dans une salle de cinéma.
Arrière du
Prise de sortie audio numérique
coaxiale
Prises Component OUT (Sorties
vidéo à composantes)
Prises
Audio OUT
(Sorties
audio)
YPBP
Câble vidéo (non fourni)
Câble audio (non
fourni)
Prises Component IN (Entrées
R
vidéo à composantes)
Prises AUDIO IN (Entrées
audio)
Connexion à un système audio externe
Cette connexion permet d'utiliser un
amplificateur audio et des haut-parleurs
externes, et d'ajuster le niveau audio à l'aide de
la télécommande du téléviseur.
32
Câble numérique coaxial
(non fourni)
Arrière du
Prise d'entrée audio
numérique coaxiale
Amplificateur AV avec décodeur
ambiophonique numérique intégré
Précaution Pour effectuer la connexion ci -dessus, ne pas
www.insignia-products.com
TV
régler DOLBY DIGITAL sur « ON » (Marche) sur
l'amplificateur AV. Sinon, les haut-parleurs
émettront un bruit intense pouvant
éventuellement endommager l'ouïe de
l'utilisateur ou les haut-parl eurs.
Page 35

Fabriqué sous licence de Dolby Laboratories. «
Dolby » et le symbole à doub le D sont des
marques de commerce de Dolby Laboratories.
Remarque Cet appareil n'a pas de sortie audio DTS. Il ne se
produira aucune sortie sonore s'il est connecté à
un amplificate ur AV avec un décodeur DTS
intégré.
Piles de la télécommande
La télécommande nécessite deux piles AA (non
fournies). Il est recommandé de remplacer les
piles une fois par an ou lorsque le
fonctionnement de la télécommande devient
intermittent ou non satisfaisant. Remplacer les
piles d'origine par des piles neuves AA. Ne pas
mélanger des piles neuves avec des anciennes
ou de types différents.
Connexion du téléviseur à un caméscope
Pour lire à partir d'un caméscope, connecter
celui-ci au téléviseur comme illustré.
Caméscope
Prises Audio/Video OUT
(Sorties audio/vidéo)
Câble audio/vidéo (non
fourni)
Avant du téléviseur
Connexion du téléviseur à un jeu
Le téléviseur peut être utilisé en tant qu'écran
d'affichage pour de nombreux jeux vidéo.
Cependant, compte tenu du large éventail de
signaux générés par ces dispositifs et des
variations requises par suite au niveau des
branchements, ceux-ci n'ont pas tous été inclus
dans les schémas de connexion suggéré s.
Consulter le manuel du propriétaire de chaque
composant pour de plus amples informations.
Avant du téléviseur
TV GAME
Prise Audio/Video OUT (Sortie
audio/vidéo)
Câble audio/vidéo (non
fourni)
Remplacement des piles :
1 Appuyer sur la languette de verrouillage du
compartiment des piles et ouvrir le
compartiment des piles.
2 Placer deux piles AA dans le compartiment,
en respectant les symboles de la polarité
représentés dans le compartiment des piles.
3 Fermer le couvercle du compartiment des
piles.
Précaution • N’utiliser que la taille et le type de pile
spécifiés.
• Veiller à respecter la polarité telle
qu’indiquée dan s le compartiment de s
piles. L'inversion acci dentelle des piles
peut endommager l’ a ppareil.
• Ne pas mélanger différents types de pile
(par exemple : alcalines et au
carbone-zinc) ni des piles usagées avec
des piles neuves.
• Si la télécommande ne doit pas être
utilisée pendant une longue période de
temps, retirer les piles afin d'éviter tout
épanchement d'acide éventuel pouvant
provoquer des dommages ou des
blessures.
• Ne pas essayer de recharger des piles qui
ne sont pas conçues po ur cela. Elles
peuvent surchauffer et exploser.
www.insignia-products.com
33
Page 36

Présentation du téléviseur
Commandes et connexions
Panneau avant
Panneau arrière
9
8
Élément
1Touche POWER
2 Lentille du
3 Témoin de mise
4CANAL
5VOLUME
6 Prise d'entrée
7 Prises d’entrée
Commande/
connexion
(Mise sous/hors
tension)
capteur
infrarouge
sous tension
Touches ou
Touches ou
S-Vidéo
AUDIO L/R
(Audio G/D) et
VIDEO (Vidéo) 3
Fonction
Permet d'allumer ou d'éteindre
le téléviseur.
Reçoit les signaux de la
télécommande.
S'allume qua nd le télévis eur est
mis sous tension.
Permettent de passer au canal
suivant ou précédent ou de se
déplacer parmi les options du
menu.
Permettent d’augmenter ou de
diminuer le volume ou de
modifier des réglages ou de
passer au menu d’écran
suivant.
Connecter à cette pris e un
câble S-Vidéo d’une source
extérieure, telle qu’un lecteur
de DVD.
Connecter aux prises AUDIO
les câbles de sortie audio
(gauche et droit
respectivement) d’une source
extérieure, telle qu’un
magnétoscope. Connecter un
câble vidéo d’une source
extérieure, telle qu’un
magnétoscope.
Élément
1 Prise d’entrée
2 Prises
3 Prises d’entrée
4 Prises d’entrée
5 Prise d’entrée
6 Prise de sortie
7 Prise d'entrée
Commande/
connexion
d’antenne RF
COMPONENT IN
(Entrées vidéo à
composantes)
AUDIO L/R
(Audio G/D) et
VIDEO (Vidéo) 1
AUDIO L/R
(Audio G/D) et
VIDEO (Vidéo) 2
audio droite
audio numérique
coaxiale
S-VIDEO
(S-Vidéo) 1
Fonction
Connecter le câble d’antenne à
cette prise.
Connecter à ces prises les
câbles audio et vidéo à
composantes d’une source
extérieure, telle qu’un lecteur de
DVD.
Connecter à ces prises un câble
audio (gauche et droite) et un
câble vidéo composite reliés à
une source extérieure, telle
qu’un magnéto sc o pe .
Connecter à ces prises un câble
audio (gauche et droite) et un
câble vidéo composite reliés à
une source extérieure, telle
qu’un magnéto sc o pe .
Connecter à cette prise le câble
de sortie vidéo droi te d’une
source extérieure, telle qu’un
magnétoscope.
Connecter un câble coa xial
audio numérique de cette prise
à un amplificateur ext erne, tel
qu’un décodeur Dolby Digital.
Connecter à ces prises un câble
S-Vidéo reli é à un e source
extérieure, telle qu’un lecteur de
DVD.
34
8 Prise d'entrée
S-VIDEO
(S-Vidéo) 2
9 Cordon
d’alimentation
de CA
www.insignia-products.com
Connecter à ces prises un câble
S-Vidéo reli é à un e source
extérieure, telle qu’un lecteur de
DVD.
Insérez la fiche du cordon CA à
la prise de CA polarisée (120
volts, 60 hertz).
Page 37

Télécommande
Élément Touche Fonction
1
2
3
4
5
6
7
Élément Touche Fonction
1Touche POWER
(Mise sous/hors
tension)
2 Touche SLEEP
(Arrêt différé)
3Touches
numériques de
sélection des
canaux
4 Touche RESET
(Réinitialisation)
Permet d'allumer ou
d'éteindre le télévi seur.
Permet de programmer un
arrêt différé automatique du
téléviseur après une durée
déterminée. Pour plus
d’informations, se reporter à
“Pour régler le temporisateur
d'arrêt automatique:” voir
page 37.
Permettent d’entrer un
numéro de canal directement.
Pour plus d’informations, se
reporter à “Pour utiliser le
téléviseur :” voir page 35.
En mode de réglage, permet
de ramener les réglages
d'image, de son et d'écran de
menu à la position préréglée
en usine.
13
8
9
10
11
15
16
14
12
7 Touche MENU Permet d’accéder au menu
8
9 Touche MUTE
10 Touche DISPLAY
11 Touche PICTURE
12 Touche INPUT
13 Touche QUICK
14 Touche CLOSED
15 CANAL
16 Touche EXIT
Touches FAV
ou
(Sourdine)
(Affichage)
SIZE (Taille de
l’image)
SELECT
(Sélection de
l’entrée)
VIEW (Affichage
rapide)
CAPTION
(Sous-titres)
Touches ou
(Quitter)
d’écran.
Permettent de sélectionner les
canaux préférés. Pour plus
d’informations, se reporter à
“Enregistrement des canaux
favoris” voir page 38.
Active ou désactiv e le son.
Pour plus d’informations, se
reporter à “Pour utiliser le
téléviseur :” voir page 35.
En mode analogique —
Permet d’afficher à l’écran le
numéro de canal.
En mode numérique —
Permet d’afficher à l’écran
l’information su r le can al .
Pour plus d’informations, se
reporter à “Pour afficher les
informations actuelles à
l'écran :” voir page 36.
Permet d'afficher le menu
PICTURE SIZE (Taille de
l'image).
Permet de sélectionner le
mode TV ou une entrée
externe. Pour plus
d’informations, se reporter à
“Sélection de la source
d’entrée vidéo” voir page 36.
Permet de revenir au cana l
précédent. Pour plus
d’informations, se reporter à
“Pour utiliser le téléviseur :”
voir page35.
Permet d'afficher le menu
CLOSED CAPTION
(Sous-titres).
Permettent de passer au canal
suivant ou précédent ou de se
déplacer parmi les options du
menu. Pour plus
d’informations, se reporter à
“Pour utiliser le téléviseur :”
voir page35.
Permet de quitter le menu
d’écran.
Fonctionnement du téléviseur
5 Touche ENTER
(Entrée)
6Touches VOL
(Volume) + ou -
Permet de saisir ou de
sélectionner des informations
pour des opérations à l'écran
du menu.
Permettent d’augm enter ou de
diminuer le volume, de
modifier des réglages ou de
passer à l'écran de menu
suivant. Pour plus
d’informations, se reporter à
“Pour utiliser le téléviseur :”
voir page35.
www.insignia-products.com
Fonctionnement de base
Pour utiliser le téléviseur :
1 Appuyer sur la touche POWER (Marche) du
téléviseur ou de la télécommande pour
allumer le téléviseur.
2 Mettre l'option de menu TV/CABLE dans la
position appropriée (pour de plus amples
informations, se reporter à “Pour sélectionner
le mode TV ou le mode Câble :” on page 37).
35
Page 38

3 Régler le volume en appuyant sur VOL + ou
VOL – .
Sélection de la source d’entrée vidéo
Appuyer sur INPUT SELECT (Sélection de
l’entrée) pour afficher un signal provenant d'un
autre périphérique connecté au téléviseur, tel
qu'un magnétoscope ou un lecteur de DVD. Les
sélections possibles sont ANT, VIDEO1,
VIDEO2, VIDEO3 (sur le panneau avant) ou
COMPONENT (Vidéo à composantes), suivant
les prises d'entrée utilisées pour connecter les
périphériques.
Le volume sonore est indiqué à l'écran par
des barres vertes. Lorsque le volume sonore
augmente , le nombre de barres aug mente. Si
le volume diminue, le nombre de barres
vertes diminue également.
Appuyer sur MUTE (Sourdine) pour couper le
son. Appuyer de nouveau sur MUTE
(Sourdine) ou sur VOL + ou VOL –, pour
rétablir le son.
4 Pour changer de canal, vers le haut ou vers
le bas, appuyer sur CH ou . Le téléviseur
s'arrête au prochain canal programmé en
mémoire. Pour plus d’informations, se
reporter à “Mémorisation des canaux” on
page 37.
- OU Appuyer sur les touches numériques de
sélection des canaux
pour sélectionner l e c ana l.
ANT
ABCD
12
SOURCE SELECTION
0. ANT
1. VIDEO1
2. VIDEO2
3. VIDEO3
4. COMPONENT
/0-4 : SELECT
Une pression de la touche INPUT SELEC T
(Sélection de l'entrée) de la télécommande
affiche la source actuelle du signal (appuyer de
nouveau sur INPUT SELECT ou 0-4 pour
changer).
Pour afficher les informations actuelles à
l'écran :
1 Appuyer sur la touche DISPLAY (Affichage)
de la télécommande.
Lorsque le téléviseur reçoit un signal
numérique, les informations numériques
apparaissent.
51-3
Moon Star
CITYHD
Remaining Time 0:20 TV-Y7
No program information is available.
SUN Jan 01 12:00 PM
English
HD CC
Pour sélectionner des canaux analogiques :
• 1-9 – Appuyer deux fois sur 0, puis sur 1 à
9 selon le besoin. Par exemple, pour
sélectionner
le canal 2, appuyer sur 0 0 2.
• 10-99 – Appuyer sur 0, puis les deux
derniers chiffres. Par exemple, pour
sélectionner le canal 12, appuyer sur 0 1
2.
• 100-125 – Appuyer sur les 3 chiffres dans
l’ordre. Par exemple, pour sélectionner le
canal 120, appuyer sur 120.
Pour sélectionner des canaux numériques :
• Appuyer sur les 3 premiers chiffres, puis
appuyer sur la touche –, suivie des trois
derniers chiffres. Par exemple, pour
sélectionner le canal 015-001, appuyer
sur 0 1 5 – 0 0 1.
Remarque • Si le canal sélectionné ne diffuse aucune
émission, le son est automatiquement mis
en sourdine.
• Si le canal sélectionné arrête de diffuser, le
téléviseur s'arrête automatiquement après
15 minutes.
5 Appuyer sur QUICK VIEW (Affichage rapide)
pour passer au dernier canal sélectionné,
puis appuyer de nouveau sur QUICK VIEW
pour revenir au canal initial.
• Nom de l'émission diffusée
• Nom de la station
• Temps restant
• Langue de l’audio
• Nom de l'émission
• Classification de la puce antiviolence
• Symbole HD ou SD
• Symbole du sous-titrage
• Symbole de la puce antiviolence
2 Appuyer de nouveau sur DIS PLAY
(Affichage) ; les informations analogiques
apparaissent.
STEREO
SAP
TV-PG L V
ON TIMER 8:30AM
OFF TIMER 11:30PM
SLEEP TIMER 2h00m
ANT
FULL CABLE
CLOCK 12:00AM SUN
ABCD
7
• Horloge
• Numéro du canal ou mode VIDEO
sélectionné
• Étiquette du canal (si préréglé)
36
www.insignia-products.com
Page 39

• État audio : stéréo ou SAP (deuxième
trame sonore)
• Classification par conte nu
• On timer (Temporisateur de mise en
marche automatique), Off timer
(Temporisateur d'arrêt automatique),
Sleep time (Durée avant l’arrêt différé) (si
préréglée)
• Taille de l'image
3 Appuyer sur la touche ou pour
sélectionner LANGUAGE (Langue).
SETUP
LANGUAGE ENGLISH
CLOCK SET
TV/CABLE CABLE
AUTO C H ME MORY
ADD/DELETE
ENGLISH / FRANÇAIS / ESPAÑOL
Remarque Lorsque le téléviseur reçoit un signal analogique,
DISPLAY (Affichage) montre seulement les
informations analogiques.
3 Appuyer de nouveau sur DISPLAY
(Affichage) pour effacer l’affichage.
Pour régler le temporisateur d'arrêt
automatique :
1 Pour que le téléviseur s'éteigne après une
durée déterminée, appuyer sur la touche
SLEEP (Arrêt différé) de la télécommande.
L'horloge ajoute 10 minutes à l'intervalle à
chaque pression de la touche SLEEP (Arrêt
différé).
Une fois programmée la durée avant l'arrêt
différé, l'affichage apparaît brièvement toutes
les dix minutes pour rappeler que le
temporisateur d'arrêt automatique
fonctionne.
2 Pour confirmer le réglage du temporisateur
d'arrêt automatique, appuyer sur la touche
SLEEP (Arrêt différé) et le temps restant
s'affiche pendant quelques secondes.
3 Pour annuler l’arrêt différé, appuyer de façon
répétée sur la touche SLEEP (Arrêt différé)
jusqu'à ce que l'affichage devienne 0h00m.
Paramètres de départ
Cette section décrit les paramètres qui doivent
fixés dès la première mise sous tension du
téléviseur.
Sélection de la langue
Il est possible de choisir l’anglais, l’espagnol ou
le français pour la langue des menus affichés à
l’écran.
Pour sélectionner la langue :
1 Appuyer sur la touche MENU de la
télécommande. L’écran du menu s’affiche.
2 Appuyer sur la touche ou pour
sélectionner l'icône de configuration .
L’écran du menu SETUP (Configuration)
s’affiche.
SETUP
LANGUAGE ENGLISH
CLOCK SET
TV/CABLE CABLE
AUTO CH MEMORY
ADD/DELETE
:SELECT :ADJUST
:SELECT :ADJUST
4 Appuyer sur la touche ou pour
sélectionner la langue désirée.
5 Appuyer sur la touche EXIT (Quitter) de la
télécommande pour revenir au mode de
visualisation nor ma l.
Mémorisation des canaux
Le téléviseur est équipé d'un dispositif de
mémorisation des canaux qui permet de passer
aux canaux suivants ou précédents en mémoire,
en sautant les canaux non souhaités. Les
canaux doivent être programmés dans la
mémoire du téléviseur avant de pouvoir
sélectionner un canal particulier. Le téléviseur
peut recevoir jusqu'à 250 canaux VHF/UHF et
500 canaux câblés.
Pour utiliser le téléviseur avec une antenne,
mettre l'option de menu TV/CABLE en mode TV.
Au départ de l'usine, cette option de menu est
en mode CABLE.
Pour sélectionner le mode TV ou le mode
Câble :
1 Appuyer sur la touche MENU de la
télécommande. L’écran du menu s’affiche.
2 Appuyer sur la touche ou pour
sélectionner l'icône de configuration .
L’écran du menu SETUP (Configuration)
s’affiche.
SETUP
LANGUAGE ENGLISH
CLOCK SET
TV/CABLE CABLE
AUTO CH MEMORY
ADD/DELETE
:SELECT :ADJUST
3 Appuyer sur ou pour sélectio nne r TV/
CABLE.
4 Appuyer sur ou pour sélectionner TV ou
CABLE.
• TV – Canaux VHF/UHF
• CABLE – Canaux de TV câblée
5 Appuyer sur la touche EXIT (Quitter) de la
télécommande pour revenir au mode de
visualisation nor ma l.
Pour mémoriser les canaux :
1 Appuyer sur la touche MENU de la
télécommande. L’écran du menu s’affiche.
www.insignia-products.com
37
Page 40

2 Appuyer sur la touche ou pour
sélectionner l'icône de configuration .
L’écran du menu SETUP (Configuration)
s’affiche.
SETUP
LANGUAGE ENGLISH
CLOCK SET
TV/CABLE CABLE
AUTO CH MEMORY
ADD/DELETE
7 Répéter les étapes ci-dessus pour chaque
canal à ajouter.
Pour ajouter ou supprimer des canaux :
1 Appuyer sur la touche MENU de la
télécommande. L’écran du menu s’affiche.
2 Appuyer sur la touche ou pour
sélectionner l'icône de configuration .
L’écran du menu SETUP (Configuration)
s’affiche.
:SELECT :ADJUST
3 Appuyer sur ou pour sélectionner
AUTO CH MEMORY (Mise en mémoire
automatique des canaux).
SETUP
LANGUAGE ENGLISH
CLOCK SET
TV/CABLE CABLE
AUTO CH MEMORY
ADD/DELETE
:SELECT :ADJUST
4 Appuyer sur ou pour que le téléviseur
commence à mémoriser les canaux
disponibles dans la zone. Ceci peut prendre
plusieurs minutes. Le téléviseur se remet en
mode de visualisation normal lorsque le
processus est terminé.
AUTO CH MEMORY
EXIT : CANCEL
PROGRAMMING NOW
PLEASE WAIT
Remarque De nouveaux canaux peuvent devenir disponibles
à n'importe quel moment, aussi il est
recommandé d'exécuter périodiquement la
procédure de mémorisation des canaux pour
mettre à jour la liste de c anaux.
Pour ajouter un canal numérique :
1 Sélectionner le canal à ajouter à la liste des
canaux à l'aide des touches numériques
(0-9).
2 Appuyer sur la touche MENU de la
télécommande. L'écran du menu s'affiche.
3 Appuyer sur ou pour sélectionner
l'icône de configuration, puis sur ou
pour sélectionner ADD/DELETE (Ajouter/
supprimer).
4 Appuyer sur , le menu ADD/DELETE
s'affiche.
5 Appuyer sur ou pour sélectionner
ADDING CHANNEL (Ajout de canal), puis
appuyer sur . Le canal sélectionné est
ajouté à la liste.
6 Appuyer sur la touche EXIT (Quitter) de la
télécommande pour revenir au mode de
visualisation normal.
SETUP
LANGUAGE ENGLISH
CLOCK SET
TV/CABLE CABLE
AUTO CH MEMORY
ADD/DELETE
:SELECT :ADJUST
3 Appuyer sur ou pour sélectio nne r ADD/
DELETE (Ajouter/supprimer), puis appuyer
sur . Le menu ADD/DELETE (Ajouter/
supprimer) s'affiche.
4 Appuyer sur ou pour sélectionner le
canal à ajouter ou supprimer, puis appuyer
sur ou pour sélectionner ADD (Ajouter)
ou DELETE (Supprimer), suivant le cas.
Remarque Pour éliminer tous les cana ux de la mémoire,
sélectionner CLEAR ALL (Effacer tout) à partir du
menu, puis appuyer sur ou pour exécuter
l'opération.
5 Répéter l'étape 4 pour les autres canaux à
ajouter ou à supprimer, puis appuyer sur
ENTER (Entrée).
6 Appuyer sur la touche EXIT (Quitter) de la
télécommande pour revenir au mode de
visualisation nor ma l.
Enregistrement des canaux favoris
Il est possible de désigner jusqu'à 12 canaux
comme canaux favoris.
Pour définir les canaux fa voris :
1 Sélectionner un canal à inclure dans la liste
des canaux favoris.
2 Appuyer sur la touche MENU de la
télécommande. L’écran du menu s’affiche.
3 Appuyer sur la touche ou pour
sélectionner l'icône Option . L’écran du
menu OPTION s’affiche .
OPTION
ON/OFF TIMER OFF
FAVORITE CH
CH LABEL
VIDEO LABEL
:SELECT :ADJUST
38
www.insignia-products.com
Page 41

4 Appuyer sur ou pour sélectionner
FAVORITE CH (Canal favori), puis appuyer
sur ou . Le menu FAVORITE CH (Canal
favo ri) s’affiche.
FAVORITE CH:CH 23-100
SET/ CLEAR TV CABLE
123-456
123-456
OPTION MENU
:SELECT :ADJUST
CLEAR:ENTER END :EXIT
15-001
15-001
13
23-100
13
23-100
0
0
0
0
6-001
6-001
0
0
0
0
0
0
0
0
0
0
5 Appuyer sur ou pour sélectionner SET
(Définir), puis appuyer sur ENTER (Entrée).
6 Appuyer sur la touche EXIT (Quitter) de la
télécommande pour revenir au mode de
visualisation normal.
7 Répéter les étapes 1 à 5 pour définir jusqu'à
11 canaux favoris supplémentaires.
Configuration générale et commandes
Configuration de la puce antiviolence (V-Chip)
Il est possible d'empêcher la visualisation de
certaines émissions sur le téléviseur afin d'éviter
que les enfants puissent voir ou entendre des
scènes violentes ou des images jugées comme
inappropriées. La restriction s'applique aux
classifications des émissions TV et des films, si
ces données sont transmises. Il est possible de
définir cette restriction séparément. Pour utiliser
la fonction de puce antiviolence, commencer par
enregistrer un mot de passe.
Pour enregistrer un mot de passe :
1 Appuyer sur la touche MENU de la
télécommande ou du téléviseur. L’écran du
menu s’affiche.
2 Appuyer sur la touche ou pour
sélectionner (LOCKS) (Verrouillage). Le
menu LOCKS (Verrouillage) s’affiche.
Remarque
Pour regarder un canal favori,
appuyer sur FAV
ou sur la télécommande pour
sélectionner le canal. FAV ou ne
fonctionne pas tant que les canaux favoris
n'ont pas été mis en mémoire.
Pour supprimer un canal de la liste des
canaux favoris :
1 Sélectionner un canal à supprimer dans la
liste des canaux favoris.
2 Appuyer sur la touche MENU de la
télécommande. L’écran du menu s’affiche.
3 Appuyer sur la touche ou pour
sélectionner l'icône Option . L’écran du
menu OPTION s’affiche.
OPTION
ON/OFF TIMER OFF
FAVORITE CH
CH LABEL
VIDEO LABEL
:SELECT :ADJUST
4 Appuyer sur ou pour sélectionner
FAVORITE CH (Canal favori), puis appuyer
sur ou . Le menu FAVORITE CH (Canal
favori) s'affiche.
5 Appuyer sur ou pour sélectionner
CLEAR (Effacer), puis appuyer sur ENTER
(Entrée).
6 Appuyer sur la touche EXIT (Quitter) de la
télécommande pour revenir au mode de
visualisation normal.
LOCKS
V-CHIP SET
FRONT PANEL LOCK
NEW PASSWORD
:SELECT :ADJUST
3 Appuyer sur ou pour sélectionner NEW
PASSWORD (Nouveau mot de passe).
L’écran NEW PASSWORD (Nouveau mot de
passe) s’affiche.
LOCKS
NEW PASSWORD
[0-9] : SELECT ENTER : SET
EXIT : END
4 Entrer un mot de passe de 4 chiffres à l'aide
des touches numériques de la
télécommande, puis appuyer sur ENTER
(Entrée). L’écran CONFIRM PASSWORD
(Confirmation du mot de passe) s’affiche.
LOCKS
CONFIRM PASSWORD
[0-9] : SELECT ENTER : SET
EXIT : END
www.insignia-products.com
39
Page 42

5 Entrer le même mot de passe, puis appuyer
sur ENTER (Entrée). Le mot de passe est
enregistré et le menu V-Chip (Puce
antiviolence) s'affiche.
Remarques Pour éviter d'oublier le mot de passe, il est
recommandé de le note r par écri t et de le gard er
en lieu sûr.
En cas d'oubli du mot de passe :
1. Régler le volume au plus bas.
2. Appuyer à la fois sur la touc he du volume
vers le bas (sur le téléviseur) et la touche du
canal 0 (sur la télécommande) et les tenir
enfoncées plus de 2 secondes.
Pour la séle cti on de TV-Y7, TV-PG, TV-14 ou
de TV-MA, appuyer sur -/DISPLAY pour une
description de la classification. Appuyer sur
ou pour sélectionner la classification
souhaitée, puis sur ou pour
sélectionner ON (Activé) ou OFF (Désactivé).
7 Appuyer sur ou pour sélectio nne r
MOVIE RATING (Classification des films),
puis sur . Le menu de configuration de la
classification (RATING SET) s'af f ic h e.
8 Appuyer sur ou pour sélectio nne r une
classification, puis sur ou pour
sélectionner ON (Activé) ou OFF (Désactivé).
Configuration de la puce antiviolence
(V-Chip) :
1 Appuyer sur la touche MENU de la
télécommande ou du téléviseur. L'écran du
menu s'affiche.
2 Appuyer sur ou pour sélectionner
(LOCKS) [Verrouillage]. Le menu LOCKS
(Verrouillage) s'affiche.
LOCKS
V-CHIP SET
FRONT PANEL LOCK
NEW PASSWORD
:SELECT :ADJUST
3 Appuyer sur ou pour accéder au mode
de saisie du mot de passe. L'écran du mot de
passe de verrouillage (LOCKS) s'affiche.
4 Saisir le mot de passe à 4 chiffres à l'aide
des touches numériques de la
télécommande, puis appuyer sur ENTER
(Entrée). Le menu de configuration du
verrouillage (LOCKS) s'affiche.
5 Appuyer sur ou pour sélectionner
V- CHIP SET (Configuration de la puce
antiviolence), puis sur . Le menu
Configuration (SET) s'affiche.
6 Appuyer sur ou pour sélectionner TV
RATING (Classification TV), puis appuyer sur
ou pour sélectionner la classification
souhaitée.
Classification Explication
OFF (Désactivé) La fonction TV RATING n'est pas
TV-Y Approprié pour les enfants de tous
TV-Y7 Approprié pour les enfants âgés de
TV-G Tout public
TV-PG Contrôle parental suggéré
TV-14 Inappropri é po ur le s en fa nts âgés de
activée
âges
sept ans et plus
moins de 14 ans
Classification Explication
G Tous publics
PG Contrôle par e ntal suggéré
PG-13 Inapproprié pour les en fa nts âgés de
moins de 13 ans
R Accès réservé : Les enfants de moins
de 17 ans doivent être accompagnés
par un parent ou un resp onsable
adulte
NC-17 Interdit aux moins de 17 ans
X Adultes seulement
9 Appuyer deux fois sur MENU pour revenir à
l'écran LOCKS (Verrouillage), puis sur ou
pour sélectionner V-CHIP (Puce
antiviolence).
10 Appuyer sur ou pour sélectionner ON
(Activé). La configuration est enregistrée en
mémoire.
11 Appuyer sur la touche EXIT (Quitter) de la
télécommande pour revenir au mode de
visualisation nor ma l.
Remarque La fonction de puce antiviolence est activée
uniquement sur les émissions et sources d'entrée
qui comprennent un signal de classification.
L'option V-CHIP SET (DTV) (Co nfiguration de la
puce antiviolence - TVN) pourra être sélectionnée
chaque fois qu'un nouveau système de
classification des émi ssions numériques aux
États-Unis peut être reçu.
Pour utiliser le téléviseur une fois qu'il est
protégé :
• Pour recevoir une émission qui est bloquée
par la puce antiviolence, appuyer sur MUTE
(Sourdine) et entrer le mot de passe, puis
appuyer sur ENTER (Entrée) pour voir
l'émission.
Si le mot de passe est entré correctement, la
protection est temporairement levée. Si le
téléviseur est éteint ou si le canal est changé,
la restriction de la puce antiviolence est
rétablie.
TV-MA Adultes seulemen t
40
www.insignia-products.com
Page 43

Pour changer le mot de passe :
1 Appuyer sur la touche MENU de la
télécommande ou du téléviseur. L’écran du
menu s’affiche.
2 Appuyer sur la touche ou pour
sélectionner (LOCKS) (Verrouillage). Le
menu LOCKS (Verrouillage) s’affiche.
LOCKS
V-CHIP SET
FRONT PANEL LOCK
NEW PASSWORD
:SELECT :ADJUST
3 Appuyer sur ou pour accéder au mode
de saisie du mot de passe. L’écran du mot de
passe LOCKS (Verrouillage) s’affiche.
8 Appuyer sur la touche EXIT (Quitter) de la
télécommande pour revenir au mode de
visualisation nor ma l.
Verrouillage du panneau avant
Il est possible de verrouiller les touches du
panneau avant pour éviter toute modification
accidentelle des paramètres. Lorsque le
verrouillage du panneau avant est activé (ON),
aucune des touches de commande du panneau
avant du téléviseur (à l'exception de POWER
[Marche]) ne fonctionne.
Pour verrouiller ou déverrouiller le panneau
avant :
1 Appuyer sur la touche MENU de la
télécommande ou du téléviseur. L’écran du
menu s’affiche.
2 Appuyer sur la touche ou pour
sélectionner (LOCKS) (Verrouillage). Le
menu LOCKS (Verrouillage) s’affiche.
LOCKS
PASSWORD
[0-9] : SELECT ENTER : SET
EXIT : END
4 Entrer le mot de passe de 4 chiffres à l'aide
des touches numériques de la
télécommande, puis appuyer sur ENTER
(Entrée). Le menu de configuration LOCKS
(Verrouillage) s’affiche.
LOCKS
V-CHIP SET
V-CHIP OFF
TV RATING OFF
MOVIE RATING OFF
FRONT PANEL LOCK OFF
NEW PASSWORD
:SELECT :ADJUST
5 Appuyer sur ou pour sélectionner NEW
PASSWORD (Nouveau mot de passe), puis
appuyer sur ou .
LOCKS
NEW PASSWORD
[0-9] : SELECT ENTER : SET
EXIT : END
6 Entrer un nouveau mot de passe de 4 chiffres
à l'aide des touches numériques de la
télécommande, puis appuyer sur ENTER
(Entrée). L’écran CONFIRM PASSWORD
(Confirmation du mot de passe) s’ affi ch e.
7 Entrer le même mot de passe, puis appuyer
sur ENTER (Entrée). Le mot de passe est
changé.
LOCKS
V-CHIP SET
FRONT PANEL LOCK
NEW PASSWORD
:SELECT :ADJUST
3 Appuyer sur ou pour accéder au mode
de saisie du mot de passe. L’écran du mot de
passe LOCKS (Verrouillage) s’affiche.
LOCKS
PASSWORD
[0-9] : SELECT ENTER : SET
EXIT : END
4 Entrer le mot de passe de 4 chiffres à l'aide
des touches numériques de la
télécommande, puis appuyer sur ENTER
(Entrée). Le menu de configuration LOCKS
(Verrouillage) s’affiche.
5 Appuyer sur ou pour sélectio nne r
FRONT PANEL LOCK (Verrouillage du
panneau avant), puis appuyer sur ou
pour sélectionner ON (Marche) ou OFF
(Arrêt).
Lorsque que le panneau avant est verrouillé,
le message « NOT AVAILABLE » (Non
disponible) apparaît à l'écran en réponse à
toute pression d'une touche du panneau
avant.
6 Appuyer sur la touche EXIT (Quitter) de la
télécommande pour revenir au mode de
visualisation nor ma l.
Étiquetage des canaux
Une étiquette de canal apparaît au-dessus du
numéro du canal à chaque fois que le téléviseur
est allumé, qu'un canal est sélectionné ou que la
touche DISPLAY (Affichage) est enfoncée.
www.insignia-products.com
41
Page 44

N'importe quelle combinaison de quatre
caractères peut être sélectionnée pour identifier
un canal.
Pour créer une étiquette de canal :
1 Sélectionner le canal à étiqueter. 2 Appuyer sur la touche MENU de la
télécommande. L’écran du menu s’affiche.
3 Appuyer sur la touche ou pour
sélectionner l'icône Option . L’écran du
menu OPTION s’affiche.
OPTION
ON/OFF TIMER OFF
FAVORITE CH
CH LABEL
VIDEO LABEL
3 Appuyer sur la touche ou pour
sélectionner l'icône Option . L’écran du
menu OPTION s’affiche .
OPTION
ON/OFF TIMER OFF
FAVORITE CH
CH LABEL
VIDEO LABEL
:SELECT :ADJUST
4 Appuyer sur ou pour sélectio nne r CH
LABEL (Étiquette de canal), puis appuyer
sur ou . Le menu CH LABEL (Étiquette
de canal) s'affiche.
:SELECT :ADJUST
4 Appuyer sur ou pour sélectionner CH
LABEL (Étiquette de canal), puis appuyer
sur ou . Le menu CH LABEL (Étiquette
de canal) s'affiche.
CH LABEL : CH 23
SET/ CLEAR
LABEL ––––
OPTION MENU
:SELECT :ADJUST
ENTER : SET EXIT : END
5 Appuyer sur ou pour sélectionner SET/
CLEAR (Définir/effacer), puis appuyer sur
ou pour changer le paramètre en SET
(Définir).
6 Appuyer sur ENTER (Entrée) pour
sélectionner LABEL (Étiquette), puis
appuyer plusieurs fois sur ou jusqu'à ce
que le caractère désiré soit affiché.
7 Appuyer sur ENTER (Entrée) pour
sélectionner le caractère.
8 Répéter le processus jusqu'à ce que tous les
caractères désirés aient été sélectionnés.
9 Appuyer de nouveau sur ENTER (Entrée)
une fois la saisie de l'étiquette terminée.
10 Appuyer sur la touche EXIT (Quitter) de la
télécommande pour revenir au mode de
visualisation normal.
11 Répéter les étapes 1 à 9 pour étiqueter
d'autres canaux.
CH LABEL : CH 23
SET/ CLEAR
LABEL ––––
OPTION MENU
:SELECT :ADJUST
ENTER : SET EXIT : END
5 Appuyer sur ou pour sélectio nne r SET/
CLEAR (Définir/effacer), puis appuyer sur
ou pour changer le paramètre en CLEAR
(Effacer).
6 Appuyer sur
ENTER (Entrée) pour confirmer
la modification.
7 Appuyer sur la touche EXIT (Quitter) de la
télécommande pour revenir au mode de
visualisation nor ma l.
8 Répéter les étapes 1 à 6 pour effacer
l'étiquette d'autres canaux.
Étiquetage de la source d’entrée vidéo
La fonction d'étiquette vidéo permet d'étiqueter
chaque source d'entrée pour le téléviseur.
Pour étiqueter la source d’entrée vidéo :
1 Appuyer sur la touche MENU de la
télécommande. L’écran du menu s’affiche.
2 Appuyer sur la touche ou pour
sélectionner l'icône Option . L’écran du
menu OPTION s’affiche .
OPTION
ON/OFF TIMER OFF
FAVORITE CH
CH LABEL
VIDEO LABEL
Remarque Pour repasser du menu CH LABEL (Étiquette de
canal) au menu OPTION, sélectionner OPTION
MENU (Menu Option), pu is a ppuye r su r ou .
Pour effacer une étiquette de canal :
1 Sélectionner le canal dont l'étiquette est à
effacer.
2 Appuyer sur la touche MENU de la
télécommande. L’écran du menu s’affiche.
42
www.insignia-products.com
:SELECT :ADJUST
Page 45

3 Appuyer sur ou pour sélectionner
VIDEO LABEL (Étiquette vidéo), puis
appuyer sur ou . Le menu VIDEO
LABEL (Étiquette vidéo) s'affiche.
3 Appuyer sur ou pour sélectio nne r
CLOCK SET (Réglage horloge), puis
appuyer sur . Le menu CLOCK SET
(Réglage horloge) s'affiche.
VIDEO LABLE
1. VIDEO1 - /VCR/DVD/DTV
2. VIDEO2 - SAT/CBL
3. VIDEO3 -
4. COMPONENT -
OPTION MENU
:SELECT :ADJUST
4 Appuyer sur la touche ou pour
sélectionner la source vidéo à étiqueter.
VIDEO LABEL
1. VIDEO1 -
2. VIDEO2 -
3. VIDEO3 -
4. COMPONENT - / VCR/ DVD/ DTV
OPTION MENU
:SELECT :ADJUST
SAT/CBL
5 Appuyer sur la touche ou pour
sélectionner l'étiquette désirée.
VIDEO LABLE
1. VIDEO1 -
2. VIDEO2 -
3. VIDEO3 -
4. COMPONENT - /VCR/ DVD/DTV
OPTION MENU
:SELECT :ADJUST
SAT/CBL
6 Appuyer sur la touche EXIT (Quitter) de la
télécommande pour revenir au mode de
visualisation normal.
Réglage de l’horloge
L'horloge doit être correctement réglée pour que
le temporisateur de marche/arrêt remplisse sa
fonction à l'heure correcte. Pour plus
d’informations, se reporter à “Réglage des
temporisateurs de marche et arrêt” voir page 43.
SETUP
LANGUAGE ENGLISH
CLOCK SET
TV/CABLE CABLE
AUTO CH MEMORY
ADD/DELETE
:SELECT :ADJUST
4 Appuyer sur ou pour régler le mois
(MONTH), puis appuyer sur .
CLOCK SET
MONTH 1
DAY 1 ( SUN)
YEAR 2006
TIME 12:00AM
:SELECT :ADJUST
EXIT:END
5 Régler le jour (DAY), l'année (YEAR) et le
temporisateur (TIMER) de la même manière
que le mois à l'étape 3.
Remarque • Une f ois l'horloge réglée, la date et l' heure
sont automatiquement mises à jour.
• Après une panne d'élect ricité ou si le
téléviseur est débranché, les réglages de
l'horloge sont perdus et doivent être
restaurés.
6 Appuyer sur la touche EXIT (Quitter) de la
télécommande pour revenir au mode de
visualisation nor ma l.
Réglage des temporisateurs de marche et arrêt
Cette fonction permet que l'appareil s'allume et
s'éteigne automatiquement à une heure
déterminée. Si la fonction ON/OFF TIMER
(Temporisateur de marche/arrêt) est
programmée sur DAILY (Quotidiennement), le
téléviseur s'allume et s'éteint tous les jours à la
même heure sur le même canal.
Pour régler l'horloge :
1 Appuyer sur la touche MENU de la
télécommande. L’écran du menu s’affiche.
2 Appuyer sur la touche ou pour
sélectionner l'icône de configuration .
L’écran du menu SETUP (Configuration)
s’affiche.
SETUP
LANGUAGE ENGLISH
CLOCK SET
TV/CABLE CABLE
AUTO CH MEMORY
ADD/DELETE
:SELECT :ADJUST
www.insignia-products.com
Pour régler le temporisateur de mise en
marche automatique (ON TIMER) :
1 Appuyer sur la touche MENU de la
télécommande. L’écran du menu s’affiche.
2 Appuyer sur la touche ou pour
sélectionner l'icône Option . L’écran du
menu OPTION s’affiche .
OPTION
ON/ OFF TIMER ON/ OFF/SET
FAVORITE CH
CH LABEL
VIDEO LABEL
:SELECT :ADJUST
3 Appuyer sur la touche ou pour
sélectionner ON/OFF TIMER (T emporisateur
de marche/arrêt).
43
Page 46

4 Appuyer sur ou pour sélectionner SET
(Définir), puis appuyer sur ENTER (Entrée).
Le menu ON/OFF TIMER (Temporisateur de
marche/arrêt) s’affiche.
ON/ OFF TIMER
ON TIMER
12:00AM CH 1
OFF TIMER
12:00AM
OPTION MENU
: SELECT : ADJUST
EXIT : END
CLEAR
CLEAR
Pour régler le temporisateur d'arrêt
automatique (OFF TIMER) :
1 Appuyer sur la touche MENU de la
télécommande. L’écran du menu s’affiche.
2 Appuyer sur la touche ou pour
sélectionner l'icône Option . L’écran du
menu OPTION s’affiche .
OPTION
ON/ OFF TIMER ON/ OFF/SET
FAVORITE CH
CH LABEL
VIDEO LABEL
5 Appuyer sur ou pour sélectionner ON
TIMER (Temporisateur de mise en marche
automatique), puis appuyer sur pour régler
le temporisateur.
6 Appuyer sur ou pour régler l'heure
désirée, puis appuyer sur .
Veiller à indiquer si l'heure réglée est AM ou
PM.
7 Régler les minutes et le canal de démarrage
de la même façon que l'heure à l'étape 6.
8 Appuyer sur ou pour sélectionner
DAIL Y (Quotidiennement), puis appuyer sur
ENTER (Entrée).
9 Appuyer sur la touche EXIT (Quitter) de la
télécommande pour revenir au mode de
visualisation normal.
Remarques • Le téléviseur s'éteint automatiquement
environ 1 heure après l'act ivation du
temporisateur de mise en marche
automatique si aucun OFF TIMER
(Temporisateur d'arrêt automatique) n'a
été réglé. Pour continuer à regarder le
téléviseur, appuyer sur une touche
quelconque pour annuler l'arrêt
automatique au bout d'une heure.
• Si le canal sélectionné arrête de diffuser, le
téléviseur s'arrête automatiquement
après 15 minutes.
• Pour annuler le temporisateur de mise en
marche automatique (ON TIMER),
sélectionner CLEAR (Effacer) à l'éta pe 8.
Appuyer sur EXIT (Quitter) pour revenir à
l'écran normal.
• Si le téléviseur est débranché ou en cas de
panne d'électricité, les réglages des
temporisateurs sont perdus.
• Pour repasser du menu ON/OFF TIMER
(Temporisateur de marche/arrêt) au
menu OPTION, sélectionner OPTION
MENU (Menu Option), puis appu yer sur
ou .
:SELECT :ADJUST
3 Appuyer sur la touche ou pour
sélectionner ON/OFF TIMER (T emporisateur
de marche/arrêt).
4 Appuyer sur ou pour sélectionner SET
(Définir), puis appuyer sur ENTER (Entrée).
Le menu ON/OFF TIMER (Temporisateur de
marche/arrêt) s’affiche.
ON/ OFF TIMER
ON TIMER
12:00AM CH 1
OFF TIMER
12:00AM
OPTION MENU
: SELECT : ADJUST
EXIT : END
CLEAR
CLEAR
5 Appuyer sur ou pour sélectio nne r OFF
TIMER (Temporisateur d'arrêt automatique),
puis appuyer sur pour régler le
temporisateur.
6 Appuyer sur ou pour régler l'heure
désirée, puis appuyer sur .
Veiller à indiquer si l'heure réglée est AM ou
PM.
7 Régler les minutes et le canal de démarrage
de la même façon que l'heure à l'étape 6.
8 Appuyer sur ou pour sélectionner
DAIL Y (Quotidiennement), puis appu yer sur
ENTER (Entrée).
Remarque Pour annuler le temporisateu r d' arrêt
automatique (OFF TIMER), appuyer sur
sélectionner CLEAR (Effacer) après cette étape,
puis appuyer sur ENTER (Entrée).
pour
44
www.insignia-products.com
Page 47

9 Appuyer sur la touche EXIT (Quitter) de la
télécommande pour revenir au mode de
visualisation normal.
Taille d'image NATURAL (Naturelle) –
Généralement, cette image est au format 4:3
standard, avec des barres gris sur les côtés.
Remarques • Pour confirmer les réglages du
temporisateur de marche/arrêt (ON/OFF
TIMER), appuyer sur DISPLAY
(Affichage) pour afficher l'émission à
l'écran.
• Si le canal sélectionné arrêt e de diffuser,
le téléviseur s'arrête automat iquement
après 15 minutes.
• Après une panne d'é lectricité ou si le
téléviseur est débranché, les réglages
des temporisateurs sont perdus.
• Pour repasser du menu ON/OFF TIMER
(Temporisateur de marche/arrêt) au
menu OPTION, sélectionner OPTION
MENU (Menu Option), puis appuyer sur
ou .
Pour activer ou désactiver le temporisateur
de marche/arrêt (ON/OFF TIMER) :
1 Appuyer sur la touche MENU de la
télécommande. L’écran du menu s’affiche.
2 Appuyer sur la touche ou pour
sélectionner l'icône Option . L’écran du
menu OPTION s’affiche.
OPTION
ON/ OFF TIMER ON/ OFF/SET
FAVORITE CH
CH LABEL
VIDEO LABEL
:SELECT :ADJUST
Taille d'image CINEMA WIDE1 (Panoramique1)
(pour émissions au format 4:3) – Pour remplir
l'écran, les bords droit et gauche sont
repoussés. Cependant, le centre de l'image
conserve pratiquement son aspect normal.
Les bords supérieur et inférieur de l'image
peuvent être cachés.
Taille d'image CINEMA WIDE2 (Panoramique2)
(pour émissions au format boîte aux lettres) –
L'image entière est uniformément agrandie. Elle
est étirée dans la même proportion en largeur et
en hauteur (et conserve ses proportions
d'origine).
Les bords supérieur et inférieur de l'image
peuvent être cachés. Pour voir les zones
cachées, il est possib le de faire défiler l'image
(se reporter à “Réglage du défilement de
l'image” voir page 46).
3 Appuyer sur la touche ou pour
sélectionner ON/OFF TIMER (T emporisateur
de marche/arrêt).
4 Appuyer sur ou pour sélectionner ON
(Marche) ou OFF (Arrêt) et activer ou
désactiver le temporisateur, respectivement.
5 Appuyer sur la touche EXIT (Quitter) de la
télécommande pour revenir au mode de
visualisation normal.
Réglage de la taille de l'image
Les émissions au format 480i et 480p peuvent
être affichées sous diverses tailles d'image,
notamment NATURAL (Naturelle), CINEMA
WIDE1 (Panoramique1), CINEMA WIDE2
(Panoramique2), CINEMA WIDE3
(Panoramique3) et FULL (Plein écran).
Remarque La fonction PICTURE SIZE (Taille de l'image)
n'est pas disponible pour certains formats
d'émission (tels que 1080i ou 720p). De tels
formats s'affichent en mode FULL (Plein écran).
A B C D E F G - - - - - - - - - - - - - - - -
Taille d'image CINEMA WIDE3 (Panoramique3)
(pour émissions au format boîte aux lettres avec
sous-titres) – Pour remplir la largeur de l'écran,
l'image est étirée horizontalement. Cependant,
elle n'est étirée que légèrement vers le haut et
vers le bas.
Les bords supérieur et inférieur de l'image
peuvent être cachés. Pour voir les zones
cachées (telles que les sous-titres), il est
possible de faire défiler l'image (se reporter à
“Réglage du défilement de l'image” voir
page 46).
A B C D E F G - - - - - - - - - - - - - - - -
A B C D E F G - - - - - - - - - - - - - - - - - - - - - - - - - -
www.insignia-products.com
45
Page 48

Taille d'image FULL (Plein écran) (pour
émissions au format 16:9) – Ce réglage affiche
l'image à la taille maximale.
Pour sélectionner la taille de l'image :
1 Appuyer sur la touche MENU de la
télécommande. L’écran du menu s’affiche.
2 Appuyer sur la touche ou pour
sélectionner l'icône de configuration .
L’écran du menu SETUP (Configuration)
s’affiche.
SETUP
CLOSED CAPTION OFF
CC ADVANCED
PICTURE SIZE
PICTURE SCROLL
CINEMA MODE FILM
: SELECT : ADJUST
3 Appuyer sur ou pour sélectionner
PICTURE SIZE (Taille de l'image), puis
appuyer sur . Le menu PICTURE SIZE
(Taille de l'im age ) s'af fic he.
PICTURE SIZE
0. NATURAL
1. CINEMA WIDE1
2. CINEMA WIDE2
3. CINEMA WIDE3
4. FULL
Pour régler le défilement de l'image :
1 Appuyer sur la touche MENU de la
télécommande en mode CINEMA WIDE2
(Panoramique2) ou CINEMA WIDE3
(Panoramique3). L’écran du menu s’affiche.
2 Appuyer sur la touche ou pour
sélectionner l'icône de configuration .
L’écran du menu SETUP (Configuration)
s’affiche.
SETUP
LANGUAGE ENGLISH
CLOCK SET
TV/CABLE CABLE
AUTO CH MEMORY
ADD/DELETE
:SELECT :ADJUST
3 Appuyer sur ou pour sélectio nne r
PICTURE SCROLL (Défilement de l'image).
SETUP
CLOSED CAPTION OFF
CC ADVANCED
PICTURE SIZE
PICTURE SCROLL
CINEMA MODE FILM
: SELECT : ADJUST
4 Appuyer sur ou pour accéder à l'écran
SCROLL ADJUSTMENT (Réglage du
défilement).
/0-4 : SELECT
4 Appuyer sur ou , ou utiliser les touches
numériques de 1 à 4, pour sélectionner la
taille d'image désirée, puis appuyer sur
ENTER (Entrée).
5 Appuyer sur la touche EXIT (Quitter) de la
télécommande pour revenir au mode de
visualisation normal.
Réglage du défilement de l'image
Il est possible de faire défiler l'image dans les
modes CINEMA WIDE2 (Panoramique2) et
CINEMA WIDE3 (Panoramique3).
SCROLL ADJUSTMENT 0
TO ADJUST
5 Pour ajuster la position verticale de l'image,
appuyer sur ou .
SCROLL ADJUSTMENT 0
TO ADJUST
6 Pour remonter l’image, appuyer sur .
SCROLL ADJUSTMENT +10
TO ADJUST
46
www.insignia-products.com
Page 49

7 Pour abaisser l’image, appuyer sur .
SCROLL ADJUSTMENT -10
TO ADJUST
Définition de la préférence d'image
Il est possible de choisir entre quatre modes
d'image : SPORTS, STANDARD, MOVIE (Film)
et MEMORY (Mémoire).
Mode Description
8 Appuyer sur la touche EXIT (Quitter) de la
télécommande pour revenir au mode de
visualisation normal.
Remarque Les défilements possibles pour un signal source
480i/480p sont :
CINEMA WIDE1 (Panoramique1) : Non réglable
CINEMA WIDE2 (Panoramique2) : -10 à +20
CINEMA WIDE3 (Panoramique3) : -10 à +10
Sélection du mode cinéma
Pour regarder un DVD à partir du lecteur de D VD
lorsqu'il est connecté à l'entrée composantes, il
se peut que l'image soit plus fluide si le mode
cinéma (CINEMA MODE) est réglé sur FILM.
Pour sélectionner le mode cinéma :
1 Appuyer sur la touche MENU de la
télécommande. L’écran du menu s’affiche.
2 Appuyer sur la touche ou pour
sélectionner l'icône de configuration .
L’écran du menu SETUP (Configuration)
s’affiche.
SETUP
CLOSED CAPTION OFF
CC ADVANCED
PICTURE SIZE
PICTURE SCROLL
CINEMA MODE FILM
: SELECT : ADJUST
3 Appuyer sur ou pour sélectionner
CINEMA MODE (Mode cinéma), puis
appuyer sur ou pour sélectionner FILM.
SETUP
CLOSED CAPTION OFF
CC ADVANCED
PICTURE SIZE
PICTURE SCROLL
CINEMA MODE FILM / VIDEO
: SELECT : ADJUST
4 Pour ramener le mode cinéma à VIDEO,
appuyer sur ou pour sélectionner
VIDEO.
5 Appuyer sur la touche EXIT (Quitter) de la
télécommande pour revenir au mode de
visualisation normal.
Sports Image brillante et dynamique (réglé en
usine)
Standard Qualité d'image standard (réglé en
usine)
Movie (Film) Image de typ e film (rég l é en usi ne )
Memory
(Mémoire)
Préférence personnelle, définie par
l'utilisateur à l'aide des commandes
de réglage de l'image. Pour plus
d’informations, se reporter à “Réglage
de l’image” voir page48.
Pour définir la préférence d'image :
1 Appuyer sur la touche MENU de la
télécommande. L’écran du menu s’affiche.
2 Appuyer sur la touche ou pour
sélectionner l'icône d'image . L’écran du
menu PICTURE (Image) s’affiche.
PICTURE
PICTURE PREFERENCE SPORTS
BRIGHTNESS 25
CONTRAST 50
COLOR 25
TINT 0
SHARPNESS 25
: SELECT : ADJUST
3 Appuyer sur ou pour sélectio nne r
PICTURE PREFERENCE (Préférence
d'image).
PICTURE
PICTURE PREFERENCE SPORTS
SPORTS/ STANDARD/ MOVIE/ MEMORY
BRIGHTNESS 25
CONTRAST 50
COLOR 25
TINT 0
SHARPNESS 25
: SELECT : ADJUST
4 Appuyer sur la touche ou pour
sélectionner le paramétrage désiré.
PICTURE
PICTURE PREFERENCE MOVIE
SPORTS/ STANDARD/ MOVIE/ MEMORY
BRIGHTNESS 25
CONTRAST 50
COLOR 25
TINT 0
SHARPNESS 25
: SELECT : ADJUST
5 Appuyer sur la touche EXIT (Quitter) de la
télécommande pour revenir au mode de
visualisation nor ma l.
www.insignia-products.com
47
Page 50

Réglage de l’image
Pour régler l’image :
1 Appuyer sur la touche MENU de la
télécommande. L’écran du menu s’affiche.
2 Appuyer sur la touche ou pour
sélectionner l'icône d'image . L’écran du
menu PICTURE (Image) s’affiche.
PICTURE
PICTURE PREFERENCE SPORTS
BRIGHTNESS 25
CONTRAST 50
COLOR 25
TINT 0
SHARPNESS 25
: SELECT : ADJUST
3 Appuyer sur ou pour sélectionner
l'élément à régler, puis appuyer sur ou
pour effectuer le réglage.
PICTURE
PICTURE PREFERENCE SPORTS
BRIGHTNESS 25
CONTRAST 50
COLOR 25
TINT 0
SHARPNESS 25
: SELECT : ADJUST
Élément
Luminosité diminuer la lumino sité augmenter la lumi nosité
Contraste
diminuer le contraste augmenter le contraste
(réglé au
maximum en
usine)
Couleur couleur plus pâle couleur plus rich e
Teinte plus rouge plus vert
Netteté image plus douce image plus nette
4 Une fois l'image correctement réglée,
appuyer sur la touche EXIT (Quitter) de la
télécommande pour revenir au mode de
visualisation normal.
Réglage de la température de couleur
Il est possible de changer la qualité de l'image
en choisissant parmi troi s temp érature s de
couleur préréglées : COOL (Froide), MEDIUM
(Moyenne) et WARM (Chaude).
Pour régler la température de couleur :
1 Appuyer sur la touche MENU de la
télécommande. L’écran du menu s’affiche.
2 Appuyer sur la touche ou pour
sélectionner l'icône d'image . L’écran du
menu PICTURE (Image) s’affiche.
PICTURE
PICTURE PREFERENCE SPORTS
BRIGHTNESS 25
CONTRAST 50
COLOR 25
TINT 0
SHARPNESS 25
: SELECT : ADJUST
3 Appuyer sur ou pour sélectio nne r
COLOR TEMPERATURE (Température de
couleur), puis appuyer sur ou pour
sélectionner le mode désiré.
PICTURE
COLOR COOL
TEMPERATURE COOL/MEDIUM/WARM
DISPLAY FORMAT 1080i
SVM HIGH
RESET
: SELECT : ADJUST
Mode Description
Cool
(Froide)
Medium
(Moyenne)
Warm
(Chaude)
Image bleuâtre
Image neutre
Image rougeâtre
4 Appuyer sur la touche EXIT (Quitter) de la
télécommande pour revenir au mode de
visualisation nor ma l.
Réglage du format d’affichage
Ce réglage convertit un signal d'entrée 480p en
540p ou 1080i.
Remarques • La fonction de format d'affichage est
disponible uniquement pour une entrée
480p. 1080i est toujours affiché lorsque
le signal en entrée est autre que 480p.
• Si un scintillement est perceptible dans
une image 480p, essayer de régler le
format d'affichage sur 540p.
Pour régler le format d'affichage :
1 Appuyer sur la touche MENU de la
télécommande. L’écran du menu s’affiche.
2 Appuyer sur la touche ou pour
sélectionner l'icône d'image . L’écran du
menu PICTURE (Image) s’affiche.
PICTURE
PICTURE PREFERENCE SPORTS
BRIGHTNESS 25
CONTRAST 50
COLOR 25
TINT 0
SHARPNESS 25
: SELECT : ADJUST
3 Appuyer sur ou pour sélectio nne r
DISPLAY FORMAT (Format d'affichage).
PICTURE
COLOR COOL
TEMPERATURE
DISPLAY FORMAT 540p /1080i
SVM HIGH
RESET
: SELECT : ADJUST
48
www.insignia-products.com
Page 51

4 Appuyer sur ou pour sélectionner 540p
ou 1080i.
5 Appuyer sur la touche EXIT (Quitter) de la
télécommande pour revenir au mode de
visualisation normal.
Sélection de la modulation de la vitesse de balayage (SVM)
La fonction SVM améliore le contraste et la
netteté de l'image. Cette fonction a trois modes :
HIGH (Haut), LOW (Bas) et OFF (Désactivé).
Pour sélectionner la fonction SVM :
1 Appuyer sur la touche MENU de la
télécommande. L’écran du menu s’affiche.
2 Appuyer sur la touche ou pour
sélectionner l'icône d'image . L’écran du
menu PICTURE (Image) s’affiche.
Pour réinitialiser les réglages de l'image :
1 Appuyer sur la touche MENU de la
télécommande. L’écran du menu s’affiche.
2 Appuyer sur la touche ou pour
sélectionner l'icône d'image . L’écran du
menu PICTURE (Image) s’affiche.
PICTURE
PICTURE PREFERENCE SPORTS
BRIGHTNESS 25
CONTRAST 50
COLOR 25
TINT 0
SHARPNESS 25
: SELECT : ADJUST
3 Appuyer sur ou pour sélectio nne r
RESET (Réinitialiser), puis appuyer sur .
Les paramètres sont réinitialisés.
PICTURE
PICTURE PREFERENCE SPORTS
BRIGHTNESS 25
CONTRAST 50
COLOR 25
TINT 0
SHARPNESS 25
: SELECT : ADJUST
3 Appuyer sur la touche ou pour
sélectionner SVM.
PICTURE
COLOR COOL
TEMPERATURE
DISPLAY FORMAT 1080i
SVM HIGH /LOW/OFF
RESET
: SELECT : ADJUST
4 Appuyer sur la touche ou pour choisir le
paramétrage désiré, HIGH (Haut), LOW
(Bas) ou OFF (Désactivé).
5 Appuyer sur la touche EXIT (Quitter) de la
télécommande pour revenir au mode de
visualisation normal.
Réinitialisation des réglages de l'image
La fonction RESET (Réinitialisation) ramène les
réglages de qualité de l'image aux paramètres
d'usine suivants :
• PICTURE PREFERENCE (Préférence
d'image) ...............................sports
• BRIGHTNESS (Luminosité).centre (25)
• CONTRAST (Contraste) ......max (50)
• COLOR (Couleur) ................centre (25)
• TINT (Teinte)........................centre (0)
• SHARPNESS (Netteté)........centre (25)
• COLOR TEMPERATURE (Température de
couleur)................................COOL (Froide)
• DISPLAY FORMAT (Format d'affichage)
.............................................1080i
• SVM.....................................HIGH (Haut)
PICTURE
COLOR COOL
TEMPERATURE
DISPLAY FORMAT 1080i
SVM HIGH
RESET
: SELECT : ADJUST
Réglage des sous-titres codés
Ce téléviseur a la capacité de décoder et
d'afficher des émissions télévisées en
sous-titres codés. La fonction de sous-titres
codés affiche le texte à l'écran pour les
téléspectateurs malentendants, ou traduit et
affiche le texte dans une autre langue.
Deux modes de sous-titres codés sont
disponibles :
• Sous-titres codés : Ce mode codé des
sous-titres affiche le texte à l'écran en anglais
ou dans une autre langue. Généralement, les
sous-titres codés en anglais sont transmis
sur C1 et les sous-titres dans d'autres
langues sont transmis sur C2.
www.insignia-products.com
49
Page 52

• Te xte : Le mode texte des sous-titres codés
remplit généralement la moitié de l'écran
avec un calendrier de programmation ou
d'autres informations.
Si le signal reçu est analogique, les choix
possibles sont : C1, C2, T1, T2 et OFF
(Désactivé).
Remarques • S i l'émission ou la vidéo sél ectionnée n'a
pas de sous-titres codés, au cun
sous-titre ne s'affiche à l'écran, mais le
téléviseur reste en mode de sous-t itres
codés.
• Si le texte n'est pas disponible dan s une
zone de réceptio n particulière, un
rectangle noir pourra apparaître à
l'écran. Si cela se produit, régler la
fonction des sous-tit res codés sur OFF
(Désactivé).
• Lorsque la fonction des sous-titres codés
est sélectionnée, les sous-titres
apparaissent au bout d'environ 10
secondes.
• Des fautes d'orth ographe ou des
caractères bizarres peuvent
occasionnellement ap paraître dans les
sous-titres codés. Ceci est normal, en
particulier pour des émissions en direct,
dans la mesure où les sous-titres cod és
sont dans ce cas également saisis en
direct. Ces transmissions ne donnent pas
le temps de procéder à une relecture.
• Lorsque les sous-titres codés sont
affichés, les affichages à l'écran, tels que
le volume et la sourdine, peuvent être
visibles mais se superpose r aux
sous-titres codés.
• Certains systèmes de TV câblée et
certains systèmes de protection contre la
copie peuvent gêner la réception des
sous-titres codés.
• En cas d'utilisatio n d'u n e an te nn e
intérieure ou si la réception TV est très
médiocre, il est possible que le décodeur
de sous-titres n'apparaisse pas ou
apparaisse avec des caractère s bizarres
ou des mots mal orthographiés. Dans ce
cas, ajuster l'a ntenne pour obtenir une
meilleure réception ou utiliser une
antenne extérieure.
Pour activer les sous-titres codés :
1 Appuyer sur la touche MENU de la
télécommande. L’écran du menu s’affiche.
2 Appuyer sur la touche ou pour
sélectionner l'icône de configuration .
L’écran du menu SETUP (Configuration)
s’affiche.
SETUP
CLOSED CAPTION OFF
CC ADVANCED
PICTURE SIZE
PICTURE SCROLL
CINEMA MODE FILM
: SELECT : ADJUST
SETUP
CLOSED CAPTION OFF
CC ADVANCED
PICTURE SIZE
PICTURE SCROLL
CINEMA MODE FILM
: SELECT : ADJUST
C1/C2/T1/T2/OFF
- OU Si le signal reçu est numérique, les choix
possibles sont : CS1, CS2, CS3, CS4, CS5,
CS6, C1, C2, C3, C4, T1, T2, T3, T4 et OFF
(Désactivé).
SETUP
CLOSED CAPTION OFF
CS1/CS2/CS3/CS4/CS5/CS6
C1/C2/C3/C4/T1/T2/T3/T4/OFF
CC ADVANCED
PICTURE SIZE
PICTURE SCROLL
CINEMA MODE FILM
: SELECT : ADJUST
5 Appuyer sur la touche EXIT (Quitter) de la
télécommande pour revenir au mode de
visualisation nor ma l.
Personnalisation des sous-titres codés
Les sous-titres codés sont préréglés en usine.
Cependant, il est possible de régler
individuellement les sous-titres de la manière
suivante :
Pour personna liser des sous-titres codés
numériques :
1 Appuyer sur la touche MENU de la
télécommande. L’écran du menu s’affiche.
2 Appuyer sur la touche ou pour
sélectionner l'icône de configuration .
L’écran du menu SETUP (Configuration)
s’affiche.
SETUP
CLOSED CAPTION OFF
CC ADVANCED
PICTURE SIZE
PICTURE SCROLL
CINEMA MODE FILM
: SELECT : ADJUST
50
3 Appuyer sur ou pour sélectionner
CLOSED CAPTION (Sous-titres codés).
4 Appuyer sur la touche ou pour
sélectionner le mode de sous-titres codés
souhaité.
www.insignia-products.com
Page 53

3 Appuyer sur ou pour sélectionner CC
ADVANCED (Sous-titres codés avancés),
puis appuyer sur . Le menu CC
ADVANCED (Sous-titres codés avancés)
s’affiche.
CC ADVANCED
TEXT SIZE
TEXT TYPE
TEXT COLOR
TEXT EDGE
BACKGROUND COLOR
: SELECT : ADJUST
4 Appuyer sur ou pour sélectionner
l'option de CC ADVANCED (Sous-titres
codés avancés) à personnaliser, puis
appuyer sur ou .
Lorsque le téléviseur reçoit une émission
diffusée en stéréo ou avec une deuxième trame
sonore, le mot STEREO ou SAP apparaît à
l'écran lorsque le téléviseur est allumé, à chaque
changement de canal et à chaque pression de la
touche DISPLAY (Affichage).
Pour sélectionner stéréo ou SAP :
1 Appuyer sur la touche MENU de la
télécommande. L’écran du menu s’affiche.
2 Appuyer sur la touche ou pour
sélectionner l'icône audio . L’écran du
menu AUDIO s’affiche.
AUDIO
MTS STR / SAP / MONO
BASS 25
TREBLE 25
BALANCE 0
SPEAKERS ON
TEXT SIZE
AUTO
SMALL
STANDARD
LARGE
: SELECT : ADJUST
5 Appuyer sur la touche ou pour
sélectionner le paramétrage désiré.
Option Paramètres
Text size (T aille du
texte)
Text type (T ype de
texte)
Text color
(Couleur du texte)
Text edge (Bord
du texte)
Background color
(Couleur de fond)
Auto, small (petite), standard, large
(grande)
Auto, default (défaut), mono w/serif
(espacement fixe avec empattement),
prop w/serif (espacement
proportionnel avec empattement),
mono w/o serif (espacement fixe sans
empattement), prop w/o serif
(espacement proportionnel sans
empattement), casual (courant),
cursive, small caps (petit es
majuscules)
Auto, black (noir), white (blanc), red
(rouge), green (vert), blue (bleu),
yellow (jaune), magenta et cyan
Auto, none (aucun), raised (surélevé),
depressed (enfoncé), uniform
(uniforme), left drop shadow (ombre
avec dénivelé à gauche), right drop
shadow (ombre avec dénivelé à droite)
Auto, black (noir), white (blanc), red
(rouge), green (vert), blue (bleu),
yellow (jaune), magenta et cyan
6 Appuyer sur la touche EXIT (Quitter) de la
télécommande pour revenir au mode de
visualisation normal.
Sélection du son stéréo, de la deuxième trame sonore (SAP) et réglage du son
La fonction de transmission multivoie de signaux
sonores en télévision (MTS) fournit un son
stéréo haute fidélité. MTS peut aussi transmettre
une deuxième trame sonore (SAP) contenant
une deuxième langue ou d'autres informations
audio.
: SELECT : ADJUST
3 Appuyer sur ou pour sélectionner MTS,
puis appuyer sur ou pour sélectionner
l'option désirée (STR, SAP ou MONO).
Remarques • Normalement, le té léviseur pe u t r e ster en
mode stéréo, étant donné qu'il reproduit
automatiquement le type de son diffusé
(stéréo ou mono ).
• Si le son stéréo comporte des parasites,
sélectionner MONO pour réduire les
parasites.
Pour régler le son :
1 Appuyer sur la touche MENU de la
télécommande. L’écran du menu s’affiche.
2 Appuyer sur la touche ou pour
sélectionner l'icône audio . L’écran du
menu AUDIO s’affiche.
AUDIO
MTS STEREO
BASS 25
TREBLE 25
BALANC E 0
SPEAKERS ON
: SELECT : ADJUST
3 Appuyer sur la touche ou pour
sélectionner l'élément du son à régler.
4 Appuyer sur la touche ou pour
augmenter ou diminuer le niveau de
l'élément sélectionné.
5 Appuyer sur la touche EXIT (Quitter) de la
télécommande pour revenir au mode de
visualisation nor ma l.
www.insignia-products.com
51
Page 54

Désactivation des haut-parleurs intégrés
Pour désactiver les haut-parleurs intégrés :
1 Appuyer sur la touche MENU de la
télécommande. L’écran du menu s’affiche.
2 Appuyer sur la touche ou pour
sélectionner l'icône audio . L’écran du
menu AUDIO s’affiche.
AUDIO
MTS STEREO
BASS 25
TREBLE 25
BALANCE 0
SPEAKERS ON/OFF
Pour sélectionner la sortie audio numérique :
1 Appuyer sur la touche MENU de la
télécommande. L’écran du menu s’affiche.
2 Appuyer sur la touche ou pour
sélectionner l'icône audio . L’écran du
menu AUDIO s’affiche.
AUDIO
BBE ON
AUDIO LANGUAGE
DIGITAL OUTPUT PCM
RESET
: SELECT : ADJUST
DOLBY DIGITAL
/
PCM
: SELECT : ADJUST
3 Appuyer sur ou pour sélectionner
SPEAKERS (Haut-parleurs ), puis appu yer
sur ou pour sélectionner OFF
(Désactivés). (Pour activer les haut-parleurs
intégrés, sélectionner ON [Activés].)
4 Appuyer sur la touche EXIT (Quitter) de la
télécommande pour revenir au mode de
visualisation normal.
Sélection du BBE
En corrigeant le retard de phase et la distorsion
naturellement générés par les sys tème s de
haut-parleurs, la fonction de son BBE garantit
que le son qui parvient aux oreilles de
l'utilisateur est aussi naturel que le son original.
Les voies humaines sont plus claires et la
musique est naturelle et bien définie.
Sous licence de BBE Sound, Inc. sous les brevets USP
5510752 et 5736897. BBE et le symbole BBE sont des
marques déposées de BBE Sound, Inc.
Pour sélectionner le BBE :
1 Appuyer sur la touche MENU de la
télécommande. L’écran du menu s’affiche.
2 Appuyer sur la touche ou pour
sélectionner l'icône audio . L’écran du
menu AUDIO s’affiche.
3 Appuyer sur ou pour sélectio nne r
DIGITAL OUTPUT (Sortie numérique), puis
appuyer sur ou pour sélectionner PCM
ou DOLBY DIGITAL.
4 Appuyer sur la touche EXIT (Quitter) de la
télécommande pour revenir au mode de
visualisation nor ma l.
Sélection de la langue audio
Lorsque que plusieurs langues audio sont
incluses dans un signal numérique, il est
possible de sélectionner une des langues audio.
Pour sélectionner la langue audio :
1 Appuyer sur la touche MENU de la
télécommande. L’écran du menu s’affiche.
2 Appuyer sur la touche ou pour
sélectionner l'icône audio . L’écran du
menu AUDIO s’affiche.
AUDIO
BBE ON
AUDIO LANGUAGE
DIGITAL OUTPUT PCM
RESET
: SELECT : ADJUST
AUDI O
BBE ON /OFF
AUDIO LANGUAGE
DIGITAL OUTPUT PCM
RESET
: SELECT : ADJUST
3 Appuyer sur ou pour sélectionner BBE,
puis appuyer sur ou pour sélectionner
ON (Activé). (Pour désactiver le BBE,
sélectionner OFF [Désactivé].)
4 Appuyer sur la touche EXIT (Quitter) de la
télécommande pour revenir au mode de
visualisation normal.
Sélection de la sortie audio numérique
Il est possible de choisir le format du signal de
sortie audio numérique.
52
3 Appuyer sur ou pour sélectio nne r
AUDIO LANGUAGE (Langue audio), puis
appuyer sur ou . Le menu AUDIO
LANGUAGE (Langue audio) s’affiche.
4 Appuyer sur la touche ou pour
sélectionner la langue désirée.
5 Appuyer sur la touche EXIT (Quitter) de la
télécommande pour revenir au mode de
visualisation nor ma l.
www.insignia-products.com
AUDIO LANGUAGE
0. ENGLISH 1
1. ENGLISH 2
2. FRENCH
3. SPANISH
4. NO INFO
5. NO INFO
6. NO INFO
7. NO INFO
/ 0-7 : SELECT
Page 55

Réinitialisation des réglages audio
La fonction RESET (Réinitialisation) ramène les
réglages audio aux paramètres d'usine
suivants :
• BASS (Graves).................... centre (25)
• TREBLE (Aigus) .............. centre (25)
• BALANCE ........................ centre (0)
Pour réinitialiser les réglages audio :
1 Appuyer sur la touche MENU de la
télécommande. L’écran du menu s’affiche.
2 Appuyer sur la touche ou pour
sélectionner l'icône audio . L’écran du
menu AUDIO s’affiche.
AUDIO
BBE ON
AUDIO LANGUAGE
DIGITAL OUTPUT PCM
RESET
4 Appuyer sur la touche EXIT (Quitter) de la
télécommande pour revenir au mode de
visualisation nor ma l.
Remarques • La fonction de mesure du signal n'est pas
disponible pour les canaux analogiques.
• Après 240 sec ondes, l'écran SIGN AL
METER (Mesure du signal) revient
automatiquement au fonctionnement
normal du téléviseur.
Problèmes et solutions
Utiliser la liste de vérification suivante pour
identifier et résoudre les problèmes qui peuvent
survenir avec le téléviseur. Si le problème
persiste, consulter le revendeur local ou un
centre de services. Lors d'une utilisation avec
d'autres appareils, vérifier que toutes les
connexions sont correctes.
Problème Solution
: SELECT : ADJUST
3 Appuyer sur ou pour sélectionner
RESET (Réinitialiser), puis appuyer sur .
Les réglages audio sont ramenés aux
réglages d’usine.
Vérification de la puissance du signal numérique
Ceci permet d'afficher la puissance du signal
numérique pour les canaux numériques.
Pour vérifier la puissance du signal
numérique :
1 Appuyer sur la touche MENU de la
télécommande. L’écran du menu s’affiche.
2 Appuyer sur la touche ou pour
sélectionner l'icône de configuration .
L’écran du menu SETUP (Configuration)
s’affiche.
SETUP
SIGNAL METER
: SELECT : ADJUST
3 Appuyer sur ou pour sélectionner
SIGNAL METER (Mesure du signal), puis
appuyer sur ou . La fenêtre SIGNAL
METER (Mesure du signal) apparaît,
affichant la puissance du signal numérique.
SIGNAL METER
CHANNEL (DIGITAL) 123-045
80
Le téléviseur ne
fonctionne pas
Pas de son ou
son médiocre
Pas d’image ou
image médiocre
Mauvaise
réception sur
certains canaux
Pas de couleur
ou couleur
médiocre
L’image tremble
ou dérive
• Vérifier que le cordon d'alimentation est
branché.
• Essayer une autre prise sect eur.
• Absence de courant. Vérifier le fusible ou
le disjonc teur.
• Débrancher le téléviseur pendant une
heure, puis le rebrancher.
• La station ou le câble a des problèmes ;
essayer une autre station.
• Vérifier les réglages du son (volumes et
sourdine).
• Vérifier s'il exist e des sources possibles
d’interférences.
• La station ou le câble a des problèmes ;
essayer une autre station.
• S’assurer que les canaux sont enregistrés
en mémoire.
• Vérifier les connexions de l'antenne ou du
câble et essayer de régler l'antenne.
• Vérifier s'il exist e des sources possibles
d’interférences.
• Vérifier les réglages du contrôle de
l’image.
• La station ou le câble a des problèmes ;
essayer une autre station.
• S’assurer que les canaux sont enregistrés
en mémoire.
• La station est faible ; régler l’antenne
pour obtenir une meilleure réception.
• Vérifier s'il exist e des sources possibles
d’interférences.
• La station ou le câble a des problèmes ;
essayer une autre station.
• S’assurer que les canaux sont enregistrés
en mémoire.
• Vérifier les réglages du contrôle de
l’image.
• Vérifier les connexions de l'antenne ou du
câble ; régler l'antenne.
• Vérifier s'il exist e des sources possibles
d’interférences.
• La station ou le câble a des problèmes ;
essayer une autre station.
• S’assurer que les canaux sont enregistrés
en mémoire.
• Le câblo-opérateur brouill e le signal.
• Régler l’antenne.
www.insignia-products.com
53
Page 56

Problèmes à
l'écran lors
d'une émission
numérique
Pas de réception
de la TV câblée
Barres
horizontales ou
diagonales sur
l'écran
• Vérifier la puissance du signal
numérique.
• Vérifier toutes les connexions du réseau
câblé.
• Régler l'option du menu TV/CABLE sur le
mode CABLE.
• Problèmes de la station ou du réseau
câblé ; essayer une autre stati on.
• Vérifier les con ne x ion s de l'a n ten n e et
régler ou réorienter l'antenne.
• Vérifier s' il ex is t e de s so urces possibles
d’interférences.
Spécifications
Caractéristiques générales
Alimentation : CA 120 V, 60 Hz
Consommation électrique :
Fonctionnement : 195 W
Veille : 1 W
Poids : 117,7 lb (53,5 kg)
Dimensions : 31 5/16 × 21 5/8 ×
22 3/18 pouces
(796 × 549,2 × 563 mm)
Pas de réception
au-delà du canal
13
La
télécommande
ne fonctionne
pas
Le téléviseur
s'éteint
Les sous-titres
codés ne sont
pas activ és
L'affichage n'est
pas dans la
langue désirée
• Vérifier que l'option du menu TV/CABLE
est dans le mode approprié.
• En cas d'utilisation d'une antenne, vérifier
les connexions à l'antenne UHF.
• Les piles sont faibles, mortes ou insérées
incorrectement.
• La télécommande est hors de portée ; se
rapprocher du téléviseur (à moins de 5
mètres).
• Veiller à ce que la télécommande soit
pointée vers le capteur.
• Vérifier qu'il n'existe aucun obstacle
entre la télécommande et le téléviseur.
• Vérifier que le cordon d'alimentation est
branché.
• Aucune émission n'est diffusée par la
station syntonisée.
• Le temporisateur automatique d’arrêt
automatique est activé.
• L'alimentation électrique a été
interrompue.
• La station de télévision a des problèmes
ou l'émission diffusée n’est pas avec
sous-titres codés. Essayer un autre
canal.
• Vérifier la connexion au réseau câblé ou à
l'antenne VHF/UHF. Repositionner ou
pivoter l’antenne.
• Régler le décodeur de sous-titres dans le
menu.
• Sélectionner la langue correcte dans les
options du menu.
Entrées :
VIDÉO : 1 V (c-c)/75 ohms
AUDIO : –8 dBm/50 k ohms
S-VIDÉO : Y : 1 V (c-c), 75 ohms
C : 0,286 V (c-c), 75 ohms
COMPOSANTES :Y : 1 V (c-c), 75 ohms
P
: 0,7 V (c-c), 75 ohms
R
: 0,7 V (c-c), 75 ohms
P
B
Sortie :
VIDÉO : 1 V (c-c)/75 ohms
AUDIO : 150 mV (efficace)
AUDIO
NUMÉRIQUE : 0,5 V (c-c), 75 ohms
Entrée antenne : Entrée VHF/UHF/CÂBLE
75 ohms coaxial
Tube cathodique : 30 pouces (760 mm
diagonale)
Type de syntoniseur : Synthétiseur de fréquence
PLL à quartz
Canaux de réception :
VHF 2-13
UHF 14-69
CÂBLE 14-36 (A)-(W)
37-59 (AA)-(WW)
60-85
(AAA)-(ZZZ)
86-94 (86)-(94)
95-99 (A-5)-(A-1)
100-125 (100)-(125)
01 (5A)
54
Haut-parleur : 1,8 × 3,9 pouces (45,7 x
Puissance de sortie du son : 5 W + 5 W
La conception et les spécifications sont sujettes à modifications sans
avis préalable.
www.insignia-products.com
99 mm), 8 ohms x 2
Page 57

Garantie limitée
Insignia Products garantit au premier acheteur
de ce Produit que ce produit sera exempt de vice
de matériaux ou de main-d’œuvre pour une
période de trois cent soixante-cinq jours (365) à
compter de la date d’achat, comme suit :
1 MAIN-D’ŒUVRE : Pendant la période de
garantie, si ce produit est considéré comme
étant défectueux, Insignia le réparera ou le
remplacera, à sa discrétion, gratuitement ou
paiera les frais de main-d’œuvre à tout
service de réparation agréé par Insignia.
Au-delà de la période de garantie, l’utilisateur
sera redevable de tous les frais afférents à la
main-d’œuvre.
2 PIÈCES DÉTACHÉES : En outre, Insignia
fournira gratuitement les pièces détachées
neuves ou remises à neuf, en échange des
pièces défectueuses pendant la durée de la
garantie. À l’expiration de la période de
garantie le coût de toute pièce détachée sera
à la charge de l’utilisateur.
Pour obtenir le service de la garantie, le produit
devra être présenté accompagné du reçu
original ou de toute autre preuve d’achat, soit
dans son emballage original, soit dans un
emballage procurant des conditions identiques
de protection, au détaillant le plus proche du
magasin ou du site Web où le produit a été
acheté.
Cette garantie ne couvre pas les dommages
esthétiques ou ceux résultants de catastrophes
naturelles, de la foudre, d’un accident, d’une
mauvaise utilisation, de manipulations abusives,
de négligence, d’une utilisation commerciale ou
d’une modification de tout ou partie du produit, y
compris l’antenne. Cette garantie ne couvre
aucun dommage ayant pour origine une
utilisation ou une maintenance défectueuse, la
connexion à une source électrique dont la
tension est inadéquate ou encore toute
réparation réalisée par quiconque autre qu’un
service de réparation agréé par Insignia. Cette
garantie ne couvre pas les produits vendus « EN
L’ÉTAT » ou « HORS SERVICE » ou les
consommables (tels que les fusibles ou les
piles). Cette garantie n’est applicable qu’aux
États-Unis et au Canada.
La garantie est annulée si le numéro de série
usine a été altéré ou enlevé du produit.
LA RÉPARATION OU LE REMPLACEMENT,
TELS QU’OFFERTS PAR CETTE GARANTIE,
CONSTITUENT LE SEUL RECOURS DU
CONSOMMATEUR. INSIGNIA NE POURRA
PAS ÊTRE TENU POUR RESPONSABLE DE
DOMMAGES ACCESSOIRES OU
CONSÉCUTIFS, OU DE L’INEXÉCUTION
D'UNE GARANTIE EXPRESSE OU IMPLICITE
SUR CE PRODUIT. SAUF DISPOSITIONS
CONTRAIRES DES LOIS ET RÈGLEMENTS
APPLICABLES, TOUTE GARANTIE IMPLICITE
DE QUALITÉ MARCHANDE OU
D’ADAPTATION À UN USAGE PARTICULIER
RELATIVE À CE PRODUIT EST LIMITÉE À LA
PÉRIODE DE GARANTIE APPLICABLE TELLE
QUE DÉCRITE CI-DESSUS.
Certains états ou provinces ne permettent ni
l'exclusion ou la limitation des dommages
accessoires ou consécutifs, ni les limitations
implicites de durée d'une garantie, de sorte que
les limitations ou exclusions énoncées ci-dessus
peuvent être nulles dans le cas du premier
acheteur. La présente garantie donne au
premier acheteur des garanties juridiques
spécifiques ; il peut aussi bénéficier d'autres
garanties qui varient d'un état ou d'une province
à l'autre.
Pour le service à la clientèle, appeler le
1-877-467-4289
www.insignia-products.com
Insignia Products, Richfield, Minnesota,
États-Unis
Avis juridiques
Déclaration de conformité FCC
Cet équipement génère, utilise et diffuse des
ondes radio et, s’il n’est pas installé et utilisé
conformément aux instructions dont il fait l’objet,
il peut provoquer des interférences indésirables
avec les communications radio. Cependant,
nous ne pouvons pas garantir qu’aucune
interférence ne se produira pour une installation
particulière. Les changements ou modifications
apportés à cet appareil peuvent donner lieu à
des interférences nuisibles, à moins que les
modifications ne soient expressément
approuvées dans le manuel d'instruction.
L'utilisateur pourrait perdre le droit de faire
fonctionner cet appareil s'il a subi un
changement ou une modification non autorisée.
Si cet équipement est source d’interférences
gênant la réception d'ondes radio ou télévisées
(déterminé en éteignant et en rallumant
l’équipement), il est recommandé que
l’utilisateur tente de corriger le problème en
suivant a u moins l'une des mesures suivantes :
• Réorienter ou déplacer l’antenne réceptrice.
• Augmenter la distance entre l’équipement et
le récepteur.
• Brancher l’équipement dans la prise
électrique d’un circuit différent de celui
auquel le récepteur est relié.
• Contacter le revendeur ou un technicien
radio/télévision qualifié pour toute
assistance.
Cet appareil est conforme à l'article 15 du
règlement de la FCC. Son fonctionnement est
soumis aux deux conditions suivantes :
• Cet appareil ne doit pas émettre
d’interférences nuisibles, et
• Cet appareil doit accepter toutes les
interférences reçues, y compris celles
pouvant provoquer un fonctionnement non
souhaité.
Droits d’auteurs
© 2006 Insignia. Insignia et le logo Insignia sont des
marques de commerce de Best Buy Enterprise
Services, Inc. Les autres noms de marques et de
produits mentionnés sont des marques de commerce
ou des marques déposées de leurs propriétaires
respectifs. Les caractéristiques et spécifications sont
susceptibles d’être modi fié es sans préavis.
www.insignia-products.com
55
Page 58

Bienvenido
Felicitaciones por su compra de este producto
de alta calidad de Insignia. Su televisor digital de
pantalla panorámica plana modelo NS-30HTV
de 30 pulgadas representa el más moderno
diseño de TV, y está concebido para brindar un
rendimiento confiable y sin problemas. Para
referencia futura, escriba el número de serie, la
fecha de compra, y el nombre del distribuidor en
los espacios a continuación.
Número de modelo: NS-30HTV
Número de serie:____________________
Fecha de compra:___________________
Distribuidor:________________________
Contenido
Características. . . . . . . . . . . . . . . . . . . . . . . . . . .56
MEDIDAS DE SEGURIDAD IMPORTANTES . . .56
Preparación para instalar su TV . . . . . . . . . . . . .59
Conexión de su TV . . . . . . . . . . . . . . . . . . . . . . .59
Familiarización con su TV . . . . . . . . . . . . . . . . . .63
Uso del TV. . . . . . . . . . . . . . . . . . . . . . . . . . . . . .65
Solución de problemas . . . . . . . . . . . . . . . . . . . .82
Especificaciones . . . . . . . . . . . . . . . . . . . . . . . . .83
Garantía Limitada . . . . . . . . . . . . . . . . . . . . . . . .84
Avisos legales . . . . . . . . . . . . . . . . . . . . . . . . . . .84
Características
• Imagen de alta calidad con resolución
horizontal de más de 500 líneas–Excede la
resolución Super VHS (400 líneas) o la del
disco láser (430 líneas).
• Compatible con una amplia gama de
salidas de audio mediante un conector de
audio digital (coaxial) –Cuando se conecta
un componente con un decodificador Dolby
Digital incorporado, el sonido Dolby Digital
puede producir el efecto de estar en un cine
o en una sala de conciertos.
• Sintonizador digital integrado—Usted
puede ver programas digitales sin usar una
caja de TV por cable digital.
• Decodificador de subtítulos con modo de
texto completo—Muestra subtítulos o texto
completo en pantalla para personas con
discapacidad auditiva.
• Ajustes de imagen usando el control
remoto—La visualización en pantalla
proporciona ajustes precisos mediante el
control remoto del brillo, contraste, color, tinte
y nitidez.
• Temporizador de apagado automático del
TV programable—Disponible mediante el
control remoto, usted puede programar su
TV para que se apague automáticamente
después de un máximo de 120 minutos.
• V-Chip—La función V-Chip puede leer la
clasificación de contenido de un programa o
película de TV si el programa está codificado
con esta información. La función V-Chip le
permite establecer un nivel de restricción.
• Recepción estéreo/SAP—Su TV está
diseñado para recibir transmisiones de
programas en estéreo y segundo audio
(SAP), donde están disponibles.
• BBE—BBE proporciona un sonido vívido con
increíble presencia.
• Conectores de S-Video/video de
componente—Su TV está equipado con 3
tipos de conectores de entrada de video.
Usted puede conectar un VCR, reproductor
de DVD, receptor de satélite u otro
componente de audio/video a su televisor.
Los conectores de entrada de video de
componente y entrada de S-Video le
permiten usar el reproductor de DVD u otros
dispositivos de video con una imagen de alta
calidad.
• Visualización en pantalla de 3 idiomas
sted puede seleccionar inglés, español o
U
francés para la programación en pantalla.
* Fabricado con licenci a de Dolby Laboratories. "Dolby" y el símbolo
de la doble D son marcas registradas de Dolby Lab oratories.
—
ADVERTENCIA:
PARA REDUCIR EL RIESGO DE INCENDIO O
DESCARGA ELÉCTRICA, NO SE DEBE
EXPONER ESTE APARATO A LA LLUVIA O
HUMEDAD.
AVI SO :
PARA REDUCIR EL RIESGO DE DESCARGA
ELÉCTRICA, NO RETIRE LA CUBIERTA (O SECCIÓN
POSTERIOR). EN EL INTERIOR DEL APARATO NO
HAY COMPONENTES QUE REQUIERAN SERVICIO
DE MANTENIMIENTO POR EL USUARIO. SOLICITE
CUALQUIER OPERACIÓN DE MANTENIMIENTO A
PERSONAL DE SERVICIO CALIFICADO.
El símbolo del rayo dentro de un triángulo
equilátero tiene por finalidad alertar al usuario
de la presencia de tensión peligrosa (sin
aislamiento) en el interior del producto, que
puede tener la intensidad suficiente como para
constituir un riesgo de descarga eléctrica.
El signo de exclamación dentro de un triángulo
equilátero tiene por finalidad alertar al usuario
de importantes instrucciones de operación y
mantenimiento (servicio) en la literatura que
acompaña a este aparato.
MEDIDAS DE SEGURIDAD IMPORTANTES
• Lea las instrucciones--Lea toda s las
instrucciones de seguridad y operación antes
de usar el televisor.
• Guarde las instrucciones--Guarde las
instrucciones de seguridad y operación para
referencia futura.
• Siga las advertencias–Preste atención a
todas las advertencias sobre su TV y las
instrucciones de operación.
• Siga las instrucciones--Siga todas las
instrucciones de operación y uso.
• Limpieza–Desconecte el TV del
tomacorriente en la pared antes de limpiarlo.
No use limpiadores líquidos o en aerosol.
Use un paño húmedo para limpiar.
56
www.insignia-products.com
Page 59

EXCEPCIÓN: Los productos que requieren
el uso de servicio ininterrumpido y que, por
alguna razón específica, como la posibilidad
de pérdida del código de autorización del
convertidor CA TV, no permiten que el usuario
los desconecte para limpiarlos o por
cualquier otra razón, no requieren seguir las
instrucciones que indican desconectar el TV
en la descripción de limpieza necesaria en
esta instrucción.
• Accesorios–No use accesorios que no
hayan sido recomendados por el fabricante
del televisor ya que podrían causar
problemas peligrosos.
• Agua y humedad–No use el televisor cerca
del agua; por ejemplo, cerca de una bañera,
lavabo, fregadero de cocina, o lavadero; en
un sótano mojado o cerca de una piscina.
• Accesorios–No coloque el televisor en un
carro, base, trípode, soporte, o mesa
inestable. El tele vi sor p ued e cae rse y ca us ar
lesiones personales graves y daño grave a la
unidad. Usar solamente con carros, bases,
trípodes, soportes, o mesas especificadas
por el fabricante o que se vendan con el
televisor.
Si va a montar el televisor,
siga las instrucc iones del
fabricante y use un accesorio
de montaje recomendado por
el fabricante. Mueva el
conjunto del TV y el carro con
cuidado. Las paradas
repentinas, la fuerza excesiva y las
superficies irregulares pueden causar que su
TV y el carro se volteen de lado.
• Ventilación–Las ranuras y aberturas en el
gabinete en y en la parte posterior o inferior
se proveen por ventilación, para asegurar la
operación confiable del televisor, y para
protegerlo contra el sobrecalentamiento. No
bloquee las aberturas. No coloque el TV en
una cama, un sofá, una alfombra u otra
superficie similar. El televisor nunca se debe
colocar cerca o sobre un radiador. No
coloque el televisor en una instalación
integrada, tal como un librero o estantería a
menos que se proporcione ventilación
apropiada o se hayan seguido las
instrucciones del fabricante.
• Fuentes de alimentación eléctrica–Use
sólo el tipo de alimentación eléctrica indicado
en la etiqueta de marca. Si no esta seguro
del tipo de fuente de energía en su casa,
consulte con el vendedor de su TV o la
compañía local de energía. Para televisores
diseñados para funcionar con baterías, u
otras fuentes, consulte las instrucciones de
operación respectivas.
• Conexión a tierra o polarización--El
televisor está equipado con un enchufe
polarizado de corriente alterna (un enchufe
que tiene una lamina más ancha que la otra).
Este enchufe se conecta en el tomacorriente
de una sola forma. Esta es una característica
de seguridad. Si no puede insertar
completamente el enchufe en el
tomacorriente, intente darle vuelta al
enchufe. Si el enchufe todavía no entra,
contacte a su electricista para que reemplace
el tomacorriente obsoleto. No anule el
propósito de seguridad del conector a tierra
polarizado.
• Protección del cable de
alimentación--Coloque los cables de
alimentación eléctrica de tal forma que no se
pisen o queden aplastados por objet os
colocados contra ellos; preste atención
especial a los cables conectados a
tomacorrientes y al lugar de donde salen del
televisor.
• Conexión a tierra de la antena exterior--Si
una antena externa o un sistema de cable
esta conectado al TV, asegúrese de que la
antena o el sistema de cable esté conectado
a tierra, para proporcionar algo de protección
contra sobretensiones de voltaje y la
acumulación de cargas estáticas. El artículo
810 del código nacional eléctrico, ANSI/
NFPA No. 70-1984 proporciona información
con respecto a la conexión a tierra del poste
y la estructura de soporte, la conexión a
tierra del alambre principal de una unidad de
descarga de antena, el tamaño de los
conductores de la conexión a tierra y la
conexión del electrodo de conexión a tierra.
EXAMPLE OF ANTENNA GROUNDING AS PER
NEC - NATIONAL ELECTRICAL CODE POWER SERVICE GROUNDING
S2898A
FIGURE A
NATIONAL ELECTRICAL CODE
ELECTRIC
SERVICE
EQUIPMENT
GROUND
CLAMP
GROUNDING CONDUCTORS
(NEC SECTION 810-21)
GROUND CLAMPS
ELECTRODE SYSTEM
(NEC ART 250, PART H)
• Relámpagos–Para protección adicional del
receptor de TV durante una tormenta de
rayos, o cuando se deje sin usar por un
periodo de tiempo extensivo, desconéctelo
del tomacorriente de la pared y desconecte
la antena o el sistema de cable. Esto evitará
daños al televisor debido a sobretensión de
energía o relámpagos.
• Líneas de alimentación–Un sistema de
antena externa no debe de ubicarse en las
inmediaciones de líneas de corriente u otros
circuitos de luz eléctrica o de energía, o
donde pueda caer sobre dichos circuitos o
líneas de corriente. Cuando instale un
sistema de antena exterior, no toque los
circuitos o líneas de alimentación ya que el
contacto con ellos puede ser fatal.
ANTENNA
LEAD IN
WIRE
ANTENNA
DISCHARGE UNIT
(NEC SECTION 810-20)
www.insignia-products.com
57
Page 60

• Sobrecarga–No sobrecargue los
tomacorrientes ni los cables de extensión ya
que esto podría resultar en riesgo de
incendio o choque eléctrico.
• Introducción de objetos y líquidos–Nunca
inserte objetos de ningún tipo en el televisor
a través de las aberturas, ya que podrían
tocar puntos de voltaje peligrosos o hacer
corto circuito con otros componentes que
podrían resultar en incendio o choque
eléctrico. Nunca derrame líquidos de ninguna
clase sobre el televisor.
• Reparación–No trate de reparar este TV
usted mismo, ya que abrir o quitar las
cubiertas puede exponerlo a voltajes
peligrosos u otros peligros. Referir todas las
reparaciones al personal de servicio
calificado.
• Daños que requieren reparación–
Desconecte el TV del tomacorriente y refiera
la reparación a personal calificado bajo las
siguientes condiciones:
• Cuando el cable de alimentación o el
enchufe se dañe o se pele.
• Si líquido ha sido derramado u objetos
han caído dentro del TV.
• Si el TV ha sido expuesto a la lluvia o al
agua.
• Si el televisor no fu ncion a normalm ente al
seguir las instrucciones de operación,
ajuste sólo los controles cubiertos por las
instrucciones de operación, ya que un
ajuste incorrecto de otros controles puede
resultar en daño, y a menudo requiere
extenso trabajo por parte de un técnico
calificado para restaurar el televisor a su
operación normal.
• Si el televisor se ha caído o dañado de
cualquier forma.
• Cuando el televisor muestra un cambio
evidente en el funcionamiento, esto indica
que se necesita reparación.
• Piezas de repuesto–Cuando se necesitan
repuestos, asegúrese de que el técnico de
reparación use repuestos especificados por
el fabricante o que tengan las mismas
características que la parte original. Las
substituciones no autorizadas pueden
resultar en incendio, choque eléctric o,
lesiones a personas u otros peligros.
• Verificación de segur idad–Después de
completar la reparación de su TV, pídale al
técnico de servicio que realice verificaciones
de seguridad rutinarias para determinar que
el TV se encuentra en buena condición de
operación.
• Calor–No instale el TV cerca de fuentes de
calor tales como radiadores, estufas u otros
productos (tales como amplificadores) que
produzcan calor.
Nota para el instalador del sistema CATV:
Este recordatori o se proporciona para que el instalador del
sistema CATV preste atención al Artículo 820 -40 del NEC el
cual proporciona pautas para una correcta conexión a tierra
y, en particular, especifica que la conexión a tierra del cable
debe estar conectada al sistema de tierra de la edificación,
tan cerca al punto de entrada del cable como sea práctico.
UNA NOTA SOBRE RECICLAJE: Las pilas no deben tirarse o
incinerarse, sino descartarse de acuerdo con las normas
locales concernientes a desechos químicos.
CUIDADO:
CHOQUE ELÉCTRICO, NO USE ESTE ENCHUFE
POLARIZADO CON UN CABLE DE EXTENSIÓN, UN
TOMACORRIENTE U OTRO TIPO DE RECEPTÁCULO A
MENOS QUE EL ENCHUFE PUEDA SER INSERTADO SIN
EXPONER NINGUNA PARTE DE LAS LÁMINAS
ADVERTENCIA DE FCC:
que no esté aprobado expresamente por la parte
responsable por el cumplimiento con el reglamento de FCC
puede anular la autoridad del usuario para operar el equipo.
CUIDADO: PARA EVITAR EL RIESGO DE
.
Cualquier cambio o modificación
58
www.insignia-products.com
Page 61

Preparación para instalar
su TV
Desempaque y configuración
La caja del televisor debe contener:
• Televisor digital de pantalla panorámica
plana de 30 pulgadas
• Guía del usuario
• Control remoto
Si necesita reemplazar estos accesorios, llame
a nuestra línea de ayuda mencionada en la
sección de Garantía de esta guía.
Dependiendo del sistema de su antena, es
posible que necesite diferentes tipos de
combinadores (mezcladores) o separadores
(divisores). Comuníquese con la tienda local de
electrónica para adquirir estos artículos.
Remueva cuidadosamente todos los
componentes de la caja, y verifique que tenga
todos los componentes necesarios antes de
desechar la caja.
• Remueva todo el material de empaque de los
componentes individuales.
• No remueva ninguna etiqueta o pegatina en
el panel posterior del TV.
• Coloque el TV en la ubicación deseada. El
TV está diseñado para ser usado en una
superficie nivelada, plana y estable como
una mesa, escritorio, estante o pedestal,
cerca de un tomacorriente de pared, lejos de
la luz solar directa, y lejos de fuentes de
excesivo calor, polvo, humedad o vibración.
• Desenrolle el cable de alimentación CA en la
parte posterior del TV y extienda el cable
completamente.
Fuente de alimentación
Use el cable de línea de CA polarizado
proporcionado para la operación con
alimentación de CA. Inserte el cable de CA en
un tomacorriente CA estándar polarizado de 120
V, 60 Hz.
Si usted causa una descarga de estática al tocar
el TV y éste deja de funcionar, desenchufe el TV
del tomacorriente de CA y enchúfelo
nuevamente. El TV debe regresar a su
operación normal.
Advertencia
• El sistema tiene un enchufe de CA
polarizado con una lámina ancha y una
lámina estrecha. El enchufe entrará
únicamente en tomacorrien tes de CA
polarizados. Este es un mecanismo de
seguridad par a reducir la posibili da d de
choque eléctrico. Si el en chufe no entra
en el tomacorriente de CA,
probablemente es un tomacorriente
antiguo sin polarización que debe ser
reemplazado por un electricista
calificado y con licencia. No lime la
lámina ancha del enchufe, ni use un
adaptador para hacer que el enchufe
entre en el tomacorriente. Est o anularía
el mecanismo de seguridad y podría
exponerle a un choque eléctrico.
• Nunca conecte el enchufe de un cable de
CA a otro voltaje que no sea el
especificado (120 V, 60 Hz). Use
solamente el cable de ali mentación
proporcionado.
Conexión de su TV
Conexiones
Si va a usar una antena para interiores o
exteriores, siga las instrucciones
correspondientes al sistema de antena. Si va a
usar un servicio de TV por cable (CABLE), vea
“Conexiones del sistema de TV por cable” on
page 60.
Conexiones de la antena
Antena de VHF/UHF combinada (cables de dos
conductores separados de VHF y UHF de 300
ohmios)
Conecte el cable de 75 ohmios proveniente de la
antena de VHF/UHF combinada al conector RF
IN.
Si su antena combinada VHF/UHF tiene un
cable de dos conductores de 300 ohmios, puede
necesitar un transformador de empalme de
300-75 ohmios.
Conector RF IN
Cable coaxial de 75
ohmios
Conector RF IN
Antena combinada VHF/UHF (cable simple de
75 ohmios o cable de dos conductores de 300
ohmios)
www.insignia-products.com
Transformador de empalme de 300-75
ohmios
59
Page 62

Conecte el cable dedos conductores de 300
ohmios de UHF al combinador (no
suministrado). Conecte el cable de dos
conductores de 300 ohmios de VHF a un
transformador de empalme de 300-75 ohmios.
Conecte el transformador al combinador, luego
conecte el combinador al conector RF IN.
Conector RF IN
Transformador de empalme de 300-75
ohmios
Combinador
Si usted es un abonado al servicio de TV por
cable que requiere el uso de un convertidor/caja
decodificadora, conecte el cable coaxial de
entrada de 75 ohmios al convertidor/caja
decodificadora. Usando otro cable coaxial de 75
ohmios, conecte el conector de salida del
convertidor/caja decodi ficadora al conector RF
IN del televisor. Establezca el TV en el canal de
salida del convertidor/caja decodificadora
(generalmente canal 3 ó 4) y use el convertidor/
caja decodificadora para seleccionar los
canales.
Cable de entrada de 75 ohmios
de TV por cable
Conector RF IN
UHF de 300
ohmios
VHF de 300 ohmios
Antenas separadas VHF/UHF (cable de 75
ohmios de VHF y cable de dos conductores
de 300 ohmios de UHF)
Conecte el cable de 75 ohmios de VHF y el
cable de dos conductores de 300 ohmios de
UHF al combinador. Conecte el combinador al
conector RF IN.
Conector RF IN
VHF de 75 ohmios
Combinador
UHF de 300 ohmios
Conexiones del sistema de TV por cable
El televisor tiene un amplio rango de
sintonización y puede sintonizar la mayoría de
canales de cable sin usar la caja convertidora de
TV por cable. Algunas compañías de TV por
cable ofrecen “canales de pago especial” que
tienen una señal codificada. Para descodificar
estas señales para una visualización normal es
necesario usar un dispositivo decodificador
generalmente proporcionado por la compañía
de TV por cable.
Para los abonados al servicio básico de TV
por cable.
Para el servicio de cable básico que no requiere
convertidor/caja decodificadora, conecte el
cable coaxial de 75 ohmios al conector RF IN
situado en la parte posterior del televisor.
Conector RF IN
Convertidor/decodificador
Cable de 75 ohmios
al TV
Para los abonados al servicio codificado
básico de TV por cable con canales de pago
especial codificados.
Si usted es un abonado a un servicio de TV por
cable en el cual los canales básicos están
descodificados y los canales de pago especial
requieren el uso de una caja de convertidor/
decodificador, quizás le convenga usar un
divisor de señal y una caja de conexiones A/B
(disponible a través de la compañía de TV por
cable o en una tienda de artículos electrónicos).
Con el interruptor en la posición "B", puede
sintonizar directamente en su televisor cualquier
canal no codificado. Con el interruptor en la
posición "A", puede sintonizar su televisor en la
salida de la caja del convertidor/decodificador
(generalmente el canal 3 ó 4) y use la caja del
convertidor/decodificador para sintonizar los
canales codificados.
Cable de
entrada de 75
ohmios de TV
por cable
Convertidor/decodificador
Divisor
Interruptor A/B
A
B
Cable de 75 ohmios
al TV
Conexiones a otros equipos
La configuración exacta para conectar diversos
componentes de video y audio a su TV depende
del modelo y de las características de cada
componente. Revise el manual del propietario
proporcionado con cada componente para
ubicar las entradas y salidas de video y audio.
Los diagramas de conexión se ofrecen como
sugerencias. Es posible que tenga que
modificarlos para alojar su selección particular
de componentes. Los diagramas están
diseñados para mostrar sólo las conexiones de
video y audio de componentes.
Conector RF IN
Cable coaxial de 75
ohmios
Para los abonados al servicio codificado de
TV por cable.
60
www.insignia-products.com
Page 63

Conexión del televisor a un VCR
(videograbadora)
Panel posterior del TV
A los conectores Audio/Video OUT
(salida de audio/video)
Cable de audio/video (no
suministrado)
A los conectores AUDIO/VIDEO IN (entrada de
audio/video) 1 (ó 2)
Conector del televisor a un VCR con un cable
de S-Video
Use este método para conectar el TV a
dispositivos de video con un conector de salida
S-Video. Este tipo de conexión provee una
calidad de imagen mejor que el de la conexión
de cables de audio/video.
Utilice un cable de S-Video disponible
comercialmente para esta conexión.
Si conecta un VCR con un cable de S-Video al
conector S-VIDEO IN situado en la parte
posterior del TV, también puede conectar los
cables de audio a los conectores AUDIO IN
situados en la parte posterior del televisor. El
cable de S-Video sólo transmite la señal de
video. La señal de audio es separada.
Conector de
S-VIDEO IN
(entrada de
S-VIDEO)
A los conectores AUDIO IN (entrada de
audio) 1 (ó 2)
A los conectores
Audio OUT
(salida de audio)
Nota
Al conector de S-Video OUT
(salida de S-Video)
Cable de S- Video (no
suministrado)
Cable de audio (no
suministrado)
Si conecta un cable a los conectores S-VIDEO y
VIDEO al mis m o tiempo, la conexión S -Video
tiene prioridad.
Panel
posterior del
TV
Conexión de su TV a un reproductor de DVD
con video de componente
A los conectores Component OUT (salida de
componente)
YPBP
R
A los
conectores
Audio OUT
(salida de
audio)
Cable de audio (no
suministrado)
Nota
Cable de video (no
suministrado)
Las entradas de video d e componente de su TV
A los conectores Component IN
(entrada de componente)
A los conectores AUDIO IN (entrada
de audio)
se usan con dispositivos que establecen salida de
señales entrelazada s 480i/1080i y señales
progresivas 480p/720p.
Conexión del TV a un receptor de DTV/caja
de TV por cable
Si va a conectar un receptor de DTV/caja de TV
por cable, conecte el televisor éste usando un
cable de video de componente.
A los conectores Component OUT
(salida de componente)
YPBP
A los
conectores
Audio OUT
(salida de
audio)
Cable de audio (no
suministrado)
R
A los conectores
Component IN (entrada de
componente)
Cable de video (no
suministrado)
A los conectores AUDIO IN (entrada de
audio)
Conexión de un sistema de audio externo
Esta conexión le permite usar un amplificador de
audio y altavoces externos, y ajustar el nivel de
audio usando el control remoto del televisor.
Panel
posterior del
TV
Panel
posterior del
TV
Conexión del TV a un reproductor de DVD o
receptor de satélite con un cable de S-Video
A S-VIDEO IN
(entrada de video) 1
(o 2)
A los conectores AUDIO IN
(entrada de audio) 1 (ó 2)
A los
conectores
Audio OUT
(salida de
audio)
Al conector de
S-Video OUT (salida
de S-Video)
Cable de S-Video (no
suministrado)
Cable de audio (no
suministrado)
Panel
posterior del
TV
www.insignia-products.com
61
Page 64

Para controlar el audio, encienda el TV y el
amplificador de estéreo, y apague los altavoces
incorporados del televisor (vea “Desactivación
de los altavoces integrados” en la paginá 80).
Fabricado con licencia de Dolby Laboratories.
"Dolby" y el símbolo de la doble D son marcas
registradas de Dolby Laboratories.
Amplificador
Panel posterior del TV
Al conector de salida de audio
(Der.)
Nota
Al conector de entrada de
audio (Izq.)
Al conector de salida de audio
(Izq.)
Cable de audio (no
suministrado)
Al conector de
entrada de audio
(Der.)
Para escuchar el sonido cuando usa un
amplificador de au dio externo, el volumen del
televisor y del amplif icador debe establecerse
arriba de 0 (cero).
Por ejemplo, si el volumen de tu televisor se
establece en 0, no podrá escuchar ningún sonido,
aunque el volumen del amplificador esté en su
nivel más alto.
Uso de un amplificador AV con sonido
envolvente digital integrado
Si usa un amplificador con sonido envolvente
digital integrado como sigue, puede disfrutar
varios sistemas de audio, inclusive audio Dolby
Digital Surround con sonido similar al del cine.
Panel posterior del TV
Nota
Esta unidad no tiene salida de audio DTS. No
habrá salida de sonido si se co necta a un
amplificador AV con decodificador DTS
integrado.
Conexión del TV a una cámara de video
Para reproducir desde una cámara de video, conecte
la cámara de video al televisor como se muestra.
Cámara de vídeo
A los conectores Audio/
Video OUT (salida de
audio/video)
Cable de audio/video (no
suministrado)
Frente del TV
Conexión del TV a un juego
También puede usar el televisor como
dispositivo de visualización para muchos juegos
de video. Sin embargo, debido a la amplia
variedad de señales generadas por estos
dispositivos y las subsiguientes variaciones de
conexión requeridas, todas no se han incluido
en los diagramas de conexión sugeridos. Para
obtener información adicional, debe consultar el
manual del propietario de cada componente.
Frente del TV
Cable digital coaxial
(no suministrado)
Al conector IN (entrada) de
audio digital coaxial
Amplificador AV con decodificador de
envolvente digital integrado
Cuidado
Al hacer la conexión anterior, no establezca
DOLBY DIGITAL en DOLBY DIGITAL“ON” en el
amplificador AV. Si lo hace, los altavoces emitirán
un ruido fuerte que puede causar daño a su
sentido del oído o a los altavoces.
Al conector OUT (salida) de audio
digital coaxial
TV GAME
Al conector Audio/
Video OUT (salida de
audio/video)
TV
Cable de audio/video (no
suministrado)
62
www.insignia-products.com
Page 65

Pilas del control remoto
El control remoto necesita dos pilas AA (no
incluidas). Recomendamos cambiar las pilas
cada año, o cuando la operación del control
remoto sea intermitente o insatisfactoria.
Reemplace las pilas originales con pilas AA
nuevas. No mezcle pilas viejas y nuevas o de
diferentes tipos.
Para reemplazar las pilas:
1 Presione le lengüeta de fijación del
portapilas y abra el compartimiento de las
pilas.
Familiarización con su TV
Controles y conexiones
Panel frontal
2 Coloque dos pilas AA en el portapilas,
alineando la polaridad indicada en el
compartimiento de pilas.
3 Cierre la cubierta de las pilas.
Cuidado
• Use sólo el tamaño y t ipo de pilas
especificados.
• Asegúrese de seguir la polaridad correcta
según lo indicado el compartimiento de
las pilas. Si invierte las pilas puede causar
daño al dispositivo.
• No combine diferentes tipos de pilas (por
ej., alcalinas y carbón-zinc) ni tampoco
pilas usadas con nuevas.
• Si el dispositivo no se usará por un periodo
de tiempo extensivo, se deben extraer las
pilas para evita r daños o lesiones
causadas por el posible derrame del ácido
de las mismas.
• No intente recargar pil as que no están
diseñadas para ser recargadas. Se pueden
sobrecalentar y rajarse.
Elemento
1 Botón POWER
2Ventana del
3 Indicador de
4 CHANNEL
5VOLUME
6 Conector de
7 Conectores de
Control/
conexión
(encendido)
sensor infrarrojo
encendido
(canal)
Botones o
(volumen)Boton
es
o
entrada de
S-video
entrada AUDIO
Izq./Der. y
VIDEO 3
Función
Presione para encender o
apagar su TV.
Recibe la señal del control
remoto.
Se ilumina cuando el TV está
encendido.
Presione para cambiar los
canales hacia arriba o abajo, o
para moverse arriba o abajo
en las selecciones del menú.
Presione para ajustar el
volumen hacia arriba o abajo,
o para cambiar ajustes o para
moverse a la siguiente
pantalla del menú.
Conecte un cable de v ideo
S-Video desde una f uente
externa, tal como un
reproductor d e DVD.
Conecte los cables de audio
de salida (izquierdo y derecho,
respectivamente) desde una
fuente externa, tal co mo un
VCR, a estos c onectores de
AUDIO. Conecte un cable de
video desde una fuente
externa, tal como un V CR .
www.insignia-products.com
63
Page 66

Panel posterior
Elemento
Control/
conexión
Función
Elemento
1 Conector IN
2 Conectores
3 Con ectores de
Control/
conexión
(entrada) de
antena RF
COMPONENT IN
(entrada de
componentes)
entrada AUDIO
(Izq./Der.)
VIDEO 1
9
8
Función
Conecte el cable de antena a
este conector.
Conecte los cables de video y
audio de componente desde
una fuente externa, tal como
un reproductor de DVD, a
estos conectores.
Conecte los cables de video
de componente y audio
(izquierdo y derecho) desde
una fuente externa, tal como
un VCR a estos conectores.
9 Cable de CA Conecte el enchufe pequeño
en el extremo del cable al
conector de entrada de CA en
el parte trasera del aparato,
luego inserte el enchufe más
ancho de cable de CA en un
tomacorriente de CA de 120
V, 60 Hz polarizado.
Control remoto
8
1
2
9
3
4
10
11
12
13
14
5
15
6
7
16
4 Con ectores de
entrada AUDIO
(Izq./Der.)
VIDEO 2
5 Conector de
entrada de au dio
derecho
6 Conector de
salida de audio
digital coaxial
7 Conector de
entrada de
S-VIDEO 1
8 Conector de
entrada de
S-VIDEO 2
Conecte los cables de video
de componente y audio
(izquierdo y derecho) desde
una fuente externa, tal como
un VCR a estos conectores.
Conecte el cable de salida de
audio derecho desde una
fuente externa, tal co mo un
VCR, a este conector.
Conecte el cable coax ial de
audio digital desde este
conector a un amplificador
externo, tal como un
decodificador de Dolby
Digital.
Conecte un cable de video
S-Video desde una fuente
externa, tal como un
reproductor de DVD, a estos
conectores.
Conecte un cable de video
S-Video desde una fuente
externa, tal como un
reproductor de DVD, a estos
conectores.
Elemento Botón Función
1Botón POWER
(encendido)
2 Botón SLEEP
(apagado
automático)
3 Botones de
número de canal
Presione para encender o
apagar su TV.
Ajusta el temporizador de
apagado automático para que
se apague el TV después de
un tiempo preestabl ecido.
Para obtener más
información, vea “Para
establecer el temporizador de
apagado automático:” en la
paginá 66.
Presione para ingresar
números de canal
directamente. Para obte ne r
más información, vea “Para
hacer funcionar el televisor:”
en la paginá 65.
64
www.insignia-products.com
Page 67

Elemento Botón Función
Elemento Botón Función
4 Botón RESET
5 Botón ENTER
6 VOL (Volumen)
7 Botón MENU Presione para acceder el
8
9 Botón MUTE
(restablecer)
(ingresar)
botones + o -
Botones FAV
o
(silenciar)
En el modo de ajuste,
presione para restablecer la
pantalla del me nú, ajustes de
imagen y sonido, a sus
posiciones predefinidas en la
fábrica.
Presione para introducir o
seleccionar informa ción para
las operaciones de la pantalla
del menú.
Presione para ajustar el
volumen hacia arriba o abajo,
o para cambiar ajustes o para
moverse a la siguiente
pantalla del menú. Para
obtener más información, vea
“Para hacer funcionar el
televisor:” en la paginá 65.
menú de pantalla .
Presione para seleccionar sus
canales favoritos Para
obtener más información, vea
“Como establecer sus
canales favoritos.” en la
paginá 68.
Apaga y enciende el sonido.
Para obtener más
información, vea “Para hacer
funcionar el te levisor:” en la
paginá 65.
15 CHANNEL
(canal)Botones
o
16 Botón EXIT
(salir)
Uso del TV
Operación básica
Para hacer funcionar el televisor:
1 Presione POWER en el TV o en el control
remoto para encender el televisor.
2 Establezca la opción del menú TV/CABLE en
la posición adecuada (para obtener más
información, vea “Para seleccionar el modo
TV o Cable:” on page 67).
3 Ajuste el nivel de volumen presionando VOL
+ o VOL – .
Presione para cambiar lo s
canales hacia arriba o abajo,
o para moverse arriba o abajo
en las selecciones del menú.
Para obtener má s
información, vea “Para hacer
funcionar el televis or:” en la
paginá65.
Presione para salir del menú
de pantalla.
10 Botón DISPLAY
(visualización)
11 Botón PICTURE
SIZE (tamaño de
imagen)
12 Botón INPUT
SELECT
(selección de
entrada)
13 Botón QUICK
VIEW (vista
rápida)
14 Botón CLOSED
CAPTION
(subtítulos)
En el modo analógico —
Presione para mostrar el
número de canal en la
pantalla.
En el modo digital—Presione
para mostrar información de
canal en la pantalla.
Para obtener más
información, vea “Para
mostrar la información actual
en la pantalla:” en la
paginá 66.
Presione para mostrar el
menú PICTURE SIZE (tamañ o
de imagen)
Presione para seleccionar
entre la entrada de TV o
externa Para obtener más
información, vea “Selecci ón
de la fuente de entrada de
video” en la pa gi ná66.
Presione para regresar al
último canal que se sintonizó.
Para obtener más
información, vea “Para hacer
funcionar el te levisor:” en la
paginá 65.
Presione para mostrar el
menú CLOSED CAPTION
(subtítulos)
El nivel de volumen se indica en la pantalla
mediante barras de color verde. A medida
que aumenta el nivel del volumen, aumenta
el número de barras. Si se disminuye el
volumen, también disminuye el número de
barras de color verde.
Presione MUTE (Silenciar) para desactivar el
sonido. Presione MUTE (Silenciar)
nuevamente, o VOL + o VOL – para activar el
sonido.
4 Para cambiar el canal hacia arriba o hacia
abajo, presione CH o . El TV se detiene
en el siguiente canal programado en la
memoria. Para obtener más información, vea
“Memorización de canales” en la paginá 67.
- O BIEN Presione los botones de números de canal
para seleccionar el canal.
ANT
ABCD
12
Para seleccionar canales analógicos:
www.insignia-products.com
65
Page 68

• 1-9 – Presione 0 dos veces, luego 1-9
según sea necesario. Por ejemplo, para
seleccionar el
canal 2, presione 0 0 2.
• 10-99 – Presione 0, luego los 2 dígitos
restantes. Por ejemplo, para seleccionar
el canal 12, presione 0 1 2.
• 100-125 – Presione los 3 dígitos en
orden. Por ejemplo, para seleccionar el
canal 120, presione 120.
Para seleccionar canales digitales:
• Presione los primeros 3 dígitos, luego
presione el botón –, seguido de los 3
dígitos restantes. Por ejemplo, para
seleccionar el canal 015-001, presione 0
1 5 – 0 0 1.
Nota
• Si se selecciona un canal que no tiene
transmisión, el sonido se silencia
automáticamente.
• Si una estación qu e está viendo detiene la
transmisión, el televisor automáticamente
se apaga después de 15 minutos.
5 Presione QUICK VIEW (Vista rápida) para
ver el último canal seleccionado, luego
presione QUICK VIEW nuevamente para
regresar al canal inicial.
Selección de la fuente de entrada de video
Presione INPUT SE L ECT (Selección de
entrada) para ver una señal de otro dispositivo
conectado a su TV, tal como un VCR o
reproductor de DVD. Puede seleccionar ANT,
VIDEO1, VIDEO2, VIDEO3 (en el panel frontal )
o COMPONENT dependiendo de los conectores
de entrada usados para conectar sus
dispositivos.
• Tiempo restante
• Idioma de audio
• Nombre del programa
• CLASIFICACIÓN DE V-CHIP
•Marca HD o SD
• Marca de subtítulos
• Marca de V-Chip
2 Presione DIS PLAY (Visualización)
nuevamente, aparecerá la información
analógica.
STEREO
SAP
TV-PG L V
ON TIMER 8:30AM
OFF TIMER 11:30PM
SLEEP TIMER 2h00m
ANT
FULL CABLE
CLOCK 12:00AM SUN
ABCD
7
• Reloj
• Número de canal o modo VIDEO
seleccionado
• Etiqueta de canal (si está predefini do)
• Estado de audio estéreo o SAP (segundo
programa de audio)
• Clasificación de contenido
• Temporizador de encendido,
temporizador de apagado, temporizador
de apagado automático (si están
predefinidos)
• Tamaño de imag en
Nota
Cuando el televisor recib e una señal analógica,
DISPLAY (Visualización) muestra sólo
información analógica.
SOURCE SELECTION
0. ANT
1. VIDEO1
2. VIDEO2
3. VIDEO3
4. COMPONENT
/0-4 : SELECT
Al presionar INPUT SELECT (Selección de
entrada) en el control remoto verá la fuente de
señal actual (presione INPUT SELECT
nuevamente o 0-4 para cambiar).
Para mostrar la información actual en la
pantalla:
1 Presione DISPLAY (Visualización) en el
control remoto.
Cuando el TV recibe una señal digital,
aparecerá la información digital.
51-3
Moon Star
CITYHD
Remaining Time 0:20 TV-Y7
No program information is available.
SUN Jan 01 12:00 PM
English
HD CC
• Nombre de programa de transmisión
• Nombre de estación
3 Presione DIS PLAY (Visualización)
nuevamente para borrar la visualización.
Para establecer el temporizador de apagado
automático:
1 Para establecer su TV para que se apague
después de un tiempo determinado, presione
SLEEP (Apagado automático) en el control
remoto. El reloj añade 10 minutos al intervalo
cada vez que usted presiona el botón SLEEP
(Apagado automático).
Después de programar el intervalo del
temporizador de apagado automático, la
pantalla aparece brevemente cada diez
minutos para recordarle que el temporizador
de apagado automático está funcionando.
2 Para confirmar el ajuste del temporizador de
apagado automático, presione SLEEP
(Apagado automático) y el tiempo restante
aparecerá por unos segundos.
3 Para cancelar el temporizador de apagado
automático, presione el botón SLEEP
(Apagado automático) repetidamente hasta
que la pantalla muestre 0h00m.
Configuración inicial
Esta sección describe la configuración inicial
que debe realizar cuando enciende el TV por
primera vez.
66
www.insignia-products.com
Page 69

Selección del idioma
Puede seleccionar entre Inglés, Español, o
Francés para el idioma del menú mostrado en la
pantalla.
Para seleccionar su idioma preferido:
1 Presione MENU en el control remoto. La
pantalla del menú aparecerá.
2 Presione o para seleccionar el icono de
configuración . Aparecerá la pantalla del
menú SETUP (Configuración).
SETUP
LANGUAGE ENGLISH
CLOCK SET
TV/CABLE CABLE
AUTO CH MEMORY
ADD/DELETE
:SELECT :ADJUST
3 Presione o para seleccionar
LANGUAGE (Idioma).
3 Presione o para selecc ion ar TV/
CABLE.
4 Presione o para seleccionar TV o
CABLE.
• TV – Canales VHF/UHF
• CABLE – Canales de TV por cable
5 Presione EXIT (Salir) en el control remoto
para regresar a la visualización normal.
Para memorizar los canales:
1 Presione MENÚ en el control remoto. La
pantalla del menú aparecerá.
2 Presione o para seleccionar el icono de
configuración . Aparecerá la pantalla del
menú SETUP (Configuración).
SETUP
LANGUAGE ENGLISH
CLOCK SET
TV/CABLE CABLE
AUTO CH MEMORY
ADD/DELETE
:SELECT :ADJUST
SETUP
LANGUAGE ENGLISH
CLOCK SET
TV/CABLE CABLE
AUTO C H ME MORY
ADD/DELETE
:SELECT :ADJUST
ENGLISH / FRANÇAIS / ESPAÑOL
4 Presione o para seleccionar el idioma
deseado.
5 Presione EXIT (Salir) en el control remoto
para regresar a la visualización normal.
Memorización de canales
El televisor está equipado con una función de
memoria de canales que permite saltar canales
hacia arriba o hacia abajo al siguiente canal
definido en la memoria, saltando los canales no
deseados. Antes de seleccionar los canales,
éstos deben programarse en la memoria del
televisor. Usted puede recibir hasta 250 canales
VHF/UHF y 500 canales de TV por cable.
Para usar su TV con antena, establezca la
opción del menú TV/CABLE en el modo TV.
Cuando se envía de la fábrica, esta opción del
menú está en el modo CABLE.
Para seleccionar el modo TV o Cable:
1 Presione MENÚ en el control remoto. La
pantalla del menú aparecerá.
2 Presione o para seleccionar el icono de
configuración . Aparecerá la pantalla del
menú SETUP (Configuración).
3 Presione o para selecc ion ar AUTO CH
MEMORY (Memoria automática de canales)
SETUP
LANGUAGE ENGLISH
CLOCK SET
TV/CABLE CABLE
AUTO CH MEMORY
ADD/DELETE
:SELECT :ADJUST
4 Presione o , el TV comenzará a
memorizar los canales disponibles en su
área. Este proceso puede durar varios
minutos. El TV regresa al modo de
visualización normal cuando concluye el
proceso.
AUTO CH MEMORY
EXIT : CANCEL
PROGRAMMING NOW
PLEASE WAIT
Nota
Pueden haber nuevos canales disponibles en
cualquier momento, por lo tanto, recomendamos
que realice el procedimiento de memorización de
canales periódicamente para actualizar su lista de
canales.
SETUP
LANGUAGE ENGLISH
CLOCK SET
TV/CABLE CABLE
AUTO CH MEMORY
ADD/DELETE
:SELECT :ADJUST
Para agregar un canal digital:
1 Presione los botones numéricos (0-9) para
seleccionar el canal que desea agregar a la
lista de canales.
2 Presione MENU en el control remoto. La
pantalla del menú aparecerá.
www.insignia-products.com
67
Page 70

3 Presione o para seleccionar el icono de
configuración, luego o para seleccionar
ADD/DELETE (Añadir/Eliminar).
4 Presione , el menú ADD/DELETE (Añadir/
eliminar) aparece .
5 Presione o para seleccionar ADDING
CHANNEL (Añadir canal), luego . El canal
seleccionado ya se ha agregado a la lista.
6 Presione EXIT (Salir) en el control remoto
para regresar a la visualización normal.
7 Repita los pasos anteriores para cada canal
que desea añadir.
Para agregar o borrar canales:
1 Presione MENÚ en el control remoto. La
pantalla del menú aparecerá.
2 Presione o para seleccionar el icono de
configuración . Aparecerá la pantalla del
menú SETUP (Configuración).
SETUP
LANGUAGE ENGLISH
CLOCK SET
TV/CABLE CABLE
AUTO CH MEMORY
ADD/DELETE
:SELECT :ADJUST
3 Presione o para seleccionar ADD/
DELETE (Añadir/Borrar), luego presione .
Se abre el menú ADD/DELETE (Añadir/
Borrar).
4 Presione o para seleccionar el canal a
añadir o borrar, luego presione o para
seleccionar ADD o DELETE, según sea
apropiado.
Nota
Para retirar los canales de la memoria, seleccione
CLEAR ALL (Borrar todos), en el menú, luego
presione o para completar la acción.
5 Repita el paso 4 para los otros canales que
desea añadir o borrar, luego presione
ENTER (Ingresar).
6 Presione EXIT (Salir) en el control remoto
para regresar a la visualización normal.
Como establecer sus canales favoritos.
Puede elegir hasta 12 canales como sus
canales favoritos.
3 Presione o para seleccionar el icono
Option (Opcion). Aparecerá la pantalla
del menú OPTION (Opcion).
OPTION
ON/OFF TIMER OFF
FAVORITE CH
CH LABEL
VIDEO LABEL
:SELECT :ADJUST
4 Presione o para seleccionar FAVORITE
CH (Canal favorito), luego presione o .
Se abre el menú FAVORITE CH (Canales
favoritos).
FAVORITE CH:CH 23-100
SET/ CLEAR TV CABLE
123-456
123-456
OPTION MENU
:SELECT :ADJUST
CLEAR:ENTER END :EXIT
15-001
15-001
13
23-100
13
23-100
0
0
0
0
6-001
6-001
0
0
0
0
0
0
0
0
0
0
5 Presione o para seleccionar SET
(Establecer), luego presione ENTER
(Ingresar).
6 Presione EXIT (Salir) en el control remoto
para regresar a la visualización normal.
7
Repita los pasos 1 a 5 para establecer hasta 11 canales favoritos adicionales.
Nota
Para ver su canal favorito, presione FAV o
en el control remoto para seleccionar el
canal. FAV o no funcionarán hasta que
usted haya programado sus canales
favoritos en la memoria.
Para borrar un canal de su lista de canales
favoritos:
1 Seleccione un canal para borrar de su lista
de canales favoritos.
2 Presione MENÚ en el control remoto. La
pantalla del menú aparecerá.
3 Presione o para seleccionar el icono
Option (Opcion). Aparecerá la pantalla
del menú OPTION (Opcion).
Para establecer sus canales favoritos:
1 Seleccione un canal que desea incluir en su
lista de canales favoritos.
2 Presione MENÚ en el control remoto. La
pantalla del menú aparecerá.
68
4 Presione o para seleccionar FAVORITE
CH (Canal favorito), luego presione o ,
se abrirá el menú FAVORITE CH (Canales
favoritos).
5 Presione o para seleccionar CLEAR
(Borrar), luego presione ENTER (Ingresar).
6 Presione EXIT (Salir) en el control remoto
para regresar a la visualización normal.
www.insignia-products.com
OPTION
ON/OFF TIMER OFF
FAVORITE CH
CH LABEL
VIDEO LABEL
:SELECT :ADJUST
Page 71

Ajustes generales y controles
Cómo hacer los ajustes del V-Chip
Puede establecer las limitaciones de
visualización en su TV para evitar que los niños
vean o escuchen escenas violentas o imágenes
que usted desea excluir. La restricción se aplica
a las clasificaciones de TV y de películas, si
estos datos son transmitidos. Usted puede
establecer esta re stricción por se parado. Para
usar la función V-Chip, primero debe registrar
una contraseña.
Para registrar una contraseña:
1 Presione MENU ya sea en el control remoto
o en el TV. La pantalla del menú aparecerá.
2 Presione o para seleccionar
(BLOQUEOS). Se abre el menú LOCKS
(Bloqueos).
LOCKS
V-CHIP SET
FRONT PANEL LOCK
NEW PASSWORD
:SELECT :ADJUST
3 Presione o para seleccionar NEW
PASSWORD (Nueva contraseña). Se abre la
pantalla NEW PASSWORD (Nueva
contraseña).
LOCKS
NEW PASSWORD
[0-9] : SELECT ENTER : SET
4 Introduzca una contraseña de 4 dígitos con
las teclas de números del control remoto,
luego presione ENTER (Ingresar). Se abre la
pantalla CONFIRM PASSWORD (Confirmar
contraseña).
EXIT : END
5 Introduzca la misma contraseña, luego
presione ENTER (Ingresar). La contraseña
está registrada y se abre el menú V-Chip.
Notas
Para evitar olvidarse de la contraseña, escríbala
en una hoja de papel y guárdela en un lugar
seguro.
Si se olvidó de su contraseña:
1. Baje el volumen al mínimo.
2. Presion e si multáneamente el botón de
volumen (en el tele visor) y el botón del canal 0
(en el control remoto) durante más de 2
segundos.
Para ajustar el V-Chip:
1 Presione MENU ya sea en el control remoto
o en el TV. La pantalla del menú aparecerá.
2 Presione o para seleccionar
(BLOQUEOS). Se abre el menú LOCKS
(Bloqueos).
LOCKS
V-CHIP SET
FRONT PANEL LOCK
NEW PASSWORD
:SELECT :ADJUST
3 Presione o para entrar al modo de
introducción de contraseña. Se abre la
pantalla de contraseña de bloqueos
(LOCKS).
4 Introduzca su contraseña de 4 dígitos con las
teclas de números del control remoto y
presione ENTER (Ingresar). Se abre el menú
de configuración de bloqueos (LOCKS).
5 Presione o para selecc ion ar V-CHIP
SET (Configuración del V-CHIP), luego
presione . Se abre el menú SET
(Configuración).
6 Presione o para selecc ion ar TV
RATING (Clasificaciones de TV), luego
presione o para seleccionar la
clasificación deseada.
LOCKS
CONFIRM PASSWORD
[0-9] : SELECT ENTER : SET
EXIT : END
Clasificación Explicación
OFF
(Desactivado)
TV-Y Apropiado para todos los niños
TV-Y7 Apropiado para niños de siete años o
TV-G Público en general
TV-PG Se recomienda guía paternal
TV-14 No apto para niños menores de 14
TV-MA Público maduro únicamente
www.insignia-products.com
La clasificación de T V no está
establecida
más.
años
69
Page 72

Cuando seleccione TV-Y7, TV-PG, TV-14 o
TV-MA, presione -/DISPLAY (-/Visualización)
para una descripción de la clasificación.
Presione o para seleccionar la
clasificación deseada, luego presione o
para seleccionar ON (Activado) o OFF
(Desactivado).
7 Presione o para seleccionar MOVIE
RATING (Clasificaciones de películas), luego
presione . El menú RATING SET
(Configuración de la clasificación) se abre.
8 Presione o para seleccionar la
clasificación deseada, luego presione o
para seleccionar ON (Activado) o OFF
(Desactivado).
Clasificación Explicación
G Audiencia ge ne r a l
PG Se recomienda guía paternal
PG-13 No apto para niños menores de 13
años
R Restringido : Niños menores de 17
años requieren la compañía de un
padre o tutor adulto
NC-17 No se permit e a nadie menor de 17
años
X Público maduro únicamente
9 Presione el botón MENU dos veces para
regresar a la pantalla LOCKS (Bloqueos),
luego presione ou para V-CHIP.
10 Presione o para seleccionar ON
(Activado). La configuración esta guardadas
en la memoria.
11 Presione EXIT (Salir) en el control remoto
para regresar a la visualización normal.
Para cambiar la contraseña:
1 Presione MENU ya sea en el control remoto
o en el TV. La pantalla del menú aparecerá.
2 Presione o para seleccionar
(BLOQUEOS). Se abre el menú LOCKS
(Bloqueos).
LOCKS
V-CHIP SET
FRONT PANEL LOCK
NEW PASSWORD
:SELECT :ADJUST
3 Presione o para entrar al modo de
introducción de contraseña. Se abre la
pantalla de contraseña de bloqueos LOCKS
(Bloqueos).
LOCKS
PASSWORD
[0-9] : SELECT ENTER : SET
EXIT : END
4 Introduzca su contraseña de 4 dígitos con las
teclas de números del control remoto y
presione ENTER (Ingresar). Se abre el menú
de configuración de bloqueos LOCKS
(Bloqueos).
5 Presione o para selecc ion ar NEW
PASSWORD (Nueva contraseña), luego
presione o .
Notas
La función V-Chip se activa só lo en los
programas y fuentes de entrada que tienen la
señal de clasificación.
La opción V-CHIP SET (DTV) (Configuración del
V-CHIP - DTV) estará disponible cuando un
nuevo sistema de clasif icación de las emisoras
digitales existe en los Est ados Unidos.
Para usar el TV después de proteger el TV:
• Cuando reciba un programa bloqueado por la
función V-Chip, presione MUTE (Silenciar) e
introduzca la contraseña, luego presione
ENTER (Ingresar) para ver el programa.
Cuando la contraseña se introduce
correctamente, la protección se suprime
temporalmente. Si se apaga el TV o se
cambia de canal, se reactiva la restricción
V-Chip.
LOCKS
NEW PASSWORD
[0-9] : SELECT ENTER : SET
EXIT : END
6 Introduzca una nueva contraseña de 4
dígitos con las teclas de números del control
remoto, luego presione ENTER (Ingresar).
Se abre la pantalla CONFIRM PASSWORD
(Confirmar contraseña).
7 Introduzca la misma contraseña, luego
presione ENTER (Ingresar). Se ha cambiado
la contraseña.
8 Presione EXIT (Salir) en el control remoto
para regresar a la visualización normal.
Establecimiento del bloqueo del panel frontal
Usted puede bloquear los botones del panel
frontal para evitar un cambio accidental de los
ajustes. Cuando el bloqueo del panel frontal
está activado, todos los botones de control
situados en el panel frontal del TV (excepto
POWER) no funcionarán.
70
www.insignia-products.com
Page 73

Para bloquear o desbloquear el panel frontal
1 Presione MENU ya sea en el control remoto
o en el TV. La pantalla del menú aparecerá.
2 Presione o para seleccionar
(BLOQUEOS). Se abre el menú LOCKS
(Bloqueos).
LOCKS
V-CHIP SET
FRONT PANEL LOCK
NEW PASSWORD
:SELECT :ADJUST
3 Presione o para entrar al modo de
introducción de contraseña. Se abre la
pantalla de contraseña de bloqueos LOCKS
(Bloqueos).
LOCKS
PASSWORD
[0-9] : SELECT ENTER : SET
EXIT : END
4 Introduzca su contraseña de 4 dígitos con las
teclas de nú meros del control remoto y
presione ENTER (Ingresar). Se abre el menú
de configuración de bloqueos LOCKS
(Bloqueos).
5 Presione o para seleccionar FRONT
PANEL LOCK (Bloqueo del panel frontal),
luego presione o para seleccionar ON u
OFF (Activado o Desactivado).
Cuando el bloqueo del panel frontal está
activado, en la pantalla aparece el mensaje
“NOT AVAILABLE” (No disponible) cuando
se presiona un botón del panel frontal.
6 Presione EXIT (Salir) en el control remoto
para regresar a la visualización normal.
Etiquetas de canal
Las etiquetas de canal aparecen sobre la
visualización del número de canal cada vez que
usted enciende el TV, selecciona una canal o
presiona DISPLAY (Visualización).
Puede elegir cuatro caracteres para identificar
un canal.
Para crear etiquetas de canal:
1 Seleccione el canal que desea identificar. 2 Presione MENU en el control remoto. La
pantalla del menú aparecerá.
3 Presione o para seleccionar el icono
Option (Opcion). Aparecerá la pantalla
del menú OPTION (Opcion).
OPTION
ON/OFF TIMER OFF
FAVORITE CH
CH LABEL
VIDEO LABEL
:SELECT :ADJUST
4 Presione o para selecc ion ar CH
LABEL (Etiqueta de canal), luego presione
o , se abrirá el menú CH LABEL
(Etiqueta de canal).
CH LABEL : CH 23
SET/ CLEAR
LABEL ––––
OPTION MENU
:SELECT :ADJUST
ENTER : SET EXIT : END
5 Presione o para selecc ion ar SET/
CLEAR (Establecer/Borrar), luego presione
o para cambiar el ajuste a SET
(Establecer).
6 Presione ENTER para seleccionar LABEL
(Etiqueta), luego presione o
repetidamente hasta que aparezca el
carácter que usted desea.
7 Presione ENTER (Ingresar) para selecc ionar
el carácter.
8 Repita el proceso hasta que haya
seleccionado todos los caracteres deseados.
9 Presione ENTER (Ingresar) nuevamente
cuando haya terminado de escribir la
etiqueta.
10 Presione EXIT (Salir) en el control remoto
para regresar a la visualización normal.
11 Repita los pasos 1 a 9 para etiquetar otros
canales.
Notas
Para regresar del menú CH LABEL (Etiqueta de
canal) al menú OPTION (Opción), seleccione
OPTION MENU, (Menú de opciones) o .
Para borrar etiquetas de canal:
1 Seleccione el canal del cual desea eliminar la
etiqueta
2 Presione MENU en el control remoto. La
pantalla del menú aparecerá.
www.insignia-products.com
71
Page 74

3 Presione o para seleccionar el icono
Option (Opcion). Aparecerá la pantalla
del menú OPTION (Opcion).
OPTION
ON/OFF TIMER OFF
FAVORITE CH
CH LABEL
VIDEO LABEL
:SELECT :ADJUST
4 Presione o para seleccionar CH
LABEL (Etiqueta de canal), luego presione
o , se abrirá el menú CH LABEL
(Etiqueta de canal).
3 Presione o para selecc ion ar VIDEO
LABEL (Etiqueta de video), luego presione
o , se abrirá el menú VIDEO LABEL
(Etiqueta de video).
VIDEO LABLE
1. VIDEO1 - /VCR/DVD/DTV
2. VIDEO2 - SAT/CBL
3. VIDEO3 -
4. COMPONENT -
OPTION MENU
:SELECT :ADJUST
4 Presione o para seleccionar la fuente
de video deseada.
CH LABEL : CH 23
SET/ CLEAR
LABEL ––––
OPTION MENU
:SELECT :ADJUST
ENTER : SET EXIT : END
5 Presione o para seleccionar SET/
CLEAR (Establecer/Borrar), luego presione
o para cambiar el ajuste a CLEAR
(Borrar).
6 Presione ENTER (Ingresar) para confirmar el
cambio.
7 Presione EXIT (Salir) en el control remoto
para regresar a la visualización normal.
8 Repita los pasos 1 a 6 para quitar las
etiquetas de otros canales.
Cómo etiquetar la fuente de entrada de video
La función de etiqueta de video le permite
identificar cada fuente de entrada de su TV.
Cómo etiquetar la fuente de entrada de
video:
1 Presione MENU en el control remoto. La
pantalla del menú aparecerá.
2 Presione o para seleccionar el icono
Option (Opcion). Aparecerá la pantalla
del menú OPTION (Opcion).
OPTION
ON/OFF TIMER OFF
FAVORITE CH
CH LABEL
VIDEO LABEL
VIDEO LABEL
1. VIDEO1 -
2. VIDEO2 -
3. VIDEO3 -
4. COMPONENT - / VCR/ DVD/ DTV
OPTION MENU
:SELECT :ADJUST
SAT/CBL
5 Presione o para seleccionar la etiqueta
deseada.
VIDEO LABLE
1. VIDEO1 -
2. VIDEO2 -
3. VIDEO3 -
4. COMPONENT - /VCR/ DVD/DTV
OPTION MENU
:SELECT :ADJUST
SAT/CBL
6 Presione EXIT (Salir) en el control remoto
para regresar a la visualización normal.
Ajuste del reloj
Debe establecer correctamente el reloj para que
el temporizador de encendido/apagado se active
a la hora correcta. Para obtener más
información, vea “Selección de la salida de
sonido digital” en la paginá 81.
Para establecer el reloj:
1 Presione MENU en el control remoto. La
pantalla del menú aparecerá.
2 Presione o para seleccionar el icono de
configuración . Aparecerá la pantalla del
menú SETUP (Configuración).
72
:SELECT :ADJUST
www.insignia-products.com
SETUP
LANGUAGE ENGLISH
CLOCK SET
TV/CABLE CABLE
AUTO CH MEMORY
ADD/DELETE
:SELECT :ADJUST
Page 75

3 Presione o para seleccionar CLOCK
SET (Establecer reloj), luego presione . Se
abre el menú CLOCK SET (Establecer reloj).
SETUP
LANGUAGE ENGLISH
CLOCK SET
TV/CABLE CABLE
AUTO CH MEMORY
ADD/DELETE
:SELECT :ADJUST
4 Presione o para establecer el MES,
luego presione .
CLOCK SET
MONTH 1
DAY 1 ( SUN)
YEAR 2006
TIME 12:00AM
:SELECT :ADJUST
EXIT:END
5 Establezca el DÍA, AÑO y TEMPORIZADOR
a medida que establece el MES en el paso 3.
Nota
• Después de estable cer el reloj, la fecha y
hora comenzarán a funcionar
automáticamente.
• Después de una interrupción o
desconexión de la alimentación eléctrica,
se perderán los ajustes del reloj y será
necesario restablecerlos.
6 Presione EXIT (Salir) en el control remoto
para regresar a la visualización normal.
Establecimiento de los temporizadores de encendido y apagado
Esta función permite encender y apagar su
televisor automáticamente a una hora
predetermina da. Si usted programa el
temporizador de encendido/apagado en la
opción DAILY (diariamente), su TV se
encenderá y apagará todos los días a la misma
hora y en el mismo canal.
Para establecer el temporizador de
encendido:
1 Presione MENU en el control remoto. La
pantalla del menú aparecerá.
2 Presione o para seleccionar el icono
Option (Opcion). Aparecerá la pantalla
del menú OPTION (Opcion).
OPTION
ON/ OFF TIMER ON / OFF/SET
FAVORITE CH
CH LABEL
VIDEO LABEL
4 Presione o para seleccionar SET
(Establecer), luego presione ENTER
(Ingresar). Se abre el menú ON/OFF TIMER
(Temporizador de encendido/apagado).
ON/ OFF TIMER
ON TIMER
12:00AM CH 1
OFF TIMER
12:00AM
OPTION MENU
: SELECT : ADJUST
EXIT : END
CLEAR
CLEAR
5 Presione o para seleccionar ON TIMER
(Temporizador de encendido), luego
presione a fin de introducir el ajuste para
el temporizador.
6 Presione o para establecer la hora
deseada, luego presione .
Fíjese si está estableciendo la hora en AM o
PM.
7 Establezca los minutos y el canal de inicio
como estableció la hora en el paso 6.
8 Presione o para seleccionar DAILY
(Diariamente), luego presione ENTER
(Ingresar).
9 Presione EXIT (Salir) en el control remoto
para regresar a la visualización normal.
Notas
• El TV se apagará automáticamente
aproximadamente 1 hora después de que
se active el temporizador de encendido, si
no se ha establecido el temporizador de
apagado. Para continuar viendo TV,
presione cualquier botón para cancelar la
desactivación automática de una hora.
• Si la estación que está viendo suspend e la
transmisión, el televisor automáticamente
se apaga después de 15 minutos.
• Para cancelar el temporiza dor de
encendido, seleccione CLEAR (Borrar) en
el paso 8. Presione EXIT (Salir) para
regresar a la pantalla normal.
• Si se interrumpe o se desconecta la
alimentación eléctrica, se perderán los
ajustes del temporizador.
• Para regresar del menú ON/OFF TIMER
(Temporizador de encendido/apagado) al
menú OPTION (Opción), seleccione
OPTION MENU (Menú de opcion es), lueg o
presione o .
Para establecer el temporizador de apagado:
1 Presione MENU en el control remoto. La
pantalla del menú aparecerá.
2 Presione o para seleccionar el icono
Option (Opcion). Aparecerá la pantalla
del menú OPTION (Opcion).
:SELECT :ADJUST
3 Presione o para seleccionar ON/OFF
TIMER (Temporizador de encendido/
apagado).
www.insignia-products.com
OPTION
ON/ OFF TIMER ON / OFF/SET
FAVORITE CH
CH LABEL
VIDEO LABEL
:SELECT :ADJUST
73
Page 76

3 Presione o para seleccionar ON/OFF
TIMER (Temporizador de encendido/
apagado).
4 Presione o para seleccionar SET
(Establecer), luego presione ENTER
(Ingresar). Se abre el menú ON/OFF TIMER
(Temporizador de encendido/apagado).
Para activar o desactivar el temporizador de
encendido/apagado:
1 Presione MENU en el control remoto. La
pantalla del menú aparecerá.
2 Presione o para seleccionar el icono
Option (Opcion). Aparecerá la pantalla
del menú OPTION (Opcion).
ON/ OFF TIMER
ON TIMER
12:00AM CH 1
OFF TIMER
12:00AM
OPTION MENU
: SELECT : ADJUST
EXIT : END
CLEAR
CLEAR
5 Presione o para seleccionar OFF
TIMER (Temporizador de apagado), luego
presione a fin de introducir el ajuste para
el temporizador.
6 Presione o para establecer la hora
deseada, luego presione .
Fíjese si está estableciendo la hora en AM o
PM.
7 Establezca los minutos y el canal de inicio
como estableció la hora en el paso 6.
8 Presione o para seleccionar DAIL Y
(Diariamente), luego presione ENTER
(Ingresar).
Nota
Para cancelar el temporizador de apagado,
presione
para seleccionar CLEAR (Borrar)
después de este paso, luego presione ENTER
(Ingresar).
9 Presione EXIT (Salir) en el control remoto
para regresar a la visualización normal.
Notas
• Para confirmar los ajustes del temporizador
de encendido/apagado, presione DISPLAY
(Visualización) para mostrar el programa
en la pantalla.
• Si la estación que está viendo suspende la
transmisión, el televisor automáticamente
se apaga después de 15 minutos.
• Después de una interrupción o
desconexión de la alimentación eléctrica,
se perderán los ajustes del temporizador.
• Para regresar del menú ON/OFF TIMER
(Temporizador de encendido/apagado) al
menú OPTION (Opción), seleccione
OPTION MENU (Menú de op ciones ), luego
presione o .
OPTION
ON/ OFF TIMER ON / OFF/SET
FAVORITE CH
CH LABEL
VIDEO LABEL
:SELECT :ADJUST
3 Presione o para selecc ion ar ON/OFF
TIMER (Temporizador de encendido/
apagado).
4 Presione o para seleccionar ON
(Activado) u OFF (Desactivado) para activar
o desactivar el temporizador,
respectivamente.
5 Presione EXIT (Salir) en el control remoto
para regresar a la visualización normal.
Establecimiento del tamaño de la imagen
Usted puede ver los programas de formato 480i
y 480p en una variedad de tamaños de imagen,
entre ellos NATURAL, CINEMA WIDE1,
CINEMA WIDE2, CINEMA WIDE3 y FULL.
Nota
La función PICTU RE SIZE (Tamaño de imagen)
no está disponib le para algunos format os de
programas (tales como 1080i o 720p). Dichos
formatos se visualizan en FULL (Completo).
Tamaño de imagen NATURAL – Generalmente,
esta imagen es el aspecto 4:3 estándar, con
barras laterales gris.
Tamaño de imag en CINEMA WIDE1 (para
programas de aspecto 4:3) – Para llenar la
pantalla, se extienden los bordes derecho e
izquierdo. Sin embargo, el centro de la imagen
permanece cerca a su relación normal.
Los bordes superior e inferior de la imagen
pueden estar ocultos.
74
Tamaño de imag en CINEMA WIDE2 (para
programas de buzón) – Toda la imagen de
agranda uniformemente. Se extiende por igual
en ancho y altura (y retiene su proporción
original).
www.insignia-products.com
Page 77

Los bordes superior e inferior de la imagen
pueden es tar oc ultos . P ar a v er las áreas oc ulta s,
puede desplazar la imagen (vea
“Establecimiento del desplazamiento de la
imagen” en la paginá 75).
3 Presione o para selecc ion ar PICTURE
SIZE (Tamaño de imagen), luego presione
. Se abre el menú PICTURE SIZE (T amaño
de imagen).
PICTURE SIZE
0. NATURAL
1. CINEMA WIDE1
2. CINEMA WIDE2
3. CINEMA WIDE3
4. FULL
A B C D E F G - - - - - - - - - - - - - - - -
Tamaño de imagen CINEMA WIDE3 (para
programas de buzón con subtítulos) – Para
llenar el ancho de la pantalla, la imagen se
extiende horizontalmente. Sin embargo, sólo se
extiende ligeramente en la parte superior e
inferior.
Los bordes superior e inferior de la imagen
pueden estar ocultos. Para ver las áreas ocultas
(como subtítulos), puede desplazar la imagen
(vea “Establecimiento del desplazamiento de la
imagen” en la paginá 75).
A B C D E F G - - - - - - - - - - - - - - - -
A B C D E F G - - - - - - - - - - - - - - - - - - - - - - - - - -
Tamaño de imagen FULL Para programas de
fuente 16:9) – Este ajuste muestra la imagen en
su tamaño máximo.
/0-4 : SELECT
4 Presione o , o los botones de números 1
a 4, para seleccionar el tamaño de imagen
deseado, luego presione ENTER.
5 Presione EXIT (Salir) en el control remoto
para regresar a la visualización normal.
Establecimiento del desplazamiento de la imagen
Usted puede desplazar la imagen en los modos
CINEMA WIDE2 y CINEMA WIDE3.
Para establecer el desplazamiento de la
imagen:
1 Presione MENU en el control remoto en el
modo CINEMA WIDE2 o CINEMA WIDE3.
La pantalla del menú aparecerá.
2 Presione o para seleccionar el icono de
configuración . Aparecerá la pantalla del
menú SETUP (Configuración).
SETUP
LANGUAGE ENGLISH
CLOCK SET
TV/CABLE CABLE
AUTO CH MEMORY
ADD/DELETE
Para establecer el tamaño de la imagen:
1 Presione MENU en el control remoto. La
pantalla del menú aparecerá.
2 Presione o para seleccionar el icono de
configuración . Aparecerá la pantalla del
menú SETUP (Configuración).
SETUP
CLOSED CAPTION OFF
CC ADVANCED
PICTURE SIZE
PICTURE SCROLL
CINEMA MODE FILM
: SELECT : ADJUST
:SELECT :ADJUST
3 Presione o para selecc ion ar PICTURE
SCROLL (Desplazamiento de imagen).
SETUP
CLOSED CAPTION OFF
CC ADVANCED
PICTURE SIZE
PICTURE SCROLL
CINEMA MODE FILM
: SELECT : ADJUST
4 Presione o para abrir la pantalla
SCROLL ADJUSTMENT (Ajuste de
desplazamiento).
SCROLL ADJUSTMENT 0
TO ADJUST
www.insignia-products.com
75
Page 78

5 Para ajustar la posición vertical de la imagen,
presione o .
3 Presione o para selecc ion ar CINEMA
MODE (Modo de cinema), luego presione
o para seleccionar FILM (Película).
SCROLL ADJUSTMENT 0
TO ADJUST
6 Para subir la imagen, presione .
SCROLL ADJUSTMENT +10
TO ADJUST
7 Para bajar la imagen, presione .
SCROLL ADJUSTMENT -10
TO ADJUST
8 Presione EXIT (Salir) en el control remoto
para regresar a la visualización normal.
SETUP
CLOSED CAPTION OFF
CC ADVANCED
PICTURE SIZE
PICTURE SCROLL
CINEMA MODE FILM / VIDEO
: SELECT : ADJUST
4 Para cambiar el modo de cinema a VIDEO,
presione o para seleccionar VIDEO.
5 Presione EXIT (Salir) en el control remoto
para regresar a la visualización normal.
Establecimiento de la preferencia de imagen
Puede seleccionar cuatro modos de imagen—
SPORTS, STANDARD, MOVIE y MEMORY.
Modo Descripción
Sports
(Deportes):
Standard
(Estándar)
Movie (Película) Ajuste de imagen similar al de las
Memory
(Memoria)
Imagen brillante y dinám ica
(establecido en la fáb rica)
Calidad de imagen estándar
(establecido en la fáb rica)
películas (establecido en la fábrica).
Sus preferencias personales,
establecidas por usted usando los
ajustes de control de imagen. Para
obtener más informació n, vea “Ajuste
de la imagen” en la paginá 7 7.
Nota
Las cantidades de desplazamiento para una
fuente de señal 480i/480p son:
CINEMA WIDE1 : No ajustable
CINEMA WIDE2 : -10 a +20
CINEMA WIDE3 : -10 a +10
Selección del modo de cinema
Cuando usted ve un DVD mediante el
reproductor de DVD conectado con la entrada
de componente, puede obtener un movimiento
más suave estab leciendo la opción CINEMA
MODE (Modo de cinema) en FILM (Película).
Para seleccionar el modo de cinema:
1 Presione MENU en el control remoto. La
pantalla del menú aparecerá.
2 Presione o para seleccionar el icono de
configuración . Aparecerá la pantalla del
menú SETUP (Configuración).
SETUP
CLOSED CAPTION OFF
CC ADVANCED
PICTURE SIZE
PICTURE SCROLL
CINEMA MODE FILM
: SELECT : ADJUST
Para establecer la preferencia de imagen:
1 Presione MENU en el control remoto. La
pantalla del menú aparecerá.
2 Presione o para seleccionar el icono de
la imagen . Aparecerá la pantalla del
menú PICTURE (Imagen).
PICTURE
PICTURE PREFERENCE SPORTS
BRIGHTNESS 25
CONTRAST 50
COLOR 25
TINT 0
SHARPNESS 25
: SELECT : ADJUST
3 Presione o para selecc ion ar PICTURE
PREFERENCE (Preferencia de imagen).
PICTURE
PICTURE PREFERENCE SPORTS
SPORTS/ STANDARD/ MOVIE/ MEMORY
BRIGHTNESS 25
CONTRAST 50
COLOR 25
TINT 0
SHARPNESS 25
: SELECT : ADJUST
76
www.insignia-products.com
Page 79

4 Presione o para seleccionar el ajuste
deseado.
PICTURE
PICTURE PREFERENCE MOVIE
SPORTS/ STANDARD/ MOVIE/ MEMORY
BRIGHTNESS 25
CONTRAST 50
COLOR 25
TINT 0
SHARPNESS 25
: SELECT : ADJUST
5 Presione EXIT (Salir) en el control remoto
para regresar a la visualización normal.
Ajuste de la imagen
Para ajustar la imagen:
1 Presione MENU en el control remoto. La
pantalla del menú aparecerá.
2 Presione o para seleccionar el icono de
la imagen . Aparecerá la pantalla del
menú PICTURE (Imagen).
PICTURE
PICTURE PREFERENCE SPORTS
BRIGHTNESS 25
CONTRAST 50
COLOR 25
TINT 0
SHARPNESS 25
: SELECT : ADJUST
3 Presione o para seleccionar el
elemento que desea ajustar, luego presione
o para hacer el ajuste.
Para establecer la temperatura del color:
1 Presione MENU en el control remoto. La
pantalla del menú aparecerá.
2 Presione o para seleccionar el icono de
la imagen . Aparecerá la pantalla del
menú PICTURE (Imagen).
PICTURE
PICTURE PREFERENCE SPORTS
BRIGHTNESS 25
CONTRAST 50
COLOR 25
TINT 0
SHARPNESS 25
: SELECT : ADJUST
3 Presione o para seleccion ar COLOR
TEMPERATURE (Temperatura del color),
luego presione o para establecer el
modo deseado.
PICTURE
COLOR COOL
TEMPERATURE COOL/MEDIUM/WARM
DISPLAY FORMAT 1080i
SVM HIGH
RESET
: SELECT : ADJUST
Modo Descripción
Cool (Frío) Imagen azulada
Medium
(media)
Imagen neutra
PICTURE
PICTURE PREFERENCE SPORTS
BRIGHTNESS 25
CONTRAST 50
COLOR 25
TINT 0
SHARPNESS 25
: SELECT : ADJUST
Elemento
Brillo reducir el brillo aumentar el brillo
Contraste
disminuir el contraste aumentar el contraste
(establecido
en el nivel
máximo en la
fábrica)
Color color más pálido color más vívido
Tinte más rojo más verde
Nitidez imagen más suave imagen más clara
4 Cuando la imagen esté correc tam ente
ajustada, presione EXIT (Salir) en el control
remoto para regresar a la visualización
normal.
Cómo establecer la temperatura del color
Usted puede cambiar la calidad de la imagen
seleccionando entre tres opciones de
temperaturas predeterminadas de color —
COOL, MEDIUM y WARM:
Warm
Imagen rojiza
(caliente)
4 Presione EXIT (Salir) en el control remoto
para regresar a la visualización normal.
Ajuste de l formato de la pan talla
Este ajuste convierte una señal de entrada de 480p a
540p o 1080i.
Notas
• La función de forma to de pant alla só lo es tá
disponible para entrada de 480p. 1080i se
muestra siempre cuando la entrada es una
señal diferente a 480p.
• Si observa temblor en una imagen de 480p,
intente establecer el formato de pantalla
en 540p.
Para establecer el formato de pantalla:
1 Presione MENU en el control remoto. La
pantalla del menú aparecerá.
2 Presione o para seleccionar el icono de
la imagen . Aparecerá la pantalla del
menú PICTURE (Imagen).
PICTURE
PICTURE PREFERENCE SPORTS
BRIGHTNESS 25
CONTRAST 50
COLOR 25
TINT 0
SHARPNESS 25
: SELECT : ADJUST
www.insignia-products.com
77
Page 80

3 Presione o para seleccionar DISPLAY
FORMAT (Formato de pantalla).
PICTURE
COLOR COOL
TEMPERATURE
DISPLAY FORMAT 540p /1080i
SVM HIGH
RESET
: SELECT : ADJUST
4 Presione o para seleccionar 540p o
1080i.
5 Presione EXIT en el control remoto para
regresar a la visualización normal.
Selección de la modulación de velocidad de escán (SVM)
La función SVC mejora el contraste y la nitidez
de la imagen. Esta función tiene tres modos:
HIGH (Alto), LOW (Bajo) y OFF (Desactivado).
• SVM ..................................HIGH (Alto)
Para restablecer los ajustes de la imagen:
1 Presione MENU en el control remoto. La
pantalla del menú aparecerá.
2 Presione o para seleccionar el icono de
la imagen . Aparecerá la pantalla del
menú PICTURE (Imagen).
PICTURE
PICTURE PREFERENCE SPORTS
BRIGHTNESS 25
CONTRAST 50
COLOR 25
TINT 0
SHARPNESS 25
: SELECT : ADJUST
3 Presione o para selecc ion ar RESET
(Restablecer), luego presione . Los ajustes
están restablecidos.
Para seleccionar la SVM:
1 Presione MENU en el control remoto. La
pantalla del menú aparecerá.
2 Presione o para seleccionar el icono de
la imagen . Aparecerá la pantalla del
menú PICTURE (Imagen).
PICTURE
PICTURE PREFERENCE SPORTS
BRIGHTNESS 25
CONTRAST 50
COLOR 25
TINT 0
SHARPNESS 25
: SELECT : ADJUST
3 Presione o para seleccionar SVM.
PICTURE
COLOR COOL
TEMPERATURE
DISPLAY FORMAT 1080i
SVM HIGH /LOW/OFF
RESET
: SELECT : ADJUST
4 Presione o para elegir el ajuste
deseado, HIGH, LOW u OFF.
5 Presione EXIT en el control remoto para
regresar a la visualización normal.
Restablecimiento de los ajustes de la imagen.
La función RESET (Restablecer) regresa los
ajustes de calidad de la imagen a los siguientes
ajustes de fábrica:
• PICTURE PREFERENCE (Referencia de
imagen).............................sports (deportes)
• BRIGHTNESS (Brillo).......centro (25)
• CONTRAST (Contraste)...máx (50)
• COLOR .............................centro (25)
• TINT (Tinte).......................centro (0)
• SHARPNESS (Nitidez) .....centro (25)
• COLOR TEMPERATURE (Tempe ratura del
color).................................COOL (Frío)
• DISPLAY FORMAT (Formato de pantalla)
..........................................1080i
PICTURE
COLOR COOL
TEMPERATURE
DISPLAY FORMAT 1080i
SVM HIGH
RESET
: SELECT : ADJUST
Cómo establecer la función de subtítulos
Este televisor tiene la capacidad de decodificar y
mostrar programas de televisión con subtítulos.
Los subtítulos muestran texto en la pantalla para
las personas con dificultad auditiva, o traduce y
muestra el texto en otro idioma.
Hay dos modos de subtítulos disponibles:
• Subtítulos: Este modo de subtítulos muestra
texto en la pantalla en inglés o en otro
idioma. Generalmente, los subtítulos en
inglés se transmiten en C1 y los subtítulos en
otros idiomas se transmiten en C2.
78
www.insignia-products.com
Page 81

• Texto: El modo de Subtítulos de texto
generalmente llena la mitad de la pantalla
con información de programación u otro tipo
de información.
Cuando se recibe una señal analógica,
puede elegir entre C1, C2, T1, T2 y OFF.
Notas
• Si ele programa o video seleccionado no se
transmite con subtítulos, no aparecerán
subtítulos en la pantalla, pero el televisor
permanecerá en el modo de Subt ítulos.
• Si el texto no está disponible en su área de
visualización, puede aparecer un
rectángulo negro en la pantalla. Si esto
sucede, establezca la f unción Closed
Captions (Subt ítulos) en OFF
(Desactivado).
• Cuando selecci ona Closed Captions
(Subtítulos), los subtít ulos tienen un
retardo de aproximadamente 10
segundos.
• De vez en cuando pueden aparecer errores
de ortografía o caracteres inu suales
durante la transmisión con subtítulos .
Esto es normal, especialmente en los
programas en vivo ya que durant e estos
programas los subtítulos también se
introducen en vivo. Estas transmisione s
no permiten tiempo para edición.
• Cuando se mues tran subtítulos, pueden
verse visualizaciones en pantalla como
volumen y silenciamiento, pero estos
pueden interferir con los subtítulos.
• Algunos sistemas de TV por cable y
sistemas de protección de copia pueden
interferir con la señal de los subtít ulos.
• Si usa una antena de interiores o si la
recepción de televisión es deficiente, el
decodificador de subtítulos quizás no
aparezca o puede aparecer con caracteres
extraños o palabras con errores de
ortografía. En este caso, aj uste la antena
para una mejor recepción o use una
antena de exterior es.
Para establecer los subtítulos:
1 Presione MENU en el control remoto. La
pantalla del menú aparecerá.
2 Presione o para seleccionar el icono de
configuración . Aparecerá la pantalla del
menú SETUP (Configuración).
SETUP
CLOSED CAPTION OFF
CC ADVANCED
PICTURE SIZE
PICTURE SCROLL
CINEMA MODE FILM
: SELECT : ADJUST
3 Presione o para seleccionar CLOSED
CAPTION (Subtítulos).
4 Presione o para seleccionar el modo de
subtítulos deseado.
SETUP
CLOSED CAPTION OFF
CC ADVANCED
PICTURE SIZE
PICTURE SCROLL
CINEMA MODE FILM
: SELECT : ADJUST
C1/C2/T1/T2/OFF
- O BIEN Cuando se recibe una señal digital, usted
puede elegir entre CS1, CS2, CS3, CS4,
CS5, CS6, C1, C2, C3, C4, T1, T2, T3, T4 u
OFF (Desactivado).
SETUP
CLOSED CAPTION OFF
CS1/CS2/CS3/CS4/CS5/CS6
C1/C2/C3/C4/T1/T2/T3/T4/OFF
CC ADVANCED
PICTURE SIZE
PICTURE SCROLL
CINEMA MODE FILM
: SELECT : ADJUST
5 Presione EXIT (Salir) en el control remoto
para regresar a la visualización normal.
Personalización de los subtítulos
Los subtítulos se establecen en la fábrica, sin
embargo, usted puede ajustar los subtítulos
digitales individualmente de la siguiente forma:
Para personalizar los subtítulos digitales:
1 Presione MENU en el control remoto. La
pantalla del menú aparecerá.
2 Presione o para seleccionar el icono de
configuración . Aparecerá la pantalla del
menú SETUP (Configuración).
SETUP
CLOSED CAPTION OFF
CC ADVANCED
PICTURE SIZE
PICTURE SCROLL
CINEMA MODE FILM
: SELECT : ADJUST
3 Presione o para selecc ion ar CC
ADVANCED (Subtítulos avanzados), luego
presione . Se abre el menú CC
ADVANCED (Subtítulos avanzados).
CC ADVANCED
TEXT SIZE
TEXT TYPE
TEXT COLOR
TEXT EDGE
BACKGROUND COLOR
www.insignia-products.com
: SELECT : ADJUST
79
Page 82

4 Presione o para seleccionar la opción
CC ADVANCED (Subtítulos avanzados) que
desea personaliza, luego presione o .
TEXT SIZE
AUTO
SMALL
STANDARD
LARGE
: SELECT : ADJUST
5 Presione o para seleccionar el ajuste
deseado.
Para seleccionar estéreo o SAP:
1 Presione MENU en el control remoto. La
pantalla del menú aparecerá.
2 Presione o para seleccionar el icono de
audio . Aparecerá la pantalla del menú
AUDIO.
AUDIO
MTS STR / SAP / MONO
BASS 25
TREBLE 25
BALANCE 0
SPEAKERS ON
: SELECT : ADJUST
Opción Parámetros
Text size (Tamaño
del texto)
Text type (Tipo de
texto)
Text color (Color
del texto)
Text edge (Borde
del texto)
Background color
(Color del fondo )
Auto (Automático), Small (Pequeño),
Standard (Estándar), Large (Grande)
Auto (Automático), Default
(Predeterminado), Mono w/serif
(Mono con serif), Prop w/serif (Prop
con serfi), Mono w/o serif (Mono sin
serif), Prop w/o serif (Prop sin serif),
Casual, Cursive (Cursiva), Small caps
(mayúsculas pequeñas)
Auto (Automático), Black (Negro),
White (Blanco), Red (Rojo), Gre en
(Verde), Blue (Azul), Y ellow (Amarillo),
Magenta y Cyan (Turquesa)
Auto (Automático), None (Ninguno),
Raised (Elevado), Depressed
(Deprimido), Uniform (Uniforme), Left
drop shadow (Sombr a izquierda),
Right drop sha do w (Sombra derecha) .
Auto (Automático), Black (Negro),
White (Blanco), Red (Rojo), Gre en
(Verde), Blue (Azul), Y ellow (Amarillo),
Magenta y Cyan (Turquesa)
6 Presione EXIT (Salir) en el control remoto
para regresar a la visualización normal.
Selección de estéreo, segundo programa de audio (SAP) y ajuste del sonido
La función de sonido de TV multicanales (MTS)
proporciona sonido estéreo de alta fidelidad.
MTS también puede transmitir un segundo
programa de audio (SAP) que contiene un
segundo idioma u otra información de audio.
Cuando el TV recibe una transmisión en estéreo
o SAP, la palabra STEREO o SAP aparece en la
pantalla cada vez que usted enciende el
televisor, cambia de canal o presiona DISPLAY.
3 Presione o para selecc ion ar MTS,
luego presione o para seleccionar la
opción deseada (STR, SAP o MONO).
Notas
• Normalmente puede dejar el TV en el modo
etéreo porque el TV automáticamente
establece la salida de l tipo de sonido
transmitido (estéreo o monofó nico).
• Si el sonido estéreo es rui doso, seleccione
MONO para reducir el ruido.
Para ajustar el sonido:
1 Presione MENU en el control remoto. La
pantalla del menú aparecerá.
2 Presione o para seleccionar el icono de
audio . Aparecerá la pantalla del menú
AUDIO.
AUDIO
MTS STEREO
BASS 25
TREBLE 25
BALANC E 0
SPEAKERS ON
: SELECT : ADJUST
3 Presione o para selecc ion ar el
elemento de sonido que desea ajustar.
4 Presione o para aumentar o disminuir el
nivel del elemento seleccionado.
5 Presione EXIT (Salir) en el control remoto
para regresar a la visualización normal.
Desactivación de los altavoces integrados
Para desactivar los altavoces integrados:
1 Presione MENU en el control remoto. La
pantalla del menú aparecerá.
2 Presione o para seleccionar el icono de
audio . Aparecerá la pantalla del menú
AUDIO.
80
www.insignia-products.com
AUDIO
MTS STEREO
BASS 25
TREBLE 25
BALANCE 0
SPEAKERS ON/OFF
: SELECT : ADJUST
Page 83

3 Presione o para seleccionar
SPEAKERS (Altavoces), Luego presione
o para seleccionar OFF (Desactivado).
(Para activar los altavoces, seleccione ON
(Activado)).
4 Presione EXIT (Salir) en el control remoto
para regresar a la visualización normal.
Selección de BBE
Al corregir el retardo de fase y la distorsión
generada naturalmente por los sistemas de
altavoz, la función de sonido BBE asegura que
el sonido que llega a su oído es tan natural
como el sonido original . La voz humana es más
clara y la música es natural y bien definida.
Licenciado de BBE Sound, Inc. sobre el numero
USP5510752 y 5736897. BBE y el simbolo de BBE son
marcas registradas de BBE Sound, Inc.
Para seleccionar BBE:
1 Presione MENU en el control remoto. La
pantalla del menú aparecerá.
2 Presione o para seleccionar el icono de
audio . Aparecerá la pantalla del menú
AUDIO.
AUDI O
BBE ON /OFF
AUDIO LANGUAGE
DIGITAL OUTPUT PCM
RESET
: SELECT : ADJUST
Selección del idioma del audio
Cuando dos o más idiomas de audio están
incluidos en una señal digital, puede seleccionar
uno de los idiomas de audio.
Para seleccionar el idioma de audio:
1 Presione MENU en el control remoto. La
pantalla del menú aparecerá.
2 Presione o para seleccionar el icono de
audio . Aparecerá la pantalla del menú
AUDIO.
AUDIO
BBE ON
AUDIO LANGUAGE
DIGITAL OUTPUT PCM
RESET
: SELECT : ADJUST
3 Presione o para selecc ion ar AUDIO
LANGUAG E (Idioma de audio), luego
presione o . Se abre el menú AUDIO
LANGUAGE (Idioma de audio).
AUDIO LANGUAGE
0. ENGLISH 1
1. ENGLISH 2
2. FRENCH
3. SPANISH
4. NO INFO
5. NO INFO
6. NO INFO
7. NO INFO
/ 0-7 : SELECT
3 Presione o para seleccionar BBE,
luego presione o para seleccionar ON
(Activado). (Para desactivar BBE, seleccione
OFF (Desactivado)).
4 Presione EXIT (Salir) en el control remoto
para regresar a la visualización normal.
Selección de la salida de sonido digital
Puede seleccionar el formato de la señal de
salida de audio digital.
Para seleccionar la salida de sonido digital:
1 Presione MENU en el control remoto. La
pantalla del menú aparecerá.
2 Presione o para seleccionar el icono de
audio . Aparecerá la pantalla del menú
AUDIO.
AUDIO
BBE ON
AUDIO LANGUAGE
DIGITAL OUTPUT PCM
RESET
: SELECT : ADJUST
DOLBY DIGITAL
/
PCM
3 Presione o para seleccionar DIGITAL
OUTPUT (Salida digital), luego presione o
para seleccionar PCM o DOLBY DIGITAL.
4 Presione EXIT (Salir) en el control remoto
para regresar a la visualización normal.
4 Presione o para seleccionar el idioma
deseado.
5 Presione EXIT (Salir) en el control remoto
para regresar a la visualización normal.
Restablecimiento de los ajustes de audio
La función RESET (Restablecer) regresa los
ajustes de audio a los siguientes ajustes de
fábrica:
• BASS (GRAVES).................... centro (25)
• TREBLE (AGUDOS) .............. centro (25)
• BALANCE .............................. centro (0)
Para restablecer los ajustes de audio:
1 Presione MENU en el control remoto. La
pantalla del menú aparecerá.
2 Presione o para seleccionar el icono de
audio . Aparecerá la pantalla del menú
AUDIO.
AUDIO
BBE ON
AUDIO LANGUAGE
DIGITAL OUTPUT PCM
RESET
: SELECT : ADJUST
3 Presione o para selecc ion ar RESET
(Restablecer), luego presione . Los ajustes
de audio se restablecen a los valores
preestablecidos de fábri ca .
www.insignia-products.com
81
Page 84

Verificación de la intensidad de la señal digital
Esto le permite ver el medidor de señal digital
para los canales digitales.
Para verificar la intensidad de la señal
digital:
1 Presione MENU en el control remoto. La
pantalla del menú aparecerá.
2 Presione o para seleccionar el icono de
configuración . Aparecerá la pantalla del
menú SETUP (Configuración).
SETUP
SIGNAL METER
: SELECT : ADJUST
3 Presione o para seleccionar SIGNAL
METER (Medidor de señal), luego presione
o . Se abre el menú SIGNAL METER
(Medidor de señal) y muestra la intensidad
de la señal digital.
SIGNAL METER
CHANNEL (DIGITAL) 123-045
80
4 Presione EXIT (Salir) en el control remoto
para regresar a la visualización normal.
Notas
• La función de medidor de señal no está
disponible para los can ales analógicos.
• Después de 240 segundos, la pantalla
SIGNAL METER (Medidor de señal)
regresa a la operación de TV normal
automáticamente.
Solución de problemas
Use la siguiente lista de verificación para
resolver problemas que surjan con su televisor.
Consulte con su distribuidor local o
establecimiento de servicio si el problema
persiste. Asegúrese de que todas las
conexiones estén hechas correctamente cuando
use otras unidades.
Problema Solución
El TV no
funciona
• Asegúrese de que el cable de
alimentación esté enchu fado.
• Pruebe con otro tomacorriente de CA.
• La alimentación está desactivada, revise
el fusible o el interruptor automático.
• Desenchufe su televisor por una hora,
luego enchúfelo nuevamente.
Imagen
insatisfactoria o
no hay sonido
Imagen
insatisfactoria o
no hay imagen
Recepción
deficiente en
algunos canales
Color
insatisfactorio o
sin color
Imagen inestable
o dispersa
Problema de
pantalla con
transmisión
digital
No hay
recepción de TV.
Barras
horizontales o
diagonal es en la
pantalla
No hay
recepción en los
canales
superiores al 13
El control
remoto no
funciona
• Estación o sistem a de cable con
problemas, sintonice otra estación.
• Verifique los ajustes del sonido (volumen
y silenciamiento).
• Verifique las posibles fuentes de
interferencia.
• Estación o sistem a de cable con
problemas, sintonice otra estación.
• Asegúrese de que los canales están
establecidos en la memoria.
• Revise las conexiones de la antena o
cable, y trate de ajustar la antena.
• Verifique las posibles fuentes de
interferencia.
• Verifique los ajustes de control de la
imagen.
• Estación o sistem a de cable con
problemas, sintonice otra estación.
• Asegúrese de que los canales están
establecidos en la memoria.
• La estación es débil, ajuste la antena para
recibir una mejor recepción.
• Verifique las posibles fuentes de
interferencia.
• Estación o sistem a de cable con
problemas, sintonice otra estación.
• Asegúrese de que los canales están
establecidos en la memoria.
• Verifique los ajustes de control de la
imagen.
• Revise las conexiones de la antena o
cable, ajuste la antena.
• Verifique las posibles fuentes de
interferencia.
• Estación o sistem a de cable con
problemas, sintonice otra estación.
• Asegúrese de que los canales están
establecidos en la memoria.
• La compañía de cable está codificando la
señal.
• Ajuste la antena
• Verifique la inte nsidad de la señal digital
• Compruebe todas las conexiones del
sistema de cable.
• Establezca la opción del menú TV/CABLE
en el modo CABLE.
• Problema de la estación o sistema de
cable, intent e co n otr a es ta c ió n.
• Revise las conexiones de la antena y
ajuste o redirija la antena.
• Verifique las posibles fuentes de
interferencia.
• Asegúrese de que la opción del menú TV/
CABLE está establecida en el modo
apropiado.
• Si está usando una antena, revise las
conexiones de la antena UHF.
• Las pilas están bajas o agotadas, o se
insertaron incorrectamente.
• El control remoto está fuera de rango,
acérquelo al TV (debe estar a menos de
15 pies).
• Asegúrese de que el control remoto
apunte hacia el sensor.
• Confirme que no hayan obstrucciones
entre el control remoto y el televisor.
• Asegúrese de que el cable de
alimentación esté enchufado.
82
www.insignia-products.com
Page 85

El televisor se
apaga
Los subtítulos
no están
activados.
La visualización
no se muestra
en su idioma
• No hay transmisión en la estación
sintonizada.
• El temporizador de apagado automático
está establecido.
• Interrupción de la alimentación elé ctrica.
• La estación de televisión tiene problemas
o el programa sintonizado no ofrece
subtítulos. Pruebe otro canal.
• Revise la conexión del cable o la antena
VHF/UHF. Cambie la posición o gire la
antena.
• Establezca el decod if icador de subtítulos
en el menú.
• Seleccione el idioma correcto en las
opciones del menú.
Especificaciones
Especificaciones generales
Fuente de alimentación: CA 120 V 60 Hz
Consumo de potencia: Operación: 195 W
Standby: 1 W
Peso: 117.7 lbs (53.5 kg)
Dimensiones: 31-5/16 × 21-5/8 ×
Entradas:
VIDEO: 1 V (p-p)/75 ohms
AUDIO: –8 dBm/50 k ohmios
S-VIDEO: Y: 1 V (p-p), 75 ohmios
ohmios
COMPONENTE:Y: 1 V (p-p), 75 ohmios
Salida:
VIDEO: 1 V (p-p)/75 ohmios
AUDIO: 150 mV (rms)
DIGITAL
AUDIO: 0.5 V (p-p), 75 ohmios
22-3/18 pulgadas
(796 × 549.2 × 563 mm)
C: 0.286 V (p-p), 75
P
: 0.7 V (p-p), 75 ohmios
R
: 0.7 V (p-p), 75 ohmios
P
B
Entrada de antena: Entrada de VHF/UHF/
CABLE
75 ohmios coaxial
Tubo de imagen : 30 pulgadas (760 mm
diagonal)
Tipo de sintonizador: Frecuencia Quartz PLL
Sintetizada
Canales de recepción:
VHF 2-13
UHF 14-69
CABLE 14-36 (A)-(W)
37-59 (AA)-(WW)
60-85
(AAA)-(ZZZ)
86-94 (86)-(94)
95-99 (A-5)-(A-1)
100-125 (100)-(125)
01 (5 A)
Altavoz: 1.8 × 3.9 pulg. (45.7 x
99 mm), 8 ohmios x 2
Potencia de la salida de sonido: 5.0 W + 5.0 W
El diseño y las especificaciones están sujetos a cambio sin previo
aviso.
www.insignia-products.com
83
Page 86

Garantía Limitada
Insignia Products le garantiza a usted, el
comprador original de este Producto, que éste
estará libre de defectos de material o mano de
obra por un período de trescientos sesenta y
cinco (365) días contados a partir de la fecha de
compra como se indica a continuación:
1 MANO DE OBRA: Durante el Periodo de
Garantía, si se encuentra que este producto
está defectuoso, Insignia reparará o
reemplazará el Producto, a su discreción sin
costo alguno, o pagará los cargos de
reparación a un centro autorizado de servicio
de Insignia. Después del Periodo de
Garantía, usted deberá cubrir todos los
gastos de mano de obra.
2 REPUESTOS: Además, Insignia proveerá,
sin costo alguno, repuestos ya sean nuevos o
como nuevos como reemplazo de los
componentes que se encuentren
defectuosos durante el Periodo de Garantía.
Después del Periodo de Garantía, usted
deberá cubrir todos los gastos de repuestos.
Para obtener servicio de garantía, usted deberá
llevar el Producto junto con su recibo original u
otra prueba de compra, ya sea en su empaque
original o un empaque que proporcione el mismo
grado de protección, al centro de venta más
cercano de la tienda o del sitio Web donde usted
compró el Producto.
Esta garantía no abarca daños cosméticos, o
daños por fuerzas de la naturaleza, rayos,
accidentes, uso indebido, abuso, negligencia,
uso comercial o modificación de alguna parte del
Producto, incluyendo la antena. Esta garantía no
abarca daño debido a operación o
mantenimiento inadecuado, conexión a una
fuente de voltaje inadecuada, o el intento de
reparación por parte de cualquier persona
excepto un representante autorizado por
Insignia para llevar a cabo dicha reparación del
Producto. Esta garantía no abarca productos
vendidos TAL CUAL (en el estado en que se
encuentran) o CON TODAS FALLAS o
consumibles (tales como fusibles o baterías).
Esta garantía es valida únicamente en los
Estados Unidos y Canadá.
Esta garantía es inválida si el número de serie
aplicado en la fábrica ha sido alterado o
removido del producto.
REPARACIÓN O REEMPLAZO PROVEÍDOS
MEDIANTE ESTA GARANTÍA SON LA ÚNICA
SOLUCIÓN OFRECID A AL CLIENTE. INSIGNIA
NO SERÁ RESPONSABLE POR CUALQUIER
DAÑOS INCI DENTALES O DIRECTOS POR LA
VIOLACIÓN DE CUALQUIER GARANTÍA
EXPRESA O IMPLÍCITA PARA CON ESTE
PRODUCTO. CON EXCEPCIÓN DEL
ALCANCÉ PERMITIDO POR LA LEY,
CUALQUIER GARANTÍA IMPLÍCITA,
REPRESENTACIÓN O CONDICIÓN DE
COMERCIALIZACIÓN O ADECUACIÓN PARA
UN FIN DETERMINADO DE E STE PR ODUCT O
ESTÁ LIMITADA POR LA DURACIÓN DE LA
GARANTÍA.
Dado que algunos estados o provincias no
permiten la exclusión o imposición de
limitaciones sobre daños y perjuicios
incidentales o directos en cuanto al tiempo que
una garantía implícita durará, es posible que la
limitación o exclusión anteriormente indicada no
se aplique en su caso. Esta garantía le da
derechos legales específicos, y usted puede
poseer otros derechos que varían de estado a
estado, o provincia a provincia.
Para servicio al cliente favor llamar al
1-877-467-4289
www.insignia-products.com
Insignia Products, Richfield, Minnesota, U.S.A.
Avisos legales
Declaración de cumplimiento con FCC
Este equipo genera, usa y puede emitir energía
de radiofrecuencia. Sí no se instala y usa de
acuerdo con las instrucciones, este aparato
puede causar interferencias perjudiciales a las
comunicaciones de radio. Sin embargo, no se
garantiza que no ocurrirá interferencia en una
instalación particular. Los cambios o
modificaciones que se realicen a este equipo
podrían causar interferencia perjudicial a menos
que las modificacione s est én expresam ente
autorizadas en el manual de instrucciones. El
usuario podría perder la autoridad de operar
este equipo si se realiza un cambio o
modificación no autorizada. Si el equipo causa
interferencias perjudiciales en la recepción de la
señal de radio o televisión, lo cual puede
comprobarse encendiéndolo y apagándolo
alternativamente, se recomienda al usuario
corregir la interferencia mediante uno de los
siguientes procedimientos:
• Cambiar la orientación o la ubicación de la
antena receptora.
• Aumentar la distancia entre el equipo y el
receptor.
• Conectar el equipo a un tomacorriente de un
circuito distinto de aquel al que esta
conectado el receptor.
• Solicitar consejo al distribuidor o a un técnico
experto en radio/TV para obtener ayuda.
Este dispositivo satisface la parte 15 del
reglamento FCC. Su operación esta sujeta a las
dos condiciones siguientes:
• Este dispositivo no puede causar
interferencia dañina, y
• Este dispositivo debe aceptar cualquier
interferencia recibida, incluyendo
interferencias que puedan causar una
operación no deseada.
Derechos de reproducción
© 2006 Insignia. Insignia y el logotipo de Insignia son
marcas de comercio de Best Buy Enterprise Services,
Inc. Otras marcas y nombres de productos son
marcas de comercio o marcas registradas de sus
dueños respectivos. Las especificaciones y
características están sujetas a cambio sin aviso previo
u obligación.
84
www.insignia-products.com
Page 87

Page 88

R1
 Loading...