

Innotek UltraSmart, UltraSmart IUT-300C User Manual
INNOTEK®UltraSmart
™
Micro Remote Trainer
Micro-dispositif de dressage
télécommandé INNOTEK
®
UltraSmart
™
IUT-300C
English ........1
French........10

About your INNOTEK®UltraSmart™Remote Trainer
Now you can experience the difference a remote trainer can make. Spend less time training your dog. INNOTEK®training products have
just the right touch, right when you need it. INNOTEK
®
products are the quicker way to a better-behaved dog.
This handheld remote is small yet full-featured. You’re in complete control
of stimulation levels 1 through 9. There’s even a button for when you need
a little more persuasion with the press of a single button. The remote signals
the electronic collar to produce a harmless yet effective stimulation or tone.
The display shows at a glance which
level your remote is set on. You can
even train 2 dogs at once – the display
shows or to indicate which dog
you are controlling.
The UltraSmart™collar has been designed by professionals to offer
optimal training stimulation in a sleek, low-profile design. The collar is
packed with features including PerfectFit
™
, an indication that the collar is
fitted properly to your dog.
Collar charging station plugs into any 110 v wall outlet. The collar fits in
the cradle and charges the collar in just 2-3 hours. It’s an attractive unit
designed for use in your home.
You MUST charge
collar for 3 hours prior
to first use.
Important: Never leave the collar on the dog
for more than 12 consecutive hours.
See “Important Advice”, page 8.
1
Step 2 Turning the collar ON and OFF
Step 1 Power Up
Quick Start Guide IUT-300C
INNOTEK®UltraSmart™Micro Remote Trainer, 275m
Remote: Insert 12v alkaline battery in the handheld remote. Replace the access
panel.
Collar: Charge the collar on the power outlet-mounted charging station. The light
on the collar will glow red while charging, and green when fully charged.
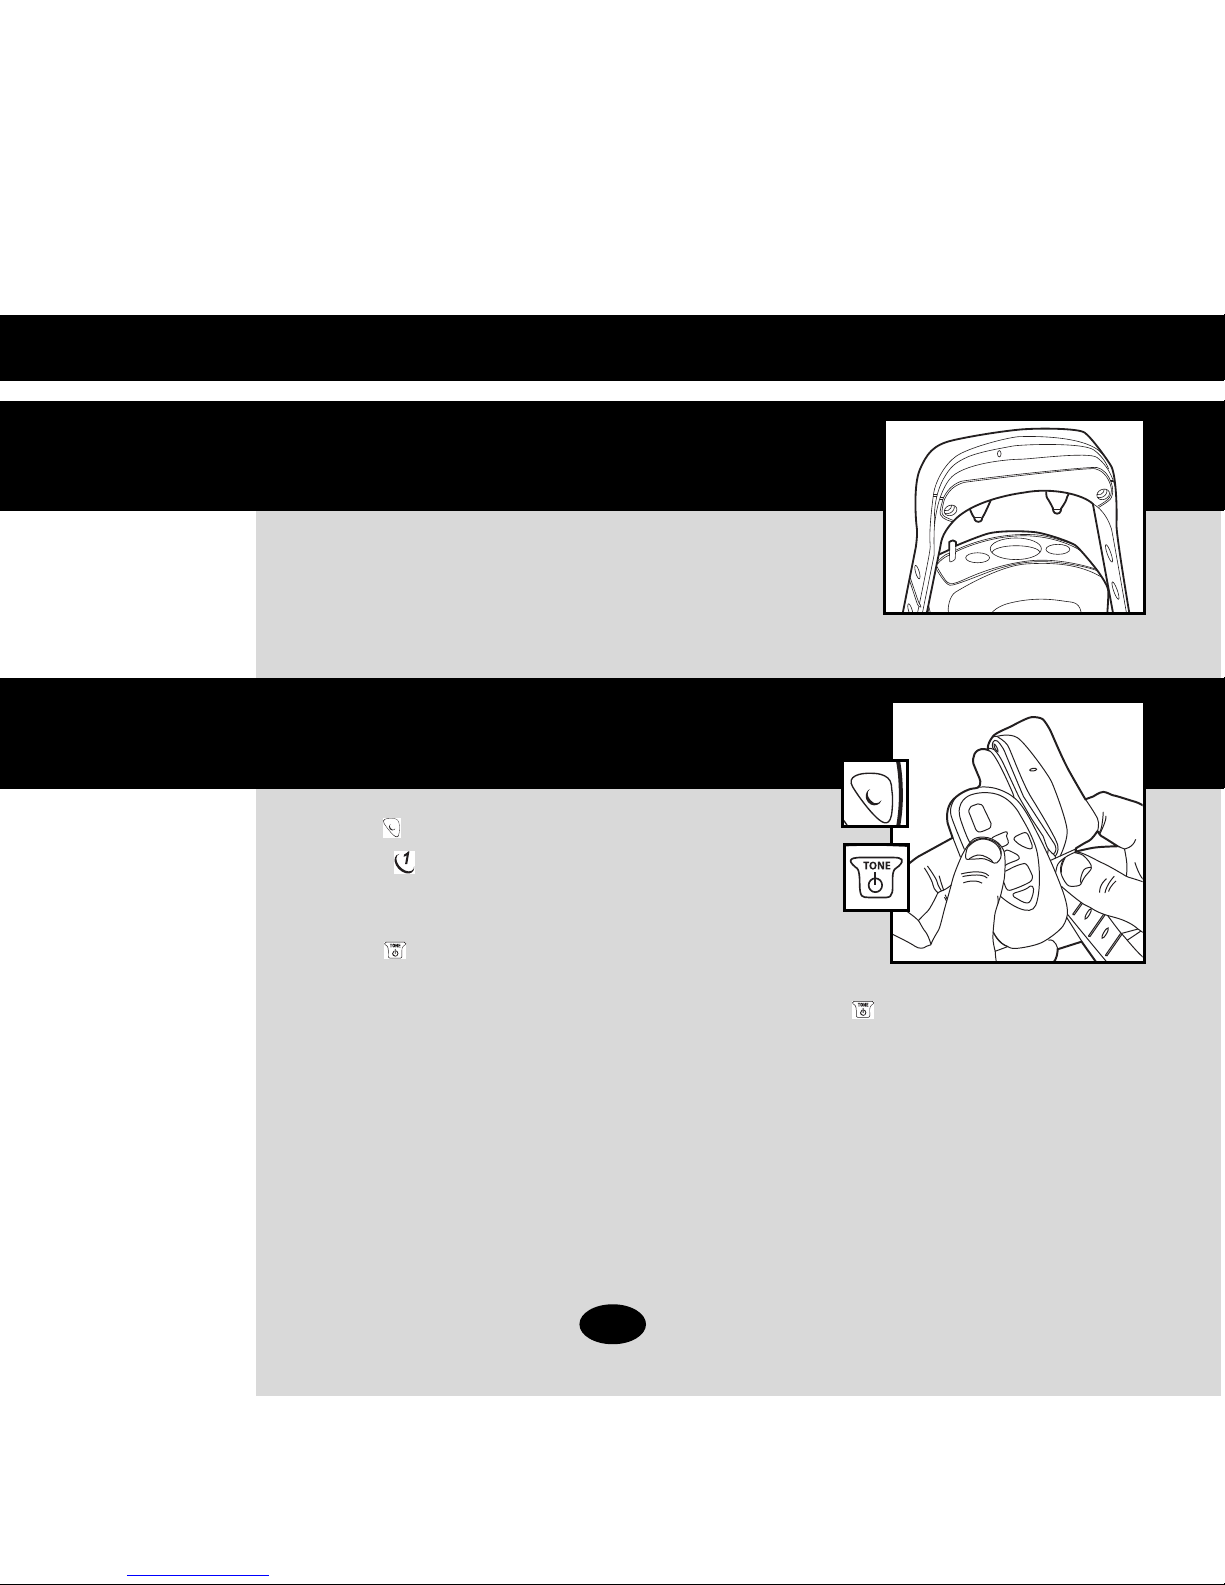
a. Press the button (for collar) on the remote once or
twice until appears in the display.
b. Hold the collar one inch from the remote, taking care not to touch the
metal contacts that touch your dog’s skin.
c. Press the button. The collar will emit a
start-up tone, and the light will glow solid green.
d. To turn collar OFF, hold collar and remote one inch apart and press the button. The collar will emit a shut-
down tone, and the light will glow solid red, then go out.
NOTE: To use two collars, repeat the procedure with the second collar.
This ON/OFF command only works when remote and collar are in close proximity; it will not work at a
distance. Never turn the unit ON/OFF while your dog is wearing the collar.
2
When turning the collar ON, hold the button for 3 seconds. The collar will go into PerfectFit™mode. The collar
will emit a click tone as the contacts touch your dog’s skin. A proper fit will be acknowledged with 5 consecutive
click tones.
To skip the PerfectFit
™
test, just turn the collar ON by pressing the button less than 3 seconds. The collar will
function normally, bypassing the PerfectFit™test.
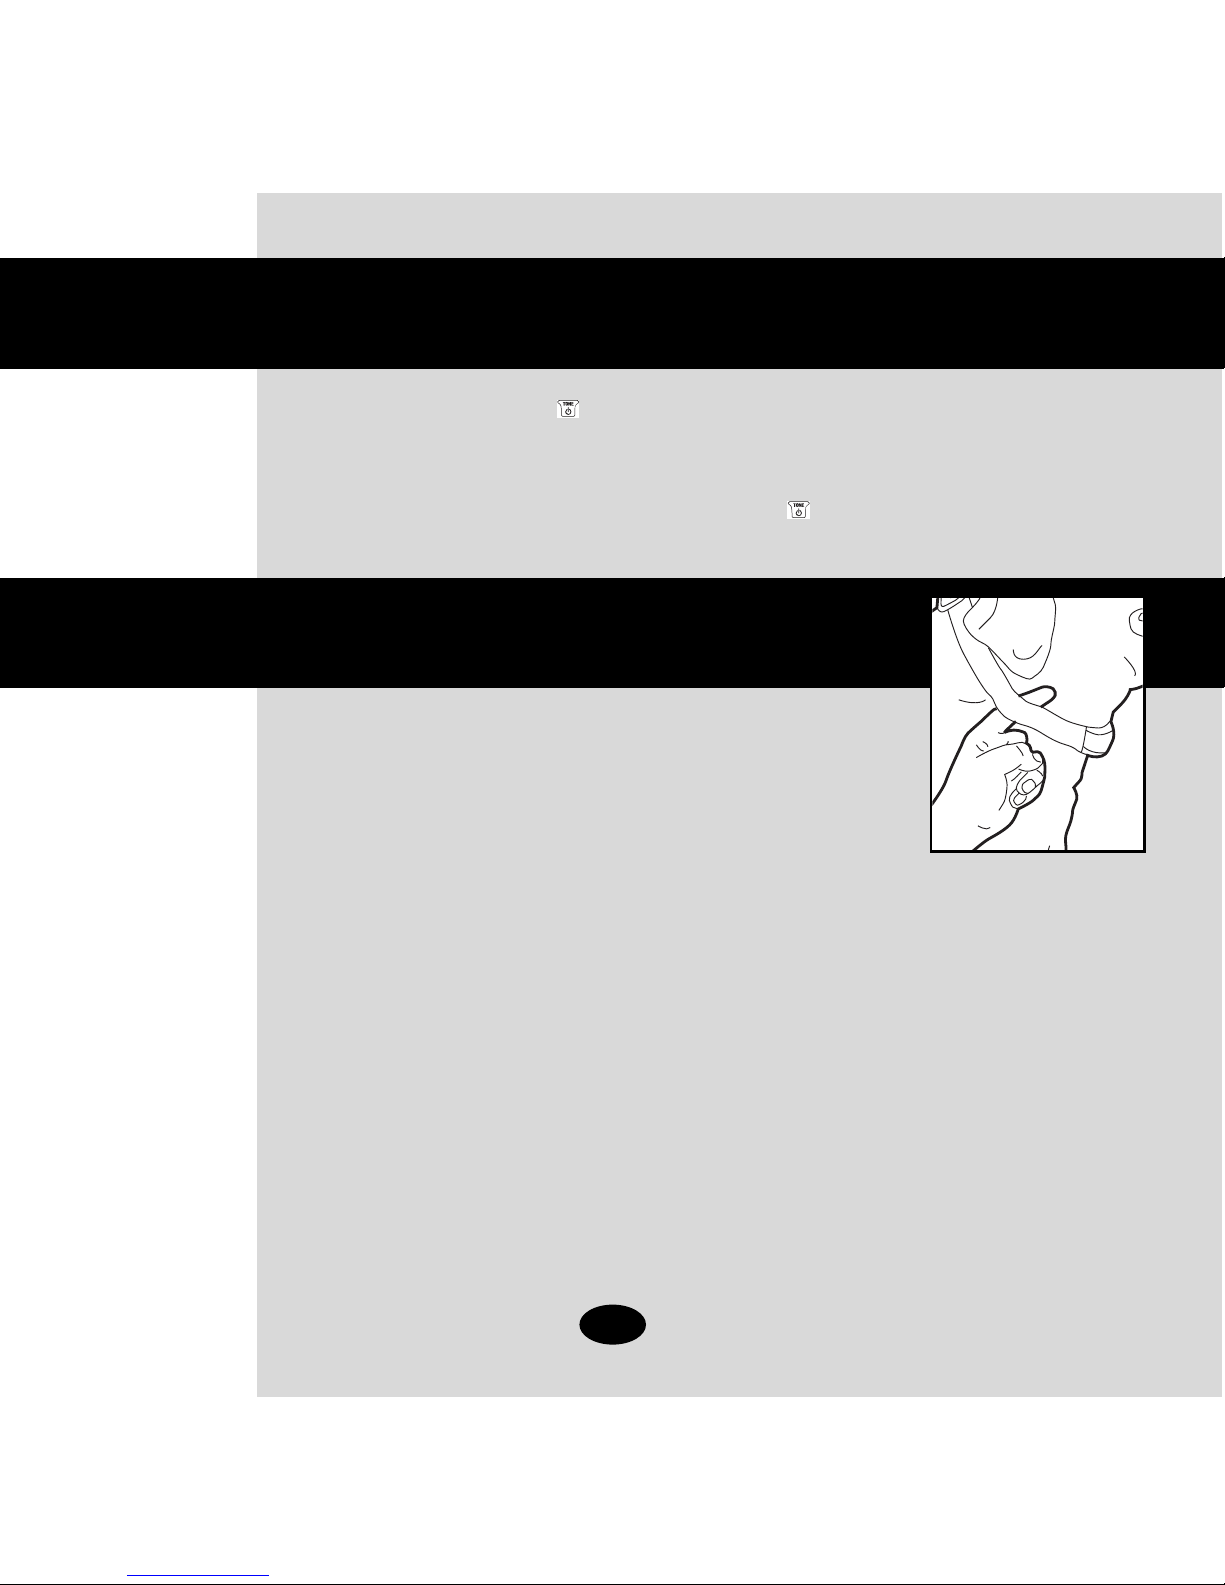
Cinch the collar around your dog’s neck to find proper fit. The collar fit should be
snug, yet loose enough to allow one finger to fit between the strap and the dog’s
neck. Fit is important because a loose collar may cause inconsistent performance.
Proper Fit Collar Indicator
ReadyTest™includes a proper fit indicator that works on most dogs. It assures the collar is making complete
contact with the dog’s skin.
Dogs’ coats are as unique as dogs themselves. On certain dogs’ coats, it is possible the proper fit will not
detect skin contact, but that the collar will stimulate at a level that the dog can feel. You may wish to try the
longer contacts if your dog has a heavy coat. Be certain your dog can feel stimulation before training begins.
See the user guide section on “Fitting the Collar on Your Dog.”
Step 4 Adjust the Collar
3
Optional
Step 3
PerfectFit
™
INNOTEK®UltraSmart
™
Micro Remote Trainer
Model IUT-300C
Understanding the Remote
The handheld remote signals the electronic
collar to produce a harmless yet effective stimulation or tone.
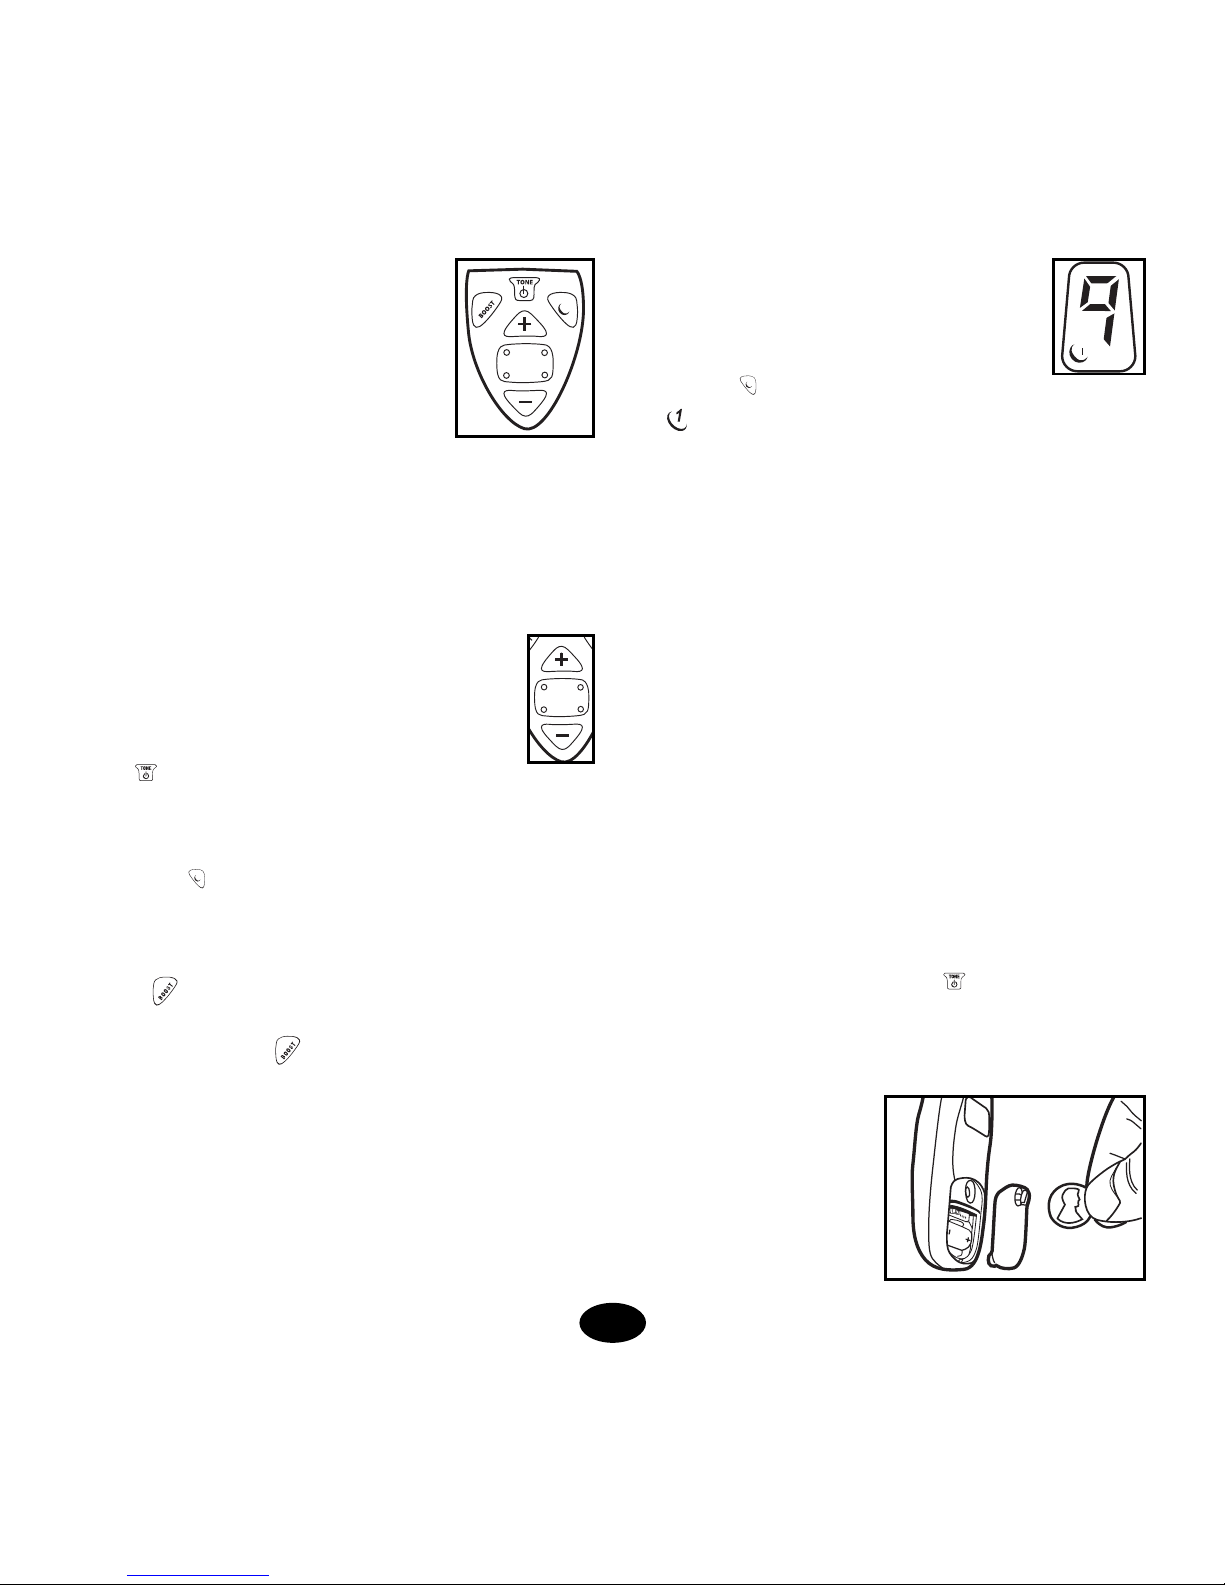
Remote Buttons:
STIMULATION (red central button)– sends stimulation signal to the
collar at the intensity shown in the display window. Button features
four raised bumps, one at each corner, to easily locate by touch.
Level UP (+) & Level DOWN (-) – adjusts the
stimulation intensity through a range of levels. From
Low-1 to High-9.
TONE – Produces a training tone from the collar. No
stimulation is delivered. See page 4, “Tone Option”. Button is also
used to turn collar ON/OFF.
Dog 1/Dog 2 – Switches remote controls from Collar 1 to Collar
2, great when training two dogs. IUT-300C users can purchase a
second accessory collar to expand their system to train two dogs.
BOOST – Produces stimulation 2 levels higher than the
currently selected level. For example, if the stimulation level is set
at Level 2, a touch of the control will stimulate at Level 4. Some
trainers like instant access to a higher setting for circumstances
where the dog may not respond to lower levels, such as around
high distractions.
Antenna
The antenna helps transmit the signal to the collar. Take care not
to cover or shield the antenna with your body or hand or you may
see a reduction in transmission range.
Digital Display
The display shows stimulation levels 1 through 9.
The lower part of the display shows which collar is
active. Press button once or twice until Collar 1
icon shows as active. Pressing the red stimulation button sends
a correction command to the collar indicated on the display. The
active collar icon will display at the bottom of the window. The
display will stay ON, only going OFF 30 minutes after the last
button press.
Power Up
Remove the battery access door by unscrewing it with the edge of
a small coin. Insert the 12v alkaline battery, ensuring proper +/polarity. Replace the door and tighten by screwing down with the
coin.
The remote is waterproof, though submersion is not
recommended. It operates on a replaceable 12v alkaline battery
(23A or A23). These are commonly available where you bought
your system or where batteries are sold.
ON/OFF
To turn the collar ON or OFF, hold the collar within one inch of the
remote antenna, taking care not to touch the metal contacts that
touch your dog’s skin. Press the Tone button. The collar will
emit a start-up tone, and the light will glow solid green.
This ON/OFF command only works when remote and collar are in
close proximity; it will not work
at a distance. Never turn the
unit ON/OFF while your dog is
wearing the collar.
About Stimulation
We recommend that you
always start training your dog
Remove battery door with
screwdriver or coin
4

with the lowest stimulation, and increase to a higher level if
necessary. You will know when you’ve reached the right level
when your dog responds by twitching his head, neck or shoulders
or by perking up his ears. If the dog vocalizes, you need to go to a
lower level.
You control the length of the stimulation by the time you press the
button. For a short stimulation, press and release the button. For a
longer stimulation, hold the button down. A maximum of 10
seconds may be applied before the safety feature to prevent overcorrection engages. After 10 seconds, stimulation will be locked
out for another 10 seconds.
A press of the Boost button sends a signal to the collar to issue
a correction two levels higher than the currently selected level. For
example, if the stimulation level is set at Level 2, a touch of the
Boost control will correct at Level 4. Some trainers like instant
access to a higher setting for circumstances where the dog may
not respond to lower levels, such as around high distraction. The
system will not correct higher than level 9.
Tone Option
The Tone button sounds a tone in the collar. No stimulation is
delivered when this button is pressed. The tone continues for as
long as the button is held down. Tones can help strengthen a dog’s
response to training. Tones can be used as a warning tone prior to
pressing the stimulation button; or can be a reward tone when
presented with a praise, play, or food for good behavior.
The use of training tone is optional. Its use varies between popular
training methods. Whether the tone will mean reward or warning
to your dog is up to the training method you choose. Remember:
the one training tone CANNOT be both a warning and a reward.
To learn more about tone training, consult a qualified canine
training professional.
Low Battery Indicator
Your remote will tell you when the battery is low. The display
will flash “L” when you press the Tone button or either of the
stimulation buttons. Your remote will continue to function following
the first sign of low battery. Replace with one 12v alkaline battery
(23A or A23) as soon as possible.
Note: Cold temperatures may lead to premature low battery
signal. The LCD display may also be slow to respond. Suggestion:
carry your remote close to your body; your body’s warmth may
improve this cold-weather condition.
Understanding the Collar
The lightweight, comfortable electronic collar is integrated into a
sleek, fashionable collar strap your dog wears. The collar produces
a harmless yet effective stimulation and emits a training tone. The
collar is waterproof and is safe for your dog to wear even while
swimming. The collar is rechargeable; the collar’s light glows red
while charging and it glows green once charging is complete.
The collar uses a light to let you know its status. See table on page 6.
Charging the Collar
The collar charging station has been designed to plug into a
standard 110-v wall outlet and act as a charging stand for your
collar.
Plug in the wall charger. Position the collar in the charging cradle.
The collar fits in the cradle with the contacts facing down through
the holes in the case. A built-in safety circuit prevents the unit from
overcharging. The collar’s light glows red when the collar is properly
seated and charging; it will turn green when charging is complete.
The collar will achieve a full charge in 2-3 hours. Each charge can
last up to 100 hours of continuous use.
Battery Caution: Do not charge your collar every night. Frequent
charging can have a negative effect on your collar’s battery. We
recommend the collar be used until the collar light blinks red.
5

ReadyTest™feature
When you remove the collar from the charging cradle, the unit will
automatically go into self-test mode for about 8 seconds. The
collar’s internal diagnostics will check that the battery charge is
full and that all circuits are working correctly. Do not touch the
metal contacts during this test. ReadyTest
™
gives you added
confidence that your collar is working and ready to go.
If Continuous Red – If the ReadyTest™self-test fails, the unit will
tone and the LED will glow solid red for 20 seconds. Replace in the
charger for 5 seconds, then remove. Do not touch the metal
contacts. If the unit continues to fail, call your authorized Innotek
Service Center.
PerfectFit
™
Test for Skin Contact
When turning the collar ON, hold the Tone button for 3
seconds. The collar will go into PerfectFit™mode. The collar will
emit a click tone as the contacts touch your dog’s skin. A proper
fit will be acknowledged with 5 consecutive click tones.
To skip the PerfectFit™test, just turn the
collar ON by pressing the Tone button
less than 3 seconds. The collar will
function normally, bypassing the
PerfectFit™test.
Fitting the Collar
The collar strap should fit snugly towards
the top of your dog’s neck with the collar unit on the bottom of the
neck. Check that the INNOTEK
®
logo is right side up. You should be
able to get one finger between the collar strap and your dog’s
neck. The contacts must make contact with the dog’s skin for
proper operation. A little hair thinning may be required. Do not
shave your dog’s neck.
Occasionally, check the tightness of the contacts to ensure they
will not be lost from the collar. Lost components are not covered
under your warranty.
Trim excess strap along the diagonal score marks. You’ll want to
leave about 2 inches of excess strap. Note if your dog is young and
you expect him/her to grow, you’ll want to leave extra strap to
adjust the collar fastening. Replacement straps are available.
About 2 dog systems
If you purchased the IUT-300C system, and wish to add another
collar, accessory collars are available where you bought your
training system, or call your authorized Innotek Service Center.
Take the first collar, set your remote to , and turn it on with the
Tone button. Set it down, then take the second collar, set your
remote to , and turn it on. The remote will send a signal to
whichever collar appears in the remote display window. To switch
between collars, press the button.
Testing the Collar
You may wish to test the collar from time to time. To test:
• Hold the test light provided across the collar’s metal contacts
• Press the stimulation button on the remote
• The test light will illuminate
• The intensity of the test light will increase as the level
increases
Replacement Batteries:
Your remote uses a 9-volt alkaline battery, or a rechargeable nickel
metal hydride (NiMH) battery. These are commonly available where
you bought your training system, or where batteries are sold.
Operating Range
Your remote communicates with your pet’s collar via a radio
signal. A variety of factors may affect your system’s operating
range, positively or negatively. These include weather, terrain,
vegetation, proximity to metal structures including buildings and
fences, and other factors. Some things like outside radio
interference and emissions will diminish your range.
6
 Loading...