

Innotek SD-2000, SD-3100, SD-2050, SD-3000 Quick Start Manual
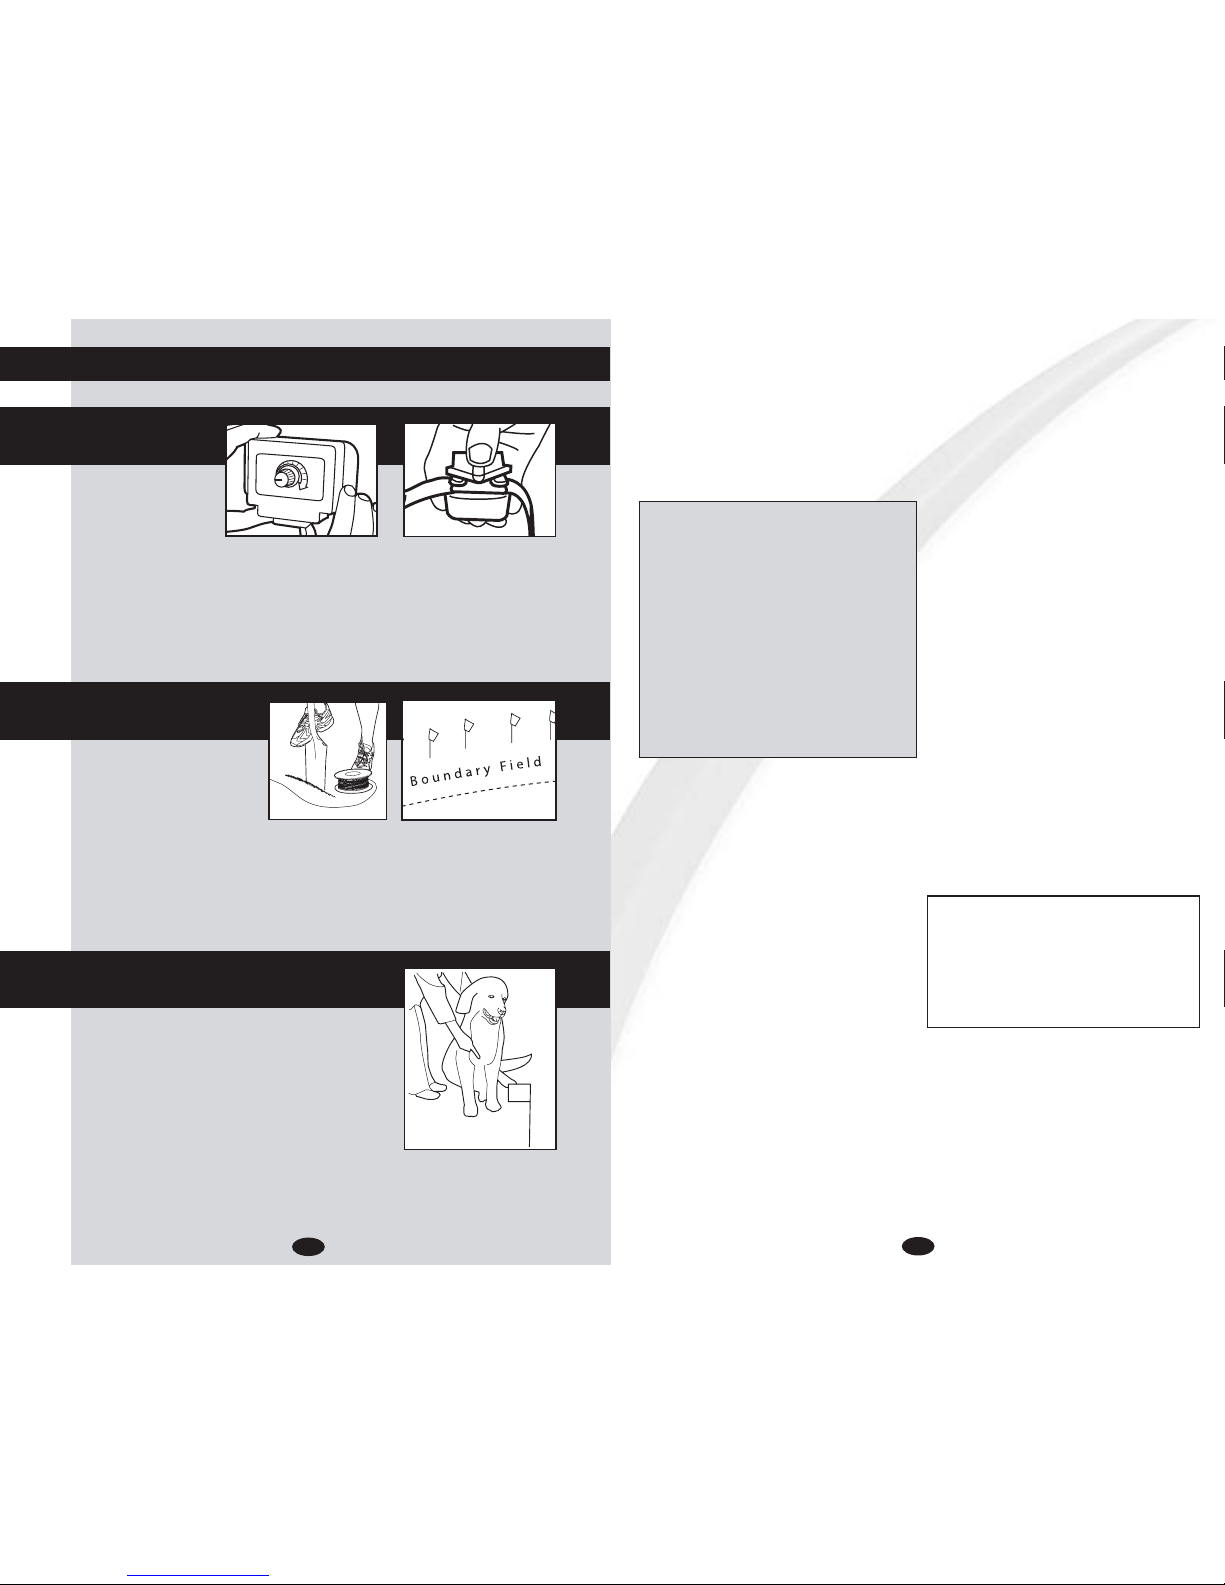
Step 2 Install the wall-mount transmitter
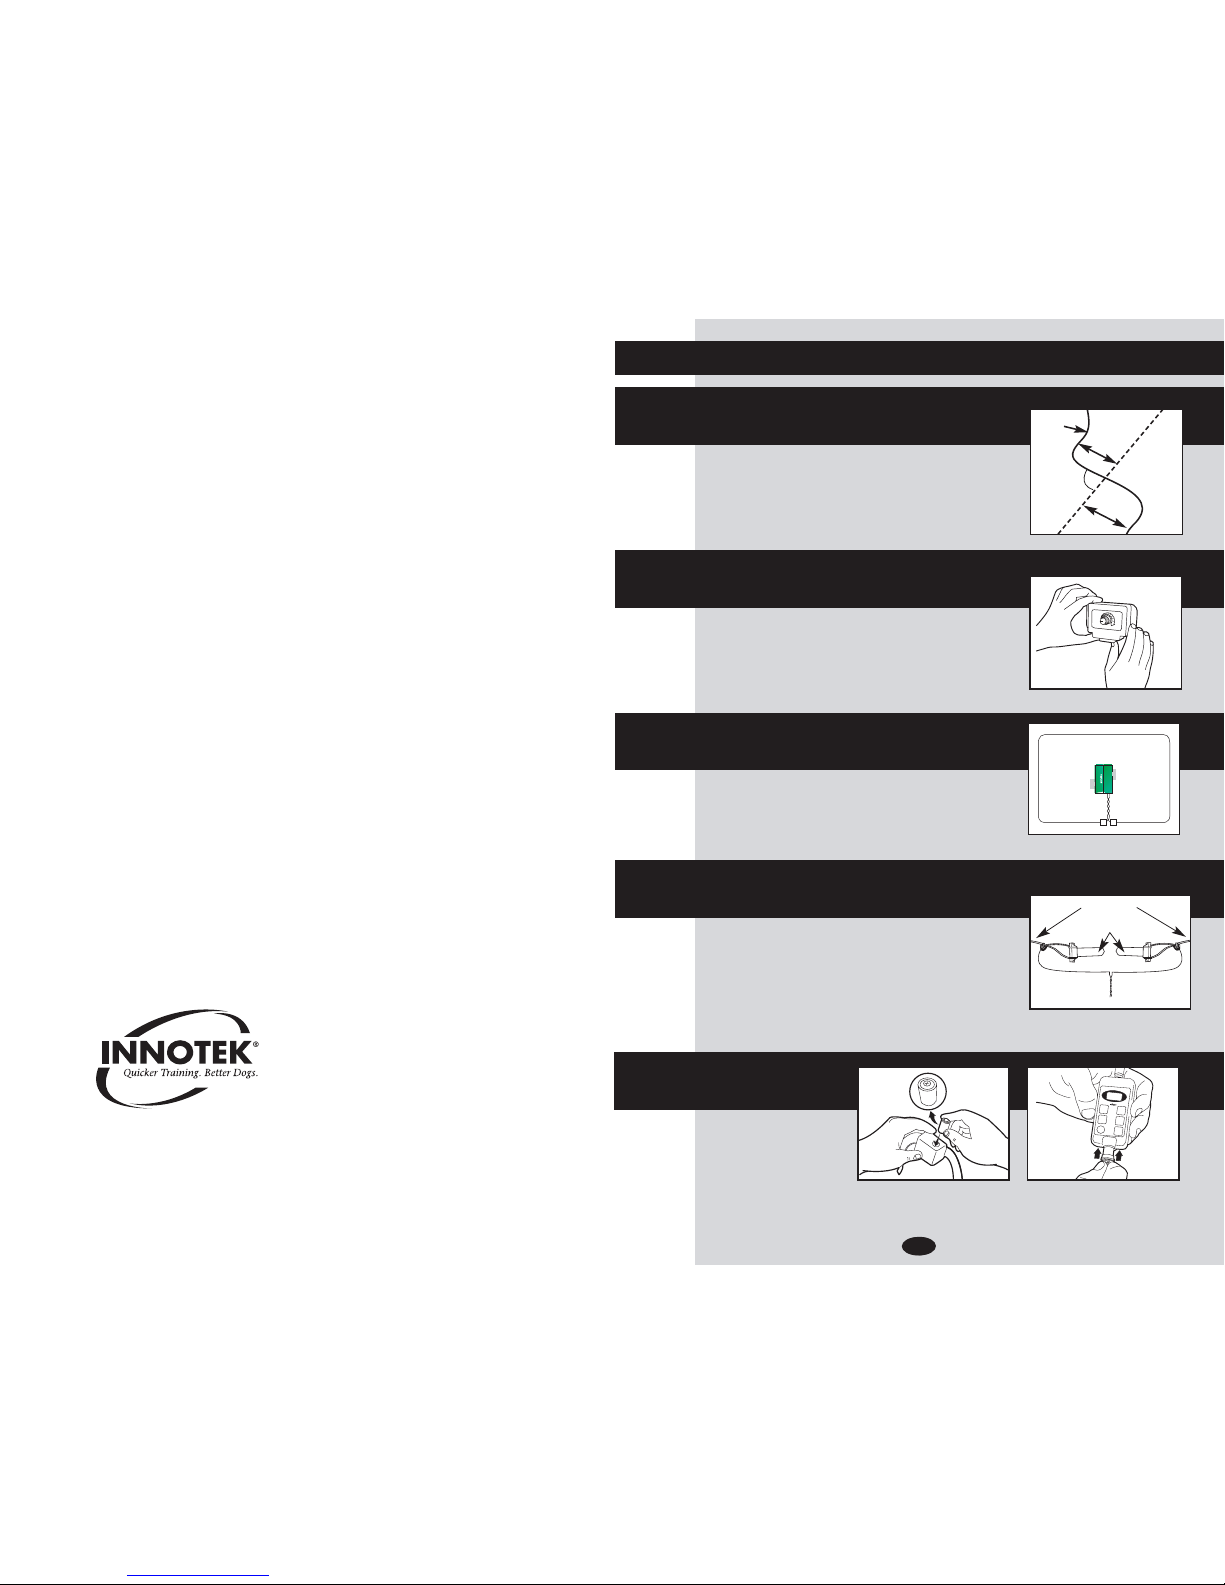
Step 1 Design your fence
Step 5 Power Up
Quick Start Guide Models SD-2000, SD-2050, SD-3000, SD-3100
For all systems, install batteries positive side out as shown.For Contain’N’Train
systems, please refer to the “Match Receiver”section on page 9 of this guide.
Have the local utility companies mark your underground lines.On a sheet of paper, draw your house
and yard.Draw a line around your property that represents the containment area for your dog.
Most people find that the inside of an exterior wall of
a garage or basement is ideal.From the sample layouts included, you can see the twisted wire running
from the house attaches directly to the transmitter.
Step 3 Layout the fence wire
Run the containment wire around the property as
outlined in your plan.
Step 4 Final connections
Splice the containment loop wires to the twisted
wire using the supplied waterproof splices.
Connect the other end of the twisted wire to the
wall-mount transmitter. Plug the AC adapter,
connect it to the transmitter and turn it on. The
red light should illuminate on the transmitter
indicating a successful loop.
Invisible Technologies,Inc.
800-826-5527
www.Innotek.net
2100252-1
Boundary
Wire
10’
10’
Buried Cable
90˚
1
Boundary Wire
Splice
To wall-mount transmitter
IMPORTANT ADVICE
1. Read the complete manual and follow all directions.
This includes the Training & Troubleshooting Guide.
If you have any questions, please call 1-800-826-5527.
2.This device is intended for use only on dogs.Never
attempt to use it for any purpose not described in
this manual.
3.Never perform set-up procedures while the collar is
on your dog.
4. Any collar worn for extended periods can cause a
condition similar to bedsores, known as Pressure
Necrosis.To reduce the possibility, you must do
the following:
• Never leave the collar on the dog for more than 12
hours per day.
• Check the fit to prevent excessive pressure;you
should be able to insert one finger between the
collar strap and your dog’s skin.
• Examine the dog’s neck daily for any signs of a
rash or a sore.
• Wash the dog’s neck area and the probes of the
collar weekly with a damp cloth.
• If the condition persists beyond 24 hours,
see your veterinarian.
5. Always use the rubber insulators between the
collar strap and probes to provide insulation
in damp conditions.
6. Other collars and metal tags should be removed
as they may interfere with proper operation.
7. Do not attempt to dismantle or repair any
components of this system;doing so will void the
warranty in full.The computerized circuitry should
be serviced only by an authorized expert.
8.Realize that because dogs have unique temperaments, there is no way of knowing how your dog
will react to the introduction of a training collar
system.For the safety of your dog, a long lead
should be used during initial training so you have
control of the situation.
9.If you have reason to believe that your dog may
pose a danger to others, harm itself, or react
adversely to the collar, do not rely solely on this
product to train your dog. If your dog shows signs
of growling, snarling or biting while using the collar,
stop immediately. Aggression in dogs has many
causes.We recommend that you consult a knowledgeable professional dog trainer or animal
behaviorist with experience with aggressive dogs
if your dog has shown any of these characteristics.
10.Occasionally, a dog cannot be trained to respond
to a training collar.Sometimes even a properly
trained dog may disobey a command. Therefore,
Invisible Technologies, its distributors, and dealers
cannot guarantee that the system will in all cases
keep the customer’s animal from disobeying
commands.
LIMITED LIFETIME WARRANTY
WE CARE. CALL US FIRST. 1-800-826-5527
Invisible Technologies, Inc., warrants to the original retail
purchaser, that Innotek brand products will be free from
defects in material and workmanship, under normal use,
for a period of one year from the date of the original retail
purchase.This Limited Warranty excludes:accidental damage due to dog chews; lightning damage where an
INNOTEK lightning protection component is not in use (inground pet fencing systems); or neglect, alteration and
misuse.
Invisible Technologies offers several product exchange
options during the warranty period. If service is required,
call 1-800-826-5527 to discuss the service plan that best
serves your needs. Costs are dependent on the processing time and the desired shipping options. Please do not
return this product to your retailer.
After one year from date of original retail purchase, we will
repair, replace or upgrade your product at a fixed rate
based on the component.
Invisible Technologies, Inc., shall not be liable or responsible for any incidental or consequential damages resulting
from the use of the product or caused by any defect, failure or malfunction of the product, whether a claim is based
upon warranty, contract, negligence or otherwise.
3
2
FREE Professional Training Support
Additional behavior or training issues? Looking for the
best way to get a well-behaved dog? Just call our
FREE Professional Training Support hotline at
1-800-364-3362 and speak with the professionals
at Dogstar Training.
Visit www.partnersinbehavior.com
Step 8 Train your dog
Step 7 Bury fence wire
Step 6 Test your fence
Quick Start Guide
continued Models SD-2000, SD-2050, SD-3000, SD-3100
Set your FIELD WIDTH ADJUSTMENT KNOB to the 9 o’clock position.Using the
supplied test light, walk the dog’s collar up to the fence wire. NOTE:For Contain
‘N’Train Systems collar must be set to containment. Listen for the warning tone
and look for the test light to light. Try a number of different places around the
fenced area, in order to verify the range is consistent.
Dig the trench 3”deep with a flat edge spade. Or, it is faster to use a gas-powered
edger. Digging the trench at an angle helps keep the wire in the ground as you
place it. Place Flags at edge of selected boundary field, where the warning tone
is first heard NOT at the wire.
Watch the training video and follow the training steps
outlined in the separate Training and Troubleshooting
Guide.You may see your dog respond immediately
to the training, however continue to follow the
inclosed Training Guide to fully train your dog. The
convenience that your new fence offers plus the
added safety for your dog are well worth the time
invested.
 Loading...