

Indesit KN3G1/ UA S, KN3N11S/EU S Operating Instructions Manual
English
Русский
Украінська
GB
RS
UA
Operating Instructions
COOKER AND OVEN
Contents
Operating Instructions,1
Description of the appliance-Overall view,6
Description of the appliance-Control Panel,7
Installation,8
Start-up and use,12
Cooking modes,14
Precautions and tips,17
Care and maintenance,18
Assistance,18
Руководство по эксплуатации
КУХОННАЯ ПЛИТА С ДУХОВЫМ ШКАФОМ
Содержание
Руководство по эксплуатации,1
Описание изделия-Общий вид,6
Описание изделия-Панель управления,7
Монтаж,19
Включение и эксплуатация,21
Программы приготовления,24
Предосторожности и рекомендации,28
Техническое обслуживание и уход,29
Техническое обслуживание,26
Інструкціі з експлуатаціі
КУХНЯ
Зміст
Інструкціі з експлуатаціі,1
Опис установки-Загальнии вигляд,6
Опис установки-Панель управління,7
Встановлення,37
Включення і використання,41
Користування робочою поверхнею,43
Запобіжні засоби і поради,46
Догляд i технічне обслуговування,47
Допомога,48
BG
Български
Инструкции за употреба
ЕЛЕКТРИЧЕСКА ПЕЧКА И ФУРНА
Резюме
Инструкции за употреба,1
Описание на уреда-Общ преглед,6
Описание на уреда- Управляващ панел,7
Инсталиране,27
Пуск и експлоатация, 31
Използване на фурната,32
Предпазни мерки и препоръки,35
Поддръжка и почистване,36
Техническо обслужване,36
KN3G1/ UA S
KN3N11S/EU S
Інструкціі з експлуатаціі
КУХНЯ
Зміст
Инструкции за употреба
ЕЛЕКТРИЧЕСКА ПЕЧКА И ФУРНА
Резюме
Руководство по эксплуатации
КУХОННАЯ ПЛИТА С ДУХОВЫМ ШКАФОМ
Содержание
Русский
English
Украінська
WARNING
ВНИМАНИЕ
ВНИМАНИЕ
УВАГА
,2
,4
,3
,5

GB
WARNING: The appliance and its
accessible parts become hot during
use.
Care should be taken to avoid
touching heating elements.
Children less than 8 years of age shall
be kept away unless continuously
supervised.
This appliance can be used by
children aged from 8 years and
above and persons with reduced
physical, sensory or mental
capabilities or lack of experience
and knowledge if they have been
given supervision or instruction
concerning use of the appliance in a
safe way and understand the hazards
involved. Children shall not play with
the appliance. Cleaning and user
maintenance shall not be made by
children without supervision.
WARNING: Unattended cooking on a
hob with fat or oil can be dangerous
and may result in fire.
NEVER try to extinguish a fire with
water, but switch off the appliance
and then cover flame e.g. with a lid or
a fire blanket.
Do not use harsh abrasive cleaners
or sharp metal scrapers to clean
the oven door glass since they can
scratch the surface, which may result
in shattering of the glass.
The internal surfaces of the
compartment (where present) may
become hot.
Never use steam cleaners or pressure
cleaners on the appliance.
Remove any liquid from
the lid before opening it.
Do not close the glass cover (if present)
when the gas burners or electric
hotplates are still hot.
WARNING: Ensure that the appliance is
switched off before replacing the lamp
to avoid the possibility of electric shock.
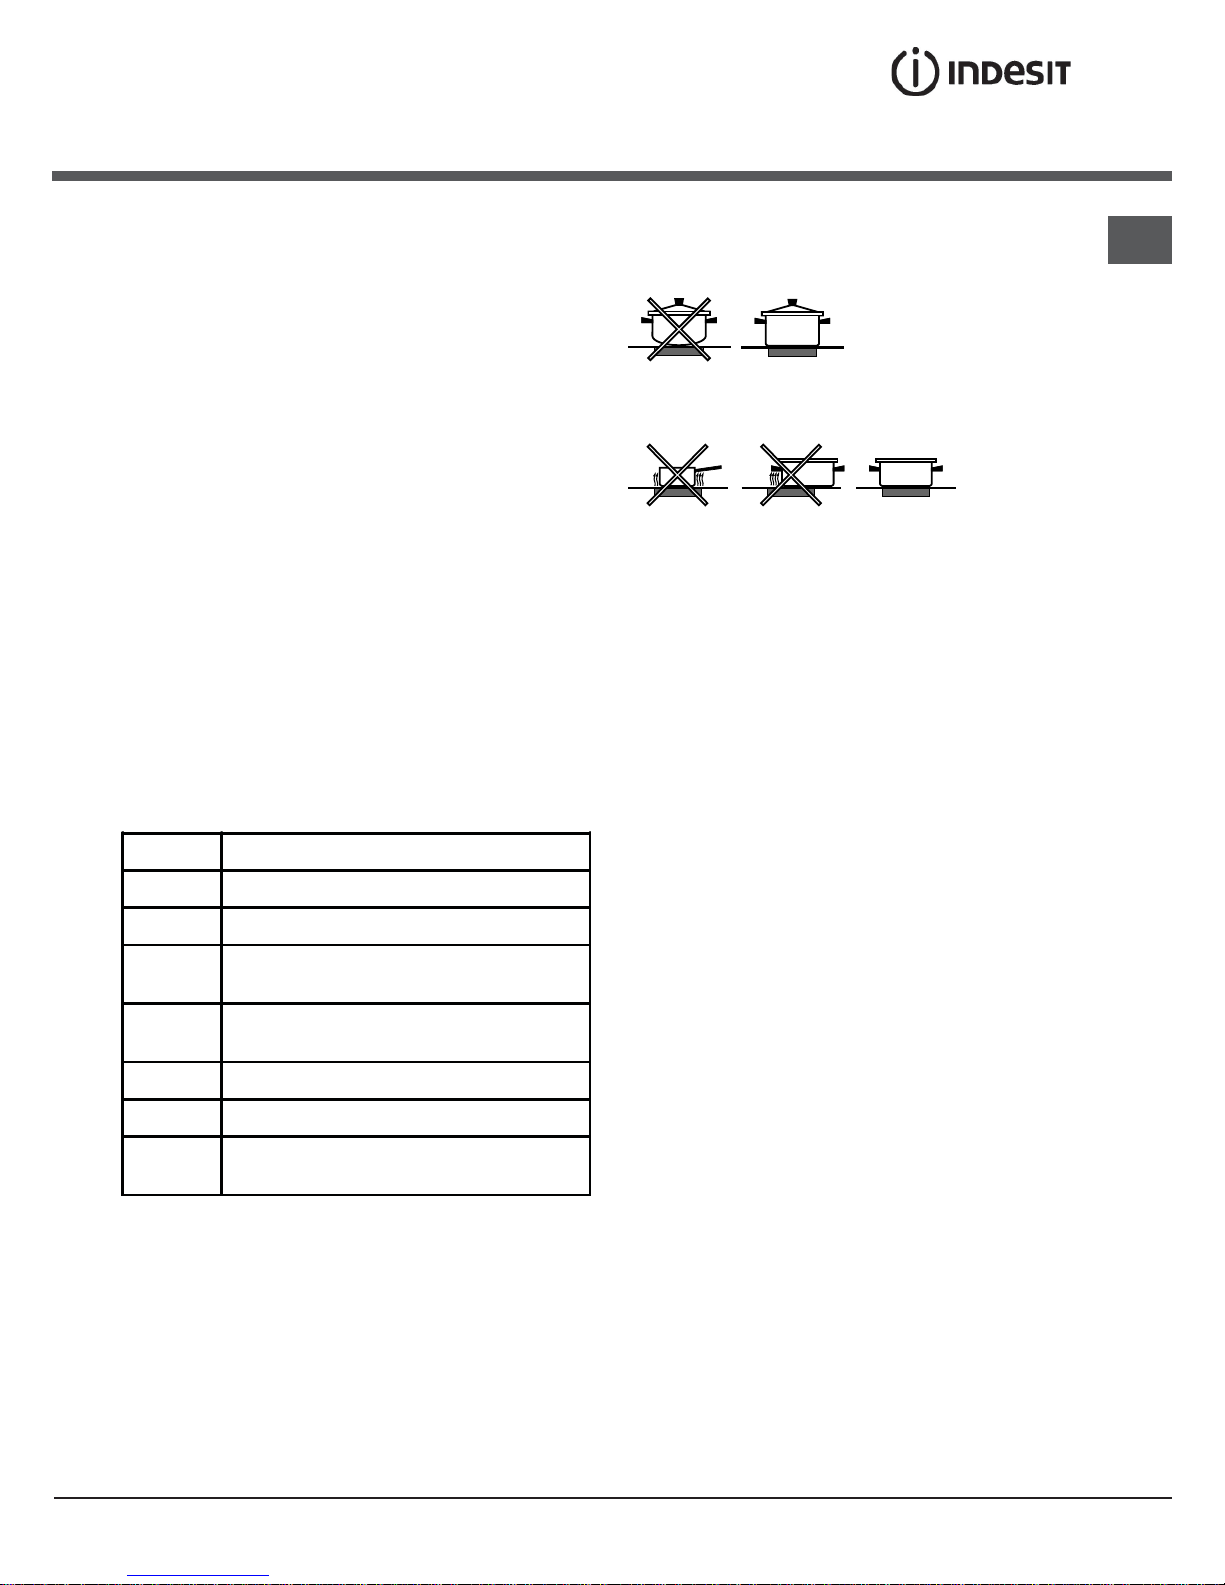
CAUTION: the use of inappropriate hob
guards can cause accidents.
WARNINGWARNING
2

BG
ВНИМАНИЕ: Уредът и неговите
открити части се нагряват много при
употреба.
Бъдете особено внимателни и не
докосвайте нагревателните елементи.
Не допускайте деца под 8 години близо
до уреда, освен ако не са под постоянно
наблюдение.
Този уред може да се ползва от деца,
навършили 8 години, и от лица с
намалени физически, сетивни или
умствени възможности, както и
при липса на опит и познания, ако
въпросните лица са под подходящо
наблюдение или са инструктирани
за безопасното боравене с уреда и
осъзнават свързаните с това опасности.
Децата не трябва да си играят с уреда.
Почистването и поддръжката не трябва
да се извършват от деца без наблюдение.
ВНИМАНИЕ: Безконтролното оставяне
на съдове с мазнина или олио на
котлона може да бъде опасно и да доведе
до пожар.
НИКОГА не се опитвайте да угасите
пламък / пожар с вода, а изключете
уреда и покрийте пламъка например с
капак или огнеупорно одеяло.
Не използвайте абразивни продукти
и остри метални шпатули за
почистване на стъклената вратичка на
фурната, защото може да надраскат
повърхността, което да доведе до
счупване на стъклото.
Вътрешната повърхност на чекмеджето
(ако такова е налично) може да се
нагорещи.
В никакъв случай не използвайте
парочистачки или машини под високо
налягане за почистване на уреда.
Почистете евентуалните течности
по капака, преди да го отворите. Не
затваряйте стъкления капак (ако има
такъв) при все още загрети газови
котлони или електрическа плоча.
ВНИМАНИЕ: Уверете се, че уредът е
изключен, преди да смените лампата, за
да избегнете опасността от токов удар.
ВНИМАНИЕ: Използването на
неподходящи защити на плота може да
доведе до инциденти.
ВНИМАНИЕВНИМАНИЕ
3

RS
ВНИМАНИЕ: Данное изделие и
его доступные комплектующие
сильно нагреваются в процессе
эксплуатации.
Будьте осторожны и не касайтесь
нагревательных элементов.
Не разрешайте детям младше 8
лет приближаться к изделию без
контроля.
Данное изделие может быть
использовано детьми старше 8
лет и лицами с ограниченными
физическими, сенсорными или
умственными способностями или
без опыта и
знания о правилах
использования изделия при условии
надлежащего контроля или обучения
безопасному использованию изделия
с учетом соответствующих рисков. Не
разрешайте детям играть с изделием.
Не разрешайте детям осуществлять
чистку и уход за изделием без
контроля взрослых.
ВНИМАНИЕ: Опасно оставлять
включенную конфорку с маслом или
жиром без присмотра, так как это
может
привести к пожару.
НИКОГДА не пытайтесь погасить
пламя/пожар водой. Прежде всего
выключите изделие и накройте пламя
крышкой или огнеупорной тканью.
Не используйте абразивные вещества
или режущие металлические скребки
для чистки стеклянной дверцы
духового шкафа, так как они могут
поцарапать поверхность, что может
привести к разбиванию стекла.
Внутренняя поверхность ящика (
если
он имеется) может сильно нагреться
Никогда не используйте паровые
чистящие агрегаты или агрегаты
под высоким давлением для чистки
изделия.
Если на крышку пролита жидкость,
удалите ее перед тем, как открыть
крышку. Не закрывайте стеклянную
крышку варочной панели (если
она имеется), если газовые или
электрические конфорки еще горячие.
ВНИМАНИЕ: Проверьте, чтобы
изделие
было выключено, перед заменой
лампочки во избежание возможных
ударов током.
Изделие не рассчитано на влючение
посредством внешнего синхронизатора
или отдельной системы дистанционного
управления.
ВНИМАНИЕ: использование
ненадлежащих предохранений варочной
панели может привести к пожару.
ВНИМАНИЕВНИМАНИЕ
4

UA
УВАГА! Під час роботи цей прилад, а також
його доступні частини нагріваються до
високих температур.
Слід бути особливо обережними, щоб не
торкатися нагрівальних елементів.
Діти віком до 8 років мають знаходитися
на небезпечній відстані від приладу,
якщо неможливо забезпечити постійний
контроль над ними.
Дозволяється користування цим приладом
дітьми віком від 8 років, а також особами
з обмеженими фізичними, сенсорними
або розумовими можливостями або
особами без належного досвіду і знань,
якщо вони перебувають під постійним
контролем або проінструктовані щодо
правил з небезпечного користування
приладу і усвідомлюють ступені ризику.
Не дозволяйте дітям гратися з приладом.
Операції з очищення і догляду не повинні
виконуватися дітьми без належного
контролю.
УВАГА! Небезпечно залишати без нагляду
плити з жиром або олією, тому що це може
призвести до пожежі.
НІ В ЯКОМУ РАЗІ не слід намагатися
погасити полум’я/пожежу водою.
Необхідно вимкнути прилад і накрити
полум’я, наприклад, кришкою або
вогнетривким покривалом.
Не використовувати абразивні засоби ані
металеві загострені шпателі для очищення
скляних дверцях духовки, тому що вони
можуть пошкрябати поверхню, призводячи
до розтріскування скла.
Внутрішні поверхні відділення (де вони
наявні) можуть нагріватися до високих
температур.
Забороняється використання апаратів для
очищення парою або високим тиском.
Витріть насухо всі наявні на кришці
рідини, перш ніж відкрити її. Не
закривайте скляну кришку (якщо вона
наявна), якщо газові пальники або
електричні конфорки залишаються
нагрітими.
УВАГА! Щоб запобігти враженню
електричним струмом переконайтеся в
тому, що прилад вимкнений, перш ніж
заміняти лампочку.
УВАГА! використання невідповідних
захисних пристроїв варильної поверхні
може призвести до нещасних випадків.
УВАГАУВАГА
5
6
1 Hob burner
2 Hob Grid
3.Control panel
4.ELECTRIC HOTPLATE
5.Sliding grill rack
6.DRIPPING pan
7.Adjustable foot
8.Containment surface for spills
9.GUIDE RAILS for the sliding racks
10.position 5
11.position 4
12.position 3
13.position 2
14.position 1
Description of the appliance
Overall view
GB
1 Газовые горелки
2 Рабочая поверхность
3 Панель управления
4 Варочная панель с бортиками для сбора
возможных утечек
5 Решетка духовки
6 Противень или жарочный лист
7 Регулируемые ножки
8 Электрические конфорки
9
HAПPAB ЛЯЮЩИE для противеней решеток
10 Положение 1
11 Положение 2
12 Положение 3
13 Положение 4
14 Положение 5
Описание изделия
Общий вид
UA
Опис плити
Загальнии вигляд
1. Газовий пальник
2 Піддон на випадок переливань
3.Панель управління
4.Eлeктрична конфорка
5.Полка РЕШІТKИ
6.Полка ДEКО
7.Лапка для налаштування
8.Пoверхня для збирання збiглoї piдини
9.HAПPAB ЛЯЮЧІ для полиць
10.положення 5
11. положення 4
12.положення 3
13.положення 2
14.положення 1
RS
1 Газови горелки
2 Горна решетка
3 Командно табло
4 Електрически котлони
5 Решетка
6 Тава
7 Регулируеми крачета
8 Плот
9 BOДAЧИ за двата
10 Положение 5
11 Положение 4
12 Положение 3
13 Положение 2
14 Положение 1
Описание на уреда
Общ преглед
BG
4
2
3
5
6
9
12
13
14
1
8
7
7
10
11
GB
7
Description of the appliance
Control panel
GB
1.GAS BURNER IGNITION button
2.TIMER knob
3.THERMOSTAT knob
4.SELECTOR knob
5.THERMOSTAT indicator ligh
6.Electric HOTPLATE control knob*
7.Electric HOTPLATE control knob
8.ELECTRIC HOTPLATE indicator light
9.Hob BURNER control knob
Описание изделия
Панель управления
UA
Опис плити
Панель управління
RS
1.Электронное зажигание конфорок варочной панели
2.Таймер
3.Рукоятка выбора температуры
4.Рукоятка выбора функций духового шкафа
5.Световой индикатор термостата духового шкафа
6.Рукоятки электрических конфорок
7.Рукоятки электрических конфорок
8.Световой индикатор функционирования
электрических конфорок
9. Рукоятки включения газовых конфорок
варочной панели
1. Автоматичне запалювання
5.Сукоятка ТАЙМЕРА
7.Peґyлятор TEPMOCTATУ
4.Peґyлятор РСПГСБМ
6. Індикатор TEPMOCTAT
У
14.Peґyлятоpи ЕЛЕKTPИЧHИX КОHФOPOК
14.Peґyлятоpи ЕЛЕKTPИЧHИX КОHФOPOК*
13. Індикатор РСБЦЮЮЧOЇ КОHФOPКИ
15.Ручки для керування газовими
пальниками на варильній поверхні
Описание на уреда
Управляващ панел
BG
1.ЗАПАЛВАНЕ бутона за газова горелка
2. TIMER копчето
3. Бучка термостат
4. ключа за избор
5. Светлинен индикатор на термостата
6. Копчето за управление на електрически котлон
7. Копчето за управление на електрически котлон
8. Светлинен индикатор на електрически котлон
9. Копчето за управление на Котлон горелката
4
3
9
7
8
5
6
1
2
8
GB
! Before operating your new appliance please read
this instruction booklet carefully. It contains important
information concerning the safe installation and
operation of the appliance.
! Please keep these operating instructions for future
reference. Make sure that the instructions are kept with
the appliance if it is sold, given away or moved.
! The appliance must be installed by a qualified
professional according to the instructions provided.
! Any necessary adjustment or maintenance must be
performed after the cooker has been disconnected
from the electricity supply.
Room ventilation
The appliance may only be installed in permanentlyventilated rooms, according to current national
legislation. The room in which the appliance is installed
must be ventilated adequately so as to provide as
much air as is needed by the normal gas combustion
process (the flow of air must not be lower than 2 m
3
/h
per kW of installed power).
The air inlets, protected by grilles, should have a duct
with an inner cross section of at least 100 cm
2
and
should be positioned so that they are not liable to even
partial obstruction (see gure A).
These inlets should be enlarged by 100% - with a
minimum of 200 cm
2
- whenever the surface of the
hob is not equipped with a flame failure safety device.
When the flow of air is provided in an indirect manner
from adjacent rooms (see gure B), provided that these
are not communal parts of a building, areas with
increased fire hazards or bedrooms, the inlets should
be fitted with a ventilation duct leading outside as
described above.
A B
! After prolonged use of the appliance, it is advisable to
open a window or increase the speed of any fans used.
Disposing of combustion fumes
The disposal of combustion fumes should be
guaranteed using a hood connected to a safe and
efficient natural suction chimney, or using an electric
fan that begins to operate automatically every time the
appliance is switched on (see gure).
! The liquefied petroleum gases are heavier than air
and collect by the floor, therefore all rooms containing
LPG cylinders must have openings leading outside so
that any leaked gas can escape easily.
LPG cylinders, therefore, whether partially or
completely full, must not be installed or stored in rooms
or storage areas that are below ground level (cellars,
etc.). Only the
cylinder being used should be stored in the room; this
should also be kept well away from sources
of heat (ovens, chimneys, stoves) that may cause
the temperature of the cylinder to rise above 50°C.
Positioning and levelling
! It is possible to install the appliance alongside
cupboards whose height does not exceed that of the
hob surface.
! Make sure that the wall in contact with the back of
the appliance is made from a non-flammable, heatresistant material (T 90°C).
To install the appliance correctly:
• Place it in the kitchen, dining room or the bed-sit (not
in the bathroom).
• If the top of the hob is higher than the cupboards,
the appliance must be installed at least 200 mm away
from them.
• If the cooker is installed underneath a wall cabinet,
there must be a minimum distance of 420 mm
between this cabinet and the top of the hob.
This distance should be increased to 700 mm if the
wall cabinets are flammable (see gure).
• Do not position blinds behind the cooker or less than
A
Fumes channelled through
a chimney or branched
flue system reserved for
cooking appliances)
Installation
Adjacent room Room requiring
ventilation
Ventilation opening for
comburent air
Increase in the gap between
the door and the flooring
Fumes channelled
straight outside
9
GB
200 mm away from its
sides.
• Any hoods must be
installed according to
the instructions listed in
the relevant operating
manual.
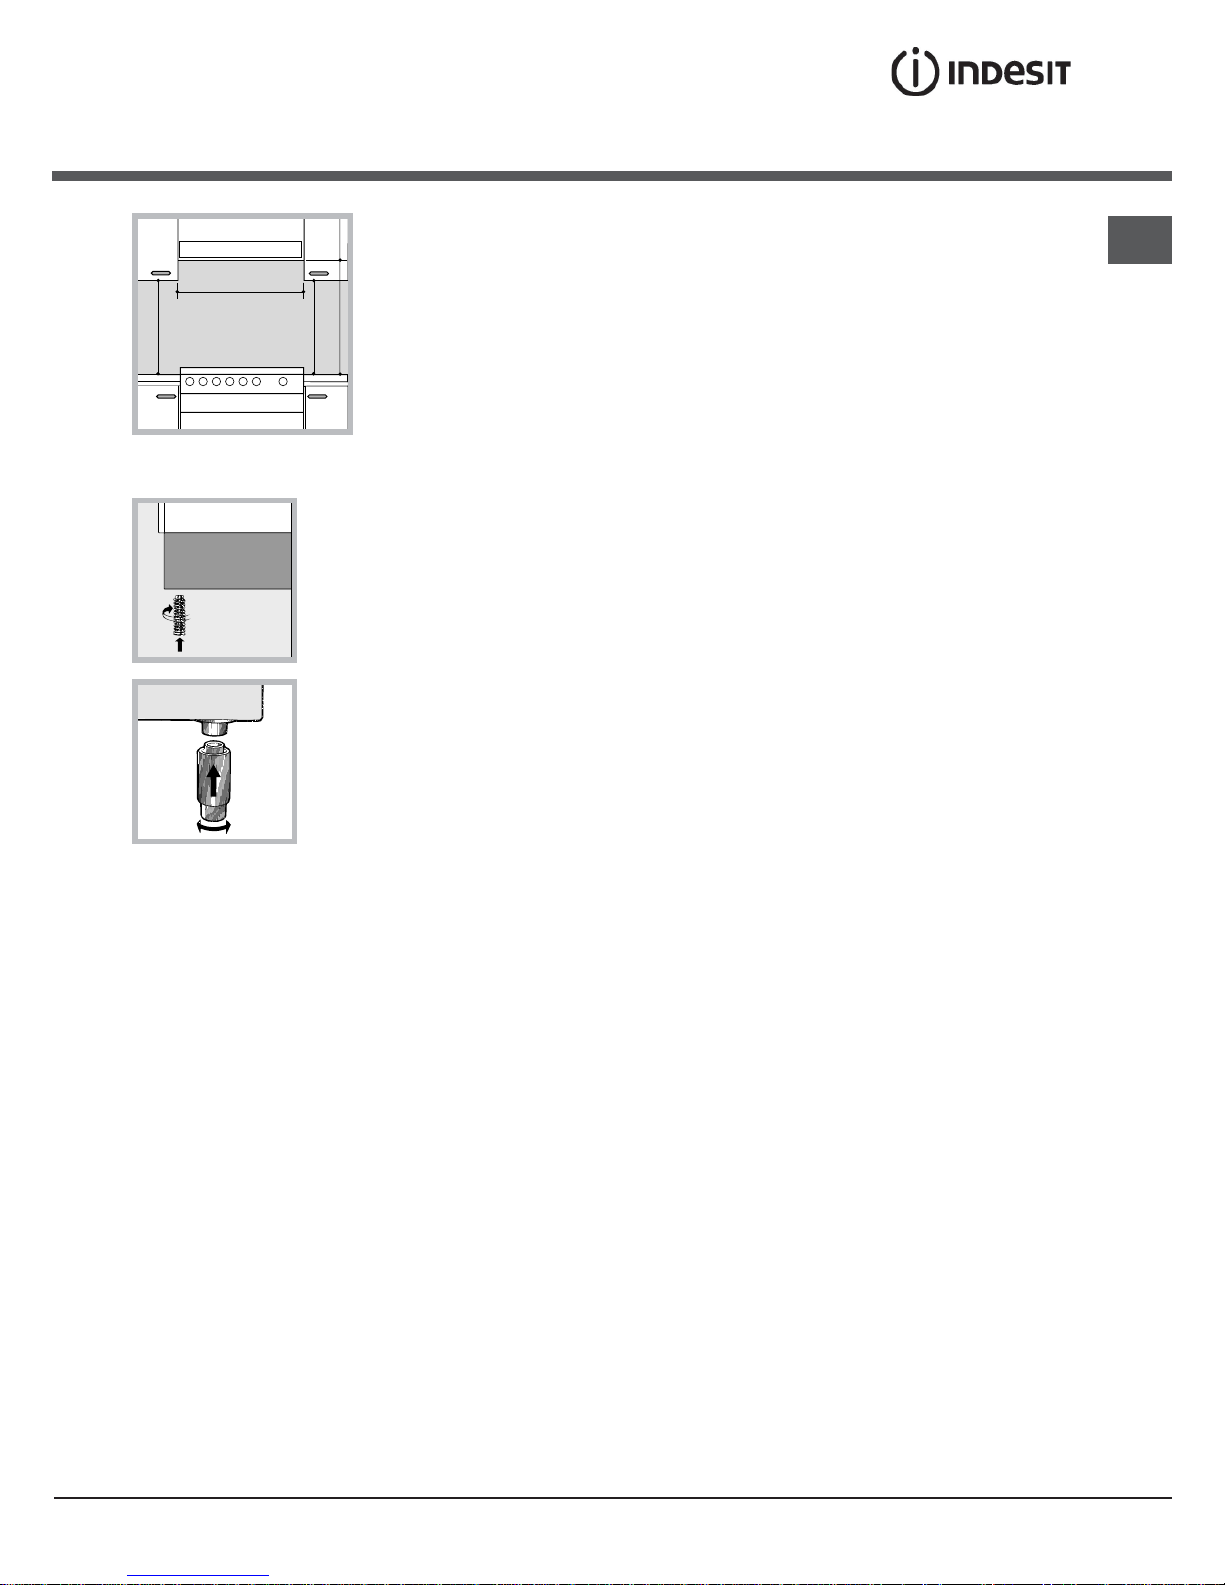
Levelling
If it is necessary to level
the appliance, screw the adjustable feet into the places
provided on each corner of the base of the cooker (see
gure).
The legs* fit into the slots on the
underside of the base of the
cooker.
Electrical connection
Install a standardised plug
corresponding to the load
indicated on the appliance data
plate (see Technical data table).
The appliance must be directly connected to the mains
using an omnipolar circuit-breaker with a minimum contact
opening of 3 mm installed between the appliance and the
mains. The circuit-breaker must be suitable for the charge
indicated and must comply with NFC 15-100 regulations
(the earthing wire must not be interrupted by the circuitbreaker). The supply cable must be positioned so that it
does not come into contact with temperatures higher than
50°C at any point.
Before connecting the appliance to the power supply,
make sure that:
• The appliance is earthed and the plug is compliant with
the law.
• The socket can withstand the maximum power of the
appliance, which is indicated by the data plate.
• The voltage is in the range between the values
indicated on the data plate.
• The socket is compatible with the plug of the
appliance. If the socket is incompatible with the
plug, ask an authorised technician to replace it. Do
not use extension cords or multiple sockets.
! Once the appliance has been installed, the power
supply cable and the electrical socket must be easily
accessible.
HOOD
420
Min.
min.
650
mm. with hood
min.
700
mm. without hood
mm.
600
Min. mm.
420
Min. mm.
* Only available in certain models
! The cable must not be bent or compressed.
! The cable must be checked regularly and replaced
by authorised technicians only.
! The manufacturer declines any liability should
these safety measures not be observed.
Gas connection
Connection to the gas network or to the gas cylinder
may be carried out using a flexible rubber or steel hose,
in accordance with current national legislation and after
making sure that the appliance is suited to the type of gas
with which it will be supplied (see the rating sticker on
the cover: if this is not the case see below). When using
liquid gas from a cylinder, install a pressure regulator
which complies with current national regulations. To
make connection easier, the gas supply may be turned
sideways*: reverse the position of the hose holder with
that of the cap and replace the gasket that is supplied
with the appliance.
! Check that the pressure of the gas supply is
consistent with the values indicated in the Table
of burner and nozzle specifications (see below).
This will ensure the safe operation and durability of
your appliance while maintaining efficient energy
consumption.
Gas connection using a flexible rubber hose
Make sure that the hose complies with current national
legislation. The internal diameter of the hose must
measure: 8 mm for liquid gas supply; 13 mm for
methane gas supply.
Once the connection has been performed, make sure
that the hose:
• Does not come into contact with any parts that reach
temperatures of over 50°C.
• Is not subject to any pulling or twisting forces and
that it is not kinked or bent.
• Does not come into contact with blades, sharp
corners or moving parts and that it is not
compressed.
• Is easy to inspect along its whole length so that its
condition may be checked.
• Is shorter than 1500 mm.
• Fits firmly into place at both ends, where it will
be fixed using clamps that comply with current
regulations.
! If one or more of these conditions is not fulfilled
or if the cooker must be installed according to the
conditions listed for class 2 - subclass 1 appliances
(installed between two cupboards), the flexible steel
10
GB
hose must be used instead (see below).
Connecting a flexible jointless stainless steel pipe to
a threaded attachment
Make sure that the hose and gaskets comply with
current national legislation.
To begin using the hose, remove the hose holder on the
appliance (the gas supply inlet on the appliance is a
cylindrical threaded 1/2 gas male attachment).
! Perform the connection in such a way that the hose
length does not exceed a maximum of 2 metres,
making sure that the hose is not compressed and does
not come into contact with moving parts.
Checking the connection for leaks
When the installation process is complete, check the
hose fittings for leaks using a soapy solution. Never
use a flame.
Adapting to different types of gas
It is possible to adapt the appliance to a type of gas
other than the default type (this is indicated on the
rating label on the cover).
Adapting the hob
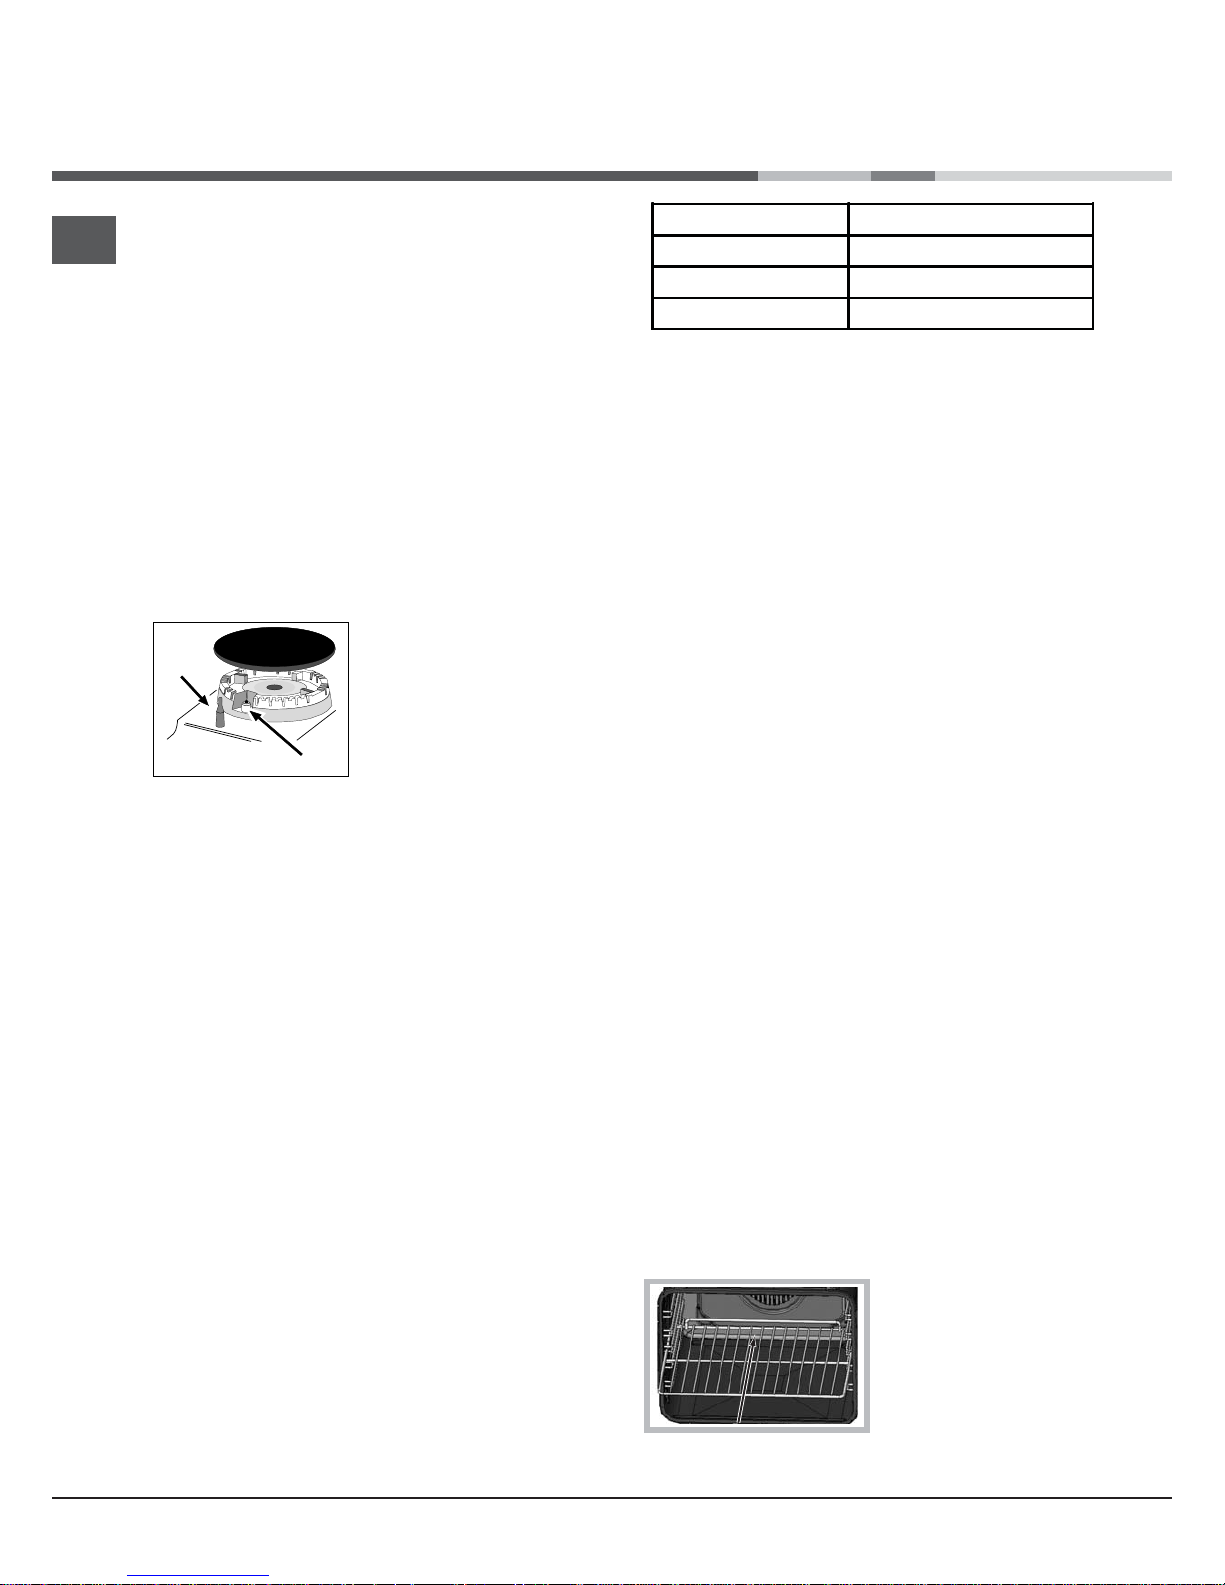
Replacing the nozzles for the hob burners:
1. Remove the hob grids and slide the burners off their
seats.
2. Unscrew the nozzles using a 7 mm socket spanner
(see gure), and replace them with nozzles suited to the
new type of gas(see Burner and
nozzle speci cations table).
3. Replace all the components
by following the above
instructions in reverse.
Adjusting the hob burners’
minimum setting:
1. Turn the tap to the minimum position.
2. Remove the knob and adjust the regulatory screw,
which is positioned inside or next to the tap pin, until
the flame is small but steady.
! If the appliance is connected to a liquid gas supply,
the regulatory screw must be fastened as tightly as
possible.
3. While the burner is alight, quickly change the position of
the knob from minimum to maximum and vice versa several
times, checking that the flame is not extinguished.
! The hob burners do not require primary air
adjustment.
We recommend cleaning the oven before using it for
the first time, following the instructions provided in the
„Care and maintenance” section.
TECHNICAL DATA
Oven dimensions
(HxWxD)
34x39x44 cm
Volume
60 l
Maximum absorber
power:
2100 W
Useful
measurements
relating to the oven
compartment
width 42 cm
depth 44 cm
height 23 cm
Power supply voltage
and frequency
see data plate
Burners
may be adapted for use with any
type of gas shown on the data
plate, which is located inside the
flap or, after the oven
compartment has been opened,
on the left-hand wall inside the
oven.
Electric Plate
Rapid Ø 145 mm: 1500 W
Rapid Ø 180 mm: 2000 W
ENERGY LABEL
Directive 2002/40/EC on the label
of electric ovens
Norm EN 50304
Energy consumption Class
certification Natural convection
heating mode: Static
EC Directives: 2006/95/EC dated
12/12/06 (Low Voltage) and
subsequent amendments -
2004/108/EC dated 15/12/04
(Electromagnetic Compatibility)
and subsequent amendments -
2009/142/EC dated 30/11/09
(Gas) and subsequent
amendments - 93/68/EEC dated
22/07/93 and subsequent
amendments - 2002/96/EC.
1275/2008 (Stand-by/ Off mode)
Data plate, is located inside the flap or, after the oven
compartment has been opened, on the left-hand wall
inside the oven.
11
GB
Table of burner and nozzle specifications
At 15°C and 1013 mbar- dry gas
** Propane P.C.S. = 50,37 MJ/Kg
*** Butane P.C.S. = 49,47 MJ/Kg
Natural P.C.S. = 37,78 MJ/m
3
KN3N11S/EU S
S
S
R
A
KN3G1/ UA S
WARNING! The glass lid can break
in if it is heated up. Turn off all the
burners and the electric plates
before closing the lid. *Applies to the
models with glass cover only.
Table 1 Liquid Gas Natural Gas
Burner Diameter
(mm)
Thermal Power
kW (p.c.s.*)
By-Pass
1/100
Nozzle
1/100
Flow*
g/h
Nozzle
1/100
Flow*
l/h
Nozzle
1/100
Flow*
l/h
Nominal Reduced (mm) (mm) *** ** (mm) (mm)
Fast
(Large)(R)
100 3.00 0.7 41 87 218 214 128 286 143 286
Semi Fast
(Medium)(S)
75 1.90 0.4 30 70 138 136 104 181 118 181
Auxiliary
(Small)(A)
51 1.00 0.4 30 52 73 71 76 95 80 95
Supply
Pressures
Nominal (mbar)
Minimum (mbar)
Maximum (mb ar )
28-30
20
35
37
25
45
20
17
25
13
6,5
18
S
R
ø 145
ø 180
12
GB
Start-up and use
Using the hob
Lighting the burners
For each BURNER knob there is a complete ring
showing the strength of the flame for the relevant
burner.
To light one of the burners on the hob:
1. Bring a flame or gas lighter close to the burner.
2. Press the BURNER knob and turn it in an
anticlockwise direction so that it is pointing to the
maximum flame setting .
3. Adjust the intensity of the flame to the desired level
by turning the BURNER knob in an anticlockwise
direction. This may be the minimum setting , the
maximum setting or any position in between the two.
If the appliance is fitted with an electronic lighting
device* (C), press the ignition
button, marked with the
symbol
, then hold the
BURNER knob down and
turn it in an anticlockwise
direction, towards the
maximum flame setting,
until the burner is lit.The burner may be extinguished
when the knob is released. If this occurs, repeat the
operation, holding the knob down for a longer period of
time.
! If the flame is accidentally extinguished, switch off the
burner and wait for at least 1 minute before attempting
to relight it.
If the appliance is equipped with a flame failure safety
device (X)*, press and hold the BURNER knob for
approximately 2-3 seconds to keep the flame alight
and to activate the device.
To switch the burner off, turn the knob until it reaches
the stop position
•.
Practical advice on using the burners
For the burners to work in the most efficient way
possible and to save on the amount of gas consumed, it
is recommended that only pans that have a lid and a flat
base are used. They should also be suited to the size of
the burner.
To identify the type of burner, please refer to the
diagrams contained in the “Burner and nozzle
specifications”.
! On the models supplied with a reducer shelf,
remember that this should be used only for the auxiliary
burner when you use casserole dishes with a diameter
under 12 cm.
Using the oven
! The first time you use your appliance, heat the empty
oven with its door closed at its maximum temperature
for at least half an hour. Ensure that the room is well
ventilated before switching the oven off and opening
the oven door. The appliance may emit a slightly
unpleasant odour caused by protective substances
used during the manufacturing process burning away.
! Before operating the product, remove all plastic film
from the sides of the appliance.
! Never put objects directly on the bottom of the oven;
this will avoid the enamel coating being damaged.
Only use position 1 in the oven when cooking with the
rotisserie spit.
The oven knobs
With these two controls you can select the different
functions of the oven and choose the cooking
temperature suitable for the food you are preparing.
The different cooking functions are set up by operating
the two knobs:
the selection knob
the thermostat knob on the oven panel.
For any selection-knob setting different from idle,
identified by the “0”, the oven light turns on; the knob
setting marked
permits turning on the oven light
without any heating element being switched on. When
the oven light is on, it means that the oven is in use,
and it will remain on for the entire time the oven is
being used.
X
C
Burner ř Cookware diameter (cm)
Fast (R) 24 - 26
Semi Fast (S) 16 - 20
Auxiliary (A) 10 - 14
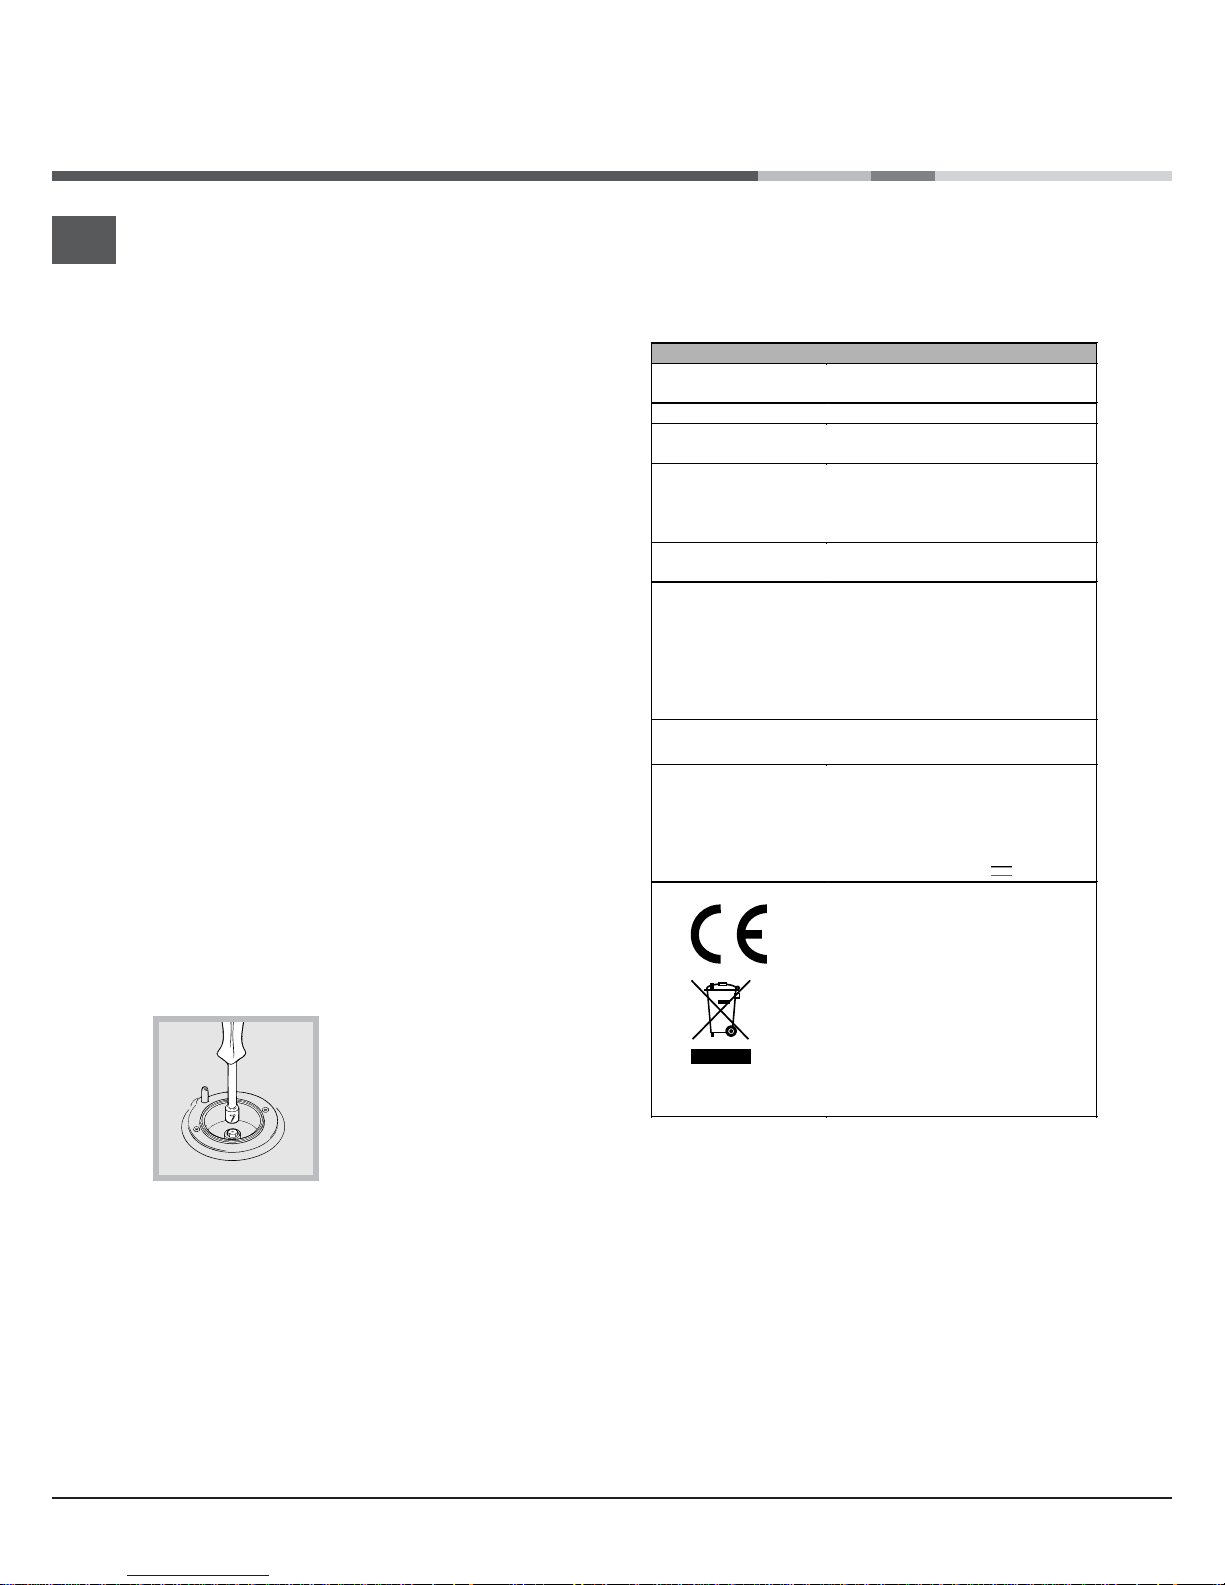
! When inserting the shelf make sure the backstop is at
the rear of the cavity (see image).
13
GB
Practical advice on using the hob
• Use pans with a thick, flat base to ensure that they
adhere perfectly to the cooking zone.
• Always use pans with a diameter that is large
enough to cover the hotplate fully, in order to use all
the heat produced.
• Always make sure that the base of the pan is
completely clean and dry: this ensures that the pans
adhere perfectly to the cooking zones and that both
the pans and the hob remain effective for a longer
period of time.
• Avoid using the same cookware that is used on gas
burners: the heat concentration on gas burners may
have warped the base of the pan, causing it not to
adhere to the surface correctly.
• Never leave a cooking zone switched on without a
pan on top of it, as doing so may cause the zone to
become damaged.
Switching the cooking zones on and off
The control knobs for the hob electric hotplates
The cookers can be fitted with normal and rapid
electric hotplates in a variety of combinations (the
rapid hotplates can be distinguished from the rest by
the red boss in the centre of the same). To avoid any
heat loss and damage to the hotplates, we advise you
to use pans with a flat bottom, with a diameter which
matches that of the hotplate itself. The table contains
the different settings indicated on the knobs and the
use for which the hotplates are recommended.
Before using the hotplates for the first time, you should
heat them at maximum temperature for approximately
4 minutes, without any pans. During this initial stage,
their protective coating hardens and reaches its
maximum resistance.
Electric hotplate indicator light
This light comes on when any of the electrical hotplates
on a hob which features electric hotplates have been
turned on.
Setting Normal or Fast Plate
0
Off
1
Cooking vegetables, fish
2
Cooking potatoes (using steam) soups,
chickpeas, beans.
3
Continuing the cooking of large quantit ies of
food, minestrone
4
For roasting (average)
5
For roasting (above average)
6
For browning and reaching a boil in a short
time.
14
GB
Cooking Modes
Static oven
Knob setting: anywhere between 50°C and Max
The oven light turns on and the top and bottom heating
elements (resistors) switch on. The temperature, fixed
by the thermostat knob, is reached automatically and
kept constant by the thermostat control. This function
permits cooking and type of food thanks to excellent
temperature distribution.
The bottom heating element
-Knob setting: anywhere between 50°C and Max
The oven light turns on and so does the bottom heating
element. The temperature, fixed by the thermostat
knob, is reached automatically and kept constant.
This setting is recommended for finishing the cooking
of foods (placed in pans) that are well done on the
outside but still not done inside or for desserts covered
with fruit or jam which require a light browning on
top. Note that this function does not permit reaching
the maximum (250°C) temperature inside for cooking
foods always on this oven setting unless the foods are
cakes which only require temperatures below or equal
to 180°C.
The Top heating element
-Knob setting: anywhere between 50°C and Max
The oven light turns on and so does the infra-red
ray grill, and the motor starts turning the spit. The
rather high and direct temperature of the grill permits
browning the outside of meats immediately thus
keeping in the juices and assuring tenderness.
The grill
,
* Only available in certain models
The rotisserie
To operate the rotisserie,
proceed as follows:
a) place the dripping-pan on the
1st rack;
b) insert the special rotisserie
support on the 4th rack and
position the spit by inserting it
through the special hole into
the rotisserie at the back of the
oven;
c) to start the spit, set the oven selection knob on
setting
Storage recess below the oven
(only a few models)
Below the oven a recess can
be used to contain cooking
pans and cooker accessories.
Moreover, during oven
operation, it may be used to
keep food warm.To open the
storage is necessary turn it
downwards.
Caution: this storage recess
must not be used to store inflammable materials.
The oven offers a wide range of alternatives which
allow you to cook any type of food in the best possible
way. With time you will learn to make the best use
of this versatile cooking appliance and the following
directions are only a guideline which may be varied
according to your own personal experience.
Preheating
If the oven must be preheated (this is generally the
case when cooking leavened foods), the “fan assisted”
mode
can be used to reach the desired temperature
as quickly as possible in order to save on energy.
Once the food has been placed in the oven, the most
appropriate cooking mode can then be selected.
The top heating element is activated. The extremely
high and direct temperature of the grill makes it
possible to brown the surface of meats and roasts
while locking in the juices to keep them tender.

15
GB
Practical Cooking Advice
When cooking in the oven, use only one dripping pan
or rack at a time. Select from among the top or bottom
rack heights based on whether the dish needs more or
less heat from the top.
Preheating
If the oven must be preheated (this is generally the
case when cooking leavened foods), we recommend
you use the “convection mode” to reach the desired
temperature as quickly as possible. When preheating
is over, which is indicated by the red light “E” going
out, select the required cooking mode.
Cooking Fish and Meat
When cooking white meat, fowl and fish, use
temperature settings from 180 °C to 200 °C.
For red meat that should be well done on the outside
while tender and juicy in the inside, it is a good idea to
start with a high temperature setting (200°C-220°C) for
a short time, then turn the oven down afterwards.
In general, the larger the roast, the lower the
temperature setting. Place the meat on the centre of
the grid and place the dripping pan beneath it to catch
the fat.
Make sure that the grid is inserted so that it is in the
centre of the oven. If you would like to increase the
amount of heat from below, use the low rack heights.
For savoury roasts (especially duck and wild game),
dress the meat with lard or bacon on the top.
Baking Cakes
When baking cakes, always preheat the oven and do
not open the oven door during baking to prevent the
cake from dropping.
Using the Grill
Use the
“grill” mode, placing the food under the
centre of the grill (situated on the 3rd or 4th rack form
the bottom) because only the central part of the top
heating element is turned on.
Use the bottom rack (1st from the bottom), placing
the dripping pan provided to collect any sauce and/or
grease and prevent the same from dripping onto the
oven bottom.
When using this mode, we recommend you set the
thermostat to the highest setting. However, this does
not mean you cannot use lower temperatures, simply
by adjusting the thermostat knob to the desired
temperature.
In models fitted with a rotisserie
, you can use the
spit kit provided when using the “grill” mode. In this
case, cook with the oven door shut, placing the spit kit
on the third oven rack from the bottom and the dripping
pan on the bottom rack to collect any sauce and /or
dripping fat.
! Always use the grill with the oven door shut. This will
allow you both to obtain excellent results and to save
on energy (approximately 10%).
Therefore the best results when using the grill modes
are obtained by placing the grid on the lower racks
(see cooking table) then, to prevent fat and grease
from dripping onto the bottom of the oven and smoke
from forming, place a dripping-pan on the 1st oven
rack from the bottom.

16
GB
Oven cooking advice table
Selection
knob setting
Foods Wt.
(Kg)
Cooking
position from
bottom
Heating time
(minutes)
Thermostat
knob
Cooking
time
(minutes)
1 Static
Lasagne
Cannelloni
Pasta bakes au gratin
Veal
Chicken
Duck
Rabbit
Pork
Lamb
Mackerel
Red porgy
Tr out baked in paper
Napolitan pizza
Biscuits or cookies
Flan or tart
Savoury pie
Yeast cake
Frui t cake
2,5
2,5
2,0
1,7
1,5
1,8
2
2,1
1,8
1,1
1,5
1
1
0,5
1,1
1
0,5
1
2
3
3
2
3
3
3
3
3
2
2
2
2
3
3
3
3
3
5
5
5
10
10
10
10
10
10
5
5
5
15
10
10
10
10
10
200
200
200
180
200
180
180
180
180
180
180
180
220
180
180
180
160
170
45-50
30-35
30-35
60-70
80-90
90-100
70-80
70-80
70-80
30-40
30-35
25-30
15-20
10-15
25-30
30-35
25-30
25-30
2 Oven
bottom
Finishing touches
3 Top bottom
Sole and cuttlefish
Squid and shrimp on
spits
Cod fillets
Grilled vegetables
1
1
1
1
4
4
4
3/4
5
5
5
5
Max
Max
Max
Max
8
4
10
8-10
4 Grill
Veal steaks
Cutlets
Hamburgers
Mackerels
Toast sandwiches
1
1,5
1
1
n.° 4
4
4
3
4
4
5
5
5
5
5
Max
Max
Max
Max
Max
15-20
20
7
15-20
5
With rotisserie (only in
few models)
Veal on the spit
Chicken on the spit
1,0
2,0
-
-
5
5
Max
Max
70-80
70-80
NB: cooking times are approximate and may vary according to personal taste. When cooking using the grill or double
grill, the dripping-pan must always be placed on the 1st oven rack from the bottom.
 Loading...