

Instructions for use
WASHER-DRYER
GB
English,1
IWDC 7125
! This symbol reminds you to read this instruction
manual.
Contents
Installation, 2-3
Unpacking and levelling
Connecting the electricity and water supplies
The first wash cycle
Technical data
Care and maintenance, 4
Cutting off the water or electricity supply
Cleaning the washer-dryer
Cleaning the detergent dispenser drawer
Caring for the door and drum of your appliance
Cleaning the pump
Checking the water inlet hose
Precautions and tips, 5
General safety
Disposal
Description of the washer-dryer and starting
a wash cycle, 6-7
Control panel
Indicator lights
Starting a wash cycle
GB
Wash cycles, 8
Table of wash cycles
Personalisation, 9
Setting the temperature
Setting the drying cycle
Functions
Detergents and laundry, 10
Detergent dispenser drawer
Preparing the laundry
Garments requiring special care
Load balancing system
Troubleshooting, 11
Service, 12
1
Installation
GB
! This instruction manual should be kept in a safe
place for future reference. If the washer-dryer is
sold, transferred or moved, make sure that the
instruction manual remains with the machine so
that the new owner is able to familiarise himself/
herself with its operation and features.
! Read these instructions carefully: they contain
vital information relating to the safe installation
and operation of the appliance.
Unpacking and levelling
Unpacking
1. Remove the washer-dryer from its packaging.
2. Make sure that the washer-dryer has not been
damaged during the transportation process. If it
has been damaged, contact the retailer and do not
proceed any further with the installation process.
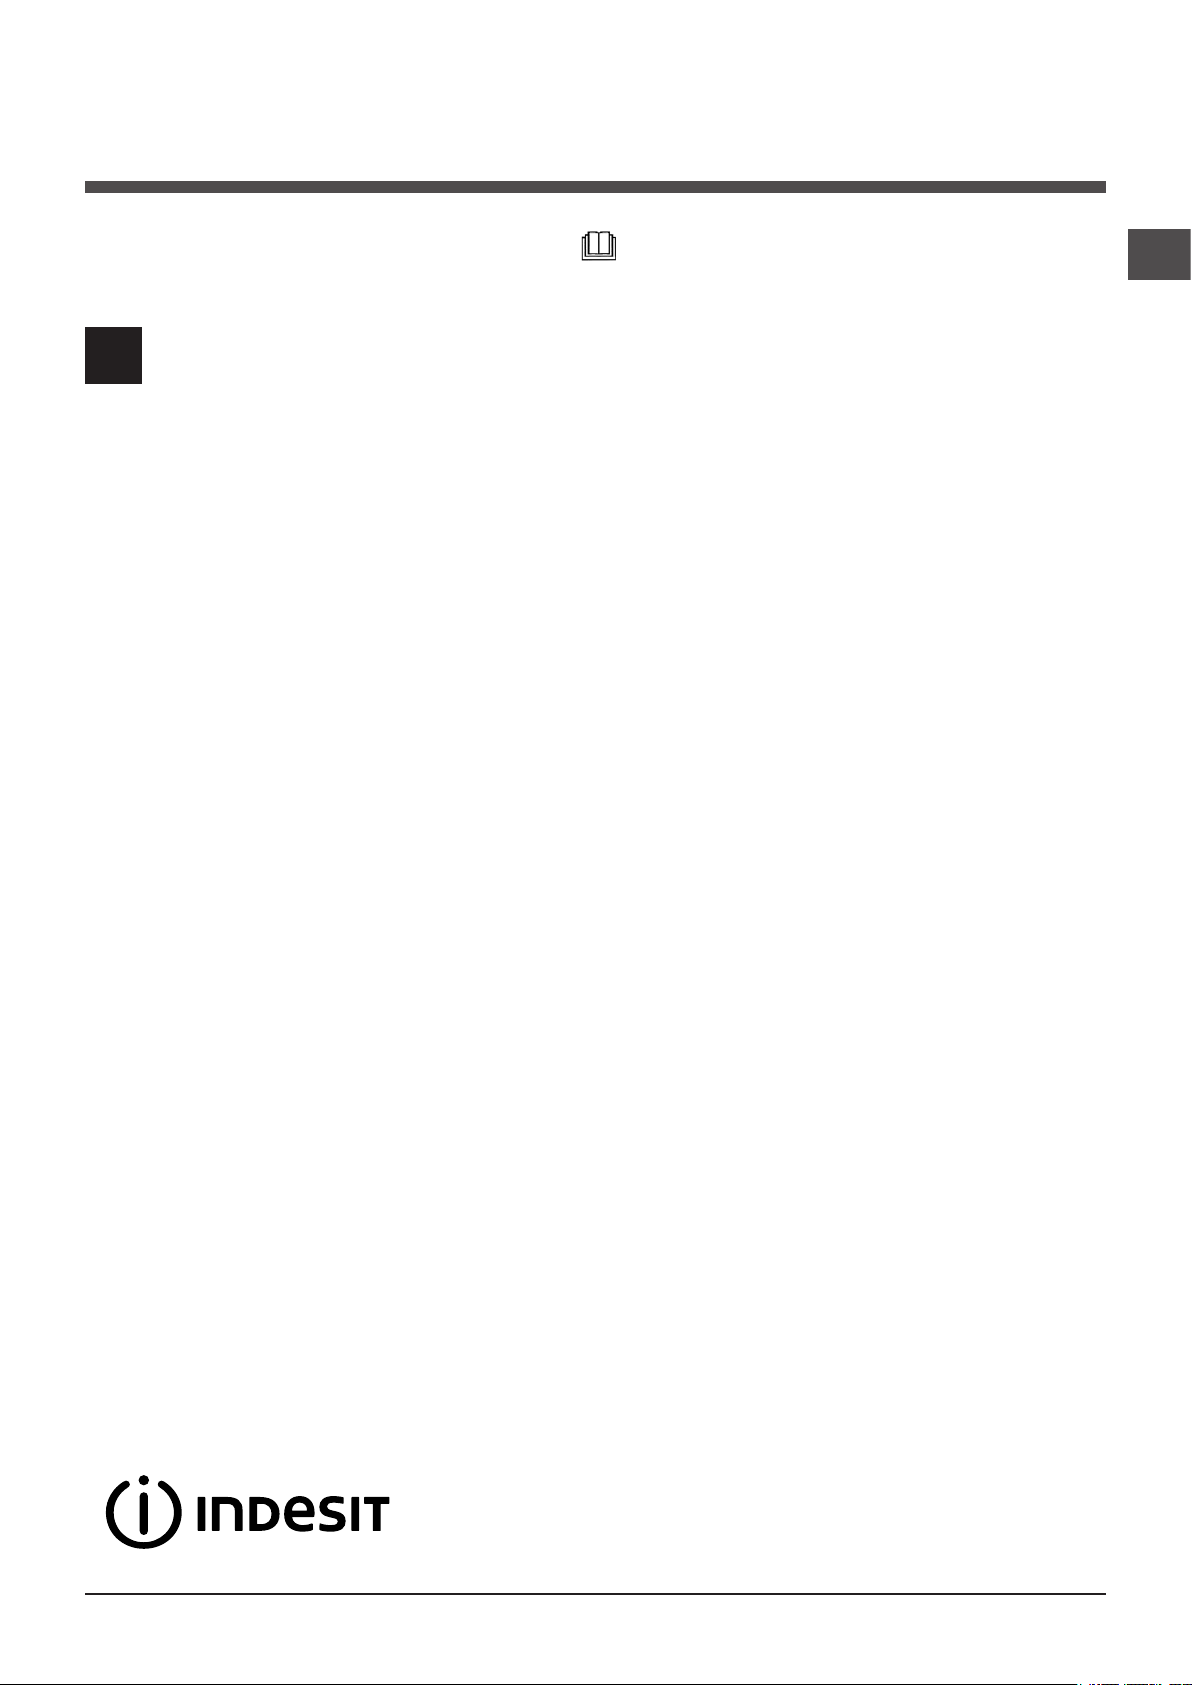
3. Remove the 4 protective screws (used
during transportation)
and the rubber washer
with the corresponding
spacer, located on the
rear part of the appliance (see figure).
4. Close off the holes using the plastic plugs provided.
5. Keep all the parts in a safe place: you will
need them again if the washer-dryer needs to
be moved to another location.
! Packaging materials should not be used as
toys for children.
Levelling
1. Install the washer-dryer on a flat sturdy floor,
without resting it up against walls, furniture cabinets or anything else.
2. If the floor is not perfectly level, compensate
for any unevenness by
tightening or loosening
the adjustable front feet
(see figure); the angle of
inclination, measured in
relation to the worktop,
must not exceed 2°.
Levelling the machine correctly will provide it with
stability, help to avoid vibrations and excessive
noise and prevent it from shifting while it is operating. If it is placed on carpet or a rug, adjust
the feet in such a way as to allow a sufficient
ventilation space underneath the washer-dryer.
Connecting the electricity and water supplies
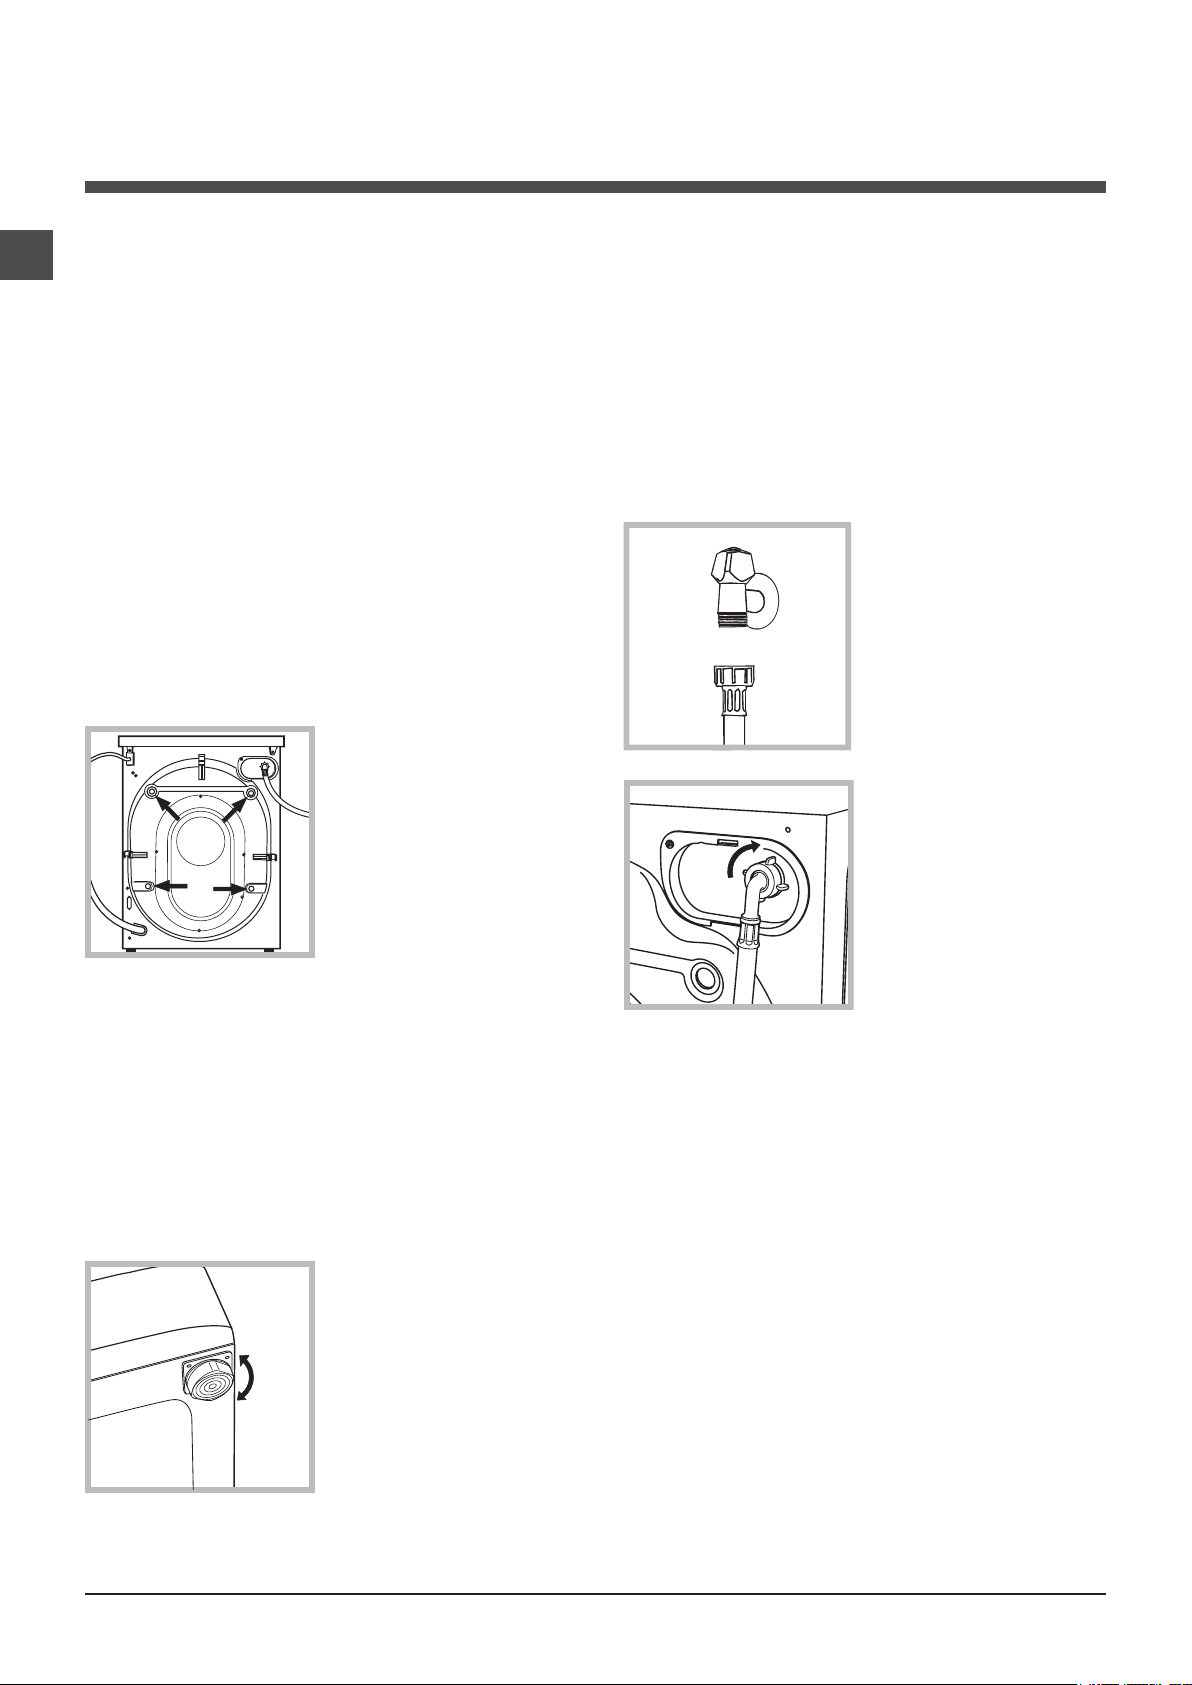
Connecting the water inlet hose
1. Connect the supply
pipe by screwing it to
a cold water tab using
a ¾ gas threaded connection (see figure).
Before performing the
connection, allow the
water to run freely until
it is perfectly clear.
2. Connect the inlet
hose to the washer-dryer by screwing it onto
the corresponding water inlet of the appliance, which is situated on
the top right-hand side
of the rear part of the
appliance (see figure).
3. Make sure that the hose is not folded over
or bent.
! The water pressure at the tap must fall within
the values indicated in the Technical details table
(see next page).
! If the inlet hose is not long enough, contact a
specialised shop or an authorised technician.
! Never use second-hand hoses.
! Use the ones supplied with the machine.
2
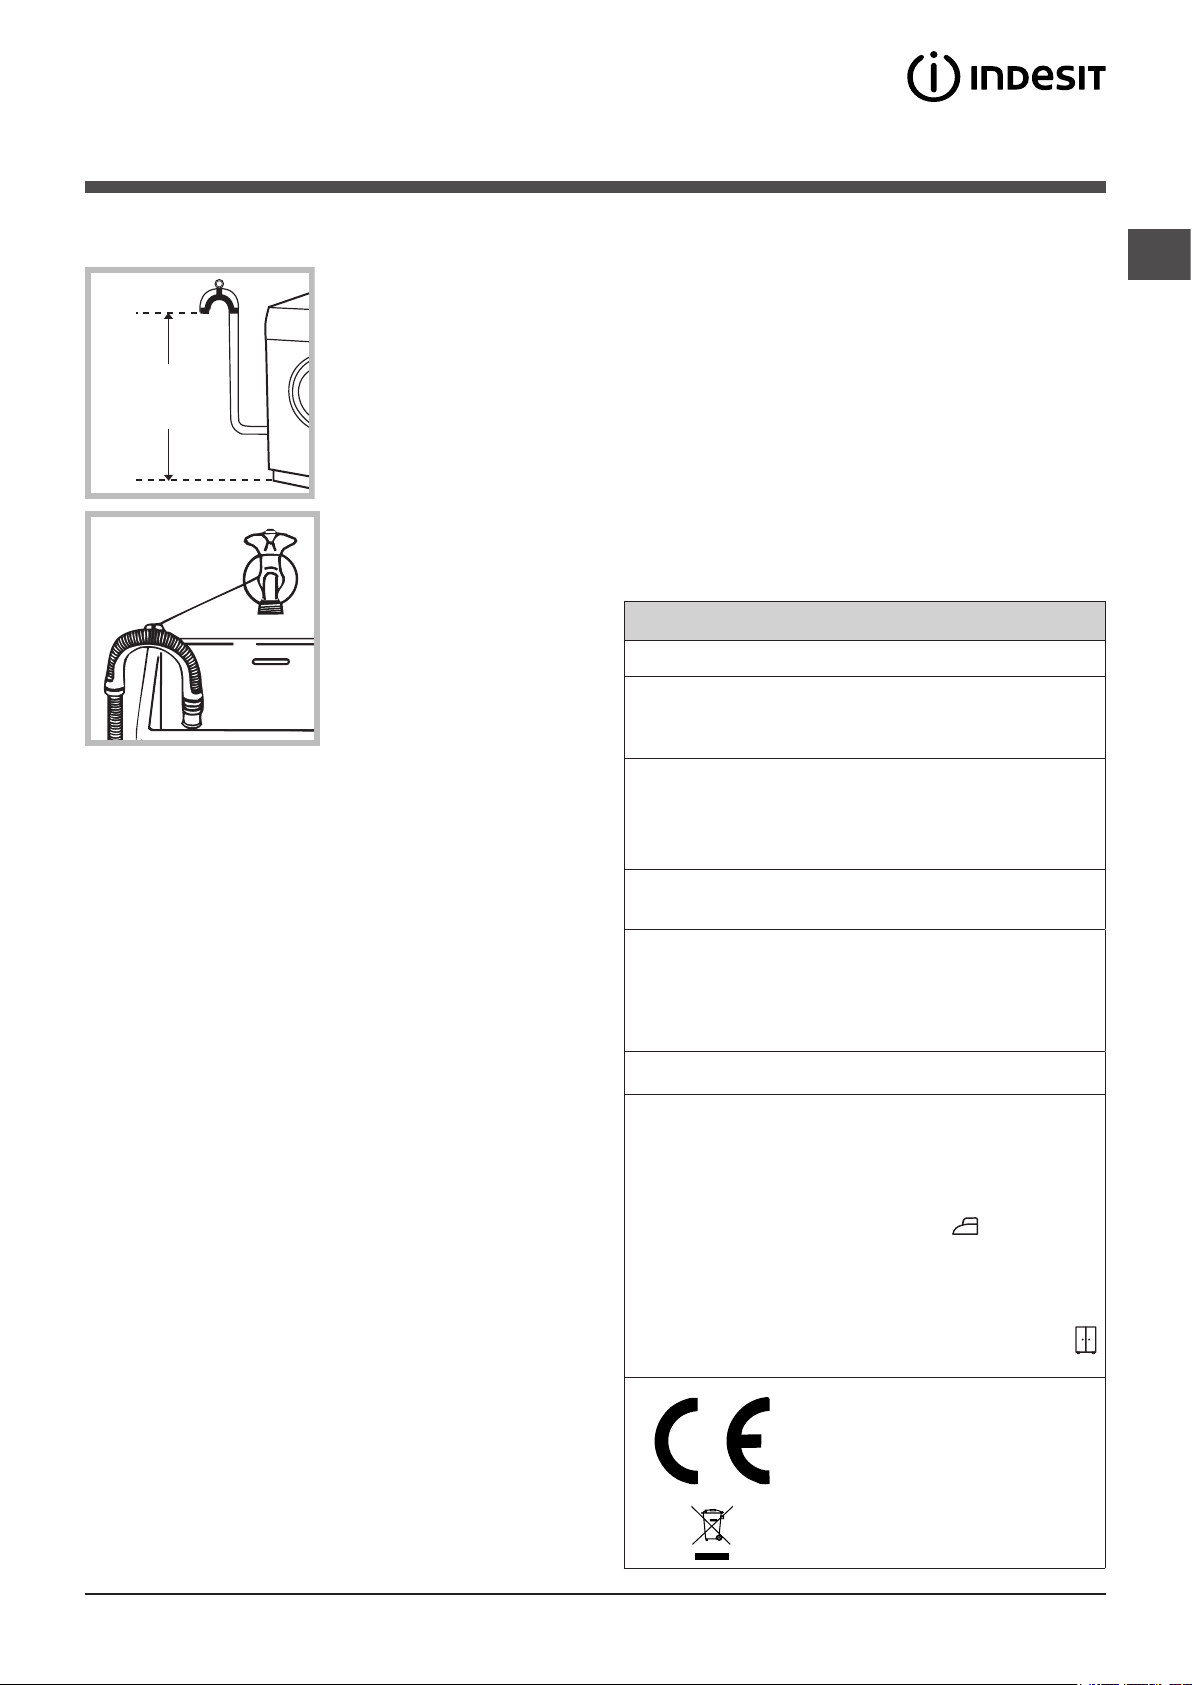
65 - 100 cm
Connecting the drain hose
Con nec t th e dr ain
hose, without bending
it, to a drainage duct or
a wall drain located at a
height between 65 and
100 cm from the floor;
alternatively, rest it on
the side of a washbasin or bathtub, fastening the duct supplied
to the tap (see figure).
The free end of the
hose should not be
underwater.
! The cable should not be bent or compressed.
! The cable should be replaced only by authori-
sed technicians.
! If the supply cord is damaged, it must be repla-
ced by the manufacturer, its service agent or similarly qualified persons in order to avoid a hazard.
Warning! The company shall not be held responsible for any incidents that occur if these
regulations are not observed.
The first wash cycle
Once the appliance has been installed, and before
you use it for the first time, run a wash cycle with
detergent and no laundry, using the wash cycle 2.
Technical data
Model
Dimensions
IWDC 7125
width 59.5 cm
height 85 cm
depth 53,5 cm
GB
! We advise against the use of hose extensions;
if it is absolutely necessary, the extension must
have the same diameter as the original hose and
must not exceed 150 cm in length.
Electrical connection
Before inserting the plug into the electrical socket, make sure that:
• the socket is earthed and complies with current regulations;
• the socket can withstand the maximum load of
the appliance, which is indicated in the Technical data table (see opposite);
• the power supply voltage falls within the values indicated in the Technical data table (see opposite);
• the socket is compatible with the plug of the appliance. If this is not the case, either the socket
or the plug must be replaced.
! The machine must not be installed outdoors,
even in covered areas. It is extremely dangerous
to leave the appliance exposed to rain, storms
and other weather conditions.
! Once the machine has been installed, the
electricity socket should be easily accessible.
! Avoid using any extension cord or multiple
socket outlet.
! CAUTION: if this appliance is supplied from a
cord extension set or electrical portable outlet
device, the cord extension set or electrical portable outlet device must be positioned so that it
is not subject to splashing or ingress of moisture.
Capacity
Electrical
connections
Water connections
Spin speed
Energy rated
programmes
according to:
- AS/NZS
2040.2 (washing)
- AS/NZS
2442.2 (drying)
from 1 to 7,5 kg for the
wash programme;
from 1 to 4,5 kg for the
drying programme
please refer to the technical
data plate fixed to the machine
maximum pressure 1 MPa
(10 bar)
minimum pressure 0.05
MPa (0.5 bar)
drum capacity 52 litres
up to 1200 rotations per minute
Wash: programme 2; temperature 60°C at 1200 rpm;
run with a load of 7,5 kg.
Drying: the smaller load
(2kg) must be dried by
selecting the “ ” dryness
level. The load must consist
of 2 sheets, 1 pillowcase and 1 hand towel; the
remainder of the load must
be dried by selecting the “
” dryness level.
This appliance conforms to
the following EC Directives:
- 89/336/EEC dated
03/05/89 (Electromagnetic
Compatibility) and subsequent modifications
- 2012/19/EU (WEEE)
- 2006/95/EC Low Voltage)
3

Care and maintenance
GB
Cutting off the water and electricity
supplies
• Turn off the water tap after every wash cycle.
This will limit wear on the hydraulic system
inside the washer-dryer and help to prevent
leaks.
• Unplug the washer-dryer when cleaning it and
during all maintenance work.
Cleaning the washer-dryer
The outer parts and rubber components of the
appliance can be cleaned using a soft cloth
soaked in lukewarm soapy water. Do not use
solvents or abrasives.
Cleaning the detergent dispenser
drawer
Remove the dispenser
by raising it and pulling
it out (see figure).
Wash it under running
water; this operation
should be repeated
frequently.
Cleaning the pump
The washer-dryer is fitted with a self-cleaning
pump which does not require any maintenance. Sometimes, small items (such as coins or
buttons) may fall into the pre-chamber which
protects the pump, situated in its bottom part.
! Make sure the wash cycle has finished and
unplug the appliance.
To access the pre-chamber:
1. using a screwdriver,
remove the cover panel on the lower front
part of the washerdryer (see figure);
2. unscrew the lid by
rotating it anti-clockwise (see figure): a little
water may trickle out.
This is perfectly normal;
Caring for the door and drum of
your appliance
• Always leave the porthole door ajar in order to
prevent unpleasant odours from forming.
4
3. clean the inside thoroughly;
4. screw the lid back on;
5. reposition the panel, making sure the hooks
are securely in place before you push it onto the
appliance.
Checking the water inlet hose
Check the inlet hose at least once a year. If there
are any cracks, it should be replaced immediately: during the wash cycles, water pressure is
very strong and a cracked hose could easily
split open.
! Never use second-hand hoses.
 Loading...