

Page 1

TUMBLE DRYER
Use and Care & Installation Instructions
SÉCHOIR À TAMBOUR
Utilisation et Entretien et Notice D’Installation
SECADORA
Instrucciones de Instalación, Uso y Mantenimiento
SECADOR DE ROUPA
Instruções de Utilização, Conservação e Instalação
ASCIUGATRICE
Instruzioni per L’Installazione, L’Uso e La Manutenzione
IS30V
Page 2

Page 3
English
Contents
Safety Advice 2
Electrical Requirements 2
Features - Get to know the main parts of your Dryer 3
Where to put and vent your Dryer 3
How to use your Dryer 3
Sorting your laundry 4
Wash Care Labels 4
Items not suitable for tumble drying 4
Items requiring special attention 5
The Controls 5
Guide to Drying Times 6
How to remove and clean the fluff filter 6
Caring for your Dryer 6
If something goes wrong 7
If it still won’t work 7
Register your purchase now
Simply complete and return the Registration Form supplied with the appliance
documents.
Retention of this Instruction Book
This Instruction Book must be kept handy for reference as it contains important details on
the safe and proper use of the appliance.
If you sell or pass the appliance to someone else, or move house and leave it behind, make
sure this Book is also provided so the new owner can become familiar with the appliance
and safety warnings.
1
Page 4
For your safety
For your safety
IMPORTANT
Using your Tumble Dryer is easy.
Nevertheless, for your own safety and to get the best results it is important to know your
Dryer by reading right through this handbook before using your dryer for the first time.
NEVER ● Allow children to play with or otherwise interfere with the dryer.
NEVER ● Allow the air inlet at the back of the dryer, the air outlet or vent hose
to be obstructed.
NEVER ● Direct the vent hose outlet towards the air intake at the back of the
machine.
NEVER ● Allow the tumble dryer to recycle exhaust air.
NEVER ● Switch the machine off leaving a hot load in the drum.
NEVER ● Tumble dry without the filter in position.
NEVER ● Exceed the maximum load capacity recommended or place
dripping wet items in the drum.
NEVER ● Use the dryer on a carpeted floor where the pile height would
prevent air from entering the dryer from the base.
NEVER ● Allow lint to collect around the dryer.
NEVER ● Add liquid or sheet fabric conditioner to the dryer, use liquid
conditioner in the final rinse of your wash.
NEVER ● Use the dryer for commercial drying, the dryer is only suitable for
domestic use.
NEVER ● Dry Acrylics on the high heat setting.
NEVER ● Tumble dry articles that have NOT been well washed in water and
detergent then well rinsed and spun.
NEVER ● Tumble dry articles that have had chemicals used for cleaning.
NEVER ● Dry articles that are contaminated with flammable substances such
as: petrol, oil, paint, hair lacquer, creams, cooking fat or oil.
NEVER ● Tumble dry: rubber, foam rubber, plastic, plastic foam, nappy pants
or liners, polythene or paper.
Large, very bulky items including duvets and sleeping bags.
NEVER ● Never attempt to stand on top of your dryer, it is not designed for
such use and you could injure yourself or damage the dryer by such
abuse.
NEVER ● Switch electricity On or Off with wet hands.
IMPORTANT
A CHILD COULD CLIMB INTO OR TAMPER WITH AN UNATTENDED
TUMBLE DRYER.
WHEN THE MACHINE IS NOT IN USE SWITCH OFF, REMOVE THE PLUG AND
CLOSE THE DOOR.
ALWAYS ● When the dryer is not in use, switch off, remove plug, and
ALWAYS ● Comply with the specified electrical requirements.
ALWAYS ● Ensure that your dryer is installed correctly and has adequate
ALWAYS ● Use the vent hose for optimum drying performance.
ALWAYS ● Finish every programme with the cool tumble cycle provided on
ALWAYS ● Clean the filter, it is essential that the filter is kept clear of fluff
ALWAYS ● Observe the rules for drying garments:
ALWAYS ● Buy genuine accessories and spares.
close the door.
ventilation. (see “Where to put and vent your dryer”)
the control.
at all times.
In particular woollen articles should not be dried in a
tumble dryer unless they are labelled ‘Superwash’,
‘Machine washable’ or have the ‘May be tumble dried’
symbol:
If in any doubt do not dry wool in the machine.
Unlike other materials, the mechanism of wool
shrinkage is irreversible, i.e. it will not stretch back to
the original size and shape.
CAUTION:
When the dryer is in use avoid touching the
rear of the dryer as it may be hot!
Electrical Requirements
WARNING:This appliance must be earthed!
REFER TO THE RATING PLATE FOR VOLTAGE AND CURRENT
REQUIREMENTS. (See diagram for location.)
The dryer should be connected to the mains supply via a suitable
socket which is accessible after installing your dryer.
The wires in the mains lead are coloured in accordance with the
following:
GREEN/YELLOW - EARTH
BLUE - NEUTRAL
BROWN - LIVE
If a replacement plug is to be fitted, the appropriate wire must be
connected to the correct terminal,the cut-off plug must be disposed
of safely. DO NOT leave where it can be inserted into a socket and
create a shock hazard.
Changing the
mains cable
Should the mains lead ever require replacing at any time please
contact your nearest Service Centre. A charge will be made for the
replacement of the mains lead or if you require a longer lead.
The mains lead must only be replaced by a specially prepared
cable obtainable from your Spares Stockist and fitted by a
qualified electrician.
NOTE: IF IN DOUBT ABOUT ANY OF THE ABOVE CONSULT A
QUALIFIED ELECTRICIAN.
2
Page 5

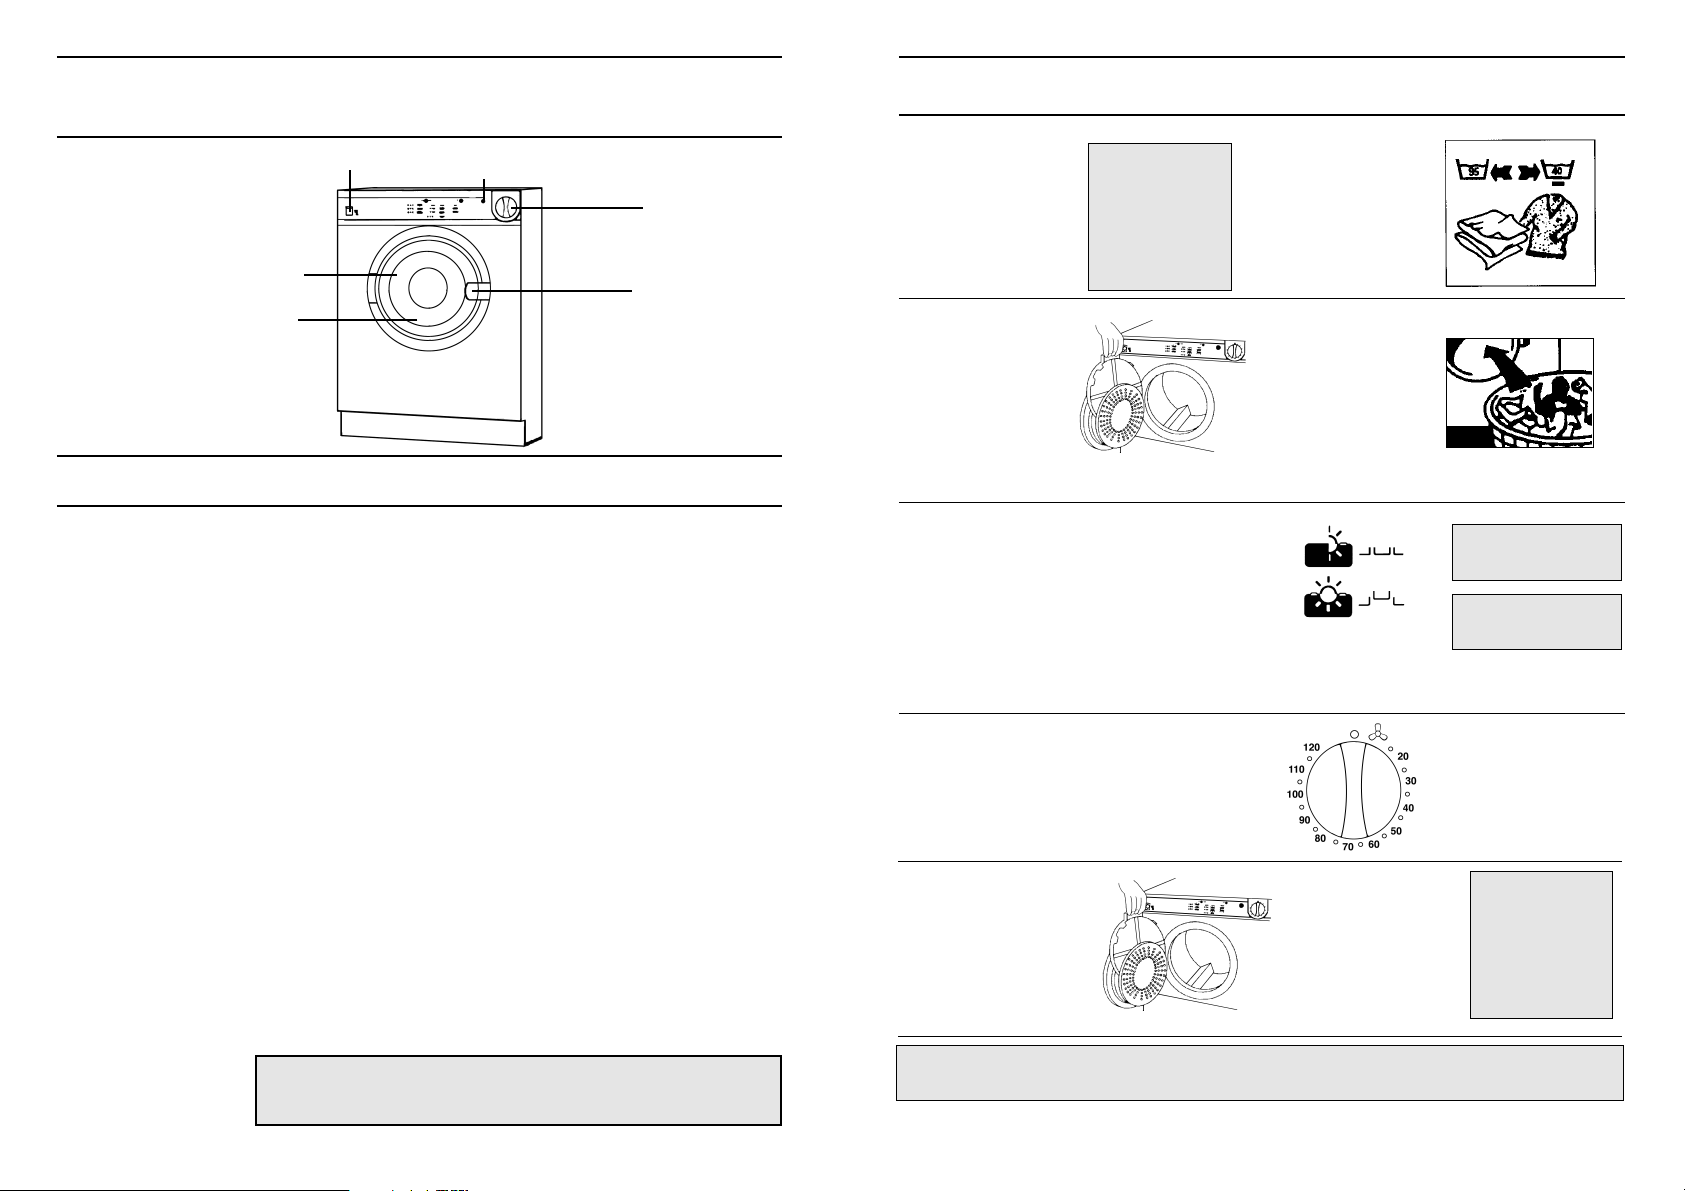
Features - Get to know the main parts of your dryer
How to use your dryer
Mains On/Off
Heat Selector Switch
Filter Assembly
(on inside of the door)
Exhaust Air Grille
Indicator Light
(if fitted)
Where to put and vent your dryer
Your tumble dryer should NOT be located adjacent to a gas hob,
●
cooker, heater, or eye level grill as flames from the burners could
cause damage to your machine.
The dryer should be placed where air can freely circulate around
●
it, preferably near a window that can be opened to reduce the possibility of condensation occuring while the dryer is in use.
When operating the dryer, there has to be adequate ventilation to
●
avoid the back flow of gases into the room from appliances
burning other fuels, including open fires.
A vent hose is recommended for optimum performance.
●
DO NOT operate the dryer in an enclosed environment,
●
ensure the dryer is adequately ventilated.
DO NOT allow clothes, towels etc., to hang down the front of
●
the dryer into the airstream. This obstructs the airflow and
may damage the dryer.
Ensure that the end of the hose is not directed towards the
●
air intake grille at the rear of the dryer.
NOTE:The vent hose should not exceed 2.4 metres in length,
●
and should be kept free of any possible accumulation of fluff
lint (and water) by frequently shaking it out. Always ensure
that the hose is not squashed.
Window Vent Kit
Wall Hanging Kit
A venting kit is available as an optional extra, which will take the moist
air directly from the dryer and out through an open window.
The venting kit is fitted to the front of the door.
This allows the dryer to be mounted on a wall of suitable strength to
take the weight. Alternatively it should be used when the dryer is
mounted on top of a work surface to secure the dryer to the wall.
WARNING:
DO NOT DISCHARGE THE EXHAUST AIR INTO A FLUE WHICH IS
USED FOR EXHAUSTING FUMES FROM OTHER APPLIANCES
BURNING GAS OR OTHER FUELS.
Timer Knob
Door Release
1. Plug in, switch
on electricity.
3. Open the door.
Check that the fluff
filter is clean (see
section How to
remove and clean
the fluff filter).
5. Select the
relevant heat setting
(see section “Sorting
your Laundry”).
Push IN for full heat, for cottons, linens and
synthetics.
Low setting - button OUT for acrylics and
acrylic mixtures.
6. Turn the Timer
clockwise to select the
required drying time.
(See Section “The
Controls”.)
The dryer will start
7. When finished
open the door and
take out the laundry.
Clean and replace
the fluff filter.
Never switch the dryer off with a hot load in the drum.
You must terminate every programme with the Cool Tumble Phase.
WARNING:WHEN
SWITCHING ON
OR OFF, PLEASE
ENSURE THAT
YOUR HANDS
ARE DRY
2. Sort your laundry (see section
“Sorting Your
Laundry”)
4. Load the dryer
placing the clothes
carefully in the
drum, pushing
them well towards
the back and away
from the door seal.
Close the door.
8. Switch off electricity
and remove plug from
socket.
Button OUT
LOW HEAT
Button IN
HIGH HEAT
WARNING:WHEN
SWITCHING ON
OR OFF, PLEASE
ENSURE THAT
YOUR HANDS
ARE DRY
3
Page 6
Sorting your laundry
Wash Care Labels
Maximum
load size
Typical load
1. Always separate laundry into the correct fabric groups before
washing and drying.
2. See that all zips are closed, hooks and eyes are fastened and
belt, strings etc. are tied loosely in bows, you will normally have
done this for each item before the washing stage.
3. It is important to extract as much water as possible from each
item before drying. This saves you time and money.
WARNING: CLOTHES SHOULD NEVER BE LOADED
DRIPPING WET
4. Make sure that the items to be dried are suitable for tumble
drying, or are not of a type requiring ‘special attention’ (see“Wash
Care Labels” section).
Your dryer will hold a load of 3kg (6.6lb) dry weight of natural fabrics.
if you are drying items of man-made fibres (synthetic or acrylics), the
maximum load should not exceed 2kg (4.4lb) dry weight.
This difference is that man-made fibres require more space to
tumble-dry without creasing.
WARNING: DO NOT OVERLOAD AS THIS COULD RESULT IN
REDUCED DRYING PERFORMANCE AND A POSSIBLE FIRE
HAZARD.
To help you estimate how many items it takes to make up a drying
load, the charts below show the approximate weights of some
everyday washing items.
Clothes
Blouse Cotton 150g 5oz
1
2oz
1
/2oz
/2oz
Other 100g 3 1/
Dress Cotton 500g 1lb 2oz
Other 350g 12oz
Jeans 700g 1lb 6oz
10 Nappies 1000g 2lb 3oz
Shirt Cotton 300g 10
Other 200g 7oz
T-Shirt 125g 4
Household Items
Duvet cover Cotton 1500g 3lb 5oz
(Double)
Large Tablecloth 700g 1lb 6oz
Small Tablecloth 250g 9oz
Tea Towel 100g 3
Bath Towel 700g 1lb 8oz
Hand Towel 350g 12oz
Double Sheet 500g 1lb 2oz
Single Sheet 350g 12oz
Other 1000g 2lb 3oz
1
/2oz
Most of today’s fabrics can be tumble dried in your Dryer with no
trouble at all, but there are certain fabric finishes which should be
dried away from direct heat.
The majority of garments now have wash-care labels on them, giving
full washing and drying instructions. These should always be followed
carefully especially when you are drying something for the first time.
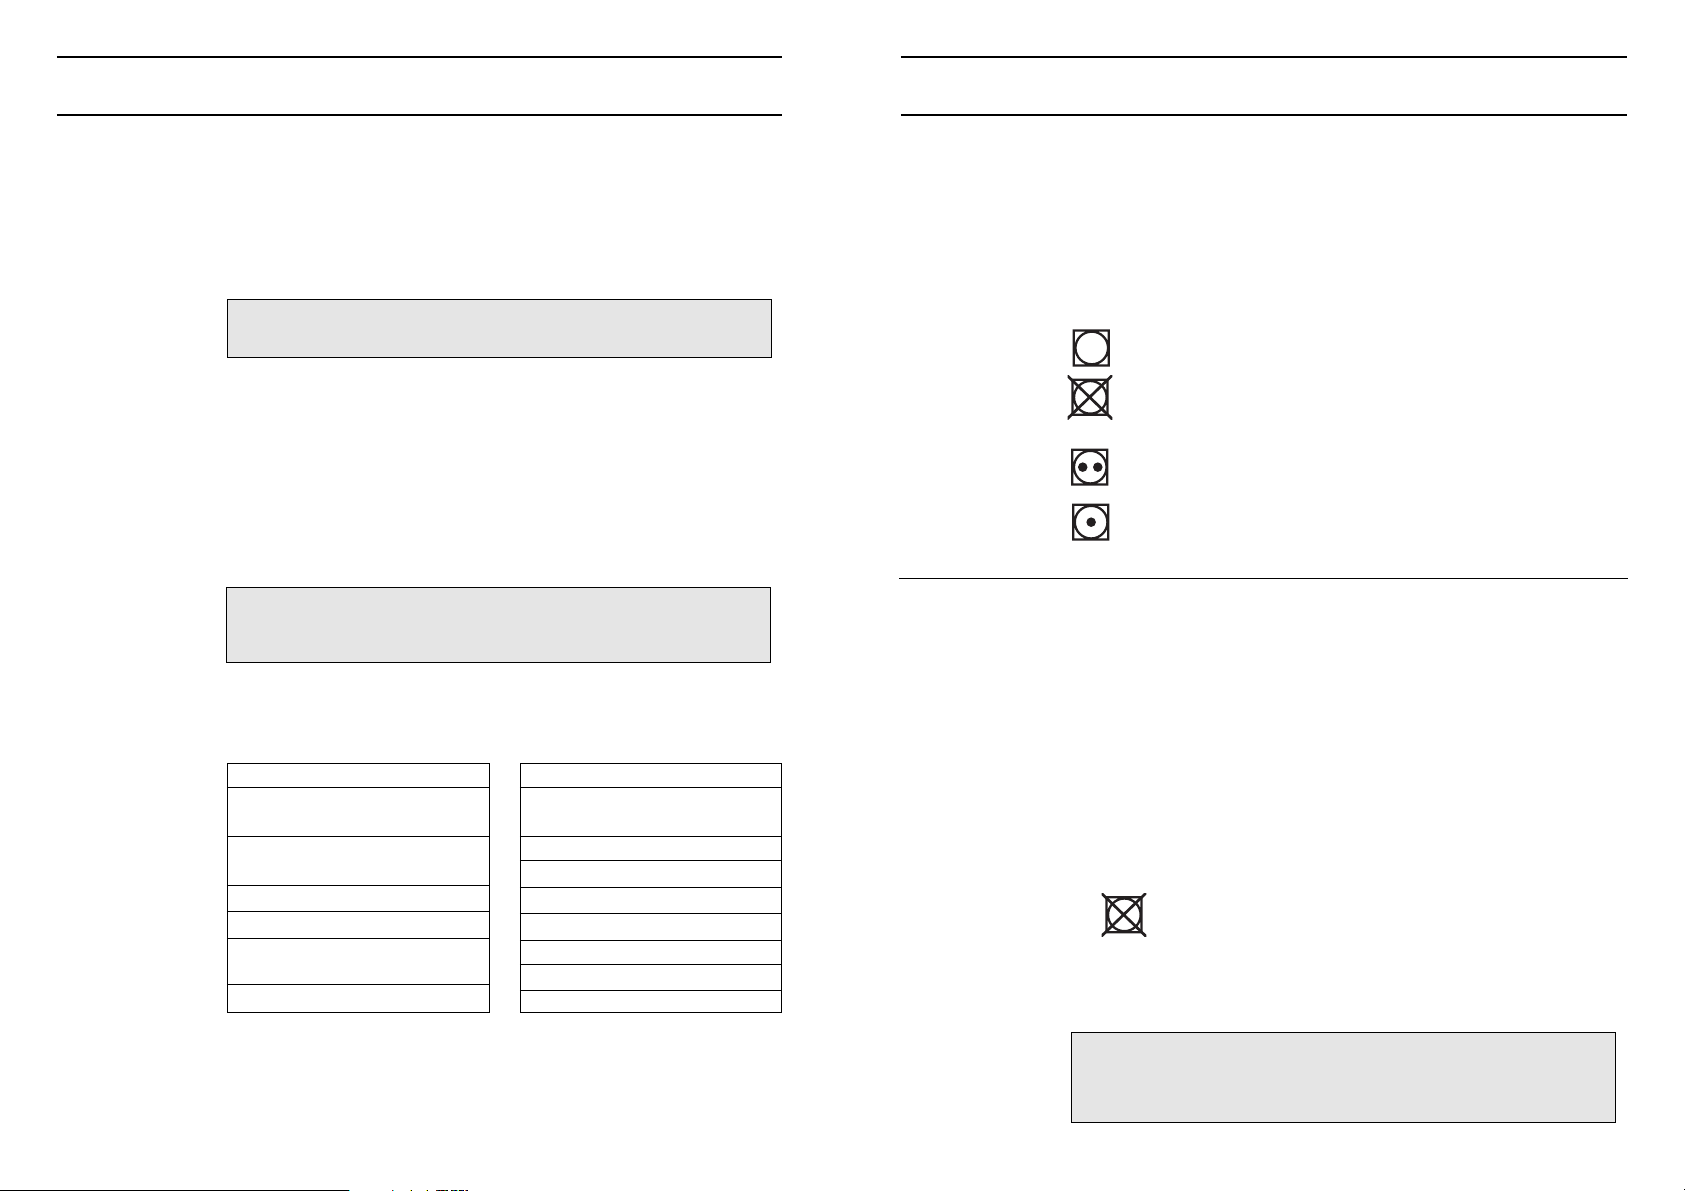
Typical symbols are:
May be tumble dried
Do not tumble dry
Or:
Tumble dry at high heat setting
Tumble dry at low heat setting
Items not suitable for tumble drying
• Those containing foam rubber or rubber-like materials or plastic
film (e.g. pillows, cushions, PVC rainwear), or any other articles
which are inflammable or contain inflammable substances (e.g.
towels contaminated with hair lacquer
• Fibreglass (e.g. some types of curtains)
• Items which have been dry cleaned
• Woollens. Woollen items need as much care in drying as they do
in washing. The movement of the tumble-drying action causes the
woollen fibre to shrink and distort.
• Garments with the ITCL Code (see ‘Items Requiring Special
Attention’).
Do not tumble dry.
• Large bulky items e.g. continental quilts, sleeping bags, pillows,
cushions, double blankets and large bedspreads. These expand
when drying and would prevent airflow through the Dryer.
If you group small cotton or terry-towelling items with a synthetic
fabric load they could be damp at the end of the drying cycle. If this
happens simply give them an additional short period of drying to
finish them off.
WARNING: THE DRYER IS INTENDED FOR USE ONLY
WHERE WATER SOLUTION IS USED FOR THE CLEANING
PROCESS. MISUSE OF A TUMBLE DRYER MAY CREATE A
FIRE HAZARD.
4
Page 7

Items requiring special attention
The Controls
Blankets and
Bedspreads
Permanently
pleated or creased
garments
Starched articles
Fabric conditioner
Home Dry
Cleaning
The drying requirements of blankets and bedspreads will, of course,
vary tremendously according to size and weight. Some, however are
simply too big. if you have difficulty getting them into the Dryer, the
machine will have difficulty drying them properly. Blankets (and
Garments) made from Acrylic fibres (e.g. Acilan, Courtelle, Orion and
Dralon) must be dried with special care on Low heat setting.
Overdrying should be avoided to ensure heat creasing does not
occur.
Your dryer will cope with such clothes very well, but you should
always read the manufacturer’s drying instructions attached to the
garment before you begin.
Starched articles should be dried together in the same load to avoid
the distribution of starch to non-starched items. You should use a
slightly heavier starch solution than you would when drying the items
on the washing line. Make sure that as much of the solution is
removed from the load as possible before placing it in the Dryer.
Remove the items from the dryer as soon as they reach ironing
dampness. If they are overdried the starch will powder, leaving the
fabric limp - which rather defeats the purpose of the exercise!
To make sure all your tumble dried clothes come out really fresh and
soft we recommend you use a liquid fabric conditioner in the final
rinse of your wash. A liquid fabric conditioner restores bounce and
softness and helps eliminate static cling.
WARNING: ON NO ACCOUNT SHOULD LIQUID FABRIC
CONDITIONER BE ADDED TO THE DRYER ITSELF.
Garments with the ITCL Code may be cleaned using one of the
Home Dry Cleaning Kits available.
The instructions supplied with the Home Dry Cleaning Kit must be
strictly followed.
Timer Control
Door Release
Heat Selection
Turn the timer clockwise to select the required drying time.
The timer controls the drying time for both heat settings. All you have
to do is turn the Timer Knob clockwise until it lines up with the required
time.
Never wind the timer control anti-clockwise.
This operation also starts the dryer, provided the door is closed and
the machine is plugged in.The “Guide To Drying Times” section will tell
you how much time you’ll need for various loads.
To open door, grip the handle and pull towards you.
If the door is opened while the Dryer is in use, the drying programme
cuts out automatically and the machine stops. When the door is
closed the Dryer will restart but you will not need to reset the Timer
Control.
You can however reset the Timer Control at any stage, should you
wish.
WARNING: CHILDREN HAVE BEEN KNOWN TO CLIMB INTO
TUMBLE DRYERS AND INJURE THEMSELVES. ALWAYS
ENSURE THAT THE MACHINE IS SWITCHED OFF AT THE
MAINS WHEN THE DRYER IS NOT BEING USED.
Select the appropriate position for low heat or for high heat.
With the switch IN High Heat is selected
With the switch OUT Low Heat is selected
The choice of FULL HEAT or LOW HEAT depends upon the fabric you
wish to dry (see section “Sorting your Laundry”).
5
Page 8
Guide to Drying Times
How to remove and clean the fluff filter
Please note that the Drying Times stated below and on appliance
control panel are a GUIDE only and drying times are affected by:
The amount of
water remaining in
the clothes after
Items such as towelling retain a lot of water after spinning, also the
suggested wash programme for small items such as T-Shirts may
sometimes incorporate a low spin speed which has the same effect.
spinning
The type of fabric
Your drying load may contain the same type of fabric but of different
thicknesses. Thinner items will take less time to dry. Some fabrics,
such as those used for jeans are of closer texture than others and
although light when dry will be heavy after washing and spinning.
The quantity of
clothes to be dried
How dry you want
the clothes
Single items of clothes or small loads may take disproportionally
longer to dry. It is more energy efficient to dry larger loads.
As it takes longer to fully dry clothes than to have them ready for
ironing, you may wish to remove some clothes when they are slightly
damp, ready for ironing and then continue to dry the remainder until
they are fully dry.
The heat setting
you have selected
The temperature
of the room
Bulky items
The label on the garment should tell you the correct heat setting to
select. See ‘Wash Care Labels’.
If the room in which the dryer is situated is cold, your clothes will take
longer to dry than if the room is warm.
Some bulky items such as padded jackets can be dried, with care,
and we do advise that you remove these items several times, shake
them and return them to the dryer. THERE ARE HOWEVER SOME
ITEMS THAT WE DO NOT ADVISE YOU TO DRY. SEE ‘ITEMS NOT
SUITABLE FOR TUMBLE DRYING’
Drying Guide - approximate drying time in minutes (weights specified are when dry)
COTTONS SYNTHETICS ACRYLICS
High Heat High Heat Gentle Heat
Drying times 800 - 1000rpm
in washing machine
1 kg
30 - 45
Half
load
2 kg
45 - 55
Full
load
3 kg
60 - 70
Drying times on reduced
spin in washing machine
Half
load
1 kg
25 - 45
Full
load
2 kg
45 - 60
Drying times on
reduced spin in
washing machine
Half
load
1 kg
30 - 55
Full
load
2 kg
55 - 75
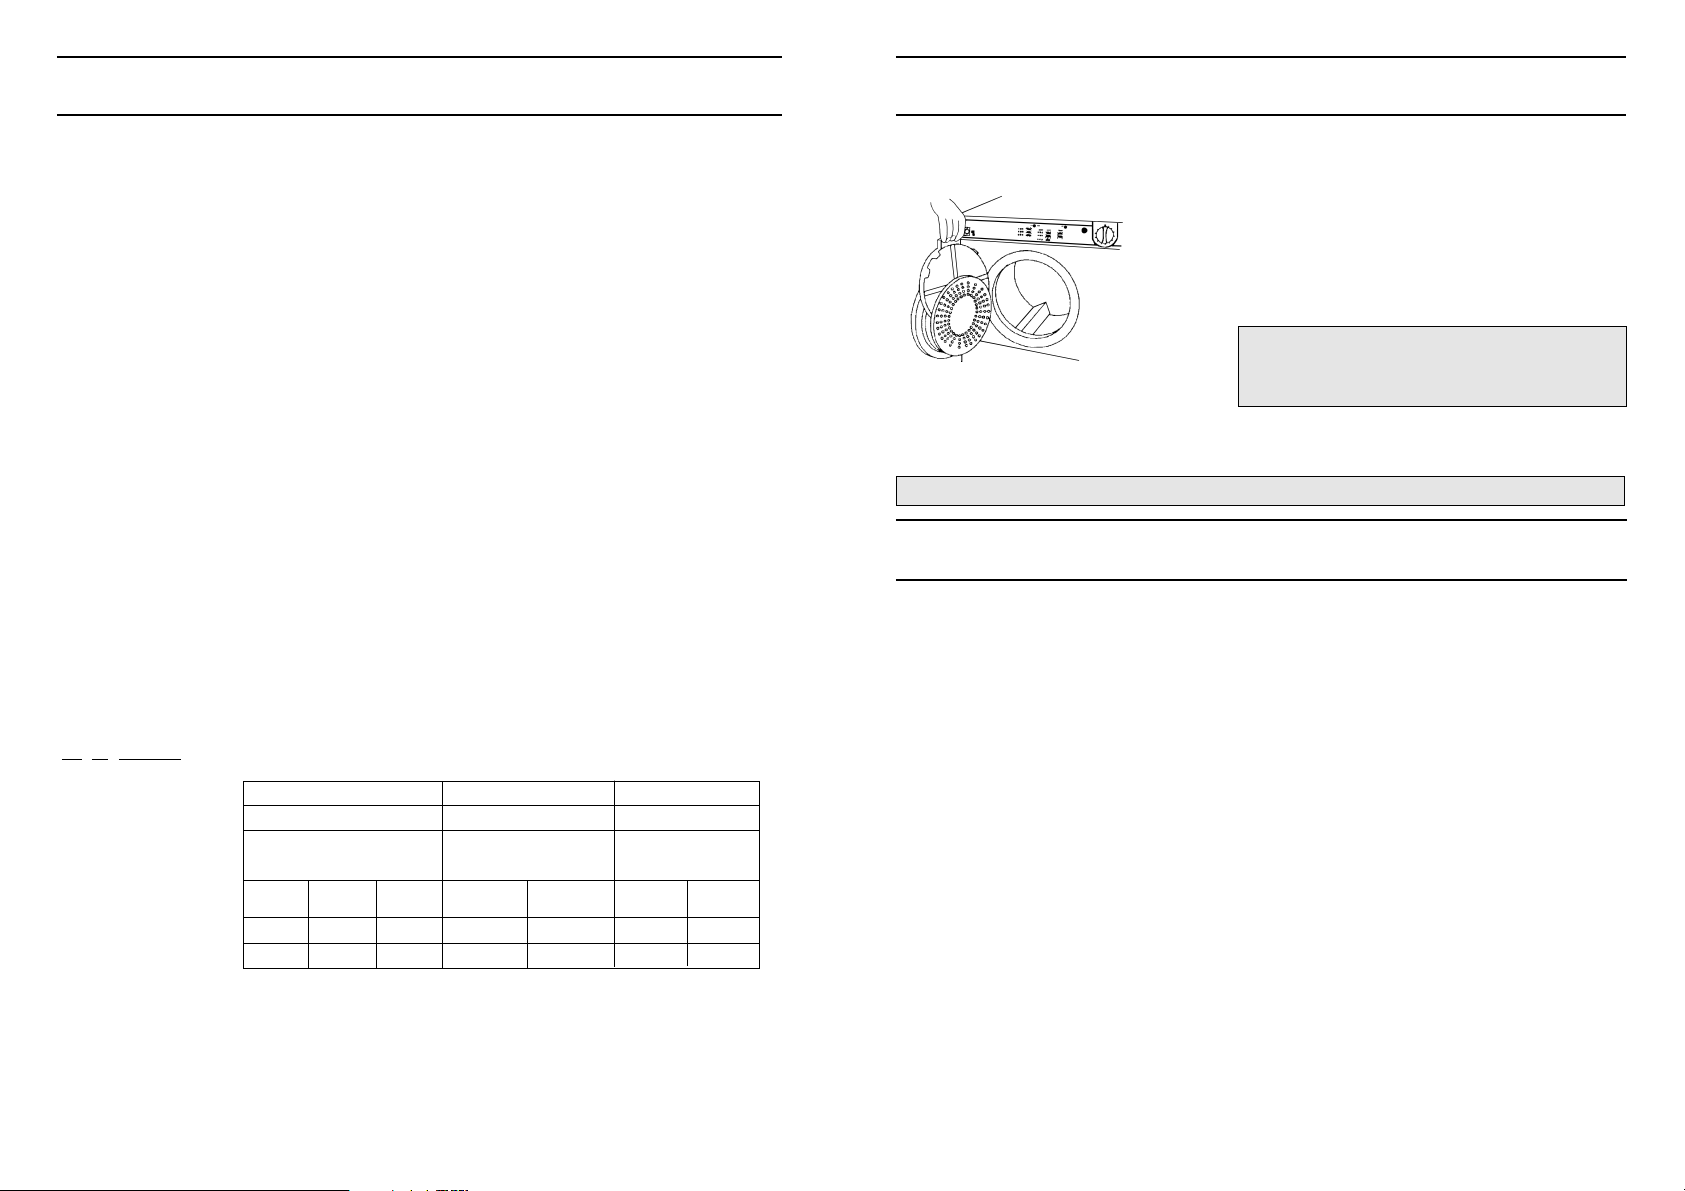
To remove the filter
Wash or vacuum clean the filter occasionally.
Don’t be alarmed by the amount of fluff you may find on the filter. It’s part of the wearing, washing and
drying process.
WARNING: DO NOT OPERATE THE DRYER WITHOUT THE FILTER IN POSITION.
A very important part of your dryer is the fluff filter at
the front edge of the drum. It’s there to trap the particles of lint and fluff which are normally blown away
when clothes are dried on the washing-line.
if the filter is allowed to become blocked, the passage
of warm air through the drum will be severely restricted. This means your clothes will take much longer than
normal to dry and the cost of drying them will be
increased. it may also damage your dryer.
WARNING: DO NOT OPERATE THE DRYER
WITHOUT CLEANING THE FILTER AFTER
EACH DRYING CYCLE. FAILURE TO CLEAN
THE FILTER MAY RESULT IN A FIRE HAZARD.
Caring for your Dryer
Your tumble dryer needs very little attention. The following simple
steps will keep it performing well.
When finished
After each load
As necessary
Lubrication
Switch off electricity and remove plug.
Always clean the filter and turn the drum by hand to check that small
items like handkerchiefs do not get missed.
Clean exterior metal and plastic surfaces with a damp cloth or silicon
polish only. Regularly check and clean if necessary, the vent hose and
any permanent venting fixture to ensure that there has been no accumulation of fluff or lint during the drying process.
Do not use abrasive cleaners, scouring agents, acids, chlorine
bleach or metal polish to clean any part of the machine. These could
damage the machine.
Your tumble dryer uses special bearing components. Lubrication by
the user is not necessary and must not be attempted.
Be careful not to
overdry
6
All fabrics contain a little natural moisture even when ‘dry’ and this
natural moisture should not be lost if the clothes are to remain soft
and fluffy. Clothes that are dried for too long tend to wrinkle and will
need more ironing than usual giving you extra work that the dryer
was designed to remove.
We strongly recommend that all appliances are regularly checked for
electrical and mechanical safety.
Page 9
If something goes wrong
First, don’t panic! There may be nothing wrong at all. Look for your
problem below, then check the things we suggest. More often than
not, this will give you the answer to your problem, and you’ll be able
to carry on without having to telephone your Service Office.
If it still won’t work...
Contact the Service Office
If something is still wrong with your machine after you’ve been
through the check-list on the previous page:
1. Switch off and unplug your machine from the mains.
2. Call your nearest Service Office or local importer.
Problem
‘It won’t start’
‘It is taking a long
time to dry’
Any other
problem
If after this you still cannot get your machine to work, follow the
advice given on the next page.
Check these things first
1. Is the machine plugged in and switched on at the socket?
2. Is the Timer Control set to required time?
3. Is the door securely closed?
4. Has the fuse blown? (Try plugging in another appliance to check)
5. Have you used an extension lead? Many are not suitable. Try
plugging the dryer directly into a socket to check.
1. Have you forgotten to clean the filter? It should be cleaned after
each load.
2. Have you selected the correct Heat setting for the type of fabric
you are drying?
3. Is the flexible Vent Hose blocked or kinked? Check it for foreign
objects or condensate (water).
4. Is the air inlet obstructed in any way?
5. Permanent venting - is flap on the storm cover obstructed?
6. Were the clothes ‘excessively wet’ when they were put in?
7. Was the correct time selected?
8. Have you overloaded the dryer?
Have you re-read this instruction book?
When you contact us we will want to know the following:
1. Your name, address and postcode.
2. Your telephone number.
3. Clear and concise details of the fault.
4. The model number and the serial number of your dryer.
5. The date of purchase enter the date here.
Please make sure you have all these details ready when you call.
Spare parts
Please remember your new appliance is a complex piece of
equipment.
‘DIY” repairs or unqualified and untrained service people may put you
in danger, could damage the appliance, and might mean you lose
cover under the Parts Guarantee.
If you do experience a problem with the appliance don’t take risks,
call in our Service Engineer. Our Spare Parts are designed
exclusively to fit your appliance. Do not use them for any other
purpose as you may create a safety hazard.
Recycling and Disposal Information
As part of our continued commitment to helping the environment, we
reserve the right to use quality recycled components to keep down
customer costs and minimise material wastage.
● Disposal of packaging materials: follow local regulations, so that
packaging can be recycled.
● To minimise the risk of injury to children, remove the door and
plug - then cut off the mains cable, flush with the appliance.
Dispose of these parts separately to ensure that the appliance
can no longer be plugged into a mains socket.
This appliance conforms to the following EEC Directives.
Low Voltage Equipment
72/23/EEC
93/68/EEC
Electromagnetic Compatibility
89/336/EEC
92/31/EEC
93/68/EEC
Disposal of old electrical appliances
The European Directive 2002/96/EC on Waste Electrical and
Electronic Equipment (WEEE), requires that old household electrical
appliances must not be disposed of in the normal unsorted municipal
waste stream. Old appliances must be collected separately in order
to optimise the recovery and recycling of the materials they contain
and reduce the impact on human health and the environment.
The crossed out “wheeled bin” symbol on the product reminds you of
your obligation, that when you dispose of the appliance it must be
separately collected.
Consumers should contact their local authority or retailer for
information concerning the correct disposal of their old appliance.
7
Page 10

Français
Sommaire
Pour votre sécurité 2
Exigences en matière d’électricité 2
Caractéristiques - Familiarisez-vous avec les principaux éléments de votre sèche-linge 3
Emplacement et aération du séchoir 3
Comment utiliser le séchoir 3
Séparation des vêtements 4
Etiquettes de précautions de lavage 4
Articles ne convenant pas au séchoir rotatif 4
Articles qui requièrent une attention spéciale 5
Les commandes 5
Guide de la durée de séchage 6
Pour enlever et nettoyer le filtre de peluches 6
Entretien du séchoir 6
Si un problème se pose 7
Si le problème persiste 7
1 FRANÇAIS
Enregistrez dès maintenant votre achat
Il vous suffit de remplir et de renvoyer le formulaire d’enregistrement fourni avec
la documentation de votre appareil.
Conservation de ce livret
Ce livret de consignes doit être gardé à portée de main car il contient des détails
importants sur l’utilisation correcte et en toute sécurité de cette machine.
Si vous vendez ou donnez cette machine à quelqu’un d’autre, ou si vous déménagez et la
laissez, veillez à ce que ce livret reste avec la machine afin que le nouveau propriétaire
puisse se familiariser avec la machine et les consignes de sécurité.
Page 11
Pour votre sécurité
Pour votre sécurité
IMPORTANT
Votre séchoir rotatif est facile à utiliser.
Pour votre propre sécurité et pour tirer le meilleur parti de l’appareil, il est toutefois important de connaître votre séchoir et de lire entièrement ce manuel avant d’utiliser le séchoir
la première fois.
NE JAMAIS ● Laisser les enfants jouer avec le séchoir ou nuire à son
fonctionnement
NE JAMAIS ● Laisser s’obstruer l’entrée d’air à l’arrière du séchoir, la sortie
d’air ou le conduit d’aération.
NE JAMAIS ● Diriger la bouche du conduit d’aération vers l’entrée d’air à
l’arrière de la machine.
NE JAMAIS ● Laisser le séchoir rotatif recycler l’air d’échappement.
NE JAMAIS ● Eteindre la machine en laissant une charge encore chaude dans
le tambour.
NE JAMAIS ● Faire sécher si le filtre n’est pas en place.
NE JAMAIS ● Dépasser la charge maximale recommandée ou placer des
articles qui dégouttent dans le tambour.
NE JAMAIS ● Utiliser le séchoir sur un tapis dont les fibres empêchent l’air de
pénétrer dans le séchoir pas le dessous.
NE JAMAIS ● Permettre aux peluches de s’accumuler autour du séchoir.
NE JAMAIS ● Ajouter de conditionneur de tissu liquide ou en feuille, utiliser le
conditionneur liquide au rinçage final durant le lavage.
NE JAMAIS ● Utiliser le séchoir pour un usage commercial, ce séchoir ne
convient qu’à un usage domestique.
NE JAMAIS ● Sécher d’acryliques à une température élevée.
NE JAMAIS ● Sécher des articles qui N’ONT PAS été bien lavés à l’eau et au
savon, puis bien rincés et essorés.
NE JAMAIS ● Faire sécher au sèche-linge des chiffons ou autres qui ont été
utilisés avec des détergents ou produits de nettoyage chimiques.
NE JAMAIS ● Sécher d’articles contaminés par des produits inflammables
comme l’essence, l’huile, la peinture, la laque pour cheveux, les
crèmes, la graisse ou l’huile de cuisson.
NE JAMAIS ● Sécher avec le séchoir rotatif : caoutchouc, caoutchouc mousse,
plastique, mousse de plastique, couches pour bébés ou sacspoubelles, polythène ou papier.
De gros articles encombrants y compris les couettes et sacs de
couchage.
NE JAMAIS ● Tenter de se tenir debout sur le séchoir; il n’a pas été conçu à
cet effet et vous pourriez vous blesser et endommager l’appareil
par un tel traitement.
NE JAMAIS ● Mettre sous tension ou hors tension si vous mains sont mouillées.
IMPORTANT
UN ENFANT PEUT MONTER DANS LE SECHOIR OU LE DEREGLER SI
L’APPAREIL EST LAISSE SANS SURVEILLANCE. QUAND LA MACHINE
N’EST PAS UTILISEE, L’ETEINDRE, RETIRER LA FICHE ET FERMER LA
PORTE.
TOUJOURS ● Eteindre l’appareil, retirer la fiche électrique et fermer la porte de
TOUJOURS ● Se conformer aux exigences électriques spécifiées.
TOUJOURS ● S’assurer que le séchoir est correctement installé et jouit d’une
TOUJOURS ● Utiliser la conduite d’aération pour obtenir un séchage optimum.
TOUJOURS ● Terminer chaque programme par un cycle à l’air frais disponible
TOUJOURS ● Nettoyer le filtre, il est essentiel que le filtre ne soit jamais
TOUJOURS ● Observer les règles de séchage des vêtements :
TOUJOURS ● Acheter des accessoires et des pièces de rechange d’origine.
la machine quand elle n’est pas utilisée.
aération adéquate. (voir “Emplacement et aération du séchoir.”)
sur la commande.
obstrué par des peluches.
Les articles de laine, en particulier, ne doivent pas être placés
dans le séchoir rotatif s’ils n’ont pas d’étiquette «Super
lavage» , «Lavable à la machine» ou le symbole «Convient à
un séchoir rotatif»:
En cas de doute, ne pas sécher de laine dans la machine.
Contrairement à d’autre matériel, le rétrécissement de la laine
est irréversible, c’est-à-dire que la laine ne retrouve pas sa
forme et sa taille originales.
ATTENTION:
en cours d’utilisation du sèche-linge, éviter de toucher
l’arrière de l’appareil car il risque
d’être très chaud
Exigences en matière d’électricité
ATTENTION: Cet appareil doit être mis à la terre.
REPORTEZ-VOUS A LA PLAQUE DE SPECIFICATIONS POUR
CONNAITRE LE VOLTAGE ET LES EXIGENCES ACTUELLES.
(voir schéma pour l’emplacement.)
Le séchoir doit être branché au secteur grâce à une prise qui
demeure accessible après l’installation du séchoir.
Les fils du câble du secteur possèdent des couleurs codées :
VERT/JAUNE - MISE A LA TERRE
BLEU - NEUTRE
BRUN - PHASE
S’il faut installer une prise de remplacement, le fil bon doit être
branché à la borne appropriée, la prise qui a été enlevé doit être éliminée de façon sécuritaire. NE PAS la laisser où elle pourrait être
branchée à une prise et constituer un danger électrique.
Changement
du câble du
secteur
S’il faut remplacer le câble du secteur, veuillez contacter votre Centre
de services le plus prêt. Des frais seront exigés pour le remplacement
du câble du secteur ou s’il vous faut un câble plus long.
Le câble du secteur ne doit être remplacé que par un câble spécial obtenu d’un fournisseur de pièces de rechange et installé
par un électricien qualifié.
REMARQUE : EN CAS DE DOUTE AU SUJET DES POINTS
PRECEDENTS, CONSULTEZ UN ELECTRICIEN QUALIFIE
!
FRANÇAIS 2
Page 12
Caractéristiques - Prenez connaissance des
principales parties de votre séchoir
Bouton de sélection de température
Filtre (à l'intérieur de la porte)
Grille d'air d'évacuation
Voyant Sous/Hors tension
(si applicable)
Minuterie
Ouverture de porte
Emplacement et aération du séchoir
●
Votre séchoir rotatif NE DOIT PAS être placé à côté d’une plaque
chauffante, un appareil de chauffage ou un gril à hauteur des yeux
fonctionnant au gaz, car les flammes des brûleurs peuvent endommager
votre machine.
●
Placer le séchoir dans un emplacement où l'air peut circuler librement,
de préférence près d'une vitre que l'on peut ouvrir, afin de réduire les
possibilités de condensation pendant le fonctionnement du séchoir.
●
Pendant le fonctionnement du séchoir, il est indispensable de prévoir une
bonne ventilation afin d’éviter le retour dans le local de gaz provenant
d’appareils brûlant d’autres combustibles (ex.feux de bois à foyer ouvert).
●
Pour une performance optimum, il faut utiliser un tuyau
d’aération.
●
NE PAS faire fonctionner le séchoir dans un local sans aération.
Vérifier que le séchoir est suffisamment aéré.
●
NE PAS suspendre de vêtements, serviettes, etc. à l'avant du
séchoir dans le flux d'air sinon cela risque d'obstruer le flux d'air et
d'endommager le séchoir.
●
S’assurer que l’extrémité du tuyau n’est pas dirigée vers la grille
d’entrée d’air à l’arrière du séchoir.
●
REMARQUE : Le tuyau d’aération ne doit pas dépasser une longueur
de 2,4 mètres et doit être libre de peluches (ou d’eau). Pour ce faire,
il faut le secouer régulièrement. Toujours s’assurer que le tuyau ne
soit pas écrasé.
Kit d'aération dans
une vitre
Kit de montage
mural
3 FRANÇAIS
Proposé en option, le kit d'aération dans une fenêtre permet d'évacuer
directement l'humidité du séchoir pour le faire sortir par la vitre ouverte.
Ce kit d'aération se monte à l'avant de la porte.
Ce kit d'aération permet de monter le séchoir sur un mur présentant une
résistance suffisante pour supporter son poids. En variante, il faut l'utiliser
si le séchoir est monté sur une surface de travail. Il permettra de fixer le
séchoir dans le mur.
ATTENTION: NE PAS DÉCHARGER L’AIR D’ÉVACUATION DANS UN
TUYAU UTILISÉ POUR LES FUMÉES D’ÉVACUATION DE GAZ DE
COMBUSTION PROVENANT D’AUTRES APPAREILS OU D’AUTRES
COMBUSTIBLES.
Comment utiliser le séchoir
1. Brancher
l’appareil, le mettre
sous tension.
Ouvrir la porte.
3.
Vérifier si le filtre de
peluches est propre
(Voir la section “Pour
enlever et nettoyer le
filtre de peluches”).
5.
Sélectionner le réglage
de température approprié
(voir section “Séparation
des vêtements”)
Température élevée : ENFONCER ce bouton
pour obtenir le réglage Température élevée
pour le coton, le lin et les synthétiques.
Basse température : Faire RESSORTIR le
bouton pour les acryliques et mélanges
d'acryliques.
ATTENTION:
LORSQUE VOUS
ALLUMEZ OU
ETEIGNEZ L’APPAREIL, S’ASSURER D’AVOIR LES
MAINS SECHES.
6. Sélectionner la durée de séchage
approprié.
Tourner la commande de la minuterie
dans le sens des aiguilles d’une
montre pour choisir la durée désirée.
Le séchoir se mettra en marche.
(voir section «Les commandes»)
7. Lorsque terminé,
ouvrir la porte et retirer
les vêtements. Nettoyer
et replacer le filtre de
peluches.
Ne jamais éteindre le séchoir lorsque une charge chaude est encore dans le tambour. Il faut
toujours terminer un programme avec la phase de «rotation à l’air frais».
2. Séparer les
vêtements (voir
section «Séparation
des vêtements»)
4. Charger le séchoir,
placer soigneusement
les vêtements dans le
tambour en les poussant
vers le fond et en
s’assurant qu’ils
n’encombrent pas la
fermeture de la porte.
Fermer la porte.
Mettre hors
8.
tension et
débrancher la fiche
électrique.
Bouton RESSORTI -
BASSE
TEMPÉRATURE
Bouton ENFONÉ -
TEMPÉRATURE
ÉLEVÉE
ATTENTION:
LORSQUE VOUS
ALLUMEZ OU
ETEIGNEZ L’APPAREIL, S’ASSURER D’AVOIR LES
MAINS SECHES.
Page 13

Séparation des vêtements
Etiquettes de précautions de lavage
Charge maximale
Charge normale
1. Toujours séparer les vêtements en fonction du type de tissu avant
de les laver et de les sécher.
2. S’assurer que toutes les fermetures éclair sont fermées, que les
crochets et boutonnières sont attachés et que les ceintures, les
cordons etc. forment une boucle. Il faut effectuer ces préparatifs
pour chaque article avant le lavage.
3. Il est important d’éliminer le maximum d’eau de chaque article
avant de le sécher. Cette mesure vous fera économiser du temps
et de l’argent.
ATTENTION : LES VETEMENTS NE DOIVENT JAMAIS ETRE
CHARGES S’ILS DEGOUTTENT.
4. S’assurer que les articles à sécher conviennent au séchoir rotatif et
ne requiecont pas d’«attention spéciale». (Voir la section
«Etiquettes de précautions de lavage»).
Votre séchoir peut contenir une charge de 3 kg de linge sec de tissus
naturels. Si vous séchez des articles de tissu artificiel (synthétique ou
acrylique) la charge maximale ne doit pas dépasser 2 kg de linge sec.
La différence tient au fait que les fibres artificielles prennent plus de
place dans le séchoir rotatif sans se froisser.
ATTENTION : NE PAS SURCHARGER LE SECHOIR, CECI
POURRAIT REDUIRE LA PERFORMANCE DE SECHAGE ET
CONSTITUER UN RISQUE D’INCENDIE.
Pour vous aider à évaluer le nombre d’articles convenant à une
charge de séchage, les tableaux suivants indiquent le poids
approximatif de certains articles courants.
Vêtements
Chemisier Coton
Autre
Robe
Jeans 700g
10
couches
Chemise
T-Shirt 125g
Coton 500g
Autre
Coton 300g
Autre
150g
100g
350g
1000g
200g
Articles domestiques
Couverture de
couette (double)Autre
Grande nappe
Petite nappe
Torchon à vaisselle
Serviette de bain
Serviette essuie-mains
Drap double
Drap simple
Coton 1500g
1000g
700g
250g
100g
700g
350g
500g
350g
Si vous placez de petits articles en coton ou en tissu-éponge avec
une charge de tissus synthétiques, ils peuvent être encore mouillés à
la fin du séchage. Si cela se produit, les faire sécher une courte
période supplémentaire.
De nos jours, la plupart des tissus peuvent être séchés sans problème dans le séchoir rotatif, mais certaines finitions de tissu ne
doivent pas être séchées à la chaleur directe.
La majorité des vêtements possèdent des étiquettes de précautions
de lavage qui fournissent des instructions de lavage et de séchage. Il
faut toujours suivre attentivement ces instructions, en particulier la
première fois que vous séchez un article.
Les symboles les plus connus sont les suivants :
Peut être séché dans un séchoir rotatif
Ne pas sécher dans un séchoir rotatif
Ou:
Régler le séchoir rotatif à température élevée
Régler le séchoir rotatif à température basse
Articles ne convenant pas au séchoir rotatif
• Ceux qui contiennent du caoutchouc mousse, des matières sem
blables au caoutchouc, du film plastique (par exemple, les oreillers,
les coussins, les imperméables en PVC) et tous autres articles
inflammables ou contenant des substances inflammables.(par
exemple des serviettes imbibées de laque pour cheveux).
• Fibre de verre (certains types de rideaux par exemple)
• Articles qui ont été nettoyés à sec
• Lainages. Les article en lainage requièrent autant de soin pour le
séchage que pour le lavage. Le mouvement du tambour du
séchoir rotatif peuvent rapetisser ou déformer la fibre de laine.
• Vêtements comportant le Code ITCL (voir,’Articles qui requièrent
une attention spéciale’).
Ne pas sécher dans le séchoir rotatif
• Les gros articles encombrants, par exemple les édredons, les sacs
de couchage, les oreillers, les coussins, les couvertures doubles et
les couvre-lits épais. Ces articles s’élargissent lors du séchage et
empêchent la circulation d’air dans le séchoir.
ATTENTION : LE SECHOIR EST CONCU POUR USAGE AVEC
DES ARTICLES LAVES DANS UNE SOLUTION A L’EAU. UNE
MAUVAISE UTILISATION DU SECHOIR ROTATIF PEUT
ENTRAINER DES RISQUES D’INCENDIE.
FRANÇAIS 4
Page 14

Articles qui requièrent une attention spéciale
Les Commandes
Couvertures et
couvre-lits
Vêtements plissés
et pliés de façon
permanente
Articles empesés
Conditionneur de
tissu
Nettoyage à sec
maison
Il est évident que les conditions de séchage des couvertures et des
couvre-lits varient énormément selon leur taille et leur poids. Certains
sont tout simplement trop gros. Si vous avez de la difficulté à les
charger dans le séchoir, la machine aura de la difficulté à les sécher
correctement. Les couvertures (et les vêtements) en fibres d’acrylique
(par exemple Acilan, Courtelle, Orion et Dralon) doivent être séchées
avec précaution à basse température.Il faut éviter de trop sécher pour
empêcher le plissage dû à la chaleur.
Votre séchoir traitera très bien ces vêtements, mais il faut toujours lire
les instructions de séchage du fabricant attachées aux vêtements
avant de commencer.
Les articles empesés doivent être séchés ensemble dans la même
charge pour éviter que l’empois se répande sur des articles non
empesés. Il faut utiliser une solution d’empois un peu plus dense que
celle utilisée pour les articles séchés sur la corde à linge. S’assurer
que le maximum de solution soit retiré de la charge avant de la placer dans le séchoir.
Enlever les articles du séchoir dès qu’ils atteignent l’humidité requise
pour le repassage. S’ils sont trop séchés, l’empois se transforme en
poudre et le tissu se ramollit, ce qui constitue une belle perte de
temps!
Pour s’assurer que les vêtements séchés dans le séchoir rotatif soient
frais et souples, nous recommandons d’utiliser un conditionneur de
tissu liquide dans le dernier rinçage du lavage. Un conditionneur de
tissu liquide restaure le rebond et la douceur et élimine l’électricité
statique.
ATTENTION : EN AUCUN CAS, UN CONDITIONNEUR
LIQUIDE NE DOIT ETRE MIS DANS LE SECHOIR.
Les vêtements portant le code ITCL peuvent être nettoyés en
utilisant l’un des kits de nettoyage à sec maison disponibles.
Les instructions fournies avec le kit de nettoyage à sec maison
doivent être strictement suivies.
Réglage de la
minuterie
Ouverture du
hublot
Sélection de la
température
Tourner la minuterie dans le sens des aiguilles d’une montre pour
choisir la période de séchage requise.
La durée de séchage pour les deux niveaux de température est
contrôlée par la minuterie. Tout ce que vous avez à faire est de
tourner la Commande de la minuterie dans le sens des aiguilles d’une
montre jusqu’à ce que la durée désirée soit alignée avec l’indicateur.
Ne jamais tourner la commande de la minuterie dans le sens
contraire des aiguilles d’une montre.
Cette action démarre le séchoir, à condition que la porte soit fermée
et que l’appareil soit branché au secteur. La section “Guide de la
durée de séchage” vous indique la durée nécessaire pour les divers
types de charge.
Pour ouvrir la porte, tenez la poignée et tirez vers vous.
Si on ouvre la porte pendant que le séchoir est en marche, le
programme de séchage s’interrompt automatiquement et la machine
s’arrête. Quand on referme la porte, le séchoir redémarre, mais il
faudra de nouveau régler la minuterie.
De toutes façons, il est possible de rerégler la minuterie à chaque
stade, si vous le désirez.
ATTENTION : LES ENFANTS ONT TENDANCE A GRIMPER
DANS LE SECHOIR ROTATIF ET PEUVENT SE BLESSER.
TOUJOURS S’ASSURER QUE LA MACHINE EST
DEBRANCHEE A LA PRISE DE COURANT LORSQU’ELLE
N’EST PAS UTILISEE.
Sélectionner le réglage de température approprié:
Bouton ENFONCÉ, TEMPÉRATURE ÉLEVÉE
Bouton RESSORTI, BASSE TEMPÉRATURE
Le choix entre TEMPÉRATURE ÉLEVÉE ou BASSE TEMPÉRATURE
est fonction du type de tissu à sécher (voir section “Séparation des
vêtements”)
5 FRANÇAIS
Page 15

Guide de la durée de séchage
Pour enlever et nettoyer le filtre de peluche
Veuillez noter que les durées de séchage indiquées ci-dessous et sur le
panneau de commandes de l’appareil ne le sont qu’à titre INDICATIF et
que la durée de séchage est influencée par :
La quantité d’eau
retenue dans les
vêtements après
l’essorage
Le type de tissu
Les articles comme les serviettes retiennent beaucoup d’eau après l’essorage. Le programme de lavage suggéré pour de petits articles comme
les T-shirts peut comporter un lent cycle d’essorage pouvant avoir le
même effet.
Votre charge de séchage peut comprendre des tissus de même type,
mais d’épaisseur différente. Les articles plus minces prennent moins de
temps pour sécher. Certains tissus, comme ceux utilisés pour les jeans
sont plus denses et, bien que légers lorsqu’ils sont secs, sont plus lourds
après le lavage et l’essorage.
La quantité de
vêtements à sécher
Le degré de
séchage requis
Les articles séchés seuls ou les petites charges peuvent, de façon disproportionnée, prendre plus de temps à sécher. Il est plus économique de
sécher de grosses charges.
Comme il faut plus de temps pour sécher complètement des vêtements
que pour sécher des vêtements pour le repassage, il est possible de retirer certains vêtements lorsqu’ils sont légèrement humides, prêts pour le
repassage, puis de continuer le séchage avec les autres articles jusqu’à
ce qu’ils soient entièrement secs.
Le réglage de
chaleur choisi
La température de
la pièce
Articles
encombrants
L’étiquette sur le vêtement devrait indiquer la bonne température de
séchage requise. Voir la section ‘Etiquettes de précautions de lavage’.
Si la pièce où se trouve le séchoir est froide, vos vêtements prendront
plus de temps à sécher que si elle est chaude.
Certains articles encombrants comme les vestons matelassés peuvent
être séchés avec précaution, mais nous recommandons de retirer ces
articles plusieurs fois, de les secouer et de les remettre dans le séchoir.
IL Y A CEPENDANT CERTAINS ARTICLES QUE NOUS RECOMMANDONS DE NE PAS SECHER. VOIR ‘ARTICLES NE CONVENANT PAS
AU SECHOIR ROTATIF’.
Guide de séchage - temps de séchage approximatif en minutes (le poids indiqué est pour les vêtements secs)
Pour retirer le filtre
Un élément très important de votre sèche-linge est le filtre à
peluche situé à l’avant du tambour. Il sert à piéger les
particules pelucheuses qui s’envolent naturellement lorsque
les vêtements sont séchés sur une corde à linge.
Si le filtre se colmate, la circulation de l’air chaud dans le
tambour sera gravement perturbée. En conséquence, les
vêtements prendront beaucoup plus de temps à sécher et le
coût du séchage augmentera. Cela peut également
endommager le sèche-linge.
AVERTISSEMENT: APRES CHAQUE SEANCE DE
SECHAGE, NETTOYEZ LE FILTRE. NE FAITES PAS
MARCHER LE SECHE-LINGE SANS AVOIR NETTOYE LE
FILTRE. SI LE FILTRE N’A PAS ETE NETTOYE, IL PEUT Y
AVOIR UN RISQUE D’INCENDIE.
De temps en temps, lavez le filtre ou nettoyez-le à l’aspirateur.
Ne vous alarmez pas de la quantité de peluche que vous trouverez sur le filtre. Cela fait
partie du processus d’usure, de lavage et de séchage.
AVERTISSEMENT:
NE FAITES PAS MARCHER LE SECHE-LINGE SANS LE FILTRE.
Entretien du séchoir
Votre séchoir rotatif ne requiert que peu d’entretien. Les procédures
suivantes le maintiendront en bon état.
Lorsque terminé
Après chaque
charge
Mettre hors tension et retirer la fiche électrique.
Toujours nettoyer le filtre et faire tourner le tambour manuellement pour
vérifier si les petits articles comme les mouchoirs n’y sont pas restés.
COTON SYNTHÉTIQUE ACRYLIQUE
Température élevée Température élevée Température douce
Temps de séchage 800 à 1000 tours/minute dans le
lave-linge
Demi
charge
1 kg
30 - 45
Attention de ne pas
trop faire sécher
2 kg
45 - 55
Tous les tissus contiennent une humidité naturelle, même quand ils sont
jugés ‘secs’et cette humidité naturelle ne doit pas être perdue afin de conserver la douceur et la souplesse des vêtements. Les vêtements qui sont
Charge
complète
3 kg
60 - 70
Temps de séchage avec essorage
réduit dans le lave-linge
Demi
charge
1 kg
25 - 45
Charge
complète
2 kg
45 - 60
Temps de séchage avec
essorage réduit dans le
lave-linge
Demi
charge
1 kg
30 - 55
séchés trop longtemps ont tendance à se plisser et exigent plus de repassage que d’habitude, ajoutant une somme de travail que le séchoir vise
précisément à éliminer.
Charge
complète
2 kg
55 - 75
Au besoin
Lubrification
Nettoyer les surfaces extérieures de métal et de plastique avec un linge
humide ou une cire de silicium seulement. Vérifier régulièrement et, au
besoin, nettoyer le tuyau d’aération et tout autre dispositifs d’aération
permanents pour s’assurer que les peluches ne se sont pas accumulées
durant le séchage.
Ne pas utiliser de nettoyants abrasifs, des produits de récurage, des
acides, de l’eau de Javel ou de cire pour métaux pour nettoyer les diverses parties de la machine. Ces produits peuvent endommager la machine.
Votre séchoir rotatif comportent des éléments d’articulation spéciaux.
L’utilisateur n’a pas besoin de les lubrifier et ne doit pas tenter de le faire.
Nous recommandons fortement que tous les appareils soient
régulièrement vérifiés pour assurer leur sécurité électrique et mécanique.
FRANÇAIS 6
Page 16

Si un problème se pose
Ne paniquez pas! Il se peut qu’il n’y ait pas de problème du tout.
Identifiez le problème dans la liste ci-dessous, puis prenez note des
suggestions. La plupart du temps, celles-ci offriront une solution vous
permettant de continuer sans avoir à contacter le Centre de services.
Si, après avoir essayé ces suggestions, la machine ne fonctionne toujours pas, suivez les recommandations à la page suivante.
Problème
« Il ne veut pas
démarrer »
« Il faut beaucoup
de temps pour le
séchage »
D’autres
problèmes?
7 FRANÇAIS
Vérifiez d’abord ces suggestions
1. Est-ce que la machine est branchée et en fonction au niveau de
la prise de courant?
2. Est ce que la commande de minuterie est réglée à la durée
désirée?
3. Est-ce que la porte est bien fermée?
4. Est-ce que le fusible a sauté? (Essayez de brancher un autre
appareil pour vérifier).
5. Avez-vous utilisé une rallonge électrique? Plusieurs de ces ral
longes ne conviennent pas. Essayez de brancher le séchoir
directement dans la prise électrique pour vérifier.
1. Avez-vous oublié de nettoyer le filtre? Il faut le faire après
chaque charge.
2. Avez-vous sélectionné le degré de température requis pour le
type de tissus à faire sécher?
3. Est-ce que la conduite d’aération est bloquée ou entortillée?
Vérifiez s’il y a des corps étrangers ou de la condensation (eau).
4. Est-ce que l’entrée d’air est bloquée d’une façon ou d’une autre?
5. Aération permanente - est-ce que le rabat sur le couvercle de
protection contre la pluie est bloqué?
6. Est-ce que les vêtements étaient «excessivement mouillés»
lorsque déposés dans le séchoir?
7. Est-ce que la bonne durée de séchage a été sélectionnée?
8. Est-ce que la charge est trop grosse?
Avez-vous lu de nouveau ce manuel d’instructions?
Cet appareil est conforme aux directives de la CEE suivantes :
Equipement à bas voltage
72/23/EEC
93/68/EEC
Compatibilité électromagnétique
89/336/EEC
92/31/EEC
93/68/EEC
Si le problème persiste...
Contactez le Centre de services
Si après avoir lu la liste de la page précédente, il y a toujours un
problème avec votre machine.
1. Mettre la machine hors tension et débrancher de la prise de courant.
2. Appelez le Centre de services le plus prés ou l’importateur local.
Lorsque vous nous contactez, il nous faudra connaître les
renseignements suivants:
1. Votre nom, adresse et code postal.
2. Votre numéro de téléphone.
3. Une description brève et précise du problème.
4. Le numéro du modèle et le numéro de série de votre séchoir.
5. La date d’achat. Inscrire la date ici.
Assurez-vous de posséder tous ces renseignements lorsque vous
appelez.
Pièces de rechange
N’oubliez pas que votre nouvel appareil est un équipement complexe.
Les réparations « maison» ou celles réalisés par des personnes non
qualifiées ou non formées peuvent constituer un danger, endommager
l’appareil et peuvent annuler votre droit de bénéficier de la Garantie sur
les pièces.
Si vous avez un problème avec l’appareil, ne prendre aucun risque,
appelez un technicien d’entretien. Nos pièces de rechange sont conçus
exclusivement pour convenir à votre appareil. Ne pas les utiliser pour
aucun autre usage, cela peut constituer un risque important.
Information recyclage et enlèvement de nos produits
Dans le cadre de notre engagement envers la protection de
l’environnement, nous nous réservons le droit d’utiliser des pièces
recyclées de qualité afin de réduire les coûts pour notre clientèle et
de limiter les gaspillages de matières premières.
●
Élimination du matériau d’emballage: respectez les réglementations
locales, de manière à ce que ’emballage puisse être recyclé.
●
Pour éviter que des enfants se blessent, ôtez la porte et la prise et
puis coupez le câble secteur au ras de l’appareil. Jetez ces pièces
séparément de sorte que l’appareil ne puisse plus être branché
sur une prise de secteur.
Enlèvement des appareils ménagers usagés
La Directive Européenne 2002/96/EC sur les Déchets des
Equipements Electriques et Electroniques (DEEE), exige que les
appareils ménagers usagés ne soient pas jetés dans le flux normal
des déchets municipaux. Les appareils usagés doivent être collectés
séparément afin d’optimiser le taux de récupération et le recyclage
des matériaux qui les composent et réduire l’impact sur la santé
humaine et l’environnement.
Le symbole de la ‘‘poubelle barrée’’ est apposée sur tous les produits
pour rappeler les obligations de collecte séparée.
Les consommateurs devront contacter les autorités locales ou leur
revendeur concernant la démarche à suivre pour l’enlèvement de
leur vieil appareil.
Page 17

Español
Indice
Para su seguridad 2
Requisitos Eléctricos 2
Características - Conozca las piezas principales de su secadora 3
Dónde colocar y cómo ventilar su secadora 3
Cómo utilizar el tambor secador 3
Cómo organizar la colada 4
Etiquetas con Recomendaciones para el Lavado 4
Artículos que no pueden secarse a máquina 4
Artículos que requieren especial atención 5
Los controles 5
Guía de Tiempo de Secado 6
Cómo quitar y limpiar el Filtro de Pelusa 6
Cuidado del tambor secador 6
Problemas en el funcionamiento 7
Si continua sin funcionar 7
Registre su compra ahora mismo
Solamente tiene que rellenar y devolvernos el Impreso de Registro que se le ha
entregado con los documentos del aparato.
Guarde este Manual de Instrucciones
Este manual de instrucciones se ha de guardar a mano para su referencia futura, ya que
contiene información importante sobre el uso seguro y correcto del aparato.
Si vende o cede el aparato a otra persona, o si se muda de casa y deja la lavadora en el
domicilio anterior, cerciórese de que el nuevo dueño entre en posesión del Manual para
que se familiarice con el aparato y las advertencias de seguridad.
ESPAÑOL 1
Page 18

Para su seguridad
Para su seguridad
IMPORTANTE
Su Secadora es fácil de utilizar.
No obstante, para su propia seguridad y con el fin de obtener los mejores resultados, es
importante que lea el manual completo de su secadora antes de utilizarla por primera
vez.
NUNCA ● Permita que los niños jueguen o interfieran en la secadora.
NUNCA ● Permita que se obstruya la entrada de aire en la parte posterior
de la secadora, así como la salida de aire o el tubo de ventilación.
NUNCA ● Oriente la salida del tubo de ventilación hacia la toma de aire
situada en la parte posterior de la máquina.
NUNCA ● Permita que la secadora recicle el aire de escape.
NUNCA ● Desenchufe la máquina cuando haya una colada caliente dentro
del tambor.
NUNCA ● Seque cuando el filtro no esté colocado en su posición correcta.
NUNCA ● Sobrecargue la máquina (por encima de la cantidad recomenda-
da), ni meta ropa empapada dentro del tambor.
NUNCA ● Coloque la secadora sobre un suelo alfombrado cuando el pelo
de la alfombra pueda impedir que pase el aire por la base de la
secadora.
NUNCA ● Permita que se acumule pelusa alrededor de la secadora.
NUNCA ● Añada líquido o suavizante en la secadora; utilice suavizante
líquido en el aclarado final de su lavado.
NUNCA ● Utilice la secadora para uso comercial. Esta secadora ha sido
diseñada tan solo para uso doméstico.
NUNCA ● Seque tejidos acrílicos en la temperatura más alta.
NUNCA ● Seque artículos que NO se hayan lavado bien anteriormente con
agua y detergente, y estén bien aclarados y centrifugados.
NUNCA ● Seque ropa que haya sido limpiada utilizando productos químicos.
NUNCA ● Seque artículos contaminados con sustancias inflamables, tales
como: gasolina, aceite, pintura, laca de pelo, cremas y grasas o
aceite de cocina.
NUNCA ● Seque: goma, goma espuma, plástico, plástico expansible,
braguitas pañal o pañales interiores, polietileno o papel. Artículos
grandes y abultados, como por ej. edredones o sacos de dormir.
NUNCA ● Se suba encima de la secadora; no está diseñada para ello y
podría resultar lesionado o bien dañar la lavadora.
NUNCA ● Conecte y desconecte la electricidad con las manos mojadas.
IMPORTANTE
LOS NIÑOS PUEDEN METERSE DENTRO DE LA SECADORA O MANIPULARLA SI SE LES DEJA SOLOS.
SIEMPRE QUE NO SE UTILICE LA MAQUINA: APAGUELA, DESENCHUFELA Y CIERRE LA PUERTA.
2 ESPAÑOL
SIEMPRE ● Que no utilice la secadora: apáguela, desenchúfela y cierre la
SIEMPRE ● Cumpla los requisitos eléctricos especificados.
SIEMPRE ● Asegúrese de que la secadora se ha instalado correctamente y la
SIEMPRE ● Utilice el tubo de ventilación con el fin de obtener los mejores
SIEMPRE ● Finalice cada programa con el control de ajuste del ciclo en la
SIEMPRE ● Limpie el filtro. Es esencial que el filtro esté libre de pelusa en
SIEMPRE ● Observe las recomendaciones de secado de las prendas:
SIEMPRE ● Compre accesorios y piezas de repuesto originales.
puerta.
ventilación sea la adecuada. (vea “Dónde colocar y ventilación de
la secadora.”)
resultados en el secado.
posición frío.
todo momento.
Los artículos de lana en particular no pueden secarse en una
secadora, a menos que su etiqueta indique que pueden
lavarse en lavadora o bien muestren el símbolo , indicando
que pueden secarse a máquina. De no estar seguro, no seque
los artículos de lana en la secadora. A diferencia de otros
tejidos, el mecanismo de encogimiento de la lana es
irreversible; esto es, no puede volverse a estirar y coger su
forma y tamaño anteriores.
ADVERTENCIA:
No toque la parte posterior de la secadora cuando esté en
marcha, puede estar caliente!
Requisitos Eléctricos
ADVERTENCIA: ¡Este aparato ha de estar conectado a tierra!
VEASE LA PLACA DE DATOS PARA COMPROBAR LOS REQUISITOS DE VOLTAJE Y DE CORRIENTE.
(Vea la ubicación en el diagrama.)
La secadora ha de estar conectada a la red eléctrica con un enchufe
que sea accesible una vez se haya instalado la secadora.
Los cables coloreados en el cable de la red indican lo siguiente:
VERDE/AMARILLO - TIERRA
AZUL - NEUTRO
MARRON - CORRIENTE
En caso de tener que cambiar el enchufe, conecte los cables de
acuerdo con su terminal; y deshágase del enchufe anterior de forma
segura. NO lo deje donde pueda introducirse en una toma de corriente y producir una descarga eléctrica.
Cable de
conexión a la
red
En caso de que haya que cambiar el cable de conexión a la red, contacte con su distribuidor local. Será preciso que abone el recambio del
cable, así como cualquier cable de mayor longitud que necesite.
El cable tan sólo puede cambiarse por otro especialmente
preparado, que puede adquirir a través de su Distribuidor de
Recambios. Este sólo puede instalarlo un electricista cualificado.
NOTA: EN CASO DE CUALQUIER DUDA CONSULTE CON UN
ELECTRICISTA CUALIFICADO.
Page 19

Características - Conozca las partes principales de su secadora
Cómo utilizar el tambor secador
Indicador de encendido /
Selector de calor
apagado (si instalado)
Temporizador
Conjunto de filtro (parte
interior de la puerta)
Cierre de la puerta
Rejilla de salida de aire
Dónde colocar y cómo ventilar su secadora
●
La secadora NO deberá colocarse cerca de una cocina de gas,
calefacción, o parilla puesto que las llamas de los quemadores podrían
ocasionar daños a la misma.
●
La secadora debe instalarse en un lugar en el que el aire pueda circular
libremente a su alrededor, preferentemente cerca de una ventana que
pueda abrirse a fin de reducir la posibilidad de que se produzca condensación mientras se está usando la secadora.
●
Al utilizar la secadora, es necesario que haya una ventilación suficiente
para evitar la reentrada en la habitación de los gases de escape de
aparatos que quemen otros combustibles, incluyendo fuegos abiertos.
●
Se recomienda utilizar un tubo de ventilación para un rendimiento óptimo.
●
NO ponga la secadora en funcionamiento en un lugar cerrado,
compruebe que la secadora tiene una ventilación adecuada.
●
NO deje que la ropa, las toallas, etc., cuelguen delante de la
secadora en la corriente de aire. Esto obstruye el flujo de aire y
pudiera dañar la secadora.
●
Asegúrese de que el extremo de la manguera no esté orientado
hacia la rejilla de entrada de aire, situada en la parte posterior de la
secadora.
●
NOTA: La manguera de ventilación no deberá superar los 2,4
metros de longitud y deberá mantenerse limpia de pelusas, hilas (y
agua), sacudiéndola frecuentemente. Asegúrese siempre de que la
manguera no esté aplastada.
Kit de ventilación
para la ventana
Kit para colgar en la
pared
ADVERTENCIA:
NO CONECTE LA VENTILACIÓN DE LA SECADORA A UN TUBO DE HUMOS QUE
SE UTILICE PARA LOS GASES DE ESCAPE DE APARATOS QUE QUEMEN GAS U
OTROS COMBUSTIBLES.
Opcionalmente, está disponible un kit de ventilación para la ventana, que
expulsará el aire húmedo directamente de la secadora a través de la ventana
abierta. El kit de ventilación se instala en la parte frontal de la puerta.
Éste permite que la secadora se monte sobre una pared de la resistencia
adecuada para resistir el peso. De manera alternativa, debe usarse cuando la
secadora esté instalada sobre una encimera a fin de asegurar la secadora en
la pared.
1. Enchúfelo y
ponga el interruptor
en la posición de
encendido
3. Abra la puerta.
Compruebe que el
filtro de pelusa esté
seco (vea la sección
“Cómo quitar y
limpiar el filtro de
pelusa”).
Seleccione la temperatura
5.
requerida (vea la sección
“Clasificación de la Ropa”)
ADVERTENCIA: AL
ENCENDER O
APAGAR EL
APARATO, POR
FAVOR ASEGÚRSE
DE TENER LAS
MANOS SECAS.
2. Separe la ropa
(vea la sección
“Clasificación de la
Ropa”)
4. Cargue el secador
introduciendo la ropa
con cuidado en el
tambor, empujándola
hacia la parte del
fondo, alejándola de
la puerta. Cierre la
puerta.
Botón FUERA
BAJA TEMPERATURA
Presione el botón hacia dentro para
temperatura alta cuando seque prendas
de algodón, hilo o sintéticas.
Ajuste bajo – Presione el botón hacia
Botón APRETADO
ALTA TEMPERATURA
fuera para prendas acrílicas y con mezcla
de acrílicos.
6. Seleccionar el
tiempo requerido.
Gire el temporizador
hacia la derecha para
ajustar el tiempo
requerido. El secador
comienza a funcionar.
(vea la sección
“Controles”).
Cuando acabe,
7.
abra la puerta para
sacar la ropa. Limpie
el filtro de pelusa y
vuélvalo a poner en
su sitio.
No apague nunca el secador si tiene una carga caliente en el tambor. Es necesario terminar cada
programa con la fase de Giro en Frío.
8. Apague el aparato y
desenchúfelo de la
pared.
ADVETENCIA: AL
ENCENDER O
APAGAR EL
APARATO, POR
FAVO R
ASEGÚRSE DE
TENER LAS
MANOS SECAS.
ESPAÑOL 3
Page 20

Cómo organizar la colada
Etiquetas con Recomendaciones para el
Lavado
Capacidad de
carga máxima
Carga normal
1. Antes de lavar o secar, separe siempre la ropa según el tipo de
tejido.
2. Asegúrese de cerrar cada cremallera y corchete, y que los cintur-
ones y cintas estén atados con un lazo holgado. Deberá hacer
esto con cada artículo antes de lavarlos.
3. Es importante quitar la mayor cantidad de agua posible de los
artículos antes de introducirlos en la máquina; le ahorrará tiempo
y dinero.
ADVERTENCIA: NO META NUNCA ROPA EMPAPADA.
4. Asegúrese de que todos los artículos puedan secarse a máquina,
y que no requieran «atención especial» (véase la sección
«Etiquetas de Atención al Lavado»).
Su secadora puede aguantar una carga de 3kg de tejidos naturales
secos. Si desea secar fibras sintéticas o acrílicas, la carga máxima no
ha de superar los 2kg en seco.
La diferencia consiste en que las fibras sintéticas precisan mayor
espacio para secarse sin arrugarse.
ADVERTENCIA: SI SOBRECARGA LA MAQUINA PUEDE
REDUCIR EL RENDIMIENTO DEL SECADO, ASI COMO
PROVOCAR UN INCENDIO.
Para ayudarle a calcular el número de artículos que puede meter en
un secado, la tabla siguiente le muestra el peso aproximado de
algunos de los artículos que se lavan a diario.
Prendas
Blusa Algodón 150g.
Otro 100g.
Vestido Algodón 500g.
Otro 350g.
Pantalón vaquero 700g.
10 pañales 1000g.
Camisa Algodón 300g.
Otro 200g.
Camiseta 125g.
Si junta tejidos de algodón angosto o de toalla de felpa con tejidos
sintéticos pueden continuar estando húmedos al finalizar el ciclo de
secado. Si así fuese, añada simplemente un ciclo corto de secado
para terminar de secarlos.
Ropa blanca
Funda de edredón Algodón1500g.
(Doble) Otro 1000g.
Mantel grande 700g.
Mantel pequeño 250g.
Paño de cocina 100g.
Toalla de baño 700g.
Toalla de mano 350g.
Sábana doble 500g.
Sábana sencilla 350g.
Su máquina puede secar prácticamente cualquier tipo de tejidos sin
problema alguno; aun así existen ciertos acabados de tejidos que no
pueden secarse con calor directo.
La mayoría de las prendas traen etiquetas con instrucciones completas sobre su lavado y secado. Estas instrucciones han de seguirse
cuidadosamente, especialmente si está secando algo por primera
vez.
Los símbolos típicos son:
Puede secarse a máquina
No seque a máquina
O:
Secado en muy caliente
Secado a baja temperatura
Artículos que no pueden secarse a máquina
• Aquellos que contienen goma espuma, así como materiales
gomosos o envolturas de plástico (por ej. almohadas, cojines,
impermeables de plástico), o bien cualquier artículo inflamable o
que contenga sustancias inflamables (por ej. toallas contaminadas
con laca para el pelo).
• Fibra de vidrio (por ej. algunas cortinas)
• Artículos que se hayan limpiado en seco.
• Lana. Las prendas de lana precisan el mismo tipo de cuidados al
secarse como al lavarse. El movimiento de la secadora encoge y
deforma las fibras de lana.
• Prendas con el código ITCL. (vea, ‘Artículos que requieren
especial atención’).
No seque a máquina.
• Artículos voluminosos, como por ej. edredones continentales,
sacos de dormir, almohadones, cojines, mantas dobles y colchas
grandes. Estos aumentan de tamaño al secarse e impiden la
circulación del aire en la secadora.
ADVERTENCIA: LA SECADORA TAN SOLO PUEDE USARSE
CUANDO SE HA EMPLEADO AGUA EN EL PROCESO DE
LIMPIEZA. EL USO INCORRECTO DE LA SECADORA
PUEDE PROVOCAR UN INCENDIO.
4 ESPAÑOL
Page 21

Artículos que requieren especial atención
Los controles
Mantas y Colchas
Prendas
permanentemente
plisadas o
arrugadas
Artículos
almidonados
Suavizante
Limpieza en seco
en casa
Los requisitos de secado para las mantas y colchas varían enormemente según su tamaño y peso, siendo algunas simplemente demasiado grandes. Si tiene dificultad al meterlas en la secadora, la máquina
tendrá asimismo dificultad en secarlas adecuadamente. Las mantas
(y prendas) hechas con fibras acrílicas (por ej. Acilán, Courtella, Orión
y Dralón) han de secarse con especial cuidado, a baja temperatura.
Ha de evitarse que se sequen excesivamente, o de lo contrario el
calor las puede arrugar.
Su máquina puede secar muy bien estas prendas, pero siempre ha
de leer las instrucciones del fabricante en la etiqueta antes de
empezar el proceso de secado.
Los artículos almidonados han de secarse juntos en un solo grupo, a
fin de evitar que el almidón se distribuya a otros artículos no almidonados. Deberá usar una solución ligeramente más condensada de
almidón que la que usaría normalmente para secar los artículos en
una cuerda al aire libre.
Asegúrese de quitar la mayor cantidad posible de almidón de la ropa
antes de meterla en la secadora. Saque los artículos de la máquina
en cuanto alcancen la humedad adecuada para plancharse. Si se
secan excesivamente, el almidón se convierte en polvo y la prenda
queda sin almidón.
Le recomendamos que use suavizante líquido en el último aclarado
de su lavadora, a fin de asegurarse que todas sus prendas salgan
tersas y suaves de la secadora. Los suavizantes líquidos reviven las
prendas y las dejan suaves, además de que ayudan a eliminar la
reacción estática.
ADVERTENCIA: BAJO NINGUNA CIRCUNSTANCIA DEBE
AÑADIRSE SUAVIZANTE LÍQUIDO A LA SECADORA.
Las prendas con el código ITCL peuden lavarse en seco
utilizando uno de los kits de lavado en seco para casa disponibles.
Las instrucciones que se proporcionan con el kit de lavado en seco
para casa, deben seguirse estrictamente.
Control del
Temporizador
Apertura de la
puerta
Selección de
calor
Gire el temporizador hacia la derecha para seleccionar el tiempo de
secado requerido.
El temporizador controla el tiempo de secado con ambos ajustes de
temperatura.
derecha hasta que aparezca la temperatura deseada a la altura del
indicador.
No gire nunca el control del temporizador hacia la izquierda.
Mediante este control también se pone en funcionamiento el secador,
siempre y cuando la puerta esté cerrada y el aparato haya sido
enchufado. En la sección «Guía de Tiempos de Secado» se indica
cuánto tiempo requiere cada carga.
Para abrir la puerta, agarre el tirador y tire de él hacia
usted.
Si se abre la puerta cuando la secadora está en funcionamiento
el programa de secado se interrumpe automáticamente y la
máquina se para. Cuando se cierra la puerta, la secadora vuelve
a ponerse en funcionamiento sin que usted tenga que reajustar
el Temporizador.
No obstante, usted puede reajustar el Temporizador en cualquier
momento si así lo desea
ADVERTENCIA: LOS NIÑOS PUEDEN METERSE EN EL SECADOR Y
RESULTAR LESIONADOS. ASEGÚRESE SIEMPRE DE QUE EL
APARATO ESTÉ DESCONECTADO DE LA TOMA DE ALIMENTACIÓN
CUANDO NO LO ESTÉ UTILIZANDO.
Seleccione la temperatura requerida:
Con el interruptor hacia dentro se selecciona Temperatura alta
Con el interruptor hacia fuera se selecciona Temperatura baja
La selección de TEMPERATURA ALTA o TEMPERATURA BAJA
depende del tejido que desee secar (Ver sección “
colada
”).
Sólo tiene que girar el Control del Temporizador hacia la
Cómo organizar la
ESPAÑOL 5
Page 22

Guía de Tiempos de Secado
Cómo quitar y limpiar el filtro de pelusa
Por favor observe que los tiempos de secado que se indican más abajo y
en el panel de control del aparato son sólo A TÍTULO ORIENTATIVO, y
que los tiempos de secado se ven afectados por lo siguiente:
Cantidad de agua
que queda en la
ropa después del
centrifugado
Tipo de tejido
Cantidad de ropa a
secar
Cómo de seca
quiere la ropa
El grado de temperatura seleccionado
La temperatura de
la habitación
Artículos grandes
Los artículos como las toallas retienen gran cantidad de agua después del
centrifugado, y además el programa de lavado sugerido para artículos
pequeños como por ejemplo camisetas puede a veces incluir una velocidad baja de centrifugado, que produce el mismo efecto.
Su carga de secado puede contener el mismo tipo de tejido, pero de un
grosor distinto. Los artículos más finos tardan menos en secarse.
Algunos tejidos, como por ejemplo los vaqueros, son de una textura más
apretada que otros, y aunque son ligeros cuando están secos, son pesados después del lavado y el centrifugado.
Las prendas sueltas o las cargas pequeñas pueden tardar un tiempo
desproporcionadamente más largo en secarse. Es más económico desde
el punto de vista energético secar cargas más grandes.
Debido a que lleva más tiempo secar la ropa totalmente que dejarla lista
para la plancha, puede que desee sacar algunas prendas cuando estén
todavía algo húmedas, listas para la plancha, y continuar secando el resto
hasta que esté seco del todo.
En la etiqueta de la prenda verá la temperatura adecuada.Vea “Etiquetas
de Lavado”.
Si hace frío en la habitación en la que está instalado el tambor secador,
la ropa tardará más tiempo en secarse que si estuviera algo caliente.
Algunas prendas grandes, como las chaquetas con relleno, las puede
secar con cuidado; recomendamos que saque estas prendas varias
veces, las sacuda y las vuelva a meter en el tambor secador. NO
OBSTANTE, HAY CIERTOS ARTÍCULOS QUE NO RECOMENDAMOS
QUE SEQUE. VEA ‘ARTÍCULOS NO APROPIADOS PARA EL
TAMBOR SECADOR’.
Guía de Secado - tiempo aproximado de secado en minutos (peso en seco)
ALGODÓN SINTÉTICOS ACRÍLICOS
Alta Temperatura Alta Temperatura Temperatura Moderada
Tiempos de secado 800 - 1000 rpm en lavadora Tiempos de secado en centrifugado
1 kg
30 - 45
Tenga cuidado de
no secar la ropa
demasiado
reducido en lavadora
Media
carga
2 kg
45 - 55
Todos los tejidos contienen un poco de humedad natural cuando están
‘secos’, humedad que no deben perder si quiere que se mantengan
suaves y esponjosos. Los artículos que pone a secar demasiado tiempo
tienden a arrugarse y su planchado será más difícil de lo normal, dándole
un trabajo adicional que el tambor secador debería ahorrarle.
Carga
completa
3 kg
60 - 70
Media
carga
1 kg
25 - 45
Carga
completa
2 kg
45 - 60
Tiempos de secado en centrifugado
reducido en lavadora
30 - 55
Media
carga
1 kg
Carga
completa
2 kg
55 - 75
Para retirar el filtro
Una parte muy importante de su secadora es el
filtro de pelusa situado en el borde delantero del
tambor. Su función es atrapar las partículas de
pelusa que normalmente se desprenden cuando
la ropa se seca colgada en la cuerda de tender
la ropa.
Si se permite que el filtro quede bloqueado, el
paso de aire caliente a través del tambor
quedará muy restringido y además se puede
dañar la secadora.
ADVERTENCIA: NO HAGA FUNCIONAR LA
SECADORA SIN LIMPIAR EL FILTRO DESPUÉS
DE CADA CICLO DE SECADO. SI EL FILTRO NO
SE LIMPIA PUEDE HABER RIESGO DE
INCENDIO.
Lave o limpie con una aspiradora el filtro ocasionalmente.
No se alarme por la cantidad de pelusa que pueda encontrar en el filtro. Es parte del
proceso de desgaste, lavado y secado.
ADVERTENCIA: NO HAGA FUNCIONAR LA SECADORA SIN QUE EL FILTRO ESTÉ BIEN
COLOCADO.
Cuidado del tambor secador
El tambor secador necesita muy pocos cuidados. Los siguientes
pasos sencillos harán que siga funcionando correctamente.
Al acabar de secar
Después de cada
carga
Según sea
necesario
Lubrificación
Apague la alimentación eléctrica y desenchufe la clavija.
Limpie siempre el filtro y haga girar el tambor con la mano para comprobar que no se deja artículos pequeños, como p.ej. pañuelos.
Limpie las superficies exteriores de metal y plástico con un paño
húmedo o con abrillantador de silicona solamente. Compruebe regularmente y limpie si hiciera falta, el tubo de ventilación y cualquier otro
accesorio fijo de ventilación para asegurarse de que no haya habido
acumulación de pelusa o hilos durante el secado.
No utilice en ninguna parte del tambor secador productos
limpiadores abrasivos, estropajos, ácidos, lejía de cloro o abrillantador para metal - cualquiera de ellos podría dañar el aparato.
El tambor secador utiliza unos rodamientos especiales. El usuario no
tiene que lubrificarlos, y no lo debe intentar.
Recomendamos encarecidamente que todos los aparatos sean
inspeccionados en cuanto a su seguridad eléctrica y mecánica.
6 ESPAÑOL
Page 23

Problemas en el funcionamiento
En primer lugar ¡no se asuste! Puede que no ocurra nada. Busque el
problema en el cuadro siguiente y siga los pasos que le sugerimos.
La mayoría de las veces obtendrá la respuesta de su problema, y
podrá seguir sin que tenga que llamar a la Oficina de Servicio al
Cliente.
En caso de que continúe teniendo problemas, siga los consejos que
le damos en la página siguiente.
Problema
«No se pone en
marcha»
«Tarda mucho en
secar»
Cualquier otro
problema
Compruebe antes esto
1. ¿Está la máquina enchufada correctamente?
2. ¿Se ha ajustado el Temporizador en el tiempo deseado?
3. ¿Está la puerta cerrada correctamente?
4. ¿Se ha fundido el fusible? (Enchufe otro aparato para
comprobarlo).
5. ¿Ha utilizado una extensión de cable? Hay muchas que no son las
apropiadas. Pruebe a enchufar la secadora directamente en un
enchufe.
1. ¿Se ha olvidado de limpiar el filtro? Este ha de limpiarse siempre
después de usar la secadora.
2. ¿Ha seleccionado el ajuste correcto de temperatura para los tipos
de tejidos que está secando?
3. ¿Está bloqueado o doblado el Tubo flexible de Ventilación?
Compruebe que no haya ningún objeto extraño ni condensación
(de agua).
4. ¿Está obstruida de algún modo la entrada del aire?
5. Ventilación permanente - ¿está obstruida la tapa de la contracubierta?
6. ¿Estaba la ropa que ha metido en la secadora «excesivamente
mojada»?
7. ¿Ha seleccionado el tiempo correcto?
8. ¿Ha sobrecargado la secadora?
¿Ha leído este manual?
Este aparato se ajusta a las siguientes directivas de la CEE.
Aparatos con Bajo Voltaje
72/23/CEE
93/68/CEE
Compatibilidad Electromagnética
89/336/CEE
92/31/CEE
93/68/CEE
Si continua sin funcionar...
Póngase en contacto con la Oficina de Servicio de
Asistencia Técnica
En caso de que la máquina continúe con problemas tras examinar cada
uno de los puntos en la lista de revisión de la página anterior:
1. Apague y desenchufe la máquina de la red eléctrica.
2. Llame a su Oficina de Servicio de Asistencia Técnica más cercana.
Cuando nos llame, será preciso que tenga la siguiente información:
1. Su nombre, dirección y código postal.
2. Su número de teléfono.
3. Información clara y concisa sobre la avería.
4. El número del modelo así como el número de serie de su secadora.
5. La fecha de compra. Escriba la fecha aquí.
Le rogamos tenga toda esta información lista antes de llamar.
Piezas de Repuesto
Recuerde que su nuevo electrodoméstico es un aparato complejo.
Los arreglos que haga usted mismo o personas no cualificadas,
pueden ponerlo a usted en peligro o bien dañar la máquina, del mismo
modo que puede hacer que pierda la garantía que cubre las piezas.
En caso de que se presenten problemas en su secadora, no se arriesgue, llame a nuestro mecánico. Nuestras Piezas de Repuesto están
diseñadas exclusivamente para que se ajusten a su electrodoméstico.
No las use para ningún otro propósito, o de lo contrario podrá poner en
riesgo su seguridad.
Información sobre reciclado y disposición
Como parte de nuestro compromiso continuo por ser responsables
con el medio ambiente, nos reservamos el derecho de utilizar
componentes reciclados de calidad para mantener los costes de
nuestros clientes bajos y reducir el desperdicio de materiales.
●
Desechar el material de embalaje: siga las normativas locales, de
forma que el embalaje pueda reciclarse.
●
Para reducir al mínimo el riesgo de lesiones personales a los
niños, quite la puerta y el enchufe y a continuación corte el cable de
alimentación al ras con el electrodoméstico. Deshágase de estas
piezas por separado a fin de asegurar que el electrodoméstico no
pueda volverse a enchufar al suministro.
Eliminación del electrodoméstico viejo
En base a la Norma europea 2002/96/CE de Residuos de aparatos
Eléctricos y Electrónicos (RAEE), los electrodomésticos viejos no
pueden ser arrojados en los contenedores municipales habituales;
tienen que ser recogidos selectivamente para optimizar la
recuperación y reciclado de los componentes y materiales que los
constituyen, y reducir el impacto en la salud humana y el
medioambiente.
El símbolo del cubo de basura tachado se marca sobre todos los
productos para recordar al consumidor la obligación de separarlos
para la recogida selectiva.
El consumidor debe contactar con la autoridad local o con el
vendedor para informarse en relación a la correcta eleminación de
su electrodoméstico viejo.
ESPAÑOL 7
Page 24

Português
Índice
Para a sua segurança 2
Requisitos eléctricos 2
Caracteristicas - conheça as partes principais do seu secador 3
Onde colocar e ventilar o seu secador 3
Como utilizar o seu secador 3
Separação da roupa 4
Etiquetas de cuidados de lavagem 4
Artigos que não são adequados para secar no secador 4
Artigos que requerem atenção especial 5
Controlos 5
Guia dos tempos de secagem 6
Como retirar e limpar o filtro de cotão 6
Cuidar do seu secador 6
Se algo correr mal 7
Se continua a não funcionar 7
1 PORTUGUÊS
Registe a sua compra agora
Apenas preencha e devolva o Formulário de Registo fornecido com os
documentos de candidatura.
Conservação deste Manual de Instruções
Este Manual de Instruções deve ser mantido num lugar de fácil acesso para consulta,
pois contém detalhes importantes sobre o uso seguro e correto do aparelho.
Se você vender ou passar a máquina para outra pessoa, ou se mudar de casa e a deixar
para trás, certifique-se que este Manual também seja deixado para o novo dono da
máquina para que este possa se familiarizar com o aparelho e os avisos de segurança.
Page 25

Para a sua segurança
Para a sua segurança
IMPORTANTE
A utilização do seu secador de roupa é fácil.
No entanto, para a sua própria segurança e para obter os melhores resultados é
importante conhecer o secador de roupa através deste manual antes de o utilizar pela
primeira vez.
NUNCA ● Deixe que crianças brinquem com o secador ou interfiram de
NUNCA ● Deixe obstruir a entrada de ar na traseira do secador, a saída de ar
NUNCA ● Direccione a saída da mangueira de ventilação para a entrada de
NUNCA ● Deixe que o secador recicle o ar expelido.
NUNCA ● Desligue a máquina deixando uma carga quente no tambor.
NUNCA ● Seque sem o filtro em posição.
NUNCA ● Exceda a capacidade de carga máxima recomendada ou coloque
NUNCA ● Utilize o secador num piso com alcatifa onde a altura do pêlo
NUNCA ● Deixe que se acumule cotão em volta do secador.
NUNCA ● Acrescente líquido ou amaciador de tecidos ao secador, utilize o
NUNCA ● Utilize o secador para secagem comercial, o secador só é
NUNCA ● Seque acrílicos no ajuste de calor máximo.
NUNCA ● Seque artigos que NÃO tenham sido bem lavados em água e
NUNCA ● Secar artigos que contenham produtos químicos empregados em
NUNCA ● Seque artigos que estejam contaminados com substâncias
NUNCA ● Seque: borracha, borracha esponjosa, plástico, espuma plástica,
NUNCA ● Tente pôr-se em pé em cima do secador de roupa, este não foi
NUNCA ● Ligue ou desligue a electricidade com as mãos molhadas.
IMPORTANTE
qualquer maneira com o mesmo.
ou a mangueira de ventilação.
ar na traseira da máquina.
artigos a pingar no tambor.
impeça que o ar entre no secador através da base.
líquido amaciador no enxaguamento final da lavagem.
adequado para uso doméstico.
detergente e a seguir bem enxaguados.
limpezas.
inflamáveis tais como: petróleo, óleo, tinta, lacas de cabelo,
cremes, gordura ou óleo de cozinhar.
cuecas de plástico ou resguardos, politeno ou papel.
grandes, volumosos incluindo edredões e sacos de dormir.
concebido para tal e pode ferir-se ou danificar o secador
abusando dele.
Artigos
UMA CRIANÇA PODE ENTRAR OU MEXER INDEVIDAMENTE NUM
SECADOR DE ROUPA NÃO VIGIADO.
QUANDO A MÁQUINA NÃO ESTIVER A SER UTILIZADA DESLIGUE-A,
RETIRE A FICHA DA TOMADA E FECHE A PORTA.
SEMPRE ● Quando o secador não estiver em utilização, desligue-o, retire a
SEMPRE ● Cumpra os requisitos eléctricos especificados.
SEMPRE ● Certifique-se de que o seu secador de roupa está instalado
SEMPRE ● Utilize a mangueira de ventilação para desempenho óptimo de
SEMPRE ● Termine todos os programas com o ciclo frio de secagem fornecido
SEMPRE ● Limpe o filtro, é essencial que o filtro seja limpo e mantido sempre
SEMPRE ● Cumpra as regras para a secagem dos artigos de roupa:
SEMPRE ● Compre acessórios originais e peças sobresselentes.
ficha da tomada e feche a porta.
correctamente e possui ventilação adequada. (veja, “Onde colocar e
ventilar o seu secador.”)
secagem.
no controlo.
sem cotão.
Em especial, os artigos de lã, não devem ser secos num
secador, a não ser que estes possuam a etiqueta ‘Superwash’,
‘Lavável na máquina’ ou tiverem o símbolo ‘Pode ser seco na
máquina’:
Se tiver dúvidas não seque lã na máquina. Ao contrário de
outros materiais, o mecanismo de encolhimento da lã é
irreversível, ou seja, não estica de novo para o tamanho ou
forma originais.
AVISO:
Quando a secadora estiver a ser utilizada evite tocar na
parte posterior da secadora porque esta pode estar quente!
Requisitos eléctricos
AVISO: Este aparelho tem de ser ligado à terra!
VEJA A PLACA DE ESPECIFICAÇÕES QUANTO AOS REQUISITOS DE TENSÃO E CORRENTE.
(veja o diagrama quanto à localização.)
O secador de roupa deve ser ligado à alimentação da rede através
de uma tomada adequada que fique acessível após a instalação.
Os fios do cabo de alimentação estão coloridos de acordo com o
seguinte:
VERDE/AMARELO - TERRA
AZUL - NEUTRO
CASTANHO - TENSÃO
Se tiver de instalar uma ficha, o fio adequado tem de ser ligado ao
terminal correcto, deve descartar-se da ficha que foi cortada com
segurança. NÃO a deixe onde possa ser inserida numa tomada e
possa criar um risco de choque eléctrico.
Mudar o cabo
de alimentação
Caso seja necessário substituir em qualquer altura o cabo de
alimentação, contacte o seu Centro de Assistência mais próximo.
Para a substituição do cabo de alimentação ou se necessitar de um
cabo maior haverá um custo extra.
O cabo de alimentação só deve ser substituído por um cabo
preparado especialmente, que pode obter do seu armazenista de
peças sobresselentes e instalado por um electricista qualificado.
NOTA: SE TIVER DÚVIDAS SOBRE O MENCIONADO ACIMA CONSULTE UM
ELECTRICISTA QUALIFICADO.
PORTUGUÊS 2
Page 26

Características - Conhecer as peças principais do seu secador de roupa
Como utilizar o seu secador
Botão de Selecção de
Temperatura
Indicador Luminoso de Alimentação
Ligada/Desligada (se instalado)
Selector de Temporização
Montagem de Filtro (no
interior da porta)
Desengate da Porta
Gelha de Ar de Exaustão
Onde colocar e ventilar o seu secador de roupa
O seu secador NÃO deve ser posicionado ao lado de um fogão a gás,
●
aquecedor ou grelha à altura dos olhos, porque as chamas dos bicos
podem danificar a sua máquina.
O secador deverá ser colocado num local onde é possível a livre circu-
●
lação de ar à sua volta, de preferência, perto de uma janela que possa
ser aberta, de modo a reduzir a possibilidade de condensação durante
o seu funcionamento.
Quando operar o secador, deve ter um nível adequado de ventilação
●
para evitar que a corrente de retorno dos gases penetre no compartimento, proveniente de aparelhos que queimem outros combustíveis,
incluindo fogos com chamas.
Para desempenho óptimo recomenda-se uma mangueira de
●
ventilação.
O secador NÃO pode funcionar num ambiente fechado. Certifique-
●
se de que o secador se encontra adequadamente ventilado.
NÂO deixe que a roupa, toalhas, etc caia para a parte anterior do
●
secador para a corrente de ar. Poderá obstruir a circulação de ar e
danificar o secador.
Certifique-se de que a extremidade da mangueira não está dirigida
●
para a grelha de admissão de ar situada na traseira do secador.
NOTA: A mangueira de ventilação não deve ter mais de 2,4 metros
●
de comprimento e deve sacudi-la frequentemente, para evitar a
acumulação de cotão, fiapos (e água). Assegure-se sempre de que a
mangueira não fica comprimida.
Kit de Ventilação
de Janela
Kit de Montagem
na Parede
AVISO:
NÃO DESCARREGAR OS GASES DE ESCAPE PARA UM TUBO DE EVACUAÇÃO UTILIZADO
PARA ESCAPE DOS FUMOS DE OUTROS APARELHOS QUE QUEIMEM GÁS OU OUTROS
COMBUSTÍVEIS.
3 PORTUGUÊS
Encontra-se disponível um kit de ventilação como uma opção extra que retira
o ar húmido directamente do secador, através de uma janela aberta. O kit de
ventilação é instalado na parte anterior da porta.
Este kit permite a montagem do secador numa parede suficientemente forte
para suportar o peso do mesmo. Em alternativa, deverá ser utilizado quando
o secador é montado sobre a parte superior de uma superfície de trabalho,
de modo a segurar o secador na parede.
1. Ligue a ficha à
tomada.
3. Abra a porta.
Verifique que o filtro
de cotão está limpo
(veja a secção como
retirar e limpar o
filtro de cotão).
AVISO: AO LIGAR
OU DESLIGAR,
CERTIFIQUE-SE
DE QUE AS SUAS
MÃOS ESTÃO
SECAS.
2. Separe a sua
roupa (veja a secção
“Separação da
roupa”)
4. Carregue o secador,
colocando com cuidado
a roupa no tambor
empurrando-a bem
para trás e afastando-a
do vedante da porta.
Feche a porta.
5. Seleccione o ajuste de
calor pertinente (veja a secção
“Separação da roupa”)
Carregue o botão para DENTRO para
Botão para FORA
CIMA CALOR BAIXO
seleccionar a temperatura máxima para
algodão, linho e sintéticos.
Baixa temperatura – botão para FORA
Botão para DENTRO
BAIXO CALOR MÁXIMO
para acrílicos e misturas de acrílico.
6. Seleccione o tempo
de secagem requerido.
Rode o Temporizador
da para a direita para
seleccionar o tempo
requerido.O secador
começa.
(veja a secção “Os
controlos”).
Quando tiver
7.
terminado, abra a
porta e tire a roupa.
Limpe e volte a
colocar o filtro de
cotão.
8. Desligue da electricidade retirando a ficha da
tomada.
AVISO: AO
LIGAR OU
DESLIGAR,
CERTIFIQUE-SE
DE QUE AS
SUAS MÃOS
ESTÃO SECAS.
Nunca desligue a alimentação do secador com uma carga quente no tambor.
Deverá concluir todos os programas com uma Fase de Secagem Fria.
Page 27

Separação da roupa
Etiquetas de cuidados de lavagem
Tamanho máximo
de carga
Carga típica
1. Separe sempre a roupa nos grupos de tecidos correctos antes de
lavar e secar.
2. Verifique que todos os fechos de correr estão fechados, colchetes
estão apertados e cintos, fios etc. estão apertados em laços
soltos, normalmente, isto já terá sido feito para cada artigo antes
da fase de lavagem.
3. É importante extrair de cada artigo o máximo de água possível
antes de o secar. Isto poupa-lhe tempo e dinheiro.
AVISO: AS ROUPAS NÃO DEVEM SER CARREGADAS A
PINGAR ÁGUA.
4. Certifique-se de que os artigos que vai secar são adequados para
secar na máquina ou não são do tipo que requerem ‘atenção
especial’ (veja “Etiquetas de cuidados de lavagem”).
O seu secador leva uma carga de 3 kg de peso seco de tecidos
naturais, se estiver a secar artigos de fibras fabricadas pelo homem
(sintéticos ou acrílicos), a carga máxima não deve ultrapassar 2 kg de
peso seco.
Esta diferença deve-se ao facto de que as fibras fabricadas pelo
homem requerem mais espaço para secar sem enrugarem.
AVISO: NÃO SOBRECARREGUE PORQUE PODE RESULTAR
EM DESEMPENHO DE SECAGEM REDUZIDO E POSSÍVEL
RISCO DE INCÊNDIO.
Para o auxiliar, estime quantos artigos é que irá precisar para fazer
uma carga de secagem, as tabelas apresentadas abaixo mostram os
pesos aproximados de alguns artigos de todos os dias.
A maior parte dos tecidos de hoje podem ser secos no secador sem
quaisquer problemas, mas há certos acabamentos de tecidos que
devem ser secos afastados de calor directo.
A maioria do vestuário, actualmente, possui etiquetas de cuidados de
lavagem, fornecendo instruções completas de lavagem e secagem.
Estas devem ser sempre seguidas com cuidado especialmente quando está a secar qualquer coisa pela primeira vez.
Símbolos típicos são:
Pode ser seco na máquina
Não secar na máquina
Ou:
Secar no ajuste de calor máximo
Secar no ajuste de calor baixo
Artigos que não são adequados para secar no secador
• Aqueles que contenham borracha esponjosa ou materiais tipo bor
racha ou capa de plástico (p. ex. almofadas, gabardinas em PVC)
ou quaisquer outros artigos que sejam inflamáveis ou contenham
substâncias inflamáveis (p. ex. toalhas contaminadas com laca de
cabelo)
• Fibra de vidro (p. ex. alguns tipos de cortinas)
• Artigos que tenham sido lavados a seco
Roupas
Blusa Algodão
Outro
Vestido Algodão
Outro
Jeans
10 fraldas
Camisa Algodão
Outro
T-Shirt 125g
150g
100g
500g
350g
700g
1000g
300g
200g
Artigos domésticos
Cobertura de Algodão
edredão (casal)
Toalha de mesa grande
Toalha de mesa pequena
Pano da louça
Lençol de banho
Toalha das mãos
Lençol cama de casal
Lençol cama de solteiro
Outro
1500g
1000g
700g
250g
100g
700g
350g
500g
350g
Se agrupar artigos pequenos de algodão ou toalhas felpudas com
uma carga de tecidos sintéticos, estes podem estar húmidos no final
do ciclo de secagem. Se isto suceder, basta pô-los a secar de novo
durante um período curto para acabarem de secar.
• Lãs. Os artigos de lã necessitam de tanto cuidado ao secar como
ao lavar. O movimento da acção do secador faz com que a fibra
de lã encolha e distorça.
• Artigos com o código ITCL (veja, ‘Artigos que requerem atenção
especial’).
Não secar na máquina
• Artigos grandes e volumosos p. ex. edredões, sacos de dormir,
almofadas, cobertores de cama de casal e colchas grandes. Estes
expandem ao secar e impedem a circulação de ar através do
secador.
AVISO: O SECADOR DE ROUPA DESTINA-SE A SER UTILIZADO
APENAS QUANDO SE UTILIZA SOLUÇÃO DE ÁGUA NO
PROCESSO DE LIMPEZA. A MÁ UTILIZAÇÃO DO SECADOR DE
ROUPA PODE CRIAR UM RISCO DE INCÊNDIO.
PORTUGUÊS 4
Page 28

Artigos que requerem atenção especial
Controlos
Cobertores e
colchas
Peças de roupa
com pregas
ou vincos
permanentes
Artigos
engomados
Amaciador
Limpeza a Seco
Em Casa
Os requisitos de secagem de cobertores e colchas variam imenso
dependendo do tamanho e do peso. No entanto, alguns são
simplesmente muito grandes. Se tiver dificuldade em os colocar
dentro do secador, a máquina terá dificuldade em os secar
devidamente. Cobertores (e peças de roupa) fabricados com fibras
acrílicas (p. ex. Acilan, Courtelle, Orion e Dralon) têm de ser secos
com cuidado utilizando o ajuste de calor baixo. Secar em demasia
deve ser evitado para assegurar que não ocorre enrugamento devido
ao calor.
O seu secador pode cuidar muito bem de tais roupas, mas leia
sempre as instruções de secagem dos fabricantes que se encontram
na roupa antes de começar.
Os artigos engomados devem ser secos juntos na mesma carga para
evitar a distribuição de goma a artigos não engomados. Deve utilizar
uma solução de goma ligeiramente mais concentrada do que faria
quando seca a roupa ao ar. Certifique-se de que remove o mais que
poder da solução da carga antes de a colocar no secador de roupa.
Retire os artigos do secador mal estes atinjam a humidade para
passar a ferro. Se secarem demasiado a goma passará a pó,
deixando o tecido mole - o que irá contrariar o efeito da goma!
Para ter a certeza de que toda a roupa que seca no secador sai
fresca e macia recomendamos que utilize um amaciador no
enxaguamento final da lavagem. Um amaciador restaura a
suavidade e ajuda a eliminar a aderência estática.
AVISO: EM NENHUMA CIRCUNSTÂNCIA DEVE DEITAR O
AMACIADOR NA PRÓPRIA MÁQUINA DE SECADOR DE
ROUPA.
As peças de vestuário com o código ITCL podem ser limpas a
seco utilizando um dos kits de Limpeza a Seco Em Casa disponíveis.
As instruções fornecidas com o kit de Limpeza a Seco Em Casa
devem ser seguidas rigorosamente.
Controlo de
tempo
Abrir a porta
Selecção de
calor
Rode o temporizador para a direita para seleccionar o tempo de
secagem requerido.
O tempo de secagem para ambos os ajustes de calor é controlado
pelo temporizador. Basta-lhe rodar o controlo do temporizador para a
direita até aparecer o tempo requerido do lado direito do mostrador
em linha com o indicador.
Nunca rode o controlo do temporizador para a esquerda.
Esta operação inicia também o secador, desde que a porta esteja
fechada e a máquina esteja ligada à corrente. Na secção “Guia dos
tempos de secagem” dir-lhe-á quanto tempo é que necessita para as
várias cargas.
Para abrir a porta, agarre na pega e puxe-a na sua direcção.
Se a porta for aberta enquanto o secador está a ser utilizado, o programa de secagem cessa automaticamente e a máquina pára.
Quando se fecha de novo a porta, o secador começa de novo mas
não é preciso ajustar novamente o controlo de tempo.
Pode, no entanto, ajustá-lo em qualquer altura.
AVISO: É POSSÍVEL AS CRIANÇAS ENTRAREM NAS
MÁQUINAS DE LAVAR ROUPA E FERIREM-SE. CERTIFIQUESE SEMPRE DE QUE A MÁQUINA ESTÁ DESLIGADA DA
TOMADA ELÉCTRICA QUANDO ESTA
NÃO ESTÁ A SER UTILIZADA.
Seleccione o ajuste de calor pertinente:
Quando o botão estiver carregado para DENTRO, a Alta
Temperatura encontra-se seleccionada.
Quando o botão estiver carregado para FORA, a Baixa Temperatura
encontra-se seleccionada.
A escolha de ALTA TEMPERATURA ou BAIXA TEMPERATURA
depende do tecido que deseje secar (veja a secção “Separação da
roupa”).
5 PORTUGUÊS
Page 29

Guia dos tempos de secagem
Como retirar e limpar o filtro de cotão
Pela quantidade de
água que permanece
na roupa após a
centrifugação
Pelo tipo de tecido
Pela quantidade de
roupa a secar
Quão seca é que quer
a sua roupa
Pelo ajuste de calor
que seleccionou
Pela temperatura do
compartimento onde o
secador está situado
Artigos volumosos
Guia de seca
Cuidado para não
secar demasiado
gem - Tempo aproximado de secagem em minutos (os pesos especificados são de roupa seca).
Note que os tempos de secagem indicados abaixo e no painel de
controlo do aparelho são apenas um GUIA e estes tempos são afectados:
Os artigos como toalhas felpudas retêm muita água depois da
centrifugação, também, o programa de lavagem sugerido para artigos
pequenos tais como T-shirts podem, por vezes, incorporar uma
velocidade de centrifugação baixa que tem o mesmo efeito.
A carga de secagem pode conter o mesmo tipo de tecidos mas de
espessuras diferentes. Artigos mais finos levam menos tempo a secar.
Alguns tecidos, tais como os utilizados em calças de ganga têm uma
textura mais fechada do que outros e, embora sejam leves, quando
secos, são pesados depois de lavar e centrifugar.
Artigos únicos de roupas ou cargas pequenas podem levar, em
proporção, muito mais tempo a secar. Cargas maiores são mais
eficientes relativamente a energia.
Uma vez que demora mais tempo a secar completamente a roupa do que
tê-la pronta para passar a ferro, pode querer tirar alguma roupa quando
esta está ligeiramente húmida, pronta para passar a ferro e a seguir
continuar a secar a roupa restante até estar completamente seca.
A etiqueta da peça de roupa diz-lhe o ajuste correcto de calor que deve
seleccionar. Veja ‘Etiquetas de cuidados de lavagem’.
Se a temperatura do compartimento onde o secador está situado está
fria, a sua roupa demora mais tempo a secar do que se o compartimento estivesse quente.
Alguns artigos volumosos tais como casacos almofadados podem ser
secos, com cuidado, e aconselhamos que retire estes artigos várias
vezes, que os abane e os ponha de novo no secador. NO ENTANTO HÁ
ALGUNS ARTIGOS QUE ACONSELHAMOS QUE NÃO SEQUE .
VEJA ‘ARTIGOS QUE NÃO SÃO ADEQUADOS PARA SECAR NO
SECADOR’.
ALGODÕES SINTÉTICOS ACRÍLICOS
Calor Máx.
Tempos de secagem 800 - 1000 rpm na
máquina de lavar
1 kg
30 - 45
Meia
carga
2 kg
45 - 55
Carga
completa
3 kg
60 - 70
Calor Máx.
Tempos de secagem com
centrifugação reduzida na
máquina de lavar
Meia
carga
1 kg
25 - 45
Carga
completa
2 kg
45 - 60
Calor Suave
Tempos de secagem com
centrifugação reduzida na
máquina de lavar
Meia
carga
1 kg
30 - 55
Carga
completa
2 kg
55 - 75
Todos os tecidos contêm um pouco de humidade natural mesmo quando
‘secos’ e esta humidade natural não deve ser perdida para a roupa
permanecer macia e fofa. A roupa que seca durante demasiado tempo
tem tendência para enrugar e precisa de mais ferro que o normal, dandolhe trabalho extra que o secador foi concebido para lhe tirar.
Para retirar o filtro
Uma parte muito importante do seu secador é o
filtro de cotão no bordo frontal do tambor. Este
está aí para capturar partículas de cotão ou fios
que normalmente são soprados quando a roupa
é seca ao ar.
Se se deixar bloquear o filtro, a passagem de ar
quente através do tambor ficará muito restrita, o
que significa que a sua roupa demorará muito
mais tempo a secar do que o normal e o custo de
as secar aumenta, pode também danificar o
secador.
AVISO: NÃO OPERAR O SECADOR DE ROUPA
SEM PRIMEIRO LIMPAR O FILTRO APÓS CADA
CICLO DE SECAGEM. A NÃO LIMPEZA DO
FILTRO PODE RESULTAR NUM RISCO DE
INCÊNDIO.
Lave ou aspire ocasionalmente o filtro.
Não se alarme pela quantidade de cotão que possa encontrar no filtro. Faz parte do
processo de usar, lavar e secar.
AVISO: NÃO OPERAR O SECADOR DE ROUPA SEM O FILTRO ESTAR EM POSIÇÃO.
Cuidar do seu secador
O seu secador de roupa precisa de muito pouca atenção. Os
seguintes passos simples mantê-lo-ão com bom desempenho.
Quando terminar
Depois de cada
carga
Conforme
necessário
Lubrificação
Desligue da electricidade e retire a ficha da tomada.
Limpe sempre o filtro e rode o secador à mão para verificar que
peças pequenas como lenços da mão não ficam esquecidos.
Limpe as superfícies metálicas e plásticas exteriores apenas com um
pano húmido ou cera de silicone. Verifique e limpe regularmente se
for necessário, a mangueira de ventilação e qualquer acessório de
ventilação permanente para assegurar que não houve acumulação
de cotão ou algodão durante o processo de secagem.
Não utilize produtos de limpeza abrasivos, detergentes, lixívia ou
polimento para metais para limpar qualquer parte da máquina. Estes
podem danificar a máquina.
O seu secador de roupa utiliza componentes de rolamento especiais.
A lubrificação pelo utilizador não é necessária e não deve ser
tentada.
Recomendamos veementemente que todos os aparelhos sejam
verificados regularmente quanto a segurança eléctrica e mecânica.
PORTUGUÊS 6
Page 30

Se algo correr mal
Em primeiro lugar, não entre em pânico! Pode ser que não haja nada
avariado. Veja se o seu problema é algum dos que mencionamos
abaixo e verifique o que sugerimos. Isto poderá responder à maioria
dos seus problemas e poderá assim continuar a utilizar a máquina
sem ter que telefonar a pedir assistência.
Se, depois disto, a sua máquina continuar sem trabalhar, siga os
conselhos apresentados na página seguinte.
Problema
‘A máquina não
arranca’
‘Está a demorar
muito tempo a
secar’
Qualquer outro
problema
7 PORTUGUÊS
Verifique primeiro estas coisas
1. A ficha da máquina está ligada à tomada?
2. O temporizador está ajustado para o tempo necessário?
3. A porta está bem fechada?
4. O fusível fundiu? (Tente ligar outro aparelho para verificar).
5. Utilizou uma extensão eléctrica? Muitas delas não são ade
quadas. Tente ligar o secador directamente a uma tomada para
verificar.
1. Esqueceu-se de limpar o filtro? Este deve ser limpo após cada
carga.
2. Seleccionou o ajuste de calor correcto para o tipo de tecido que
está a secar?
3. A mangueira de ventilação está bloqueada ou dobrada? Verifiquea quanto a objectos estranhos ou água condensada.
4. A entrada de ar está de alguma forma bloqueada?
5. Ventilação permanente - a aba da tampa de tempestade está
obstruída?
6. A roupa estava ‘demasiado molhada’ quando a pôs dentro?
7. Seleccionou o tempo correcto?
8. Sobrecarregou o secador?
Já leu de novo este manual de instruções?
Este aparelho está em conformidade com as Directivas da CEE.
Equipamento de baixa tensão
72/23/EEC
93/68/EEC
Compatibilidade electromagnética
89/336/EEC
92/31/EEC
93/68/EEC
Se continua a não funcionar
...
Contacte a assistência técnica
se ainda houver um problema com a sua máquina depois de ter
seguido a lista de verificação na página anterior:
1. Desligue a máquina e retire a ficha da tomada.
2. Contacte a Assistência Técnica mais próxima.
Quando nos contactar iremos querer saber o seguinte:
1. O seu nome, morada e código postal.
2. O seu número de telefone.
3. Pormenores concisos e precisos da avaria.
4. O número do modelo e o número de série do seu secador.
5. A data de compra.
Certifique-se de que tem todos estes pormenores prontos quando
telefonar.
Peças sobresselentes
Lembre-se de que a sua nova máquina é uma peça complexa de
equipamento.
Reparações feitas por você ou por pessoas não qualificadas e não
formadas pode pô-lo em perigo, pode danificar a máquina e pode
significar que perde direito à garantia.
Se tiver problemas com a máquina não corra riscos, contacte o nosso
técnico. As nossas peças sobresselentes foram concebidas
exclusivamente para montar na sua máquina. Não as utilize para
qualquer outro fim pois pode criar um risco de segurança.
Informações Acerca de Reciclagem e Eliminação de Resíduos
Como parte do nosso continuado empenho em ajudar o ambiente,
reservamo-nos o direito de utilizar componentes de qualidade, de
modo a manter os custos baixos para os clientes e minimizar o
desperdício de material.
●
Eliminação do material da embalagem: siga os regulamentos
locais, de modo que a embalagem possa ser reciclada.
●
De modo a minimizar o risco de lesões para crianças, remova a
porta e a ficha e corte o fio eléctrico do aparelho. Elimine estas
peças separadamente a fim de assegurar que o aparelho não
possa mais ser ligado a uma tomada eléctrica.
Recolha dos electrodomésticos
A directiva Europeia 2002/96/CE referente à gestão de resíduos de
aparelhos eléctricos e electrónicos (RAEE), prevê que os
electrodomésticos não devem ser escoados no fluxo normal dos
resíduos sólidos urbanos. Os aparelhos desactualizados devem ser
recolhidos separadamente para optimizar a taxa de recuperação e
reciclagem dos materiais que os compõem e impedir potenciais
danos para a saúde humana e para o ambiente.
O símbolo constituído por um contentor de lixo barrado com uma
cruz deve ser colocado em todos os produtos por forma a recordar a
obrigatoriedade de recolha separada.
Os consumidores devem contactar as autoridades locais ou os
pontos de venda para solicitar informação referente ao local
apropriado onde devem depositar os electrodomésticos velhos.
Page 31

Italiano
Indice
Sicurezza 2
Elettricità 2
Caratteristiche - Per conoscere le parti principali dell’asciugatrice
Dove installare l’asciugatrice 3
Come usare l’asciugabiancheria 3
Selezione della biancheria 4
Etichette di istruzioni per il lavaggio 4
Articoli non indicati per l’asciugatrice elettrica 4
Capi che richiedono cura particolare 5
I Comandi 5
Tempi indicativi per l’asciugatura 6
Come estrarre e pulire il filtro 6
Cura dell’asciugabiancheria 6
Se qualcosa non funziona 7
Se non funziona ancora 7
3
Registrate ora il vostro acquisto
Completate il modulo di registrazione fornito con i documenti dell’apparecchio e
speditelo qui.
Manuale di istruzioni
Il presente manuale di istruzioni deve essere tenuto a portata di mano per eventuale
consultazione, in quanto contiene le informazioni sull’uso sicuro e corretto
dell’apparecchio.
Se si vende o si regala l’apparecchio a terzi, oppure se lo si lascia nella casa quando ci si
trasferisce altrove, consegnare il presente manuale al nuovo proprietario affinché questi
possa familiarizzarsi con la macchina e i relativi avvertimenti sulla sicurezza.
ITALIANO 1
Page 32

Sicurezza
Sicurezza
IMPORTANTE
L’asciugatrice elettrica è facile da usare.
Tuttavia per garantire la propria sicurezza e per ottenere risultati ottimali, è importante
leggere attentamente il presente manuale prima di utilizzare l’asciugatrice per la prima
volta, allo scopo di conoscere appieno le funzioni dell’elettrodomestico.
MAI
MAI
MAI
MAI
MAI
MAI
MAI
MAI
MAI
MAI
MAI
MAI
MAI
MAI
MAI
MAI
MAI
MAI
IMPORTANTE
È FACILE CHE UN BAMBINO SALGA SULL’ASCIUGATRICE O GIOCHI CON ESSA
QUANDO NON È IN USO.
QUANDO NON LA SI USA, SPEGNERE L’ASCIUGATRICE, CHIUDERE LA PORTA E
STACCARE LA SPINA.
●
permettere ai bambini di giocare o di interferire in alcun modo con
l’asciugatrice.
●
ostruire le griglie di entrata dell’aria sulla parte posteriore
dell’asciugatrice né lo sfiatatoio o il tubo di sfiato.
●
dirigere il tubo di sfiato verso le griglie di entrata dell’aria sulla parte
posteriore dell’asciugatrice.
●
riciclare l’aria di scarico nell’asciugatrice.
●
spegnere la macchina lasciando i capi ancora caldi nel cestello.
●
usare l’asciugatrice senza il filtro nella posizione corretta.
●
eccedere la capacità massima di carico consigliata né immettere nel
cestello capi ancora gocciolanti d’acqua.
●
posizionare l’asciugatrice su pavimenti coperti con moquette e/o tappeti,
dove l’altezza del pelo potrebbe impedire all’aria di essere aspirata dalla
base dell’asciugatrice stessa.
●
lasciare che la lanugine si accumuli attorno all’asciugatrice.
●
aggiungere ammorbidente liquido o in fogli nell’asciugatrice, bensì usare
quello liquido durante l’ultimo risciacquo del ciclo di lavaggio.
●
usare l’asciugatrice a fini commerciali, in quanto l’elettrodomestico è
adatto solo all’uso domestico.
●
asciugare capi in fibra acrilica ad alta temperatura.
●
asciugare capi che NON siano stati ben lavati in acqua e detersivo,
quindi sciacquati e centrifugati.
●
asciugare nell’asciugatrice capi trattati con prodotti chimici.
●
asciugare capi contaminati da sostanze infiammabili quali benzina, olio,
vernice, lacca per capelli, creme o grassi o oli commestibili.
●
asciugare gomma, spugna di gomma, plastica, spugna di plastica, pannolini e mutandine sintetici, politene o carta
o ingombranti, compresi piumini e sacchi a pelo.
●
salire sul piano di lavoro dell’asciugatrice, in quanto la macchina
potrebbe subire danni.
●
accendere o spegnere l’elettrodomestico con le mani bagnate.
né capi di grandi dimensioni
2 ITALIANO
spegnere l’asciugatrice, chiudere la porta e staccare la spina quando
SEMPRE
SEMPRE
SEMPRE
SEMPRE
SEMPRE
SEMPRE
SEMPRE
SEMPRE
●
non la si usa.
osservare le norme indicate in materia di elettricità.
●
accertarsi che l’asciugatrice sia installata correttamente e sia ventilata
●
adeguatamente. (v. "Dove installare e ventilare l’asciugatrice.")
usare il tubo di sfiato per ottimizzare le prestazioni dell’asciugatrice.
●
completare ogni programma con il ciclo di raffreddamento programma-
●
bile sul pannello di controllo.
pulire il filtro; è essenziale rimuovere ogni traccia di lanugine.
●
osservare le istruzioni riportate nelle etichette informative dei capi da
●
asciugare:
In particolare, i capi di lana non vanno mai messi nell’asciugatrice,
a meno che le etichette non riportino “Superlavaggio”, “Lavabile a
macchina” oppure il simbolo “può essere asciugato con asciugatrice elettrica”:
Se si nutrono dei dubbi a riguardo, non mettere i capi di lana nell’asciugatrice elettrica.
A differenza di quanto succede con altri materiali, non è possibile
ridare ai capi di lana la forma e le dimensioni, originali una volta
che si sono ristretti.
acquistare accessori e parti di ricambio originali.
●
Elettricità
AVVERTENZA: questo elettrodomestico va messo a terra
CONSULTARE LA TARGHETTA DATI PER CONOSCERE LA TENSIONE E LA CORRENTE DI ESERCIZIO.
(per la posizione v. il disegno.)
Provvedere all’allacciamento di rete mediante una presa adatta che sia
accessibile dopo aver installato l’asciugatrice nella posizione desiderata.
I fili del cavo do alimentazione sono colorati in conformatà al codice
seguente:
GIALLO/VERDE - TERRA
BLU - NEUTRO
MARRONE - FASE
Nel caso in cui sia necessario cambiare la spina, il filo appropriato deve
essere collegato al terminale corretto; la spina usata va quindi smaltita in
conformità alle norme di sicurezza. NON LASCIARLA ove sia possibile
inserirla in una presa per evitare il pericolo di scosse elettriche.
Sostituzione
del cavo di
alimentazione
Nel caso in cui sia necessario sostituire il cavo di alimentazione in un
momento qualsiasi della vita dell’elettrodomestico, rivolgersi al centro
assistenza più vicino; il nuovo cavo o uno più lungo, se richiesto dall’utente, verranno forniti a pagamento.
Sostituire il cavo di alimentazione solo con uno preparato appositamente per l’allacciamento alla rete, che si può acquistare presso il
rivenditore autorizzato di parti di ricambio ed installato da un elettricista.
NOTA:
SE SI NUTRONO DEI DUBBI A RIGUARDO, CON SULTARE UN ELETTRICISTA.
AVVERTENZA:
quando l’asciugabiancheria è in uso evitare di toccare il retro
dell’apparecchio, in quanto potrebbe essere molto caldo.
Page 33

Caratteristiche - le parti principali dell’asciugabiancheria
Come usare l’asciugabiancheria
Spia alimentazione
Selettore della temperatura
On/Off (se in
dotazione)
Comando del timer
Gruppo filtro (all’interno
dello sportello)
Sblocco sportello
Griglia aria di scarico
Dove collocare e come ventilare l’asciugabiancheria
●
L’asciugatrice NON va collocata vicino ad una cucina a gas, ad un
apparecchio di riscaldamento o ad un piano cottura, poiché le fiamme dei
bruciatori potrebbero danneggiare la macchina.
●
L’asciugatrice deve essere collocata in un punto dove l’aria circola
liberamente, preferibilmente vicino ad una finestra, che può essere
aperta per ridurre la possibilità di condensa durante il funzionamento
dell’asciugatrice.
●
Quando si utilizza l’asciugabiancheria deve esserci un’adeguata
ventilazione per evitare il riflusso nell’ambiente di gas emessi da
apparecchi che bruciano altri combustibili, inclusi i camini.
●
Per ottenere prestazioni ottimali si consiglia l’uso di un flessibile di
ventilazione.
●
NON azionare l’asciugatrice in un ambiente troppo circoscritto,
assicurarsi che l’apparecchio sia ventilato in modo adeguato.
●
NON appendere vestiti, asciugamani, ecc. davanti al flusso dell’aria
dell’asciugatrice. Questo ostruisce il flusso d’aria e potrebbe
danneggiare l’asciugatrice.
●
Controllare che l’estremità del tubo non sia diretta verso la griglia
della presa d’aria situata sul retro dell’asciugatrice.
●
NOTA: il tubo flessaibile di sfiato non dovrebbe superare i 2,4 metri
di lunghezza e dovrebbe essere mantenuto pulito scuotendolo
frequentemente per eliminare l’eventuale accumulazione di lanugine
(e acqua). Controllare sempre che il tubo non sia schiacciato.
Kit ventilazione
finestra
Kit aggancio muro
E’ disponibile un kit ventilazione come optional, che prende l’aria umida
direttamente dall’asciugatrice e la dirige all’esterno della finestra aperta.
Il kit di ventilazione viene installato nella parte anteriore dello sportello.
Con questo kit è possibile attaccare l’asciugatrice ad una parete con
un’adeguata resistenza per il sostegno del peso. In alternativa, questo kit deve
essere usato quando l’asciugatrice viene montata nella parte superiore di una
superficie di lavoro per fissare l’apparecchio alla parete.
NON SCARICARE L’ARIA DI SCARICO IN UNA CANNA FUMARIA USATA
PER SCARICARE I FUMI PRODOTTI DA ALTRI APPARECCHI CHE
BRUCIANO GAS OD ALTRI COMBUSTIBILI.
AVVERTENZA:
1. Inserire la spina,
accendere
l’alimentazione
elettrica.
3. Aprire lo
sportello, controllare
che il filtro per
lanugine sia pulito
(consultare la
sezione “Come
estrarre e pulire il
filtro”).
AVVERTENZA:
QUANDO SI
ACCENDE O SPEGNE
L’APPARECCHIO,
ASSICURARSI DI
AVERE LE MANI
ASCIUTTE.
Suddividere il
2.
bucato in base al tipo
di tessuto (consultare
la sezione “Selezione
della biancheria”).
4. Caricare
l’asciugabiancheria,
collocando gli
indumenti con cura
nel cestello,
spingendoli bene
verso il retro e
lontano dalla
guarnizione dello
sportello.
5. Selezionare la temperatura
(consultare la sezione “Selezione della
biancheria”).
Pulsante IN FUORI
TEMPERATURA BASSA
Premere IN-DENTRO per temperatura
alta, per tessuti di cotone, lino, e sintetici.
Bassa impostazione - pulsante OUT - fuori
Pulsante IN DENTRO
TEMPERATURA ALTA
- per tessuti di acrilico e misto acrilico.
6. Selezionare il tempo di asciugatura
richiesto.
Ruotare il comando del timer in senso
orario per selezionare il tempo di
asciugatura desiderato.
L’asciugabiancheria entrerà in funzione.
(IMPORTANTE: consultare la sezione
“Comandi”.)
7. Alla fine del
programma, aprire
lo sportello ed
estrarre il bucato.
Pulire e rimettere a
posto il filtro.
8. Disinserire
l’alimentazione
elettrica e togliere
la spina dalla
presa di corrente.
AVVERTENZA:
QUANDO SI
ACCENDE O SPEGNE
L’APPARECCHIO,
ASSICURARSI DI
AVERE LE MANI
ASCIUTTE.
Non spegnere mai l’asciugabiancheria con un carico caldo nel cestello. Bisogna
lasciar terminare ogni programma con la fase di rotazione a freddo.
ITALIANO 3
Page 34

Selezione della biancheria Etichette di istruzioni per il lavaggio
Capacità
massima
Carico tipico
1. Prima di lavarli o asciugarli, suddividere sempre i capi in base al
tipo di tessuto.
2. Accertarsi di chiudere cerniere e allacciature a gancio e
annodare con fiocco lento cinture e lacci. Ciò dovrebbe essere
già stato fatto per ciascun articolo prima di lavarlo.
3. Prima di asciugare un carico, è importante strizzare ciascun indu
mento per eliminare la maggiore quantità d’acqua possibile al
fine di risparmiare tempo e denaro.
AVVERTENZA: NON CARICARE MAI CAPI ECCESSIVAMENTE
BAGNATI NELL’ASCIUGATRICE.
4. Accertarsi che i capi selezionati possano essere asciugati nella
l’asciugatrice elettrica o che non siano del tipo che richiede “cura
particolare” (vedere la sezione “Etichette di istruzioni per il
lavaggio”).
La capacità massima della macchina per le fibre naturali è di 3kg
(peso a secco); per contro per i capi sintetici (acrilici, fibre miste
ecc.) il peso non deve superare 2kg (peso a secco).
La differenza è dovuta al fatto che i tessuti sintetici richiedono uno
spazio maggiore per asciugare senza sgualcirsi.
AVVERTENZA: NON SOVRACCARICARE LA MACCHINA IN
QUANTO CIÒ POTREBBE RIDURRE LA CAPACITÀ DI
ASCIUGATURA E COSTITUIRE UN POSSIBILE RISCHIO DI
INCENDIO.
Nella tabella che segue sono riportati i pesi indicativi dei singoli capi
comunemente lavati in lavatrice allo scopo di facilitare il calcolo del
peso massimo consentito.
Indumenti Biancheria
Camicetta donna Cotone 150g Copripiumino Cotone 1500g
Abito donna Cotone 500g Tovaglia (grande) 700g
Jeans 700g Canovaccio 100g
10 pannolini 1000g Asciugamano (grande) 700g
Camicia uomo Cotone 300g
Maglietta 125g
Altro 100g matrimoniale Altro 1000g
Altro 350g (piccola) 250g
(piccola) 350g
Altro 200g Lenzuolo matrimoniale 500g
singolo 350g
È possibile asciugare senza problemi nell’asciugatrice elettrica la
maggior parte dei tessuti odierni, tuttavia alcuni sono rifiniti in modo
particolare e vanno quindi asciugati lontano da fonti di calore dirette.
La maggioranza degli indumenti è dotata di etichette che riportano
le istruzioni per lavarli ed asciugarli. Osservare attentamente tali
istruzioni, in modo particolare quando si asciuga un indumento per
la prima volta.
I simboli più comuni sono:
Può essere asciugato nell’asciugatrice elettrica
Non asciugare nell’asciugatrice elettrica
Oppure:
Asciugare ad alta temperatura
Asciugare a bassa temperatura
Articoli non indicati per l’asciugatrice elettrica
● Articoli contenenti spugna di gomma o materiali simili alla gomma
o plastificati (per es. cuscini, impermeabili di PVC) oppure qualsi
asi altro articolo infiammabile o contenente sostanze infiammabili
(per es. asciugamani sporchi di lacca per capelli).
● Fibre di vetro (per es. alcuni tipi di tende)
● Capi che vanno puliti a secco
● Maglieria. I capi di maglia devono essere asciugati con la stessa
attenzione prestata durante il lavaggio. La rotazione del tamburo
dell’asciugatrice causa il restringimento e la distorsione delle fibre
di lana.
● Indumenti riportanti il codice ITCL (‘Capi che richiedono cure
particolare’).
NON asciugare nell’asciugatrice
4 ITALIANO
Se si raggruppano piccoli capi di cotone o di spugna con altri
sintetici, alla fine del ciclo potrebbero essere ancora umidi, nel qual
caso è sufficiente asciugarli per un ulteriore, breve periodo.
● Articoli ingombranti e di grandi dimensioni, ad es. coperte imbot
tite, sacchi a pelo, cuscini di qualsiasi tipo, coperte matrimoniali e
copriletto pesanti, in quanto si dilatano durante il processo di
asciugatura, impedendo il flusso dell’aria nella macchina.
AVVERTENZA: L’ASCIUGATRICE VA USATA SOLO CON CAPI
LAVATI CON ACQUA. L’USO IMPROPRIO DELLA MACCHINA
PUÒ COSTITUIRE PERICOLO DI INCENDIO.
Page 35

Capi che richiedono cura particolare
Comandi
Coperte e
copriletto
Indumenti a
pieghe
permanenti o
pieghettati
Articoli inamidati
Ammorbidente
Lavaggio a
secco a
domicilio
È ovvio che il metodo per asciugare coperte e copriletto varierà di
molto in base alle dimensioni e al peso. Alcuni, tuttavia, sono
semplicemente troppo grandi. Se è difficile caricarli nell’asciugatrice,
sarà altrettanto difficile asciugarli perfettamente. Coperte (e
indumenti) in acrilico (per es. Acilan, Courtelle, Orion e Dralon)
devono essere asciugati con estrema cura a temperatura bassa. Si
deve evitare di asciugarli troppo a lungo per prevenire che si sgualciscano a causa del calore eccessivo.
L’asciugatrice è in grado di asciugare questo tipo di indumenti senza
alcun problema, tuttavia, prima di procedure, è buona regola leggere
le istruzioni del produttore su come asciugarli.
Gli articoli inamidati vanno raggruppati assieme nello stesso carico
per evitare che l’amido passi agli articoli non inamidati.
È consigliabile usare una soluzione di amido leggermente più firte di
quella usata quando li si stende all’aria. Accertarsi di rimuovere la
maggiore quantità di amido prima di metterli nell’asciugatrice.
Togliere gli articoli dalla macchina non appena hanno raggiunto il
livello di umidità corretto per stirarli. Se si asciugano troppo a lungo,
l’amido si trasforma in polvere, lasciando il tessuto floscio,
contrariamente al risultato voluto.
Per far sì che i capi asciugati rimangano freschi e soffici, si consiglia
di aggiungere dell’ammorbidente liquido nell’ultimo ciclo di
risciacquo. Tale prodotto restituisce elasticità e morbidezza ai capi,
prevenendo la formazione di elettricità statica.
AVVERTENZA: NON AGGIUNGERE IN NESSUN CASO
AMMORBIDENTE LIQUIDO NELL’ASCIUGATRICE
I capi contrassegnati con il codice ITCL possono essere puliti
con i prodotti per lavaggio a secco a domicilio disponibili in
commercio.
Attenersi scrupolosamente alle istruzioni fornite con il prodotto
usato.
Comando del
timer
Rilascio della
porta
Selezione della
temperatura
Ruotare il comando del timer in senso orario per selezionare il tempo
di asciugatura desiderato. Il tempo di asciugatura per entrambe le
impostazioni della temperatura è controllato dal timer. Ruotare il
timer in senso orario per selezionare il tempo desiderato per
l’asciugatura,
Non ruotare mai il timer in senso antiorario.
Se la porta è chiusa e la spina inserita nella presa di corrente,
ruotando il timer in senso orario si avvierà il ciclo di asciugatura.
Nella sezione “Guida ai tempi di asciugatura” sono riportati i tempi
necessari ad asciugare i vari capi.
Per aprire la porta, afferrare la maniglia, quindi tirare verso sé.
Se si apre la porta mentre l’asciugatrice è in uso, il programma si
interrompe automaticamente e la macchina si arresta. Chiudendo la
porta, l’asciugatrice si riavvia senza che sia necessario selezionare
nuovamente l’intervallo di tempo con il timer.
All’occorrenza, è tuttavia possibile variare l’intervallo di tempo
agendo sul timer in un momento qualsiasi del ciclo di asciugatura.
AVVERTIMENTO: POICHÉ, A VOLTE, I BAMBINI TENDONO AD ENTRARE NEL
TAMBURO DELLA MACCHINA, PROCURANDOSI DELLE LESIONI,
VERIFICARE SEMPRE CHE LA MACCHINA SIA STACCATA DALLA PRESA DI
CORRENTE QUANDO NON È IN USO.
Selezionare il tempo di asciugatura richiesto:
Pulsante “IN DENTRO” per selezionare alta temperatura
Pulsante “IN FUORI” per selezionare bassa temperatura
La scelta di ALTA TEMPERATURA o BASSA TEMPERATURA va
fatta in base al tipo di tessuto che si desidera asciugare (consultare
la sezione “Selezione della biancheria”).
ITALIANO 5
Page 36

Guida ai tempi di asciugatura
Come estrarre e pulire il filtro
Si prega di notare che i tempi di asciugatura riportati qui in basso e sul
quadro di comando dell’apparecchio hanno soltanto un valore INDICATIVO e
che essi possono essere influenzati da:
La quantità di acqua
rimasta negli
indumenti dopo
la centrifuga
Il tessuto
La quantità di
indumenti da
asciugare
Il livello di
asciugatura
desiderato
La temperatura
selezionata
La temperatura
ambiente
Capi ingombranti
Guida all’asciugatura - tempo di asciugatura approssimativo, in minuti
Fare attenzione a
non asciugare
eccessivamente
I capi in spugna conservano molta acqua anche dopo la centrifuga; inoltre il
programma di lavaggio suggerito per indumenti piccoli come le magliette
possono talvolta includere una centrifuga a bassa velocità che ha lo stesso
effetto.
Il carico di indumenti da asciugare potrebbe contenere capi dello stesso
tessuto ma di spessori differenti. Gli articoli più sottili si asciugano più
rapidamente. Alcune tessuti, come quello usato per i jeans hanno una trama
più stretta di altre e sebbene siano leggeri quando sono asciutti, dopo il
lavaggio e la centrifuga diventano molto pesanti.
Singoli capi di abbigliamento o piccoli carichi possono richiedere un tempo
sproporzionatamente più lungo per asciugarsi. È quindi più conveniente dal
punto di vista energetico asciugare dei grossi carichi.
Poiché ci vuole più tempo per asciugare completamente gli indumenti
piuttosto che per asciugarli solo fino a che sono pronti per essere stirati,
potrebbe essere una buona idea togliere alcuni indumenti quando sono
ancora leggermente umidi, pronti per essere stirati, e quindi continuare ad
asciugare il resto degli indumenti fino a che non siano del tutto asciutti.
L’etichetta sull’indumento dovrebbe indicare la corretta temperatura da
selezionare. Consultare “Etichette di istruzioni per il lavaggio”.
Se la stanza in cui si trova l’’asciugabiancheria è fredda, l’asciugatura degli
indumenti richiederà più tempo che in una stanza calda.
Alcuni articoli voluminosi, come le giacche imbottite possono essere
asciugati, con cautela, ma si consiglia di togliere diverse volte questi
indumenti dall’asciugabiancheria, scuoterli e poi rimetterli nell’apparecchio.
TUTTAVIA VI SONO ALCUNI ARTICOLI CHE SCONSIGLIAMO DI
ASCIUGARE NELL’ASCIUGABIANCHERIA. CONSULTARE “ARTICOLI
NON INDICATI PER L’ASCIUGATRICE ELETTRICA”.
(i pesi specificati sono a secco)
COTONI SINTETICI ACRILICI
Alta temperatura Alta temperatura Temperatura media
3 kg
Tempi di asciugatura a
centrifuga ridotta in
lavatrice
Mezzo
carico
1 kg
25 - 45
Carico
intero
2 kg
45 - 60
Tempi di asciugatura 800 - 1000 giri/m in lavatrice
Mezzo
carico
1 kg
30 - 45
Tutte i tessuto hanno un contenuto naturale di umidità anche quando sono
“asciutti” e questa umidità naturale non deve essere eliminata se si vuole che
gli indumenti rimangano soffici e vaporosi. Gli indumenti asciugati troppo a
lungo tendono a raggrinzirsi e richiederanno una stiratura più lunga del solito,
con maggior fatica.
45 - 55
Carico
intero
2 kg
60 - 70
Tempi di asciugatura
a centrifuga ridotta in
lavatrice
Mezzo
carico
1 kg
30 - 55
Carico
intero
2 kg
55 - 75
Per rimuovere il filtro
Il filtro per la lanugine, situato in corrispondenza del
bordo anteriore del tamburo, è una parte molto
importante del vostro asciugatore. Esso ha la funzione
di raccogliere le particelle di peluria e lanugine che
vengono normalmente soffiate via quandi si stende il
bucato fuori ad asciugare.
Se il filtro si riempie di lanugine, viene reso difficile il
passaggio dell’aria calda nel tamuro, il vostro bucato
impiegherà molto più tempo del normale ad asciugarsi
e, di conseguenza,aumenterà il costo dell’asciugatura;
Inoltre, il vostro asciugatore ptrebbe risutarne
danneggiato.
AVVERTENZA: NON AZIONATE L’ASCIUGATORE SENZA
IL FILTRO DEVE ESSERE PULITO AL TERMINE DI
PULISCE IL FILTRO SI RISCHIA DI PROVOCARE UN
AVER PRIMA PULITO IL FILTRO.
CIASCUN CICLO DI ASCIUGATURA. SE NON SI
UNCENDIO.
Ogni tanto lavate il filtro o pulitelo con l’aspirapolvere. Non spaventatevi per la quantità di
lanugine che potreste trovare sul filtro.
Ciò fa parte del normale processo d’uso, di lavaggio e di asciugatura del bucato.
AVVERTENZA: NON AZIONATE L’ASCIUGATORE SENZA AVER PRIMA INSERITO IL FILTRO.
Cura dell’asciugabiancheria
L’asciugabiancheria richiede pochissime cure.
Alla fine
dell’asciugatura
Dopo ogni ciclo
Quando è
necessario
Lubrificazione
Disinserire l’alimentazione elettrica e togliere la spina.
Pulire sempre il filtro e ruotare manualmente il cestello per controllare
di non avervi lasciato dentro piccoli articoli come i fazzoletti.
Pulire le superfici esterne di metallo e plastica solo con un panno
umido od un lucido al silicone. Controllare periodicamente e pulire, se
necessario, il flessibile di ventilazione e qualsiasi dispositivo
permanente di ventilazione, onde assicurarsi che non vi siano
accumuli di lanugine e pelucchi durante il processo di asciugatura.
Non usare detergenti abrasivi, sostanze aggressive, acidi,
candeggina o lucidi per metalli per pulire alcuna parte
dell’apparecchio. Questi prodotti possono danneggiare l’apparecchio.
L’asciugabiancheria usa speciali componenti di supporto. Non è
richiesta alcuna lubrificazione da parte dell’utente e non si deve
tentare di lubrificare l’apparecchio.
Consigliamo vivamente che tutti gli elettrodomestici vengano
controllati periodicamente per accertarne la sicurezza elettrica e
meccanica..
6 ITALIANO
Page 37

Se qualcosa non funziona Se non funziona ancora
Problema
Non si avvia
Impiega troppo
tempo ad
asciugare
Prima di tutto, non spaventarsi. È possibile che non vi sia alcun
guasto. Consultare la lista dei problemi riportata di seguito, quindi
controllare le azioni correttive suggerite. Spesso in questa lista si
trova la soluzione del problema e non sarà quindi necessario
chiamare il centro assistenza.
Se la lavatrice continua a non funzionare correttamente dopo aver
eseguito le operazioni suggerite, seguire le istruzioni riportare nella
pagina seguente.
Controllare dapprima quanto segue
1. Che la macchina sia collegata alla presa e che la corrente venga
erogata.
2. Che il timer sia stato programmato per il tempo desiderato.
3. Che la porta sia ben chiusa.
Che il fusible non sia bruciato. (Collegare un altro elettrodomestico alla
4.
presa.)
5. Se si è usata una prolunga; alcune non sono idonee ad essere
usate con la lavatrice. Collegare la lavatrice direttamente alla
presa e controllarne il funzionamento.
1. Di aver pulito il filtro. È necessario pulirlo dopo aver asciugato
ogni carico.
2. Di aver selezionato la temperatura corretta per il tipo di tessuto
da asciugare.
3. Che il tubo di sfiato non sia ostruito o storto. Controllare
l’eventuale presenza di corpi estranei o di condensa (acqua).
4. Che le griglie di entrata dell’aria non siano ostruite.
5. Ventilazione permanente: controllare che il deflettore della
calotta protettiva esterna non sia ostruito.
6. Di non aver messo nell’asciugatrice indumenti “troppo bagnati”.
7. Di aver selezionato il tempo corretto.
8. Di non aver sovraccaricato l’asciugatrice.
Questo elettrodomestico è conforme alle seguenti direttive CEE.
Apparecchi a bassa tensione
72/23/EEC
93/68/EEC
Compatibilità elettromagnetica
89/336/EEC
92/31/EEC
93/68/EEC
Rivolgersi al Centro assistenza
se la macchina non funziona ancora correttamente dopo averne
controllato il funzionamento in base alla lista di controllo riportata
nella pagina precedente:
1. Spegnere l’asciugatrice e sfilare la spina dalla presa di corrente.
2. Rivolgersi al Centro assistenza più vicino.
Quando si chiama, fornire le seguenti informazioni:
1. Nome, indirizzo e codice postale dell’utente.
2. Numero di telefono.
3. Descrizione chiara e concisa del guasto.
4. Numero del modello e di serie dell’asciugatrice.
5. Data di acquisto.
Accertarsi di avere queste informazioni a portata di mano quando si
telefona.
Parti di ricambio
Non va dimenticato che questo elettrodomestico è un apparecchio
alquanto complicato.
Riparazioni eseguite da sé o da personale non qualificato possono
mettere a repentaglio l’incolumità personale, danneggiare la
macchina e invalidare la garanzia che copre le parti di ricambio.
Se si verificano problemi durante l’uso dell’asciugatrice, per evitare
rischi inutili chiamare un tecnico autorizzato. Poiché le nostre parti
di ricambio sono progettate esclusivamente per questo
elettrodomestico, esse non devono essere usate per altri scopi.
Smaltimento e Riciclaggio
Come parte del nostro costante impegno in difesa dell’ambiente, ci
riserviamo il diritto di utilizzare componenti riciclati per diminuire i
costi del cliente e ridurre lo spreco di materiali.
●
Smaltimento del materiale di imballaggio: seguire le normative
locali in tema di smaltimento, così da permettere di riciclare
l’imballaggio.
●
Per ridurre i rischi di incidenti ai bambini, rimuovere la porta e la
spina, quindi tagliare il cavo di alimentazione a filo con
l’apparecchio. Smaltire queste parti separatamente, per
assicurarsi che l’apparecchio non possa più essere collegato ad
una presa di corrente.
Dismissione degli elettrodomestici
La direttiva Europea 2002/96/CE sui rifiuti di apparecchiature
elettriche ed elettroniche (RAEE), prevede che gli elettrodomestici
non debbano essere smaltiti nel normale flusso dei rifiuti solidi urbani.
Gli apparecchi dismessi devono essere raccolti separatamente per
ottimizzare il tasso di recupero e riciclaggio dei materiali che li
compongono ed impedire potenziali danni per la salute e l’ambiente.
Il simbolo del cestino barrato è riportato su tutti i prodotti per
ricordare gli obblighi di raccolta separata.
Per ulteriori informazioni, sulla corretta dismissione degli
elettrodomestici, i detentori potranno rivolgersi al servizio pubblico
preposto o ai rivenditori.
ITALIANO 7
Page 38

Page 39

Page 40

195041962.02 W
02/2006 - SIMLEX . Four Ashes, Wolverhampton
 Loading...