

WWW
DAILY REFERENCE
GUIDE
EN
THANK YOU FOR PURCHASING AN INDESIT
PRODUCT
To receive more comprehensive help and support, please
register your product at www . indesit . com/register
Before using the appliance carefully read the Health and Safety guide.
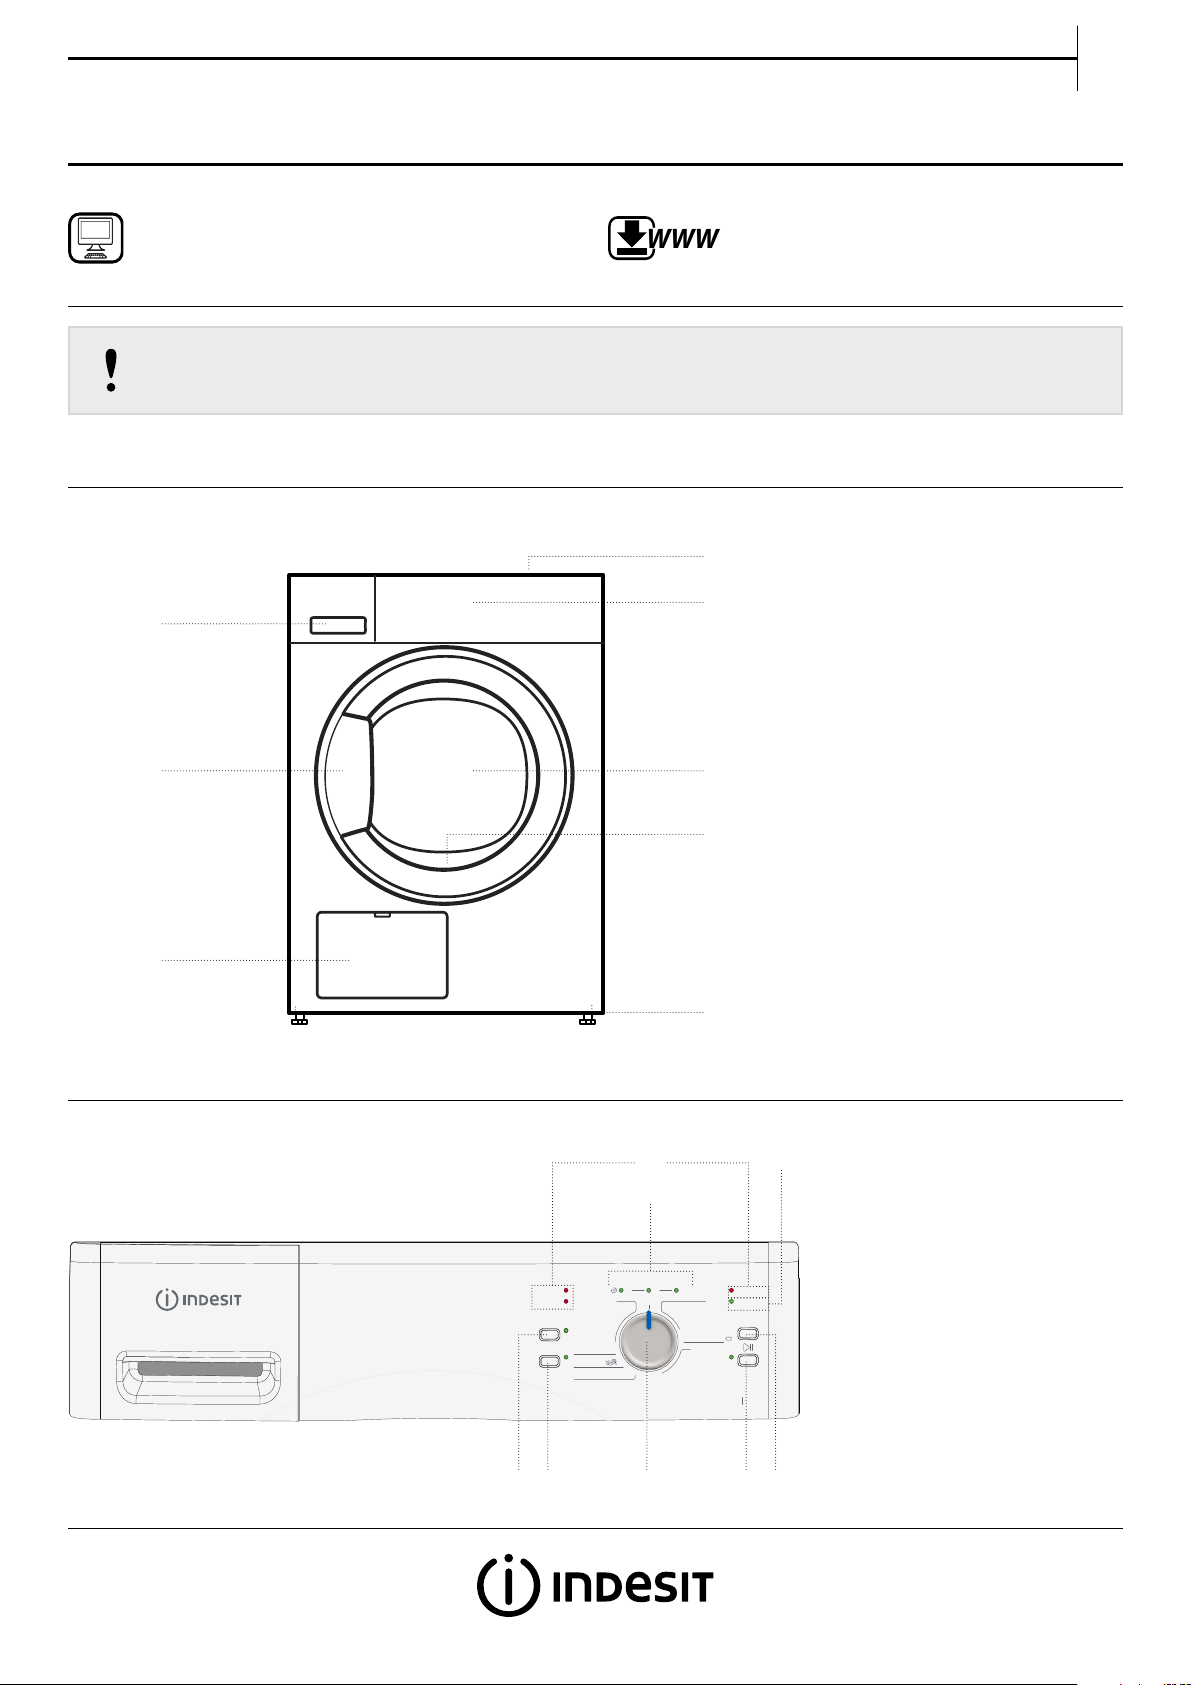
PRODUCT DESCRIPTION
APPLIANCE
3.
5. 4.
You can download the Safety Instructions and
the Use and Care Guide by visiting our website
docs . indesit . eu and following the instructions
on the back of this booklet.
1.
1. Worktop
2. Control panel
2.
3. Water tank
4. Door
5. Door handle
6. Door lter (behind door)
7. Bottom lter (behind ap)
8. Adjustable feet (4)
7.
CONTROL PANEL
Filtre de porte
Filtre de socle
Délicat
Séchage +
Départ Séchage Fin de cycle
3h 6h 9h
Temps séchage 0
90min
60min
30min
15min
XXL
Expert laine
Mix
6.
8.
8.
7.
6.
1. Délicat / Gentle option
2. Séchage + / Dry plus option
3. Programme selector
4. Start/Pause button
5. Départ diéré / Start delay
button
6. Antifroissage / Anti-crease
indicator
7. Programme sequence indicator /
Start delay indicators
8. Failure indicators
Prêt à porter
Prêt à ranger
Prêt à ranger
Prêt à repasser
Prêt à repasser
Synthétique
Prêt à porter
Eco coton
Vider réservoir
Antifroissage
Coton
Départ
différé
kg
B 9
1. 2.
3.
5.4.
1
FIRST TIME USE
BEFORE USING THE DRYER
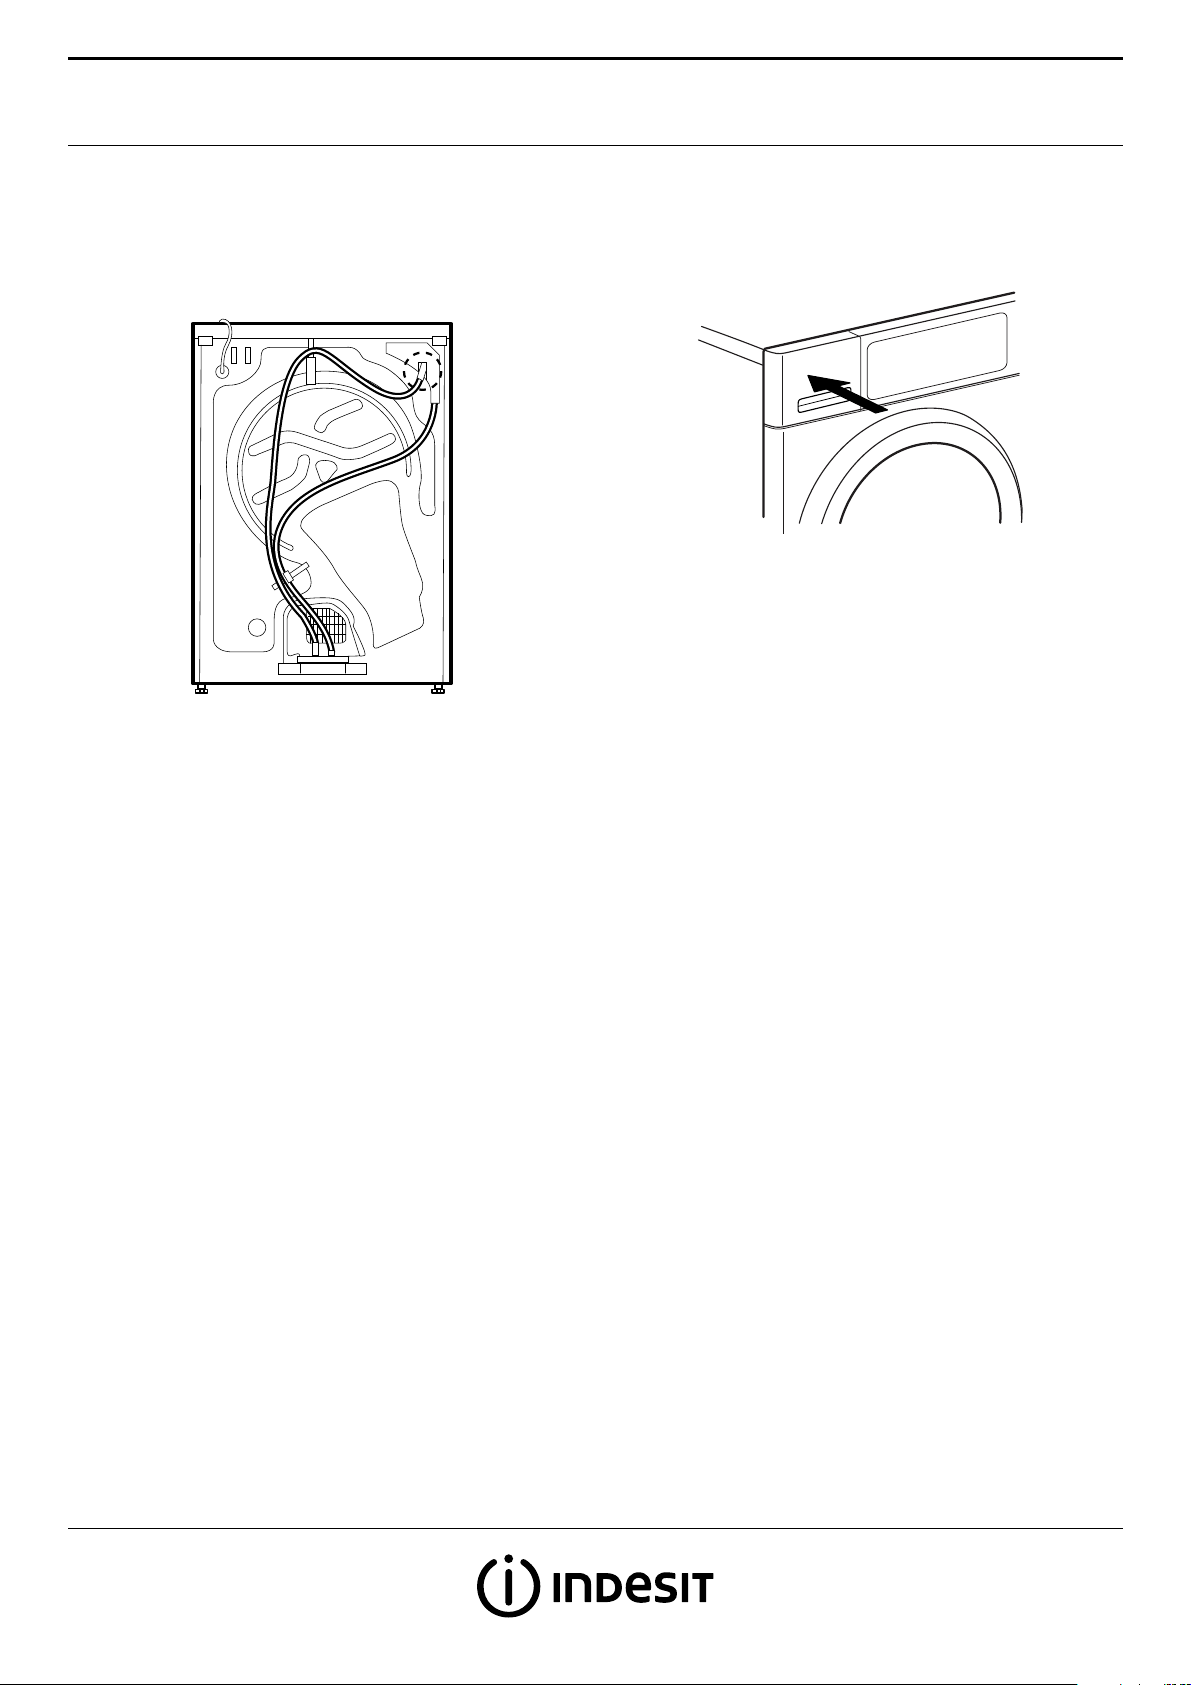
CHECK DRAIN HOSE AND WATER TANK
Make sure that the drain hose on the back of the dryer is xed
correctly, either to the dryer’s water tank (see picture), or to your
domestic sewage system (see Installation guide).
Also make sure that the water tank is correctly inserted.
2
DAILY USE
EN
See Use and Care Guide for more details on functions /
see last page for information on how to obtain the Use and Care Guide
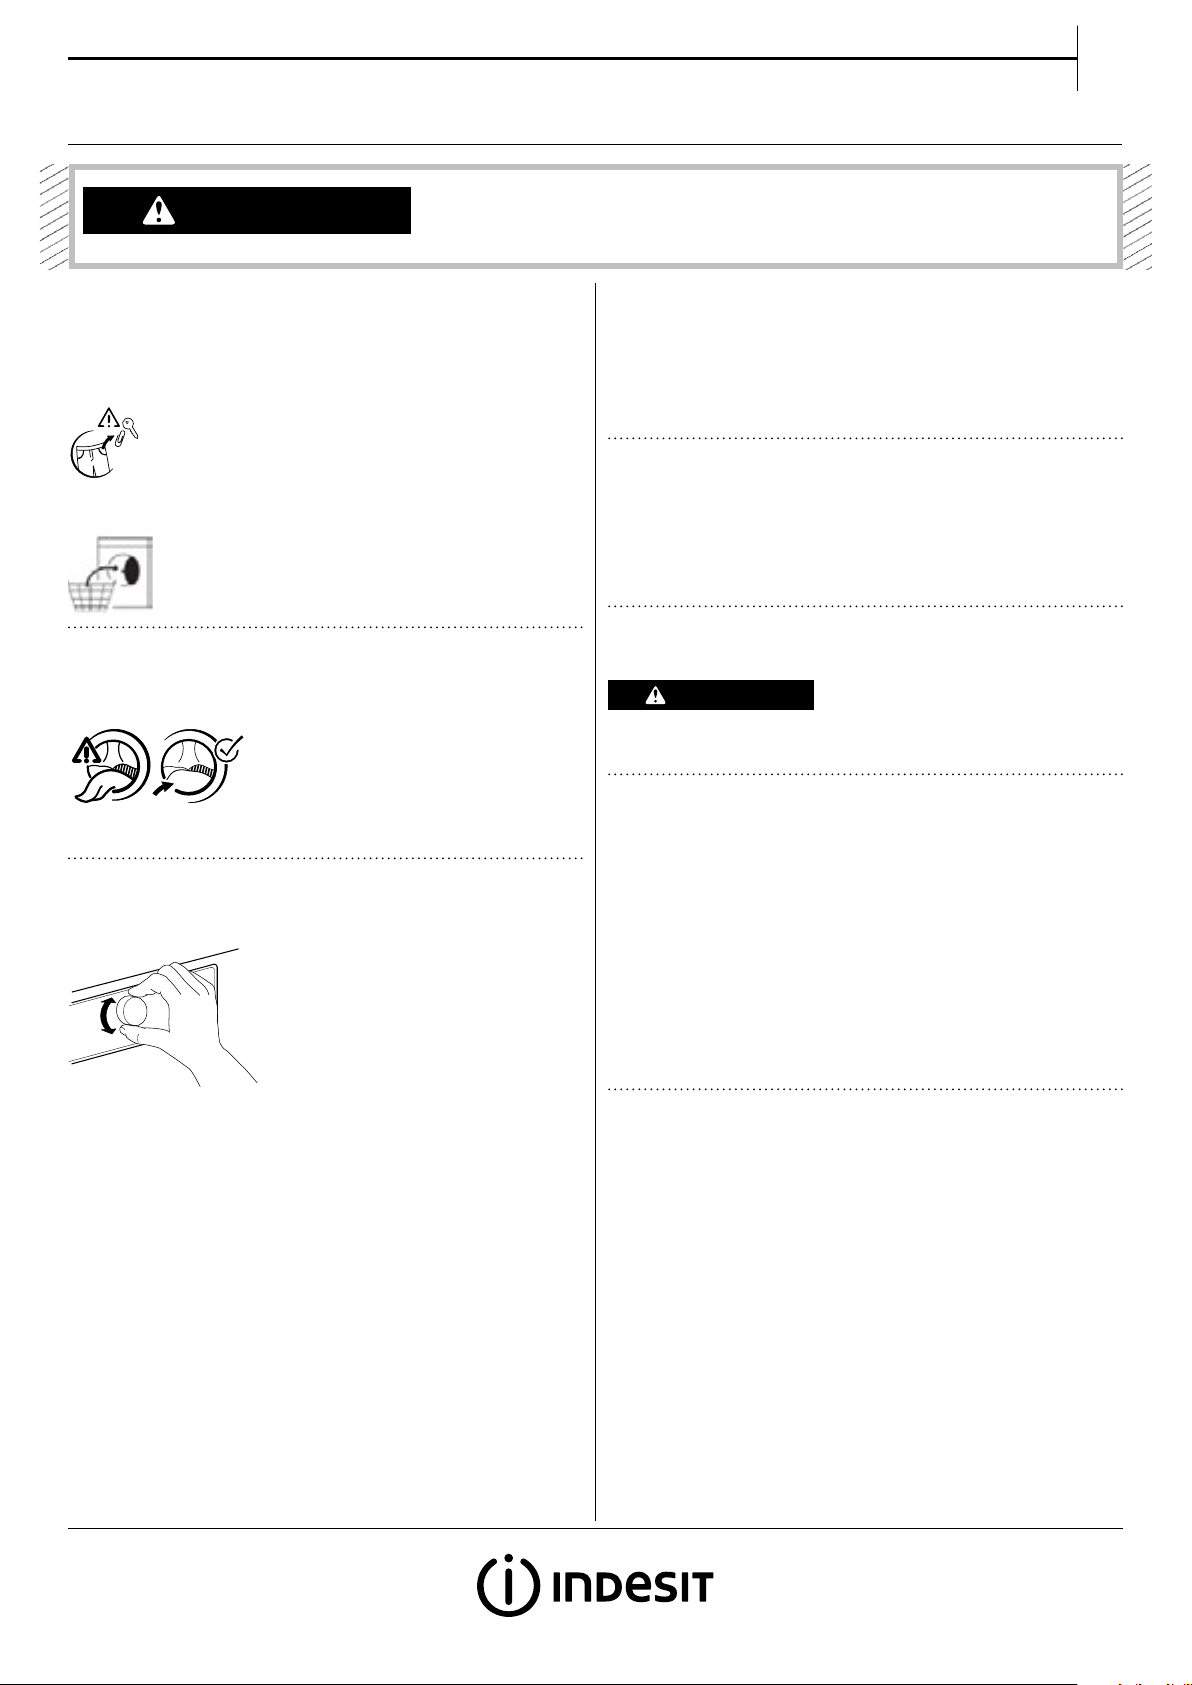
Make sure that no lighters
WARNING
or matches remain in the
laundry.
1. LOAD LAUNDRY
Prepare your laundry according to the recommendations in section
HINTS AND TIPS.
Make sure that pockets are empty, fasteners closed and ribbons tied
together.
Open the door and load the laundry. Observe the maximum load
sizes given in the PROGRAMME CHART.
2. CLOSE DOOR
Make sure that no laundry gets stuck between door glass and door
lter.
Make sure that the laundry
is not soaked with
ammable liquids.
4. START PROGRAMME
Press the Start/Pause button; the indicator next to the button lights
up. The drying process starts.
The programme duration mainly depends on the load size and on
the humidity level of the laundry.
5. CHANGE THE SETTINGS OF A RUNNING PROGRAMME, IF
NEEDED
To change the settings of a running programme or start delay:
• press Start/Pause to put the running programme on pause
• change your settings
• press Start/Pause again to continue the programme.
6. RESET A RUNNING PROGRAMME, IF NEEDED
Turn the programme selector to O/O.
WARNING
Immediately open the door and unload the laundry, so that
eventual heat in the laundry can dissipate.
Close the door so that you can hear it click shut.
3. SET THE DESIRED PROGRAMME
Turn the knob to select the desired programme.
Find more information regarding programmes in the PROGRAMME
CHART.
Select options, if needed
If you want to select additional options, press the respective button
- the indicator lights up.
Refer to section OPTIONS, FUNCTIONS AND INDICATORS for
more information.
7. SWITCH OFF THE DRYER AFTER PROGRAMME END
At the end of the programme, the end indicator lights up in the
programme sequence indicator. Turn the programme selector to
O/O to switch o the dryer. Open the door and take out your
laundry.
If you do not switch the dryer o after programme end, the dryer
drum rotates from time to time the next 10 minutes after
programme end, to reduce creasing of the laundry. During that
time, the Anti-crease indicator lights up.
The dryer will switch o automatically in about a quarter of an hour
after programme end, to save energy.
8. EMPTY WATER TANK / CLEAN DOOR FILTER / CLEAN
BOT TOM F ILTER
Refer to section CARE AND MAINTENANCE.
3
 Loading...