

IMPORTANT NOTICE:
● Place all wooden parts on a clean and smooth surface such as a rug or carpet to avoid the parts from being scratched.
● Check to be sure that you have all parts and hardware.
● Remove all wrapping materials, including staples & packing straps before you start to assemble.
● Do not tighten all screws/bolts until completely assembled.
● Keep all hardware parts out of reach of children.
You will need a Phillips Head Screw Driver or Drill and a Tape Measure to Assemble.
Hardware :
A: Self Tapping Screws (Quantity varies according to Stiffener size)
A
Parts :
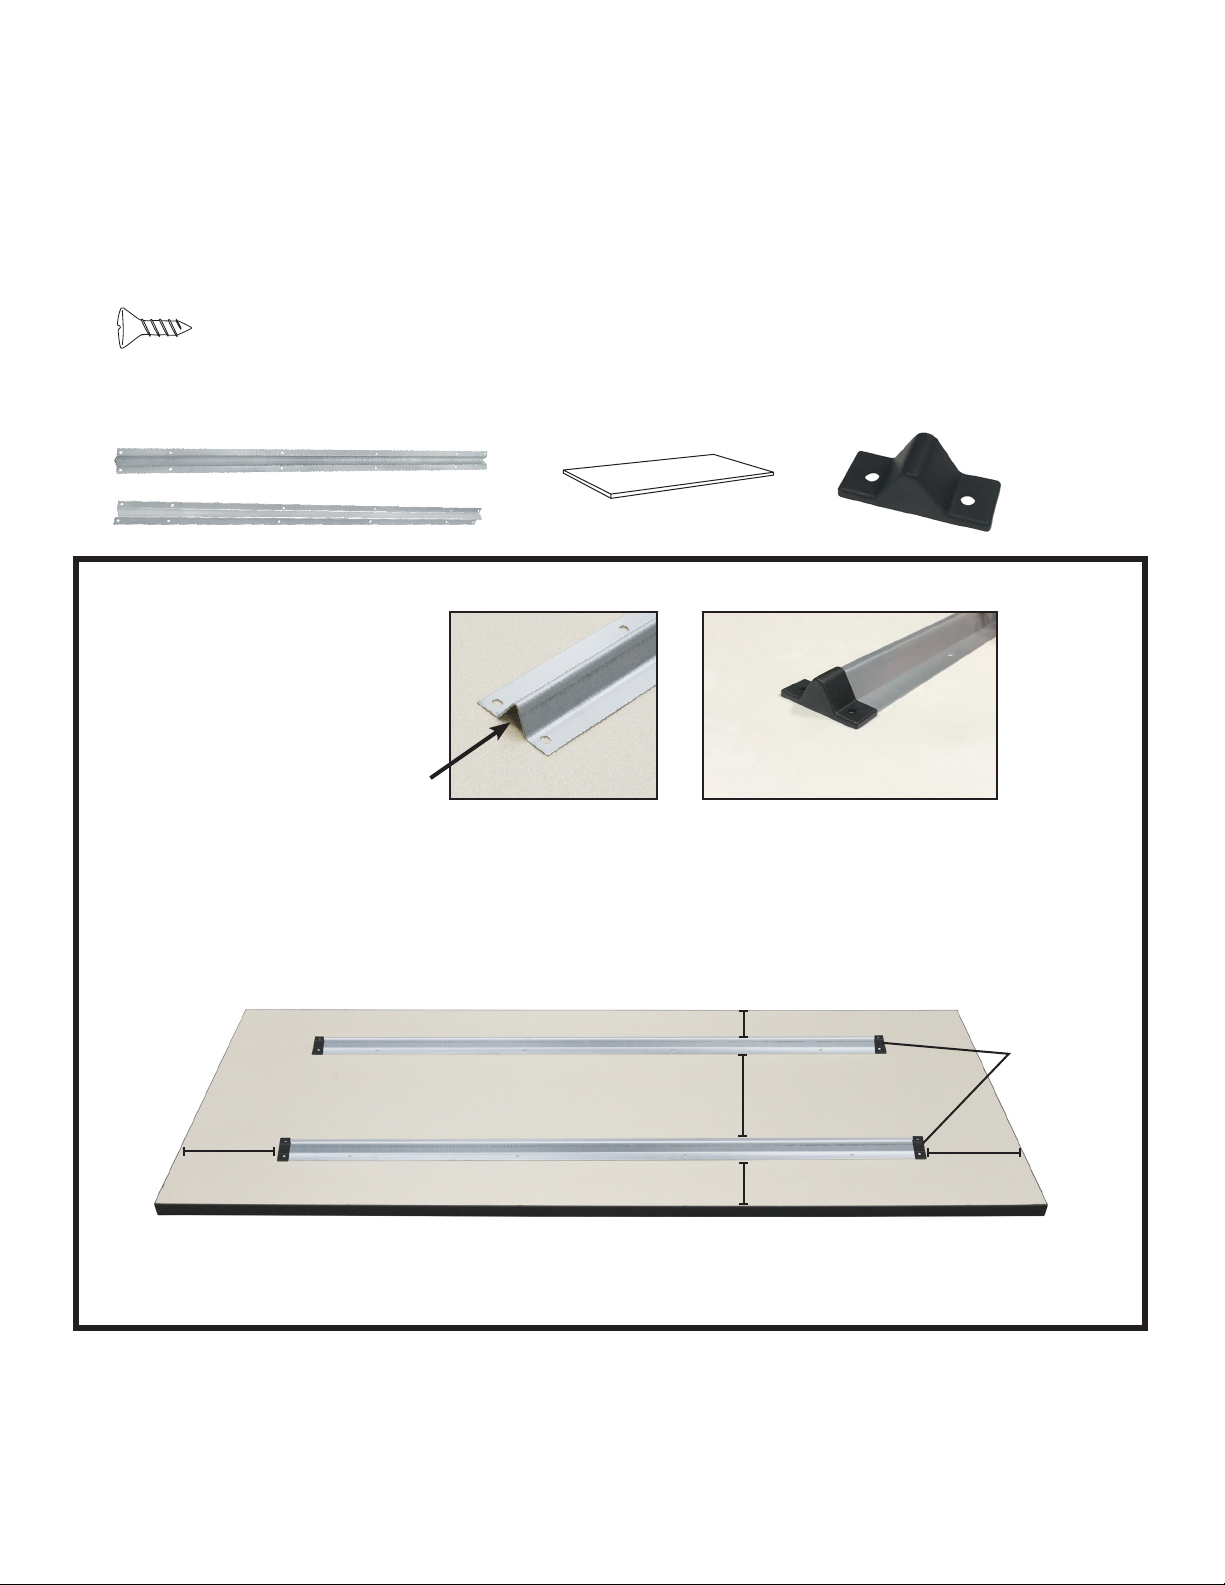
B: Table Stiffeners (2) • C: Table Top (may vary) • D: End Caps (4)
B
STEP 1A: Slide End Caps(D) onto
the ends of both Table Stiffeners(B)
apply pressure until the holes align.
(see gure 1)
STEP 1B: Place Table Top(C) on a clean at surface with
and applied
Next position Table Stiffeners(B) and applied
Note: May be adjusted to accommodate power blocks or other under-the-table accessories as needed.
End Caps(D)
in the center of the Table Top lengthwise, leaving equal space on each side.
C D
Figure 1
desired table nish face down. Position Table Stiffeners(B)
End Caps(D)
spaced evenly across the width.
1/3 of
table width
B
C
Equal
STEP 2: Attach
Table Stiffeners(B) and applied
End Caps(D) to Table Top(C) by using all of the included Screws(A).
1/3 of
table width
Equal
1/3 of
table width
 Loading...